• Skip to main content
  • Skip to primary sidebar

Everyday Homemade

menu icon
go to homepage
  • About
  • All Sourdough Recipes
  • Sourdough Bread
  • Sourdough Discard
  • Recipe eBooks + Resources
    • Facebook
    • Instagram
    • Pinterest
  • subscribe
    search icon
    Homepage link
    • About
    • All Sourdough Recipes
    • Sourdough Bread
    • Sourdough Discard
    • Recipe eBooks + Resources
    • Facebook
    • Instagram
    • Pinterest
  • ร—
    Home ยป Recipes

    Blog

    Dutch Oven Chili (Classic Beef and Bean Chili)

    September 13, 2023

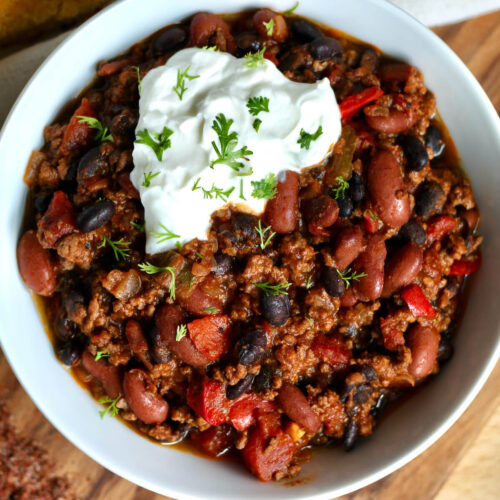
    This Dutch Oven Chili is rich, hearty, and loaded with flavorful ground beef, beans, and spices. Easy to make with just one pot, this stovetop chili recipe is perfect for a quick weeknight meal. Serve it with sour cream, cheddar cheese, and cilantro for the ultimate comfort food dish.

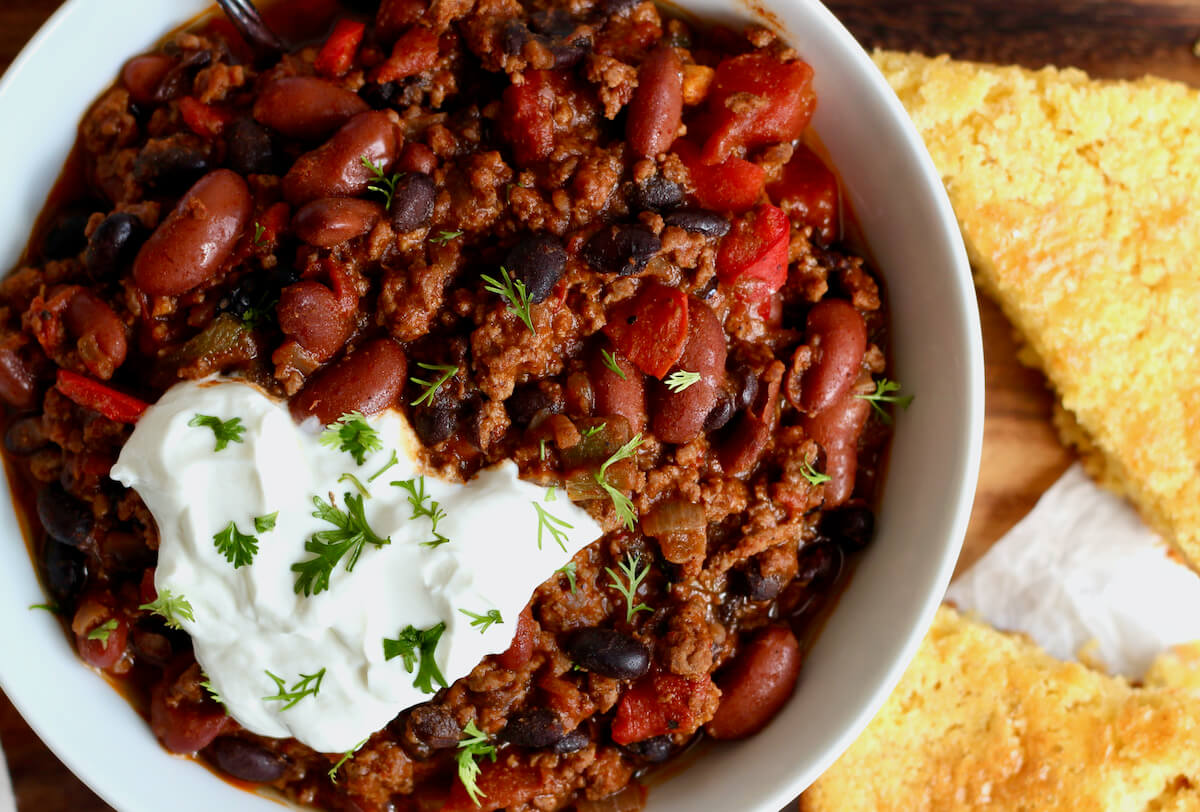
    A bowl of Dutch oven chili topped with sour cream and cilantro. The dish is next to a small jar of chili seasoning and a piece of cornbread.

    What's your go-to comfort meal for a chilly fall or winter night?

    For me, itโ€™s a warm, hearty bowl of homemade chili.

    With countless regional variations across the United States, chili is a quintessential American comfort food. And this Dutch oven recipe is my version, made with lean ground beef, two types of beans, peppers, tomatoes, and a homemade spice blend. 

    It's a healthy and satisfying dish thatโ€™s perfect for cozying up on the couch on a chilly October evening.

    Today, Iโ€™m walking you through how to make the best Dutch oven chili, including which ingredients to use, tips that will guarantee it turns out right the first time, and some of my favorite side dishes to serve with this healthy chili recipe.

    Disclaimer: Some links throughout this post are affiliate links. As an Amazon Associate, I earn from qualifying purchases. You can learn more by visiting my Affiliate Disclosure Page.

    Why You'll Love This Recipe

    • Made in One-Pot- Easier prep, less cleanup, and more flavor - this one-pot chili recipe is sure to be a winner on busy weeknights.
    • Quick Weeknight Meal- Speaking of busy weeknights, did I mention that this classic chili recipe only takes about an hour to make? Itโ€™s perfect for a quick weeknight dinner.
    • Hearty & Healthy- Packed with lean protein, fiber-rich beans, and a variety of vegetables, this hearty chili will leave you feeling full and satisfied.
    • Flavorful Seasoning- Ditch the store-bought chili seasoning packet and use my flavorful, filler-free homemade chili seasoning blend.
    • Perfect for Parties- Whether itโ€™s game day, movie night, or a casual dinner party, a big batch of homemade chili is sure to hit the spot.

    Ingredient Notes

    Here are some notes on key ingredients. For a full list of ingredients, check out the recipe card below.

    • Ground Beef- Using lean ground beef helps keep the dish light, but you can use higher fat content for a richer flavor if preferred.
    • Beans- A mix of black beans and kidney beans adds diverse texture and flavor to the chili. Be sure to rinse and drain the beans to reduce sodium and starch content.
    • Diced Tomatoes- Diced tomatoes add to the chunky texture and flavor of the chili. Opt for 'no-salt-added' canned tomatoes to have more control over the sodium content.
    • Water- Adds moisture to the chili for simmering and cooking the vegetables.
    • Onion- Yellow onions have a balanced, slightly sweet onion flavor that adds depth to the chili.
    • Garlic- Use freshly minced garlic for the best flavor.
    • Jalapeรฑo- Adjust the amount of jalapeรฑo based on your spice preference. Removing the seeds and membranes will reduce the heat.
    • Bell Pepper- Any variety of bell peppers can be used in this chili recipe. Red bell peppers are sweeter, while green peppers are more vegetal tasting.
    • Chili Seasoning Blend- I use my homemade chili seasoning for this Dutch oven chili recipe, which contains chili powder, cumin, smoked paprika, garlic powder, onion powder, kosher salt, cayenne pepper, and black pepper.
    • Olive Oil- A heart-healthy cooking oil used to sautรฉ the aromatics, cook the ground beef, and allow the spices to release their flavor.

    ๐ŸŒฑ Sustainability Tip: Growing your own food is a great way to cultivate a sustainable kitchen. Bell peppers, jalapeรฑos, beans, and tomatoes can easily be grown both in a garden and in containers.

    The ingredients to make Dutch oven chili. Each ingredient is labeled with text and includes black beans, bell peppers, garlic, onion, ground beef, seasonings, olive oil, kidney beans, jalapeรฑo, and diced tomatoes.

    Substitutions and Variations

    Here are a few ways you can customize this easy Dutch oven chili recipe to fit your diet and taste preferences.

    Substitutions

    • Ground Beef- Substitute ground beef with ground turkey, ground chicken, cooked brown lentils, or soy crumbles.
    • Beans- Swap the beans in this recipe for pinto beans, cannellini beans, navy beans, or any other bean you prefer.
    • Diced Tomatoes- For a smoother chili, opt for tomato puree or crushed tomatoes. If you like your chili on the chunkier side, use stewed tomatoes or whole tomatoes.
    • Water- Replace water with chicken stock, beef stock, or vegetable broth for additional flavor.
    • Onion- One tablespoon of onion powder can be used in place of fresh onion.
    • Garlic- Use ยฝ teaspoon of garlic powder to replace two fresh cloves of garlic.
    • Jalapeรฑo- Swap the jalapeรฑo for green bell pepper or poblano pepper if you prefer a milder chili. For more heat, try using a chipotle pepper or habanero pepper.
    • Bell Peppers- Substitute bell peppers for poblano peppers, zucchini, corn, kale, or spinach.
    • Chili Seasoning Blend- Use a packet of chili seasoning in place of the individual spices. Or simply use chili powder, cumin, cayenne pepper, and salt.
    • Olive Oil- Avocado oil, sunflower oil, canola oil, or any other neutral-flavored cooking oil can be used in place of olive oil.
    A bowl of Dutch oven chili topped with sour cream and cilantro. The dish is next to a piece of cornbread.

    Variations

    • Vegan- Swap the ground beef for your favorite plant-based protein to make vegan chili. Try soy crumbles, brown lentils, or beans.
    • Ground Turkey- Substitute the ground beef with ground turkey for a leaner option.
    • Spicy- Amp up the heat by adding extra jalapeรฑos, chipotle peppers in adobo sauce, cayenne pepper, or hot sauce. 
    • Smoky- Give the chili a smoky flavor by swapping the diced tomatoes for fire-roasted tomatoes and adding minced chipotle in adobo sauce.
    • Southwestern- Add ingredients like corn, roasted poblano peppers, and adobo sauce for a Tex-Mex flavor profile.
    • Vegetables- Make this Dutch oven chili more nutritious by adding extra vegetables such as corn, zucchini, carrots, spinach, kale mushrooms, sweet potato, butternut squash, or pumpkin.

    Equipment Notes

    Here are some notes on any special equipment I used to make this recipe.

    • Dutch Oven- A cast iron Dutch oven, like this Lodge 6-Quart Enameled Dutch Oven, is ideal for cooking chili due to its even heat distribution, moisture retention, versatility, and ample capacity.

    How to Make Dutch Oven Chili

    Here is how to make homemade chili on the stovetop.

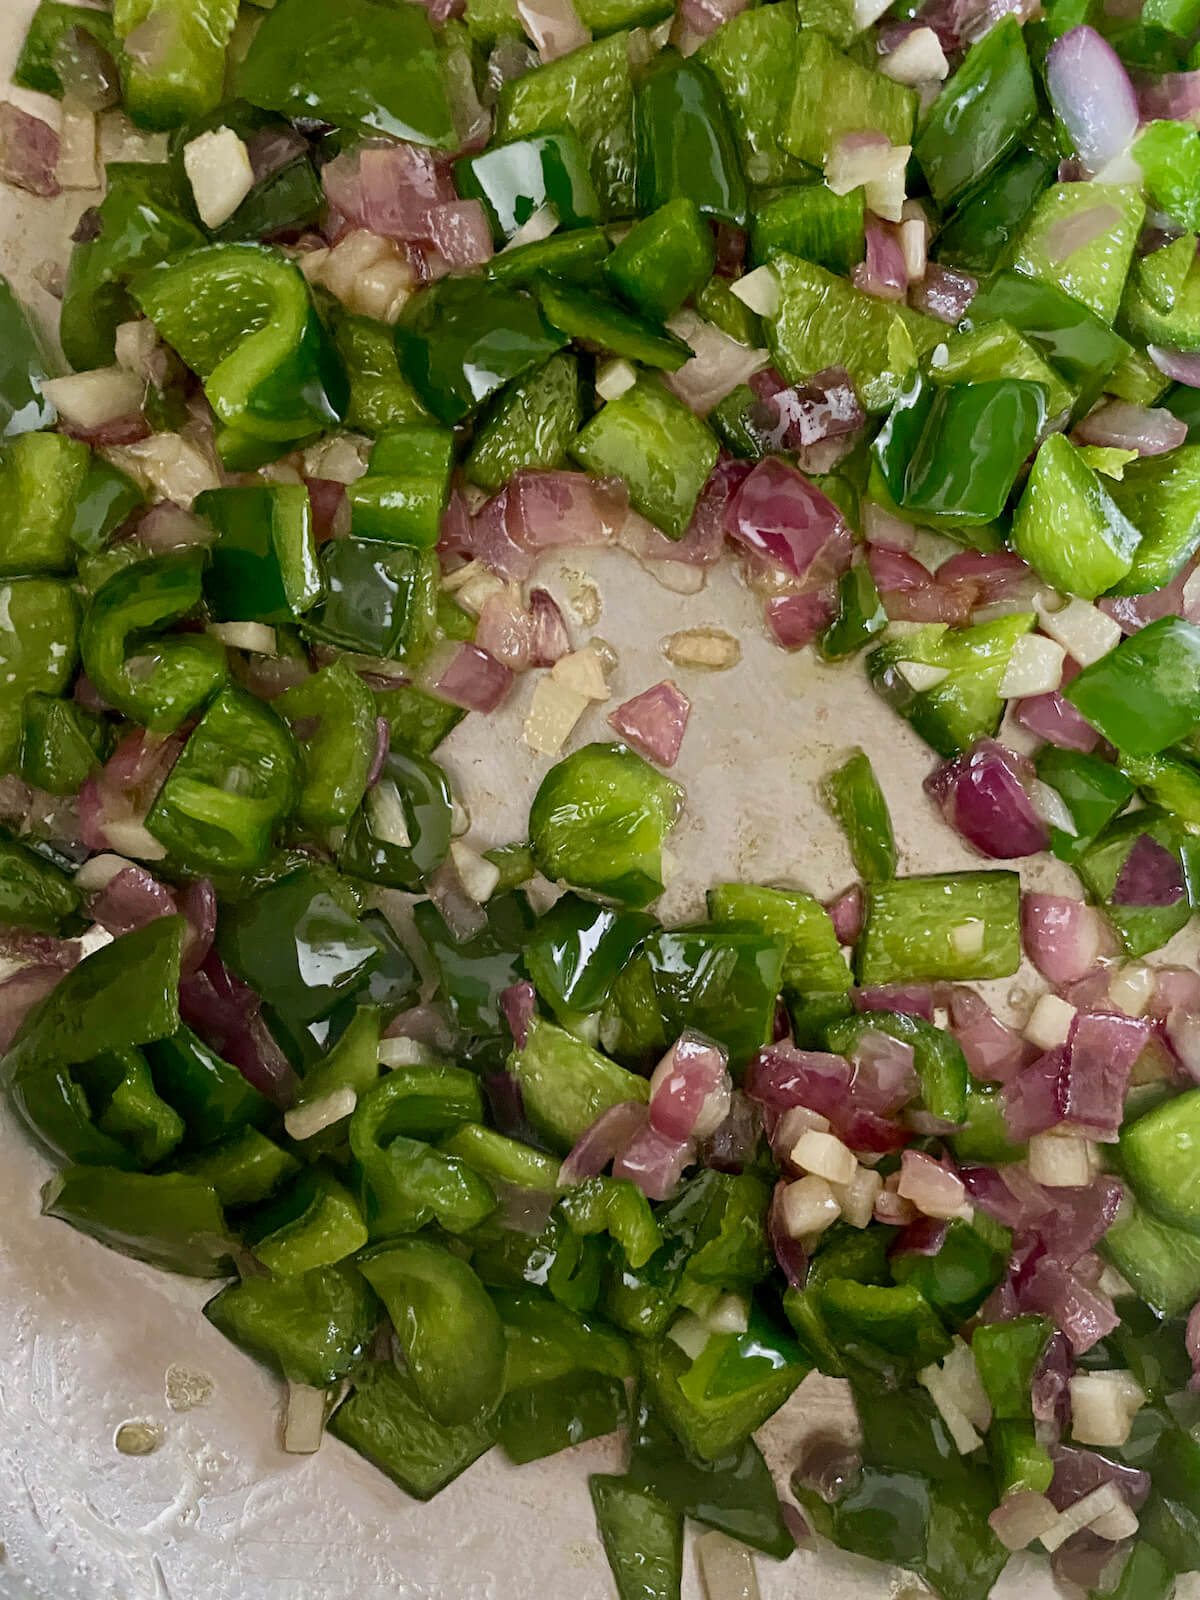
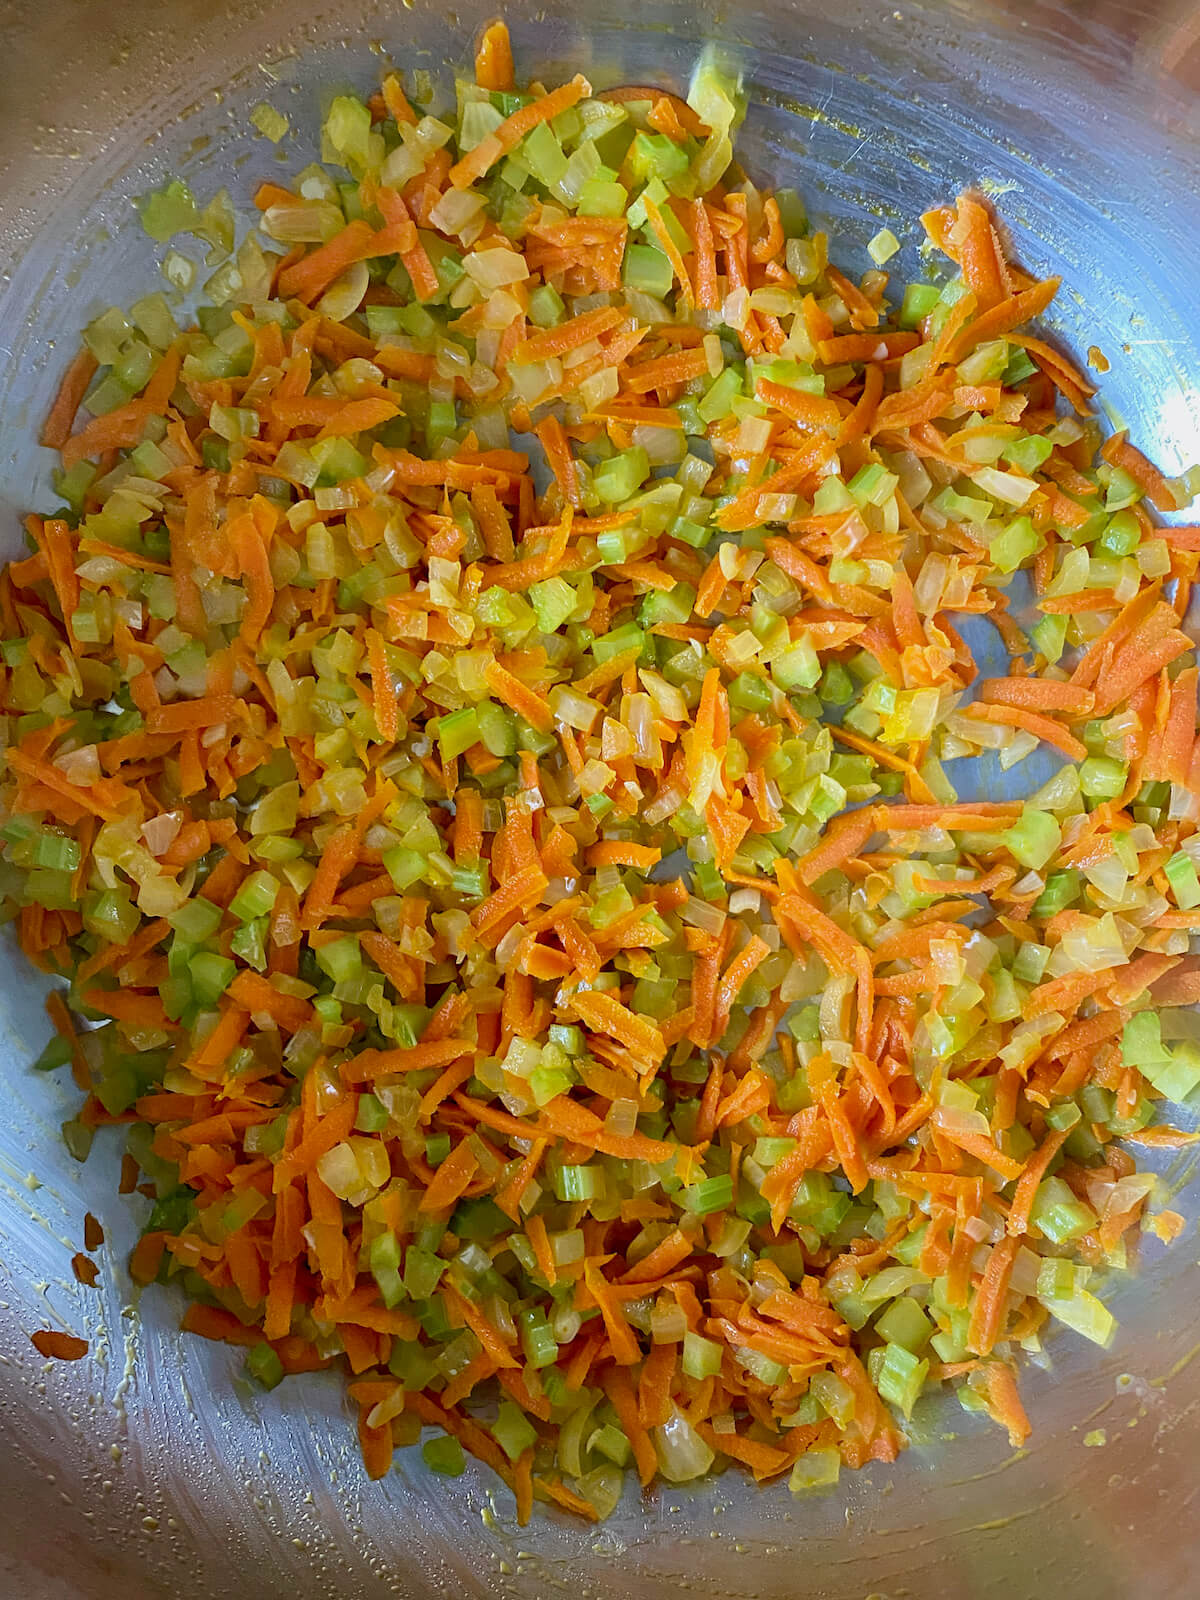
    Step 1: Sautรฉ the aromatics. Heat the olive oil in a large Dutch oven over medium heat. Add the diced onion, minced jalapeรฑo, and minced garlic. Sautรฉ for 5-7 minutes or until the vegetables are softened and beginning to brown.

    Onion, jalapeรฑo, and garlic sautรฉing in olive oil in a large Dutch oven.

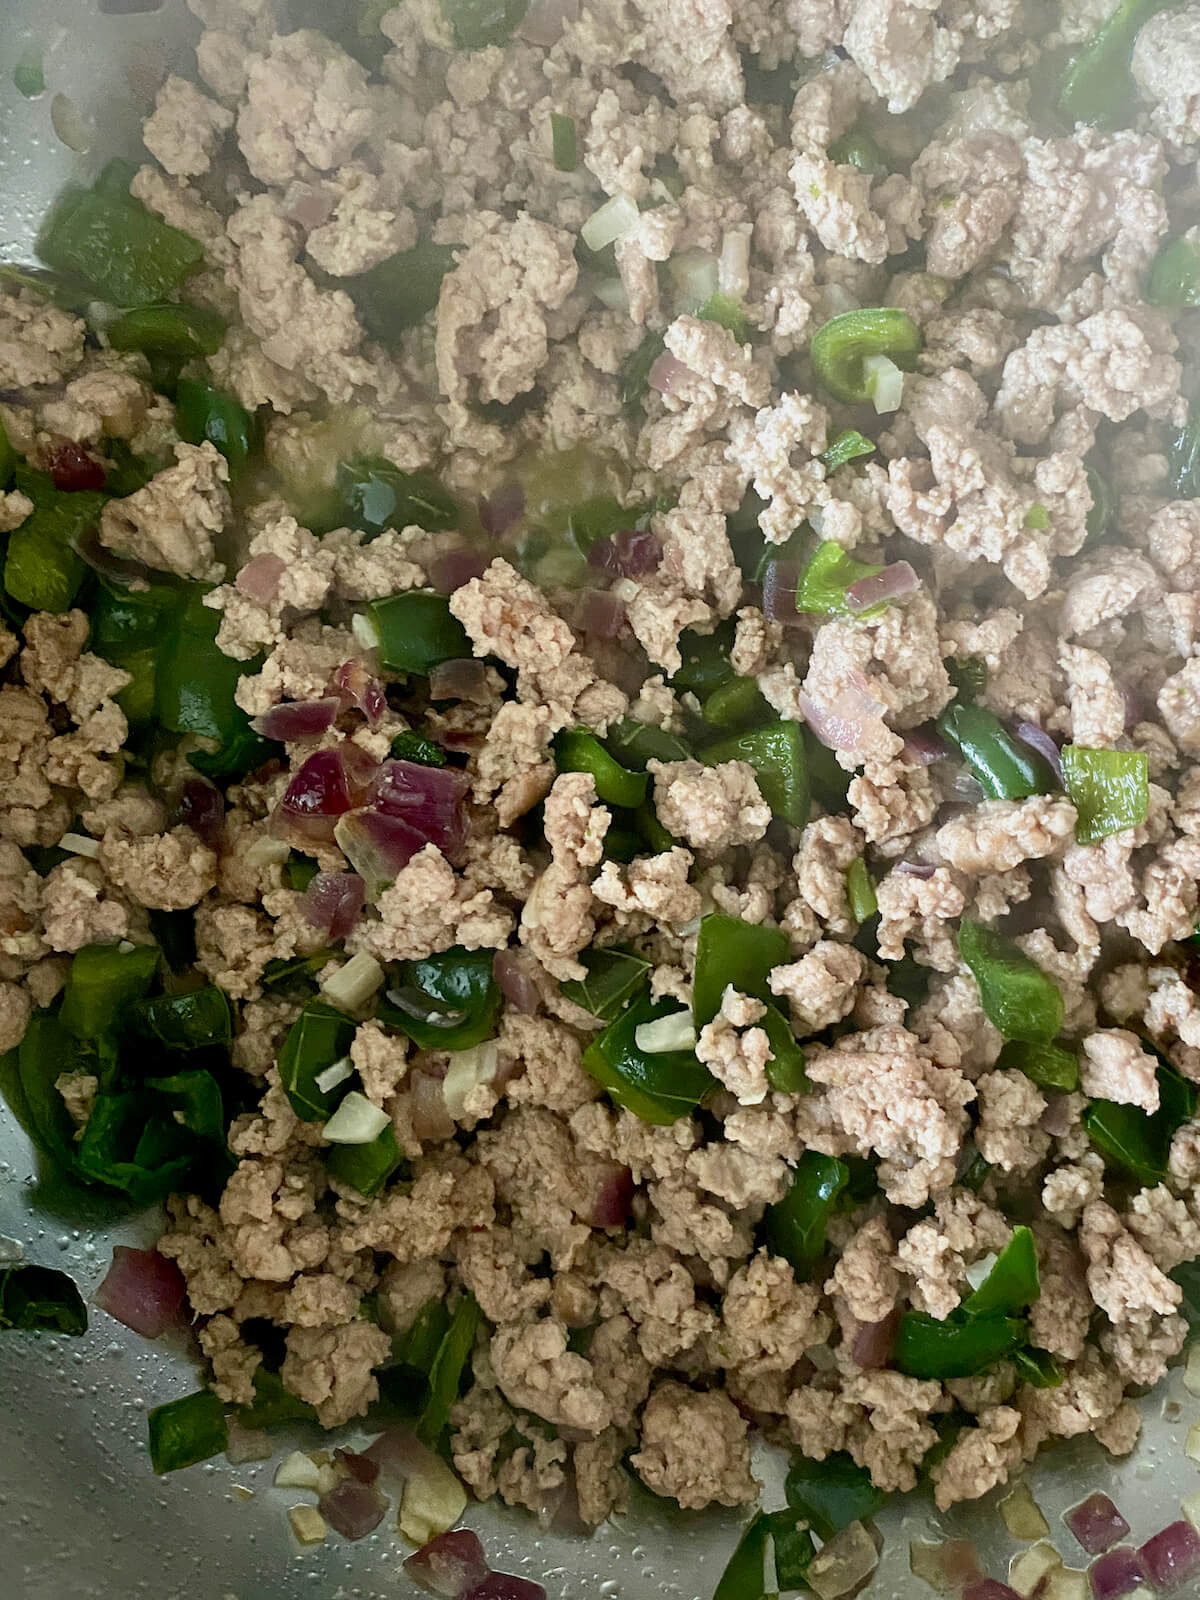
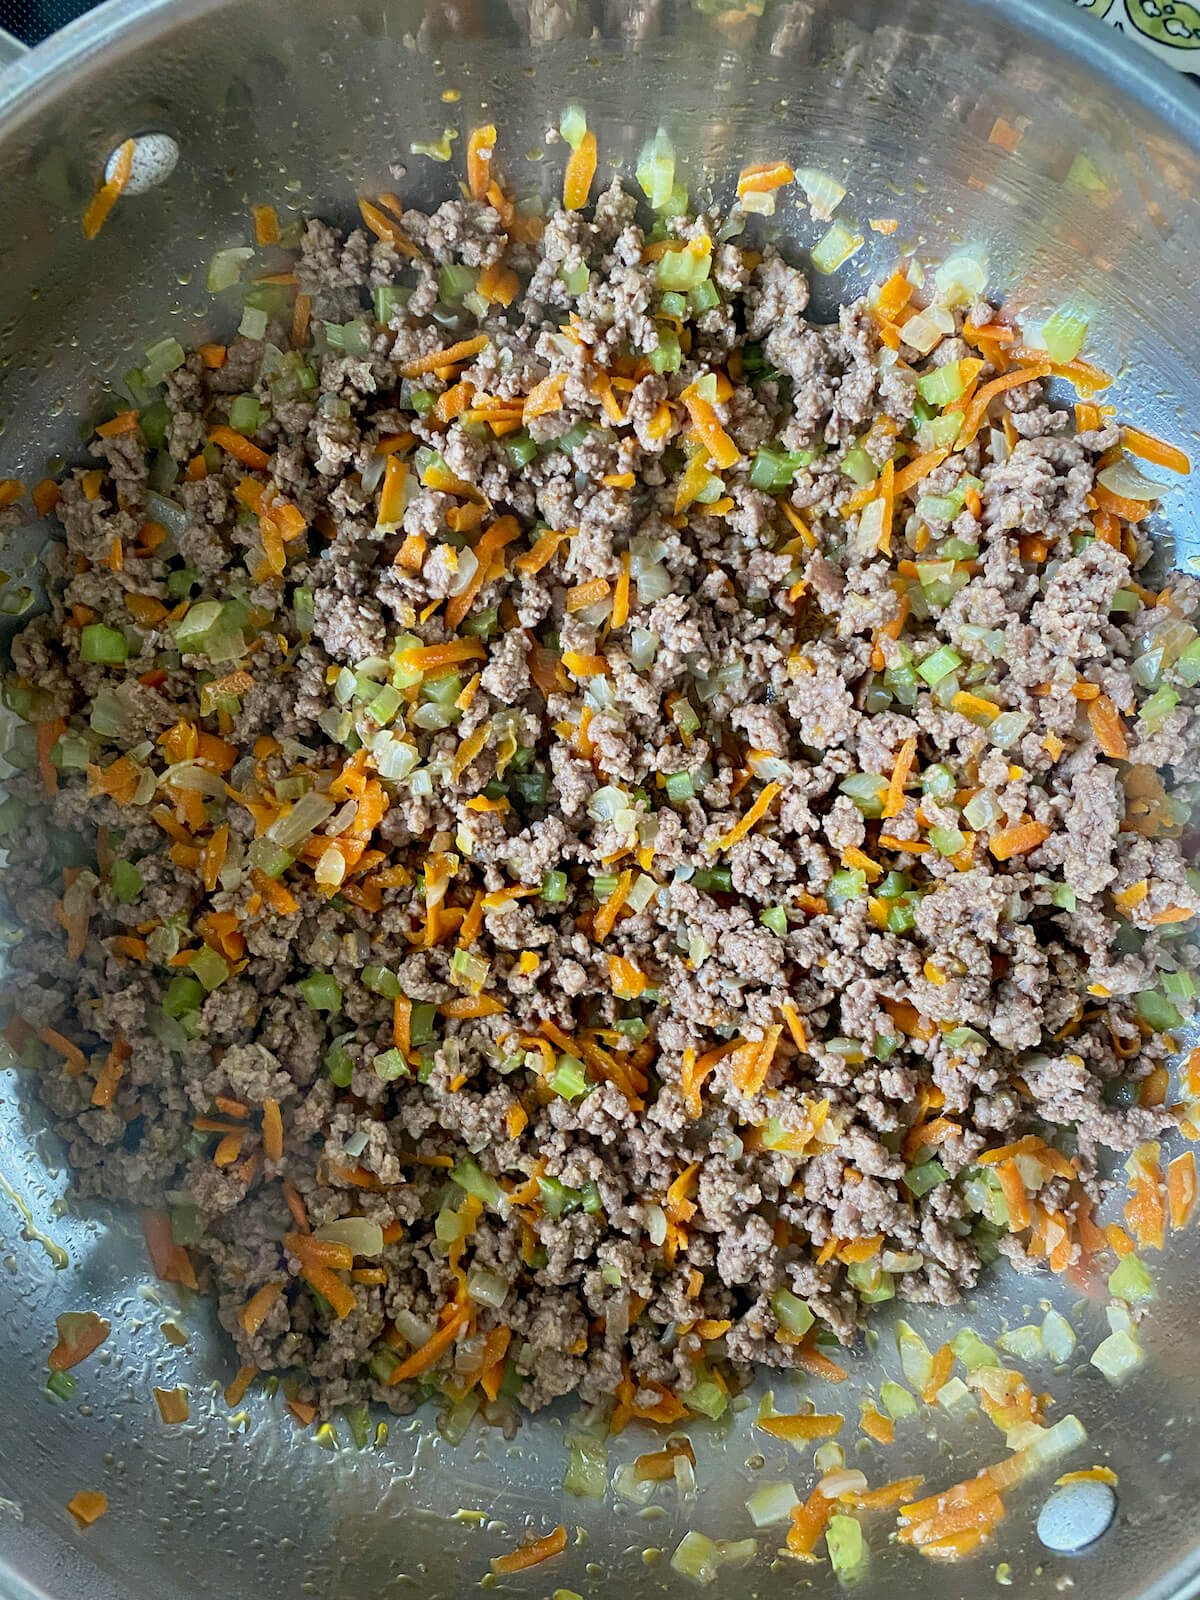
    Step 2: Brown ground beef. Push the vegetables aside and add the ground beef. Cook, breaking it up into small pieces with a wooden spoon, until it is browned and cooked through.

    Sautรฉed vegetables and raw ground beef in a Dutch oven.
    Cooked ground beef, jalapeรฑo, onion, and garlic in a Dutch oven with a wooden spoon sticking out.

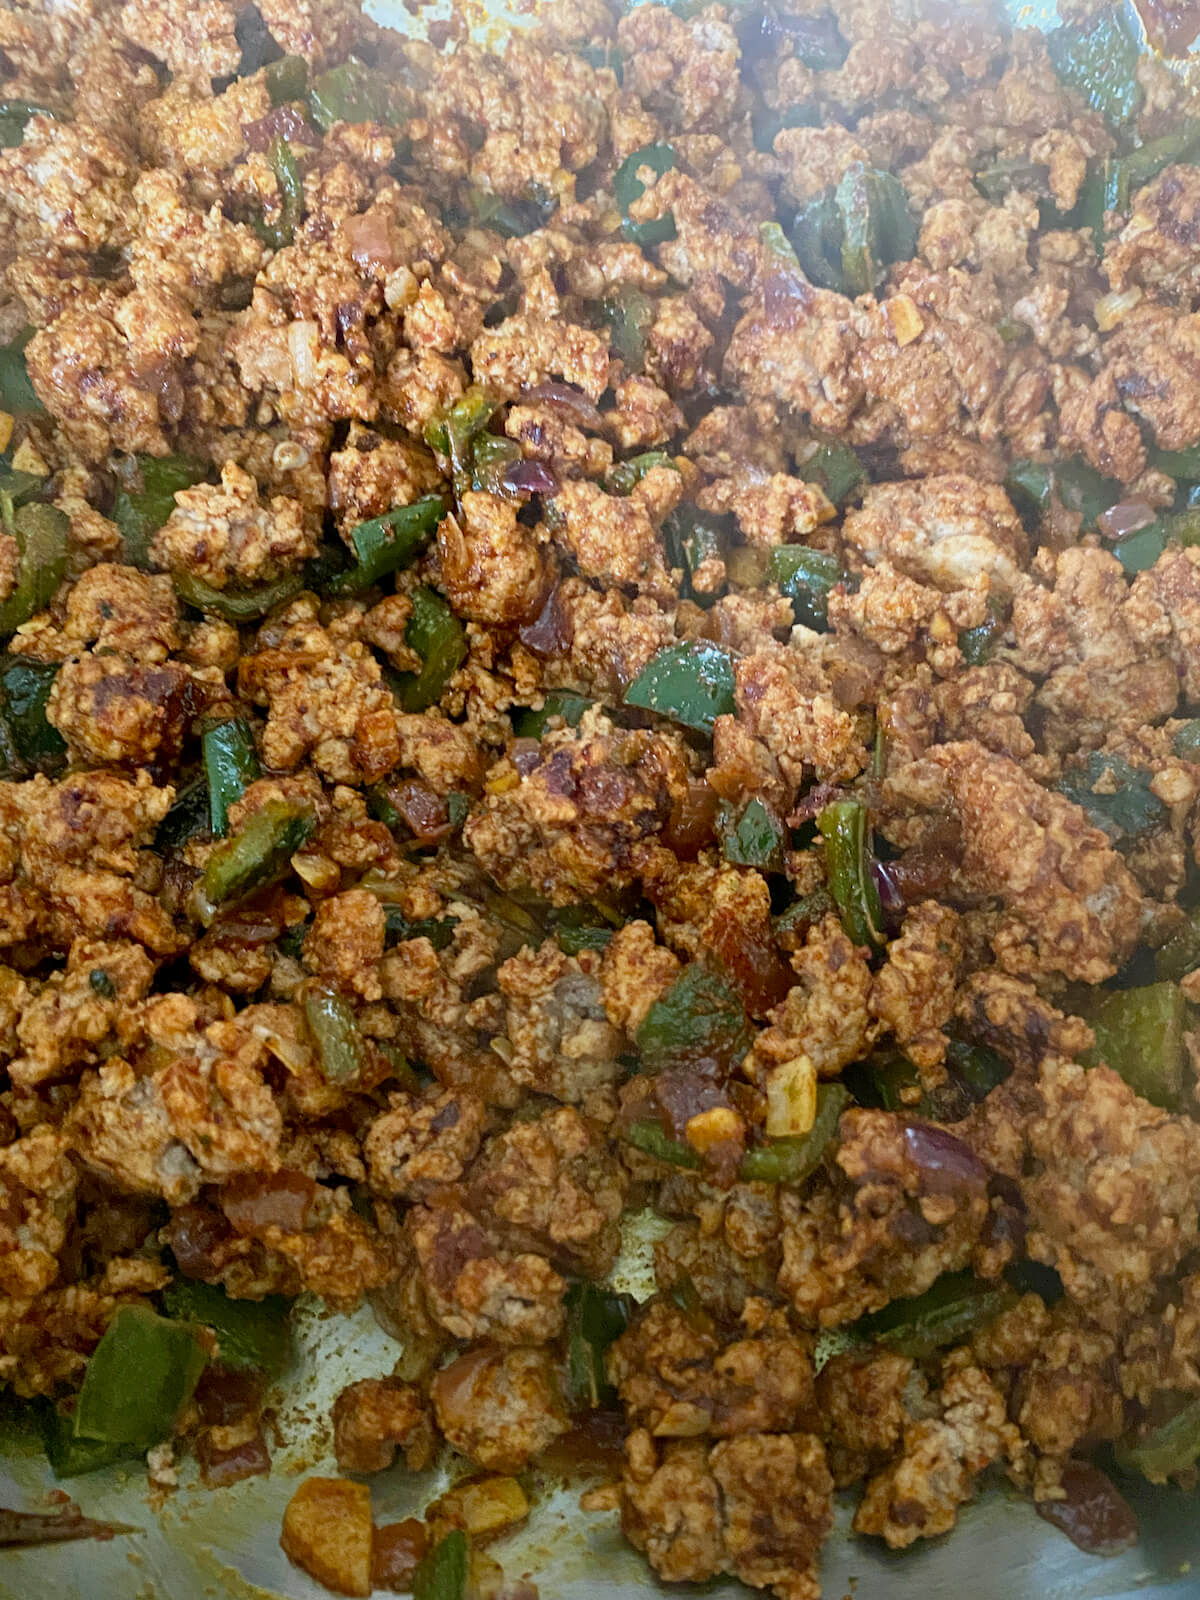
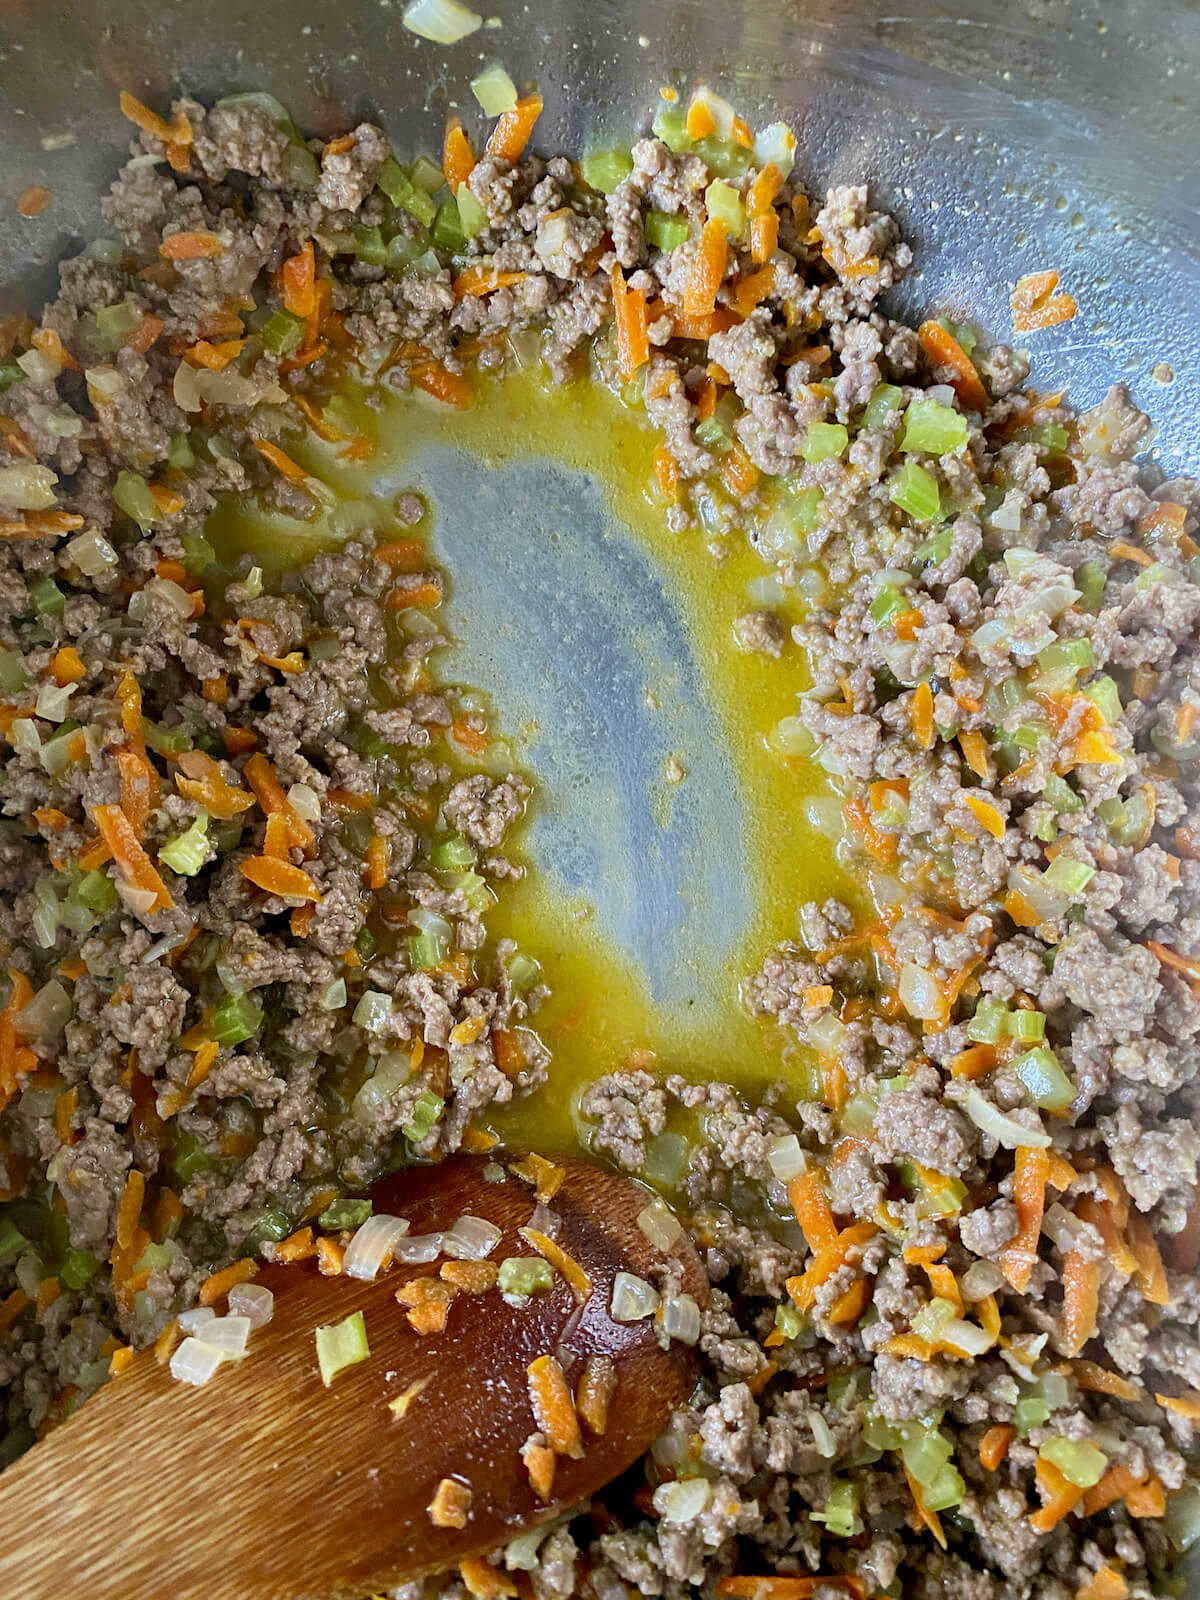
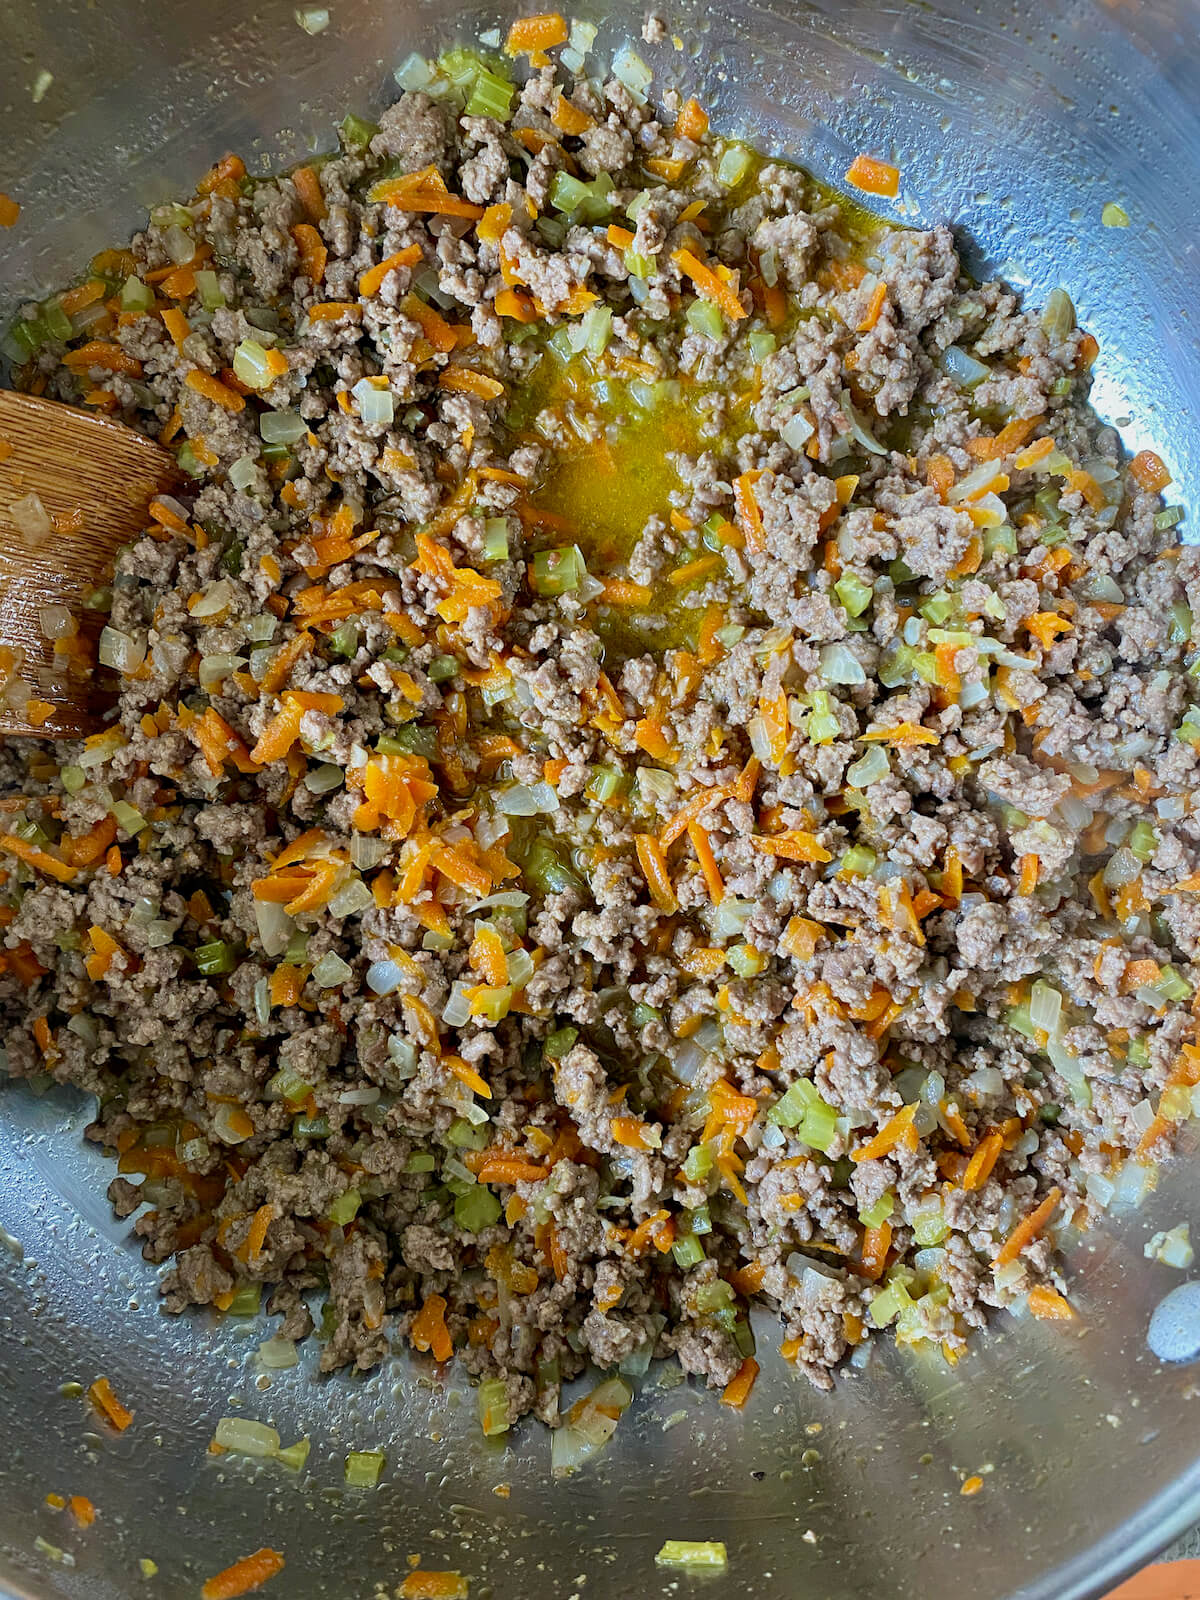
    Step 3: Season ground beef. Sprinkle in the chili seasoning blend and mix it thoroughly with the ground beef until well coated. Cook for an additional 2 minutes to let the spices release their flavor.

    Seasoned ground beef and vegetables in a Dutch oven.

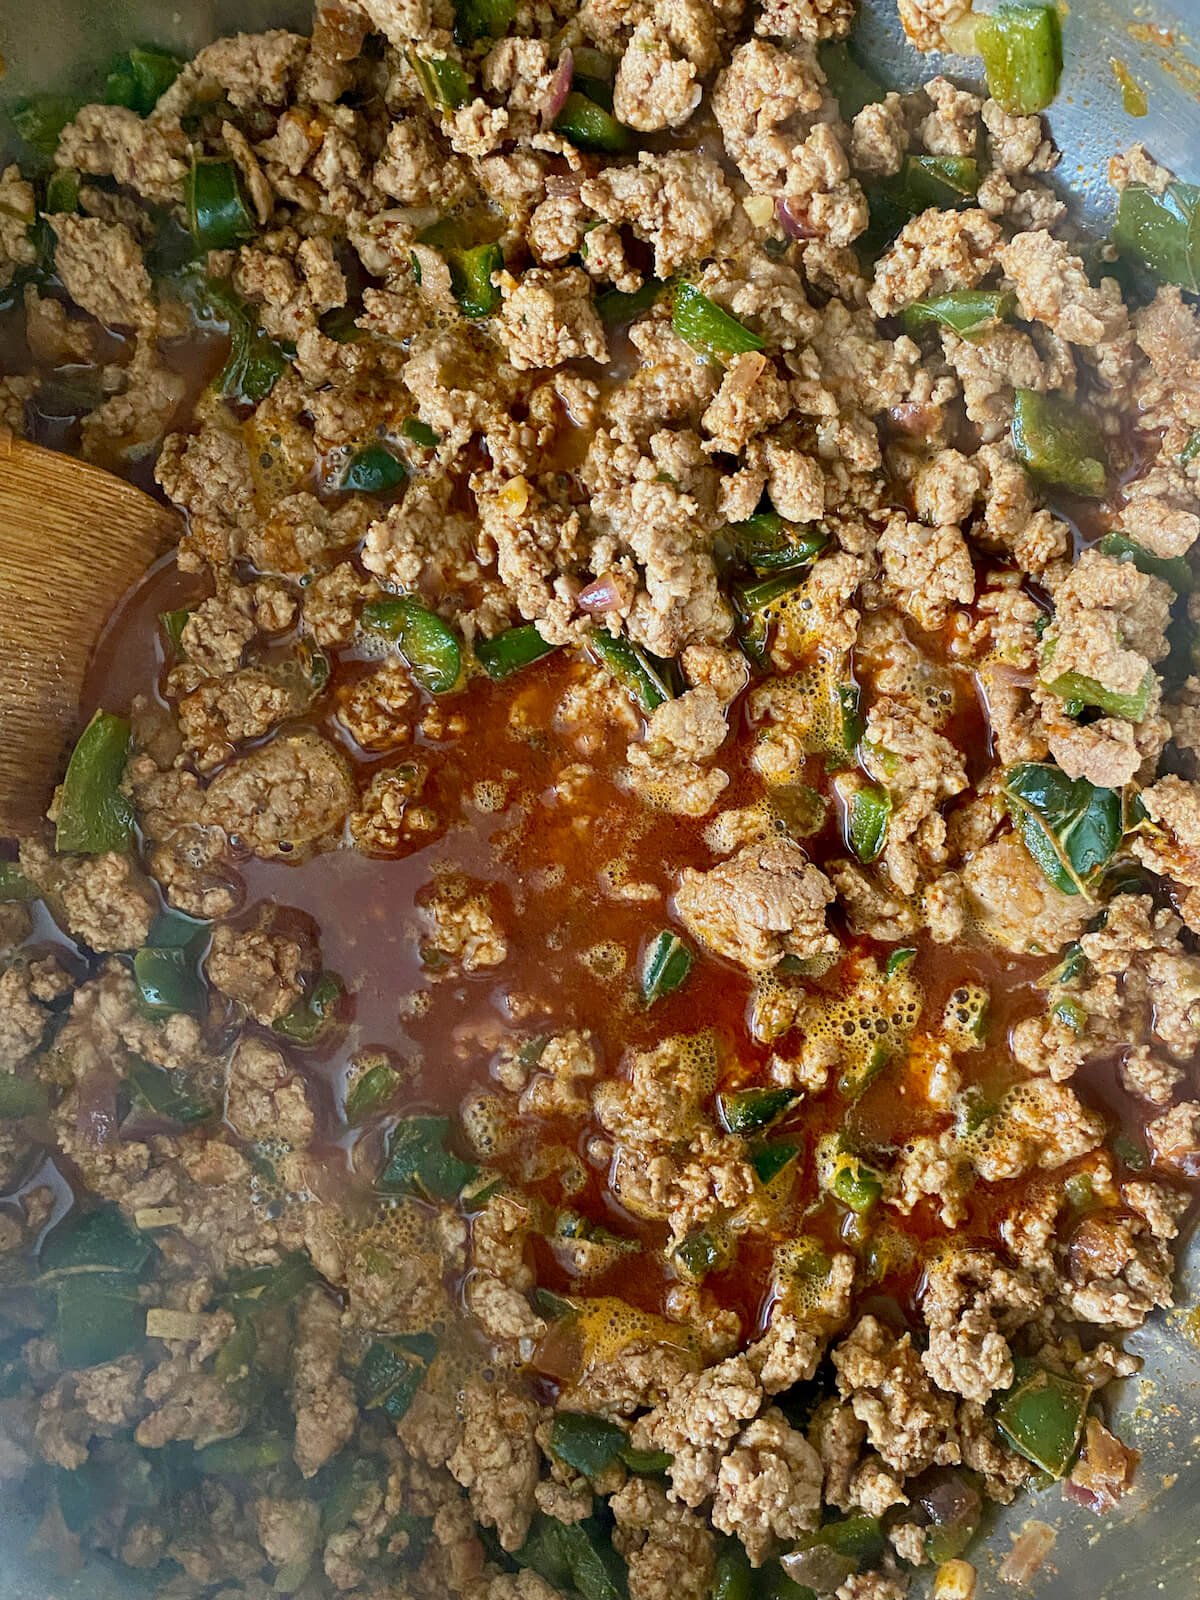
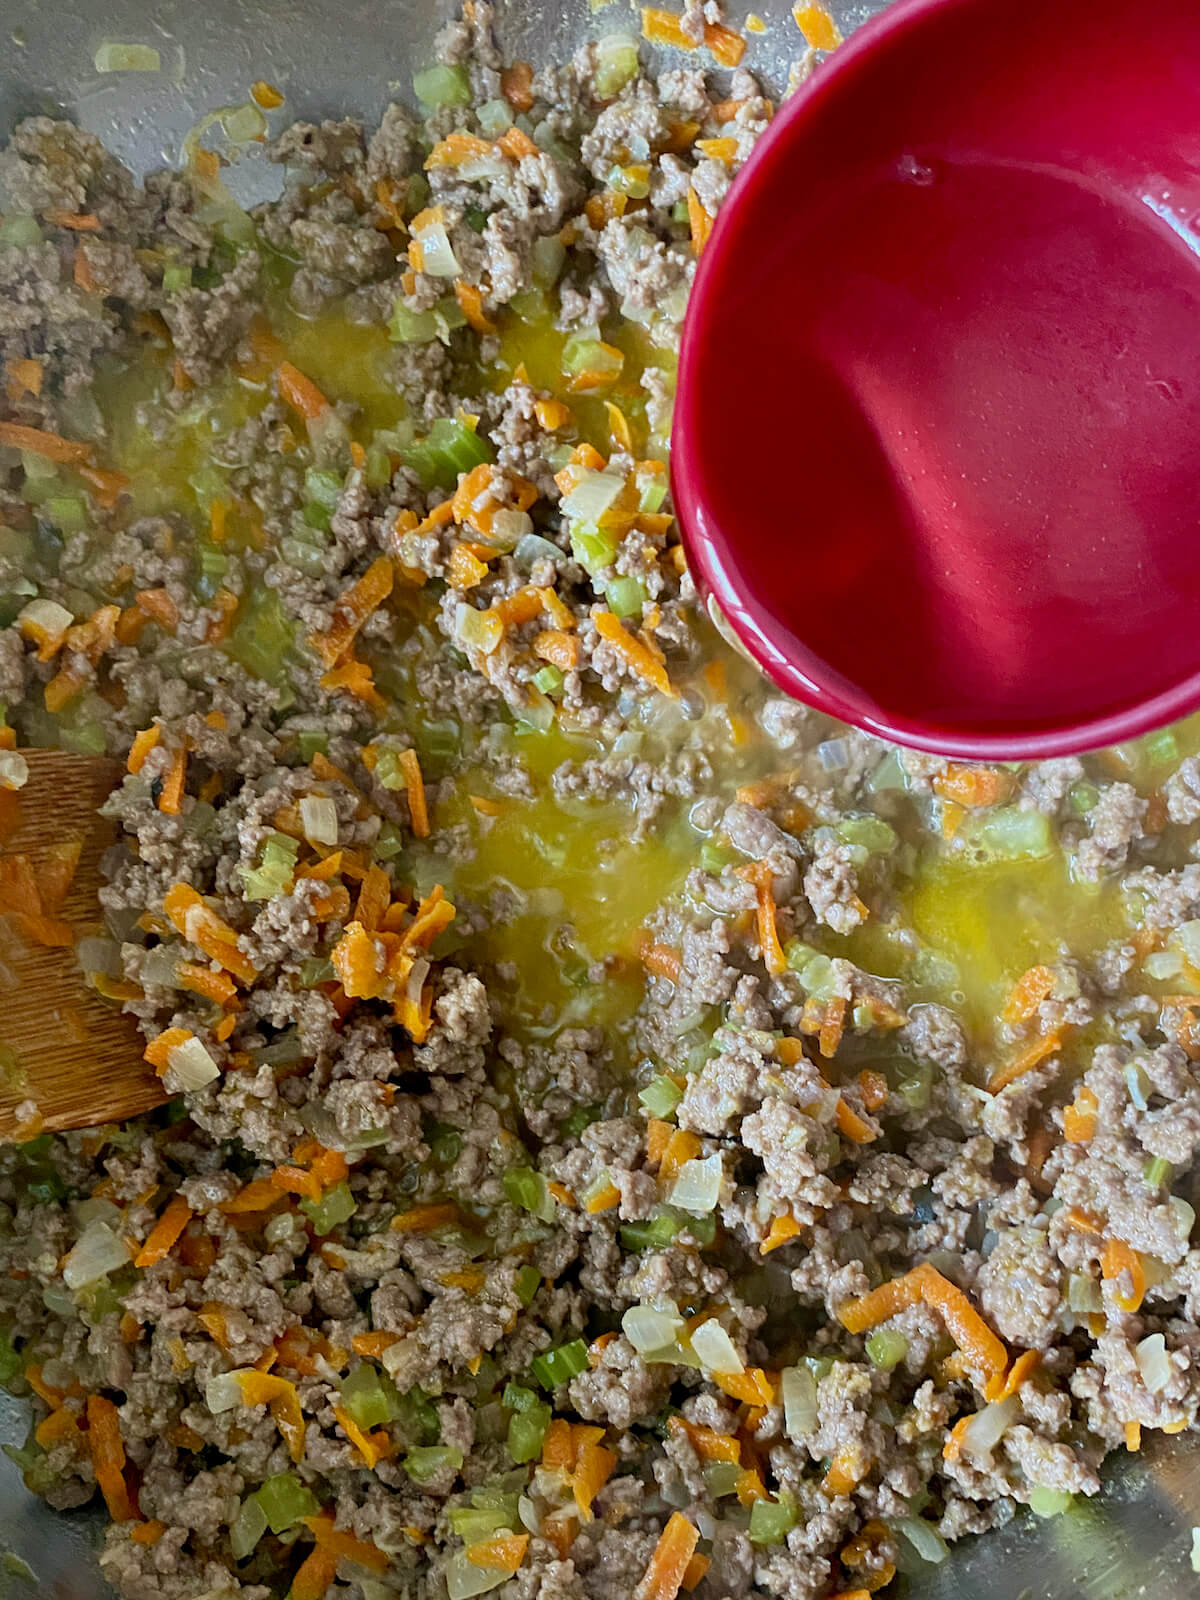
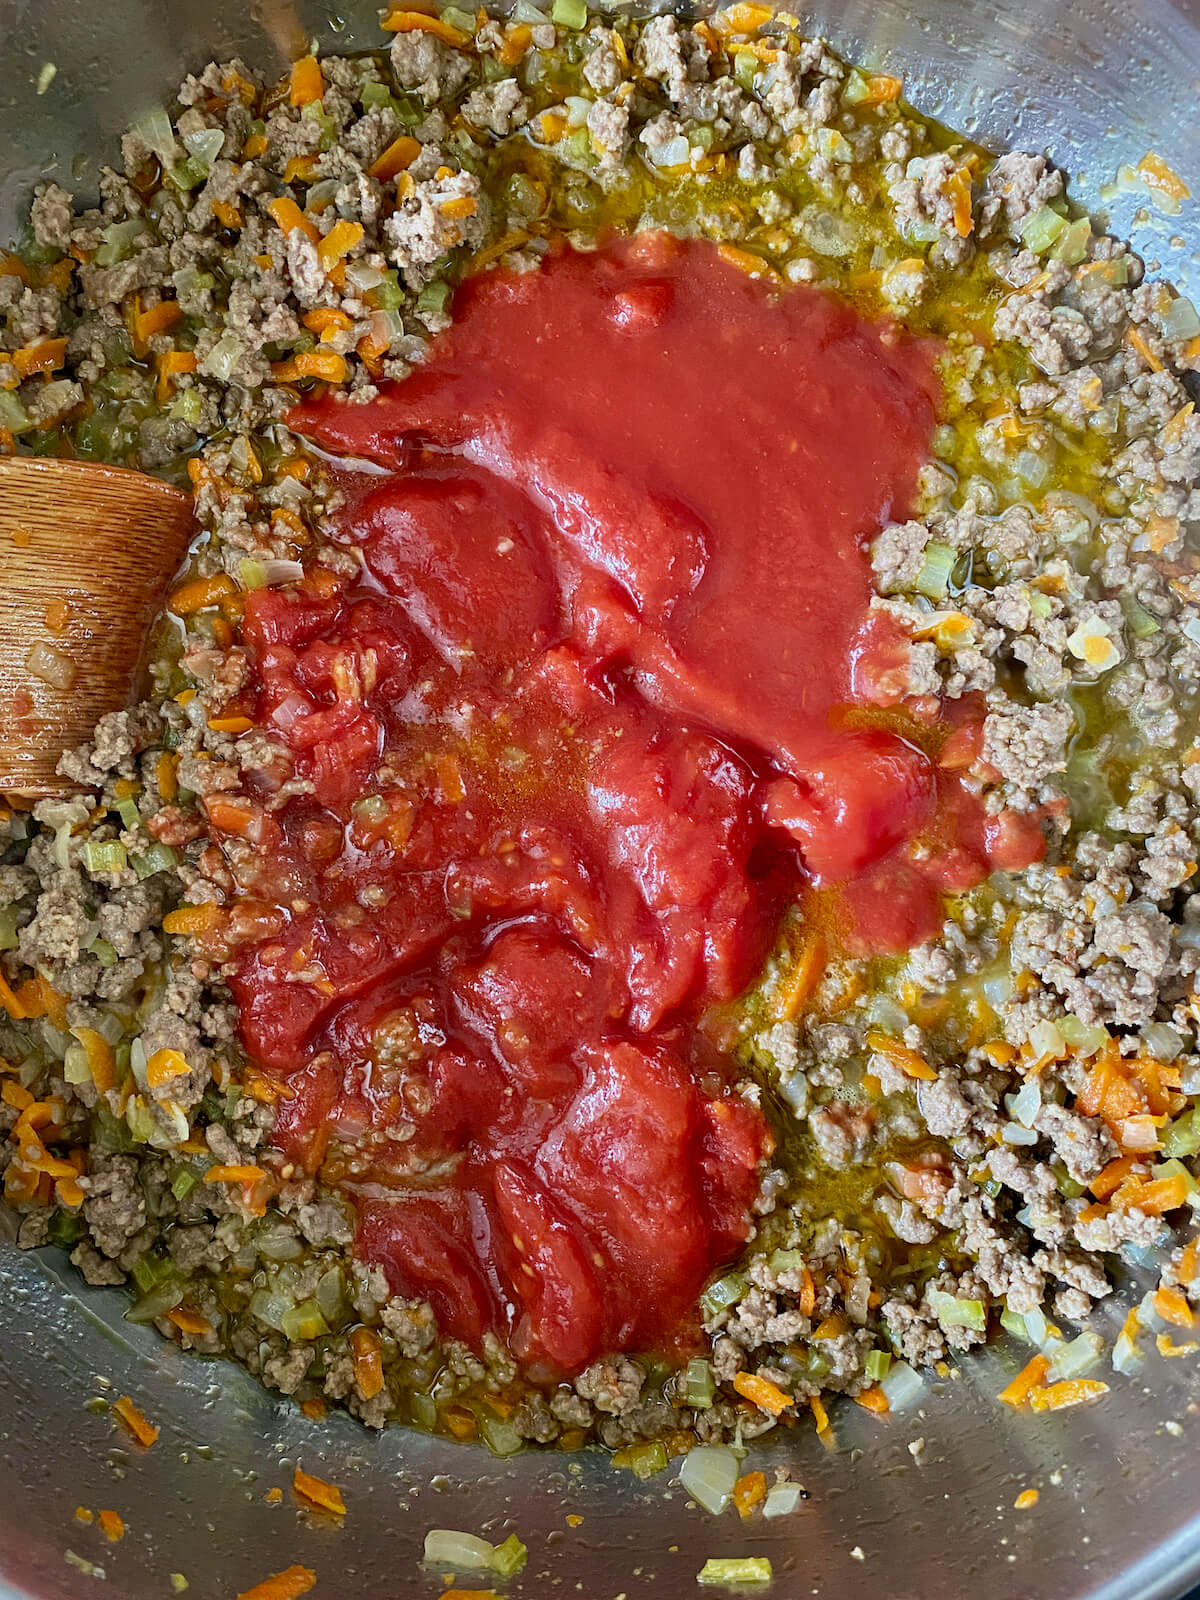
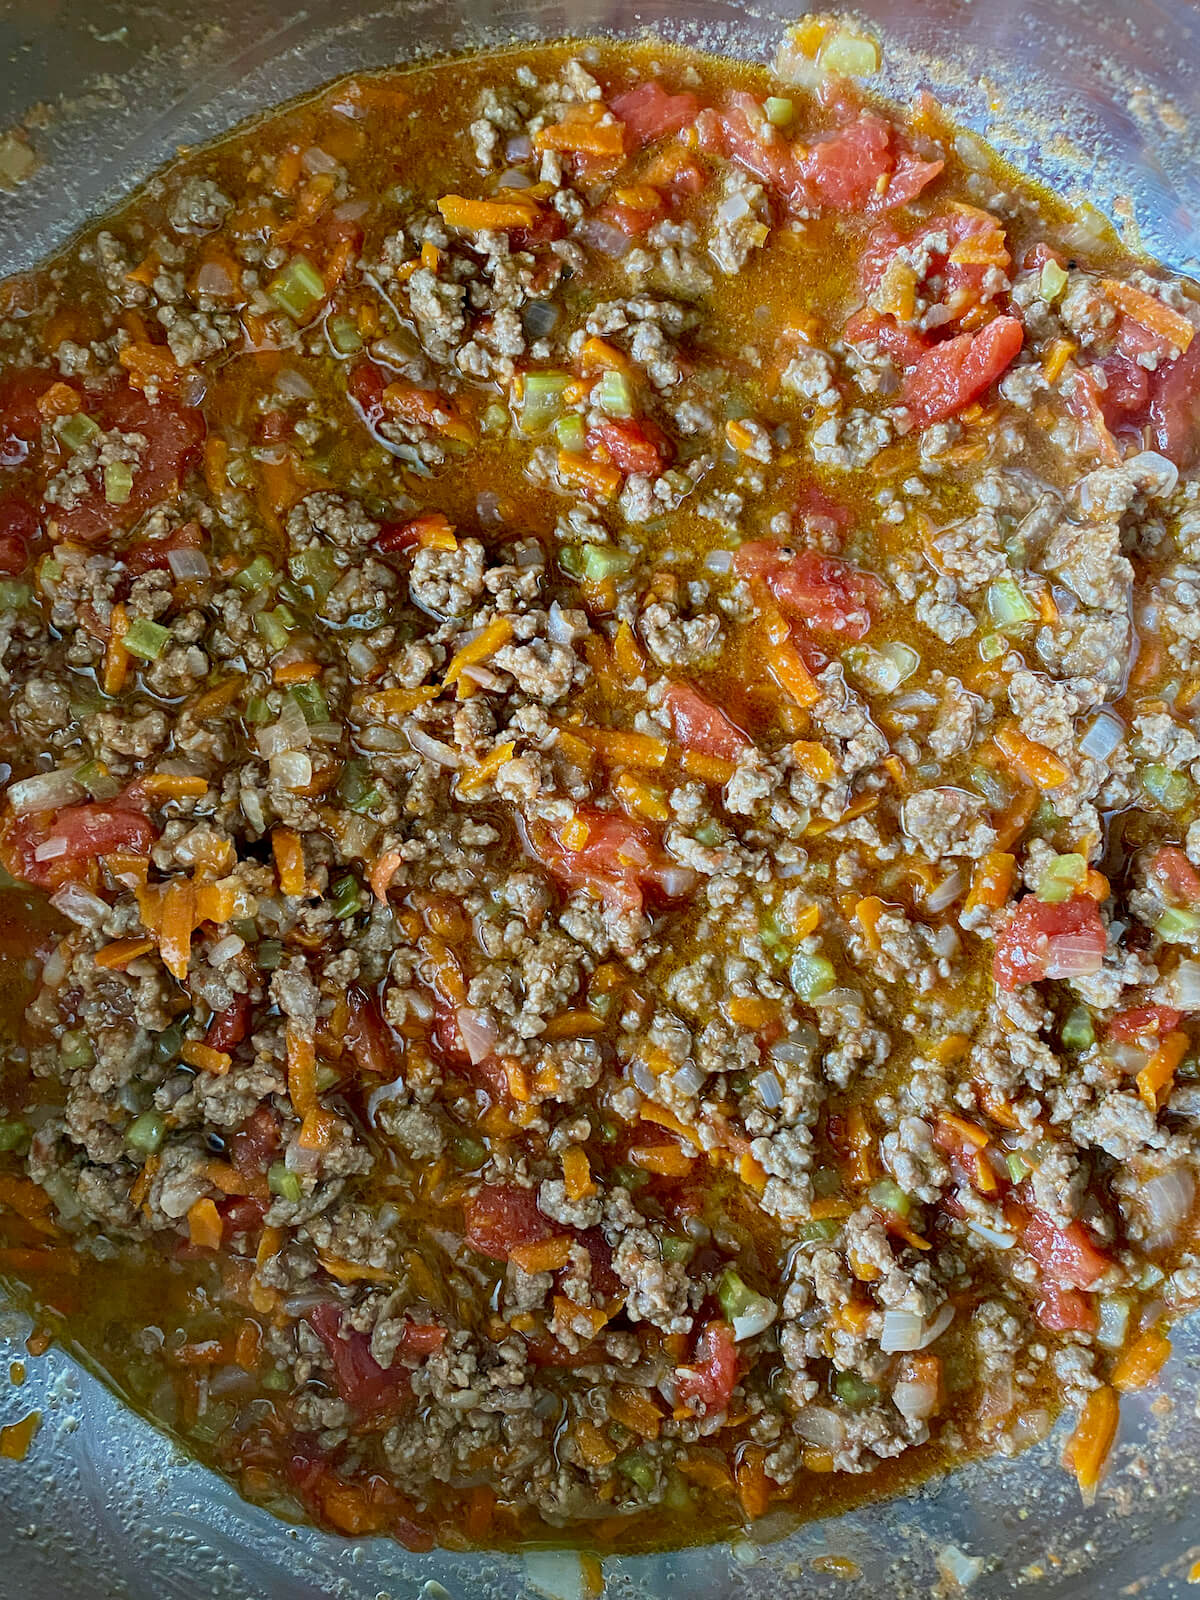
    Step 4: Add remaining ingredients. Reduce the heat to medium-low and pour in the diced tomatoes and water, scraping any cooked-on bits from the bottom of the pot. Stir in the diced bell pepper, black beans, and kidney beans until well combined.

    Tomatoes and water added to the cooked ground beef and vegetables in a Dutch oven with a spoon sticking out.
    The beef and bean chili in a large Dutch oven before simmering.

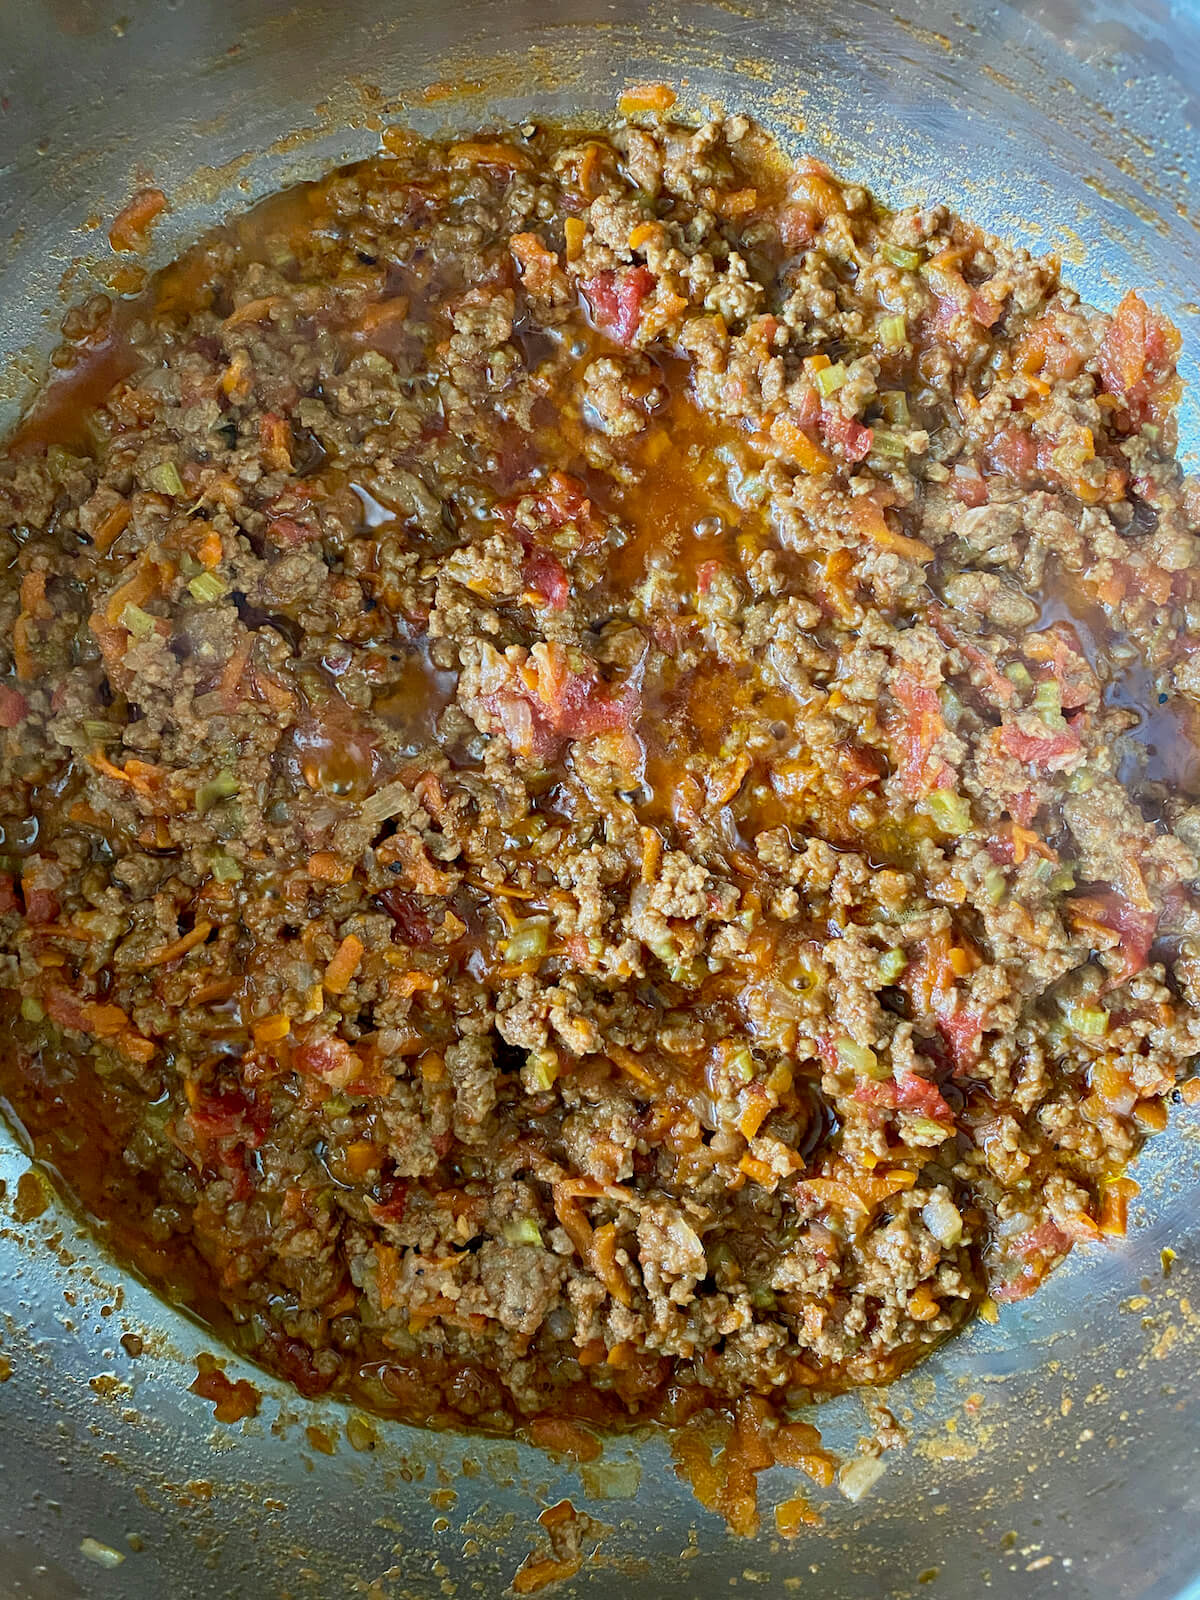
    Step 5: Simmer the chili. Bring the chili to a simmer, then cover and reduce the heat to low. Simmer for 25-30 minutes or until the peppers and tomatoes have softened.

    Step 6: Reduce the chili. Remove the lid and crush some of the beans to release their starches, naturally thickening the chili. Simmer, uncovered, for an additional 5-10 minutes or until it reaches your desired consistency.

    Step 7. Serve. โ€‹โ€‹Serve with sourdough cornbread, corn muffins, tortilla chips, and your choice of toppings. Enjoy!

    The finished beef and bean chili in a Dutch oven with a wooden spoon sticking out.

    Tips for Success

    Make this slow cooked Dutch oven chili successfully the first time using these helpful kitchen tips.

    • Prepare ingredients ahead of time. Chop the vegetables, drain the beans, and measure the spices before you start for a smoother, more efficient cooking process.
    • Don't drain the beef. After browning the ground beef, there may be a small amount of fat left in the pot. Cooking this fat into the chili creates a richer, more flavorful finished dish.
    • Use your own chili seasoning. Store-bought chili seasoning often includes additives like anti-caking agents, thickeners, and sugars. Making your own chili seasoning blend gives you full control over the flavor without these extras.
    • Thicken the chili naturally. Gently crush some of the beans to release their starches and naturally thicken the chili without the need for flour, cornstarch, or tomato paste.
    • Simmer for more flavor. The longer the chili simmers, the more the flavors meld together.
    • Adjust the consistency. If you prefer a thicker chili, simmer uncovered for a bit longer. For a slightly thinner consistency, add a touch more water.

    Classic Chili Topping Ideas

    Personalize your Dutch oven chili with a fun and flavorful twist. Here are some of my favorite topping ideas!

    • Shredded Cheddar Cheese
    • Sour Cream or Greek Yogurt
    • Fresh Salsa or Pico de Gallo
    • Guacamole or Diced Avocado
    • Cilantro Garlic Sauce
    • Fresh or Pickled Jalapeรฑos
    • Diced Red Onions
    • Pickled Banana Peppers
    • Roasted Corn
    • Black Olives
    • Cilantro
    • Green Onion
    • Lime Wedges
    • Tortilla Chips
    • Hot Sauce
    • Red Pepper Flakes

    What to Serve with Dutch Oven Chili

    Beef and bean chili is a hearty and comforting meal that pairs perfectly with a variety of side dishes. From classic cornbread to a light salad, your side dish options are as diverse as they are delicious.

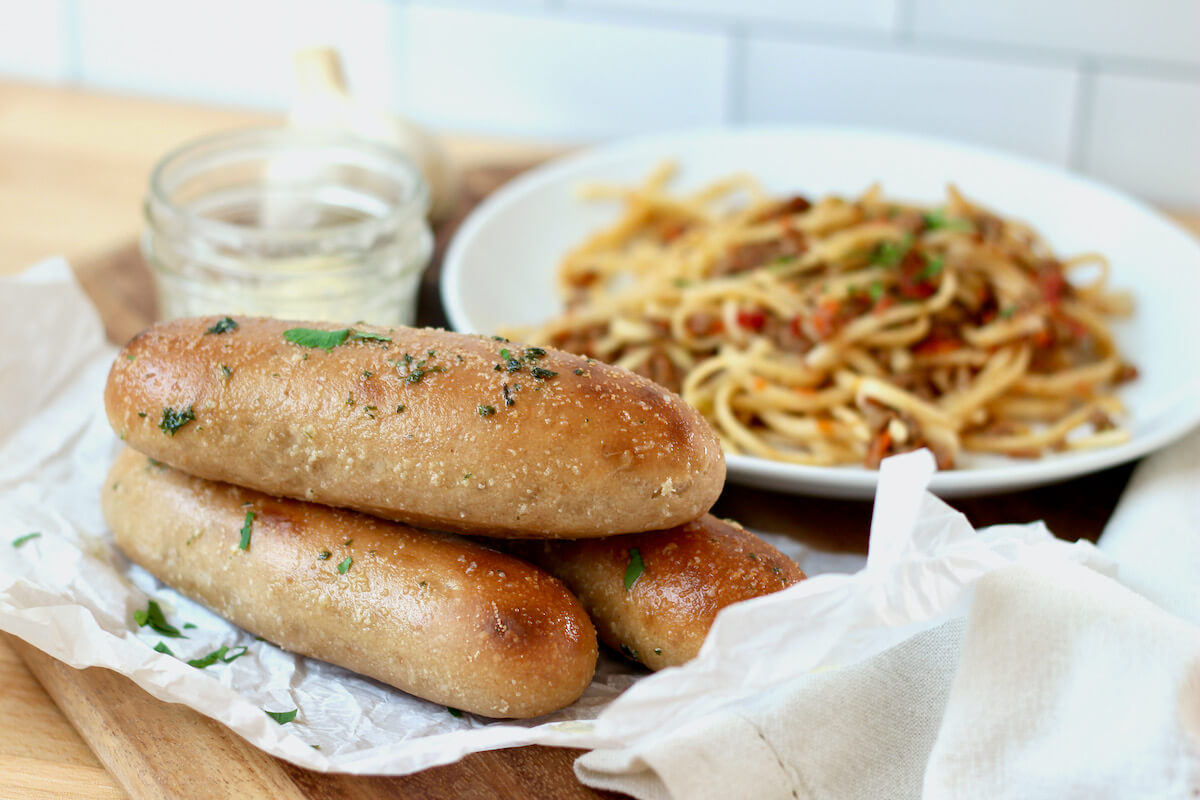
    Some of the most comforting side dishes for chili include various types of bread and crackers. Cornbread, corn muffins, warm tortillas, tortilla chips, garlic bread, breadsticks, and crusty sourdough bread are great options.

    Other starchy side dishes that complement chili include cilantro lime rice, baked potatoes, and macaroni and cheese.

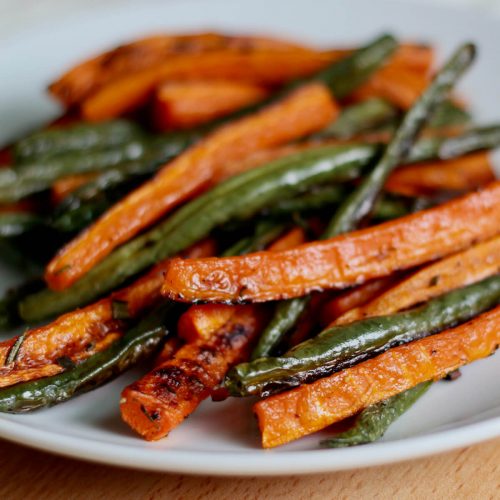
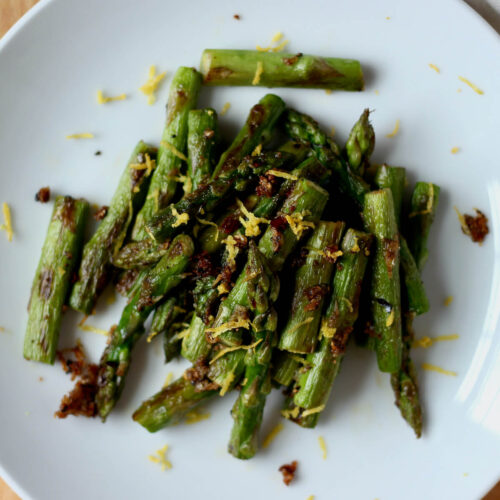
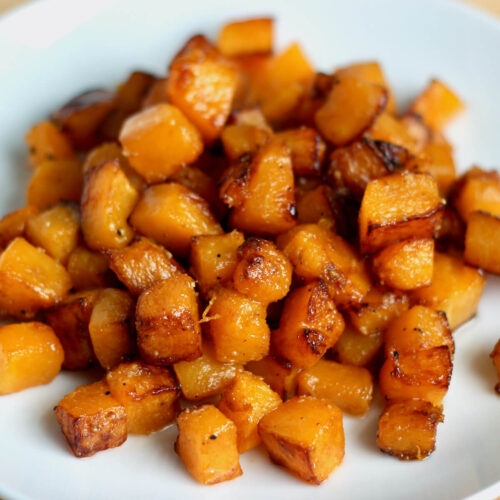
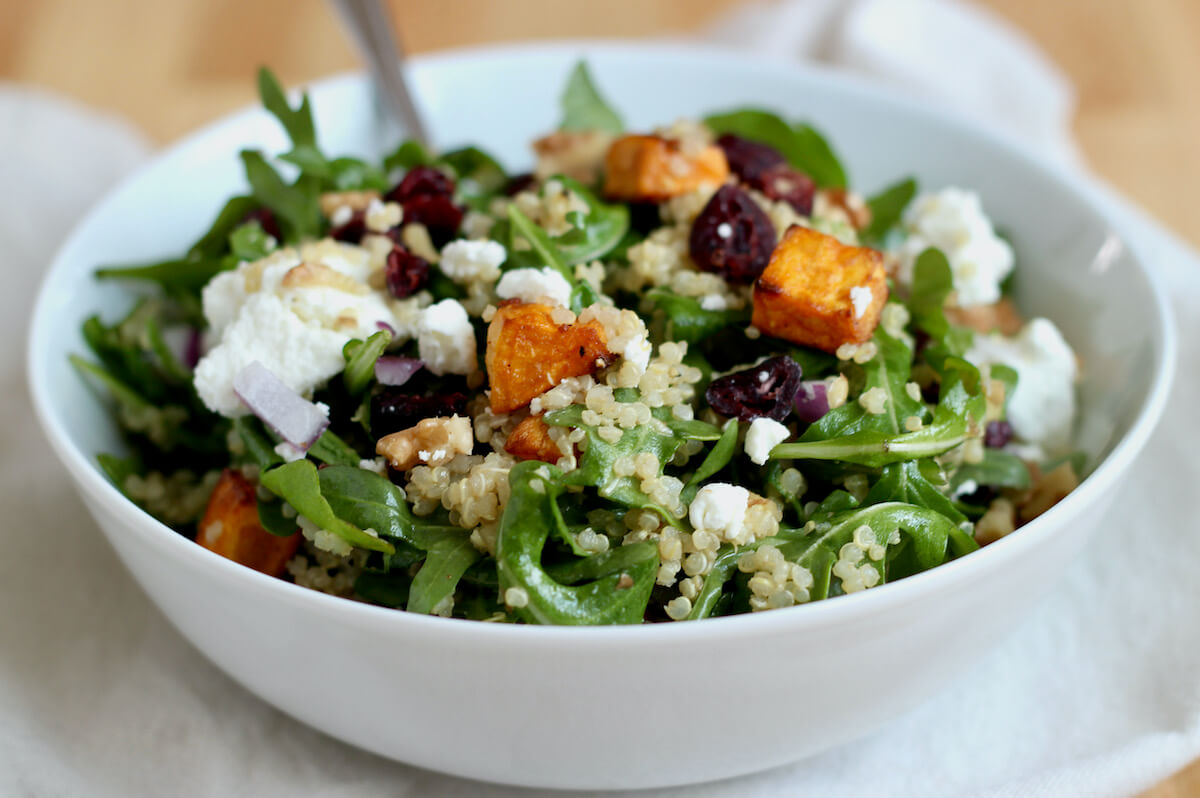
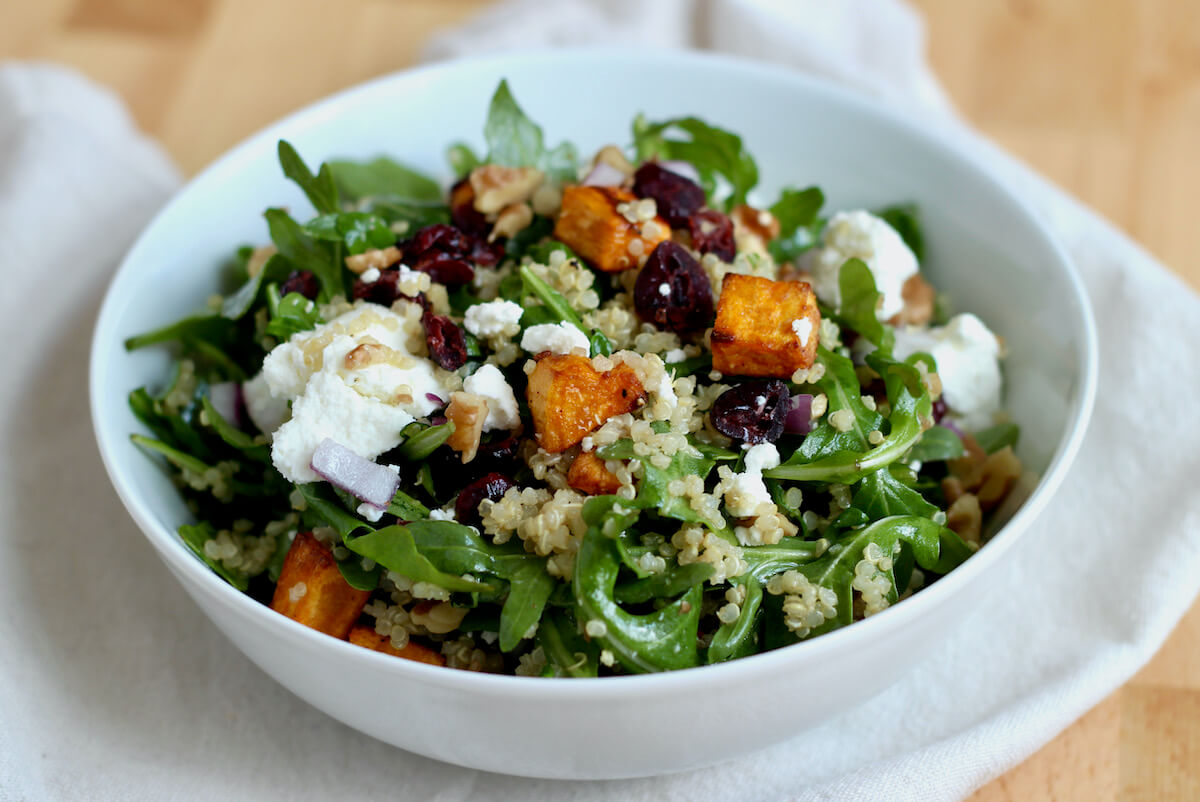
    To balance out the meal, consider serving chili with a side of salad or vegetables. Options like arugula quinoa salad, honey garlic Brussels sprouts, buttery green beans, or sautรฉed butternut squash offer a lighter, refreshing contrast to the hearty chili.

    ๐ŸŽ‰ Hosting a party? Set up a chili toppings bar with options like shredded cheese, sour cream, avocado slices, chopped cilantro, and lime wedges for a customizable experience.

    Finished chili in a lavender dutch oven. There is a wooden spoon in the chili, sticking out of the pot to the left.

    How to Use Up Leftover Chili

    Using leftover chili is an easy way to save time and minimize food waste. It's a versatile ingredient that can be repurposed into various dishes, providing quick and flavorful meals for busy days.

    Here are some of my favorite ways to repurpose leftover chili:

    • Nachos
    • Tacos, Burritos, or Quesadillas
    • Baked Potatoes or Sweet Potatoes
    • Chili Fries
    • Macaroni and Cheese
    • Stuffed Peppers
    • Omelets
    • Burgers

    Storage and Reheating

    How to Store

    • Room Temperature- If serving chili at a party, remember that it should only be kept at room temperature for a maximum of 2 hours.
    • Refrigerator- Store leftover chili in an airtight container in the refrigerator for 3-4 days.
    • Freezer- For more extended storage, place the chili in a freezer-safe plastic bag or container for up to 6 months. I like to portion leftover chili into individual or meal-sized servings for easier reheating.

    How to Reheat

    • Stovetop- Transfer leftover chili to a small saucepan and set it over medium-low heat. Add a splash of water to help loosen the chili and prevent it from drying out. Heat, stirring occasionally, until it just begins to simmer.
    • Microwave- Place chili in a microwave-safe bowl. Add a splash of water and cover the bowl with a lid or plate to keep it from splattering. Microwave on HIGH for one minute. Stir, then continue microwaving in 30-second intervals until warmed through.
    • Oven- Preheat the oven to 325ยฐF. Spread the chili into a baking dish, drizzling it with a bit of water if it seems dry. Cover the dish tightly with aluminum foil and bake for 20-30 minutes or until fully warmed through.

    ๐ŸŒถ๏ธ Quick Tip: Trying to keep the chili warm for a game day party or holiday gathering? Place the chili in a slow cooker and set it to "keep warm."

    Make Ahead

    Preparing chili in advance is perfect for busy weeks, as it allows flavors to meld for a tastier dish upon reheatingโ€”many even prefer it after a day or two in the refrigerator.

    To make this chili ahead of time, follow the recipe in its entirety. Once it cools completely, transfer it into airtight containers. Refrigerate for up to 2 days or freeze for longer storage.

    Dutch oven chili topped with sour cream and cilantro in a white bowl next to two pieces of cornbread.

    Frequently Asked Questions

    Do I need a Dutch oven to make this recipe?

    While a Dutch oven is recommended for this recipe, you can still make the chili using a large, heavy-bottomed pot with a lid. The key is to have a vessel that can comfortably accommodate all the ingredients and maintain even heat during the cooking process.

    Is chili too acidic for cast iron?

    It's advised to use an enameled cast iron Dutch oven for chili to avoid potential reactivity with acidic ingredients. If using a regular cast iron pot, it's best not to let the chili sit for an extended period to prevent any reactions with the pan's surface.

    Can I make this chili in a slow cooker?

    Yes, you can make this recipe in a slow cooker. Brown the meat and sautรฉ the vegetables in a pan first, then transfer everything to the slow cooker and cook on low for 6-8 hours.

    Can I double or halve this recipe?

    Absolutely! This recipe is flexible and can be easily adjusted to suit your needs. If you'd like to double the batch for a larger crowd or to have leftovers, simply double all the ingredient quantities. Conversely, if you'd like to make a smaller batch, you can halve the ingredient amounts. Just be sure to adjust cooking times and pot size accordingly.

    Let's Connect!

    Be sure to leave a comment below if you have any questions. You can also connect with me on Instagram, Facebook, Pinterest, or via email at [email protected].

    More Chili Recipes

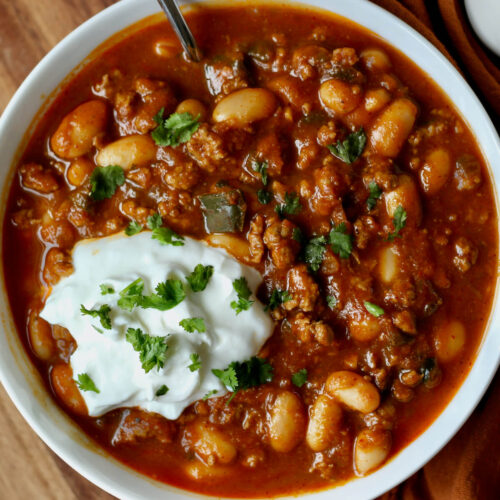
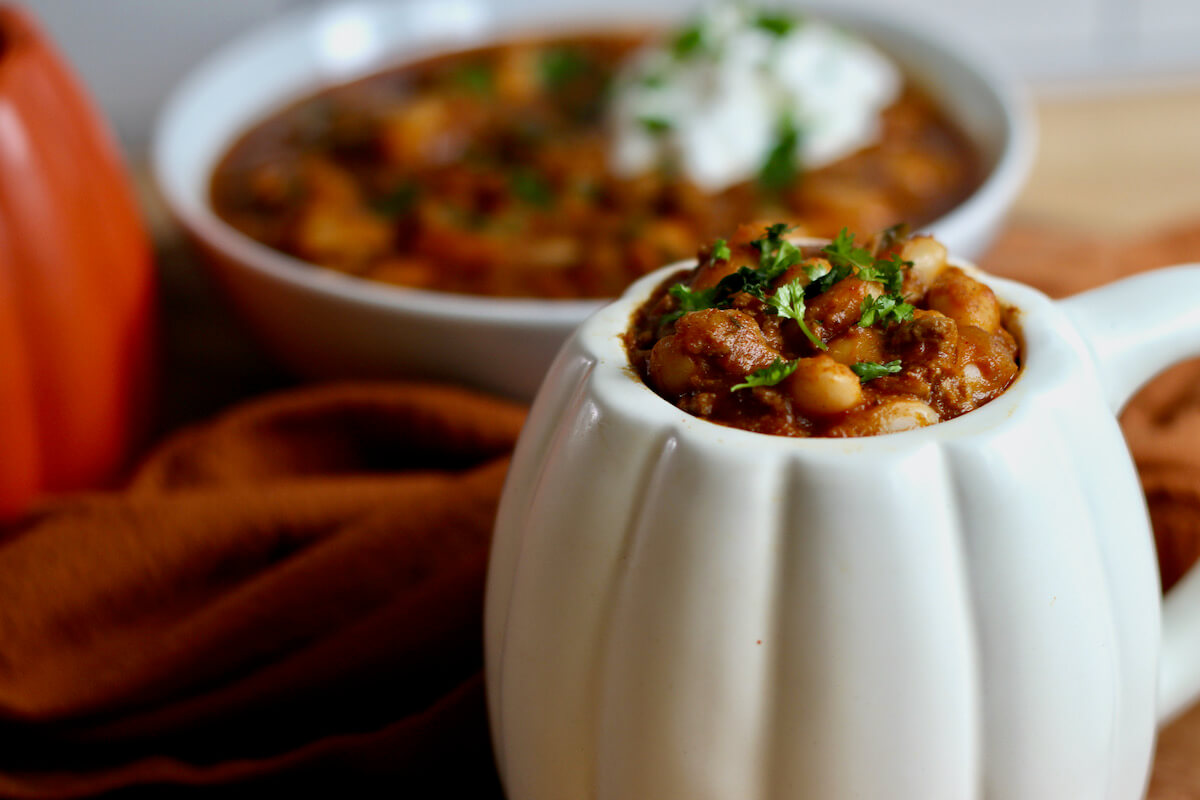
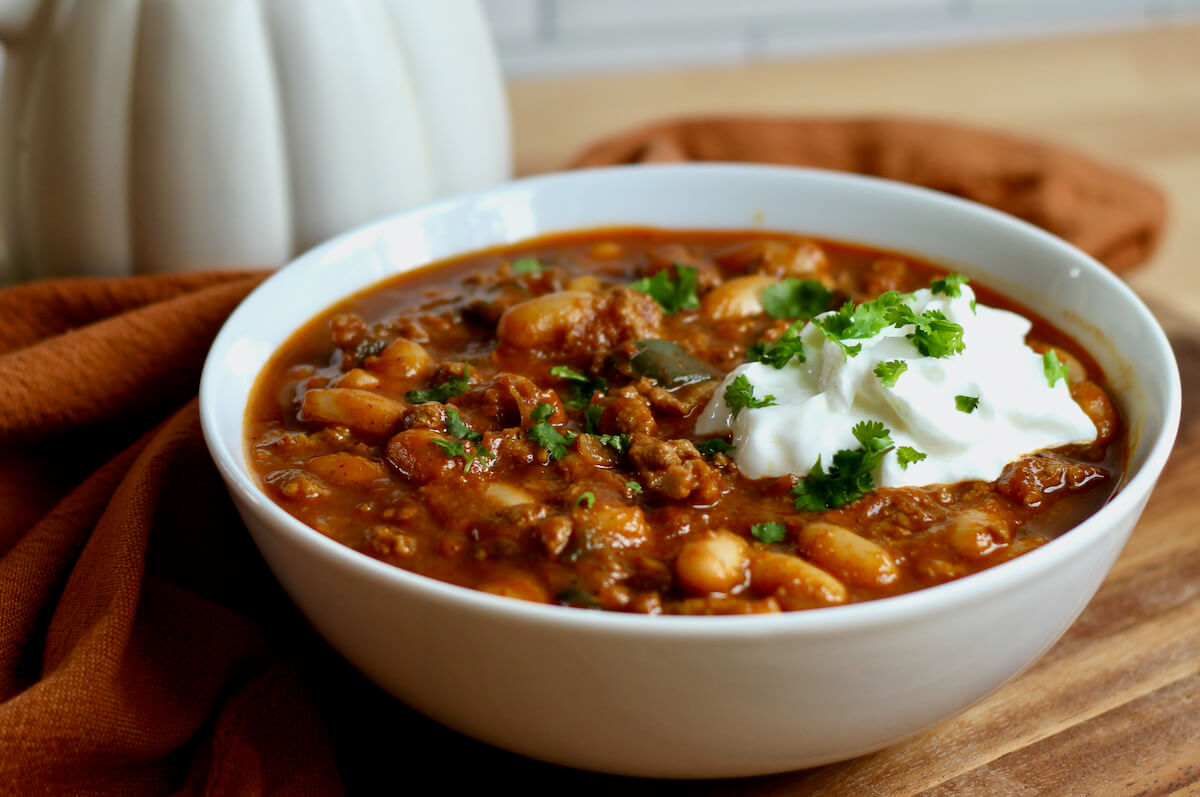
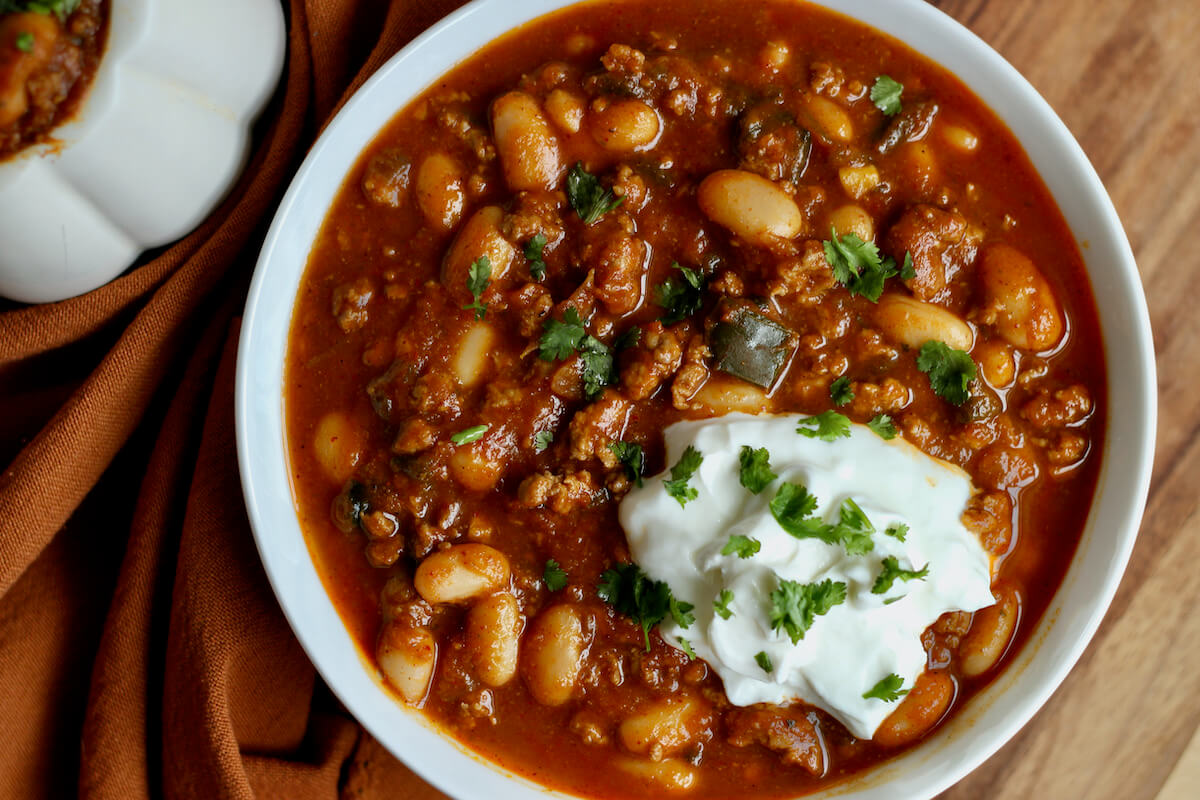
    • A bowl of pumpkin white bean chili topped with sour cream and cilantro.
      Turkey Pumpkin White Bean Chili
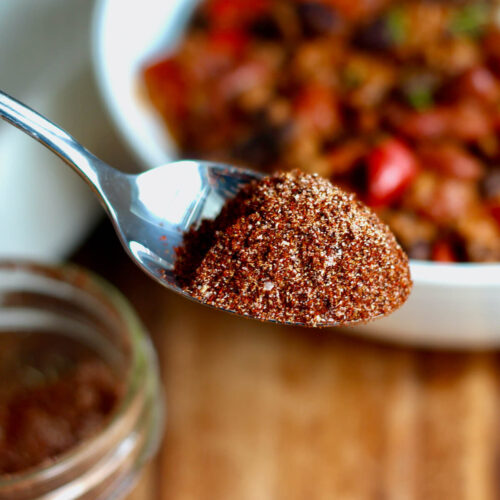
    • A spoonful of homemade chili seasoning being held above a jar of chili seasoning and a bowl of chili.
      Homemade Chili Seasoning

    ๐Ÿ“– Recipe

    A bowl of Dutch oven chili topped with sour cream and cilantro. The dish is next to a small jar of chili seasoning and a piece of cornbread.
    Print Pin SaveSaved!

    Dutch Oven Chili

    This Dutch Oven Chili is rich, hearty, and loaded with flavorful ground beef, beans, and spices. Easy to make with just one pot, this stovetop chili recipe is perfect for a quick weeknight meal. Serve it with sour cream, cheddar cheese, and cilantro for the ultimate comfort food dish.
    Course Main Course, Soup
    Cuisine American
    Prep Time 15 minutes minutes
    Cook Time 50 minutes minutes
    Total Time 1 hour hour 5 minutes minutes
    Servings 6 servings
    Calories 371kcal
    Author Ashley Petrie, RDN, LDN

    Equipment

    • 6-quart enameled cast iron dutch oven

    Ingredients

    • 2 tablespoons olive oil
    • 1 medium yellow onion diced
    • 1 jalapeรฑo minced
    • 2 cloves garlic minced
    • 1 pound ground beef 90-93% lean
    • 4 tablespoons chili seasoning blend
    • 1 14.5-ounce can diced tomatoes
    • 1 cup water
    • 1 large red or green bell pepper diced
    • 1 15.5-ounce can black beans drained and rinsed
    • 1 15.5-ounce can kidney beans drained and rinsed

    Instructions

    • Heat the olive oil in a large Dutch oven over medium heat. Add the diced onion, minced jalapeรฑo, and minced garlic. Sautรฉ for 5-7 minutes or until the vegetables are softened and beginning to brown.
      2 tablespoons olive oil, 1 medium yellow onion, 1 jalapeรฑo, 2 cloves garlic
    • Push the vegetables aside and add the ground beef. Cook, breaking it up into small pieces with a wooden spoon, until it is browned and cooked through.
      1 pound ground beef
    • Sprinkle in the chili seasoning blend and mix it thoroughly with the ground beef until well coated. Cook for an additional 2 minutes to let the spices release their flavor.
      4 tablespoons chili seasoning blend
    • Reduce the heat to medium-low and pour in the diced tomatoes and water, scraping any cooked-on bits from the bottom of the pot. Stir in the diced bell pepper, black beans, and kidney beans until well combined.
      1 14.5-ounce can diced tomatoes, 1 cup water, 1 large red or green bell pepper, 1 15.5-ounce can black beans, 1 15.5-ounce can kidney beans
    • Bring the chili to a simmer, then cover and reduce the heat to low. Simmer for 25-30 minutes or until the peppers and tomatoes have softened.
    • Remove the lid and crush some of the beans to release their starches, naturally thickening the chili. Simmer, uncovered, for an additional 5-10 minutes or until it reaches your desired consistency.
    • Serve with tortilla chips and your choice of toppings. Enjoy!

    Notes

    • Use your own chili seasoning. Store-bought chili seasoning often includes additives like anti-caking agents, thickeners, and sugars. Making your own chili seasoning blend gives you full control over the flavor without these extras.
    • Storage: Store leftover chili in an airtight container for up to 4 days in the refrigerator or up to 6 months in the freezer.

    Nutrition

    Serving: 1serving | Calories: 371kcal | Carbohydrates: 35g | Protein: 32g | Fat: 12.5g | Saturated Fat: 3.5g | Polyunsaturated Fat: 1g | Monounsaturated Fat: 6g | Cholesterol: 67mg | Sodium: 991mg | Potassium: 1129mg | Fiber: 10g | Sugar: 5g | Vitamin C: 34mg | Calcium: 92mg | Iron: 5.4mg
    Did you try this recipe?Let me know! Comment below, or take a picture and tag me on Instagram @everydayhomemadebyashley.

    Homemade Chili Seasoning

    September 12, 2023

    This Homemade Chili Seasoning strikes the perfect balance between spicy, sweet, and smoky for a delicious bowl of chili youโ€™ll crave again and again. Made without any unnecessary ingredients, this homemade spice blend recipe is easily customizable to suit your tastes. Try it with chili, tacos, grilled meats, eggs, and more.

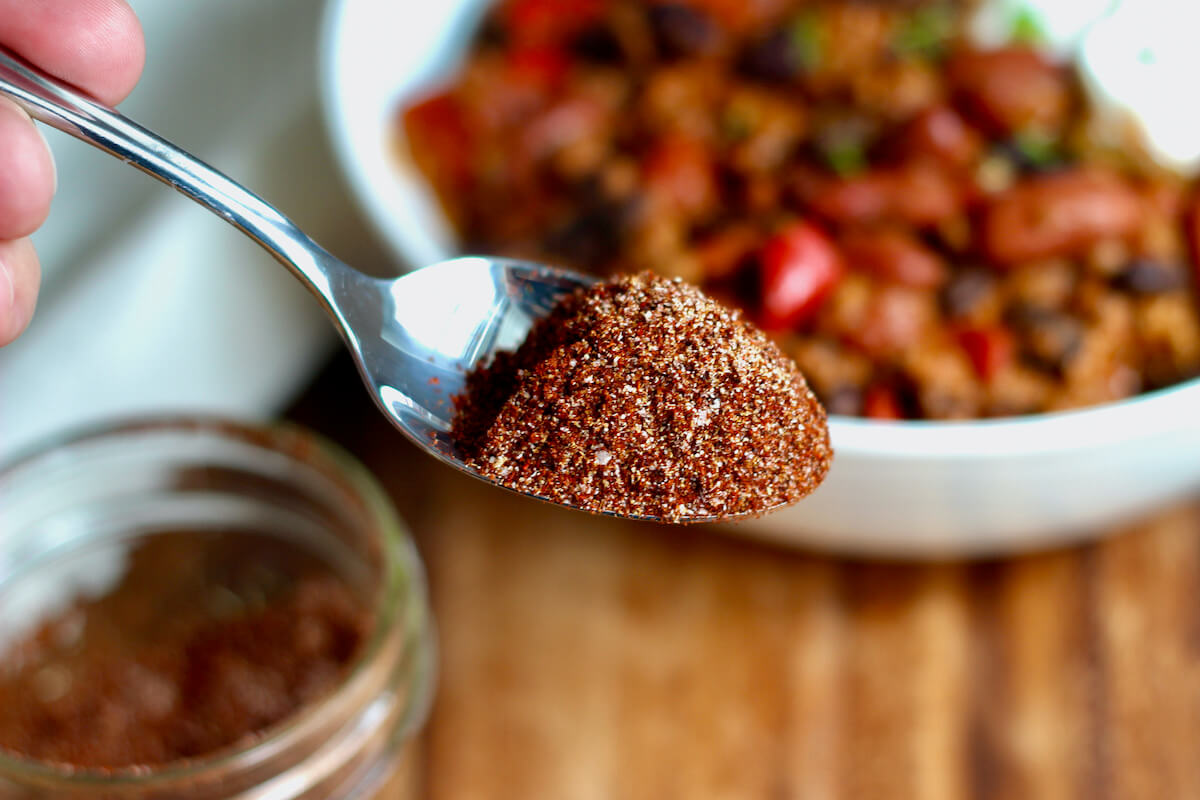
    A spoonful of homemade chili seasoning being held above a jar of chili seasoning and a bowl of chili.

    One of the easiest ways to take your chili to the next level is to use your own chili seasoning blend.

    Not only does homemade chili seasoning taste fresher and more flavorful, but it can also be customized to suit your personal taste preferences.

    Plus, by making chili seasoning from scratch, you avoid the unnecessary ingredients and fillers, like sugars, starches, and excess sodium, often found in store-bought packets.

    Today, Iโ€™m walking you through how to make the best homemade chili seasoning, including which ingredients to use, tips that will guarantee it stays fresher for longer, and some of my favorite ways to use this easy chili seasoning recipe.

    Disclaimer: Some links throughout this post are affiliate links. As an Amazon Associate, I earn from qualifying purchases. You can learn more by visiting my Affiliate Disclosure Page.

    Why You'll Love This Recipe

    • Quick & Easy- If you're new to cooking from scratch, making homemade spice blends is a great place to start. They're quick, easy, and fun to make!
    • Flavorful- No seasoning packet can compare to the flavor of a fresh, homemade spice blend.
    • Customizable- One of the best parts of making your own homemade chili seasoning from scratch is that it's easily customizable. Adjust the saltiness, spiciness, and other ingredients to suit your tastes.
    • Budget-Friendly- Making your own seasoning blend can be more cost-effective than buying pre-packaged versions, especially if you buy spices in bulk.
    • No Unnecessary Ingredients- Avoid added ingredients and fillers, such as anti-caking agents, sugar, and flour, often found in seasoning packets.
    • Great for Gifting- Homemade spice blends make a fun and creative edible gift you can share with family and friends.

    Ingredient Notes

    Here are some notes on key ingredients. For a full list of ingredients, check out the recipe card below.

    • Chili Powder- The foundational flavor for classic chili, chili powder has a warm, earthy flavor with a mild heat.
    • Cumin- Warm, pungent, earthy, and slightly citrusy, cumin adds depth to chili seasoning and pairs well with chili powder.
    • Onion Powder- Onion powder adds a sweet onion flavor to the chili seasoning.
    • Smoked Paprika- Smoky and mildly spicy with a hint of sweetness, smoked paprika rounds out the flavor profile of this chili seasoning.
    • Kosher Salt- Enhances the flavor of the other spices. Opt for kosher salt since it does not contain added ingredients like table salt often does.
    • Garlic Powder- Lends a savory garlic flavor to the chili seasoning.
    • Black Pepper- Use freshly ground black pepper for the best flavor.
    • Cayenne Pepper- Gives the chili seasoning a spicy kick. Adjust the amount of cayenne pepper to suit your tolerance for spicy foods.

    ๐ŸŒฑ Sustainability Tip: Try making your own spices from scratch! Garlic powder, onion powder, and cayenne pepper are fun and easy to make at home.

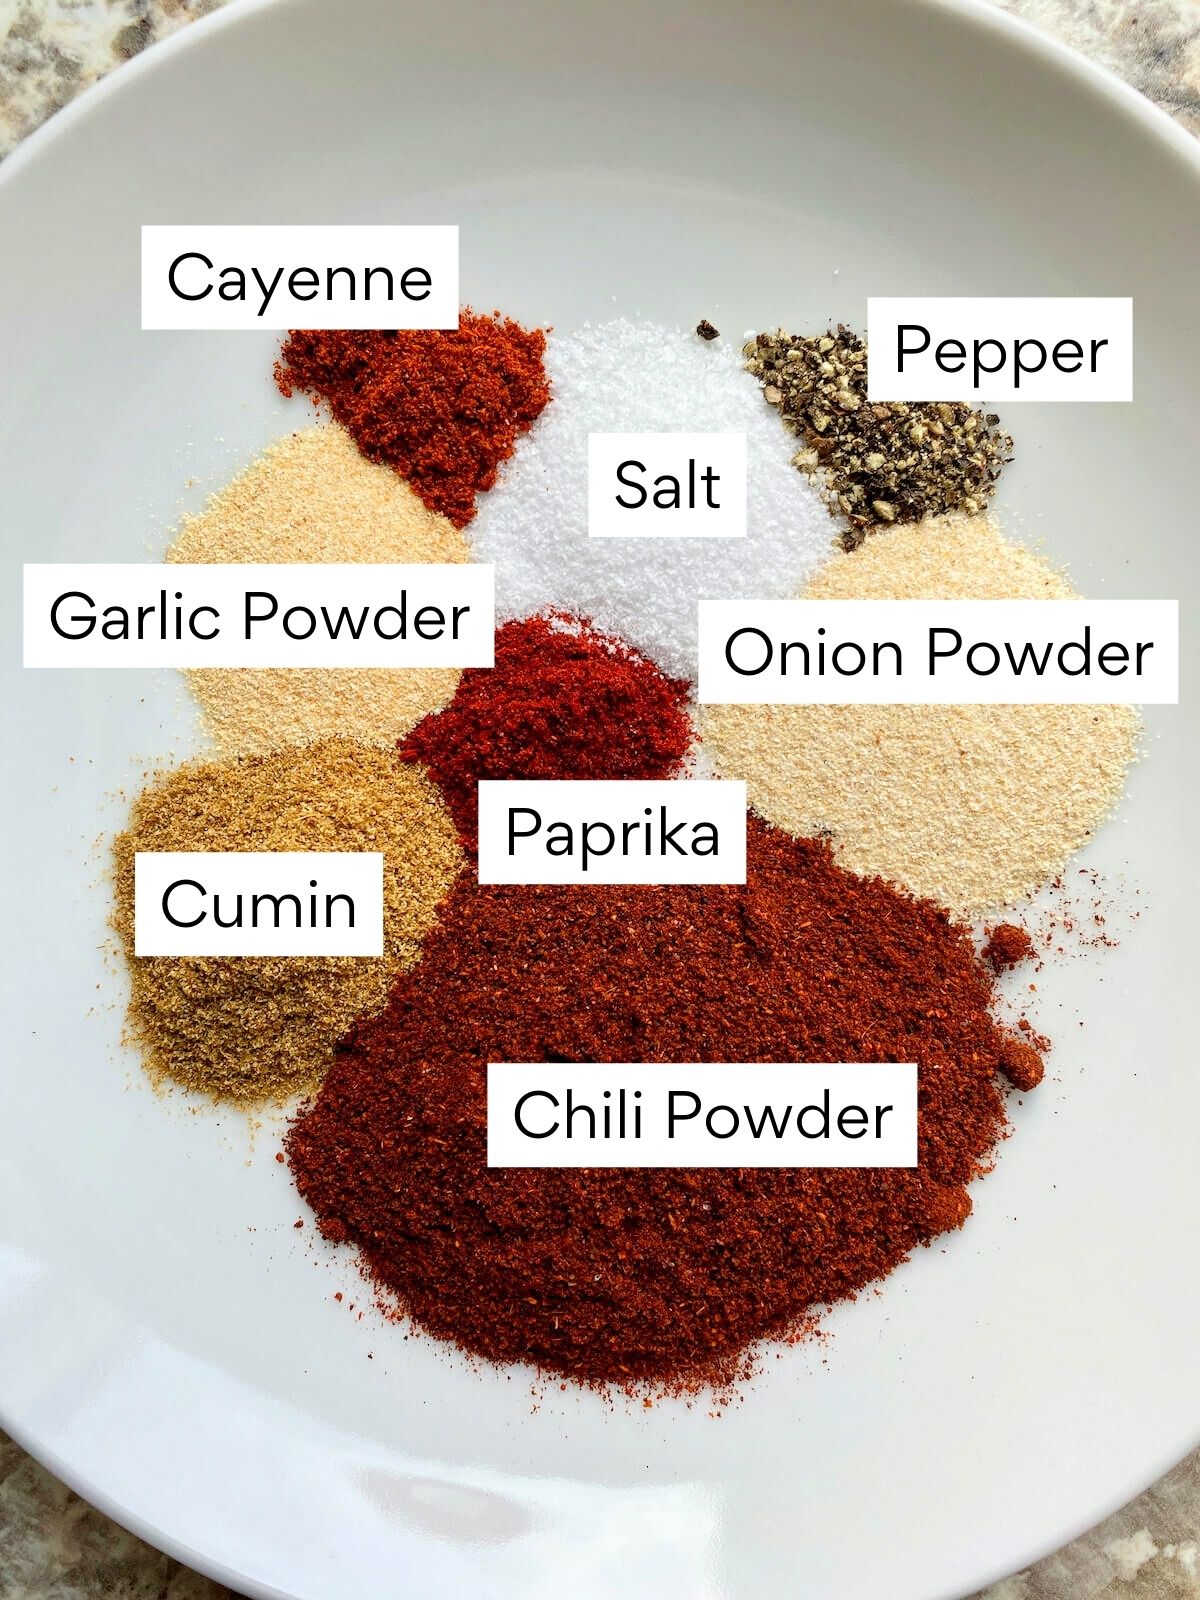
    The ingredients to make homemade chili seasoning. Each ingredient is labeled with text. They include chili powder, cumin, garlic powder, paprika, onion powder, cayenne, salt, and pepper.

    Substitutions and Variations

    Here are a few ways you can try customizing this easy chili seasoning recipe to fit your diet and taste preferences.

    Substitutions

    • Chili Powder- A combination of paprika and cayenne pepper can be used to replicate the flavor and spice of chili powder.
    • Cumin- Ground coriander has a similar flavor profile to cumin, although it's not exactly the same.
    • Onion Powder- Swap onion powder for one tablespoon of dried onion flakes.
    • Smoked Paprika- Replace smoked paprika with hot paprika, sweet paprika, or additional chili powder.
    • Kosher Salt- Substitute kosher salt with coarse ground sea salt or table salt. If using table salt, start with half the amount called for in the recipe and adjust to taste.
    • Garlic Powder- Use one teaspoon of dried minced garlic in place of garlic powder.
    • Black Pepper- Swap black pepper for white pepper to give the chili seasoning a slightly different flavor.
    • Cayenne Pepper- Red pepper flakes can be used in place of cayenne pepper. For less heat, use more chili powder or smoked paprika.
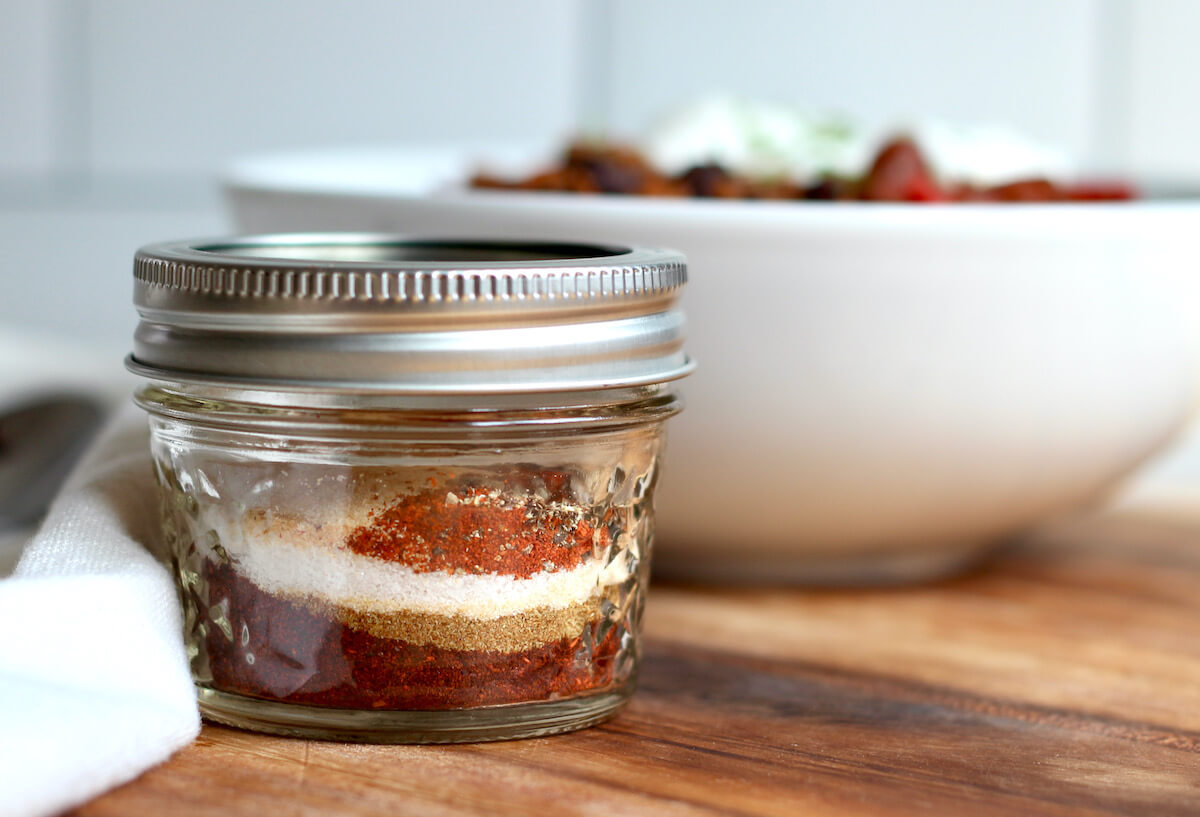
    A small glass jar of chili seasoning showing each individual spice in layers before being mixed together. There is a bowl of chili in the background.

    Variations

    • Chipotle- Substitute some or all of the chili powder with chipotle powder for a smokier, spicier flavor profile.
    • Chili Lime- Add dehydrated lime zest to give the chili seasoning a pop of citrus flavor.
    • Herbed- Dried herbs like oregano, thyme, or basil can give the chili seasoning an additional layer of flavor.
    • Sweet- Adding brown sugar and warm spices like cinnamon and nutmeg can give the chili seasoning a sweeter flavor profile.
    • Flour- While many store-bought chili seasoning packets contain flour for thickening, this homemade blend skips it. If desired, add one tablespoon of all-purpose flour to achieve a thicker consistency in your dishes.

    Equipment Notes

    Here are some notes on any special equipment I used to make this recipe.

    • Spice Jar- A small glass jar or food-grade plastic container with an airtight seal works best for maintaining freshness. Ensure the container is clean and completely dry before adding the spices.
    • Labels (optional)- Use labels to mark your homemade spice blends with the date they were prepared to keep track of their freshness.
    • Spice Grinder (optional)- For the freshest-tasting tasting chili seasoning, consider grinding whole spices using a spice grinder.

    How to Make Homemade Chili Seasoning

    Here is how to make chili seasoning from scratch.

    Step 1: Prepare the seasoning. Combine all ingredients in a small jar or airtight container. Seal and shake well to blend evenly.

    Step 2: Store and use. Store in a cool, dark place for up to 6 months. Use in chili, tacos, soups, stews, or as a meat rub.

    This homemade chili seasoning equals one store-bought packet, perfect for a 6-serving batch of chili with one pound of ground meat.

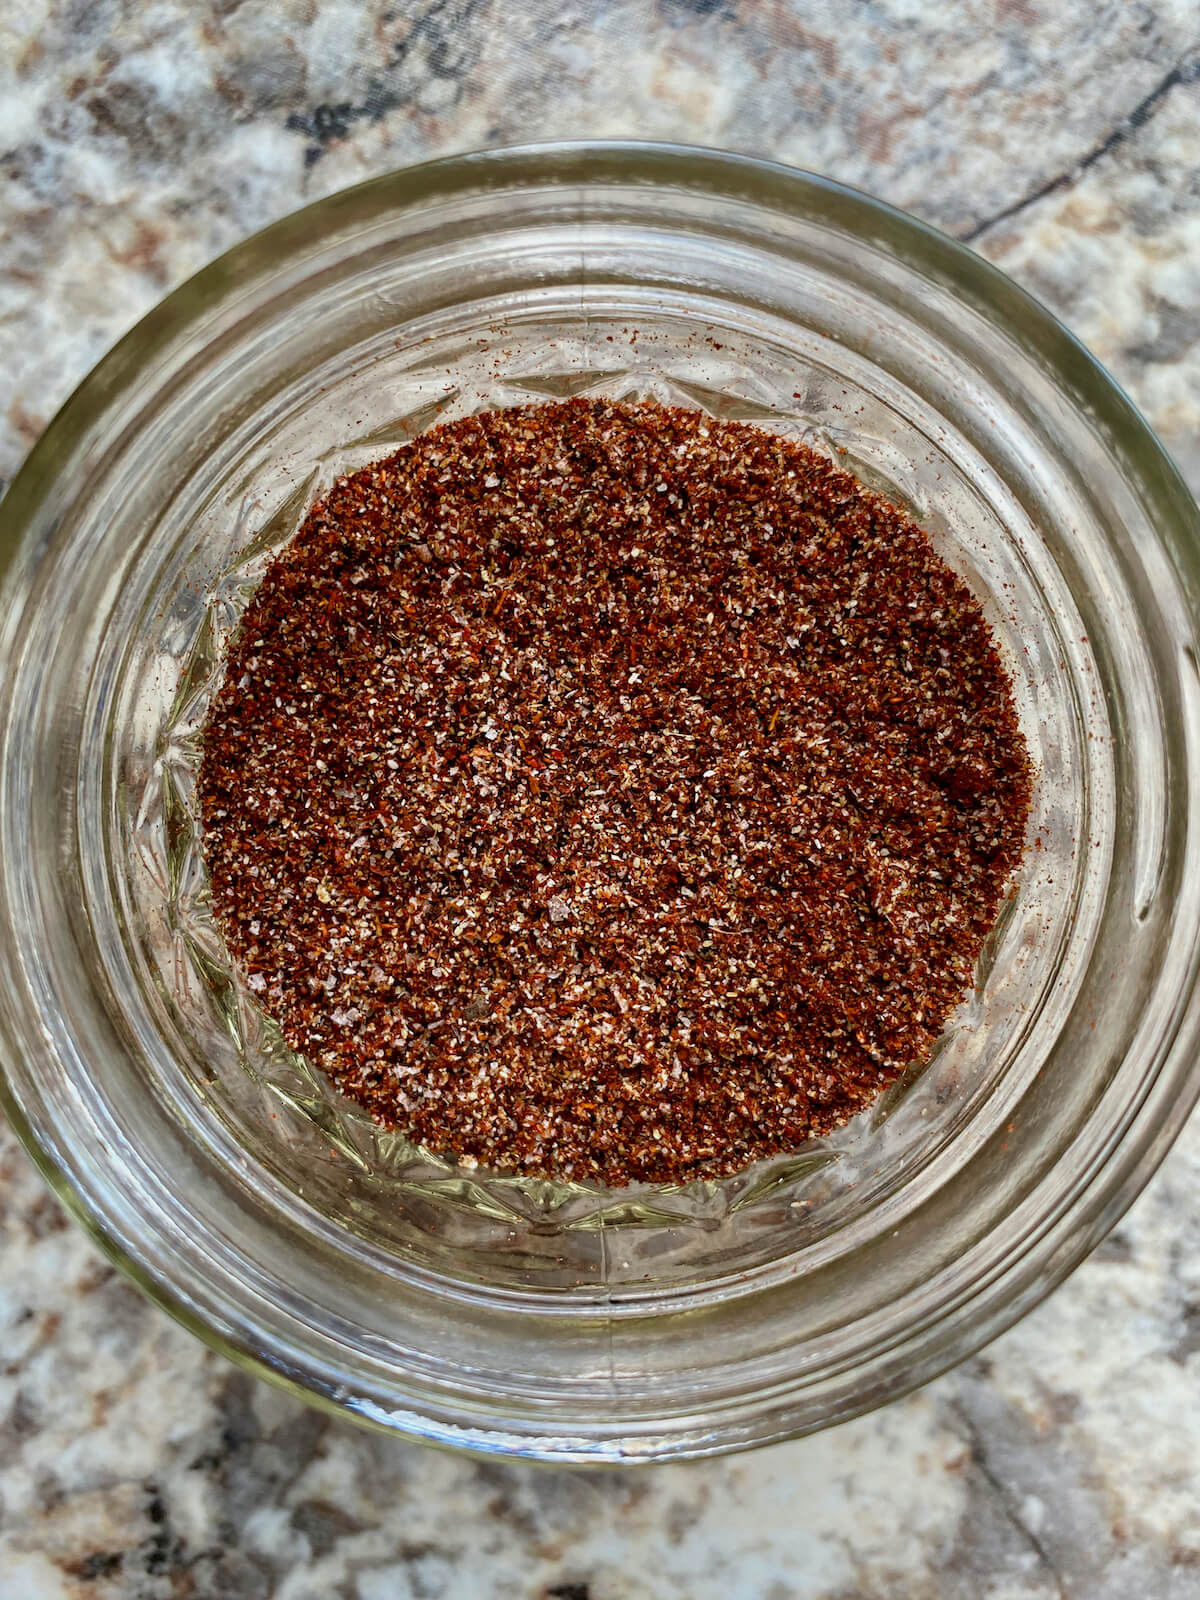
    A small glass jar of homemade chili seasoning.

    Tips for Success

    Make this easy homemade chili seasoning blend successfully the first time using these helpful kitchen tips.

    • Choose the right container. Use a glass jar or food-grade plastic storage container to maintain optimal freshness and flavor.
    • Use fresh spices. Older spices probably won't have much flavor. For the best chili seasoning, use fresh, high-quality spices.
    • Avoid moisture. Ensure all equipment and containers are completely dry to prevent clumping.
    • Store properly. Store your homemade chili seasoning mix in a cool, dark place and avoid exposure to heat or moisture.
    • Label and date. Consider labeling the container with the preparation date for easy tracking of freshness.
    • Get creative. Chili seasoning isn't just for chili! Try it in tacos, soups, stews, or as a rub for grilled meats.
    • Customize. Feel free to adjust the quantities of spices to suit your taste preferences.

    Troubleshooting

    • Clumping- If the seasoning clumps, it's likely due to exposure to moisture. Ensure all equipment and containers are completely dry before blending or storing.
    • Lacks Flavor- If the seasoning lacks flavor, it might be due to using older or stale spices. Always use fresh, high-quality ingredients for the best results.
    • Too Spicy- Add more of the other ingredients to dilute the spiciness. Reduce or eliminate the cayenne pepper in your next batch of seasoning for chili if it's too spicy.
    • Saltiness- Adjust the amount of salt to suit your personal taste preference and diet restrictions. Omit the salt entirely for a salt-free chili seasoning.

    How to Use Homemade Chili Seasoning

    Don't limit this homemade chili seasoning to just chili! It's a versatile blend that can be used to spice up a variety of your favorite dishes.

    From classic chili to chicken tacos, Mexican-inspired dishes naturally pair well with chili spices. Try it with stovetop beef chili, turkey pumpkin chili, shredded chicken tacos, grilled shrimp tacos, and ground beef nachos.

    Use this chili mix as a meat rub for grilling, roasting, or searing meats and seafood. It's perfect for grilled steak tips, chicken breasts, shrimp skewers, pan-seared chicken, and whole roasted chicken.

    Finally, use this homemade chili spice blend to season a variety of other dishes such as cilantro lime rice or roasted Brussels sprouts.

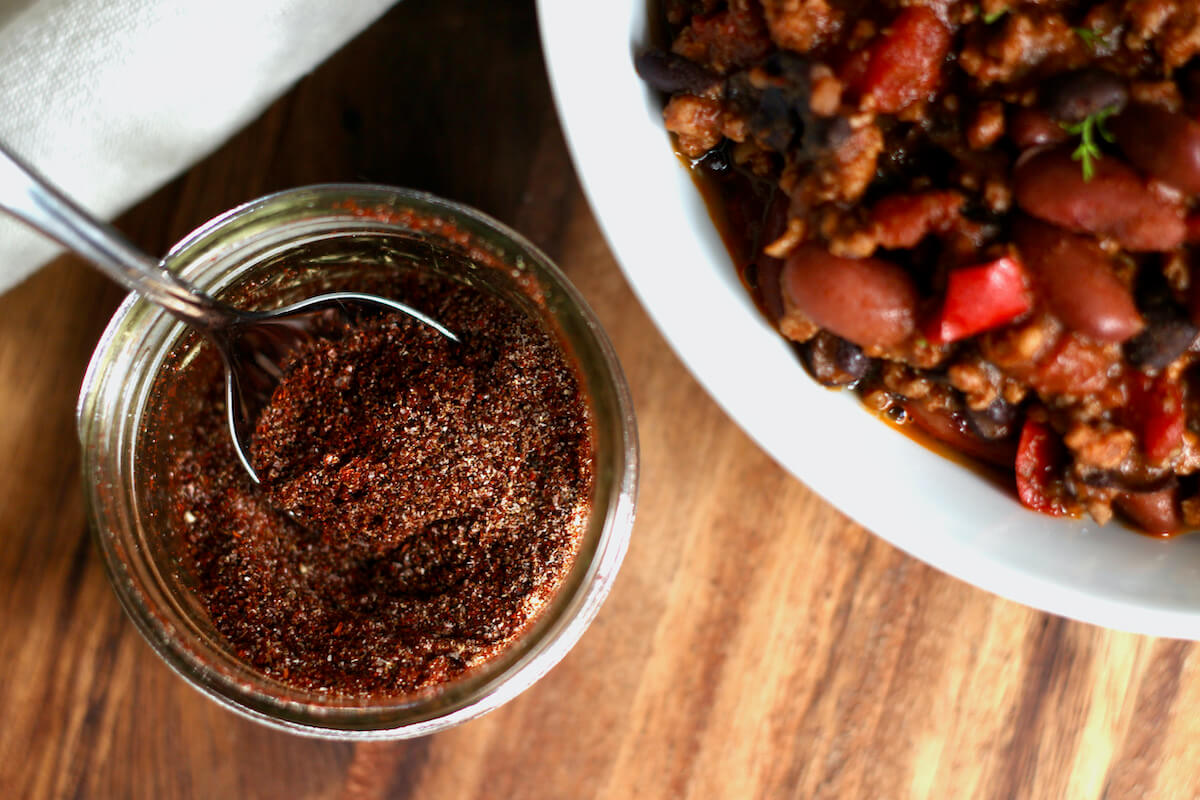
    A small glass jar of chili seasoning with a spoon in it next to a bowl of chili.

    How to Store

    • Room Temperature- Store homemade chili seasoning in an airtight container in a cool, dry place for up to 6 months.
    • Refrigerator & Freezer- It is not recommended to store spices in the refrigerator or freezer. This can introduce moisture, which may lead to clumping and degrade the quality of the spices over time.

    Make Ahead

    This homemade chili seasoning is perfect for making ahead because it has such a long shelf life.

    In fact, I suggest making a larger batch by doubling or tripling the recipe. This way, you'll always have your custom chili blend ready to enhance your favorite dishes whenever you need it.

    ๐ŸŽ Edible Gift Idea: Gifting a small jar of homemade chili seasoning is a unique and thoughtful present for special occasions like holidays and birthdays.

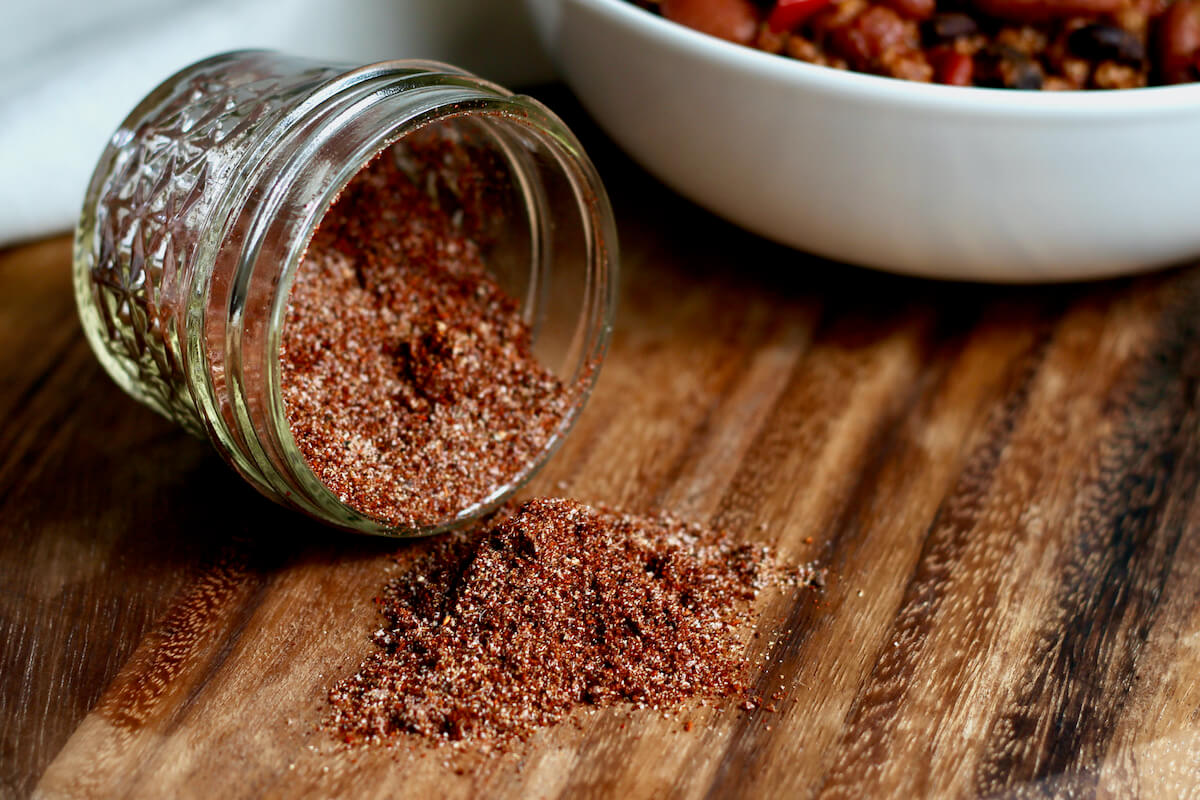
    A small glass jar of chili seasoning tipped over with some of the seasoning spilling out. Out of focus in the background is a bowl of chili.

    Frequently Asked Questions

    How much chili seasoning per pound of meat?

    This homemade chili seasoning makes 4 tablespoons, is equivalent to one store-bought packet, and is just right for one pound of ground meat.

    What can I do if my seasoning turns out too spicy?

    To reduce spiciness, you can add more of the other ingredients in the recipe. You can also dilute the spiciness by adding dairy to the dish you're using the chili seasoning in.

    How do I know if my spices are still fresh?

    Spices lose potency over time. A good rule of thumb is to give them a sniff - if they lack a strong aroma, it might be time to replace them.

    Is this homemade chili seasoning gluten-free?

    Yes, this homemade chili seasoning mix recipe is gluten-free since it does not contain flour. However, it's recommended to double-check the labels of individual spice containers to ensure there hasn't been any cross-contamination during production.

    Let's Connect!

    Be sure to leave a comment below if you have any questions. You can also connect with me on Instagram, Facebook, Pinterest, or via email at [email protected].

    My Favorite Chili Recipes

    • A bowl of pumpkin white bean chili topped with sour cream and cilantro.
      Turkey Pumpkin White Bean Chili
    • A bowl of Dutch oven chili topped with sour cream and cilantro. The dish is next to a small jar of chili seasoning and a piece of cornbread.
      Dutch Oven Chili (Classic Beef and Bean Chili)

    ๐Ÿ“– Recipe

    A spoonful of homemade chili seasoning being held above a jar of chili seasoning and a bowl of chili.
    Print Pin SaveSaved!
    5 from 2 votes

    Homemade Chili Seasoning

    This Homemade Chili Seasoning strikes the perfect balance between spicy, sweet, and smoky for a delicious bowl of chili youโ€™ll crave again and again. Made without any unnecessary ingredients, this homemade spice blend recipe is easily customizable to suit your tastes. Try it with chili, tacos, grilled meats, eggs, and more.
    Course Seasonings, Spices
    Cuisine American
    Prep Time 5 minutes minutes
    Cook Time 0 minutes minutes
    Total Time 5 minutes minutes
    Servings 4 tablespoons
    Calories 20kcal
    Author Ashley Petrie, RDN, LDN

    Equipment

    • Measuring spoons
    • Small glass jar

    Ingredients

    • 2 tablespoons chili powder
    • ยฝ tablespoon cumin
    • 1 ยฝ teaspoon onion powder
    • 1 teaspoon kosher salt
    • 1 teaspoon smoked paprika
    • ยฝ teaspoon garlic powder
    • ยผ teaspoon black pepper
    • ยผ teaspoon cayenne pepper

    Instructions

    • Combine all ingredients in a small jar or airtight container. Seal and shake well to blend evenly.
    • Store in a cool, dry place for up to 6 months. Use in chili, tacos, soups, stews, or as a meat rub.
    • Note: This homemade chili seasoning equals one store-bought packet, perfect for a 6-serving batch of chili with one pound of ground meat.

    Notes

    • Use fresh spices. Older spices probably won't have much flavor. For the best chili seasoning, use fresh, high-quality spices.
    • Avoid moisture. Ensure all equipment and containers are completely dry to prevent clumping.
    • Storage: Store in an airtight container in a cool, dark, and dry place for up to 6 months. Avoid exposure to heat or moisture, as this can affect its shelf life.

    Nutrition

    Serving: 1tablespoon | Calories: 20kcal | Carbohydrates: 4g | Protein: 1g | Fat: 1g | Polyunsaturated Fat: 0.5g | Sodium: 397mg | Potassium: 120mg | Fiber: 2g | Sugar: 0.5g | Calcium: 26mg | Iron: 1.4mg
    Did you try this recipe?Let me know! Comment below, or take a picture and tag me on Instagram @everydayhomemadebyashley.

    The Best Homemade Ketchup

    September 8, 2023

    This Homemade Ketchup has a tangy, lightly sweetened, and rich tomato flavor that tastes so much better than store-bought ketchup. Itโ€™s easy to make, customizable, and better for you, too! Start making your own pantry staples today with this beginner-friendly condiment recipe.

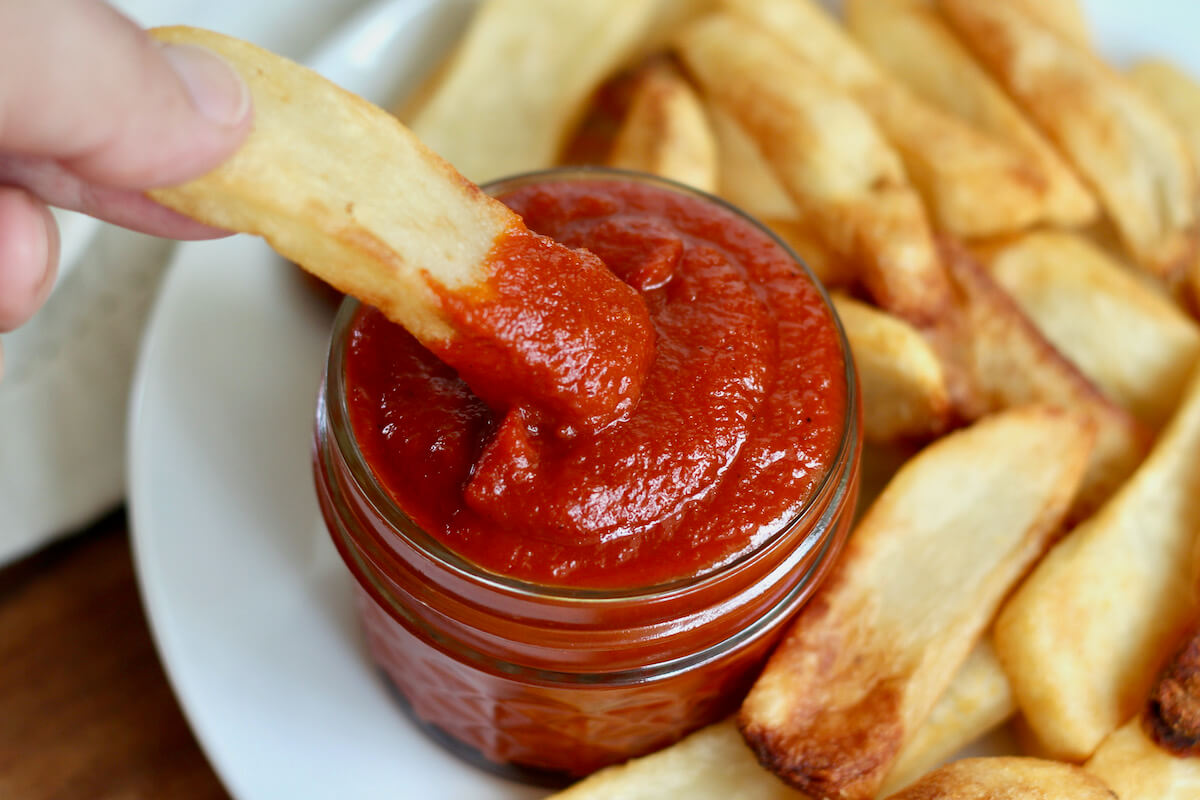
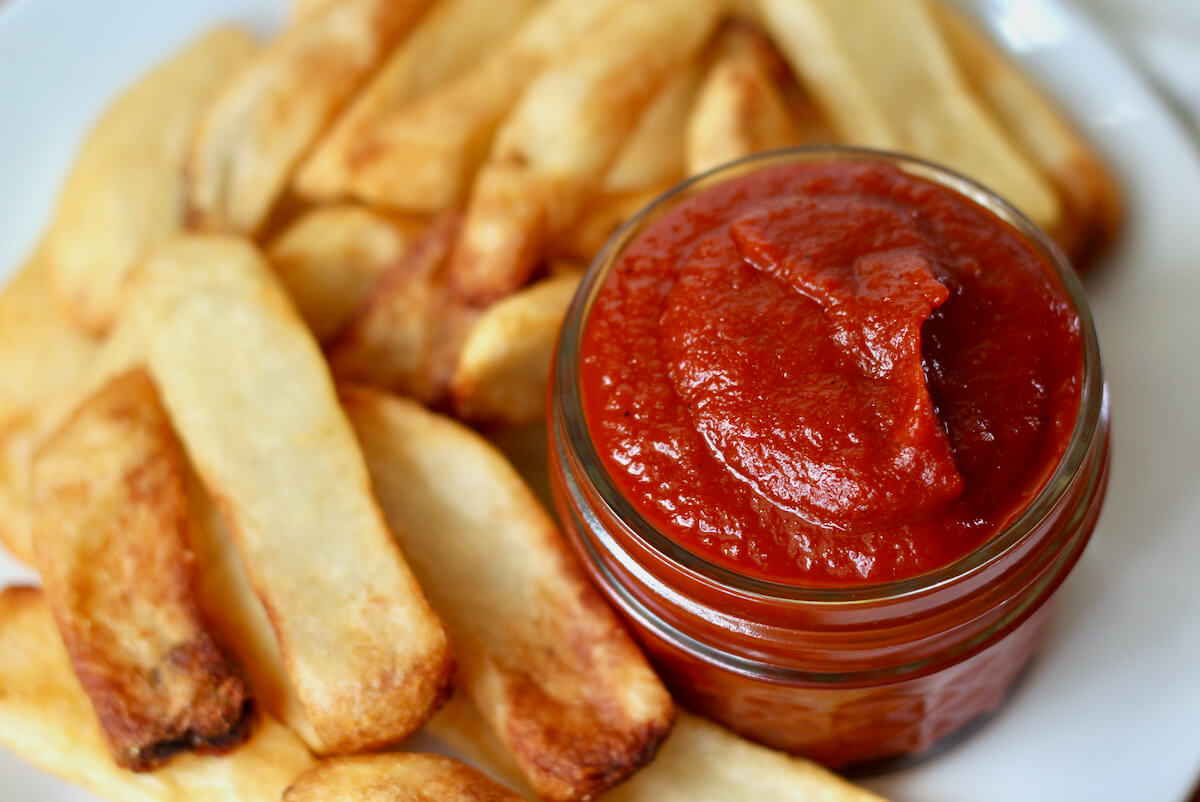
    A plate of fries with a small jar of homemade ketchup. There's a hand dipping a fry into the ketchup.

    I find it so satisfying to make pantry staples, like ketchup, from scratch.

    In a world where buying condiments is the norm, it surprises many to discover how quick, easy, and delicious homemade condiments can be.

    This homemade ketchup recipe is slow-simmered on the stovetop and uses both crushed tomatoes and tomato paste. It has a rich, vibrant tomato flavor with the perfect balance of sweetness and tanginess.

    Today, Iโ€™m walking you through how to make the best homemade ketchup, including which ingredients to use, tips that will guarantee it turns out right the first time, and some of my favorite ways to use this healthy ketchup recipe.

    Disclaimer: Some links throughout this post are affiliate links. As an Amazon Associate, I earn from qualifying purchases. You can learn more by visiting my Affiliate Disclosure Page.

    Ingredient Notes

    Here are some notes on key ingredients. For a full list of ingredients, check out the recipe card below.

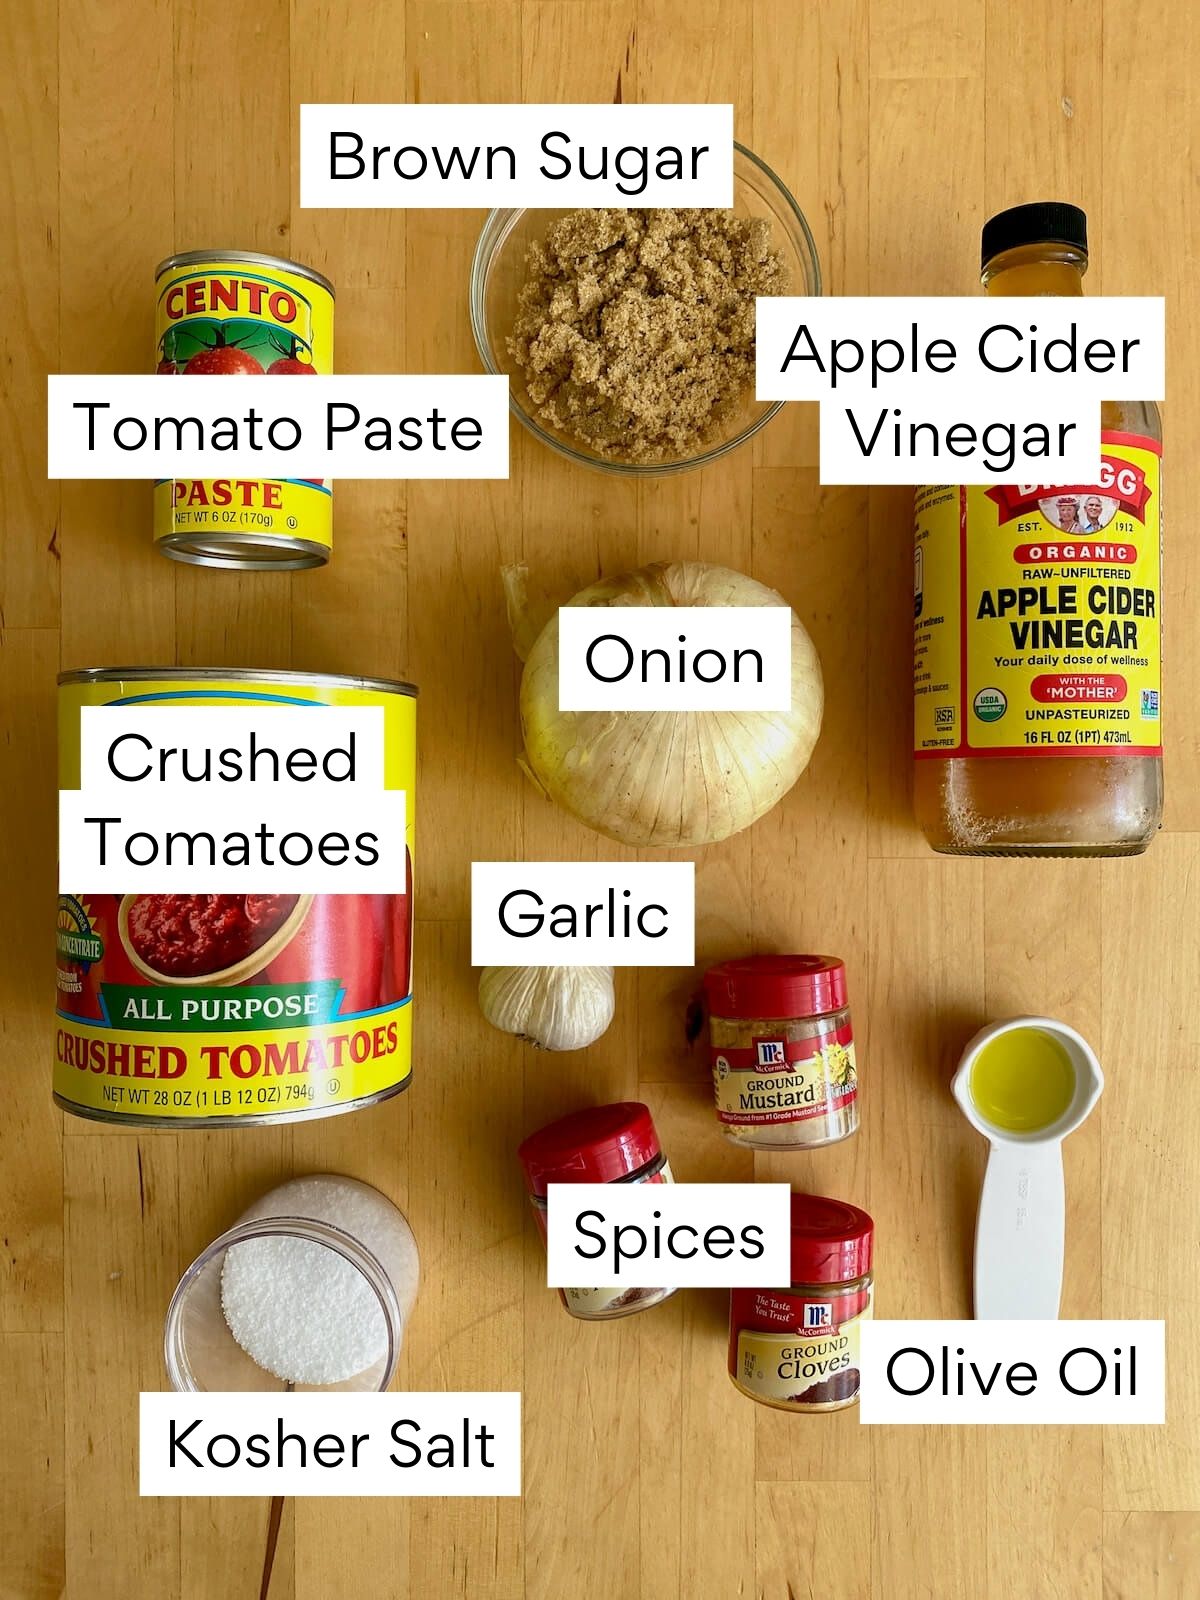
    • Crushed Tomatoes- Cooking down crushed tomatoes gives the ketchup a fresher, more vibrant flavor and better consistency compared to ketchup made with just tomato paste.
    • Tomato Paste- Adds a rich, intense tomato flavor to the ketchup. Cooking the tomato paste in oil brings out its natural sweetness.
    • Brown Sugar- Sweetens the ketchup, adding notes of caramel that pair well with the warm spices.
    • Apple Cider Vinegar- Provides a tangy, fruity acidity that balances the sweetness of the ketchup.
    • Sweet Onion- Adds a mild, sweet onion flavor to the ketchup. Using fresh onion instead of onion powder gives the ketchup more depth of flavor.
    • Garlic- Freshly minced garlic adds a savory, aromatic flavor.
    • Olive Oil- Cooking the onion, garlic, and tomato paste in olive oil intensifies their flavor.
    • Kosher Salt- Balances and enhances the other flavors. Kosher salt is preferred because it doesn't contain anti-caking agents and added sugar like table salt often does.
    • Spices- A blend of mustard powder, cloves, and allspice gives the ketchup a warm, complex flavor profile.
    The ingredients to make homemade ketchup. Each ingredient is labeled with text. They include tomato paste, crushed tomatoes, brown sugar, apple cider vinegar, onion, garlic, spices, kosher salt, and olive oil.

    Tips for Success

    • Choose high-quality ingredients. Use fresh onions and garlic and high-quality tomato products for the best flavor and texture.
    • Blend well. Thoroughly blend the ketchup until smooth. An immersion blender works well for this, but a regular blender may also be used.
    • Season to taste. Once the ketchup has finished simmering, taste for seasoning and add more sugar, vinegar, salt, or spices to suit your tastes.
    • Use a mesh sieve. Ketchup not as smooth as you'd like? Use a fine mesh sieve to strain out any remaining texture for a perfectly silky finish.
    • Cool before serving. The flavor of the ketchup develops as it cools. Allow the ketchup to cool before serving for the best flavor.
    • Label and date. Ketchup will last at least one month in the refrigerator. Be sure to label and date it to keep track of freshness.

    How to Make Homemade Ketchup

    Here is how to make ketchup from scratch.

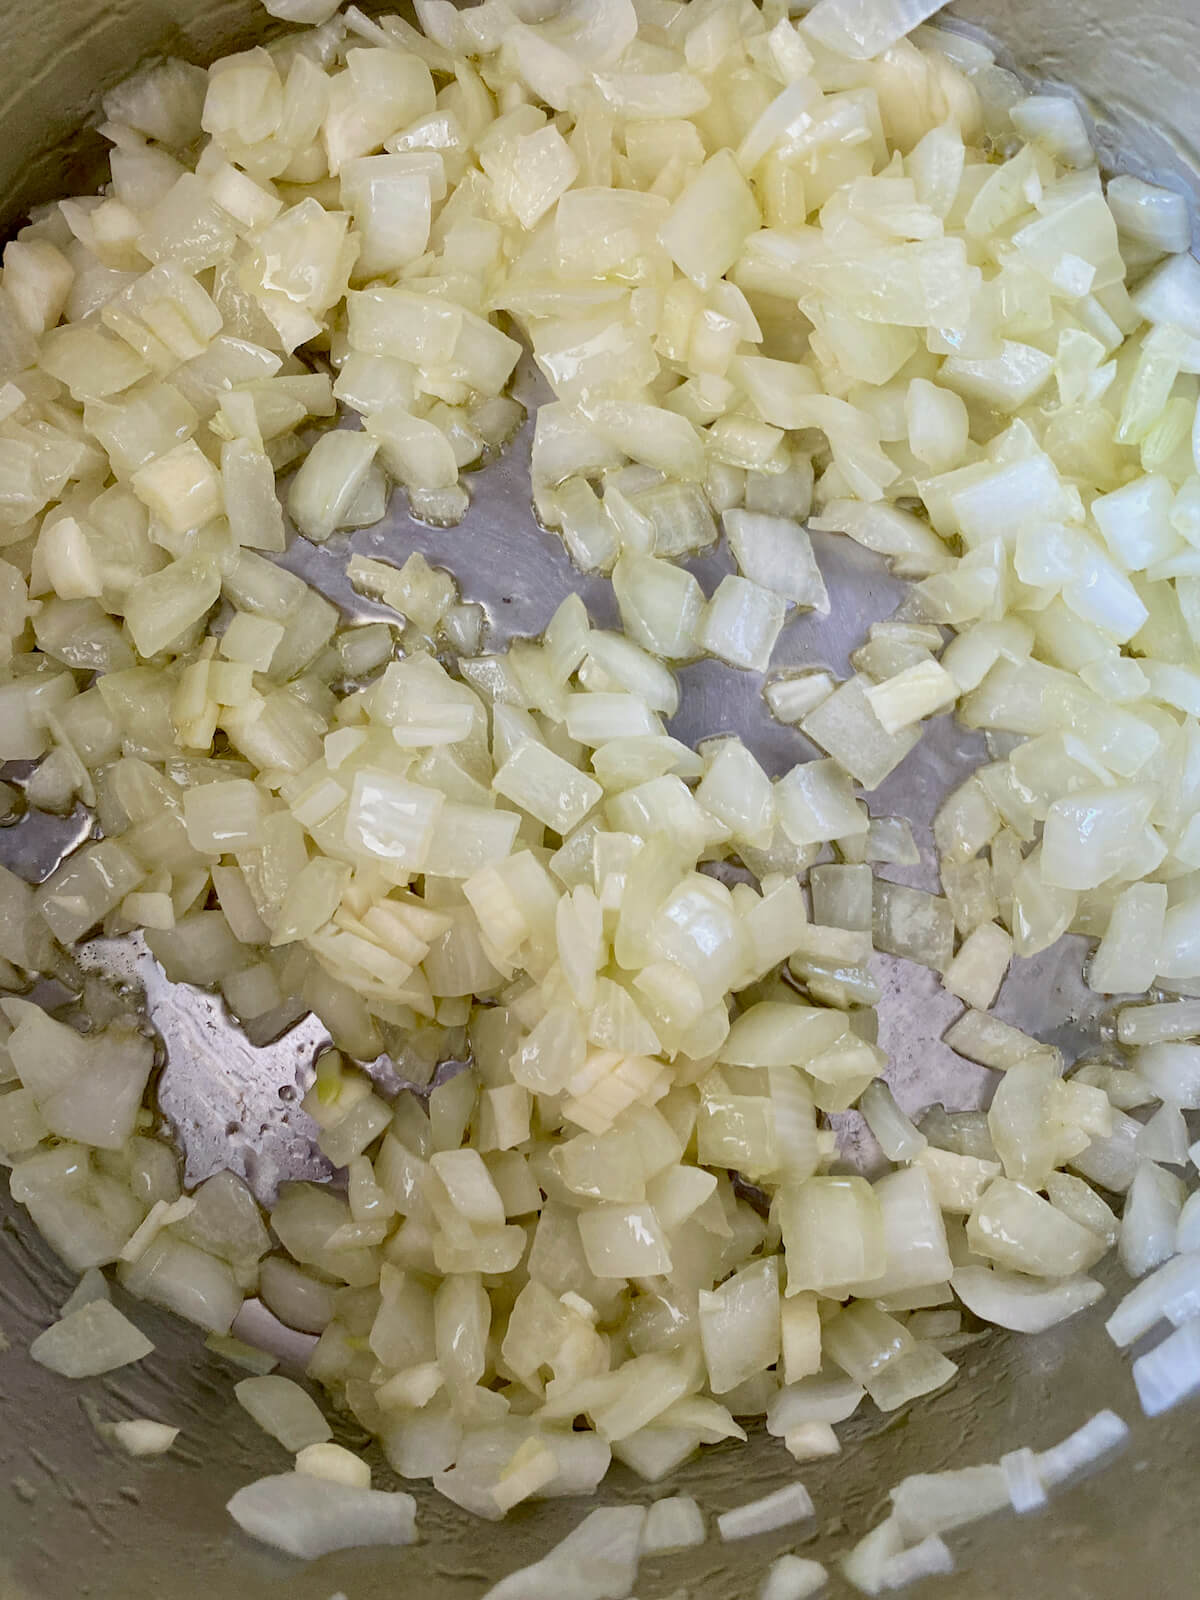
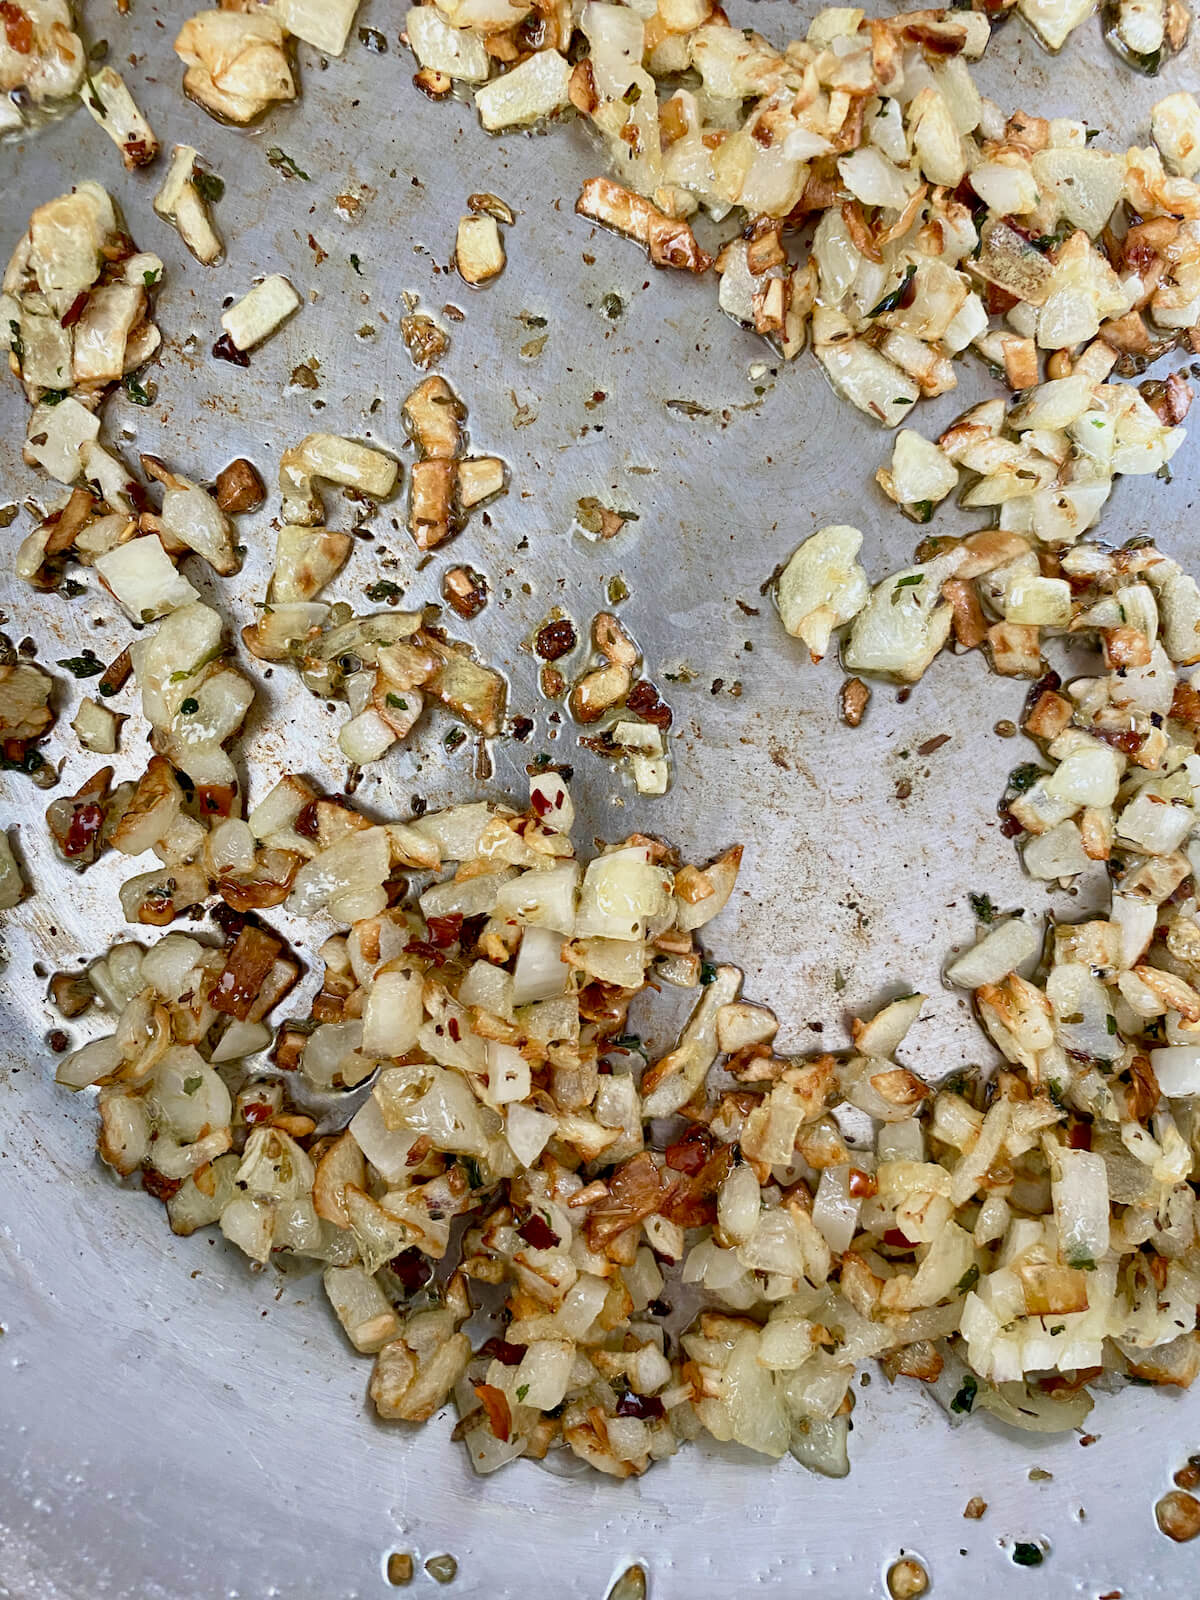
    Step 1: Sautรฉ the aromatics. Heat 2 tablespoons of olive oil in a large saucepan over medium heat. Add the diced sweet onion and sautรฉ for 5-7 minutes until softened. Then, add the minced garlic and cook for an additional 30 seconds.

    Onion and garlic sautรฉing in olive oil in a stainless steel skillet.

    Step 2: Add tomato paste. Stir in 2 tablespoons of tomato paste and cook for 1-2 minutes to intensify its flavor.

    Tomato paste, onion, and garlic sautรฉing in a stainless steel skillet.

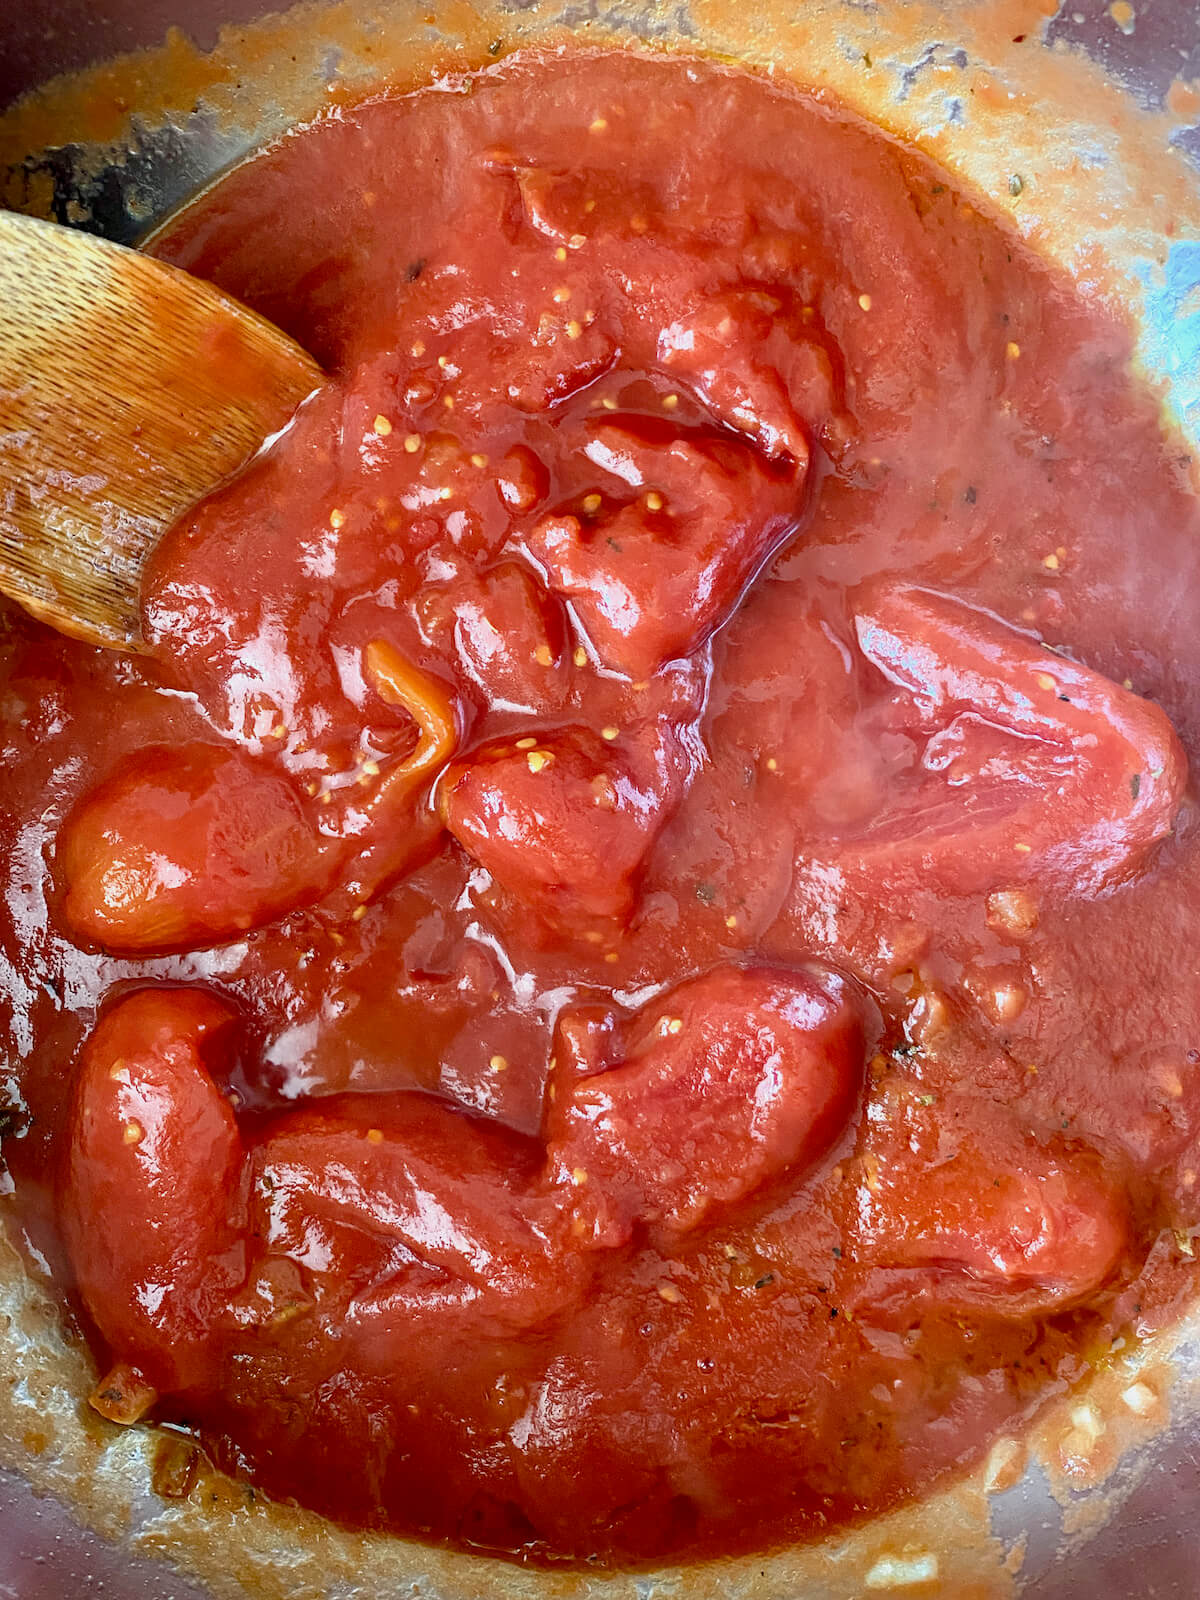
    Step 3: Add remaining ingredients. Reduce heat to low. Pour in the crushed tomatoes, making sure to scrape the bottom of the pan to release any cooked-on bits. Add brown sugar, apple cider vinegar, and spices. Mix until well combined.

    Crushed tomatoes and aromatics in a stainless steel pot.
    Vinegar, brown sugar, and spices added to the crushed tomatoes in a stainless steel skillet.

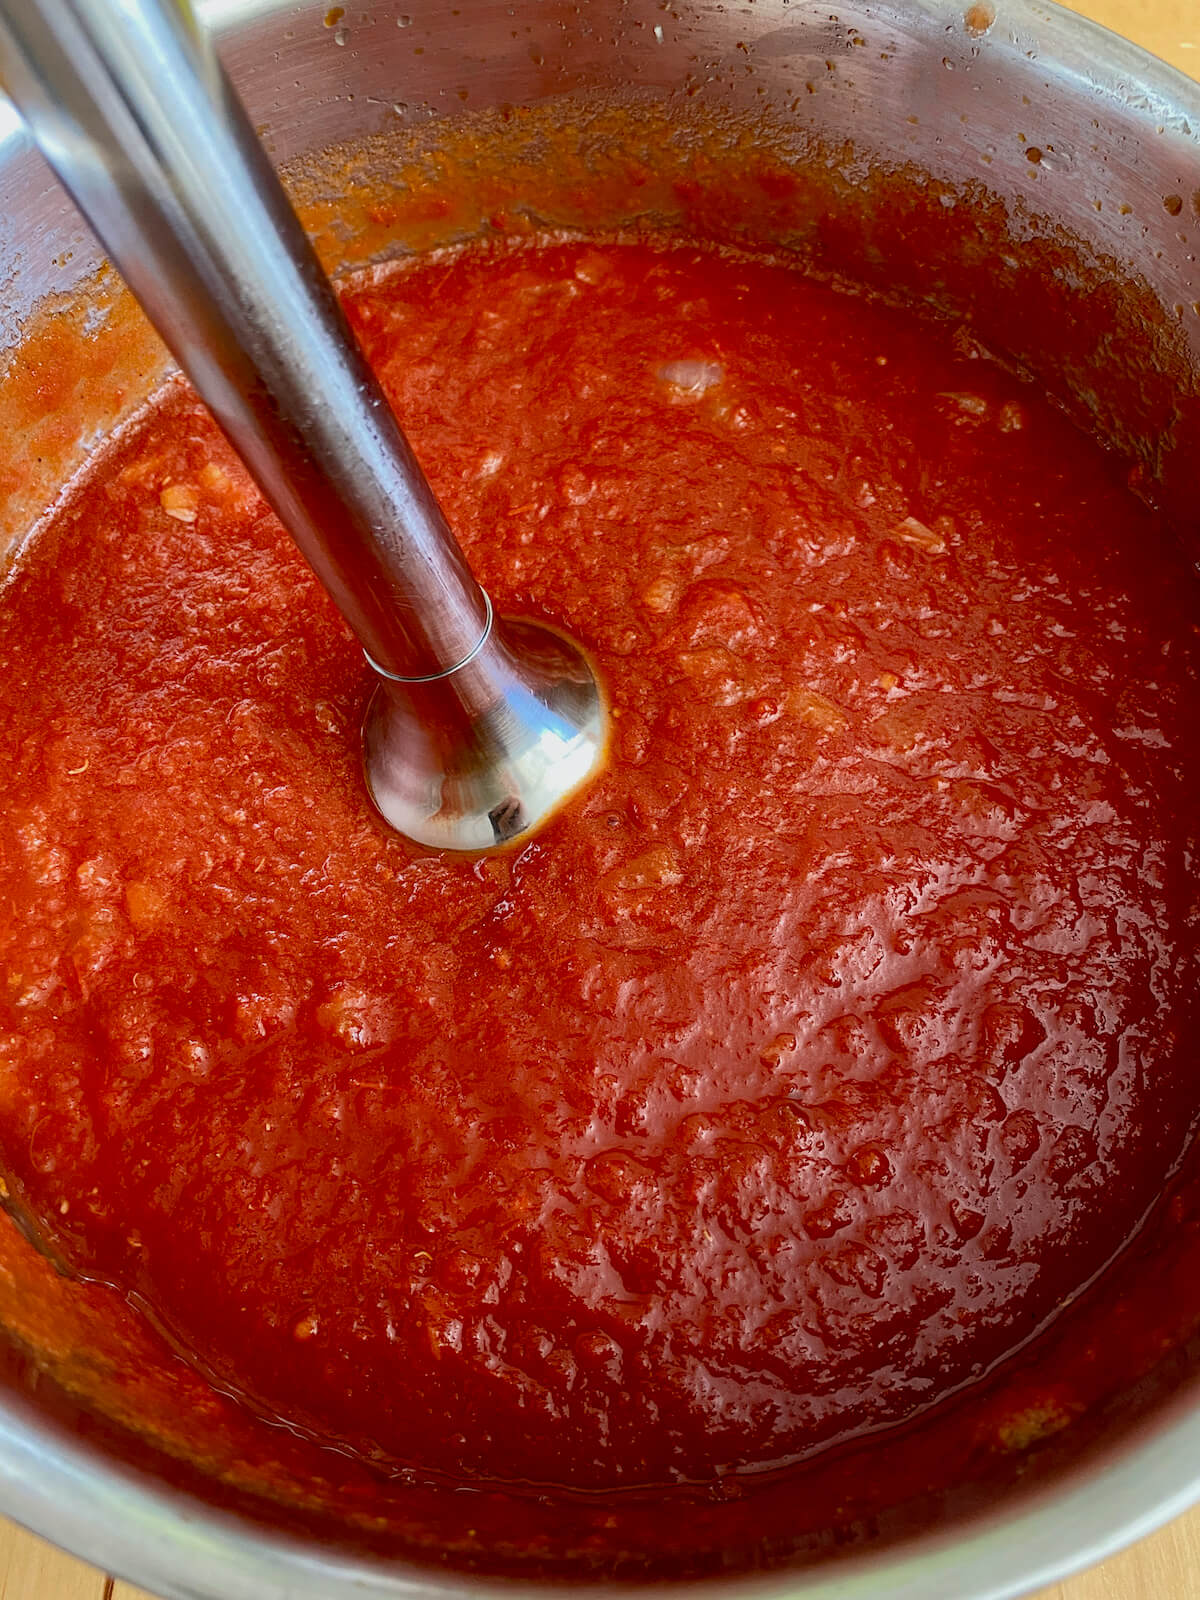
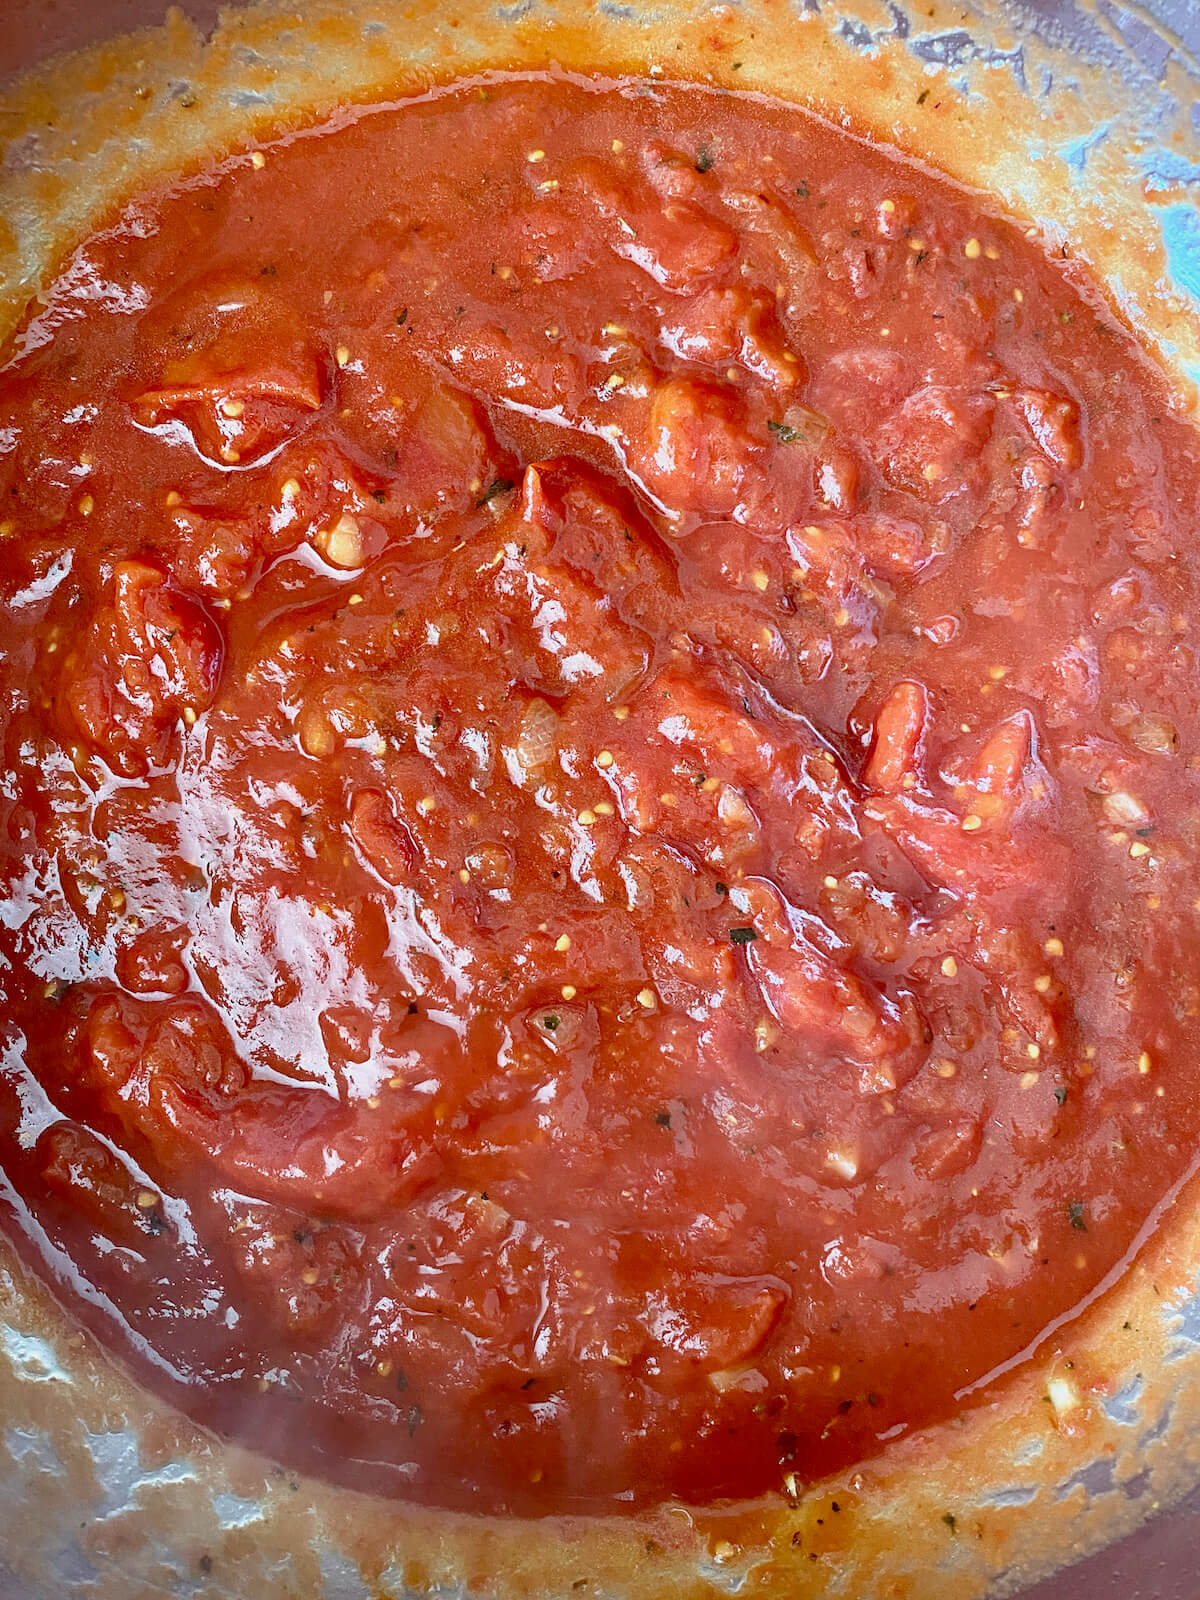
    Step 4: Puree the ketchup. Using an immersion blender directly in the saucepan, puree the mixture until smooth. Alternatively, transfer the mixture to a blender and carefully puree in batches.

    An immersion blender blending the crushed tomatoes and aromatics together.

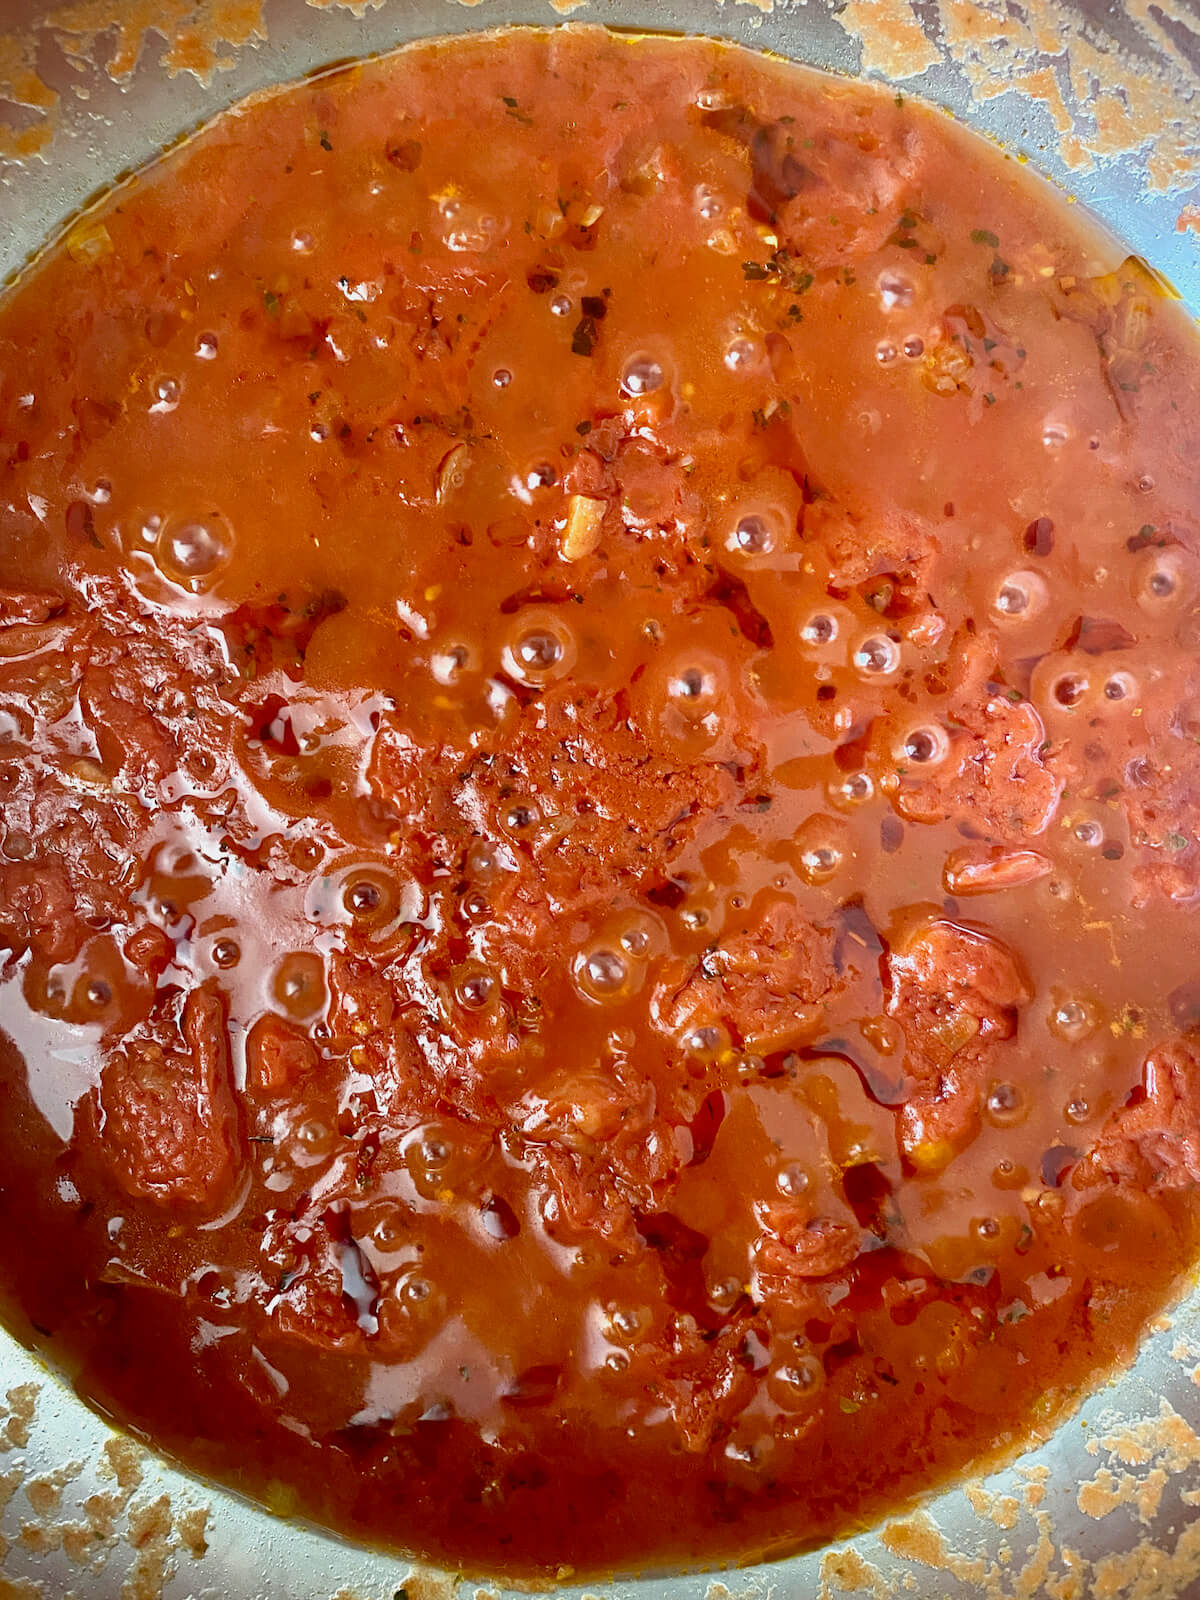
    Step 5: Simmer the ketchup. Bring the mixture to a gentle simmer. Let it simmer uncovered for 1 ยฝ to 2 hours, or until the ketchup reaches your desired consistency. Use a splatter screen if needed to minimize mess.

    Step 6: Strain ketchup (optional). After simmering, let the ketchup cool slightly. Optionally, pass it through a fine mesh sieve to achieve an even smoother consistency.

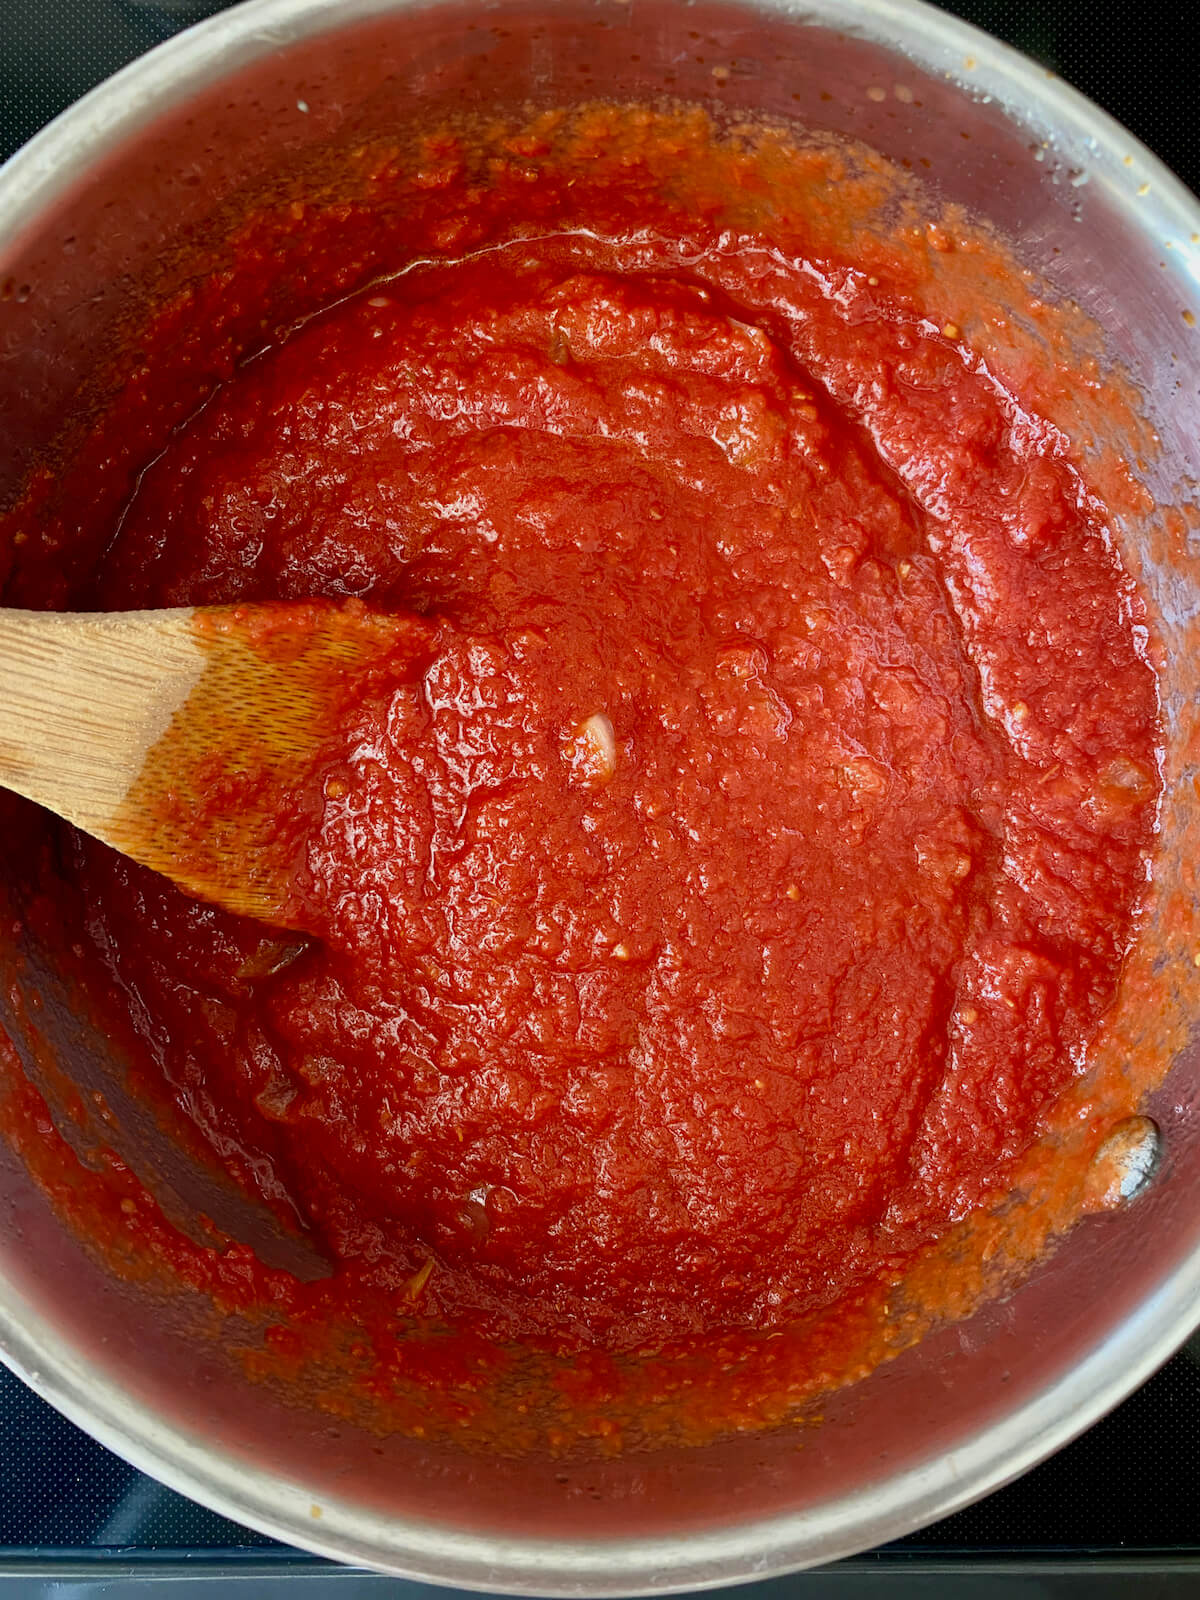
    Homemade ketchup reducing in a stainless steel skillet.
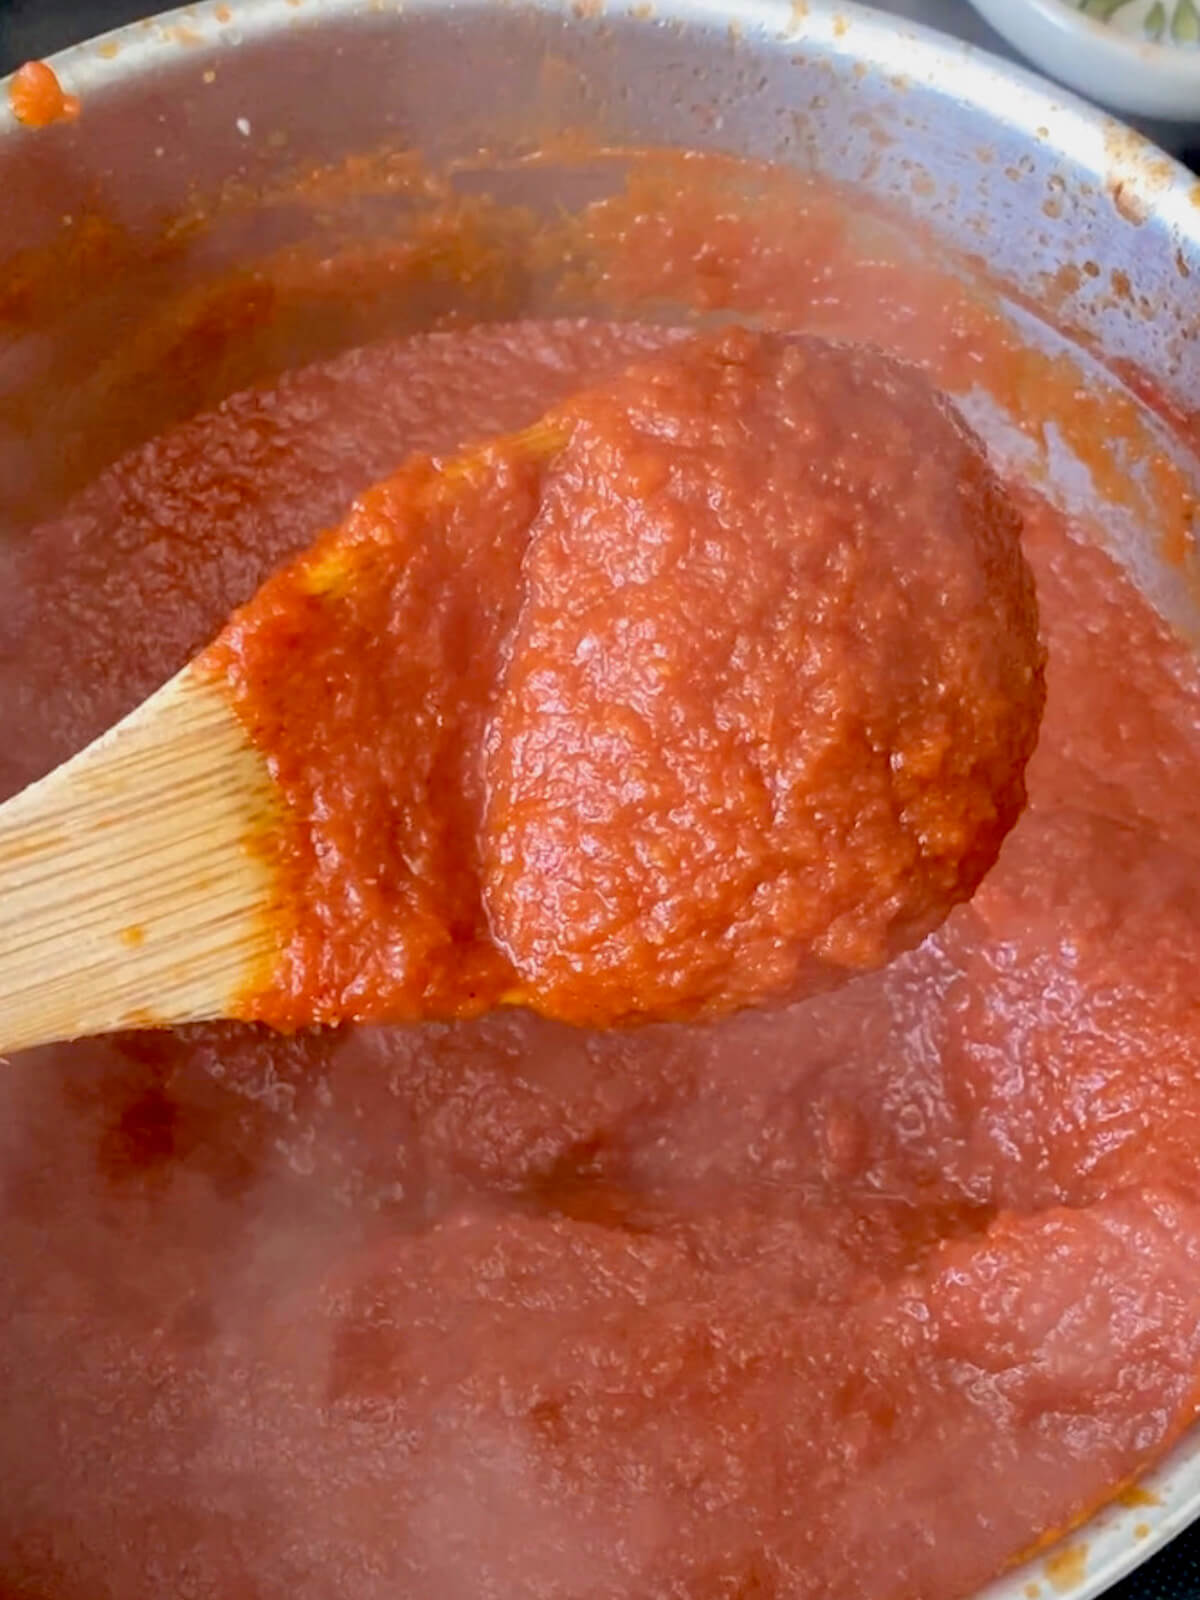
    A wooden spoon holding some homemade ketchup above the pot.

    Step 6: Cool and serve. Transfer the ketchup to a glass jar or storage container and allow it to cool completely before serving. Enjoy!
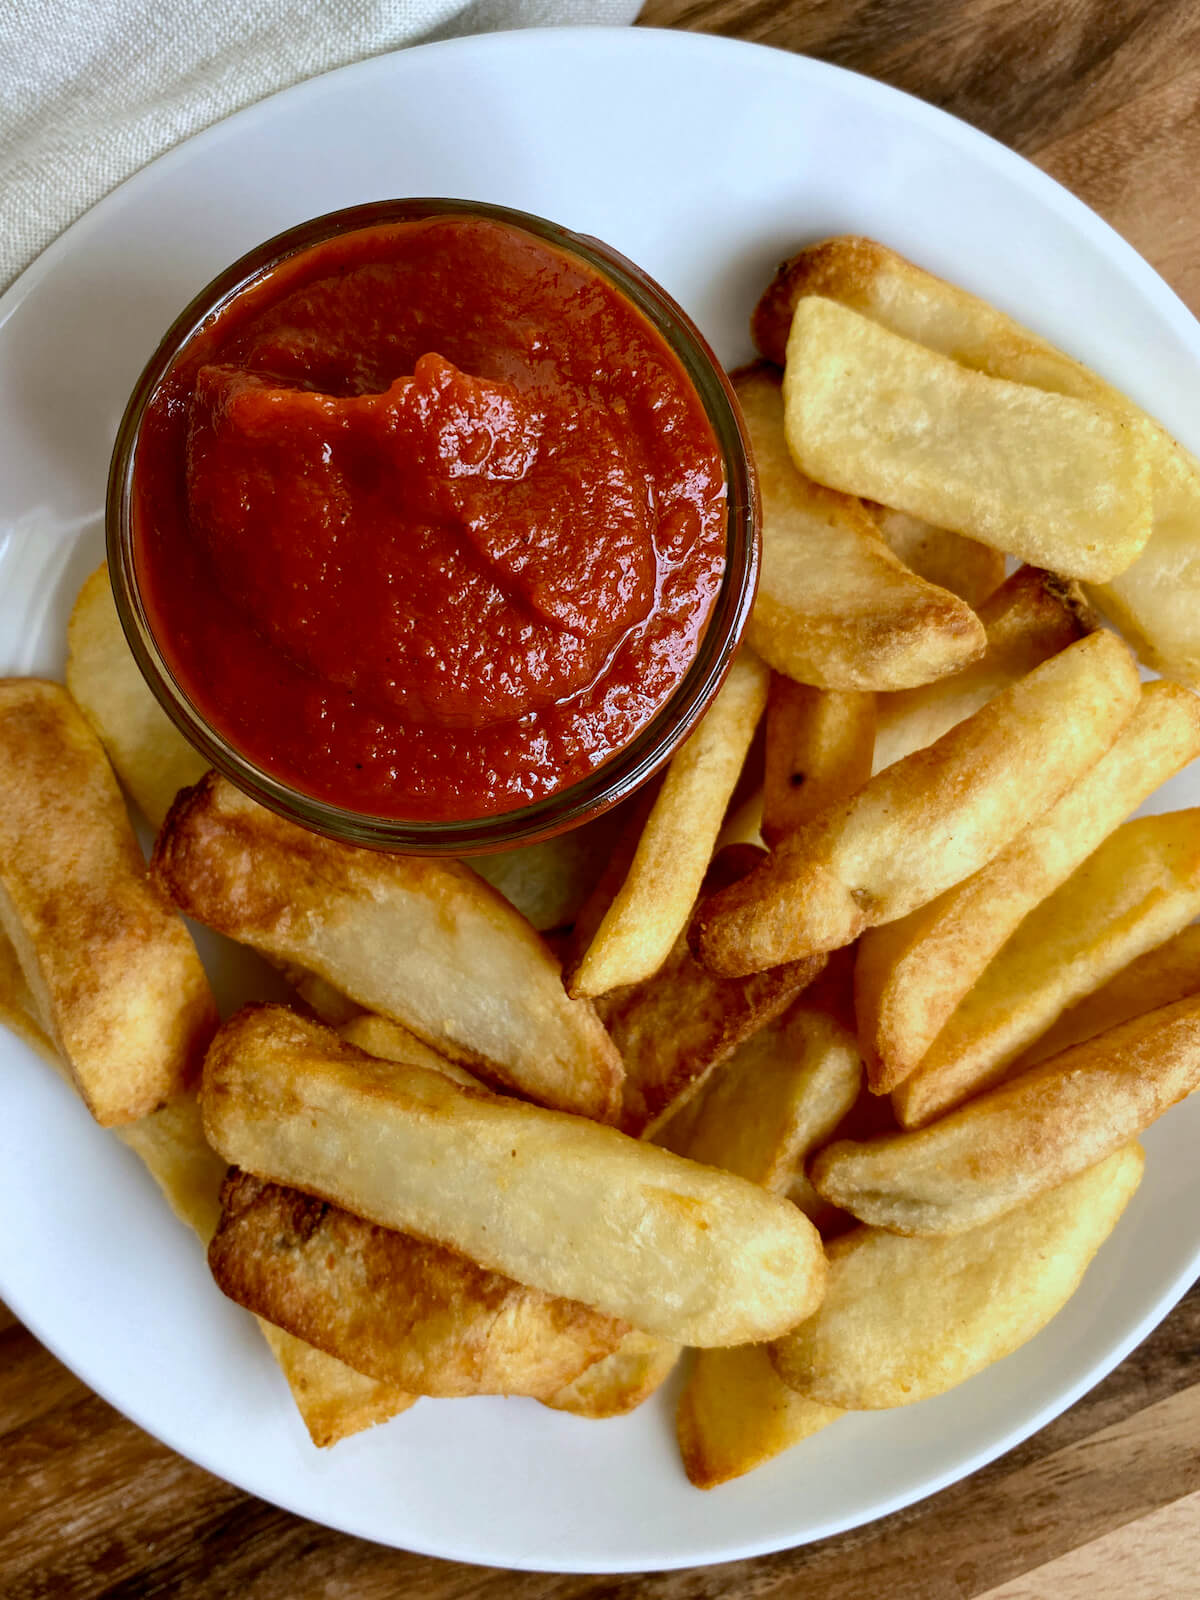
    A jar of homemade ketchup on a plate of steak fries.

    How to Store

    • Refrigerator- Store homemade ketchup in a sealed glass jar or airtight container in the refrigerator for up to one month.
    • Freezer- Freeze ketchup in a freezer-safe plastic bag or storage container for up to 6 months.

    Canning Homemade Ketchup

    Homemade ketchup can safely be preserved using the water bath canning method because of the acidity of the vinegar and tomatoes.

    If you want to can this homemade ketchup recipe, follow these steps:

    1. Fill the jars. After you prepare your homemade ketchup, carefully ladle it into sterilized jars while it's still hot. Leave about ยฝ inch of headspace to allow for expansion.
    2. Screw on the lids. Stir to remove air bubbles and wipe the jar rims clean with a clean, damp towel. Place the sterilized lids onto the jars and screw on the bands until they are just snug, but not overly tight.
    3. Place in water bath. Using a jar lifter, carefully lower the filled jars into a simmering water bath. Ensure the jars are fully submerged with at least 1-2 inches of water above the lids.
    4. Process the jars. Process the jars ina boiling water bath for about 15 minutes.
    5. Allow the jars to cool. Using the jar lifter, carefully lift the jars out of the water and place them on a clean towel or cooling rack. Allow them to cool undisturbed for 12-24 hours.
    6. Check for proper sealing. After cooling, press down on the center of each lid. If it doesn't flex and makes a popping sound, the jar is sealed properly.
    7. Label and store. Label the sealed jars with the date and store them in a cool, dark place. Store properly sealed jars for up to a year.

    Always follow proper canning guidelines when canning ketchup. And if you have any doubts about the safety of a jar, it's best to refrigerate and consume it promptly.

    This recipe yields approximately one pint-sized jar (plus a little extra).

    A small glass jar of homemade ketchup on a plate of fries.

    Let's Connect!

    Be sure to leave a comment below if you have any questions. You can also connect with me on Instagram, Facebook, Pinterest, or via email at [email protected].

    More Condiment Recipes

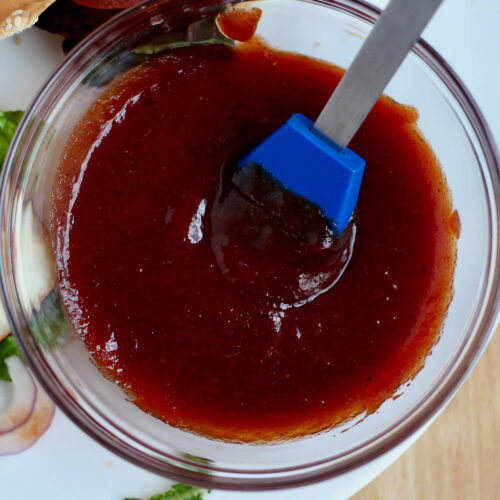
    • A bowl of apricot bbq sauce with a blue basting brush in it. The bowl is next to some burgers on a plate.
      Homemade Apricot BBQ Sauce
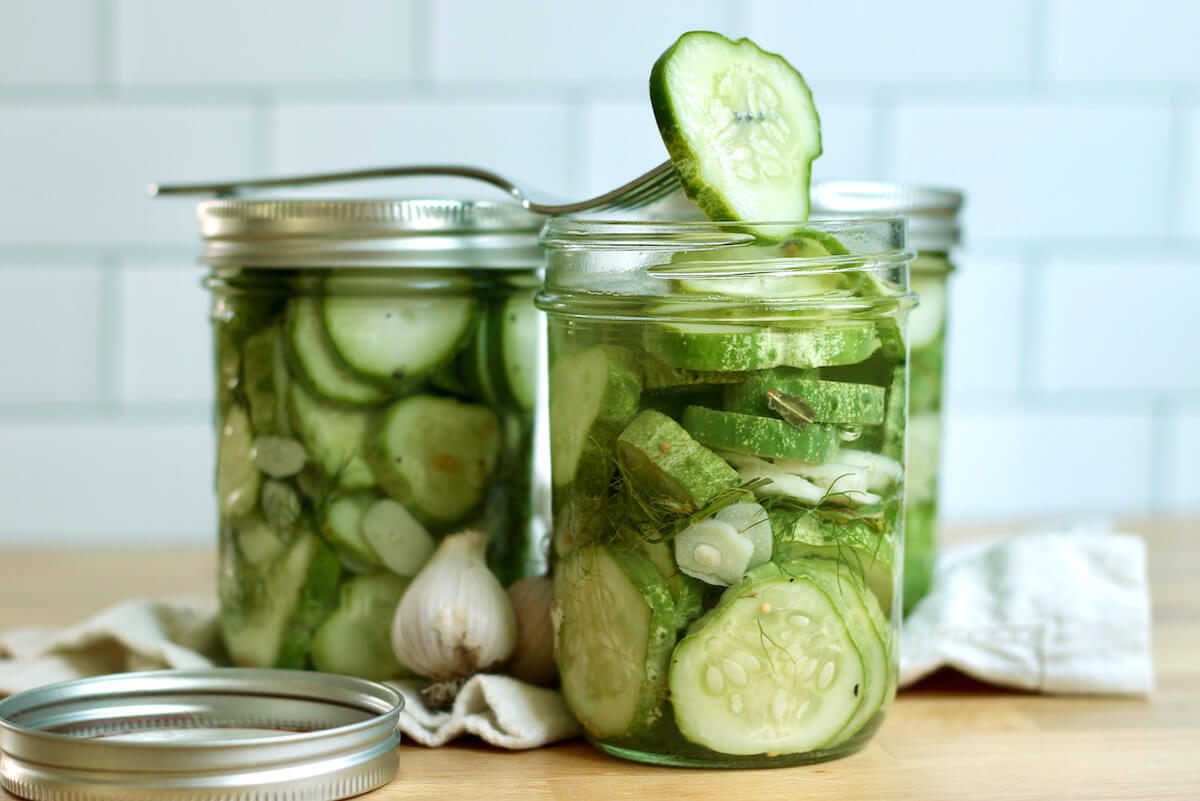
    • Three jars of refrigerator dill pickles. The front jar is open and there is a fork with a single pickle on it on top of the jar.
      Easy Refrigerator Dill Pickles
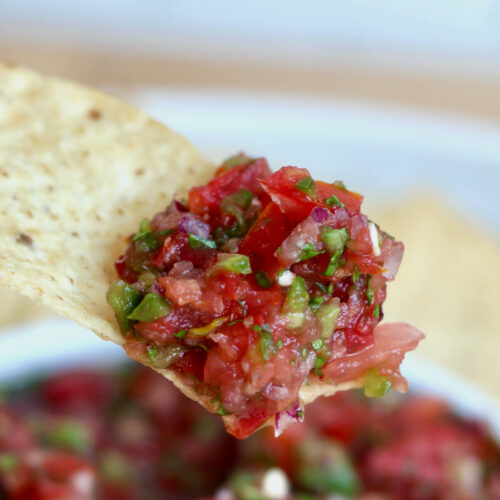
    • A tortilla chip holding up a scoop of homemade salsa above a bowl.
      Easy Homemade Salsa (For Dipping, Topping, and More!)
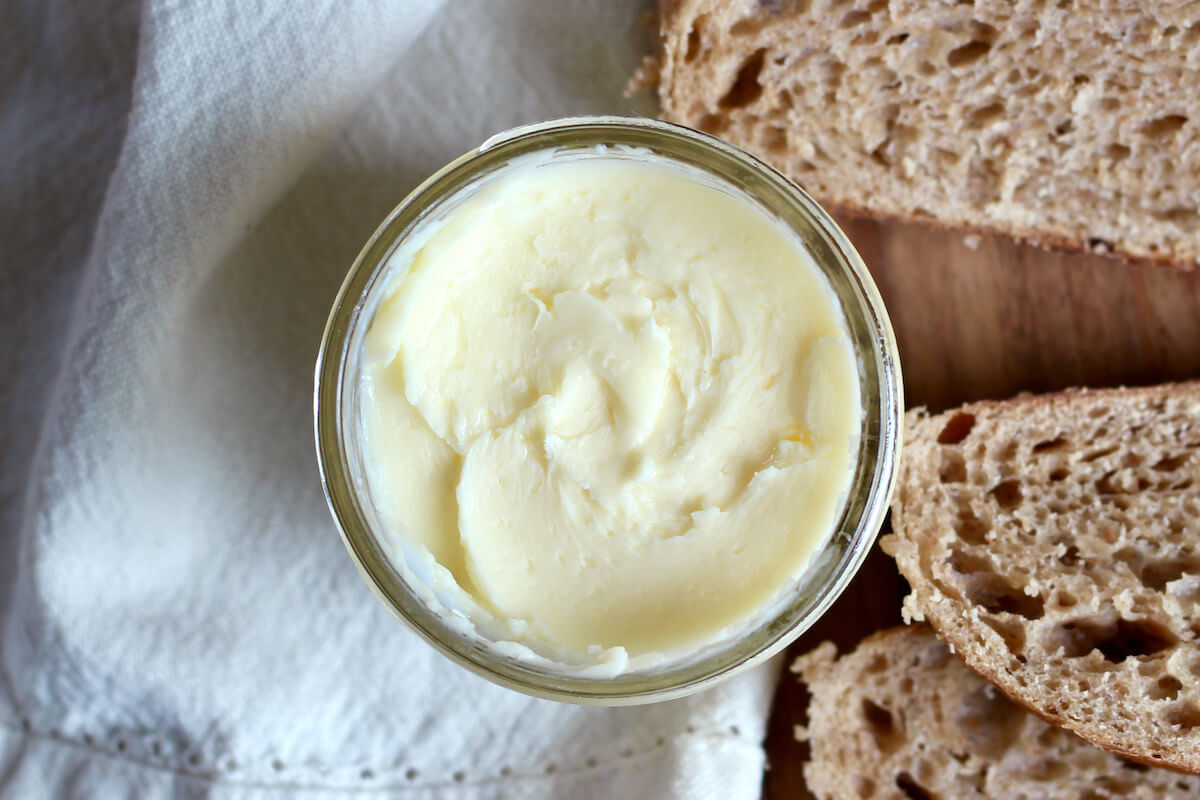
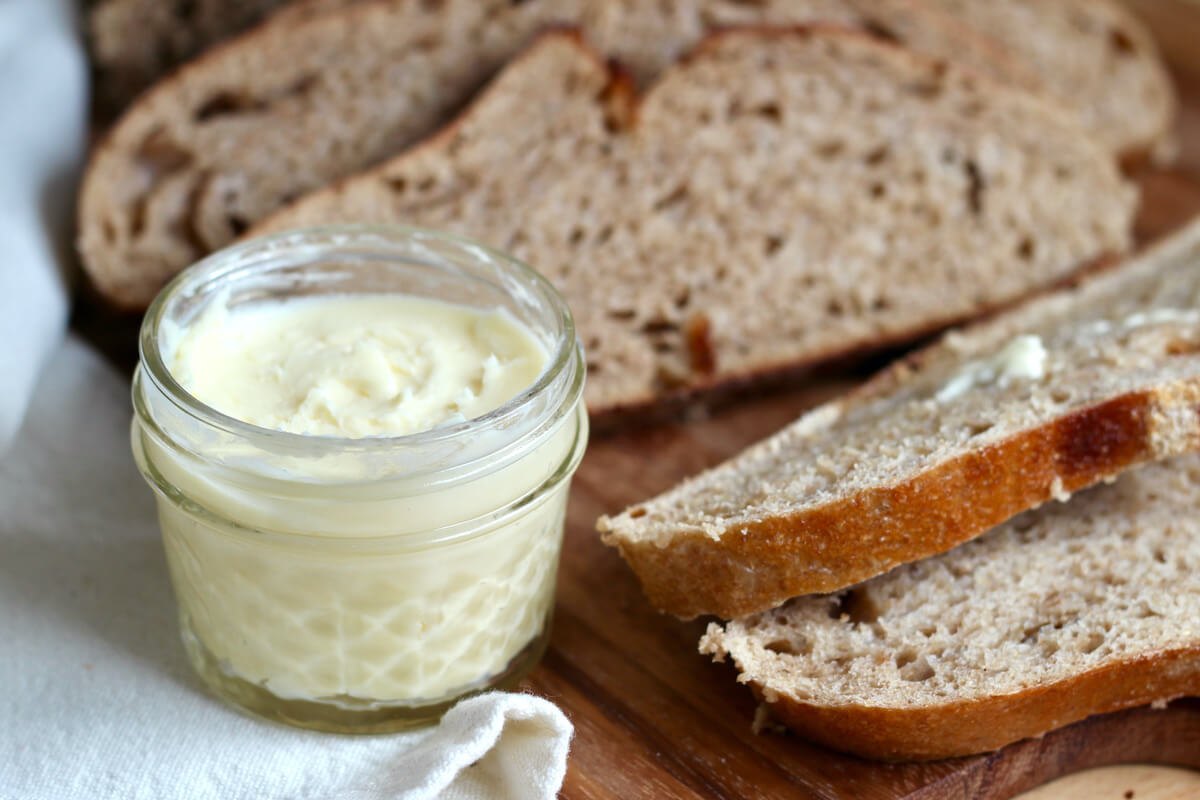
    • A small glass jar of butter next to slices of sourdough bread. There is a white cloth napkin laying beneath the jar of butter.
      How to Make Butter in a Jar

    ๐Ÿ“– Recipe

    A plate of fries with a small jar of homemade ketchup. There's a hand dipping a fry into the ketchup.
    Print Pin SaveSaved!

    Homemade Ketchup

    This Homemade Ketchup has a tangy, lightly sweetened, and rich tomato flavor that tastes so much better than store-bought ketchup. Itโ€™s easy to make, customizable, and better for you, too! Start making your own pantry staples today with this beginner-friendly condiment recipe.
    Course Condiment, Sauces
    Cuisine American
    Prep Time 10 minutes minutes
    Cook Time 2 hours hours 10 minutes minutes
    Total Time 2 hours hours 20 minutes minutes
    Servings 40 tablespoons
    Calories 25kcal
    Author Ashley Petrie, RDN, LDN

    Equipment

    • Large saucepan
    • Immersion blender or blender
    • Splatter screen optional

    Ingredients

    • 2 tablespoons olive oil
    • 1 medium sweet onion diced
    • 3 cloves garlic minced
    • 2 tablespoons tomato paste
    • 1 28-ounce can crushed tomatoes
    • ยฝ cup brown sugar packed
    • ยผ cup apple cider vinegar
    • 1 teaspoon kosher salt
    • ยฝ teaspoon ground mustard
    • โ…› teaspoon ground cloves
    • โ…› teaspoon allspice

    Instructions

    • Heat 2 tablespoons of olive oil in a large saucepan over medium heat. Add diced sweet onion and sautรฉ for 5-7 minutes until softened. Then, add the minced garlic and cook for an additional 30 seconds.
      2 tablespoons olive oil, 1 medium sweet onion, 3 cloves garlic
    • Stir in 2 tablespoons of tomato paste and cook for 1-2 minutes to intensify its flavor.
      2 tablespoons tomato paste
    • Reduce heat to low. Pour in the crushed tomatoes, making sure to scrape the bottom of the pan to release any cooked-on bits. Add brown sugar, apple cider vinegar, and spices. Mix until well combined.
      1 28-ounce can crushed tomatoes, ยฝ cup brown sugar, ยผ cup apple cider vinegar, 1 teaspoon kosher salt, ยฝ teaspoon ground mustard, โ…› teaspoon ground cloves, โ…› teaspoon allspice
    • Using an immersion blender directly in the saucepan, puree the mixture until smooth. Alternatively, transfer the mixture to a blender and carefully puree in batches.
    • Bring the mixture to a gentle simmer. Let it simmer uncovered for 1 ยฝ to 2 hours, or until the ketchup reaches your desired consistency. Use a splatter screen if needed to minimize mess.
    • After simmering, let the ketchup cool slightly. Optionally, pass it through a fine mesh sieve to achieve an even smoother consistency.
    • Transfer the ketchup to a glass jar or storage container and allow it to cool completely before serving. Enjoy!
    Notes

    • Quick Tip: Ketchup not as smooth as you'd like? Use a fine mesh sieve to strain out any remaining texture for a perfectly silky finish.
    • Storage: Store ketchup in a glass jar or airtight container in the refrigerator for up to one month or in the freezer for up to 6 months.
    • Make Ahead: Homemade ketchup actually tastes better after a day or two because the flavors have had time to melt together. So, it's perfect for making ahead!

    Nutrition

    Serving: 1tablespoon | Calories: 25kcal | Carbohydrates: 5g | Protein: 0.5g | Fat: 0.5g | Monounsaturated Fat: 0.5g | Sodium: 66mg | Potassium: 76mg | Fiber: 0.5g | Sugar: 4g | Vitamin C: 2mg | Calcium: 10.5mg | Iron: 0.3mg
    Did you try this recipe?Let me know! Comment below, or take a picture and tag me on Instagram @everydayhomemadebyashley.

    Easy Homemade Salsa (For Dipping, Topping, and More!)

    September 6, 2023

    This Homemade Salsa is made with the freshest ingredients for a bold, authentic dip and condiment that pairs perfectly with all of your favorite summer dishes. It's versatile, easy to make, and ready in just 20 minutes.

    A small white serving bowl of homemade tomato salsa surrounded by tortilla chips.

    When my garden is bursting with homegrown tomatoes, jalapeรฑos, onions, and cilantro, you know what I can't resist? Yep, you guessed it - my go-to, homemade salsa recipe.

    Fresh salsa is not just for tortilla chips. In fact, it's one of my favorite homemade condiments.

    This restaurant-style salsa complements grilled meats, salads, tacos, quesadillas, omelets, scrambled eggs, and more.

    Today, Iโ€™m walking you through how to make the best homemade salsa, including which ingredients to use, tips that will guarantee it turns out right the first time, and some of my favorite ways to use this easy salsa recipe.

    Disclaimer: Some links throughout this post are affiliate links. As an Amazon Associate, I earn from qualifying purchases. You can learn more by visiting my Affiliate Disclosure Page.

    Why You'll Love This Recipe

    • Quick & Easy- With the help of a food processor, making homemade salsa is quick and easy! In just 20 minutes, you can have this flavorful Mexican dip ready to serve.
    • Fresh Ingredients- This homemade salsa recipe uses only fresh ingredients for an authentic flavor that tastes better than store-bought salsa.
    • Healthy- Making your own salsa is not only a great way to enjoy fresh vegetables, but it also allows you to better control the ingredients you're eating.
    • Customizable- The flavor of this salsa can easily be adjusted to suit your personal tastes. Want more heat? Add another jalapeรฑo. Like things a little sweeter? Add a bit more sugar.
    • Perfect for Parties- This easy homemade salsa is always a big hit whenever I make it for a summer party.

    Ingredient Notes

    Here are some notes on key ingredients. For a full list of ingredients, check out the recipe card below.

    • Roma Tomatoes- Roma tomatoes are ideal for salsa because they're sweet and firm with thicker flesh and fewer seeds. Remove the seeds to prevent your salsa from becoming too watery.
    • Red Onion- Mild and slightly sweet, red onions give the salsa an oniony flavor without overpowering it. Roughly dice the onion before adding it to the food processor.
    • Jalapeรฑo- Fresh jalapeรฑos give this salsa a little heat. For a milder salsa, remove the seeds and membranes before processing.
    • Cilantro- The fresh, citrus-like flavor of cilantro pairs well with the other ingredients. Roughly chop the cilantro and remove any thick stems.
    • Garlic- Fresh garlic cloves add a bold garlic flavor to the salsa.
    • Lime Juice- Adds a little acidity to the salsa and helps balance the flavors of the other ingredients. Use freshly-squeezed lime juice for the best flavor.
    • Kosher Salt- I prefer to use kosher salt because it does not contain added sugars or anti-caking agents like table salt often does.
    • Granulated Sugar- Just a small amount of sugar balances the acidity of the salsa and brings out the natural sweetness of the tomatoes.
    • Cumin- Ground cumin adds a warm, earthy note to the salsa.

    ๐ŸŒฑ Sustainability Tip: Try growing your own salsa garden! Not only will your fresh homemade salsa taste amazing, but it's also better for the environment and your health.

    The ingredients to make homemade salsa. Each ingredient is labeled with text. They include roma tomatoes, cilantro, jalapeรฑo, lime, onion, garlic, kosher salt, sugar, and cumin.

    Substitutions and Variations

    Here are a few ways you can try customizing this easy fresh salsa recipe to fit your diet and taste preferences.

    Substitutions

    • Roma Tomatoes- Swap Roma tomatoes for any other variety of plum tomatoes you have available. Alternatively, vine-ripened tomatoes or globe tomatoes may also be used.
    • Red Onion- Use sweet onion, white onion, green onions, or shallots in place of red onion.
    • Jalapeรฑo- Replace jalapeรฑo peppers with green bell pepper or poblano peppers for a milder salsa. For a spicier salsa, try using a serrano pepper or habanero pepper.
    • Cilantro- If you're not a fan of cilantro, substitute it with fresh parsley instead.
    • Garlic- Substitute fresh garlic with ยฝ teaspoon of garlic powder.
    • Lime Juice- While they will give the salsa a slightly different flavor, fresh lemon juice or orange juice can be used in a pinch.
    • Kosher Salt- Swap kosher salt for sea salt or table salt. If using table salt, start with half the amount called for in the recipe and taste to adjust.
    • Granulated Sugar- An equal amount of honey, agave nectar, or maple syrup can be used in place of granulated sugar.
    • Cumin- Substitute cumin for coriander, chili powder, or smoked paprika for a slightly different flavor.
    Homemade salsa in a small white bowl surrounded by tortilla chips.

    Variations

    • Pico de Gallo- Skip the food processor and finely dice all of the vegetables instead for fresh salsa with a chunkier texture.
    • Sweet- Add diced pineapple, mango, or peaches to give this salsa a sweet, fruity taste.
    • Spicy- Swap the jalapeรฑos for serrano peppers or habanero peppers for an extra spicy homemade salsa.
    • Roasted- Roast the tomatoes, jalapeรฑo, red onion, and garlic in the oven to enhance their natural sweetness and give them a slight char before making the salsa.

    Equipment Notes

    Here are some notes on any special equipment I used to make this recipe.

    • Food Processor- A good food processor makes quick work of this salsa. For best results, be sure to use a food processor with a bowl large enough to hold all of the ingredients. I love my KitchenAid 13-Cup Food Processor.

    How to Make Homemade Salsa

    Here is how to make salsa from scratch.

    Step 1: Prepare the vegetables. Prepare your vegetables by washing them, quartering and deseeding the Roma tomatoes, dicing the red onion, removing jalapeรฑo seeds and membranes (for milder heat), chopping cilantro (remove thick stems), and mincing the garlic.

    All of the prepared vegetables on a green cutting board.

    Step 2: Add ingredients to food processor. Place all the ingredients into the bowl of your food processor.

    The salsa ingredients in the bowl of a food processor before being blended.

    Step 3: Pulse ingredients. Use the food processor to pulse the ingredients together until you reach your preferred salsa consistency. Scrape down the sides of the bowl as needed.

    Step 4: Season to taste. Before transferring the salsa to a serving bowl, give it a taste. Adjust the seasoning if necessary.

    Homemade tomato salsa in the bowl of a food processor.

    Step 5: Refrigerate the salsa. For the best flavor, cover the salsa and refrigerate it for at least 30 minutes before serving. This allows the flavors to meld together.
    Step 6: Serve. Serve with your favorite tortilla chips or use it as a topping for tacos, grilled meats, and more!

    A clear glass mixing bowl filled with homemade salsa.

    Tips for Success

    Make these easy homemade salsa successfully the first time using these helpful kitchen tips.

    • Choose fresh ingredients. Whenever possible, use fresh ingredients for the best flavor. Ripe tomatoes, freshly squeezed lime juice, minced fresh garlic, and cilantro all make a more delicious salsa.
    • Don't over-process. Over-processing will result in salsa that is watery and mushy. Pulse and scrape down the sides of the bowl regularly until the salsa reaches your desired consistency.
    • Season to taste. Taste the salsa before serving and add more fresh lime juice, salt, sugar, or spices to suit your personal taste preferences.
    • Let the flavors mingle. After blending the salsa, refrigerate it for at least 30 minutes before serving. This will let the flavors meld together for a better tasting salsa.
    • Strain the liquid off. If the salsa is too watery, use a fine mesh sieve to strain the excess liquid off before serving.
    What To Serve With Homemade Salsa

    Homemade salsa is endlessly versatile and can be used as a dip, condiment, or topping.

    Besides tortilla chips, salsa pairs well with all of your favorite Mexican dishes. Try pairing this fresh tomato salsa with ground beef nachos, chipotle chicken tacos, or tequila lime shrimp tacos.

    This salsa also makes a fantastic topping for grilled meats and seafood. I love pairing fresh salsa with grilled steak tips, grilled chicken, grilled shrimp, and burgers.

    Finally, bring fresh flavor to breakfast and brunch by serving this salsa with various egg dishes. In particular, scrambled eggs and southwestern-style frittatas pair perfectly with this salsa.

    A tortilla chip holding up a scoop of homemade salsa above a bowl.

    How to Store

    • Refrigerator- Store homemade salsa with fresh tomatoes in an airtight container in the refrigerator for 4-5 days.
    • Freezer- Fresh, uncooked salsa is best enjoyed within a few days. But, it can be frozen in a pinch. To freeze, drain as much of the liquid out of the salsa as possible before transferring it to a freezer-safe plastic bag. Store in the freezer for up to 3 months. Defrost in the refrigerator overnight before using.

    Make Ahead

    Whether you're celebrating Cinco de Mayo, Taco Tuesday, or just hosting a summer get-together, this homemade salsa is the perfect make-ahead recipe. It actually tastes better after the flavors and ingredients have had some time to meld together.

    Spend more time with your friends and family and less time in the kitchen with this easy salsa recipe.

    A small white bowl full of homemade salsa surrounded by tortilla chips.

    Frequently Asked Questions

    Can I make this salsa recipe without a food processor?

    If you don't have a food processor, you can chop all the ingredients by hand using a knife and cutting board. Alternatively, use a blender, but be cautious not to over-blend and make the salsa too smooth.

    Can I use canned tomatoes instead of fresh tomatoes?

    Yes, you can use canned tomatoes if fresh tomatoes are unavailable. Opt for canned diced tomatoes for the best texture and flavor.

    Do you peel tomatoes for salsa?

    No, there is no need to peel the tomatoes before adding them to the salsa.

    Should homemade salsa be cooked?

    Homemade fresh salsa is typically made with raw ingredients, but some variations involve cooking or roasting ingredients. Whether to cook the salsa or not depends on personal preference and the desired flavor profile.

    What should I do if my salsa is too watery?

    If your salsa becomes too watery, you can strain off excess liquid using a fine mesh sieve before serving.
    Can I preserve this salsa using the water bath canning method?

    I haven't checked the acidity of the salsa to determine if it's appropriate for water bath canning. Always follow tested and approved canning recipes and guidelines to guarantee the safety of your canned products.

    Let's Connect!

    Be sure to leave a comment below if you have any questions. You can also connect with me on Instagram, Facebook, Pinterest, or via email at [email protected].

    More Recipes You May Enjoy

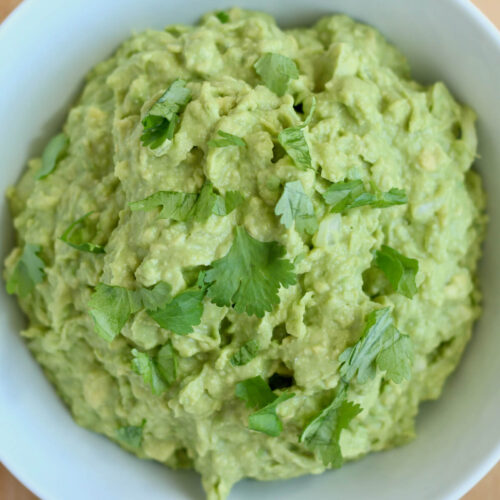
    • A bowl of 4-ingredient guacamole garnished with cilantro.
      Easy 4-Ingredient Guacamole Recipe
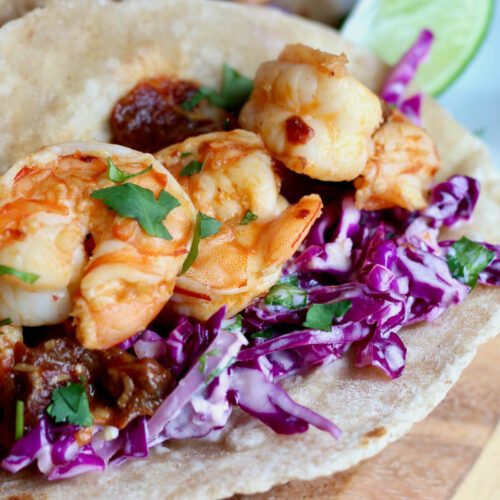
    • Red cabbage slaw on shrimp tacos.
      Creamy Red Cabbage Slaw for Tacos (No Mayo)
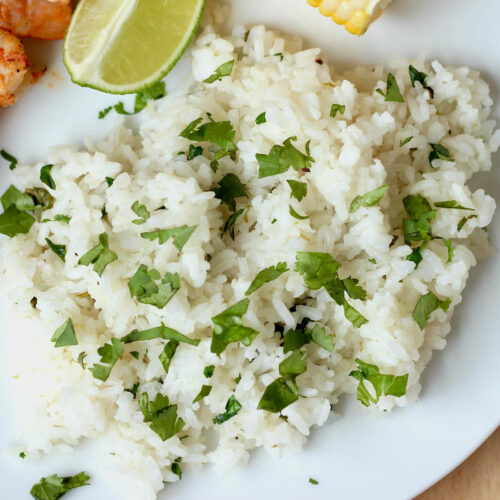
    • Rice cooker cilantro lime rice on a white dinner plate with shrimp and corn.
      Cilantro Lime Rice (Rice Cooker)
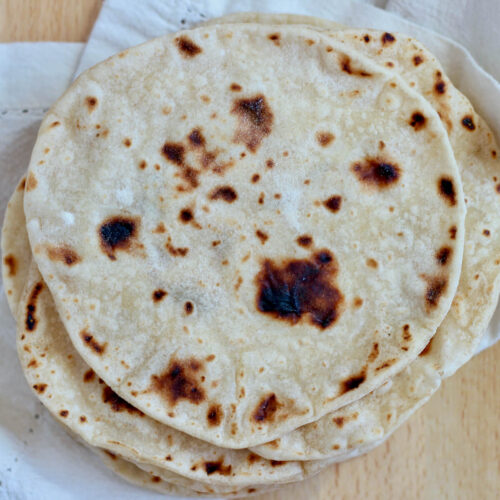
    • A pile of sourdough discard tortillas on a white cloth.
      Sourdough Discard Tortillas (5 Ingredients!)

    ๐Ÿ“– Recipe

    A tortilla chip holding up a scoop of homemade salsa above a bowl.
    Print Pin SaveSaved!

    Homemade Salsa

    This Homemade Salsa is made with the freshest ingredients for a bold, authentic dip and condiment that pairs perfectly with all of your favorite summer dishes. It's versatile, easy to make, and ready in just 20 minutes.
    Course Condiment, Snack
    Cuisine Mexican
    Prep Time 20 minutes minutes
    Total Time 20 minutes minutes
    Servings 6 ยผ-cup servings
    Calories 25kcal
    Author Ashley Petrie, RDN, LDN

    Equipment

    • Food processor

    Ingredients

    • 7-8 roma tomatoes quartered and deseeded
    • ยฝ medium red onion diced
    • 2 jalapeรฑos ends trimmed, seeds and membrane removed if desired
    • ยฝ cup cilantro thick stems removed
    • 2 cloves garlic minced
    • ยฝ lime juiced
    • 1 teaspoon kosher salt
    • ยฝ teaspoon granulated sugar
    • ยผ teaspoon ground cumin

    Instructions

    • Prepare your vegetables by washing them, quartering and deseeding the Roma tomatoes, dicing the red onion, removing jalapeรฑo seeds and membranes (for milder heat), chopping cilantro (remove thick stems), and mincing the garlic.
      7-8 roma tomatoes, ยฝ medium red onion, 2 jalapeรฑos, ยฝ cup cilantro, 2 cloves garlic
    • Place all the ingredients, including the lime juice and spices, into the bowl of your food processor.
      ยฝ lime, 1 teaspoon kosher salt, ยฝ teaspoon granulated sugar, ยผ teaspoon ground cumin
    • Use the food processor to pulse the ingredients together until you reach your preferred salsa consistency. Pulse less for a chunkier texture and more for a smoother texture. Scrape down the sides of the bowl as needed.
    • Before transferring the salsa to a serving bowl, give it a taste. Adjust the seasoning if necessary. You can add more salt, lime juice, sugar, or spice to suit your tastes.
    • For the best flavor, cover the salsa and refrigerate it for at least 30 minutes before serving. This allows the flavors to meld together.
    • Serve with your favorite tortilla chips or use it as a topping for tacos, grilled meats, and more!

    Notes

    • Choose fresh ingredients. Whenever possible, use fresh ingredients for the best flavor. Ripe tomatoes, freshly squeezed lime juice, minced fresh garlic, and cilantro all make a more delicious salsa.
    • Strain the liquid off. If the salsa is too watery, use a fine mesh sieve to strain the excess liquid off before serving.
    • Storage: Store homemade salsa in an airtight container in the refrigerator for up to 5 days.

    Nutrition

    Serving: 1serving | Calories: 25kcal | Carbohydrates: 6g | Protein: 1g | Sodium: 192mg | Potassium: 236mg | Fiber: 1.5g | Sugar: 3g | Vitamin C: 30mg | Calcium: 15mg | Iron: 0.3mg
    Did you try this recipe?Let me know! Comment below, or take a picture and tag me on Instagram @everydayhomemadebyashley.

    Quick Pickled Banana Peppers

    September 5, 2023

    These Pickled Banana Peppers are the perfect way to preserve your summer harvest. Easy to make with just a saucepan and glass jar, this quick refrigerator pickle recipe requires no special canning equipment. Serve them with snack boards, sandwiches, salads, burgers, pizza, and so much more.

    A fork holding a few sliced pickled banana peppers above a jar.

    My love for pickled banana peppers started with a simple seed packet mix-up.

    What I thought were jalapeรฑo pepper seeds actually turned out to be banana peppers. And at first, I was a little disappointed.

    What was I going to do with a bunch of banana peppers?

    Little did I know that these tangy, crunchy, savory pickled peppers would soon become a staple in my kitchen. From sandwiches and burgers to pizza and nachos, the versatility of pickled banana peppers is endless.

    Today, Iโ€™m walking you through how to make the best pickled banana peppers, including which ingredients to use, tips that will guarantee they turn out right the first time, and some of my favorite ways to use this easy pickled peppers recipe.

    Disclaimer: Some links throughout this post are affiliate links. As an Amazon Associate, I earn from qualifying purchases. You can learn more by visiting my Affiliate Disclosure Page.

    Why You'll Love This Recipe

    • Quick & Easy- Refrigerator pickled banana peppers only take 20 minutes to prepare and require just a few simple ingredients. The hardest part is waiting for them to finish brining!
    • No Canning Required- No need to boil your jars or break out the canning equipment for this quick pickled banana pepper recipe. It's home food preservation made easy!
    • Flavorful- Homemade pickled banana peppers taste fresher and more flavorful than store-bought.
    • Versatile- Enjoy these pickled peppers as a snack, as part of a charcuterie board, or on pizza, sandwiches, salads, and more.
    • Preserve Your Harvest- If you have more banana peppers in your garden than you know what to do with, this easy pickling recipe is a great way to preserve them for months to come.
    • Great for Gifting- It may be summer now, but the holiday season will soon be upon us. Homemade pickled peppers are a delicious, thoughtful, and unique gift your friends and family will love.

    Ingredient Notes

    Here are some notes on key ingredients. For a full list of ingredients, check out the recipe card below.

    • Banana Peppers- Slightly sweet and mild, banana peppers are perfect for pickling. Choose yellow, unripe banana peppers for a crispier, crunchier texture.
    • Garlic- Crushed fresh garlic cloves infuse the brine with a savory garlic flavor.
    • White Vinegar- A great choice for pickling, white vinegar is clear and has a neutral, tangy flavor. The acidity of the vinegar helps preserve the banana peppers.
    • Water- Used to dilute the vinegar and balance the acidity of the brining liquid.
    • Kosher Salt- Kosher salt or pickling salt is preferred for pickling because it does not contain additives like iodine and anti-caking agents that can affect the brine's clarity and taste.
    • Granulated Sugar- Balances the acidity, adds a touch of sweetness, and aids in preserving the peppers.
    • Mustard Seeds- Adds a slightly spicy, tangy flavor to the brining liquid.
    • Black Pepper- Either whole black peppercorns or coarse ground black pepper can be used in this recipe.

    ๐ŸŒฑ Sustainability Tip: Choose locally-grown banana peppers or grow them in your own garden to reduce the environmental impact of food transportation.

    The ingredients to make quick pickled banana peppers. Each ingredient is labeled with text. They include banana peppers, white vinegar, water, kosher salt, mustard seeds, pepper, garlic, and granulated sugar.

    When to Pick Banana Peppers for Pickling

    For optimal pickled banana peppers, harvest them when they reach their mature size of 4-5 inches and have turned pale yellow with shiny skin. This is when they will be the most crunchy.

    While they can be picked after they have ripened and turned red, it's best to choose unripe, yellow banana peppers for pickling.

    However, banana peppers are enjoyable at any ripeness, so don't worry too much about timing!

    Several unripe, yellow banana peppers on a banana pepper plant.

    Substitutions and Variations

    Here are a few ways you can try customizing this quick pickled banana peppers recipe to fit your diet and taste preferences.

    Substitutions

    • Banana Peppers- Swap banana peppers for Hungarian wax peppers, pepperoncini peppers, or jalapeรฑo peppers.
    • Garlic- Replace fresh garlic cloves with 1 teaspoon of garlic powder. Alternatively, use sliced shallots or red onion to give the pickles a different flavor.
    • White Vinegar- Apple cider vinegar can be used in place of distilled white vinegar.
    • Kosher Salt- Substitute kosher salt with pickling salt or sea salt. It is not recommended to use table salt for pickling.
    • Granulated Sugar- Swap granulated sugar for honey or maple syrup to give the pickles a slightly different flavor.
    • Mustard Seeds- Use a ยผ teaspoon of mustard powder in place of whole mustard seeds.
    • Black Peppercorn- For a spicier pickling brine, replace black peppercorn with red pepper flakes.
    Two jars of quick pickled banana peppers with a head of garlic leaning against one of the jars.

    Variations

    • Sweet- Omit the kosher salt, black pepper, and garlic. Add โ…“ to ยฝ cup of granulated sugar to the brine to make sweet pickled banana peppers.
    • Spicy- For spicy pickled banana peppers, add a few sliced jalapeรฑos or another chili pepper into the mix. Alternatively, add red pepper flakes to the brining liquid.
    • Pepper Medley- Have a variety of peppers growing in your garden? This quick pickle recipe can be used to preserve them all. Mix, match, and get creative with your pickled peppers!

    Equipment Notes

    Here are some notes on any special equipment I used to make this recipe.

    • Saucepan with Pour Spout- A small saucepan made with stainless steel or another non-reactive material works best. Using a saucepan with a pour spout makes pouring the brine over the peppers super easy.
    • Glass Mason Jars- This recipe is written to make one pint-sized mason jar full of pickled banana peppers. Always use a clean jar with a tight-fitting lid that is free from rust.

    How to Make Pickled Banana Peppers

    Here is how to pickle banana peppers.

    Step 1: Prepare the brine. In a small saucepan, combine the kosher salt, granulated sugar, mustard seeds, and black peppercorns. Pour in the white vinegar and water, stirring to combine.

    Step 2: Heat the brine. Place the saucepan over medium-low heat and heat the mixture until it's hot but not boiling, making sure to whisk occasionally so the salt and sugar fully dissolve. Once hot, remove the saucepan from the heat and set it aside to cool slightly while you work on the peppers.

    Kosher salt, granulated sugar, whole mustard seeds, and freshly ground black pepper in a stainless steel pot.
    The pickled banana pepper brine in a stainless steel pot.

    Step 3: Crush the garlic. Crush the 4 cloves of garlic and place them at the bottom of a pint-sized mason jar.

    Four cloves of crushed garlic in a glass mason jar.

    Step 4: Slice the banana peppers. Trim both ends of the banana peppers and use a small knife to remove the seeds and membranes. It's okay if a few seeds remain, but try to remove most of them. Slice the banana peppers into rings about ยผ to ยฝ inch thick.

    Step 5: Fill the jar with peppers. Place the sliced banana peppers into the mason jar with the crushed garlic.

    A hand holding a banana pepper up to the camera to show what it looks like with the seeds and membrane removed.
    Sliced banana peppers in a glass mason jar.

    Step 6: Add the brine. Carefully pour the brining liquid over peppers and garlic in the jar. Leave about a ยฝ inch of space at the top of the jar.

    Brine being poured over the sliced banana peppers and garlic cloves in a glass mason jar.
    One of my banana peppers ripened - still good to use!

    Step 7: Seal the jar and cool. Seal the mason jar tightly with the lid. Give the jar a good shake to ensure that every pepper ring is in contact with the brining liquid. Let the jar cool to room temperature on your kitchen counter.

    Step 8: Let the peppers pickle. Once cooled, store the jar in the refrigerator. Allow the pickled banana peppers to brine for at least 2 days before enjoying. The longer they sit, the more flavorful they'll become. Pickled banana peppers will last up to 6 months or longer in the refrigerator.

    A sealed jar of quick pickled banana peppers on a countertop.

    Tips for Success

    Make these easy pickled banana peppers successfully the first time using these helpful kitchen tips.

    • Choose fresh peppers. Select fresh, firm banana peppers for the best results. Avoid peppers that are beginning to show signs of spoilage.
    • Remove the membrane and seeds. The membrane and seeds may make the brine taste slightly bitter. For the best flavor, remove the membrane and seeds before pickling banana peppers.
    • Slice the peppers uniformly. Slicing the banana peppers uniformly ensures they will have a consistent texture and flavor.
    • Don't boil the brine. Using brining liquid that is too hot can lead to mushy pickled peppers.
    • Give the jars a shake. After sealing the jar, give it a gentle shake to make sure the brining liquid is evenly distributed among the peppers.
    • Brine for at least 2 days. Allow the pickled banana peppers to brine for at least 2 days before enjoying them. The longer they sit, the more developed and flavorful they will become.
    • Label and date the jars. It's important to keep track of how long the pickles have been stored in the refrigerator so you know how long you have to enjoy them.

    What To Do With Pickled Banana Peppers

    These savory pickled banana peppers add a tangy pop of flavor to a variety of dishes.

    Homemade pickled peppers are a delicious snack. They can also be served as part of a charcuterie board spread or paired with wheat crackers, sourdough bread, or homemade hummus for a more satisfying treat.

    A burger, sandwich, or wrap wouldn't be complete without the tangy addition of pickled garlic banana peppers. I always have these pickles handy when I'm serving turkey burgers and bagel sandwiches.

    Finally, pickled banana peppers are the perfect topping for pizza, salad, nachos, and more. Add them to mushroom pizza, Caesar salad, pasta salad, or ground beef nachos for a unique flavor.

    Two jars of pickled garlic banana peppers. The jar closer to the camera is open and the jar behind it is closed.

    How to Store

    • Refrigerator- Store pickled banana peppers in an airtight jar in the refrigerator for up to 6 months. Remember to label the jars with the preparation date and check for any signs of spoilage.
    • Freezer- It is not recommended to freeze pickled banana peppers as this can alter their texture.

    How to Tell If Your Pickled Banana Peppers Have Gone Bad

    • Off Odor- If the pickles have a foul or unpleasant odor, this is a clear sign that they have gone bad. Pickled peppers should have a tangy, slightly acidic aroma.
    • Cloudy Brine- If the pickling brine has turned cloudy, it could indicate bacterial growth and spoilage.
    • Visible Mold- Visible mold growth on the surface of the pickles is a definite sign of spoilage. Discard the entire jar if you see any mold.
    • Slimy Texture- Pickled banana peppers that have a slimy or excessively mushy texture have likely gone bad.
    • Unpleasant Taste- If the pickled peppers taste sour, bitter, or otherwise unpleasant, it's a strong indication that they have spoiled.

    Make Ahead

    This quick pickled banana pepper recipe is perfect for preparing ahead because the peppers need at least 48 hours to brine before they're ready to enjoy. During this brining period, the peppers soak up the flavors and develop their tangy and aromatic taste.

    ๐ŸŽ Edible Gift Idea: Gifting a jar of homemade pickled banana peppers is a wonderful way to celebrate the holiday season, a friend's birthday, or any day of the week.

    Sliced pickled banana peppers covered in brine in a glass mason jar.

    Frequently Asked Questions

    Are pickled banana peppers spicy?

    No, banana peppers are not considered a spicy pepper, offering little to no heat and only containing about 500 scoville heat units.

    Do I need to sterilize my jars?

    Since this is a quick refrigerator pickle recipe, there is no need to sterilize the jars. However, you should always use a clean glass jar, utensils, and cookware to ensure your pickled banana peppers last as long as possible in the refrigerator.

    Can I make a smaller or larger batch of pickled peppers?

    Yes, you can adjust the recipe to make a smaller or larger batch. Just ensure you maintain the proper vinegar-to-water ratio in the brine and use an appropriate-sized jar.

    Why are my pickled banana peppers mushy?

    If your brining liquid was too hot before pouring it over the peppers, this could lead to mushy pickles. For crunchy pickled banana peppers, heat the brine until it's steaming hot, but not boiling.

    How long will pickled banana peppers last in the refrigerator?

    Pickled peppers last for up to 6 months or longer in the refrigerator when properly stored. However, their flavor and texture may change over time.

    Let's Connect!

    Be sure to leave a comment below if you have any questions. You can also connect with me on Instagram, Facebook, Pinterest, or via email at [email protected].

    More Snack Recipes

    • Three jars of refrigerator dill pickles. The front jar is open and there is a fork with a single pickle on it on top of the jar.
      Easy Refrigerator Dill Pickles
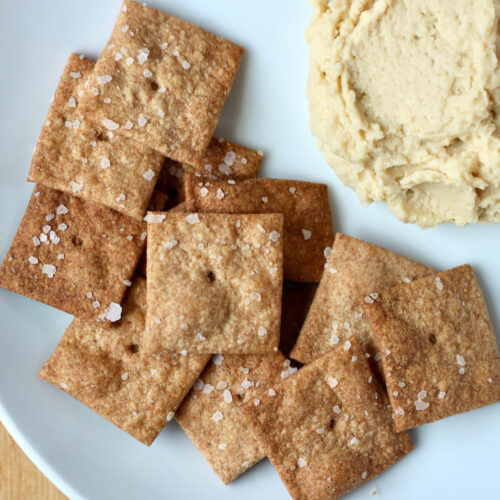
    • Sourdough discard crackers with hummus on a small white plate.
      Whole Wheat Sourdough Discard Crackers
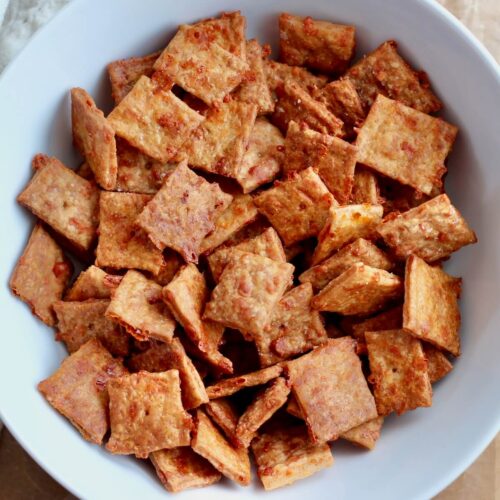
    • A bowl of sourdough cheese crackers.
      5-Ingredient Sourdough Discard Cheese Crackers (Quick & Easy!)
    • A sourdough corn muffin split in half on the wrapper with a piece of butter on each half.
      Sourdough Corn Muffins

    ๐Ÿ“– Recipe

    A fork holding a few slices of pickled banana peppers above a jar.
    Print Pin SaveSaved!

    Pickled Banana Peppers

    These Pickled Banana Peppers are the perfect way to preserve your summer harvest. Easy to make with just a saucepan and glass jar, this quick refrigerator pickle recipe requires no special canning equipment. Serve them with snack boards, sandwiches, salads, burgers, pizza, and so much more.
    Course Condiment, Snack
    Cuisine American
    Prep Time 15 minutes minutes
    Cook Time 5 minutes minutes
    Brine Time 2 days days
    Total Time 2 days days 20 minutes minutes
    Servings 1 pint-sized jar
    Calories 288kcal
    Author Ashley Petrie, RDN, LDN

    Equipment

    • Small saucepan
    • Cutting board
    • Chef's knife
    • Pint-sized mason jar

    Ingredients

    • 1 tablespoon kosher salt
    • 1 teaspoon granulated sugar
    • ยฝ teaspoon whole mustard seeds
    • ยฝ teaspoon coarse ground black peppercorn
    • 1 cup white vinegar
    • ยฝ cup water
    • 4 cloves garlic crushed
    • 10-12 banana peppers

    Instructions

    • In a small saucepan, combine the kosher salt, granulated sugar, mustard seeds, and black peppercorns. Pour in the white vinegar and water, stirring to combine.
      1 tablespoon kosher salt, 1 teaspoon granulated sugar, ยฝ teaspoon whole mustard seeds, ยฝ teaspoon coarse ground black peppercorn, 1 cup white vinegar, ยฝ cup water
    • Place the saucepan over medium-low heat and heat the mixture until it's hot but not boiling, making sure to whisk occasionally so the salt and sugar fully dissolve. Once hot, remove the saucepan from the heat and set it aside to cool slightly while you work on the peppers.
    • Crush the 4 cloves of garlic and place them at the bottom of a pint-sized mason jar.
      4 cloves garlic
    • Trim both ends of the banana peppers and use a small knife to remove the seeds and membranes. It's okay if a few seeds remain, but try to remove most of them. Slice the banana peppers into rings about ยผ to ยฝ inch thick.
      10-12 banana peppers
    • Place the sliced banana peppers into the mason jar with the crushed garlic.
    • Carefully pour the brining liquid over the peppers and garlic in the jar. Leave about a ยฝ inch of space at the top of the jar.
    • Seal the mason jar tightly with the lid. Give the jar a good shake to ensure that every pepper ring is in contact with the brining liquid. Let the jar cool to room temperature on your kitchen counter.
    • Once cooled, store the jar in the refrigerator. Allow the pickled banana peppers to brine for at least 2 days before enjoying. The longer they sit, the more flavorful they'll become. Pickled banana peppers will last up to 6 months or longer in the refrigerator.

    Notes

    • Choose fresh peppers. Select fresh, firm banana peppers for the best results. Avoid peppers that are beginning to show signs of spoilage.
    • Label and date the jars. It's important to keep track of how long the pickles have been stored in the refrigerator so you know how long you have to enjoy them.
    • Storage: Store pickled banana peppers in the refrigerator for up to 6 months (or longer). Freezing is not recommended.

    Nutrition

    Serving: 1pint-sized jar | Calories: 288kcal | Carbohydrates: 49g | Protein: 13.5g | Fat: 4g | Saturated Fat: 0.5g | Polyunsaturated Fat: 2g | Monounsaturated Fat: 0.5g | Sodium: 3469mg | Potassium: 1996mg | Fiber: 26g | Sugar: 19g | Vitamin C: 624mg | Calcium: 153mg | Iron: 3.9mg
    Did you try this recipe?Let me know! Comment below, or take a picture and tag me on Instagram @everydayhomemadebyashley.

    Turkey Pumpkin White Bean Chili

    September 2, 2023

    This Pumpkin White Bean Chili is hearty and flavorful fall comfort food in a bowl. Made entirely in one pot, this easy chili recipe is ready in just 45 minutes and is a breeze to clean up. Itโ€™s perfect for both a quick weeknight meal and game day gatherings.

    A bowl of pumpkin white bean chili topped with sour cream and cilantro. A white pumpkin-shaped mug filled with chili is next to the bowl to the right.

    Is there anything better than a warm, hearty bowl of chili on a crisp fall day?

    Filled with lean ground turkey, creamy white beans, and rich pumpkin puree, this homemade pumpkin white bean chili is one of my favorite fall recipes.

    The addition of pumpkin beer makes this chili feel wonderfully seasonal. Plus, it's quick and easy to make so it's perfect for those busy weeknights.

    Today, Iโ€™m walking you through how to make the best turkey pumpkin white bean chili, including which ingredients to use, tips that will guarantee it turns out right the first time, and some of my favorite toppings for this fall-inspired chili recipe.

    Disclaimer: Some links throughout this post are affiliate links. As an Amazon Associate, I earn from qualifying purchases. You can learn more by visiting my Affiliate Disclosure Page.

    Why You'll Love This Recipe

    • Fall Comfort Food- Hearty chili meets fall comfort food in this cozy white bean pumpkin chili recipe.
    • One-Pot- The entire dish comes together in one pot, meaning it's easy to make and easy to clean up!
    • Ready in 45 Minutes- Perfect for a quick fall weeknight dinner, this pumpkin turkey chili is ready in just 45 minutes.
    • Healthy- Made with lean ground turkey, heart-healthy white beans, and fiber-packed pumpkin puree, this satisfying meal will leave you feeling your best.
    • Perfect for Gatherings- Whether you're watching the football game with friends or just having a fall dinner party, this seasonal chili is sure to be a crowd-pleaser.

    Ingredient Notes

    Here are some notes on key ingredients. For a full list of ingredients, check out the recipe card below.

    • Pumpkin Puree- Both homemade pumpkin puree and canned pumpkin puree work well in this recipe.
    • Cannellini Beans- Cannellini beans are a large white bean with a creamy texture and mild flavor. Opt for low-sodium beans and be sure to drain and rinse them before adding them to the chili.
    • Ground Turkey- I like to use 93% lean ground turkey because it has enough fat to give the chili flavor without feeling too rich.
    • Pumpkin Beer- Use your favorite pumpkin beer to add a complex, slightly sweet flavor that pairs well with pumpkin puree.
    • Chicken Stock- Opt for homemade chicken stock or low-sodium chicken stock.
    • Poblano Peppers- An earthy, slightly smoky-tasting pepper with a mild heat.
    • Jalapeรฑo- Remove the seeds and membranes for a milder chili or leave them in to make spicy pumpkin chili.
    • Red Onion- Mild and slightly sweet, red onion pairs well with the peppers and garlic.
    • Garlic- Once cooked, minced garlic adds a subtle garlic flavor throughout the chili.
    • Olive Oil- Use olive oil or any other neutral-flavored cooking oil you prefer.
    • Seasonings- A blend of chili powder, cumin, smoked paprika, cayenne pepper, onion powder, and garlic powder gives this pumpkin chili a smoky, well-balanced flavor.
    • Kosher Salt- I recommend using kosher salt for cooking since it doesn't contain anti-caking agents or added sugars like table salt often does.
    The ingredients to make pumpkin white bean chili with ground turkey. Each ingredient is labeled with text. They include cannellini beans, ground turkey, pumpkin beer, chicken stock, jalapeรฑo, garlic, poblano, onion, oil, seasonings, salt, pumpkin puree.

    Substitutions and Variations

    Here are a few ways you can try customizing this easy turkey pumpkin chili recipe to fit your diet and taste preferences.

    Substitutions

    • Pumpkin Puree- Swap pumpkin puree for butternut squash puree or even mashed sweet potato.
    • Cannellini Beans- Substitute cannellini beans with red kidney beans, black beans, pinto beans, or navy beans.
    • Ground Turkey- Use ground chicken, ground beef, or ground pork in place of ground turkey if preferred.
    • Pumpkin Beer- Swap pumpkin beer for another type of beer or use an additional 1 ยฝ cups of chicken stock.
    • Chicken Stock- Vegetable broth or water can be used in place of chicken stock.
    • Poblano Peppers- Replace poblano peppers with green bell peppers, Anaheim peppers, or cubanelle peppers.
    • Jalapeรฑo- For a spicier chili, use a serrano pepper or habanero pepper in place of the jalapeรฑo. If you prefer a milder chili, use an additional poblano pepper instead of jalapeรฑo.
    • Red Onion- Swap red onion for yellow onion, white onion, or sweet onion.
    • Garlic- Use one teaspoon of garlic powder in place of fresh garlic.
    • Olive Oil- Any neutral-flavored oil, such as avocado oil, canola oil, or vegetable oil, can be used in place of olive oil.
    • Seasonings- Adjust the quantity of spices to suit your taste.
    • Kosher Salt- Use sea salt or table salt in place of kosher salt, if preferred, adjusting to taste.
    A white ceramic pumpkin-shaped mug filled with pumpkin white bean chili. Out of focus in the background is a white bowl of chili.

    Variations

    • Vegetarian- Swap the chicken stock for vegetable broth and use an extra can of beans in place of the ground turkey to make vegetarian pumpkin white bean chili.
    • Gluten-Free- Use gluten-free beer or additional chicken stock in place of the pumpkin beer to make a gluten-free version of this recipe.
    • Creamy- Stir in a few spoonfuls of sour cream or Greek yogurt once the chili has finished simmering to give it a creamier consistency.
    • Spicy- Replace the jalapeรฑo with a serrano pepper or habanero pepper, or use more cayenne pepper to give the chili a bit more heat.
    • Smoky- Substitute the jalapeรฑo with chipotle pepper in adobo sauce to give the chili a smokier, spicier flavor.
    • Pumpkin Spice- Add ยผ to ยฝ teaspoon ground cinnamon and a pinch of nutmeg to give the chili a warm, slightly sweet flavor that is perfect for fall.

    ๐ŸŒŸ Did you know? The secret behind flavorful homemade chili is making your own chili seasoning mix.

    How to Make Pumpkin White Bean Chili

    Here is how to make this turkey pumpkin chili.

    Step 1: Sautรฉ aromatics. Heat the olive oil in a large Dutch oven or pot over medium heat. Add the onion, poblano peppers, jalapeรฑo, garlic, and kosher salt. Sautรฉ the mixture for 5-7 minutes, or until the vegetables are softened and begin to turn brown.

    Poblano peppers, jalapeรฑo peppers, red onion, and garlic sautรฉing in olive oil in a stainless steel pot.

    Step 2: Cook the ground turkey. Push the sautรฉed vegetables to the side of the pot and add the ground turkey. Using a wooden spoon, break the turkey into small pieces as it cooks. Continue cooking until the turkey is no longer pink, approximately 5 minutes.

    Cooked ground turkey with diced peppers and onions in a stainless steel skillet.

    Step 3: Season the ground turkey. Sprinkle the spices over the cooked turkey. Sautรฉ the mixture for an additional 1-2 minutes, allowing the spices to open up and infuse their flavors into the meat.

    Step 4: Deglaze with pumpkin beer. Reduce the heat to medium-low. Pour in the pumpkin beer to deglaze the pot, ensuring you scrape up any flavorful bits stuck to the bottom. Let the beer simmer and reduce for about 5 minutes.

    Ground turkey and vegetables seasoned with chili powder, cumin, and other spices.
    Ground turkey and vegetables simmering in pumpkin beer.

    Step 5: Add pumpkin puree and beans. Whisk in the pumpkin puree until the mixture is smooth and well combined. Then, add the chicken stock and drained cannellini beans. Stir together until well mixed.

    Step 6: Simmer and thicken. Bring the chili to a gentle simmer. Allow it to simmer for 10-15 minutes, or until it reaches your desired thickness. Taste the chili for seasoning, adjusting salt and spices if needed.

    Pumpkin puree mixed with ground turkey, vegetables, and pumpkin beer.
    Chicken stock whisked into pumpkin puree, ground turkey, and vegetables.
    Ground turkey pumpkin white bean chili in a stainless steel pot with a wooden spoon sticking out to the left.

    Step 7: Garnish and serve. Garnish with your choice of toppings, such as shredded cheese, chopped cilantro, or a dollop of sour cream, and serve.

    A bowl of ground turkey white bean chili topped with sour cream and cilantro next to a ceramic orange pumpkin mug.

    Pumpkin White Bean Chili (Video)

    Tips for Success

    Make this easy pumpkin white bean chili successfully the first time using these helpful kitchen tips.

    • Use fresh ingredients. Whenever possible, use fresh ingredients for the best flavor and texture.
    • Choose 93% lean ground turkey. A little fat helps keep the turkey tender and adds to the overall flavor of the chili.
    • Cook the spices. Sautรฉing the spices in oil opens them up and makes them taste more flavorful.
    • Adjust the consistency. Adjust the consistency of the chili by simmering longer for a thicker chili or adding more chicken stock for a thinner one.
    • Taste for seasoning. Taste your chili as you cook to ensure it's seasoned to your liking. Remember that flavors can intensify as the chili simmers.
    • Let the chili rest. After cooking, let the chili rest for a few minutes before serving. This helps the flavors meld together even more.
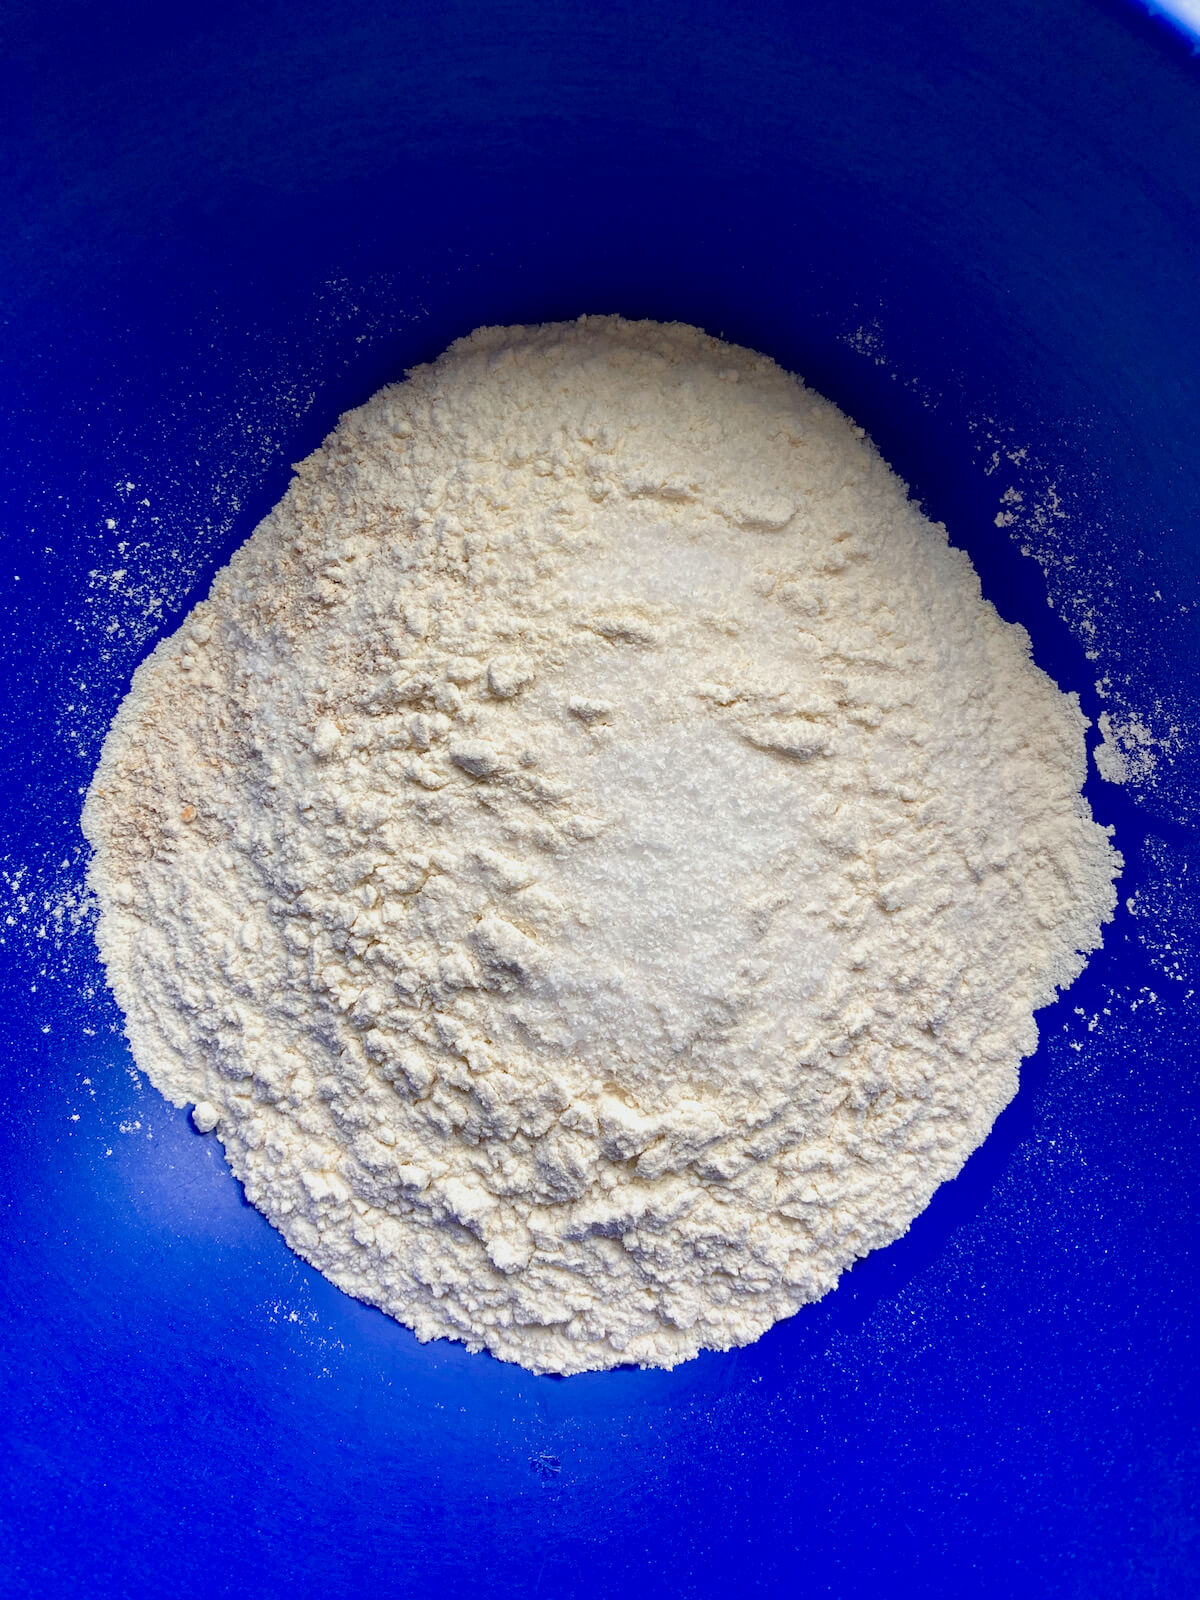
    Pumpkin Chili Topping Ideas

    Toppings are a fun way to personalize your turkey pumpkin white bean chili. Here are some of my favorite topping ideas!

    • Shredded Cheddar Cheese
    • Sour Cream or Greek Yogurt
    • Cilantro Garlic Sauce
    • Sliced Jalapeรฑos
    • Diced Red Onion
    • Pickled Jalapeรฑos
    • Cilantro
    • Avocado
    • Lime Wedges
    • Tortilla Chips
    • Roasted Pumpkin Seeds
    • Salsa or Pico de Gallo
    • Hot Sauce
    • Red Pepper Flakes

    What to Serve with Pumpkin White Bean Chili

    This pumpkin white bean chili pairs wonderfully with a variety of side dishes to create a balanced and satisfying meal.

    One of the most comforting ways to serve this fall-inspired chili is alongside bread or crackers. Some of my favorite pairings include sourdough cornbread, corn muffins, jalapeรฑo cheddar sourdough bread, homemade tortillas, tortilla chips, and crackers.

    For a lighter option, pair your pumpkin chili with a salad. Try this arugula quinoa salad, which feature fall flavors.

    A few other side dishes that pair well with ground turkey pumpkin chili include cilantro lime rice, maple roasted brussels sprouts, and sautรฉed butternut squash.

    A white bowl of ground turkey pumpkin white bean chili topped with sour cream and cilantro. There is a white ceramic pumpkin mug and an orange cloth napkin out of focus in the background.

    Storage and Reheating

    How to Store

    • Refrigerator- Store leftover pumpkin white bean chili in an airtight container in the refrigerator for 3-4 days.
    • Freezer- Freeze leftover homemade pumpkin chili in a freezer-safe container for up to 3 months.

    How to Reheat

    • Stovetop- Transfer leftover chili to a saucepan and set it over medium-low heat. Add a splash of water or chicken stock to thin the chili if it seems too thick. Heat, stirring occasionally, until warmed through.
    • Microwave- Place leftover pumpkin chili in a microwave-safe bowl and cover with a lid or plate. Add a splash of liquid if the chili seems too thick. Heat on HIGH for 1 minute. Stir and continue heating in 30-second intervals until hot.

    Make Ahead

    Gearing up for game day or trying to get ahead on meal prep?

    Luckily, this pumpkin white bean chili tastes even better when made in advance. The flavors in the chili have a chance to settle and meld together, making for an even more flavorful bowl of comfort.

    Simply store it in the refrigerator for up to 4 days or in the freezer for up to 3 months. Then, reheat it on the stovetop or in the microwave and enjoy!

    ๐Ÿˆ Serving this pumpkin chili at a game day party? Keep it warm in a slow cooker set to the "warm" setting.

    A white bowl of pumpkin white bean chili topped with sour cream and cilantro.

    Frequently Asked Questions

    Can I make this chili in a slow cooker?

    Yes, you can adapt this recipe for a slow cooker. Sautรฉ the vegetables and brown the turkey first, then transfer everything to a slow cooker and cook on low for 6-8 hours or on high for 3-4 hours.

    Can I make this chili for a large crowd?

    Absolutely! Simply double or triple the ingredients to scale the recipe for a larger group. Use a big pot or divide the chili into multiple pots if necessary.

    Is this turkey pumpkin chili spicy?

    The jalapeรฑo peppers and cayenne pepper powder provide mild to moderate heat, but you can increase or decrease the spiciness by altering the amounts or them if preferred.

    How can I make my chili more flavorful?

    If your chili lacks flavor, try adding a little more salt to enhance the overall taste. Additionally, consider incorporating more spices or seasoning as needed.

    Let's Connect!

    Be sure to leave a comment below if you have any questions. You can also connect with me on Instagram, Facebook, Pinterest, or via email at [email protected].

    More Fall Dinner Recipes

    • A bowl of Dutch oven chili topped with sour cream and cilantro. The dish is next to a small jar of chili seasoning and a piece of cornbread.
      Dutch Oven Chili (Classic Beef and Bean Chili)
    • A small white plate of creamy pumpkin pasta sauce on cavatappi pasta. The pasta is garnished with grated parmesan cheese, black pepper, and one whole sage leaf.
      Creamy Pumpkin Pasta Sauce
    • A white bowl filled with red curry lentils with sweet potatoes and spinach.
      Red Curry Lentils With Sweet Potatoes and Spinach
    • A slice of sourdough chicken pot pie on a small plate with a fork laying next to it.
      Sourdough Chicken Pot Pie

    ๐Ÿ“– Recipe

    A bowl of pumpkin white bean chili topped with sour cream and cilantro.
    Print Pin SaveSaved!

    Pumpkin White Bean Chili

    This Pumpkin White Bean Chili is hearty and flavorful fall comfort food in a bowl. Made entirely in one pot, this easy chili recipe is ready in just 45 minutes and is a breeze to clean up. Itโ€™s perfect for both a quick weeknight meal and game day gatherings.
    Course Main Course
    Cuisine American
    Prep Time 15 minutes minutes
    Cook Time 30 minutes minutes
    Total Time 45 minutes minutes
    Servings 6 servings
    Calories 359kcal
    Author Ashley Petrie, RDN, LDN

    Equipment

    • Large pot or Dutch oven

    Ingredients

    • 2 tablespoons olive oil
    • 1 medium red onion diced
    • 3 poblano peppers diced
    • 1 jalapeรฑo pepper minced
    • 4 cloves garlic minced
    • 2 teaspoons kosher salt
    • 1 ยผ pounds ground turkey 93% lean
    • 2 tablespoons chili powder
    • ยฝ tablespoon cumin
    • 1 teaspoon onion powder
    • 1 teaspoon garlic powder
    • 1 teaspoon smoked paprika
    • ยผ teaspoon cayenne pepper
    • 12 ounces pumpkin beer
    • 1 15-ounce can pumpkin puree
    • 2 cups chicken stock low-sodium
    • 2 15-ounce cans cannellini beans drained and rinsed

    Instructions

    • Heat the olive oil in a large Dutch oven or pot over medium heat. Add the onion, poblano peppers, jalapeรฑo, garlic, and kosher salt. Sautรฉ the mixture for 5-7 minutes, or until the vegetables are softened and begin to turn brown.
      2 tablespoons olive oil, 1 medium red onion, 3 poblano peppers, 1 jalapeรฑo pepper, 4 cloves garlic, 2 teaspoons kosher salt
    • Push the sautรฉed vegetables to the side of the pot and add the ground turkey. Using a wooden spoon, break the turkey into small pieces as it cooks. Continue cooking until the turkey is no longer pink, approximately 5 minutes.
      1 ยผ pounds ground turkey
    • Sprinkle the spices over the cooked turkey. Sautรฉ the mixture for an additional 1-2 minutes, allowing the spices to open up and infuse their flavors into the meat.
      2 tablespoons chili powder, ยฝ tablespoon cumin, 1 teaspoon onion powder, 1 teaspoon garlic powder, 1 teaspoon smoked paprika, ยผ teaspoon cayenne pepper
    • Reduce the heat to medium-low. Pour in the pumpkin beer to deglaze the pot, ensuring you scrape up any flavorful bits stuck to the bottom. Let the beer simmer and reduce for about 5 minutes.
      12 ounces pumpkin beer
    • Whisk in the pumpkin puree until the mixture is smooth and well combined. Then, add the chicken stock and drained cannellini beans. Stir together until well mixed.
      1 15-ounce can pumpkin puree, 2 cups chicken stock, 2 15-ounce cans cannellini beans
    • Bring the chili to a gentle simmer. Allow it to simmer for 10-15 minutes, or until it reaches your desired thickness. Taste the chili for seasoning, adjusting salt and spices if needed.
    • Garnish with your choice of toppings, such as shredded cheese, chopped cilantro, or a dollop of sour cream, and serve.

    Notes

    • Quick Tip: After cooking, let the chili rest for a few minutes before serving. This helps the flavors meld together even more.
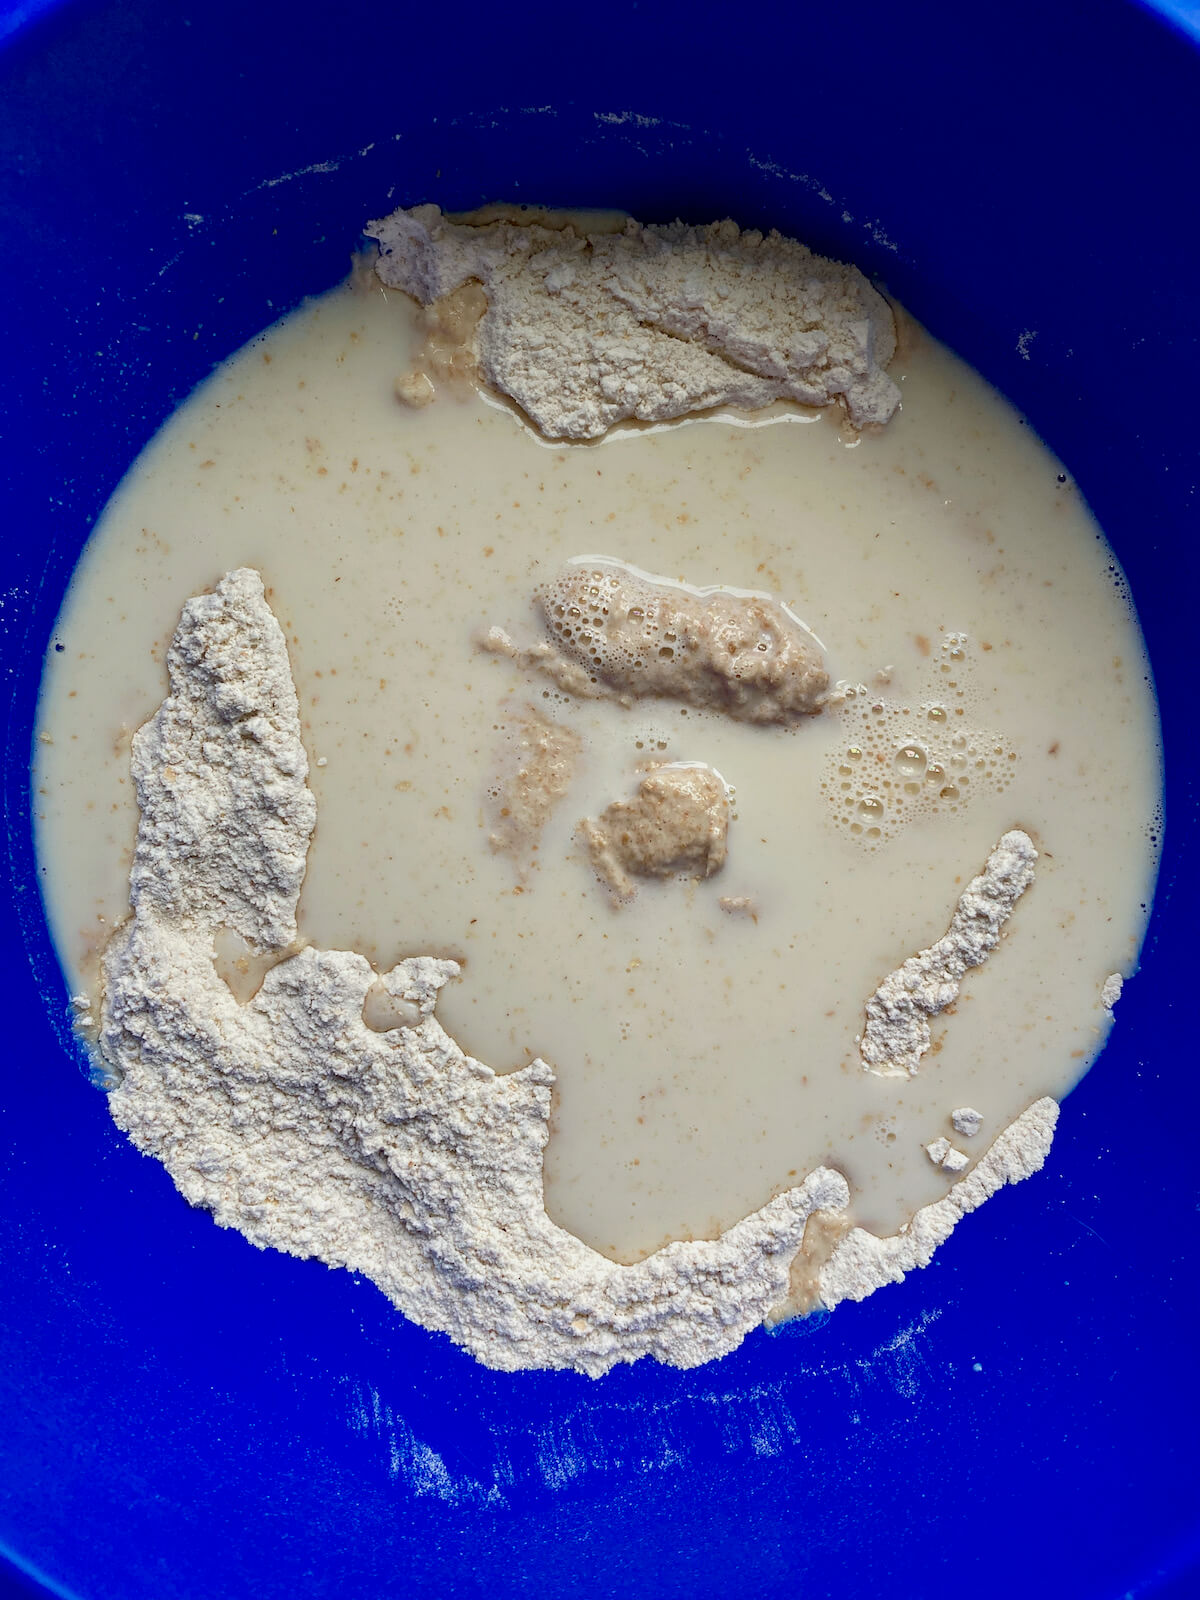
    • Storage: Store leftover pumpkin chili in an airtight container in the refrigerator for up to 4 days and in the freezer for up to 3 months.

    Nutrition

    Serving: 1serving | Calories: 359kcal | Carbohydrates: 32g | Protein: 29g | Fat: 12g | Saturated Fat: 3g | Polyunsaturated Fat: 1g | Monounsaturated Fat: 3.5g | Cholesterol: 68mg | Sodium: 913mg | Potassium: 860mg | Fiber: 8g | Sugar: 3.5g | Vitamin C: 41mg | Calcium: 146mg | Iron: 6.1mg
    Did you try this recipe?Let me know! Comment below, or take a picture and tag me on Instagram @everydayhomemadebyashley.

    San Marzano Tomato Sauce (for Pasta, Pizza, and More!)

    August 25, 2023

    This San Marzano Tomato Sauce is made with simple, high-quality ingredients for a rich, authentic-tasting sauce that pairs well with all of your favorite Italian dishes. Quick and beginner-friendly, this easy homemade tomato sauce recipe will have you saying goodbye to the store-bought version forever.

    San Marzano tomato sauce garnished with fresh basil leaves. There is a wooden spoon sticking out of the pot of sauce to the left.

    Making a simple homemade tomato sauce is a skill every home cook should master. Not only does homemade tomato sauce taste better than jarred sauce, but it also acts as the foundation for a variety of other recipes.

    Whether you're cooking an easy weeknight pasta dish or perfecting Nonniโ€™s scratch-made lasagna, having a go-to tomato sauce recipe up your sleeve is a must.

    And this San Marzano tomato sauce recipe is mine.

    I use this sauce to make everything from sourdough pizzas and calzones to hearty meatballs and lasagna.

    Today, Iโ€™m walking you through how to make the best San Marzano tomato sauce, including which ingredients to use, tips that will guarantee it turns out right the first time, and some of my favorite ways to use this basic Italian tomato sauce recipe.

    Disclaimer: Some links throughout this post are affiliate links. As an Amazon Associate, I earn from qualifying purchases. You can learn more by visiting my Affiliate Disclosure Page.

    What are San Marzano Tomatoes?

    San Marzano tomatoes are unique plum tomatoes with thick flesh, fewer seeds, and a sweet flavor, making them perfect for a rich Italian sauce. 

    Authentic San Marzano tomatoes come only from the San Marzano region in Italy. Theyโ€™re grown in Mount Vesuvius' volcanic soils in Southern Italy and bear the Denominazione d'Origine Protetta (D.O.P.) seal. 

    Look for "Pomodoro San Marzano dellโ€™Agro Sarnese Nocerino D.O.P." on labels for genuine certification.

    Why You'll Love This Recipe

    • Authentic Flavor- San Marzano tomatoes give this simple marinara sauce an authentic Italian taste. The flavor is incomparable to jarred tomato sauce.
    • Simple Ingredients- This easy San Marzano tomato sauce only requires 7 simple ingredients to make.
    • Quick & Easy- In just 45 minutes, you can have delicious homemade tomato sauce on the table for your family to devour. 
    • Versatile- This versatile marinara sauce recipe can be used for pasta, meatballs, pizza, dipping, and more!
    • Budget-Friendly- Save money by skipping expensive store-bought tomato sauces and make a large batch of homemade sauce to store in the freezer.
    • Healthy- Many store-bought tomato sauces are made with added sugars, salt, and preservatives. By making tomato sauce from scratch, you can better control the ingredients you eat.

    Ingredient Notes

    Here are some notes on key ingredients. For a full list of ingredients, check out the recipe card below.

    • San Marzano Tomatoes- San Marzano whole tomatoes are perfect for making tomato sauce because theyโ€™re less acidic and sweeter. Look for canned San Marzano tomatoes with the D.O.P. label for authenticity.
    • Extra Virgin Olive Oil- Choose a high-quality extra virgin olive oil for the best, most authentic-tasting Italian red sauce.
    • Onion- Yellow onion is milder in flavor compared to white or red onions, complementing the sauce without overpowering it.
    • Garlic- Crushing the garlic cloves before mincing them helps release their flavor.
    • Italian Seasoning- Italian seasoning is typically a blend of dried herbs like oregano, basil, thyme, marjoram, and rosemary. Sautรฉing the Italian seasoning in olive oil enhances its flavor.
    • Red Pepper Flakes- A pinch of red pepper flakes adds a subtle heat to the sauce. Adjust the quantity based on your family's spice tolerance.
    • Kosher Salt- Use kosher salt or sea salt for the best flavor. Table salt often contains added sugar and anti-caking agents.

    ๐ŸŒฑ Sustainability Tip: If you find yourself with leftover San Marzano sauce, don't let it go to waste! Freezing is an excellent way to preserve the sauce for later use.

    The ingredients to make San Marzano tomato sauce. Each ingredient is labeled with text. They include San Marzano tomatoes, olive oil, garlic, red pepper flakes, salt, onion, and Italian seasoning.

    Substitutions and Variations

    Here are a few ways you can try customizing this simple San Marzano tomato sauce recipe to fit your diet and taste preferences.

    Substitutions

    • San Marzano Tomatoes- Substitute San Marzano tomatoes for canned whole plum tomatoes or crushed tomatoes. Alternatively, use fresh San Marzano tomatoes if preferred.
    • Extra Virgin Olive Oil- Use another neutral-flavored oil or unsalted butter in place of olive oil.
    • Onion- Swap yellow onion for sweet onion, white onion, red onion, or shallots.
    • Garlic- Substitute 4 cloves of garlic for one teaspoon of garlic powder. Garlic-infused olive oil is also a good substitute for fresh garlic.
    • Italian Seasoning- Replace Italian seasoning with dried oregano or use a blend of dried basil, thyme, rosemary, and oregano. Alternatively, swap the dried herbs for fresh herbs if preferred.
    • Red Pepper Flakes- Cayenne pepper, hot sauce, or freshly ground black pepper can be used in place of red pepper flakes.
    • Kosher Salt- If using table salt, use half the amount called for in the recipe and adjust to taste from there.
    A small white plate of cavatappi pasta coated with San Marzano tomato sauce. The pasta dish is garnished with a few leaves of fresh basil and grated parmesan cheese.

    Variations

    • Allergen-Friendly- This San Marzano sauce recipe is naturally gluten-free, dairy-free, egg-free, and vegan.
    • Herbed- Simmer herbs like fresh basil, parsley, oregano, and thyme in the sauce while it cooks for a fragrant herb-infused tomato sauce.
    • Wine- Add depth of flavor and complexity to this San Marzano tomato sauce with a splash of red wine or white wine to deglaze the pot.
    • Meat- If you're looking to add some protein to your meal, consider including ground beef, pork, or turkey to create a flavorful meat sauce.
    • Vegetables- Add some fresh veggies to your marinara sauce for a boost of nutrition. Try carrots, zucchini, mushrooms, bell peppers, eggplant, spinach, or kale.
    • Tomato Paste- Add a tablespoon or two of tomato paste when sautรฉing the aromatics to give this sauce a richer tomato flavor.
    • Creamy- Stir in a splash of heavy cream to finish the sauce and give it a rich and creamy flavor.
    • Spicy- Increase the red pepper flakes to make spicy marinara sauce.

    Equipment Notes

    Here are some notes on any special equipment I used to make this recipe.

    • Stainless Steel or Dutch Oven Pot- Use a heavy-bottomed stainless steel pot or Dutch oven for even heat distribution, which prevents the sauce from scorching.
    • Immersion Blender- An immersion blender simplifies the pureeing process because it can be used directly in the pot.

    How to Make San Marzano Tomato Sauce

    Here is how to make tomato sauce with San Marzano tomatoes.

    Step 1: Sautรฉ the aromatics. Heat olive oil in a large Dutch oven or stainless steel pot over medium heat. Add the diced onion and kosher salt. Cook for 5-7 minutes until the onion is soft and just starting to turn golden.

    Step 2: Add seasonings. Stir in the minced garlic, Italian seasoning, and red chili pepper flakes. Cook for an additional 1-2 minutes to release the flavors.

    Lightly browned onions sautรฉing in olive oil in a stainless steel pot.
    Onions, garlic, Italian seasoning, and red pepper flakes sautรฉing in olive oil in a stainless steel pot.

    Step 3: Add tomatoes. Add the canned San Marzano tomatoes to the pot. Use a wooden spoon to start breaking up the tomatoes to release their juices.

    Canned San Marzano whole peeled tomatoes added to a stainless steel skillet with cooked aromatics.

    Step 4: Simmer the sauce. Bring the sauce to a gentle simmer, then reduce the heat to low. Cover the pot with a lid and let the tomatoes simmer for 20-30 minutes or until they are tender.

    Canned San Marzano whole tomatoes in a stainless steel pot after being broken up with a wooden spoon.
    San Marzano tomato sauce simmering in a stainless steel pot.

    Step 5: Puree the sauce. Once the tomatoes are tender, you can blend the sauce using an immersion blender directly in the pot or carefully transfer the sauce to a regular blender and puree it in batches. Alternatively, use the back of a wooden spoon to crush the tomatoes for a chunkier texture.

    Step 6: Thicken the sauce (optional). If you prefer a thicker tomato sauce, heat it back up to a gentle simmer after pureeing. Cook uncovered for an additional 20 minutes or until the sauce reaches your desired thickness. Keep in mind that longer simmering will result in a thicker sauce.

    Step 7: Serve. Taste and adjust the seasoning if needed. Serve with pasta, pizza, meatballs, or as a marinara dip. Enjoy!

    Pureed San Marzano tomato sauce in a stainless steel pot.
    A spoon holding up some San Marzano tomato sauce above the pot to show its consistency.

    San Marzano Tomato Sauce (Video)

    Tips for Success

    Make this San Marzano pasta sauce successfully the first time using these easy kitchen tips.

    • Choose high-quality ingredients. Since this tomato sauce made with San Marzano tomatoes relies on just a few simple ingredients, prioritize using the highest quality options available for the best flavor.
    • Simmer gently. Boiling or simmering the sauce too vigorously can cause it to scorch on the bottom. Simmer the sauce gently to develop a richer flavor.
    • Blend to your preferred texture. Adjust the texture by pureeing until smooth with a blender or using a wooden spoon for a chunkier sauce.
    • Adjust the consistency. For recipes like San Marzano pizza sauce or chicken parmesan, opt for a slightly thicker sauce. A thinner sauce works well for dishes like meatballs or spaghetti.
    • Season to taste. Taste the sauce before serving and adjust the seasoning if needed. 
    • Have fun and get creative. Enjoy the process of making homemade tomato sauce. Don't worry if it doesnโ€™t turn out perfect the first time. And feel free to make the recipe your own!

    What to Serve with San Marzano Tomato Sauce

    This San Marzano tomato sauce can be used in a variety of classic Italian dishes. It pairs well with sourdough pasta, meatballs, and lasagna.

    It can also be used as sauce for homemade pizza. Try it with my sourdough discard pizza dough or whole wheat sourdough pizza dough recipe, or use it to make sourdough focaccia pizza.

    Finally, serve this marinara sauce as a zesty dipping sauce for bread and other appetizers. Some of my favorite foods to dip in this marinara sauce include sourdough pizza bread, sourdough focaccia, sourdough discard garlic knots, sourdough breadsticks, garlic bread, sourdough bread, sourdough pepperoni calzone, and cheesy broccoli bites.

    A white bowl filled with dutch oven meatballs in tomato sauce. The meatballs are topped with freshly grated parmesan cheese and basil.
    Dutch Oven Meatballs with Marinara Sauce

    Storage and Reheating

    How to Store

    • Refrigerator- Store leftover San Marzano tomato sauce in an airtight container in the refrigerator for 4-5 days.
    • Freezer- To freeze, allow the sauce to cool completely before transferring it to a freezer-safe container or resealable bag. Store it in the freezer for up to 6 months.

    ๐Ÿฅซ Storage Tip: Make a large batch and freeze half for later. Divide the sauce into portion-sized containers and use it to make quick and easy dinners throughout the week.

    Canning Homemade San Marzano Tomato Sauce

    Interested in canning your homemade San Marzano tomato sauce? 

    You've got two options: pressure canning or water bath canning. 

    Since San Marzano tomatoes are lower in acidity, pressure canning is recommended for safety. Follow your pressure cannerโ€™s instructions for tomato sauce canning. 

    No pressure canner? No problem. Add 1 tablespoon of lemon juice per pint to increase the acidity, then boil the jars in a water bath for 35 minutes. 

    โ€‹โ€‹Following proper canning techniques is essential to ensure the safety and longevity of your preserved sauce. Be sure to consult reliable canning resources, such as the USDA Complete Guide to Home Canning.

    This recipe yields about 3 pint-sized jars.

    How to Reheat

    If your sauce is frozen, allow it to thaw overnight in the refrigerator for best results.

    • Stovetop- Transfer leftover tomato sauce to a saucepan set over medium-low heat. Heat the sauce, stirring occasionally, until warmed through.
    • Microwave- Place leftover sauce in a microwave-safe bowl and cover it with a lid or plate to prevent splattering. Heat the sauce on half power (50%) for one minute. Stir, then continue heating in 30-second intervals until hot.
    • Oven- Preheat oven to 325ยฐF. Transfer the sauce to a baking dish and cover it with aluminum foil to prevent drying. Heat for 15-20 minutes or until the sauce is fully warmed through.

    Make Ahead

    Preparing this San Marzano tomato sauce in advance is a great time saver and something I do often. By making a batch in advance, you can save time on busy days and have a flavorful base ready for various dishes.

    Simply prepare the sauce according to the recipe and store it in the refrigerator for up to 5 days or in the freezer for up to 6 months.

    A wooden spoonful of San Marzano tomato sauce being held above a pot. The pot is filled with tomato sauce.

    Frequently Asked Questions

    Why are San Marzano tomatoes better for sauce?

    San Marzano tomatoes are better for sauce because of their thick flesh, fewer seeds, and lower acidity. These characteristics yield a sweet, rich sauce with a lower water content, making them an ideal choice for flavorful tomato sauce.

    What is the difference between San Marzano tomatoes and Roma tomatoes?

    San Marzano tomatoes and Roma tomatoes both belong to the plum tomato category, but San Marzano tomatoes are generally larger, have thinner skin, fewer seeds, and are sweeter with lower acidity.

    Can I use fresh San Marzano tomatoes instead of canned?

    Yes, you can use fresh tomato sauce with San Marzano tomatoes, but they need to be blanched and peeled first. To do this, make a small "X" on the bottom, boil them for 30 seconds, cool in ice water, peel, and use in the recipe. Note that the flavor and texture may differ slightly from using canned San Marzano tomatoes.

    Do I need to add sugar to my tomato sauce?

    No, the San Marzano tomatoes' natural sweetness usually eliminates the need for added sugar in the sauce. However, if you find the sauce too acidic, you can balance it by adding a small amount of sugar or a drizzle of honey to taste. Adjust gradually and taste as you go.

    What can I do if my sauce is too thick or too thin?

    If it's too thick, you can add a splash of water or broth to thin it. If it's too thin, simmer it uncovered for a bit longer to reduce the liquid content.

    Let's Connect!

    Be sure to leave a comment below if you have any questions. You can also connect with me on Instagram, Facebook, Pinterest, or via email at [email protected].

    More Pasta Sauce Recipes

    • A plate of linguine bolognese garnished with fresh parsley and grated parmesan cheese.
      Linguine Bolognese
    • A plate of fettuccine pasta coated with roasted garlic alfredo sauce.
      Roasted Garlic Alfredo Sauce
    • Pesto without pine nuts in a small glass bowl.
      Pesto Without Pine Nuts (Walnut Pesto)
    • A small white plate of creamy pumpkin pasta sauce on cavatappi pasta. The pasta is garnished with grated parmesan cheese, black pepper, and one whole sage leaf.
      Creamy Pumpkin Pasta Sauce

    ๐Ÿ“– Recipe

    A Dutch oven filled with San Marzano tomato sauce. To the left, there is a wooden spoon sticking out of the sauce. There are a few basil leaves placed on top of the sauce as garnish.
    Print Pin SaveSaved!

    San Marzano Tomato Sauce

    This San Marzano Tomato Sauce is made with simple, high-quality ingredients for a rich, authentic-tasting sauce that pairs well with all of your favorite Italian dishes. Quick and beginner-friendly, this easy homemade tomato sauce recipe will have you saying goodbye to the store-bought version forever.
    Course Sauces
    Cuisine Italian
    Prep Time 10 minutes minutes
    Cook Time 45 minutes minutes
    Total Time 55 minutes minutes
    Servings 6 cups
    Calories 148kcal
    Author Ashley Petrie, RDN, LDN

    Equipment

    • Stainless steel pot or enameled Dutch oven
    • Immersion blender or blender optional

    Ingredients

    • 4 tablespoons extra virgin olive oil
    • 1 large yellow onion diced
    • 1 teaspoon kosher salt
    • 4 cloves garlic minced
    • ยฝ tablespoon Italian seasoning
    • ยผ-ยฝ teaspoon red chili pepper flakes to taste
    • 2 28-ounce cans San Marzano whole peeled tomatoes

    Instructions

    • Heat olive oil in a large Dutch oven or stainless steel pot over medium heat. Add the diced onion and kosher salt. Cook for 5-7 minutes until the onion is soft and just starting to turn golden.
      4 tablespoons extra virgin olive oil, 1 large yellow onion, 1 teaspoon kosher salt
    • Stir in the minced garlic, Italian seasoning, and red chili pepper flakes. Cook for an additional 1-2 minutes to release the flavors.
      4 cloves garlic, ยฝ tablespoon Italian seasoning, ยผ-ยฝ teaspoon red chili pepper flakes
    • Add the canned San Marzano tomatoes to the pot. Use a wooden spoon to start breaking up the tomatoes to release their juices.
      2 28-ounce cans San Marzano whole peeled tomatoes
    • Bring the sauce to a gentle simmer, then reduce the heat to low. Cover the pot with a lid and let the tomatoes simmer for 20-30 minutes or until they are tender.
    • Once the tomatoes are tender, you can blend the sauce using an immersion blender directly in the pot or carefully transfer the sauce to a regular blender and puree it in batches. Alternatively, use the back of a wooden spoon to crush the tomatoes for a chunkier texture.
    • If you prefer a thicker tomato sauce, heat it back up to a gentle simmer after pureeing. Cook uncovered for an additional 20 minutes or until the sauce reaches your desired thickness. Keep in mind that longer simmering will result in a thicker sauce.
    • Taste and adjust the seasoning if needed. Serve with pasta, pizza, meatballs, or as a marinara dip. Enjoy!

    Notes

    • Adjust the consistency. For recipes like pizza or chicken parmesan, opt for a slightly thicker sauce. A thinner sauce works well for dishes like meatballs or spaghetti.
    • Storage: Store leftover tomato sauce in an airtight container in the refrigerator for up to 5 days or in the freezer for up to 6 months.

    Nutrition

    Serving: 1cup | Calories: 148kcal | Carbohydrates: 14g | Protein: 2.5g | Fat: 9g | Saturated Fat: 1g | Polyunsaturated Fat: 1g | Monounsaturated Fat: 6.5g | Sodium: 365mg | Potassium: 49mg | Fiber: 5g | Sugar: 10g | Vitamin C: 16mg | Calcium: 58mg | Iron: 3.4mg
    Did you try this recipe?Let me know! Comment below, or take a picture and tag me on Instagram @everydayhomemadebyashley.

    Creamy Pumpkin Pasta Sauce

    August 24, 2023

    This Pumpkin Pasta Sauce is rich and creamy with aromatic notes of fresh sage and garlic. Ready in just 30 minutes, this easy pumpkin pasta recipe is perfect for dinner parties and seasonal gatherings. Itโ€™s the ultimate cozy fall comfort food meal!

    A small white plate of pasta coated with creamy pumpkin pasta sauce next to a small bowl of pumpkin puree and three fresh sage leaves.

    If you're craving the ultimate fall comfort food meal, you have to give this creamy pumpkin pasta sauce recipe a try.

    It's like a delicious fall twist on classic alfredo sauce.

    Made with creamy pumpkin puree, fresh sage, and a hint of nutmeg, this cozy fall dinner is perfect for a quick weeknight meal or seasonal gathering.

    Today, Iโ€™m walking you through how to make the best pumpkin pasta sauce, including which ingredients to use, tips that will guarantee it turns out right the first time, and some of my favorite dishes to serve alongside this fall-inspired pasta recipe.

    Disclaimer: Some links throughout this post are affiliate links. As an Amazon Associate, I earn from qualifying purchases. You can learn more by visiting my Affiliate Disclosure Page.

    Why You'll Love This Recipe

    • Fall Comfort Food- Rich, creamy, and bursting with pumpkin flavor, this delicious pasta recipe is one of my favorite cozy and comforting fall meals.
    • Ready in 30 Minutes- If you prepare the pumpkin sauce while the pasta cooks, you can have this easy pasta dish ready in just about 30 minutes.
    • Family-Friendly- Kids and adults alike will love this creamy pumpkin sauce recipe for pasta.
    • Perfect for Gatherings- The beautiful orange pumpkin sauce and bright green fresh sage leaves make for a lovely presentation at a dinner party or holiday gathering.

    Ingredient Notes

    Here are some notes on key ingredients. For a full list of ingredients, check out the recipe card below.

    • Pumpkin Puree- Opt for 100% pumpkin puree or pure pumpkin instead of pumpkin pie filling, as the latter contains extra sugars and spices. Feel free to use either homemade pumpkin puree or canned pumpkin puree for this recipe.
    • Heavy Cream- The fat content of heavy cream creates the rich and creamy base of this pumpkin alfredo sauce.
    • Parmesan Cheese- Use freshly grated parmesan cheese for the best flavor and texture.
    • Butter- Unsalted butter allows for better control over the saltiness of the final dish. If using salted butter, taste for seasoning prior to adding the kosher salt.
    • Fresh Sage- Fresh sage adds a woodsy, earthy flavor to the pumpkin sauce pasta that pairs well with pumpkin puree.
    • Garlic- Freshly minced garlic adds a pungent garlic flavor to the creamy pumpkin sauce that pairs well with the pumpkin and sage.
    • Kosher Salt- I prefer to use kosher salt in my dishes because it doesn't contain added sugar or anti-caking agents like table salt often does.
    • Black Pepper- Freshly ground black pepper offers the best flavor.
    • Nutmeg- A pinch of nutmeg adds warmth and depth to the sauce.
    • Pasta- Feel free to use any type of pasta you enjoy in this recipe. Some pasta shapes that hold creamy sauces well include penne, fettuccine, and rigatoni. Homemade sourdough pasta is also delicious paired with this sauce!
    The ingredients to make pumpkin pasta sauce. Each ingredient is labeled with text. They include pepper, garlic, heavy cream, parmesan, sage, butter, pumpkin puree, pasta, nutmeg, and salt.

    Substitutions and Variations

    Substitutions

    • Pumpkin Puree- Substitute pumpkin puree for butternut squash puree or acorn squash puree for a slightly different flavor.
    • Heavy Cream- Use light cream, half-and-half, or whole milk for a lighter version of this creamy sauce.
    • Parmesan Cheese- Pecorino romano cheese or asiago cheese can be used in place of parmesan cheese to give the sauce a similar nutty, salty flavor.
    • Butter- Swap butter for olive oil or coconut oil if preferred.
    • Fresh Sage- Replace fresh sage with 2 teaspoons of dried sage leaves. Alternatively, use fresh rosemary or thyme in place of sage.
    • Garlic- One teaspoon of garlic powder can be substituted for the fresh garlic cloves in this recipe.
    • Kosher Salt- Sea salt, pink Himalayan salt, or table salt can be used in place of kosher salt.
    • Black Pepper- Use red pepper flakes in place of black pepper to make spicy pumpkin pasta sauce.
    • Nutmeg- Substitute nutmeg for a pinch of cinnamon or pumpkin pie spice.
    • Pasta- Swap pasta for ravioli, tortellini, or vegetable noodles (such as zucchini noodles).
    A plate of pasta coated with pumpkin pasta sauce and garnished with sage, parmesan cheese, and black pepper.

    Variations

    • Vegan- Swap the heavy cream for coconut cream, butter for coconut oil, and parmesan cheese for nutritional yeast.
    • Gluten-Free- Use your favorite gluten-free pasta to make a gluten-free pumpkin pasta dish.
    • Herbed- Add fresh rosemary, thyme, parsley, and basil for a bolder, more herbaceous flavor.
    • Spicy- Sautรฉ red pepper flakes with the butter and sage to give this dish a little heat.
    • Roasted Vegetables- Add roasted vegetables to this creamy pasta recipe for a more balanced meal. Try roasted brussels sprouts, kale, butternut squash, mushrooms, or caramelized onions.
    • Toasted Nuts- Mix in toasted chopped walnuts, pecans, pine nuts, or pumpkin seeds to give the dish a crunchy texture.

    How to Make Pumpkin Pasta Sauce

    Here is how to make this creamy pumpkin sauce for pasta.

    Step 1: Cook pasta. Cook the pasta to al dente as per the package instructions. Once cooked, drain it and return it to the pot you used for cooking. Set it aside.

    Cooked pasta in a stainless steel pot.

    Step 2: Sautรฉ aromatics. Melt butter in a large skillet over medium heat. Add the minced garlic and chopped sage. Cook them for 1-2 minutes until they become fragrant and start to turn slightly golden.

    Step 3: Add pumpkin puree. Lower the heat to medium-low. Gently whisk in the pumpkin puree and cook for an additional 2-3 minutes. Take care as the puree might splatter a bit when added to the warm butter.

    Minced garlic and sage sautรฉing in butter in a stainless steel skillet.
    Pumpkin puree being whisked into melted butter, garlic, and sage in a stainless steel skillet.

    Step 4: Add cream and seasonings. Gradually whisk in the heavy cream. Season with kosher salt, black pepper, and ground nutmeg.

    Step 5: Simmer and thicken. Allow the sauce to gently simmer over low heat for about 5 minutes or until it thickens slightly.

    A mixture of pumpkin puree, heavy cream, garlic, sage, and seasonings in a stainless steel skillet.

    Step 6: Whisk in parmesan cheese. Remove the skillet from the heat. Whisk in the grated parmesan cheese until it's fully melted into the sauce.

    Grated parmesan cheese on top of a creamy pumpkin alfredo sauce in a stainless steel skillet.

    Step 7: Combine pasta and sauce. Pour the creamy sauce over the cooked pasta in the pot. Stir thoroughly to ensure that all the pasta is coated evenly.

    Step 8: Garnish and serve. Serve with additional grated parmesan cheese and a sprinkle of fresh herbs if desired.

    Pumpkin pasta sauce poured over cooked pasta in a stainless steel pot before being mixed.
    Cavatappi pasta mixed with cream pumpkin sage pasta sauce in a stainless steel skillet.

    Pumpkin Pasta Sauce (Video)

    Tips for Success

    Make this easy pumpkin pasta sauce successfully the first time using these helpful kitchen tips.

    • Multitask. If you make the pumpkin pasta sauce while the pasta cooks, you can easily prepare this recipe in just about 30 minutes. How's that for a quick and easy weeknight dinner?
    • Control the heat. Keep the heat on the lower side to prevent the garlic and sage from burning, the pumpkin from splattering, and the sauce from breaking. Gentle heat works best for this recipe.
    • Adjust the consistency. If the sauce becomes too thick, add a splash of cream, milk, or reserved pasta water to achieve your desired consistency. A thin sauce can be thickened by adding an additional tablespoon or two of pumpkin puree or grated parmesan cheese.
    • Season to taste. Taste the sauce before mixing it with the pasta to ensure it's seasoned the way you like it.
    • Serve immediately. Creamy sauces, like this pumpkin sage alfredo sauce, are best served as soon as they're finished cooking.

    What to Serve with Pumpkin Pasta Sauce

    This pumpkin pasta sauce recipe pairs well with a variety of dishes and can be served both as a main dish and as a side dish.

    If you're craving a comforting meal, serve this pasta in pumpkin sauce alongside homemade bread or garlic bread. Buttery garlic herb breadsticks, cheesy sourdough garlic bread, or a slice of rustic sourdough bread pair perfectly with this dish.

    For something a little lighter, serve this pumpkin alfredo with a fresh salad or vegetable side dish. Some of my favorites include spinach caprese salad, arugula quinoa harvest salad, roasted balsamic brussels sprouts, buttery garlic green beans, and sautรฉed butternut squash.

    Finally, add some protein to your meal by pairing this pasta dish with whole roasted chicken, braised turkey breast, or braised beef with mushrooms.

    A small dish of cavatappi pasta coated in creamy pumpkin pasta sauce.

    Storage and Reheating

    How to Store

    • Refrigerator- Store leftover pumpkin pasta sauce in an airtight container in the refrigerator for 3-4 days.
    • Freezer- Freeze leftover homemade pumpkin pasta in a freezer-safe container for up to 3 months. Note that freezing this dish may change the consistency of the sauce once reheated.

    How to Reheat

    • Stovetop- Transfer leftover pasta with pumpkin sauce to a saucepan and set it over medium-low heat. Add a splash of heavy cream, chicken stock, or water to help loosen the pasta and prevent sticking. Heat, stirring frequently, until warmed through.
    • Microwave- Place leftover pumpkin pasta in a microwave-safe bowl and cover with a lid or damp paper towel. Add a splash of liquid if the sauce seems too thick. Heat on HIGH for 1 minute. Stir and continue heating in 30-second intervals until hot.

    Make Ahead

    Planning a dinner party or trying to get ahead on meal prep? Luckily, this pumpkin alfredo sauce is make ahead friendly!

    • Pumpkin Puree- If you're planning to use homemade pumpkin puree in this recipe, you can easily prepare it in advance. Then, store it in an airtight container for up to 4 days in the refrigerator.
    • Creamy Pumpkin Pasta Sauce- Conveniently, the pumpkin sauce recipe can be made up to 3 days ahead of time and stored in the refrigerator. Keep it separate from the pasta and reheat it on the stovetop just before serving.
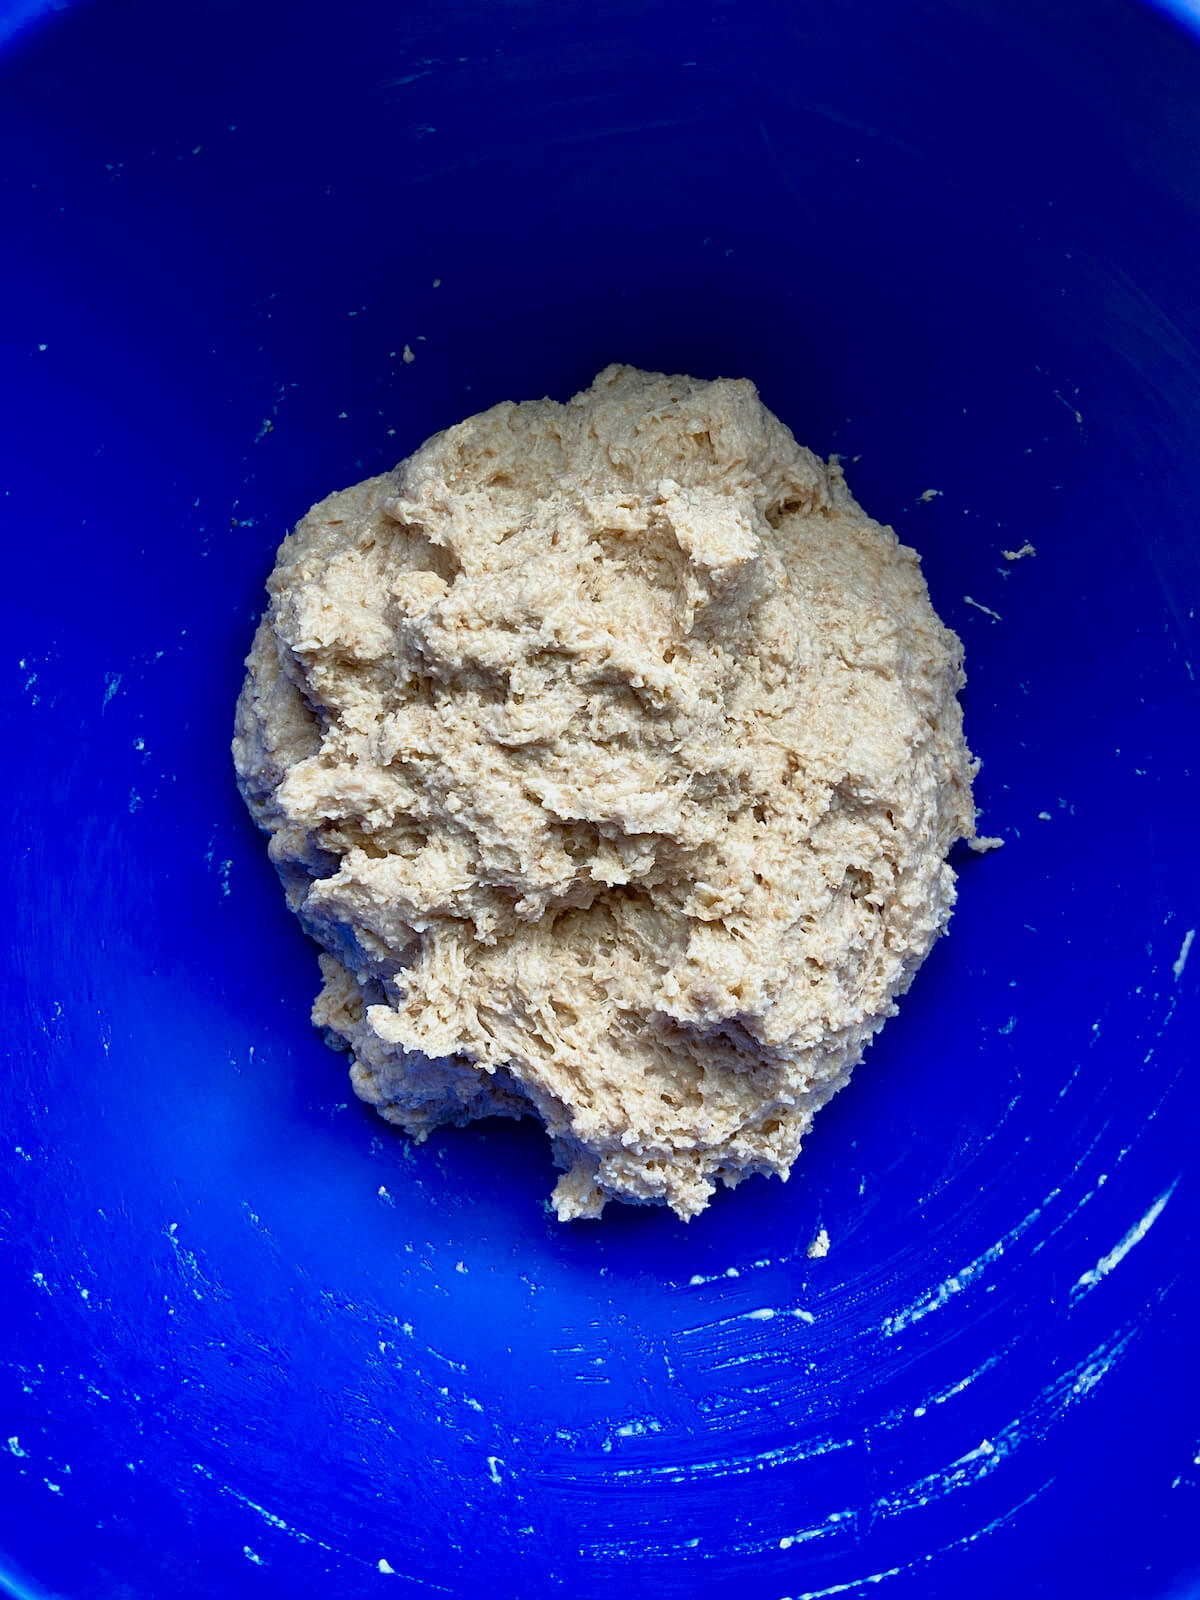
    • Pasta- If you don't feel like dealing with cooking pasta on the day you make this recipe, make it in advance! Cooked pasta will last 3-4 days in the refrigerator.
    A plate of pumpkin pasta sauce on cavatappi pasta next to a small bowl of pumpkin puree, sage leaves, and a fork.

    How to Use Up Leftover Pumpkin Puree

    Have extra pumpkin puree that you don't want to go to waste? Give some of my other favorite pumpkin recipes a try!

    • A bowl of pumpkin white bean chili topped with sour cream and cilantro.
      Turkey Pumpkin White Bean Chili
    • A roasted pumpkin bowl filled with pumpkin soup. The pumpkin bowl is sitting on a small white plate and the soup is topped with roasted pumpkin seeds.
      Roasted Pumpkin Soup (Without Cream)
    • Several sourdough pumpkin muffins laying across a wooden countertop next to a small bowl of pumpkin puree. One of the muffins is split in half down the middle on the left side.
      Sourdough Pumpkin Muffins

    Frequently Asked Questions

    Can I use pumpkin pie filling instead of pumpkin puree?

    It's best to avoid using canned pumpkin pie filling for this recipe. Pumpkin pie filling contains added sugars and spices that might alter the flavor and sweetness of the dish.

    How can I prevent the sauce from separating?

    To prevent breaking the sauce, make sure to simmer it gently over low heat and avoid boiling it vigorously. Also, remove the skillet from heat before adding the grated parmesan cheese.

    How can I make the sauce taste less bland?

    If the dish tastes too bland, adjust the seasonings gradually. Add a small amount of additional kosher salt, black pepper, and fresh sage, tasting as you go.

    How do I adjust the consistency of the sauce?

    If the sauce is too thick, add a bit of cream or milk. For a thinner sauce, use more pumpkin puree or grated Parmesan cheese.

    Let's Connect!

    Be sure to leave a comment below if you have any questions. You can also connect with me on Instagram, Facebook, Pinterest, or via email at [email protected].

    More Pasta Recipes

    • A plate of fettuccine pasta coated with roasted garlic alfredo sauce.
      Roasted Garlic Alfredo Sauce
    • A large white dinner plate with a pile of Cajun alfredo pasta with a piece of blackened salmon on top.
      Creamy Blackened Salmon Pasta
    • A plate of linguine bolognese garnished with fresh parsley and grated parmesan cheese.
      Linguine Bolognese
    • Three nests of homemade sourdough pasta noodles on a flour-dusted baking sheet.
      How to Make Sourdough Pasta

    ๐Ÿ“– Recipe

    A small white plate of creamy pumpkin pasta sauce on cavatappi pasta. The pasta is garnished with grated parmesan cheese, black pepper, and one whole sage leaf.
    Print Pin SaveSaved!

    Pumpkin Pasta Sauce

    This Pumpkin Pasta Sauce is rich and creamy with aromatic notes of fresh sage and garlic. Ready in just 30 minutes, this easy pumpkin pasta recipe is perfect for dinner parties and seasonal gatherings. Itโ€™s the ultimate cozy fall comfort food meal!
    Course Main Course, Pasta
    Cuisine American, Italian
    Prep Time 10 minutes minutes
    Cook Time 20 minutes minutes
    Total Time 30 minutes minutes
    Servings 8 servings
    Calories 395kcal
    Author Ashley Petrie, RDN, LDN

    Equipment

    • Large stockpot
    • Colander
    • Large skillet

    Ingredients

    • 1 pound pasta of choice dry
    • 4 tablespoons unsalted butter
    • 4 cloves garlic minced
    • 2 tablespoons fresh sage chopped
    • 1 cup pumpkin puree
    • 2 cups heavy cream
    • 1 teaspoon kosher salt
    • ยฝ teaspoon black pepper
    • โ…› teaspoon ground nutmeg
    • ยฝ cup grated parmesan cheese plus more for serving
    • Fresh herbs for serving (optional)

    Instructions

    • Cook the pasta to al dente as per the package instructions. Once cooked, drain it and return it to the pot you used for cooking. Set it aside.
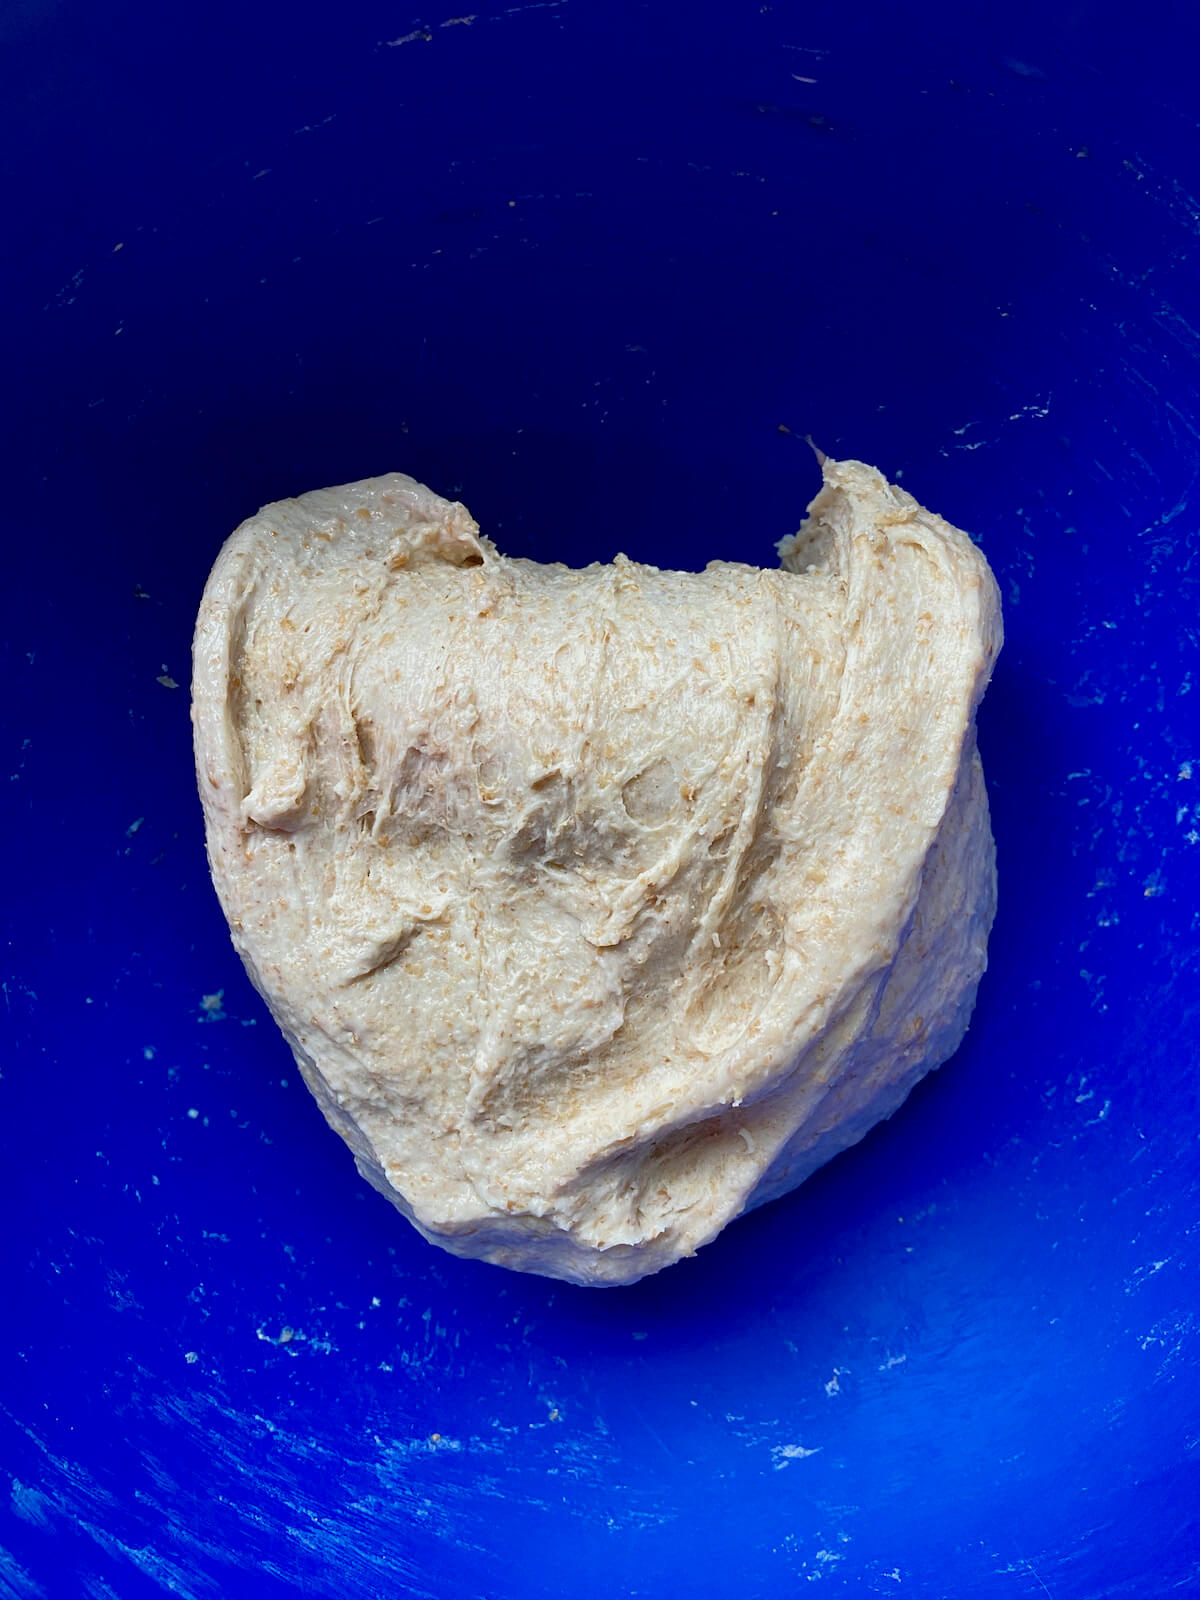
      1 pound pasta of choice
    • Melt butter in a large skillet over medium heat. Add the minced garlic and chopped sage. Cook them for 1-2 minutes until they become fragrant and start to turn slightly golden.
      4 tablespoons unsalted butter, 4 cloves garlic, 2 tablespoons fresh sage
    • Lower the heat to medium-low. Gently whisk in the pumpkin puree and cook for an additional 2-3 minutes. Take care as the puree might splatter a bit when added to the warm butter.
      1 cup pumpkin puree
    • Gradually whisk in the heavy cream. Season with kosher salt, black pepper, and ground nutmeg.
      2 cups heavy cream, 1 teaspoon kosher salt, ยฝ teaspoon black pepper, โ…› teaspoon ground nutmeg
    • Allow the sauce to gently simmer over low heat for about 5 minutes or until it thickens slightly.
    • Remove the skillet from the heat. Whisk in the grated parmesan cheese until it's fully melted into the sauce.
      ยฝ cup grated parmesan cheese
    • Pour the creamy sauce over the cooked pasta in the pot. Stir thoroughly to ensure that all the pasta is coated evenly.
    • Serve with additional grated parmesan cheese and a sprinkle of fresh herbs if desired.
      ยฝ cup grated parmesan cheese, Fresh herbs

    Notes

    • Quick Tips:ย 
      • Multitask. For faster preparation, make the sauce while the pasta cooks.
      • Adjust the consistency. If the sauce becomes too thick, add a splash of cream, milk, or reserved pasta water to achieve your desired consistency. A thin sauce can be thickened by adding an additional tablespoon or two of pumpkin puree or grated parmesan cheese.
        Season to taste. Taste the sauce before mixing it with the pasta to ensure it's seasoned the way you like it.
    • Storage: Store leftovers in an airtight container in the refrigerator for up to 4 days or in the freezer for up to 3 months.
    • Make Ahead: Prepare the sauce and pasta in advance and store them in separate airtight containers in the refrigerator for up to 3 days.

    Nutrition

    Serving: 1serving | Calories: 395kcal | Carbohydrates: 45g | Protein: 11g | Fat: 19g | Saturated Fat: 11g | Polyunsaturated Fat: 1g | Monounsaturated Fat: 5g | Trans Fat: 1g | Cholesterol: 54mg | Sodium: 264mg | Potassium: 278mg | Fiber: 3g | Sugar: 4g | Vitamin C: 2.5mg | Calcium: 100mg | Iron: 2.1mg
    Did you try this recipe?Let me know! Comment below, or take a picture and tag me on Instagram @everydayhomemadebyashley.

    Sourdough Pumpkin Muffins

    August 23, 2023

    These Sourdough Pumpkin Muffins combine pumpkin puree, warm spices, and tangy sourdough discard for the perfect fall breakfast treat. Ready the same day, this easy sourdough muffin recipe is a delicious way to use up your extra sourdough starter.

    Several sourdough pumpkin muffins laying across a wooden countertop next to a small bowl of pumpkin puree. One of the muffins is split in half down the middle on the left side.

    Recipe Updated: August 7, 2024. I re-tested and revised this recipe to improve its texture and structure, replacing the canola oil with melted butter, adding baking powder, and reducing the amount of pumpkin puree.

    With fall approaching in Massachusetts, pumpkin recipes are a must. And these sourdough pumpkin muffins are one of my favorites for a crisp fall morning.
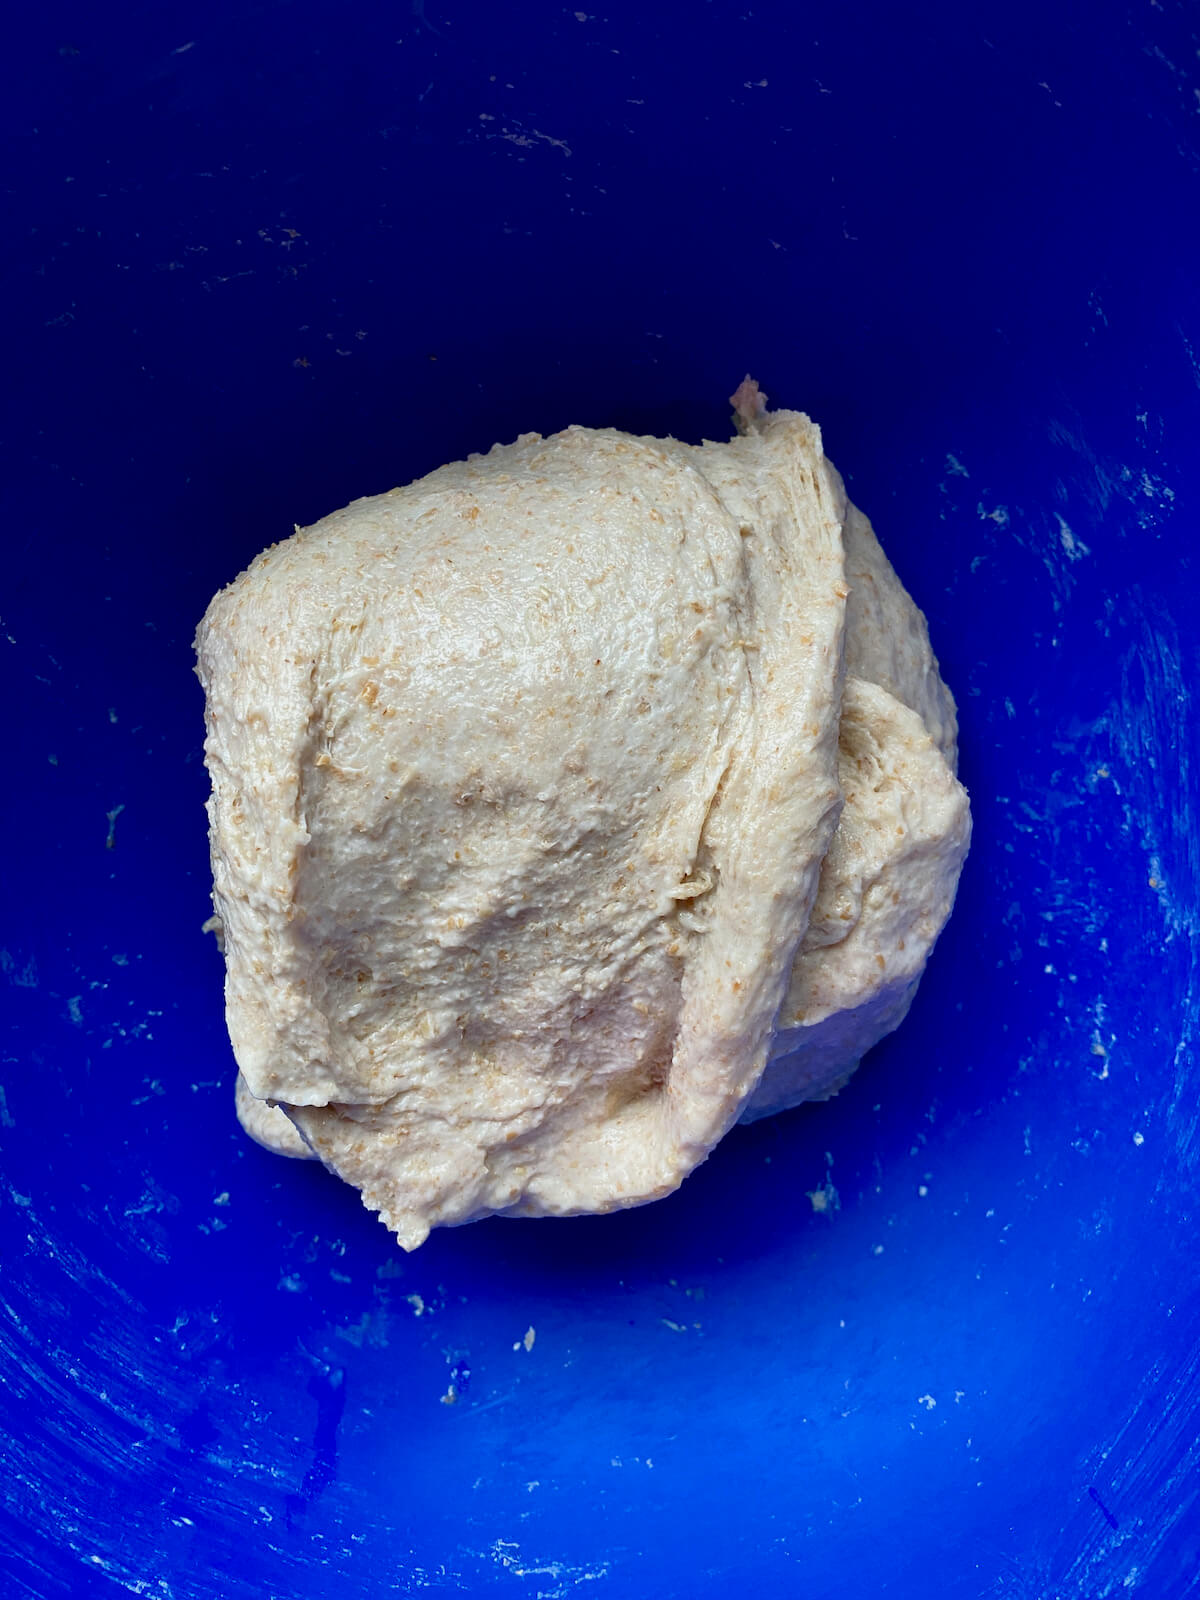
    They're soft, moist, and chock full of cozy, warm spices and pumpkin puree. Plus, they're made with excess sourdough discard so you'll never have to worry about wasting it again.

    So, if you're looking for an easy sourdough discard recipe to make this fall, give these pumpkin muffins a try. They're perfect paired with a warm cup of coffee or tea.

    I hope you enjoy them as much as I do!

    Disclaimer: Some links throughout this post are affiliate links. As an Amazon Associate, I earn from qualifying purchases. You can learn more by visiting my Affiliate Disclosure Page.

    Ingredients & Substitutions

    Here are some notes on key ingredients. For a full list of ingredients, check out the recipe card below.

    • Sourdough Discard- Sourdough discard adds moisture and a subtle tangy flavor to these pumpkin muffins. This easy recipe is also a great way to use up extra sourdough starter discard.
    • Pumpkin Puree- Use homemade or canned pumpkin puree without added sweeteners or spices.
    • Pumpkin Pie Spice- Pumpkin pie spice is typically a blend of cinnamon, ginger, nutmeg, cloves, and allspice. You can use a store-bought blend or make your own by combining individual spices.
    • All-Purpose Flour- Weigh the flour accurately to ensure the pumpkin muffins don't turn out dry or dense.
    • Granulated and Brown Sugar โ€“ I use a little less sugar in this sourdough pumpkin muffin recipe for a lightly sweetened flavor.
    • Butter- Butter gives these pumpkin muffins a rich flavor that complements the warm spices and pumpkin puree.
    • Kosher Salt- Use fine kosher salt, kosher salt flakes, or table salt. Coarse kosher salt doesn't dissolve well in the batter before baking.
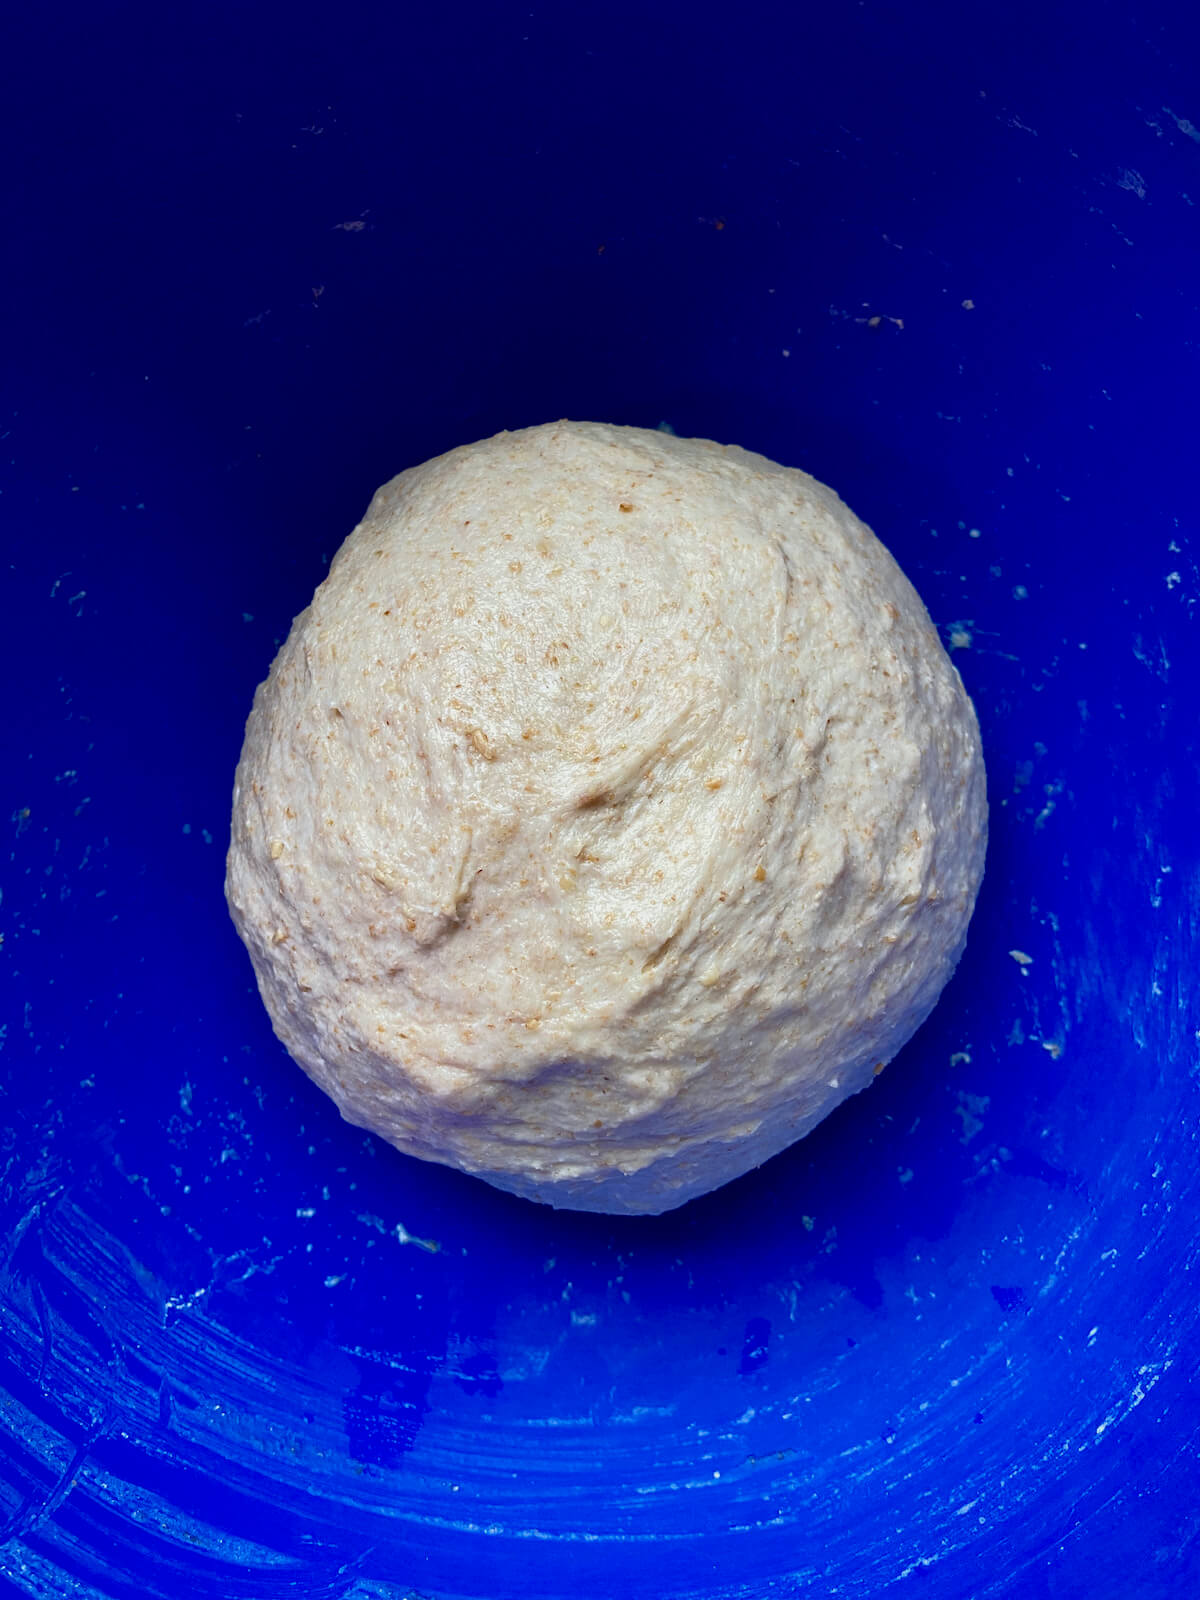
    The ingredients to make sourdough pumpkin bread. Each ingredient is labeled with text. They include all-purpose flour, brown sugar, granulated sugar, sourdough discard, salt, butter, pumpkin puree, egg, baking soda, baking powder, spices, and vanilla.
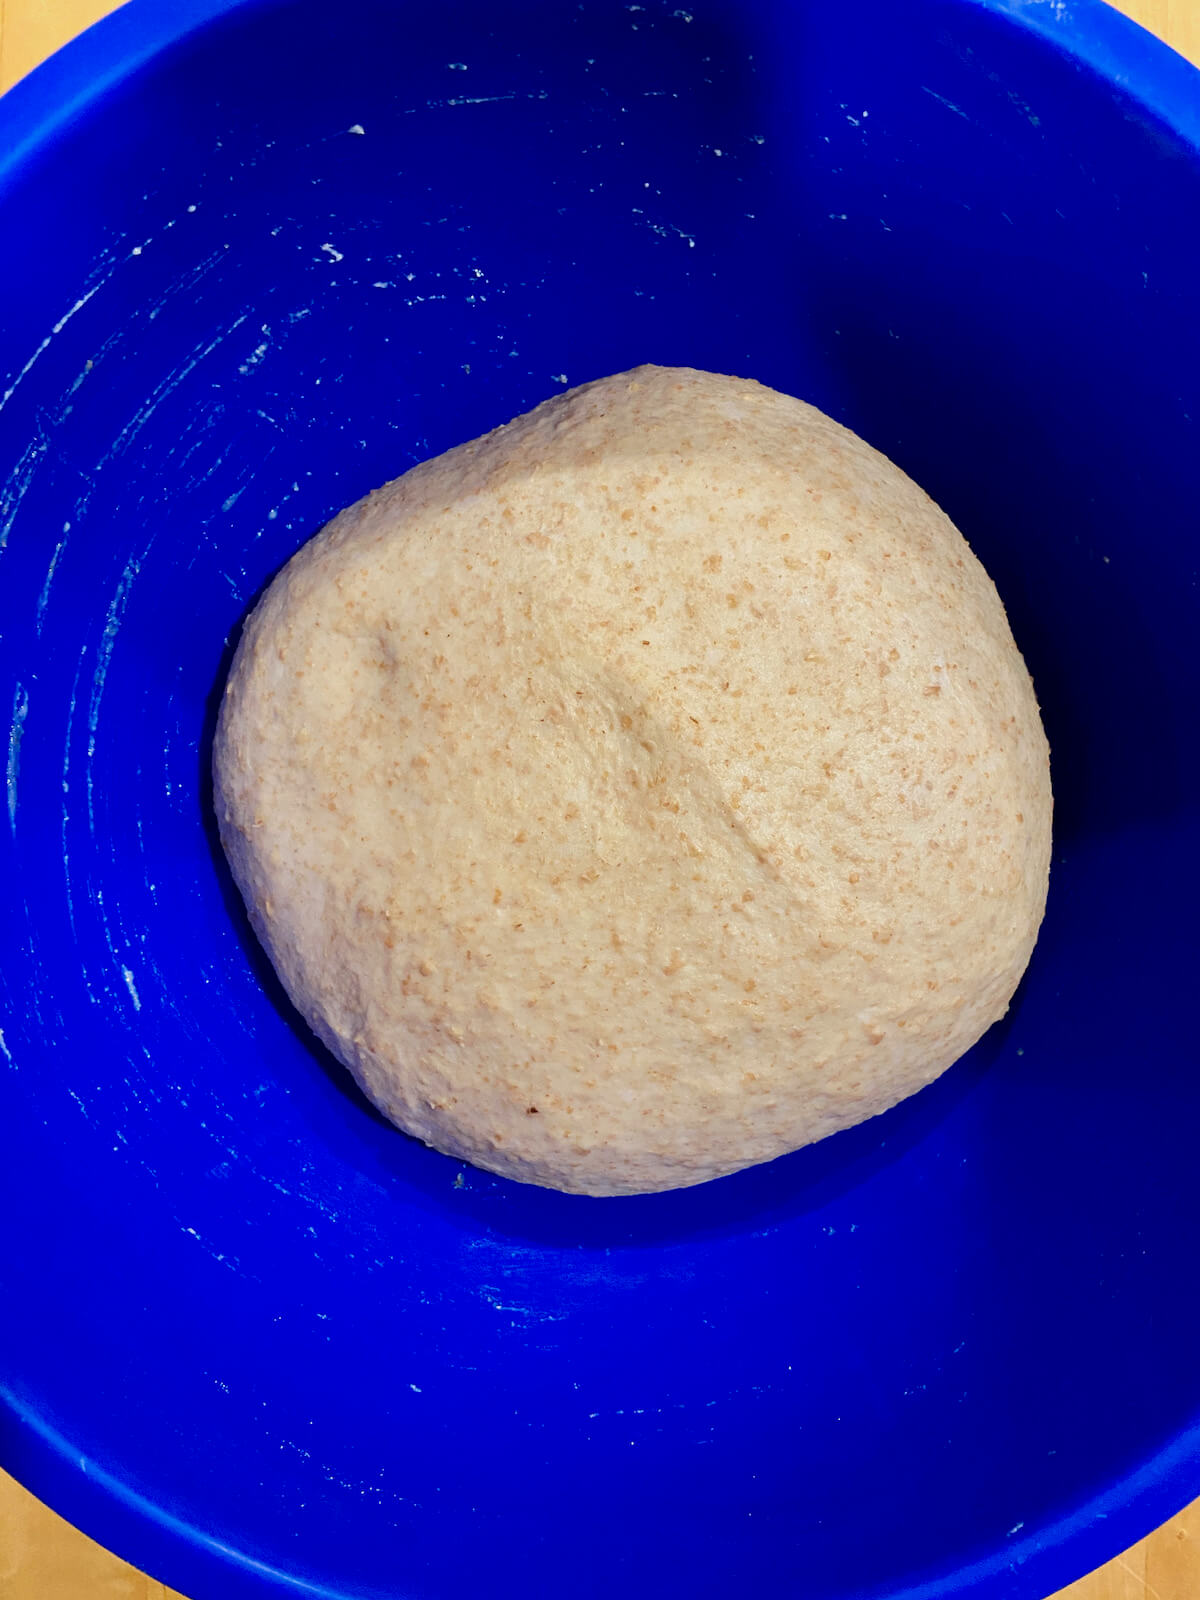
    Tips for Success

    • Weigh flour accurately. Too much flour can lead to dry, bland muffins. Use a food scale to weigh your flour or spoon it gently into a measuring cup and level it off.
    • Don't over-mix. To avoid muffins with a tough texture, fold the dry and wet ingredients together until just combined.
    • Allow the muffins to cool properly. Cool the muffins in the pan for a few minutes before transferring them to a wire rack.
    • Add mix-ins. Add up to one cup of chocolate chips, walnuts, dried cranberries, pumpkin seeds, sunflower seeds, or any other mix-ins you enjoy.

    How to Make Sourdough Pumpkin Muffins

    Here is how to make pumpkin muffins with sourdough discard.

    Step 1: Preheat oven. Preheat oven to 400โ„‰. Line a standard 12-cup muffin pan with parchment paper liners or lightly grease with butter or oil.

    Step 2: Whisk dry ingredients. In a small bowl, combine the flour, pumpkin pie spice, baking powder, baking soda, and kosher salt. Set aside.

    The dry ingredients in a small glass bowl.

    Step 3: Combine wet ingredients. In a large mixing bowl, whisk together the melted butter and sugars until smooth and shiny. Add the egg and whisk vigorously until light and fluffy. Then, add the pumpkin puree, sourdough discard, and vanilla extract, and whisk until everything is well combined.

    The wet ingredients in a glass mixing bowl with a wire whisk.

    Step 4: Mix batter. Add the dry ingredients to the wet ingredients. Use a rubber spatula to gently fold the mixture together until just combined, being careful not to over-mix.

    The sourdough discard pumpkin bread batter.

    Step 5: Bake muffins. Divide the batter equally among the 12 muffin tin wells. Bake in the preheated oven for 15 minutes, or until a toothpick inserted into the center of a muffin comes out clean.

    Step 6: Cool and enjoy. Allow the muffins to cool in the pan for 5 minutes. Then, transfer them to a wire rack to cool completely. Enjoy!

    Six muffin pan wells filled with sourdough pumpkin muffin batter.
    Six baked sourdough pumpkin muffins in a muffin tin.

    ๐ŸŽƒ Want to make quick bread instead? Pour the batter into a standard-sized 9"x 13" loaf pan and bake at 350โ„‰ for 50-60 minutes.

    How to Store

    Store sourdough discard pumpkin muffins in an airtight container at room temperature for 3-4 days.

    For longer storage, transfer the muffins to a freezer-safe container and freeze for up to 3 months. Thaw the muffins at room temperature or reheat in the oven before serving.
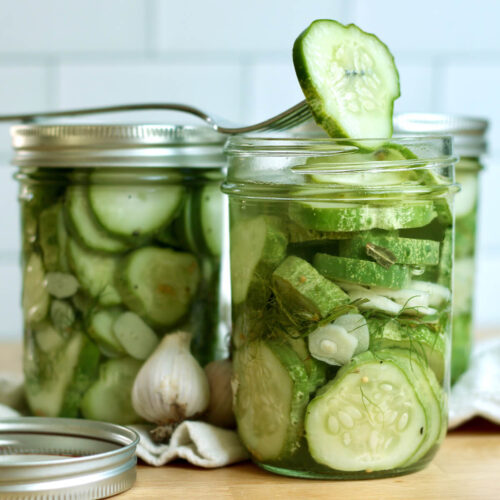
    Three sourdough pumpkin muffins stacked on top of each other. There are a few more pumpkin muffins scattered around in the foreground and background.

    Let's Connect!

    Be sure to leave a comment below if you have any questions. You can also connect with me on Instagram, Facebook, Pinterest, or via email at [email protected].

    More Sourdough Muffin Recipes

    • Five sourdough apple muffins on a piece of parchment paper on a wooden counter.
      Sourdough Apple Muffins
    • A stack of three sourdough carrot muffins with three other muffins in the background.
      Sourdough Carrot Muffins (Sourdough Carrot Cake Muffins)
    • A sourdough blueberry muffin split in half on a muffin liner. There are several more whole muffins out of focus in the background.
      Sourdough Blueberry Muffins with Streusel Topping
    • Three sourdough cranberry orange muffins on a piece of crinkled parchment paper.
      Sourdough Cranberry Orange Muffins

    ๐Ÿ“– Recipe

    Several sourdough pumpkin muffins laying across a wooden countertop next to a small bowl of pumpkin puree. One of the muffins is split in half down the middle on the left side.
    Print Pin SaveSaved!

    Sourdough Pumpkin Muffins

    These Sourdough Pumpkin Muffins combine pumpkin puree, warm spices, and tangy sourdough discard for the perfect fall breakfast treat. Ready the same day, this easy sourdough muffin recipe is a delicious way to use up your extra sourdough starter.
    Course Breakfast, Snack
    Cuisine American
    Prep Time 20 minutes minutes
    Cook Time 15 minutes minutes
    Total Time 35 minutes minutes
    Servings 12 muffins
    Calories 194kcal
    Author Ashley Petrie, RDN, LDN

    Equipment

    • Standard 12-cup muffin tin
    • Paper liners optional
    • Kitchen scale optional

    Ingredients

    • 1 ยผ cups (150 grams) all-purpose flour
    • 1 tablespoon pumpkin pie spice
    • 1 teaspoon baking powder
    • 1 teaspoon baking soda
    • ยฝ teaspoon kosher salt
    • ยฝ cup (113 grams or 1 stick) unsalted butter melted
    • ยฝ cup (100 grams) granulated sugar
    • ยผ cup (50 grams) brown sugar
    • 1 large (50 grams) egg
    • 1 cup (240 grams) pumpkin puree
    • ยฝ cup (100 grams) sourdough starter discard
    • 1 teaspoon vanilla extract

    Instructions

    • Preheat oven to 400โ„‰. Line a standard 12-cup muffin pan with parchment paper liners or lightly grease with butter or oil.
    • In a small bowl, combine the flour, pumpkin pie spice, baking powder, baking soda, and kosher salt. Set aside.
      1 ยผ cups (150 grams) all-purpose flour, 1 tablespoon pumpkin pie spice, 1 teaspoon baking soda, ยฝ teaspoon kosher salt, 1 teaspoon baking powder
    • In a large mixing bowl, whisk together the melted butter and sugars until smooth and shiny. Add the egg and whisk vigorously until light and fluffy. Then, add the pumpkin puree, sourdough discard, and vanilla extract, and whisk until everything is well combined.
      ยฝ cup (100 grams) granulated sugar, ยผ cup (50 grams) brown sugar, 1 large (50 grams) egg, 1 cup (240 grams) pumpkin puree, ยฝ cup (100 grams) sourdough starter discard, 1 teaspoon vanilla extract, ยฝ cup (113 grams or 1 stick) unsalted butter
    • Add the dry ingredients to the wet ingredients. Use a rubber spatula to gently fold the mixture together until just combined, being careful not to over-mix.
    • Divide the batter equally among the 12 muffin tin wells. Bake in the preheated oven for 15 minutes, or until a toothpick inserted into the center of a muffin comes out clean.
    • Allow the muffins to cool in the pan for 5 minutes. Then, transfer them to a wire rack to cool completely. Enjoy!

    Video

    Notes

    • How to Make Quick Bread Instead: Pour the batter into a standard 9"x 13" loaf pan. Bake at 350โ„‰ for 50-60 minutes.
    • Storage: Store pumpkin muffins in an airtight container at room temperature for up to 4 days or freeze for up to 3 months.

    Nutrition

    Serving: 1muffin | Calories: 194kcal | Carbohydrates: 27.5g | Protein: 2.5g | Fat: 8.5g | Saturated Fat: 5g | Polyunsaturated Fat: 0.5g | Monounsaturated Fat: 2.5g | Trans Fat: 0.5g | Cholesterol: 36mg | Sodium: 202mg | Potassium: 103mg | Fiber: 1.5g | Sugar: 13.5g | Calcium: 43.5mg | Iron: 0.8mg
    Did you try this recipe?Let me know! Comment below, or take a picture and tag me on Instagram @everydayhomemadebyashley.

    Roasted Dry Brined Chicken (Lemon-Garlic Roasted Chicken)

    August 16, 2023

    This Dry Brined Chicken is the most tender, juicy, and flavorful whole roasted chicken youโ€™ll ever try. Brined for 24 hours in a lemon-garlic salt rub, this easy chicken recipe will change your roast chicken game forever.

    Slices of lemon garlic roasted chicken breast with skin on next to mashed potatoes.

    If youโ€™ve never tried dry brining chicken before, youโ€™re not alone. Itโ€™s a technique that isnโ€™t often used by home cooks, but it absolutely should be!

    Itโ€™s no secret that roasted chicken can be hard to get just right. If your chicken often comes out dry, bland, and boring, give dry brining a try.

    Dry brining is my secret to making the juiciest, most flavorful roasted chicken every single time. And the best part? This easy technique only takes 10 minutes of preparation.

    In this recipe, we brine the chicken for 24 hours, then roast it low and slow. The result is perfectly cooked, moist chicken meat and crispy chicken skin. 

    Today, Iโ€™m walking you through how to make the best dry brined chicken, including which ingredients to use, tips that will guarantee your chicken turns out right the first time, and some of my favorite side dishes to serve with this easy roasted chicken recipe.

    Disclaimer: Some links throughout this post are affiliate links. As an Amazon Associate, I earn from qualifying purchases. You can learn more by visiting my Affiliate Disclosure Page.

    What is a Dry Brine?

    Dry brining is the process of thoroughly salting meat with a salt rub for several hours, up to several days, before cooking. The most basic dry brine recipe for chicken consists of just kosher salt, but you can also add other ingredients for more flavor.

    While dry brining is similar to wet brining, a technique in which you soak the meat in a liquid salt solution, I prefer to dry brine chicken for ease and convenience.

    Why Dry Brine Chicken?

    Brining helps with two very important things: flavor and moisture.

    • Flavor- When you brine chicken, the salt on the meat's surface draws water out. Then, as the salt dissolves, both the water and the salt are drawn back into the meat. The result is a deeply flavorful, well-seasoned bird.
    • Moisture- As the salt is drawn into the meat, it also breaks down protein in the muscle fibers. Doing so allows the muscle fibers to hold onto more water as they cook, leading to juicy, tender chicken.

    Is a Dry Brine or a Wet Brine Better?

    While opinions may differ on which brining method is better, I find that dry brining has several benefits. 

    Firstly, dry brining leads to better browning as the skin isn't soaked in a salt solution. The meat also retains more flavor because it isn't waterlogged. Finally, dry brining is more convenient because it takes up less space in the refrigerator.

    Why You'll Love This Recipe

    • Flavorful- The lemon garlic seasoning penetrates all the way through the meat for the most flavorful chicken ever.
    • Tender & Juicy- Dry brining helps the chicken retain its natural juices, resulting in moist and tender meat.
    • Crispy Skin- Air drying the chicken in the refrigerator allows the skin to dry out, resulting in crispy and golden brown skin when roasted. 
    • Easy to Make- With just a few minutes of prep and a few simple ingredients, you can easily make the best roasted chicken youโ€™ll ever taste.
    • No Special Equipment- Just a roasting pan and some butcherโ€™s twine are all you need to make this easy dry brined chicken.
    • Great for Meal Prep- Leftover roasted chicken can be used for various meals throughout the week, such as sandwiches, salads, or pasta dishes.
    • Flexibility- The convenience of being able to brine the chicken up to 72 hours in advance gives you the freedom to cook dinner according to your schedule.

    Ingredient Notes

    Here are some notes on key ingredients. For a full list of ingredients, check out the recipe card below.

    • Whole Chicken- Choose a fresh, high-quality whole chicken that weighs about 4 to 5 pounds.
    • Kosher Salt- In general, you'll need about 1-2 tablespoons of kosher salt for every 5 pounds of chicken.
    • Lemon Zest- Lemon zest adds a bright, citrusy flavor to the dry brine. Be sure to avoid the bitter white pith when zesting the lemon.
    • Garlic- Grating the garlic cloves helps distribute the garlic flavor more evenly in the salt brine.
    • Black Pepper- Use freshly ground black pepper for the best flavor.
    • Lemon & Garlic- Save the zested lemon and a few garlic cloves for stuffing inside the cavity of the chicken before roasting. Stuffing the chicken with aromatics adds flavor and moisture.

    ๐ŸŒฑ Sustainability Tip: Opt for an organic, free-range, or locally-sourced whole chicken to support sustainable farming practices and reduce environmental impact.

    The ingredients to make a lemon-garlic dry brined chicken. Each ingredient is labeled with text. They include kosher salt, whole chicken, garlic, lemon, and black pepper.

    Substitutions and Variations

    Here are a few ways you can try customizing this dry brined roasted chicken recipe to fit your diet and taste preferences.

    Substitutions

    • Whole Chicken- Substitute chicken parts, like split chicken breasts, bone-in chicken thighs, or chicken drumsticks, for whole chicken if preferred. Adjust the cook time accordingly.
    • Kosher Salt- Swap kosher salt for coarse sea salt or pink Himalayan salt. If your only option is table salt, reduce the amount to one tablespoon.
    • Lemon Zest- Use orange zest or lime zest in place of lemon zest.
    • Garlic- Replace freshly grated garlic with ยฝ teaspoon of garlic powder.
    • Black Pepper- Omit the black pepper or use red pepper flakes for a spicy kick.
    • Lemon & Garlic- Fresh herbs, onions, and apples can be substituted for lemon and garlic when stuffing the chicken.
    Sliced roasted dry brined chicken meat on a dinner plate with green beans and mashed potatoes.

    Variations

    • Herbed- Add fresh herbs like rosemary, thyme, or sage to the dry brine mixture for an aromatic twist.
    • Spices- Get creative by adding your favorite spices to the dry brine. Try chili powder, cumin, smoked paprika, or cayenne pepper for a warm, smoky flavor.
    • Cranberry-Orange- Swap the lemon zest for orange zest and add chopped fresh cranberries to the brine for a seasonal flavor that is perfect for the holidays.
    • Mediterranean- Use Mediterranean herbs like oregano, basil, and thyme in the dry brine.
    • Curry- Create a curry-inspired dry brine with spices like cumin, coriander, turmeric, curry powder, and garam masala.

    Equipment Notes

    Here are some notes on any special equipment I used to make this recipe.

    • Roasting Pan with Rack- A roasting rack elevates the chicken, allowing heat to circulate for even cooking and crispier skin. If you don't have a roasting rack, you can improvise with a wire rack placed on a baking sheet.
    • Butcherโ€™s Twine- Trussing the chicken with twine helps the bird cook more evenly.
    • Meat Thermometer- A meat thermometer ensures your chicken is perfectly cooked to 165ยฐ. Insert the thermometer away from the bone to get an accurate reading.
    • Cutting Board & Carving Knife- A sturdy cutting board and sharp knife make the carving process easier and safer.

    How to Dry Brine Chicken

    Here is how to dry brine and roast a whole chicken.

    Step 1: Mix the dry brine. In a small bowl, combine the kosher salt, black pepper, lemon zest, and grated garlic. Save the lemon and a few garlic cloves to stuff the chicken with before roasting.

    The brine ingredients mixed together in a small glass bowl.

    Step 2: Prepare the chicken. Prepare the chicken by removing any giblets and neck pieces that may be located inside the cavity. Pat the chicken dry inside and out and place it onto a roasting rack. If you don't have a roasting pan with a rack, you can use a baking sheet with a wire rack on it or create "foil balls" to lift the chicken off an oven-safe pan.

    A whole chicken in a roasting pan.

    Step 3: Dry brine the chicken. Rub the lemon-garlic salt mixture all over the chicken, including inside the cavity. Place the chicken, uncovered, in the refrigerator to brine for 24-72 hours. Leaving it uncovered helps the skin dry out so it crisps up beautifully in the oven.

    A raw whole chicken covered in lemon-garlic dry brine in a prepared oven-safe pan.

    Step 4. Prepare chicken for roasting. Preheat the oven to 375ยฐF. Take the chicken out of the fridge about 20 minutes before you're ready to roast to bring it closer to room temperature. Put a quartered lemon and a couple of crushed garlic cloves inside the chicken. To keep everything neat, tie the chicken's legs together with butcherโ€™s twine.

    A raw chicken in a roasting pan after brining for 24 hours.

    Step 5. Roast the chicken. Place the chicken in the preheated oven and roast for 1-ยฝ to 2 hours or until a meat thermometer inserted into the thickest part of the thigh reads 165ยฐF. Remove the chicken from the oven and tent it with foil. Let it rest for 15-20 minutes before carving to allow the juices to settle in the meat.

    A roasted dry brined chicken in a roasting pan.

    Step 6: Carve and serve. โ€‹โ€‹Use a sharp knife or kitchen shears to carefully separate the chicken into serving pieces. Start by removing the legs, then the wings, and finally, slice the breast meat. Arrange the chicken pieces on a platter and serve with your favorite side dishes.

    Tips for Success

    • Start with a fresh or thawed chicken. While you can brine frozen chicken, the brine will penetrate better if the chicken is fresh or thawed.
    • Pat the chicken dry. Before applying the dry brine, make sure to pat the chicken dry with paper towels. This helps the seasonings adhere better to the surface and promotes crispy skin during roasting.
    • Season the whole chicken. When applying the dry brine, ensure even coverage by rubbing the mixture thoroughly over the entire chicken, including the inside cavity. 
    • Use kosher salt. The bigger crystals make the brining process more gentle and effective, which means youโ€™re less likely to end up with an overly salty chicken.
    • Donโ€™t rinse off the salt. There is no need to rinse the salt brine off before roasting. The chicken will soak up the right amount of seasoning, and the rest stays on the skin to make it tasty and crispy.
    • Use a meat thermometer. To be sure your chicken reaches a perfect 165ยฐF, use a meat thermometer. It's the best way to make sure your chicken is tender and juicy every single time.
    • Rest before carving. After roasting, give the chicken a chance to rest for 15-20 minutes before carving. This allows the juices to redistribute, resulting in moister meat when served.

    What to Serve With Dry Brined Chicken

    It really doesnโ€™t get more versatile than a whole roasted chicken. From vegetables and salads to potatoes and pasta dishes, there are many side dishes that pair well with this lemon-garlic roasted chicken.

    For a healthy, well-balanced meal, pair this dry brined chicken with roasted, steamed, or sautรฉed vegetables. A few of my favorite vegetable sides include sautรฉed garlic green beans, honey garlic brussels sprouts, sautรฉed asparagus, and sautรฉed butternut squash.

    Roasted chicken also makes a tasty and healthy addition to your favorite salads. Try adding roasted chicken breast to caesar salad, spinach caprese salad, or arugula quinoa salad.

    Finally, serve this roasted chicken alongside starchy side dishes for a hearty and satisfying meal. Baked potatoes, sage stuffing, cilantro lime rice, farro, roasted garlic alfredo, macaroni and cheese, and pesto rigatoni are all delicious options.

    A dinner plate with sliced chicken breast, mashed potatoes with gravy, and buttery garlic green beans.

    How to Use Leftover Dry Brined Chicken

    Leftover lemon garlic roast chicken is one of the best ingredients to have in your refrigerator. You can easily transform leftover chicken into a variety of dishes, making for quick meal prep throughout the week.

    Repurpose leftover dry brined chicken into comforting soups, stews, and casseroles. Add shredded chicken to chicken noodle soup, chicken pot pie, buffalo chicken dip, or chicken broccoli lasagna.

    Alternatively, use leftover roasted chicken as a topping for pizza, like in this buffalo chicken flatbread. Itโ€™s also great for making Mexican-inspired meals, such as tacos, nachos, quesadillas, burritos, and enchiladas.

    Finally, make quick work of lunch by using leftover chicken to make sandwiches, wraps, and salads.

    ๐Ÿ— Quick Tip: Donโ€™t toss those chicken bones! Instead, use them to create homemade chicken stock, which can be the base for flavorful soups, sauces, and gravies.

    Storage and Reheating

    How to Store

    • Refrigerator- The USDA recommends storing cooked chicken in an airtight container in the refrigerator for 3-4 days. For better storage, it's a good idea to remove the chicken meat from the bones before refrigerating.
    • Freezer- Freeze leftover roasted chicken in a freezer-safe plastic bag or container for up to 4 months.

    How to Reheat

    • Oven- Preheat the oven to 350ยฐF. Spread the leftover chicken out evenly on a rimmed baking sheet. Cover loosely with aluminum foil and reheat for 10-15 minutes or until fully warmed through.
    • Stovetop- Heat a small amount of water or broth in a skillet or saucepan over medium-low heat. Once simmering, add the chicken meat and simmer until hot. This method also works well with frozen chicken.
    • Microwave- Place leftover chicken on a microwave-safe dish. Cover the dish with a lid or paper towel and microwave the chicken on half power (50%) for one minute. Continue heating on HIGH power in 30-second intervals until the chicken is hot.

    Make Ahead

    One of my favorite things about this dry brine chicken recipe is its flexibility. The raw chicken can be left in the refrigerator to brine for up to 72 hours, which means itโ€™s perfect for making ahead.

    Alternatively, roast the chicken and store it in the refrigerator for up to 2 days before serving. Then, reheat the whole chicken in a 350ยฐF oven for approximately 25-30 minutes. Add a small amount of liquid to the roasting pan and cover the chicken with aluminum foil so it doesnโ€™t dry out when reheating.
    A carved dry brined chicken on a large white serving plate.

    Frequently Asked Questions

    Can I dry brine in 2 hours?

    A 2-hour dry brine can improve the chicken's texture and flavor by enhancing browning and tenderness. While not as effective as longer brining, it's still a good option when time is limited. For best results, consider the recommended 24-72 hour brining period.

    Should I rinse the chicken after dry brining?

    There is no need to rinse the dry brine off the chicken. Rinsing makes the chicken wet, which can result in less crispy skin. The salt evenly dispurses throughout the meat naturally so the chicken won't be too salty.

    Does dry brine need sugar?

    While not essential, adding sugar to your dry brine mixture will enhance the flavor and browning of the chicken. Try adding ยฝ tablespoon of granulated sugar or brown sugar to this dry brine recipe to see how you like it.

    Do you use oil when dry brining?

    Olive oil or butter can certainly be used in a dry brine. However, I find my chicken comes out perfectly moist and juicy even without any added oil.

    Let's Connect!

    Be sure to leave a comment below if you have any questions. You can also connect with me on Instagram, Facebook, Pinterest, or via email at [email protected].

    More Chicken Recipes

    • A slice of sourdough chicken pot pie on a small plate with a fork laying next to it.
      Sourdough Chicken Pot Pie
    • A baking dish filled with chicken and broccoli lasagna. One piece of lasagna is sitting on a small white plate to the left of the baking dish.
      Creamy Chicken and Broccoli Lasagna
    • A light purple Dutch oven filled with chicken noodle soup. There is a wooden spoon in the pot.
      Dutch Oven Chicken Noodle Soup
    • Three Ball mason jars filled with chicken bone broth.
      How to Make Chicken Bone Broth (Stovetop Method)

    ๐Ÿ“– Recipe

    Slices of dry brined chicken on a dinner plate.
    Print Pin SaveSaved!

    Dry Brined Chicken

    This Dry Brined Chicken is the most tender, juicy, and flavorful whole roasted chicken youโ€™ll ever try. Brined for 24 hours in a lemon-garlic salt rub, this easy chicken recipe will change your roast chicken game forever.
    Course Main Course
    Cuisine American
    Prep Time 10 minutes minutes
    Cook Time 2 hours hours
    Brine Time 1 day day
    Total Time 1 day day 2 hours hours 10 minutes minutes
    Servings 6 servings
    Calories 509kcal
    Author Ashley Petrie, RDN, LDN

    Equipment

    • Roasting pan with rack
    • Butcher's twine
    • Meat thermometer
    • Cutting board
    • Carving knife

    Ingredients

    For the Lemon-Garlic Dry Brine

    • 2 tablespoons kosher salt
    • ยฝ tablespoon black pepper freshly cracked
    • Zest from 1 lemon
    • 2 cloves garlic grated

    For the Roasted Chicken

    • 1 4 to 5 pound whole chicken
    • 1 whole lemon quartered
    • 4 cloves garlic crushed

    Instructions

    • In a small bowl, combine the kosher salt, black pepper, lemon zest, and grated garlic. Save the lemon and a few garlic cloves to stuff the chicken with before roasting.
      2 tablespoons kosher salt, ยฝ tablespoon black pepper, Zest from 1 lemon, 2 cloves garlic
    • Prepare the chicken by removing any giblets and neck pieces that may be located inside the cavity. Pat the chicken dry inside and out and place it onto a roasting rack. If you don't have a roasting pan with a rack, you can use a baking sheet with a wire rack on it or create "foil balls" to lift the chicken off an oven-safe pan.
      1 4 to 5 pound whole chicken
    • Rub the lemon-garlic salt mixture all over the chicken, including inside the cavity. Place the chicken, uncovered, in the refrigerator to brine for 24-72 hours. Leaving it uncovered helps the skin dry out so it crisps up beautifully in the oven.
    • Preheat the oven to 375ยฐF. Take the chicken out of the fridge about 20 minutes before you're ready to roast to bring it closer to room temperature. Put a quartered lemon and a couple of crushed garlic cloves inside the chicken. To keep everything neat, tie the chicken's legs together with butcherโ€™s twine.
      1 whole lemon, 4 cloves garlic
    • Place the chicken in the preheated oven and roast for 1 ยฝ to 2 hours or until a meat thermometer inserted into the thickest part of the thigh reads 165ยฐF. Remove the chicken from the oven and tent it with foil. Let it rest for 15-20 minutes before carving to allow the juices to settle in the meat.
    • Use a sharp knife or kitchen shears to carefully separate the chicken into serving pieces. Start by removing the legs, then the wings, and finally, slice the breast meat. Arrange the chicken pieces on a platter and serve with your favorite side dishes.

    Notes

    • Donโ€™t rinse off the salt. There is no need to rinse the salt brine off before roasting. The chicken will soak up the right amount of seasoning, and the rest stays on the skin to make it tasty and crispy.
    • Quick Tip: Use a meat thermometer to ensure your chicken is cooked to a perfect 165ยฐF.
    • Storage: Store leftover chicken in an airtight container in the refrigerator for up to 4 days or in the freezer for up to 4 months.
    • Make Ahead: Brine the chicken and refrigerate it up to 3 days before roasting.

    Nutrition

    Serving: 1serving (includes skin) | Calories: 509kcal | Carbohydrates: 1g | Protein: 54.5g | Fat: 30.5g | Saturated Fat: 8.5g | Polyunsaturated Fat: 6.6g | Monounsaturated Fat: 12.2g | Cholesterol: 172mg | Sodium: 486mg | Potassium: 492mg | Vitamin A: 192IU | Vitamin C: 1.6mg | Calcium: 33mg | Iron: 2.9mg
    Did you try this recipe?Let me know! Comment below, or take a picture and tag me on Instagram @everydayhomemadebyashley.

    Sautรฉed Buttery Garlic Green Beans

    August 15, 2023

    These Buttery Garlic Green Beans are cooked to tender perfection, then coated in a rich and flavorful garlic butter sauce. With just a few simple ingredients, you can have this easy vegetable side dish ready in only 20 minutes. It's a versatile option that pairs well with a variety of main dishes, whether it's a weeknight dinner or holiday feast.

    Buttery garlic green beans on a white dinner plate.

    I grew up thinking green beans were meant to be mushy, boring, and flavorless. When I was a kid, we often had unseasoned, boiled green beans with dinner. And for a long time, I thought I just didn't like green beans.

    But, once I started cooking for myself, I realized that green beans actually can be delicious! It's all about how you cook and season them.

    In my opinion, the best way to jazz up fresh green beans is with a little butter and garlic. Simple, yet flavorful, butter and garlic elevate these sautรฉed green beans to the next level.

    They're so good, in fact, that they're sure to please even the pickiest eater in your family.

    Today, Iโ€™m walking you through how to make the best sautรฉed garlic green beans, including which ingredients to use, tips that will guarantee you make them successfully the first time, and some of my favorite dishes to serve with this easy vegetable side dish.

    Disclaimer: Some links throughout this post are affiliate links. As an Amazon Associate, I earn from qualifying purchases. You can learn more by visiting my Affiliate Disclosure Page.

    Why You'll Love This Recipe

    • Simply Delicious- With just 6 simple ingredients, you can make this flavorful vegetable side dish that will have everyone wondering how you made green beans taste so delicious.
    • Ready in 20 Minutes- Green beans cook quickly so you only need a few minutes to prepare this easy green bean side dish.
    • Beginner-Friendly- Sautรฉing fresh vegetables is a simple cooking technique that is great for beginner home cooks.
    • Versatile Side Dish- The mild flavor of green beans pairs well with a variety of main dishes, from roasted and grilled meats to hearty pasta dishes and more.
    • Perfect for the Holidays- Garlic butter green beans are the perfect Thanksgiving side dish to add to your holiday menu. They're flavorful, pair well with turkey, and are easy to throw together at the last-minute.

    Ingredient Notes

    Here are some notes on the key ingredients. For the full list of ingredients, check out the recipe card below.

    • Green Beans- Opt for green beans that are bright green, firm, and uniform in color. Trim the stem end of each green bean and remove any soft, mushy ends as well.
    • Butter- Gives the dish a rich, buttery flavor that pairs well with the garlic and green beans. I prefer to use unsalted butter for better control over the saltiness of the dish.
    • Garlic- Fresh minced garlic sautรฉed in butter takes the green beans from just another side dish to the best dish on your plate.
    • Garlic Powder- For additional garlic flavor, I like to add a little garlic powder to these buttery garlic green beans.
    • Kosher Salt- I prefer to use kosher salt in all of my cooking because it doesn't contain added sugar or anti-caking agents like table salt often does.
    • Black Pepper- Use freshly ground black pepper for the best flavor.

    ๐ŸŒฑ Sustainability Tip: Nothing tastes better than garden-fresh green beans. Plus, they're super easy and fun to grow both in a garden and in a container.

    The ingredients to make buttery garlic green beans. Each ingredient is labeled with text. They include green beans, garlic, butter, salt, pepper, garlic powder, and water.

    How to Store Fresh Green Beans

    What's the best way to store fresh green beans until you're ready to use them?

    • Keep them unwashed. Keep the green beans unwashed to prevent moisture from promoting bacterial growth.
    • Choose the right container. Place the unwashed green beans in a plastic bag or airtight container.
    • Store. Store the bag or container of green beans in the refrigerator's vegetable crisper drawer for up to 5 days.

    ๐Ÿ™…โ€โ™€๏ธ How do you know if your fresh green beans have gone bad? Look for discoloration, wrinkled or slimy texture, foul odor, mold or fungus growth, browning or dryness, excessive softness, or an off taste.

    Substitutions and Variations

    Here are a few ways you can try customizing this buttery garlic green beans recipe to fit your diet and taste preferences.

    Substitutions

    • Green Beans- Substitute fresh green beans for frozen green beans if fresh isn't available. Keep in mind that you may need to steam frozen green beans a few minutes longer than fresh and may also want to use less water.
    • Butter- Swap butter for olive oil to make this dish dairy-free. Dairy-free butter may also be used.
    • Garlic- Use garlic paste or minced garlic from a jar in place of fresh garlic if preferred. Alternatively, use one teaspoon of garlic powder.
    • Garlic Powder- Replace garlic powder with an additional 2 cloves of fresh minced garlic.
    • Kosher Salt- Sea salt or table salt can be used in place of kosher salt.
    • Black Pepper- Opt for red pepper flakes or cayenne pepper if you prefer your green beans with a little more heat.
    Buttery garlic green beans in a stainless steel skillet.

    Variations

    • Herbed- Add a tablespoon or two of fresh herbs, such as parsley, thyme, or rosemary, to the green beans for a fresh, herbaceous flavor.
    • Lemon- For a bright, citrusy flavor, toss the green beans with a little lemon zest and lemon juice after sautรฉing.
    • Balsamic- Drizzle balsamic glaze over the cooked green beans to balance the dish with a hint of tangy sweetness.
    • Parmesan- Grate parmesan cheese over the top of the green beans after sautรฉing to give them a cheesy flavor.
    • Bacon- Crumbled bacon pairs well with garlic green beans and gives the dish a rich, salty flavor and satisfying texture.
    • Spicy- If you love spicy food, sprinkle red pepper flakes or cayenne pepper over the green beans for a bit of heat.

    Equipment Notes

    Here are some notes on any special equipment I used to make this recipe.

    • Skillet with Lid- Using a skillet with a lid is essential for this recipe as it allows you to steam the green beans properly. Opt for a stainless steel skillet or cast iron skillet over non-stick options, as non-stick coatings do not develop flavor as well and can release harmful chemicals when heated at high temperatures.
    • Tongs- Using tongs helps you move the green beans around in the pan easily, ensuring they're cooked and seasoned evenly.

    How to Make Buttery Garlic Green Beans

    Here is how to make sautรฉed garlic green beans.

    Step 1: Prepare the green beans. Wash the green beans under cold water and trim off the tough ends.

    Step 2: Steam the green beans. Add the trimmed green beans and water to a large skillet. Cover the skillet with the lid and turn the heat to medium-low. Let the water come to a simmer and steam the green beans for about 5-7 minutes or until they turn vibrant green and start becoming tender.

    Steamed green beans in a stainless steel skillet.

    Step 3: Sautรฉ the green beans. Once the green beans are done steaming, increase the heat to medium. It's okay if there's a small amount of water remaining in the skillet. Remove the lid and add the butter and minced garlic to the skillet. Sautรฉ the green beans and garlic in the butter for 3-4 minutes.

    Steamed green beans with butter and fresh minced garlic on top.

    Step 4: Season the green beans. Sprinkle the garlic powder, kosher salt, and black pepper over the green beans. Toss together to make sure the seasoning coats the green beans evenly and let them cook for an additional minute. When finished, they should be tender with a slight crunch, but not overly soft.

    Step 5: Serve and enjoy. Transfer the seasoned green beans to a serving dish and enjoy!

    Buttery green beans seasoned with garlic powder, salt, and pepper.
    Green beans cooked in butter and seasoned with garlic in a stainless steel skillet.

    Tips for Success

    Make these easy garlic green beans successfully the first time using these tried and true tips.

    • Fresh is best. Whenever possible, use fresh green beans for the best flavor and texture. Look for beans that are firm, vibrant, and free from blemishes.
    • Watch the water level. When steaming the green beans, keep an eye on the water to ensure it doesn't completely evaporate. There should be a small amount of water remaining when you add the butter and garlic.
    • Cook to your desired tenderness. Taste-test the green beans with butter and garlic before finishing the dish to make sure they're cooked to your liking.
    • Serve immediately. These buttery garlic green beans are best enjoyed as soon as they're finished cooking.

    What to Serve With Buttery Garlic Green Beans

    Whether they're part of your holiday meal or just a quick weeknight dinner, these sautรฉed garlic green beans pair well with a variety of main dishes and are sure to become a new family favorite.

    If you're looking for a quick and easy vegetable side dish for your Thanksgiving, Christmas, or Easter feast, these green beans are a great option. They pair well with turkey breast, roasted chicken, braised beef, meatballs, and more.

    You can also serve these garlicky green beans alongside your favorite proteins for an easy weeknight dinner. Some of my favorites include grilled chicken, pan-seared chicken, grilled steak tips, grilled shrimp, and seared pesto salmon.

    Finally, pair this sautรฉed green bean recipe with a hearty pasta dish for a well-balanced meal. Pasta bolognese, roasted garlic alfredo, creamy pumpkin pasta, Cajun salmon pasta, and pesto rigatoni are all delicious choices.

    A dinner plate with sliced chicken breast, mashed potatoes with gravy, and buttery garlic green beans.

    Storage and Reheating

    How to Store

    • Refrigerator- Store leftover sautรฉed green beans with garlic and butter in an airtight container in the refrigerator for up to 3 days.
    • Freezer- Freeze leftover green beans in a freezer-safe container for up to 3 months. Keep in mind that freezing cooked green beans may alter their texture once reheated.

    How to Reheat

    • Stovetop- Heat a skillet over medium-low heat. Add leftover green beans and sautรฉ for 3-5 minutes or until hot.
    • Oven- Preheat oven to 350ยฐF. Spread leftover green beans out evenly on a rimmed baking sheet. Heat for 5-10 minutes or until fully warmed through.
    • Microwave- Place green beans on a microwave-safe dish. Heat on HIGH in 30-second intervals, stirring between each, until fully warmed through.
    • Air Fryer- Preheat the air fryer to 350ยฐF. Place leftover green beans in the air fryer basket in a single layer. Reheat for approximately 2-3 minutes or until warm.

    Make Ahead

    While sautรฉed green beans are best served fresh, you can still get a head start on preparation by trimming the green beans up to one day in advance. Trimming the green beans ahead of time is especially helpful during the busy holiday season.

    A stainless steel skillet filled with buttery garlic green beans.

    Frequently Asked Questions

    Can I use frozen green beans instead of fresh?

    Yes, you can use frozen green beans instead of fresh. Frozen green beans will take a few minutes longer to steam. And since they release water as they cook, consider using less water than called for in the recipe.

    What can I add to green beans to give them more flavor?

    This garlic green bean recipe is loaded with buttery, garlicky goodness. However, lemon zest, fresh herbs, parmesan cheese, and bacon also make tasty additions.

    Is this green bean recipe gluten-free?

    Yes, this buttery garlic green bean recipe is naturally gluten-free. Still, I always recommend double-checking the ingredient label for any ingredient that is new to you.

    Let's Connect!

    Be sure to leave a comment below if you have any questions. You can also connect with me on Instagram, Facebook, Pinterest, or via email at [email protected].

    More Vegetable Side Dishes

    • A small plateful of honey garlic Brussels sprouts.
      Honey Garlic Brussels Sprouts
    • Roasted green beans and carrots on a small white plate.
      Oven Roasted Green Beans and Carrots
    • Cast iron asparagus on a small white plate.
      Cast Iron Asparagus (Sautรฉed Asparagus With Garlic and Lemon)
    • A pile of sautรฉed butternut squash on a small white plate.
      Sautรฉed Butternut Squash (How to Pan Fry Butternut Squash)

    ๐Ÿ“– Recipe

    Buttery garlic green beans on a white dinner plate.
    Print Pin SaveSaved!

    Buttery Garlic Green Beans

    These Buttery Garlic Green Beans are cooked to tender perfection, then coated in a rich and flavorful garlic butter sauce. With just a few simple ingredients, you can have this easy vegetable side dish ready in only 20 minutes. It's a versatile option that pairs well with a variety of main dishes, whether it's a weeknight dinner or holiday feast.
    Course Side Dish
    Cuisine American
    Prep Time 10 minutes minutes
    Cook Time 10 minutes minutes
    Total Time 20 minutes minutes
    Servings 3 servings
    Calories 123kcal
    Author Ashley Petrie, RDN, LDN

    Equipment

    • Large skillet with lid
    • Tongs

    Ingredients

    • 1 pound green beans ends trimmed
    • ยฝ cup water
    • 2 tablespoons unsalted butter
    • 4 cloves garlic minced
    • ยฝ teaspoon garlic powder
    • ยฝ teaspoon kosher salt
    • ยผ teaspoon black pepper

    Instructions

    • Wash the green beans under cold water and trim off the tough ends.
      1 pound green beans
    • Add the trimmed green beans and water to a large skillet. Cover the skillet with the lid and turn the heat to medium-low. Let the water come to a simmer and steam the green beans for about 5-7 minutes or until they turn vibrant green and start becoming tender.
      ยฝ cup water
    • Once the green beans are done steaming, increase the heat to medium. It's okay if there's a small amount of water remaining in the skillet. Remove the lid and add the butter and minced garlic to the skillet. Sautรฉ the green beans and garlic in the butter for 3-4 minutes.
      2 tablespoons unsalted butter, 4 cloves garlic
    • Sprinkle the garlic powder, kosher salt, and black pepper over the green beans. Toss together to make sure the seasoning coats the green beans evenly and let them cook for an additional minute. When finished, they should be tender with a slight crunch, but not overly soft.
      ยฝ teaspoon garlic powder, ยฝ teaspoon kosher salt, ยผ teaspoon black pepper
    • Transfer the seasoned green beans to a serving dish and enjoy!

    Notes

    • Quick Tip: Taste-test the green beans before finishing the dish to make sure they're cooked to your liking.
    • Storage: Store leftover green beans in an airtight container in the refrigerator for up to 3 days.
    • Make Ahead: Trim the ends of the green beans up to one day in advance.

    Nutrition

    Serving: 1serving | Calories: 123kcal | Carbohydrates: 12g | Protein: 3g | Fat: 8g | Saturated Fat: 5g | Polyunsaturated Fat: 0.5g | Monounsaturated Fat: 2g | Cholesterol: 20mg | Sodium: 200mg | Potassium: 346mg | Fiber: 4.5g | Sugar: 5g | Vitamin C: 20mg | Calcium: 68mg | Iron: 1.7mg
    Did you try this recipe?Let me know! Comment below, or take a picture and tag me on Instagram @everydayhomemadebyashley.

    Sourdough Breadsticks with Garlic Butter

    August 11, 2023

    These Sourdough Breadsticks are irresistibly soft and chewy with a savory garlic-butter flavor. Perfect for beginners, this easy side dish pairs well with pasta dishes, soups, salads, and more.

    Three sourdough bread sticks stacked on top of each other. In the background is a plate of pasta and a jar of butter.

    When I first made these breadsticks, my fiancรฉ couldn't stop raving about them. He called them the best breadsticks ever and even said they were a more delicious homemade version of Olive Garden's breadsticks.

    Buttery, garlicky, soft, and chewy, these sourdough breadsticks are my favorite side dish for any Italian meal. I especially love serving them at the Italian feast I prepare for Christmas dinner each year.

    What I love about this recipe in particular is how easy the dough is to handle. With a lower hydration of around 55%, it's not too sticky, making it ideal for beginner sourdough bakers.

    So, whether you're hosting a holiday feast or just enjoying a cozy weeknight dinner, this sourdough breadstick recipe is sure to become a new family favorite.

    I hope you enjoy it as much as I do!

    Looking for an easy sourdough bread recipe? Try my classic Dutch oven sourdough bread.

    Disclaimer: Some links throughout this post are affiliate links. As an Amazon Associate, I earn from qualifying purchases. You can learn more by visiting my Affiliate Disclosure Page.

    Ingredient Notes

    Here are some notes on the key ingredients. For the full list of ingredients, check out the recipe card below.

    • Bread Flour- Bread flour has a higher protein content, which helps the breadsticks rise and gives them a chewy texture.
    • Sourdough Starter- This recipe relies solely on sourdough for leavening (no yeast), so make sure your starter is healthy and active.
    • Water- I used a lower hydration level to make the dough easier for beginners to handle, but you can adjust the water amount if desired.
    • Kosher Salt- Enhances the flavor of the breadsticks without added sugar or anti-caking agents, which are often found in table salt.
    • Granulated Sugar- Adds a subtle sweetness to the breadsticks.
    • Olive Oil- A bit of fat in the dough keeps the breadsticks soft and fluffy after baking.
    • Garlic Butter- Melted butter mixed with garlic powder, kosher salt, and dried herbs makes a delicious topping, similar to Olive Garden's breadsticks.
    The ingredients to make sourdough breadsticks. Each ingredient is labeled with text. They include water, sugar, kosher salt, butter, sourdough starter, bread flour, olive oil, and seasonings.

    Tips for Success

    • Use active sourdough starter. For the best results, use a mature, recently fed sourdough starter rather than discard.
    • Weigh your ingredients. A kitchen scale ensures accurate measurements and consistent results.
    • Knead well. Knead the dough until it becomes smooth and elastic - you'll notice the consistency of the dough change if you do this by hand. It's important to develop enough gluten to help the breadsticks rise.
    • Don't focus on the clock. Sourdough is more about the process than strict timing. Although I provide a sample schedule, the dough's rise time will vary based on your starter's strength and the temperature of your dough and kitchen.
    • Take pictures. Take photos of your dough to track its rise and progress, which can be helpful, especially when you're new to sourdough.

    How to Make Sourdough Breadsticks

    Here is how to make these sourdough garlic breadsticks.

    Step 1: Feed sourdough starter. Feed your sourdough starter about 6-12 hours before making the dough.

    Step 2: Mix the dough.ย In a large mixing bowl, whisk together the bread flour, salt, and sugar. Add the warm water, sourdough starter, and olive oil. Mix until thereโ€™s no dry flour left.

    Flour, salt, and sugar whisked together in a mixing bowl.
    Water, sourdough starter, and olive oil added to the dry ingredients in a mixing bowl.
    The dough mixed together in a mixing bowl.

    Step 3: Knead the dough.ย Knead the dough by hand for 15-20 minutes, or use a stand mixer, until it becomes smooth and elastic.

    Step 4: Bulk fermentation.ย Place the dough back in the mixing bowl, cover, and let it rise until puffy and doubled in size, about 6 hours at 75ยฐF.

    The sourdough breadstick dough in a mixing bowl after being kneaded.
    The breadstick dough after bulk fermentation in a mixing bowl.

    Step 5: Shape the breadsticks. Line a baking sheet with parchment paper. Turn the dough onto a floured surface and divide into 12 equal pieces. Shape each piece into a tight ball by gathering the edges together and rolling seam side down on the counter. Let the dough balls rest for 10 minutes, then roll them into a 6-inch long breadstick. Place the breadsticks evenly spaced on the baking sheet.

    Six pieces of sourdough breadstick dough. Two are shaped into breadsticks, one is shaped into a ball, and the remaining three are unshaped.
    Unbaked sourdough breadsticks on a parchment-lined baking sheet.

    Step 6: Proof the breadsticks.ย Cover and let proof for about 2 hours or until noticeably puffy. Alternatively, you can refrigerate the breadsticks overnight. When ready to bake, let them proof for 2-3 hours at room temperature.

    Unbaked sourdough breadsticks on a baking sheet after proofing.

    Step 7: Bake the breadsticks.ย Preheat the oven to 400ยฐF about 20 minutes before the breadsticks finish proofing. Bake for 20 minutes or until golden brown.

    Step 8: Prepare the garlic butter. While baking, whisk together melted butter, salt, garlic powder, and Italian seasoning.

    Step 9: Butter breadsticks and serve. Brush the hot breadsticks with garlic butter immediately after baking. Serve warm.

    Melted butter, dried herbs, salt, and garlic powder mixed together in a glass jar.
    Baked breadsticks being brushed with melted garlic butter.
    Baked sourdough breadsticks brushed with garlic butter on a parchment-lined baking sheet.

    Sample Schedule

    Here is an example of a schedule you can use to make these sourdough garlic breadsticks. The kitchen in this example is approximately 70-75ยฐF.

    Night Before

    10:00 PM: Feed sourdough starter.

    Day Of

    8:00 AM: Mix dough together and knead.

    8:30 AM-2:30 PM: Bulk fermentation.

    2:30 PM: Shape breadsticks.

    3:00-5:00 PM: Proof breadsticks.

    5:00 PM: Bake breadsticks.

    Note:ย Timing will vary based on the strength of your sourdough starter and the temperature of your kitchen and dough.

    What to Serve With Sourdough Breadsticks

    Breadsticks are perfect for dipping into sauces and dips like marinara, hummus, spinach artichoke dip, or buffalo chicken dip. They also complement pasta dishes such as linguine bolognese, meatballs, Alfredo, creamy pumpkin pasta, and Cajun salmon pasta.

    For a lighter meal, pair them with soups and salads like chicken noodle soup, broccoli asparagus soup, Caesar salad, arugula quinoa salad, farro salad, or spinach Caprese salad.

    How to Store

    Store breadsticks in an airtight container at room temperature for up to 2 days.

    For longer storage, transfer to a freezer-safe container and freeze for up to 3 months. Thaw at room temperature before reheating in the oven for best results.

    Garlic sourdough breadsticks garnished with herbs. In the background is a plate of pasta with sauce and a jar of butter.
    A cover of a recipe ebook with the title "Everyday Sourdough: 27 Sweet & Savory Sourdough Discard Recipes." There is an image of sourdough discard cinnamon rolls on the front. At the bottom, it reads "By Ashley Petrie of Everyday Homemade."
    Grab a copy today!

    Are you tired of watching your sourdough discard go to waste?

    Itโ€™s time to turn excess discard into something delicious with my new ebook - Everyday Sourdough!

    Inside, youโ€™ll find 27 tried-and-true sourdough discard recipes that will transform your leftover starter into mouthwatering creations your family and friends will love.

    No more guilt about wasting your discard - with Everyday Sourdough, you have endless options to quickly make something amazing anytime.

    Let's Connect!

    Be sure to leave a comment below if you have any questions. You can also connect with me on Instagram, Facebook, Pinterest, or via email at [email protected].

    More Sourdough Recipes

    • A small plate of sourdough garlic knots garnished with grated parmesan cheese.
      Sourdough Discard Garlic Knots (No Yeast)
    • Sourdough garlic bread on a piece of parchment paper.
      Sourdough Garlic Bread
    • A white pie plate filled with baked golden brown sourdough dinner rolls. The rolls are brushed with butter and sprinkled with kosher salt.
      Sourdough Dinner Rolls
    • Sourdough discard pizza dough stretched out on a pizza peel.
      Sourdough Discard Pizza Dough (No Yeast)

    ๐Ÿ“– Recipe

    Three sourdough bread sticks stacked on top of each other. In the background is a plate of pasta and a jar of butter.
    Print Pin SaveSaved!
    5 from 2 votes

    Sourdough Breadsticks

    These Sourdough Breadsticks are irresistibly soft and chewy with a savory garlic-butter flavor. Perfect for beginners, this easy side dish pairs well with pasta dishes, soups, salads, and more.
    Course Bread, Side Dish
    Cuisine American, Italian
    Prep Time 15 hours hours
    Cook Time 20 minutes minutes
    Total Time 15 hours hours 20 minutes minutes
    Servings 12 breadsticks
    Calories 215kcal
    Author Ashley Petrie, RDN, LDN

    Equipment

    • Kitchen scale
    • Bench scraper
    • Rimmed baking sheet
    • Parchment paper

    Ingredients

    For the Dough

    • 500 grams bread flour
    • 12 grams kosher salt
    • 12 grams granulated sugar
    • 275 grams warm water 80-90โ„‰
    • 100 grams active sourdough starter 100% hydration
    • 30 grams extra virgin olive oil

    For the Garlic Butter

    • 3 tablespoons unsalted butter melted
    • ยฝ teaspoon kosher salt
    • ยฝ teaspoon garlic powder
    • ยผ teaspoon Italian seasoning

    Instructions

    • Feed your sourdough starter about 6-12 hours before making the dough.
    • In a large mixing bowl, whisk together the bread flour, salt, and sugar. Add the warm water, sourdough starter, and olive oil. Mix until thereโ€™s no dry flour left.
      500 grams bread flour, 12 grams kosher salt, 12 grams granulated sugar, 275 grams warm water, 100 grams active sourdough starter, 30 grams extra virgin olive oil
    • Knead the dough by hand for 15-20 minutes, or use a stand mixer, until it becomes smooth and elastic.
    • Place the dough back in the mixing bowl, cover, and let it rise until puffy and doubled in size, about 6 hours at 75ยฐF.
    • Line a baking sheet with parchment paper. Turn the dough onto a floured surface and divide into 12 equal pieces. Shape each piece into a tight ball by gathering the edges together and rolling seam side down on the counter. Let the dough balls rest for 10 minutes, then roll them into a 6-inch long breadstick. Place the breadsticks evenly spaced on the baking sheet.
    • Cover and let proof for about 2 hours or until noticeably puffy. Alternatively, you can refrigerate the breadsticks overnight. When ready to bake, let them proof for 2-3 hours at room temperature.
    • Preheat the oven to 400ยฐF about 20 minutes before the breadsticks finish proofing. Bake for 20 minutes or until golden brown.
    • While baking, whisk together melted butter, salt, garlic powder, and Italian seasoning.
      3 tablespoons unsalted butter, ยฝ teaspoon kosher salt, ยฝ teaspoon garlic powder, ยผ teaspoon Italian seasoning
    • Brush the hot breadsticks with garlic butter immediately after baking. Serve warm.

    Notes

    • Storage: Store leftover breadsticks in an airtight container for up to 2 days at room temperature or freeze for up to 3 months.

    Nutrition

    Serving: 1breadstick | Calories: 215kcal | Carbohydrates: 34g | Protein: 5.5g | Fat: 6g | Saturated Fat: 2g | Polyunsaturated Fat: 1g | Monounsaturated Fat: 2.5g | Cholesterol: 8mg | Sodium: 450mg | Potassium: 49mg | Fiber: 1g | Sugar: 1g | Calcium: 9mg | Iron: 2.1mg
    Did you try this recipe?Let me know! Comment below, or take a picture and tag me on Instagram @everydayhomemadebyashley.

    Linguine Bolognese

    August 8, 2023

    This Linguine Bolognese is slow-simmered to perfection, then tossed with linguine pasta, for a rich, hearty, and authentic Italian meal that is sure to be a crowd-pleaser. Made with ground beef, San Marzano tomatoes, and white wine, itโ€™s perfect for special occasions and delicious weekend dinners.

    A small plate of linguine bolognese next to a white cloth napkin, dried linguine noodles, and parmesan cheese.

    Making bolognese sauce should take all afternoon.

    Simmered low and slow, the rich flavors and tender texture of beef bolognese are developed throughout the cooking process.

    And while making bolognese sauce from scratch should take time, don't be intimidated. Although many of the steps are hands-on at the beginning, they are simple and straightforward. Once the sauce is simmering away, it only needs an occasional stir.

    Trust me, it's worth it.

    Today, Iโ€™m walking you through the entire process of making homemade bolognese sauce, including the best ingredients to use, tips that will guarantee you make it successfully the first time, and some of my favorite side dishes to serve with this authentic Italian meal.

    Disclaimer: Some links throughout this post are affiliate links. As an Amazon Associate, I earn from qualifying purchases. You can learn more by visiting my Affiliate Disclosure Page.

    What is Bolognese Sauce?

    Bolognese sauce (pronounced bow-luh-nayz in American English) is an Italian meat-based sauce that originated near the city of Bologna, Italy.

    Known in Italy as ragรน alla bolognese, authentic bolognese sauce is cooked slowly and requires a series of flavor-developing steps to get just right. Traditional bolognese sauce is made using ground or finely chopped beef, fatty pork, soffritto, white wine, milk, and tomatoes.

    What's the Difference Between Bolognese Sauce and Spaghetti Sauce?

    Bolognese sauce is a hearty, slow-cooked, meat-based sauce with rich flavors from meat, vegetables, dairy, and wine. On the other hand, spaghetti sauce is a quicker tomato-based sauce usually made with fresh tomatoes, garlic, herbs, and sometimes meat.

    Why You'll Love This Recipe

    • Authentic Flavor- This linguine bolognese recipe uses many of the ingredients considered to be authentic - beef, soffritto, white wine, and milk.
    • Hearty & Comforting- Tender ground beef, savory vegetables, and flavorful San Marzano tomatoes come together in this rich, slow-simmered bolognese sauce with pasta. It's the ultimate comfort food meal.
    • Beginner-Friendly- Don't be intimidated by the long cook time. This simple bolognese sauce with linguine can easily be mastered by a beginner home cook - I promise!
    • Perfect for Special Occasions- Whether it's for date night, Sunday dinner, or the holiday season, this homemade linguine bolognese is sure to make the day feel extra special.
    • Crowd-Pleasing- A rich and hearty beef bolognese with pasta will please even the pickiest eaters at your dinner table.

    Ingredient Notes

    Here are some notes on the key ingredients. For the full list of ingredients, check out the recipe card below.

    • Ground Beef- I find that 85-90% lean ground beef provides the best balance of flavor without creating an overly greasy sauce.
    • Linguine- Linguine is thick enough to hold up to the hearty bolognese sauce. Cook the pasta to al dente according to the package instructions.
    • Soffritto- A blend of onion, carrot, and celery, the soffritto provides a flavorful base for the bolognese pasta sauce.
    • San Marzano Tomatoes- San Marzano tomatoes are known for their rich, sweet, and less acidic flavor.
    • Milk- Simmering the ground beef in milk helps tenderize it. The milk also adds a bit of flavor and richness to the sauce.
    • White Wine- Adds depth of flavor to the bolognese sauce. Use a wine you would drink such as sauvignon blanc, pinot grigio, or chardonnay.
    • Butter- Unsalted butter adds a rich and creamy texture.
    • Olive Oil- Opt for high-quality extra virgin olive oil for the best flavor.
    • Garlic- Grated garlic blends easily into the sauce, adding an aromatic garlic flavor.
    • Kosher Salt- Opt for kosher salt or sea salt that does not contain added sugar or anti-caking agents.
    • Black Pepper- Use freshly ground black pepper for the best flavor.
    • Nutmeg- A pinch of nutmeg adds a subtle warmth to the bolognese sauce and gives it an authentic flavor.

    ๐ŸŒฑ Sustainability Tip: Whenever possible, opt for homegrown or locally-sourced ingredients to make this bolognese sauce.

    The ingredients to make linguine bolognese on a butcher block countertop. Each ingredient is labeled with text. They include linguine, milk, tomatoes, wine, ground beef, butter, garlic, onion, carrot, celery, nutmeg, pepper, oil, and salt.

    Substitutions and Variations

    Here are a few ways you can try customizing this easy linguine bolognese recipe to fit your diet and taste preferences.

    Substitutions

    • Ground Beef- Substitute some or all of the ground beef with ground turkey, chicken, pork, sausage, tofu, chopped mushrooms, or brown lentils.
    • Linguine- Any pasta shape you like can be used in place of the linguine. For a entirely scratch-made meal, make your own homemade pasta.
    • Soffritto- Try replacing the onion with shallots, the carrots with red bell pepper, or the celery with fennel. Each of these substitutes will give the sauce a slightly different flavor.
    • San Marzano Tomatoes- Swap San Marzano tomatoes for regular canned whole tomatoes, crushed tomatoes, or fresh tomatoes if preferred.
    • Milk- Use any type of milk you prefer, including plant-based milks such as oat milk or almond milk.
    • White Wine- Substitute the white wine for red wine, chicken stock, or vegetable stock.
    • Butter- Replace butter with margarine, plant-based butter, or more olive oil.
    • Olive Oil- Swap olive oil for any other neutral flavored oil or more butter.
    • Garlic- Use ยฝ teaspoon of garlic powder in place of fresh garlic cloves.
    • Kosher Salt- Sea salt, pink Himalayan salt, or table salt can all be used in place of kosher salt.
    • Black Pepper- For a spicier sauce, use red pepper flakes in place of black pepper.
    • Nutmeg- Ground mace is the best substitute for ground nutmeg.
    A plate of linguine bolognese garnished with grated parmesan cheese and fresh parsley. The plate is next to dried linguine pasta noodles and a block of parmesan cheese.

    Variations

    • Gluten-Free- Make gluten-free linguine bolognese by swapping regular linguine for your favorite gluten-free version.
    • Dairy-Free- Substitute regular milk for dairy-free milk and the butter for additional olive oil.
    • Turkey or Chicken- Swap the ground beef for ground turkey or ground chicken, if preferred, for a leaner protein option.
    • Pork- Use a blend of ground beef and ground pork or ground sausage to add depth of flavor.
    • Vegetarian- Replace the ground beef with brown lentils or diced mushrooms.
    • Add Vegetables- Even if you're not following a vegetarian diet, adding diced mushrooms, bell peppers, zucchini, or eggplant to the sauce will provide extra flavor.
    • Spicy- Add red pepper flakes to the sauce to give it a little heat.

    How to Make Linguine Bolognese

    Here is how to make bolognese sauce with linguine pasta.

    Make the Bolognese Sauce

    Step 1: Heat the cooking fats. In a large pot or Dutch oven, heat olive oil and butter over medium heat.

    Step 2: Sautรฉ the vegetables. Add the diced onion, grated carrots, diced celery, and kosher salt. Cook for 5-7 minutes until they're soft and slightly browned.

    Grated carrots, diced celery, and diced onion sautรฉing in butter and olive oil in a stainless steel pot.

    Step 3: Cook the beef. Push the vegetables to the side of the pot and add the ground beef, grated garlic, and black pepper. Break the beef up into small pieces and cook until it's no longer pink and most of the liquid has cooked off.

    Step 4: Simmer the beef in milk. Reduce the heat to low and pour in the milk. Let it simmer for 10-15 minutes, stirring occasionally, until the milk has evaporated.

    Cooked ground beef, onions, celery, and carrots in a stainless steel pot.
    Ground beef and vegetables after simmering in milk. There is a wooden spoon pushing some of the ground beef mixture aside to show that the milk has been reduced in the pan.

    Step 5: Add the nutmeg. Sprinkle in the ground nutmeg and stir everything together.

    Step 6: Simmer the beef in wine. Pour in the white wine and let it simmer for about 10 minutes, stirring occasionally.

    A red measuring cup pouring white wine into the ground beef and vegetable mixture.
    The ground beef and vegetables in a stainless steel pot after simmering in white wine.

    Step 7: Add the tomatoes. Add the canned tomatoes to the pot. Use your spoon to break them into smaller pieces.

    Whole peeled San Marzano tomatoes added to the ground beef mixture.
    The bolognese sauce simmering after the San Marzano tomatoes have been broken up into smaller pieces.

    Step 8: Simmer the sauce. Let the sauce simmer uncovered on low heat for 2 hours, stirring occasionally. If it looks like it's drying out before 2 hours, add ยฝ cup of water. By the end, the sauce should be thick, with a bit of fat on top and very little liquid left.

    The finished bolognese sauce in a stainless steel pot.
    A wooden spoon dragging through the bolognese sauce to show the thickness.

    Make the Linguine

    Step 9: Boil pasta water. About 30 minutes before the sauce is done, bring a large pot of salted water to a boil.

    Step 10: Cook linguine. Cook the linguine to al dente according to the package instructions. Before you drain the pasta, save about ยฝ cup of the starchy pasta water.

    Cooked linguine in a stainless steel pot.

    Step 11: Toss pasta with sauce. Add the drained pasta and the reserved pasta water to the pot with the bolognese sauce. Toss the pasta and sauce together until the pasta is well coated. Serve with freshly grated parmesan cheese and a sprinkle of fresh herbs if desired.

    The cooked linguine tossed with homemade beef bolognese sauce.

    Tips for Success

    Make this beef bolognese with linguine successfully the first time using these tried and true tips.

    • Preparation is key. Before you start cooking, prepare all of your ingredients so you have everything ready to go. This will make the cooking process a lot smoother and more enjoyable.
    • Dice the vegetables small. Dicing the onion, carrot, and celery finely ensures they cook evenly and blend well into the sauce.
    • Don't rush. Bolognese sauce is meant to simmer for hours on the stovetop. Being patient with the process will help you make the best linguine bolognese.
    • Cook the pasta al dente. This ensures the pasta retains its texture when combined with the sauce.
    • Reserve some pasta water. Starchy pasta water will help the bolognese sauce stick to the linguine better.

    What to Serve With Linguine Bolognese

    Linguine alla bolognese is a hearty and satisfying dish on its own. But, it's even better when paired with tasty side dishes that compliment its flavors.

    If you're really feeling the comfort food vibes, serve this homemade bolognese sauce alongside bread or breadsticks. Rustic sourdough bread, garlic bread, breadsticks, and bruschetta are all fantastic options.

    Alternatively, lighten things up with a refreshing side salad. Some of my favorite salads to pair with pasta bolognese include Caprese Salad, Caesar Salad, and arugula quinoa salad.

    Finally, vegetable side dishes such as roasted Brussels sprouts, also pair will with this creamy bolognese sauce.

    ๐Ÿ“ Planning a romantic dinner at home? Pair this meal with chocolate-covered cheesecake strawberries for a quick and easy dessert!

    A fork holding a bite of linguine bolognese up above a small plate.

    Storage and Reheating

    How to Store

    • Refrigerator- Store the leftover linguine bolognese in an airtight container in the refrigerator for 3-4 days.
    • Freezer- Freeze leftover bolognese sauce separately from the pasta in a freezer-safe container for up to 3 months.

    Make Ahead

    Whether you're getting ready for the holidays or just preparing for the busy week ahead, making bolognese sauce in advance can be a great way to save time and stress.

    • Prepare the Vegetables- Chop the onion, carrots, and celery and store them in separate airtight containers in the refrigerator for up to 2 days.
    • Cook the Pasta- Cook the pasta up to one day in advance and store it in the refrigerator until you're ready to serve. Don't forget to save some of the starchy pasta water!
    • Make the Bolognese Sauce- Prepare the bolognese sauce and store it in the refrigerator for up to 3 days. Then, when ready to serve, cook the pasta and toss it with the prepared bolognese sauce.
    • Freeze- Make the bolognese sauce and store it in the freezer for up to 3 months. Thaw overnight in the refrigerator before using.
    A plate of linguine with bolognese sauce with a fork resting on the side of the plate. The plate is next to a white cloth napkin, dried linguine, and a piece of parmesan.

    Frequently Asked Questions

    What is the best pasta for bolognese?

    The best pasta for bolognese is one that can easily hold onto the hearty meat sauce for that perfect bite. Of course, the linguine used in this recipe is a great option. Other options include tagliatelle, pappardelle, fettuccine, and rigatoni.

    Can I use whole milk instead of low-fat milk?

    Yes, using whole milk will add more fat, giving the bolognese sauce a creamier texture and richer flavor.

    What type of white wine should I use?

    Use a dry white wine like Chardonnay, Pinot Grigio, or Sauvignon Blanc.

    Let's Connect!

    Be sure to leave a comment below if you have any questions. You can also connect with me on Instagram, Facebook, Pinterest, or via email at [email protected].

    More Italian Recipes

    • A bowl of Dutch oven meatballs in tomato sauce with pasta.
      Dutch Oven Meatballs in Tomato Sauce
    • A Dutch oven filled with San Marzano tomato sauce. To the left, there is a wooden spoon sticking out of the sauce. There are a few basil leaves placed on top of the sauce as garnish.
      San Marzano Tomato Sauce (for Pasta, Pizza, and More!)
    • A plate of fettuccine pasta coated with roasted garlic alfredo sauce.
      Roasted Garlic Alfredo Sauce

    ๐Ÿ“– Recipe

    A plate of linguine bolognese garnished with fresh parsley and grated parmesan cheese.
    Print Pin SaveSaved!

    Linguine Bolognese

    This Linguine Bolognese is slow-simmered to perfection, then tossed with linguine pasta, for a rich, hearty, and authentic Italian meal that is sure to be a crowd-pleaser. Made with ground beef, San Marzano tomatoes, and white wine, itโ€™s perfect for special occasions and delicious weekend dinners.
    Course Main Course, Pasta
    Cuisine Italian
    Prep Time 15 minutes minutes
    Cook Time 2 hours hours 45 minutes minutes
    Total Time 3 hours hours
    Servings 8 servings
    Calories 609kcal
    Author Ashley Petrie, RDN, LDN

    Equipment

    • Large pot or Dutch oven
    • Colander

    Ingredients

    • 2 tablespoons extra virgin olive oil
    • 2 tablespoons unsalted butter
    • 1 large (about 2 cups) yellow onion finely diced
    • 2 large (about 2 cups) carrots grated or finely diced
    • 4 stalks (about 1 ยฝ cups) celery finely diced
    • 1 tablespoon kosher salt plus more for salting pasta water
    • 2 pounds ground beef 85-90% lean
    • 2 cloves garlic grated or finely minced
    • 1 teaspoon black pepper freshly ground
    • 1 ยฝ cups low-fat milk
    • โ…› teaspoon ground nutmeg
    • 1 cup white wine
    • 1 28-ounce can San Marzano tomatoes
    • 1 pound linguine dry or homemade
    • Parmesan cheese or fresh herbs for serving

    Instructions

    • In a large pot or Dutch oven, heat olive oil and butter over medium heat.
      2 tablespoons extra virgin olive oil, 2 tablespoons unsalted butter
    • Add the diced onion, grated carrots, diced celery, and kosher salt. Cook for 5-7 minutes until they're soft and slightly browned.
      1 large (about 2 cups) yellow onion, 2 large (about 2 cups) carrots, 4 stalks (about 1 ยฝ cups) celery, 1 tablespoon kosher salt
    • Push the vegetables to the side of the pot and add the ground beef, grated garlic, and black pepper. Break the beef up into small pieces and cook until it's no longer pink and most of the liquid has cooked off.
      2 cloves garlic, 1 teaspoon black pepper, 2 pounds ground beef
    • Reduce the heat to low and pour in the milk. Let it simmer for 10-15 minutes, stirring occasionally, until the milk has evaporated.
      1 ยฝ cups low-fat milk
    • Sprinkle in the ground nutmeg and stir everything together.
      โ…› teaspoon ground nutmeg
    • Pour in the white wine and let it simmer for about 10 minutes, stirring occasionally.
      1 cup white wine
    • Add the canned tomatoes to the pot. Use your spoon to break them into smaller pieces.
      1 28-ounce can San Marzano tomatoes
    • Let the sauce simmer uncovered on low heat for 2 hours, stirring occasionally. If it looks like it's drying out before 2 hours, add ยฝ cup of water. By the end, the sauce should be thick, with a bit of fat on top and very little liquid left.
    • About 30 minutes before the sauce is done, bring a large pot of salted water to a boil.
      1 tablespoon kosher salt
    • Cook the linguine to al dente according to the package instructions. Before you drain the pasta, save about ยฝ cup of the starchy pasta water.
      1 pound linguine
    • Add the drained pasta and the reserved pasta water to the pot with the bolognese sauce.
    • Toss the pasta and sauce together until the pasta is well coated. Serve with freshly grated parmesan cheese and a sprinkle of fresh herbs if desired.
      Parmesan cheese or fresh herbs

    Notes

    • Storage:ย Store leftovers in an airtight container in the refrigerator for up to 4 days. If freezing, consider freezing the bolognese sauce separately and making fresh linguine when ready to serve.
    • Leftovers:ย Use leftovers to makeย lasagna bologneseย orย bolognese pizza.

    Nutrition

    Serving: 1serving | Calories: 609kcal | Carbohydrates: 58g | Protein: 41g | Fat: 20.5g | Saturated Fat: 8g | Polyunsaturated Fat: 1g | Monounsaturated Fat: 9g | Trans Fat: 0.5g | Cholesterol: 110mg | Sodium: 585mg | Potassium: 913mg | Fiber: 5g | Sugar: 11g | Vitamin C: 18.5mg | Calcium: 129mg | Iron: 6.9mg
    Did you try this recipe?Let me know! Comment below, or take a picture and tag me on Instagram @everydayhomemadebyashley.

    Ultimate Game Day Nachos (Ground Beef Nachos)

    August 2, 2023

    These Game Day Nachos are a must-try if you're looking to score big at your next game day party! Crispy tortilla chips are loaded with seasoned ground beef, hearty black beans, melty cheddar cheese, and all of your favorite toppings for an easy, 30-minute appetizer recipe that's sure to win your guests over.

    A cast iron skillet filled with game day nachos.

    While I'm not really a sports person, you can always count me in for your game day party. Let's just say, I am a big fan of party snacks.

    And these award-winning nachos are truly the ultimate game day party appetizer.

    With their winning combination of seasoned ground beef, black beans, cheddar cheese, and endless tasty toppings, they'll have your guests rushing to build their perfect nacho masterpiece.

    Today, Iโ€™m walking you through how to make the best homemade nachos with ground beef, including the ingredients you should use, tips that will guarantee you make them successfully the first time, and some of my favorite topping ideas.

    Disclaimer: Some links throughout this post are affiliate links. As an Amazon Associate, I earn from qualifying purchases. You can learn more by visiting my Affiliate Disclosure Page.

    Why You'll Love This Recipe

    • Perfect for Game Day- Hosting a game day party? Serve your guests a tray of these game-winning ground beef and black bean nachos! They're perfect for sharing and sure to score major points.
    • Quick & Easy- Ready in just 30 minutes, this game day nacho recipe requires only a few simple steps and basic ingredients. It's a quick and easy snack that's ideal for any celebration.
    • Flavorful- Seasoned ground beef, melty cheddar cheese, hearty black beans, and crunchy tortilla chips come together to make a deliciously flavorful and comforting snack. Plus, we can't forget about the endless topping possibilities!
    • Customizable- The great thing about making homemade nachos is that you can truly make them any way you like! Load them up with your favorite toppings or set up a nacho bar and let guests customize their own nachos.
    • Family-Friendly- Cheesy ground beef nachos are one snack the whole family can agree on. I also enjoy making nachos for a quick and easy weeknight meal when I don't really feel like cooking.

    Ingredient Notes

    Here are some notes on the key ingredients. For the full list of ingredients, check out the recipe card below.

    • Tortilla Chips- I like to use sturdy, traditional tortilla chips because they hold the toppings well. Round, bite-sized tortilla chips are a little easier to eat, but don't hold onto the toppings as well.
    • Ground Beef- Opt for 85-90% lean ground beef for the best flavor.
    • Black Beans- Choose low-sodium black beans, making sure to drain and rinse them before mixing them with the ground beef.
    • Cheddar Cheese- For the best flavor and better melting, shred your own cheddar cheese from the block. Pre-shredded cheeses are usually coated with anti-caking agents that prevent them from melting as nicely.
    • Taco Seasoning- A flavorful blend of chili powder, onion powder, garlic powder, cumin, cayenne pepper, kosher salt, and black pepper is used to season the ground beef.
    • Toppings- Use whichever toppings you like! If I'm feeling fancy, I like to make pico de gallo and guacamole for my sheet pan nachos.

    ๐ŸŒฑ Sustainability Tip: Grow tomatoes, jalapeรฑos, red onions, and cilantro in your own backyard or balcony garden to enjoy the freshest nacho toppings!

    The ingredients to make game day nachos. Each ingredient is labeled with text and includes tortilla chips, ground beef, cheddar cheese, black beans, seasonings, and toppings.

    Substitutions and Variations

    Here are a few ways you can try customizing this easy game day nachos recipe to fit your diet and taste preferences.

    Substitutions

    • Tortilla Chips- Swap traditional corn tortilla chips for flavored tortilla chips or pita chips for a unique twist on this recipe.
    • Ground Beef- Substitute ground beef for ground turkey, ground chicken, plant-based ground meat alternatives, or an additional can of black beans.
    • Black Beans- Try using pinto beans or kidney beans in place of black beans. Not a fan of beans? Use 2 pounds of ground beef instead.
    • Cheddar Cheese- Pepper jack cheese, monterey jack cheese, colby jack cheese, or even dairy-free cheese can all be used in place of cheddar cheese.
    • Taco Seasoning- Use a pre-mixed packet of taco seasoning for quicker preparation.
    • Toppings- Customize the toppings based on your preferences and dietary restrictions.
    A red cast iron skillet of game day nachos topped with tomatoes, jalapeรฑos, cilantro, and avocado.

    Variations

    • Gluten-Free- These game day nachos are naturally gluten-free. However, always double-check ingredient labels before consuming any new foods.
    • Vegetarian- Swap the ground beef for a plant-based ground meat alternative or use more black beans instead of meat.
    • Vegan- In addition to swapping out the ground beef, replace the cheddar cheese with dairy-free cheddar cheese.
    • Extra Spicy- Add more cayenne pepper to the ground beef and top the nachos with jalapeรฑos and your favorite hot sauce.
    • BBQ- Swap the ground beef and black bean mixture for BBQ pulled pork, chicken, or beef brisket.
    • Fruity- Top your nachos with ground chicken and pineapple mango salsa for a sweeter version of these game-winning nachos.

    How to Make Game Day Nachos

    Here is how to make nachos with ground beef.

    Step 1: Preheat the oven. Preheat your oven to 350โ„‰ and line a rimmed baking sheet with parchment paper. A large cast iron skillet will work too.

    Step 2: Cook the ground beef. In a large skillet over medium-high heat, cook the ground beef until it's browned. This usually takes about 5 minutes. Make sure to break up the beef into small pieces as it cooks.

    Ground beef cooked in a stainless steel skillet.

    Step 3: Prepare the seasoning mix. While the beef is cooking, mix together the chili powder, onion powder, garlic powder, ground cumin, kosher salt, black pepper, and cayenne pepper in a small bowl.

    Step 4: Season the ground beef. Once the beef is cooked, sprinkle the seasoning mixture over it. Stir everything together and cook for an additional 1-2 minutes to let the flavors blend.

    Step 5: Add black beans. Stir the drained and rinsed black beans in with the seasoned beef and remove the skillet from the heat.

    Ground beef seasoned with homemade taco seasoning in a stainless steel skillet.
    Seasoned ground beef and black beans in a stainless steel skillet.

    Step 6: Assemble the nachos. Spread the tortilla chips out evenly on the parchment-lined baking sheet or in a cast iron skillet. Top the chips with the ground beef and black bean mixture, making sure to distribute it as evenly as possible.

    Tortilla chips topped with seasoned ground beef and black beans in a cast iron skillet.

    Step 7: Add cheese. Sprinkle the shredded cheddar cheese evenly over the nachos.

    Step 8: Bake the nachos. Put the baking sheet or skillet into the preheated oven for about 5 minutes or until the cheese has melted and is bubbly.

    Tortilla chips topped with seasoned ground beef, black beans, and shredded cheddar cheese in a cast iron skillet.
    Nachos with ground beef, black beans, and melted cheddar cheese after being baked in the oven.

    Step 9: Add toppings and serve. Once the nachos are out of the oven, it's time to add your favorite toppings! Choose from diced tomato, jalapeรฑo, red onion, cilantro, avocado, black olives, sour cream, guacamole, pico de gallo, or any other toppings you love. Get creative!

    Ground beef nachos in a cast iron skillet after being baked and toppings added.

    Tips for Success

    Make these super bowl nachos successfully the first time using these tried and true tips.

    • Use parchment paper. Make chowing down and clean up a breeze by lining your sheet pan with parchment paper or aluminum foil to prevent the cheese from sticking.
    • Break the ground beef up. As the ground beef cooks, break it up into small pieces so it stays on the tortilla chips better and is easier to eat.
    • Cook the taco seasoning. Cook the taco seasoning in the beef fat for a few minutes to enhance its flavor, resulting in even tastier ground beef.
    • Distribute the cheese evenly. Spread the shredded cheddar cheese evenly over the nachos. The melted cheese helps hold the ground beef and black beans in place.
    • Get creative. Nachos are highly customizable so, don't be afraid to experiment with different ingredients and flavor combinations.

    ๐Ÿˆ Hosting a Party for the Big Game? Set up a nacho bar with various toppings and sauces, allowing guests to customize their nachos for a fun, interactive experience.

    Ground beef and black bean nachos topped with cheddar cheese, tomatoes, and diced avocado in a cast iron skillet.

    Storage and Reheating

    The best game day nachos are served hot and fresh from the oven. However, if you do find yourself with leftovers, here is everything you need to know about storing and reheating them.

    How to Store

    • Room Temperature- If you're serving these nachos at a party, keep in mind that they should only remain at room temperature for a maximum of 2 hours.
    • Refrigerator- Store leftover game day nachos wrapped tightly in aluminum foil or in an airtight container in the refrigerator for 3-4 days.
    • Freezer- I do not recommend freezing leftover nachos as the texture of the chips and toppings may become soggy and unpleasant after thawing.

    How to Reheat

    • Oven- Preheat oven to 350ยฐF. Remove any fresh toppings and arrange the leftover nachos in a single layer on a parchment or foil-lined baking sheet. Bake the nachos for about 5-10 minutes, or until the cheese is melted and the chips are crispy.
    • Air Fryer- Preheat the air fryer to 350ยฐF. Remove any fresh toppings and place the leftover nachos in the air fryer basket in a single layer. Air fry the nachos for 3-5 minutes, or until the cheese is melted and the chips regain their crispness.
    • Microwave- Remove any fresh toppings and transfer the leftover nachos to a microwave-safe plate. Microwave the nachos on HIGH for 1-2 minutes, or until the cheese is melted and the nachos are heated through.

    Make Ahead

    Preparing the individual components of these super bowl nachos in advance can save you time and effort when you're ready to party.

    • Beef and Bean Mixture- Cook the ground beef and black beans and store the mixture in an airtight container for up to 3 days in the refrigerator.
    • Shred the Cheese- If you're using block cheese, you can shred it up to one week in advance and store it in the fridge in an airtight container or a resealable bag.
    • Prepare the Toppings- Chop and prepare the various toppings like diced tomatoes, jalapeรฑos, red onions, and cilantro in advance. Store them separately in airtight containers or resealable bags in the refrigerator.
    A cast iron skillet filled with game day nachos.

    Frequently Asked Questions

    What toppings do you put on nachos?

    Traditional nacho toppings include diced tomatoes, jalapeรฑos, red onion, cilantro, avocado, olives, sour cream, guacamole, pico de gallo, and queso cheese sauce. Some creative topping ideas include lime juice, pineapple chunks, shredded BBQ chicken, pickled red onions, mango salsa, roasted sweet potato, or crumbled queso fresco.

    How do you keep nachos warm at a party?

    To keep nachos warm at a party, consider serving them in a buffet-style warming tray or chafing dish. Another option is to serve the nachos out of a slow cooker turned to the lowest setting. Finally, you can keep the nachos warm in a low-temperature oven and serve them in smaller batches.

    How do you prevent nachos from getting soggy?

    To prevent the nachos from getting soggy, try to avoid overloading them with wet toppings or sauces. Layer the ingredients evenly, and consider serving the toppings separately if they might make the chips soggy.

    Let's Connect!

    Be sure to leave a comment below if you have any questions. You can also connect with me on Instagram, Facebook, Pinterest, or via email at [email protected].

    More Game Day Recipes

    • A skillet filled with Greek yogurt buffalo chicken dip garnished with green onions and hot sauce.
      Greek Yogurt Buffalo Chicken Dip
    • A bowl of black bean corn feta dip surrounded by pita chips. There is a pita chip sticking out of the dip.
      Black Bean Corn Feta Dip
    • A pile of air fryer broccoli bites on a small white plate. There is some ketchup to the left of the broccoli bites on the plate.
      Cheesy Air Fryer Broccoli Bites

    ๐Ÿ“– Recipe

    Game day nachos in a cast iron skillet.
    Print Pin SaveSaved!

    Game Day Nachos

    These Game Day Nachos are a must-try if you're looking to score big at your next game day party! Crispy tortilla chips are loaded with seasoned ground beef, hearty black beans, melty cheddar cheese, and all of your favorite toppings for an easy, 30-minute appetizer recipe that's sure to win your guests over.
    Course Appetizer, Main Course
    Cuisine Mexican
    Prep Time 15 minutes minutes
    Cook Time 15 minutes minutes
    Total Time 30 minutes minutes
    Servings 6 servings
    Calories 680kcal
    Author Ashley Petrie, RDN, LDN

    Equipment

    • Rimmed baking sheet or large cast iron skillet
    • Parchment paper

    Ingredients

    • 1 pound ground beef 85-90% lean
    • 1 tablespoon chili powder
    • 1 teaspoon onion powder
    • ยฝ teaspoon garlic powder
    • ยฝ teaspoon ground cumin
    • ยผ teaspoon kosher salt
    • ยผ teaspoon black pepper
    • โ…› teaspoon cayenne pepper
    • 1 15.5-ounce can low-sodium black beans drained and rinsed
    • 1 12-ounce bag tortilla chips
    • 2 cups cheddar cheese shredded
    • Toppings of choice diced tomato, jalapeรฑo, red onion, cilantro, avocado, black olives, roasted corn, sour cream, guacamole, pico de gallo, hot sauce, etc.

    Instructions

    • Preheat your oven to 350โ„‰ and line a rimmed baking sheet with parchment paper. A large cast iron skillet will work too.
    • In a large skillet over medium-high heat, cook the ground beef until it's browned. This usually takes about 5 minutes. Make sure to break up the beef into small pieces as it cooks.
      1 pound ground beef
    • While the beef is cooking, mix together the chili powder, onion powder, garlic powder, ground cumin, kosher salt, black pepper, and cayenne pepper in a small bowl.
      1 tablespoon chili powder, 1 teaspoon onion powder, ยฝ teaspoon garlic powder, ยฝ teaspoon ground cumin, ยผ teaspoon kosher salt, ยผ teaspoon black pepper, โ…› teaspoon cayenne pepper
    • Once the beef is cooked, sprinkle the seasoning mixture over it. Stir everything together and cook for an additional 1-2 minutes to let the flavors blend.
    • Stir the drained and rinsed black beans in with the seasoned beef and remove the skillet from the heat.
      1 15.5-ounce can low-sodium black beans
    • Spread the tortilla chips out evenly on the parchment-lined baking sheet or in a cast iron skillet. Top the chips with the ground beef and black bean mixture, making sure to distribute it as evenly as possible.
      1 12-ounce bag tortilla chips
    • Sprinkle the shredded cheddar cheese evenly over the nachos. The cheese will melt and become gooey in the oven, holding all the delicious toppings together.
      2 cups cheddar cheese
    • Put the baking sheet or skillet into the preheated oven for about 5 minutes or until the cheese has melted and is bubbly. Keep a close eye on them to avoid burning.
    • Once the nachos are out of the oven, it's time to add your favorite toppings! Choose from diced tomato, jalapeรฑo, red onion, cilantro, avocado, black olives, sour cream, guacamole, pico de gallo, or any other toppings you love. Get creative!
      Toppings of choice
    • Serve the nachos immediately while they're still warm and gooey.

    Notes

    • Hosting a Party for the Big Game? Set up a nacho bar with various toppings and sauces, allowing guests to customize their nachos for a fun and interactive experience.
    • Storage: While nachos are best enjoyed hot and fresh from the oven, you can store leftovers for up to 4 days in the refrigerator.
    • Make Ahead: Prepare the seasoning mix, cook the ground beef, shred the cheese, or pre-chop toppings in advance to save time on preparation.

    Nutrition

    Serving: 1serving (before toppings) | Calories: 680kcal | Carbohydrates: 53g | Protein: 38.5g | Fat: 35g | Saturated Fat: 12g | Polyunsaturated Fat: 8g | Monounsaturated Fat: 11.5g | Trans Fat: 1g | Cholesterol: 104mg | Sodium: 686mg | Potassium: 757mg | Fiber: 8g | Sugar: 1g | Vitamin C: 1mg | Calcium: 355mg | Iron: 5mg
    Did you try this recipe?Let me know! Comment below, or take a picture and tag me on Instagram @everydayhomemadebyashley.

    The Best Buffalo Chicken Flatbread Pizzas

    August 1, 2023

    This Buffalo Chicken Flatbread is quick, easy-to-make, and so flavorful, it should be on a restaurant menu! Made with fluffy naan bread, homemade buffalo sauce, and ranch-seasoned chicken breast, these homemade flatbread pizzas are versatile and great for both parties and busy weeknight dinners.

    Three buffalo chicken flatbreads on a wooden pizza peel. One of the flatbreads is cut into three pieces.

    I'm not being dramatic when I say this might be one of the best buffalo chicken flatbread pizzas I've ever tried. Seriously, it's restaurant-level good!

    What sets this recipe apart is the ranch-seasoned chicken breast. Instead of using pre-cooked chicken, I sautรฉed sliced chicken breast in oil, then seasoned it with my own ranch-inspired blend of herbs and spices.

    To make these flatbreads even more delicious, I highly encourage you to try making your own naan bread. The incomparable flavor of homemade naan really makes these buffalo chicken flatbreads shine.

    Today, Iโ€™m walking you through the entire process including the best ingredients to use, tips that will guarantee you make this recipe successfully the first time, and some of my favorite ways to serve these spicy flatbread pizzas.

    Can't get enough buffalo? Check out my recipes for Greek yogurt buffalo chicken dip or buffalo chicken Caesar salad.

    Disclaimer: Some links throughout this post are affiliate links. As an Amazon Associate, I earn from qualifying purchases. You can learn more by visiting my Affiliate Disclosure Page.

    Why You'll Love This Recipe

    • Restaurant-Worthy Flavor- Impress your family and friends with a homemade buffalo chicken flatbread pizza that's so good, it tastes like it came from a fancy restaurant.
    • Family-Friendly- If your family loves buffalo chicken as much as mine, they're going to love this buffalo chicken flatbread recipe. It's a perfect blend of spicy and cheesy that will have everyone asking for seconds!
    • Quick & Easy- This easy flatbread pizza recipe is ready in just 35 minutes, making it perfect for a quick weeknight dinner.
    • Perfect for Game Day- Hosting a party for the big game? Score major points with a lineup of spicy buffalo chicken flatbread pizzas! You'll have all of your guests cheering.

    Ingredient Notes

    Here are some notes on the key ingredients. For the full list of ingredients, check out the recipe card below.

    • Naan Bread- If you have the time, I highly recommend making homemade naan bread for this recipe. Naan bread can be made up to 4 days in advance and stored at room temperature.
    • Chicken Breast- Opt for boneless, skinless chicken breast. I like to thinly slice my chicken breast into bite-sized pieces so it cooks quickly, but you can also cube it if preferred.
    • Hot Sauce- For classic buffalo sauce flavor, I always use Frank's RedHot Sauce. Adjust the spiciness of the buffalo wing sauce by adding more or less hot sauce to the butter.
    • Butter- Use unsalted butter to make the buffalo sauce since hot sauce already contains a lot of sodium.
    • Mozzarella Cheese- Use low-moisture, part-skim shredded mozzarella cheese. Shred it yourself from a block for the best results when making homemade flatbread pizza.
    • Cheddar Cheese- Adds a sharp, tangy flavor that goes perfectly with buffalo chicken. For the best taste and texture, I suggest shredding your own cheddar cheese from a block.
    • Ranch Seasonings- A combination of dried dill, parsley, chives, garlic powder, onion powder, kosher salt, and black pepper gives the chicken a ranch dressing-like flavor that pairs well with buffalo sauce.
    • Dressing- A drizzle of creamy ranch or blue cheese dressing mellows out the spicy buffalo sauce.
    • Scallions- Sliced green onions provide a fresh flavor and crunchy texture to the flatbread.

    ๐ŸŒฑ Sustainability Tip: Buying locally-sourced chicken supports the local economy, reduces your carbon footprint, and promotes animal welfare.

    The ingredients to make buffalo chicken flatbread pizza. Each ingredient is labeled with text. They include ranch dressing, cheddar and mozzarella cheese, chicken breast, scallions, olive oil, hot sauce, butter, naan bread, and seasonings.

    Substitutions and Variations

    Here are a few ways you can try customizing this flatbread buffalo chicken pizza recipe to fit your diet and taste preferences.

    Substitutions

    • Naan Bread- Swap naan bread for tortillas, pita bread, lavash bread, chapati, or pizza crust.
    • Chicken Breast- Substitute chicken breast for boneless, skinless chicken thighs. Or use leftover roasted chicken or a rotisserie chicken for a quicker option.
    • Buffalo Sauce- Replace Frank's RedHot Sauce with your hot sauce of choice.
    • Cheeses- Experiment with other cheese varieties like provolone cheese, monterey jack cheese, pepper jack cheese, or crumbled blue cheese.
    • Ranch Seasonings- Use a pre-made ranch seasoning packet for a quicker option.
    • Olive Oil- Any neutral flavored oil or butter can be used to sautรฉ the chicken.
    • Dressing- For a lighter, more tangy flavor, swap the dressing for sour cream or plain yogurt. Or skip the dressing altogether.
    • Scallions- Chopped red onions, chives, or even cilantro can be used as an alternative to scallions for a different flavor profile.
    Buffalo chicken flatbreads on a wooden pizza peel.

    Variations

    • Gluten-Free- Make gluten-free buffalo chicken flatbread by substituting the naan bread for gluten-free naan bread. Additionally, ensure all of the other ingredients are labeled gluten-free before using.
    • Vegetarian- Try swapping the chicken for chickpeas or white beans for a vegetarian-friendly version of this flatbread recipe.
    • Extra Spicy- Love all things spicy? Add sliced jalapeรฑo peppers for an extra boost of heat.
    • Vegetables- Top this buffalo chicken flatbread with vegetables such as cauliflower, bell peppers, red onion, or tomatoes for more flavor and nutrition.
    • Pineapple- Give this buffalo chicken naan bread pizza a sweet, tropical twist by adding some fresh pineapple chunks.

    How to Make Buffalo Chicken Flatbread

    Here is how to make these buffalo chicken flatbread pizzas.

    Step 1: Preheat the oven. Preheat the oven to 425โ„‰ and line a rimmed baking sheet with parchment paper.

    Step 2: Make the buffalo sauce. In a small mixing bowl, melt the butter in the microwave using 30-second increments on HIGH power. Once melted, add the hot sauce and whisk well to combine. Set aside.

    A small glass bowl of homemade buffalo sauce.

    Step 3: Cook the chicken. In a large skillet, heat the olive oil over medium heat. Add the sliced chicken breast and cook for 5-7 minutes or until the chicken is no longer pink.

    Step 4: Season the chicken. Sprinkle the dried dill, parsley, chives, garlic powder, onion powder, kosher salt, and black pepper over the cooked chicken. Stir and cook for an additional 1-2 minutes. Remove the skillet from the heat.

    Sliced chicken breast sautรฉing in olive oil in a stainless steel skillet.
    Cooked chicken breast pieces seasoned with homemade ranch seasoning.

    Step 5: Toss chicken with buffalo sauce. Add 2 tablespoons of the prepared buffalo sauce to the cooked chicken, and toss to combine, making sure the chicken is coated with the sauce.

    Sliced cooked chicken breast tossed with homemade ranch seasoning and buffalo sauce.

    Step 6: Assemble the flatbreads. Place the naan bread on the parchment-lined baking sheet. Spread 2-3 tablespoons of buffalo sauce on each flatbread as the base. Sprinkle the shredded mozzarella and cheddar cheese over the buffalo sauce on each flatbread. Then, evenly distribute the prepared buffalo chicken over the cheeses.

    Two naan breads with buffalo sauce spread on top of them on a parchment-lined baking sheet.
    A buffalo chicken flatbread on a piece of parchment paper before being cooked.

    Step 7: Bake the flatbreads. Place the baking sheet into the preheated oven and bake for 9-11 minutes or until the cheese is golden brown and bubbly.

    Step 8: Serve. Remove the flatbreads from the oven. Drizzle each flatbread with ranch dressing or blue cheese dressing, extra buffalo sauce (if desired), and sliced scallions. Serve immediately and enjoy!

    Two cooked buffalo chicken flatbreads on a parchment-lined baking sheet.

    Note: If you end up with extra buffalo sauce, it can be stored in the refrigerator for up to 2 weeks.

    Tips for Success

    Make these buffalo-style chicken flatbreads successfully the first time using these tried and true tips.

    • Use parchment paper. Line the baking sheet with parchment paper to prevent sticking and to make clean-up a breeze.
    • Make homemade naan bread. If you have the time, it's worth the little bit of extra effort it takes to make the naan bread from scratch. The soft, pillowy texture and authentic flavor will elevate your buffalo chicken flatbread to the next level.
    • Shred your own cheese. Pre-shredded cheese is often coated in anti-caking agents that prevent it from melting properly. For the best flavor and texture, shred your own mozzarella and cheddar cheese from the block.
    • Thinly slice the chicken breast. For tender chicken that blends perfectly into the flatbread pizza, slice the chicken breast into thin, bite-sized pieces.
    • Customize the spice level. Use more or less buffalo sauce to suit your desired spiciness level.
    • Rest the flatbreads after cooking. Allow the flatbreads to cool for a minute or two after baking. This helps the cheese and toppings settle, making them easier to handle.

    What to Serve With Buffalo Chicken Flatbread

    These buffalo chicken flatbread pizzas pair well with a variety of side dishes and can be served as either an easy weeknight meal or as a tasty party appetizer.

    If you're serving these cheesy buffalo chicken flatbreads for dinner, try pairing them with a side salad for a light and refreshing meal. Some of my favorites include buffalo chicken caesar salad, arugula quinoa salad, and spinach caprese salad.

    Alternatively, vegetable side dishes like honey garlic Brussels sprouts, sautรฉed asparagus, and roasted green beans and carrots all pair well with buffalo chicken pizza flatbreads.

    Finally, make game day extra special by serving this easy party appetizer with other homemade appetizers. Chips with guacamole and salsa or even loaded nachos are all delicious options.

    A hand holding a piece of buffalo chicken flatbread pizza up to the camera.

    Storage and Reheating

    How to Store

    • Refrigerator- Store the leftover buffalo chicken flatbread wrapped tightly in aluminum foil or in an airtight container in the refrigerator for 3-4 days.
    • Freezer- Leftover spicy chicken flatbread pizza can be stored in a freezer-safe plastic bag or container for up to 2 months.

    How to Reheat

    • Oven- Preheat oven to 350ยฐF. Place leftover flatbread on a parchment or foil-lined baking sheet. Heat for approximately 5-10 minutes or until the cheese is bubbly and the flatbread is warmed through.
    • Stovetop- Heat a skillet over medium-low heat. Add the leftover buffalo chicken flatbread to the skillet and cover with a lid. Heat for 3-5 minutes or until the cheese is melted and the flatbread is hot.
    • Air Fryer- Preheat the air fryer to 350ยฐF. Place slices of leftover buffalo chicken naan pizza in the air fryer basket. Reheat for approximately 3-5 minutes or until the flatbread is hot and the cheese is melted.
    • Microwave- Place the leftover flatbread on a microwave-safe dish. Heat on HIGH in 30-second increments until the flatbread is fully warmed through.

    Make Ahead

    Whether you're getting ready for a busy week or hosting a party, preparing all or part of these easy buffalo chicken flatbread pizzas in advance can save you time and effort.

    • Naan Bread- Freshly baked naan can be kept at room temperature in an airtight container for up to 2 to 3 days.
    • Buffalo Sauce- You can prepare the buffalo sauce ahead of time and store it in an airtight container in the refrigerator. It will keep well for about 1 to 2 weeks.
    • Chicken- Cook and season the chicken breast in advance and store it in the refrigerator for up to 2 days.
    • Frozen Pre-Made Flatbreads- Assemble the flatbreads with toppings, skip baking, and freeze on a baking sheet until solid. Wrap tightly in plastic wrap and foil and freeze for 2 to 3 months. To bake, preheat oven to 425โ„‰, bake frozen flatbreads for 12-15 minutes until golden brown and bubbly.
    A hand lifting a buffalo chicken flatbread pizza up.

    Frequently Asked Questions

    Can I used pre-cooked chicken to make this recipe?

    Yes, you can use pre-cooked chicken for this recipe. Rotisserie chicken or leftover cooked chicken works well and can save time in the preparation process.

    Can I use other types of flatbread besides naan bread?

    Yes! Use pita bread, chapati, tortillas, pizza dough, or any other type of flatbread you prefer to make buffalo chicken flatbread.

    Can I make these flatbreads larger or smaller?

    Of course! Adjust the size of the flatbreads to your preference. Smaller ones are perfect as appetizers, while larger ones can serve as a main meal.

    Is buffalo chicken flatbread healthy?

    This buffalo chicken flatbread pizza recipe is not considered low calorie since it contains butter and cheese. For a healthier, more well-balanced meal, have one to two slices of buffalo chicken flatbread with a side of salad or roasted veggies.

    Let's Connect!

    Be sure to leave a comment below if you have any questions. You can also connect with me on Instagram, Facebook, Pinterest, or via email at [email protected].

    More Pizza Recipes

    • A garlic parmesan pizza cut into 8 slices on a pizza peel.
      Creamy White Garlic Parmesan Pizza
    • Mushroom pizza cut into 8 slices on a piece of parchment paper.
      Mushroom Pizza
    • Slices of bolognese pizza on white parchment paper.
      Bolognese Pizza
    • Pieces of sourdough calzone on a sheet of parchment paper next to a small bowl of marinara dipping sauce.
      Sourdough Calzone (Pepperoni & Cheese)

    ๐Ÿ“– Recipe

    Three homemade buffalo chicken flatbreads on a wooden pizza peel.
    Print Pin SaveSaved!

    Buffalo Chicken Flatbread

    This Buffalo Chicken Flatbread is quick, easy-to-make, and so flavorful, it should be on a restaurant menu! Made with fluffy naan bread, homemade buffalo sauce, and ranch-seasoned chicken breast, these homemade flatbread pizzas are versatile and great for both parties and busy weeknight dinners.
    Course Appetizer, Main Course
    Cuisine American
    Prep Time 20 minutes minutes
    Cook Time 15 minutes minutes
    Total Time 35 minutes minutes
    Servings 3 flatbreads
    Calories 907kcal
    Author Ashley Petrie, RDN, LDN

    Equipment

    • Rimmed baking sheet
    • Small mixing bowl
    • Large skillet

    Ingredients

    For the Buffalo Sauce

    • 4 tablespoons unsalted butter
    • ยฝ cup Frank's RedHot Sauce

    For the Chicken Breast

    • 2 tablespoons olive oil
    • 1 large (about ยฝ pound) boneless, skinless chicken breast fat trimmed, sliced thin into bite-sized pieces
    • 1 teaspoon dried dill
    • 1 teaspoon dried parsley
    • 1 teaspoon dried chives
    • ยฝ teaspoon garlic powder
    • ยฝ teaspoon onion powder
    • ยผ teaspoon kosher salt
    • ยผ teaspoon black pepper

    For the Buffalo Chicken Flatbread

    • 3 large (10-inch diameter) naan bread
    • 1 cup low-moisture, part-skim mozzarella cheese shredded
    • ยฝ cup cheddar cheese shredded
    • 3 tablespoons ranch dressing or blue cheese dressing for serving
    • 3 scallions sliced, for serving

    Instructions

    • Preheat the Oven: Preheat the oven to 425โ„‰ and line a rimmed baking sheet with parchment paper.
    • Make the Buffalo Sauce: In a small mixing bowl, melt the butter in the microwave using 30-second increments on HIGH power. Once melted, add the hot sauce and whisk well to combine. Set aside.
      4 tablespoons unsalted butter, ยฝ cup Frank's RedHot Sauce
    • Cook the Chicken: In a large skillet, heat the olive oil over medium heat. Add the sliced chicken breast and cook for 5-7 minutes or until the chicken is no longer pink.
      2 tablespoons olive oil, 1 large (about ยฝ pound) boneless, skinless chicken breast
    • Season the Chicken: Sprinkle the dried dill, parsley, chives, garlic powder, onion powder, kosher salt, and black pepper over the cooked chicken. Stir and cook for an additional 1-2 minutes. Remove the skillet from the heat.
      1 teaspoon dried dill, 1 teaspoon dried parsley, 1 teaspoon dried chives, ยฝ teaspoon garlic powder, ยฝ teaspoon onion powder, ยผ teaspoon kosher salt, ยผ teaspoon black pepper
    • Toss Chicken with Buffalo Sauce: Add 2 tablespoons of the prepared buffalo sauce to the cooked chicken, and toss to combine, making sure the chicken is coated with the sauce.
    • Assemble the Flatbreads: Place the naan bread on the parchment-lined baking sheet. Spread 2-3 tablespoons of buffalo sauce on each flatbread as the base. Sprinkle the shredded mozzarella and cheddar cheese over the buffalo sauce on each flatbread. Then, evenly distribute the prepared buffalo chicken over the cheeses.
      3 large (10-inch diameter) naan bread, 1 cup low-moisture, part-skim mozzarella cheese, ยฝ cup cheddar cheese
    • Bake the Flatbreads: Place the baking sheet into the preheated oven and bake for 9-11 minutes or until the cheese is golden brown and bubbly.
    • Serve: Remove the flatbreads from the oven. Drizzle each flatbread with ranch dressing or blue cheese dressing, extra buffalo sauce (if desired), and sliced scallions. Serve immediately and enjoy!
      3 tablespoons ranch dressing or blue cheese dressing, 3 scallions

    Notes

    • Note: If you end up with extra buffalo sauce, it can be stored in the refrigerator for up to 2 weeks.
    • Quick Tip: Shred your own cheese from a block for the best texture and flavor.
    • Storage: Store leftovers in an airtight container in the refrigerator for up to 4 days or in the freezer for up to 3 months.
    • Make Ahead: For frozen, ready-to-bake buffalo chicken flatbread pizzas, assemble the flatbreads with toppings, skip baking, and freeze on a baking sheet until solid. Wrap tightly in plastic wrap and foil and freeze for 2 to 3 months. To bake, preheat oven to 425โ„‰, bake frozen flatbreads for 12-15 minutes until golden brown and bubbly.

    Nutrition

    Serving: 1whole flatbread | Calories: 907kcal | Carbohydrates: 59g | Protein: 41g | Fat: 56g | Saturated Fat: 22g | Polyunsaturated Fat: 4.5g | Monounsaturated Fat: 19.5g | Trans Fat: 1g | Cholesterol: 144mg | Sodium: 2974mg | Potassium: 388mg | Fiber: 0.5g | Sugar: 6g | Vitamin C: 1mg | Calcium: 425mg | Iron: 0.8mg
    Did you try this recipe?Let me know! Comment below, or take a picture and tag me on Instagram @everydayhomemadebyashley.

    Sourdough Discard Biscuits

    July 26, 2023

    These Sourdough Discard Biscuits are super soft and tender with lots of buttery, flaky layers. Made with real buttermilk and sourdough discard, they're perfect for your next holiday breakfast or brunch.

    Three sourdough discard biscuits stacked in a triangle shape on top of a wooden pizza peel. Out of focus in the background is a skillet of biscuits and a small glass jar of butter.

    Soft, flaky, and buttery, nothing compares to warm homemade biscuits fresh out of the oven.

    Since I started my sourdough journey about three years ago now, I've made these sourdough discard biscuits many times. I particularly love making them around the holidays or for a cozy Sunday brunch.

    One of my favorite traditions is serving them on Christmas morning, alongside fresh eggs from my chickens, rich sausage gravy, and crispy home fries.

    These sourdough buttermilk biscuits are made with real buttermilk, sourdough discard, and plenty of butter, resulting in a soft, tender texture with a rich, tangy flavor. With just 7 ingredients, theyโ€™re ready in under an hour and are incredibly easy to make.

    I hope you give them a try and enjoy them just as much as I do!

    Don't feel like making cut biscuits? Give my sourdough discard drop biscuits a try instead!

    Disclaimer: Some links throughout this post are affiliate links. As an Amazon Associate, I earn from qualifying purchases. You can learn more by visiting my Affiliate Disclosure Page.

    Ingredient Notes

    Here are some notes on the key ingredients. For the full list of ingredients, check out the recipe card below.

    • All-Purpose Flour- All-purpose flour gives these sourdough discard biscuits a soft and tender crumb.
    • Buttermilk- Buttermilk adds moisture and tanginess. Use cold buttermilk to help prevent the butter from melting.
    • Sourdough Discard- Sourdough adds moisture and a lightly tangy flavor to the biscuits. You can use either sourdough discard or active sourdough starter.
    • Butter- Keep the butter as cold as possible while making the dough to maximize the flaky, tender texture of the biscuits.
    • Baking Powder- Baking powder is the main ingredient that makes the biscuits rise. Make sure to use aluminum-free baking powder to avoid a bitter, metallic taste.
    • Kosher Salt- Salt enhances the flavor of the biscuits. I recommend using kosher salt since it doesn't have added sugar or anti-caking agents like table salt often does.
    • Honey- Provides a touch of sweetness that balances the overall flavor of the biscuits. The sugar also helps the biscuits brown as they bake.
    The ingredients to make sourdough discard biscuits. Each ingredient is labeled with text. They include butter, buttermilk, honey, all-purpose flour, kosher salt, baking powder, and sourdough discard.

    Tips for Success

    • Keep the ingredients cold. Ensure that the butter and buttermilk are cold throughout the process. Cold ingredients help give the biscuits a flakier texture.
    • Weigh ingredients for accuracy. Use a scale to weigh the ingredients, especially the flour and sourdough discard, to achieve the right texture and consistency.
    • Don't overwork the dough. Overworking the dough will cause gluten to develop, resulting it tough, dense biscuits.
    • Cut biscuits with care. When cutting out the biscuits, use a sharp biscuit cutter or cookie cutter. Press straight down without twisting to ensure proper rising during baking.

    How to Make Sourdough Discard Biscuits

    Here is how to make buttermilk biscuits with sourdough discard.

    Step 1: Combine dry ingredients. Preheat oven to 425โ„‰. In a large mixing bowl, whisk together the flour, baking powder, and salt.

    Step 2: Cut in the butter. Add the cold, cubed butter to the dry ingredients. Use your fingertips to gently pinch and spread the butter into thin sheets. Alternatively, you can use a pastry cutter. The mixture should become crumbly but still slightly stick together when pressed.

    Flour, salt, and baking powder in a glass mixing bowl.
    Cold butter cut into the flour mixture in a glass mixing bowl.
    A hand holding up some of the flour-butter mixture to show the texture.

    Step 3: Add wet ingredients. Whisk ยพ cup of buttermilk, sourdough discard, and honey in a small bowl until combined. Pour the wet mixture into the well of the dry ingredients.

    Step 4: Mix the dough. Gently fold the ingredients until a shaggy dough forms. Transfer the dough to a lightly-floured surface to prevent sticking.

    A well in the flour-butter mixture filled with buttermilk, sourdough discard, and honey.
    The dough roughly mixed with a rubber spatula in a glass mixing bowl.
    Rough, shaggy biscuit dough on a floured countertop.

    Step 5: Laminate the dough. Bring the dough together into a mound using your hands. Flatten the mound into a rectangle that's about ยพ-inch thick. Now, fold one side of the rectangle into the center, then do the same with the other side. Turn the dough horizontally and flatten it again. Repeat this folding process three times in total before flattening it into the final ยพ-inch thick rectangle for cutting.

    The biscuit dough after being kneaded and pressed into a rectangle on the counter.
    The biscuit dough rectangle with one side folded into the middle.
    The biscuit dough rectangle folded into thirds on a floured countertop.

    Step 6: Cut the biscuits. Using a 2 ยฝ-inch circular biscuit cutter, press straight down (avoid twisting) to cut the dough into biscuits. Gather scraps, form into a rectangle, and continue cutting to yield around 12 biscuits.

    A circular biscuit cutter cutting biscuits out of the dough.
    All of the dough cut into biscuits on a floured countertop.

    Step 7: Arrange biscuits in the skillet. Arrange the biscuits closely together in a 10-inch cast iron skillet or on a parchment-lined baking sheet. Lightly brush the tops with the remaining 2 tablespoons of buttermilk.

    Twelve sourdough discard biscuits in a cast iron skillet before being cooked.
    A blue silicone brush brushing buttermilk onto the raw biscuits in the cast iron skillet.

    Step 8: Bake the biscuits. Bake for 18-20 minutes until the tops turn golden brown. Remove from the oven and serve warm.

    The cooked buttermilk sourdough discard biscuits in a cast iron skillet.

    Serving Suggestions

    These biscuits are great served warm with all kinds of spreads and saucesโ€”try sourdough gravy, homemade butter, pesto butter, or your favorite jam like cranberry, strawberry-apple, or blueberry.

    You can also use them as a topping for chicken pot pie, the base for a breakfast sandwich, or even turn them into a sweet treat like strawberry shortcake.

    How to Store

    Store leftover sourdough biscuits in an airtight container at room temperature for 2-3 days.

    For longer storage, freeze for up to 3 months in a freezer-safe container. Thaw at room temperature before reheating.

    Sourdough discard biscuits in a red cast iron skillet on top of a wooden pizza peel. Next to the skillet is a small jar of butter and a few biscuits.
    A cover of a recipe ebook with the title "Everyday Sourdough: 27 Sweet & Savory Sourdough Discard Recipes." There is an image of sourdough discard cinnamon rolls on the front. At the bottom, it reads "By Ashley Petrie of Everyday Homemade."
    Grab a copy today!

    Are you tired of watching your sourdough discard go to waste?

    Itโ€™s time to turn excess discard into something delicious with my new ebook - Everyday Sourdough!

    Inside, youโ€™ll find 27 tried-and-true sourdough discard recipes that will transform your leftover starter into mouthwatering creations your family and friends will love.

    No more guilt about wasting your discard - with Everyday Sourdough, you have endless options to quickly make something amazing anytime.

    Let's Connect!

    Be sure to leave a comment below if you have any questions. You can also connect with me on Instagram, Facebook, Pinterest, or via email at [email protected].

    More Sourdough Discard Recipes

    • Sourdough drop biscuits on a piece of wrinkled parchment paper.
      Sourdough Drop Biscuits
    • Three blueberry sourdough scones on a plate. One of the scones is split in half with butter on it.
      Sourdough Scones (Sourdough Blueberry Scones)
    • Three pieces of sourdough discard cornbread on a plate with a pat of butter on top.
      Sourdough Discard Cornbread (No Added Flour)
    • Several pieces of sourdough focaccia on a piece of wrinkled parchment paper.
      Sourdough Discard Focaccia (Same Day or Overnight)

    ๐Ÿ“– Recipe

    Three sourdough discard biscuits stacked in a triangle shape on top of a wooden pizza peel. Out of focus in the background is a skillet of biscuits and a small glass jar of butter.
    Print Pin SaveSaved!
    5 from 8 votes

    Sourdough Discard Biscuits

    These Sourdough Discard Biscuits are super soft and tender with lots of buttery, flaky layers. Made with real buttermilk and sourdough discard, they're perfect for your next holiday breakfast or brunch.
    Course Bread, Side Dish
    Cuisine American
    Prep Time 20 minutes minutes
    Cook Time 20 minutes minutes
    Total Time 40 minutes minutes
    Servings 12 biscuits
    Calories 180kcal
    Author Ashley Petrie, RDN, LDN

    Equipment

    • 2 ยฝ-inch biscuit cutter
    • 10-inch cast iron skillet
    • Pastry brush or basting brush

    Ingredients

    • 2 ยผ cups (270 grams) all-purpose flour plus more for dusting
    • 2 tablespoons aluminum-free baking powder
    • 1 teaspoon kosher salt
    • ยฝ cup (1 stick or 113 grams) unsalted butter very cold, cubed
    • ยพ cup + 2 tablespoons buttermilk cold, divided
    • ยฝ cup (113 grams) sourdough starter discard
    • 1 tablespoon honey

    Instructions

    • Preheat your oven to 425โ„‰.
    • In a large mixing bowl, whisk together the flour, baking powder, and salt.
      2 ยผ cups (270 grams) all-purpose flour, 2 tablespoons aluminum-free baking powder, 1 teaspoon kosher salt
    • Add the cold, cubed butter to the dry ingredients. Use your fingertips to gently pinch and spread the butter into thin sheets. Alternatively, you can use a pastry cutter. The mixture should become crumbly but still slightly stick together when pressed.
      ยฝ cup (1 stick or 113 grams) unsalted butter
    • In a small bowl, whisk together ยพ cup of buttermilk, sourdough discard, and honey until they are well combined. Then, make a well in the center of the dry ingredients and pour the wet mixture into it.
      ยพ cup + 2 tablespoons buttermilk, ยฝ cup (113 grams) sourdough starter discard, 1 tablespoon honey
    • Gently fold the ingredients together until they just start to form a dough. Be careful not to overwork the dough; it's okay if it looks a bit shaggy.
    • Dump the dough out onto a clean, lightly-floured work surface. Since the dough will be sticky, use enough flour to prevent sticking.
    • Bring the dough together into a mound using your hands. Flatten the mound into a rectangle that's about ยพ-inch thick. Now, fold one side of the rectangle into the center, then do the same with the other side. Turn the dough horizontally and flatten it again. Repeat this folding process three times in total before flattening it into the final ยพ-inch thick rectangle for cutting.
    • Take a 2 ยฝ-inch circular biscuit cutter or cookie cutter, and cut the dough into biscuits by pressing straight down without twisting. Twisting the cutter may seal the edges, preventing the biscuits from rising properly.
    • Gather the scraps, form them into a rectangle, and continue cutting until all the dough is used. This should yield around 12 biscuits.
    • Arrange the biscuits in a 10-inch cast iron skillet or close together on a baking sheet lined with parchment paper. The biscuits should touch each other.
    • Lightly brush the tops of the biscuits with the remaining 2 tablespoons of buttermilk.
      ยพ cup + 2 tablespoons buttermilk
    • Bake in the preheated oven for 18-20 minutes or until the tops turn golden brown. Once baked, remove from the oven and serve the biscuits warm.

    Video

    Notes

    • Quick Tip: Use a scale to weigh the ingredients, especially the flour and sourdough discard, to achieve the right texture and consistency.
    • Storage: Store leftover biscuits in an airtight container at room temperature for up to 3 days and in the freezer for up to 2 months. It is not recommended to refrigerate biscuits.

    Nutrition

    Serving: 1biscuit | Calories: 180kcal | Carbohydrates: 23g | Protein: 3.5g | Fat: 8g | Saturated Fat: 5g | Polyunsaturated Fat: 0.5g | Monounsaturated Fat: 2.5g | Cholesterol: 21mg | Sodium: 441mg | Potassium: 59mg | Fiber: 1g | Sugar: 2.5g | Calcium: 41mg | Iron: 1.3mg
    Did you try this recipe?Let me know! Comment below, or take a picture and tag me on Instagram @everydayhomemadebyashley.

    How to Make Butter in a Jar

    July 25, 2023

    Learn how to make butter in a jar from scratch with this easy homemade mason jar butter recipe. All you need is heavy cream, a jar, and a little arm power to shake up fresh butter the old-fashioned way. It's perfect for beginners and a fun activity for kids.

    A small glass jar of butter next to slices of sourdough bread. There is a white cloth napkin laying beneath the jar of butter.

    While butter can be made in a variety of ways, I love the simplicity of making homemade butter in a jar. This old-fashioned butter making technique is so easy, you can even get the kids involved (with adult supervision, of course)!

    Made with just one ingredient and ready in about 20 minutes, you'll love how fresh, creamy, and delicious this homemade mason jar butter tastes.

    Plus, you have complete control over the quality of the ingredients. By using fresh, high-quality cream without additives, you'll create the best homemade butter you've ever tasted.

    Today, Iโ€™m walking you through the entire butter making process including the best ingredients to use, tips to help you make this mason jar butter recipe successfully the first time, and some ways you can customize this butter to make it your very own.

    Disclaimer: Some links throughout this post are affiliate links. As an Amazon Associate, I earn from qualifying purchases. You can learn more by visiting my Affiliate Disclosure Page.

    Why You'll Love This Recipe

    • Simple & Fresh- Homemade butter tastes fresher than store-bought butter, especially if using high-quality heavy cream without any added stabilizers.
    • Beginner-Friendly- This recipe requires only a few basic ingredients, a jar, and a bowl. Each step in the recipe is simple and straightforward, making it accessible to people with all levels of cooking experience.
    • Ready in 20 Minutes- Just 10 minutes of shaking, a little kneading, and you're ready to serve your own fresh butter to your family and friends.
    • Fun Activity for Kids- Churning butter with kids is a fun and educational way to teach them about where their food comes from. It's hands-on and gets them active!
    • Nostalgic Scratch-Cooking- If you share my passion for learning about old-fashioned cooking techniques, you'll love making homemade butter by hand. It's a fun and easy way to connect with the past while creating something delicious.
    • Customizable- Add salt, garlic, herbs, honey, or anything else you want! Homemade butter is easy to customize to suit your tastes.

    Ingredient Notes

    Here are some notes on the key ingredients. For the full list of ingredients, check out the recipe card below.

    • Heavy Cream- For the freshest, creamiest, and richest butter, choose high-quality heavy cream with a fat content of around 36% or higher. Avoid ultra-pasteurized cream, as it may not churn effectively into butter.
    • Kosher Salt- Adding kosher salt enhances the flavor of the butter and makes salted butter. If you prefer unsalted butter, omit the salt altogether.
    • Ice Water- Preparing an ice bath before making the butter is essential to cool and solidify the butter after churning, making it easier to knead.

    ๐ŸŒฑ Sustainability Tip: Whenever possible, choose locally-sourced, organic heavy cream. Not only does it taste fresher, but by supporting local farmers, you reduce the carbon footprint associated with food transportation.

    The ingredients to make homemade butter in a jar. Each ingredient is labeled with text. They include heavy cream, kosher salt, and a glass jar.

    Substitutions and Variations

    Here are a few ways you can try customizing this easy homemade butter recipe to fit your diet and taste preferences.

    Substitutions

    • Heavy Cream- If heavy cream isn't available, whipping cream or heavy whipping cream can be used. While the fat content of whipping cream is slightly lower, you should still be able to use it to make butter.
    • Kosher Salt- Sea salt, pink Himalayan salt, or table salt can be used in place of kosher salt. Look for salt that does not contain added sugar or anti-caking agents.
    A jar of homemade butter on top of a white cloth napkin on top of a wooden cutting board. Out of focus in the background is a skillet filled with biscuits.

    Variations

    When it comes to making flavored compound butter, the possibilities are truly endless. Here are some of my favorite ways to dress up this homemade butter recipe.

    • Herbs- Add dried or fresh parsley, cilantro, dill, chives, thyme, rosemary, or sage to make herbed compound butter.
    • Garlic- Minced or roasted garlic gives butter a bold flavor that's perfect for making garlic bread!
    • Honey- A little honey mixed with butter is delicious smeared on sourdough discard corn muffins, cornbread, or biscuits.
    • Citrus- Grated lemon, lime, or orange zest give homemade butter a tart, citrusy flavor.
    • Pesto- Make your own pesto butter by mixing this easy homemade butter with rich and flavorful basil pesto.
    • Cinnamon Sugar- Add cinnamon and brown sugar for a delicious breakfast butter that pairs well with French toast casserole, waffles, pancakes, and more.
    • Spiced- Spices like cinnamon, nutmeg, and ginger give the butter a warm and cozy flavor that's perfect for the holidays.

    How to Make Butter in a Jar with Cream

    Here is how to make fresh butter at home.

    Step 1: Prepare the ice bath. Prepare an ice bath by filling a mixing bowl with 1 cup of ice and 4 cups of cold water. This will be used later to knead the butter.

    Step 2: Fill the mason jar. Pour the heavy cream into the glass mason jar, filling it up to no more than halfway. Leaving room in the jar allows the cream to churn and turn into butter.

    A glass mason jar filled halfway with heavy cream.

    Step 3: Shake the jar. Securely close the mason jar with its lid and shake it vigorously for about 10-12 minutes. At first, you'll hear the cream sloshing around, but after around 5 minutes, it will turn into whipped cream and become quiet. Around the 10-minute mark, you'll hear the butter thumping against the jar and buttermilk sloshing around, indicating that the butter is done!

    Whipped cream in a glass mason jar - about halfway to making butter.
    The heavy cream separated into butter and buttermilk in a glass mason jar.

    Step 4: Pour off the buttermilk. Pour the buttermilk into a separate bowl and save it for other recipes like pancakes or biscuits. Over the sink, remove the butter from the jar and gently squeeze it together to remove excess buttermilk.

    Butter in a glass mason jar after pouring off the buttermilk.

    Step 5: Knead the butter. Place the butter into the prepared ice bath and gently knead it, further removing any remaining buttermilk. Once the butter is cohesive and free of excess liquid, take it out of the ice bath and gently squeeze it to remove the water. If desired, add ยผ teaspoon of kosher salt and knead it into the butter.

    Homemade butter in a bowl of ice water.
    A ball of homemade mason jar butter on a piece of parchment paper on a counter.

    Step 6: Store the butter. Store the homemade butter in a glass mason jar or wrap it tightly in beeswax wrap, plastic wrap, or parchment paper. Keep it in the refrigerator for up to 3 weeks or freeze it for up to 9 months.

    Homemade butter in a small glass mason jar.

    Tips for Success

    Learn how to make homemade butter successfully the first time using these tried and true tips.

    • Choose fresh, high-quality cream. Fresh cream without any added ingredients results in the freshest-tasting, richest, and creamiest homemade butter.
    • Allow the cream to warm slightly. Let the heavy cream sit out on the counter for 20-30 minutes before making butter. According to New England Cheese Making Supply Company, butter is best made when the temperature of the cream is between 50-60ยฐF.
    • Fill the jar no more than halfway. Leave enough room in the jar for the cream to churn effectively.
    • Be patient. Shake the mason jar vigorously for about 10-12 minutes. It may take some time to see the cream transform into butter, so be patient and keep shaking until you hear the distinct thumping sound.
    • Don't discard the buttermilk. Reserve it for other recipes like pancakes, biscuits, or salad dressings.
    • Label and store the butter. Store the homemade butter in a glass mason jar or wrapped tightly in beeswax wraps, parchment paper, or plastic warp. Label the container with the preparation date for easy reference.

    How to Use Homemade Butter in a Jar

    Homemade butter can be used in the same way as store-bought butter. However, because its flavor is fresher and more delicious, I recommend using it in dishes where its taste will shine and be highlighted.

    Spread this homemade mason jar butter on all kinds of bread and bread products for a comforting treat. Sourdough bread, jalapeรฑo cheddar bread, biscuits, naan bread, and crackers are some of my favorites.

    Creamy homemade butter also pairs well with a variety of breakfast foods. Smear it on waffles, pancakes, French toast, sourdough pumpkin muffins, or sourdough double chocolate muffins. Or mix it into scrambled eggs or a frittata to give them a buttery flavor.

    Finally, this simple butter will take all of your favorite side dishes to the next level. Add it to baked potatoes, macaroni and cheese, honey roasted Brussels sprouts, or sautรฉed butternut squash to give it that special touch.

    A small glass jar of butter on top of a white cloth napkin on a wooden cutting board. The jar of butter is next to a cast iron skillet filled with biscuits.

    How to Store

    • Refrigerator- Store homemade butter in the refrigerator for 2-3 weeks. It's best stored in a glass jar or wrapped tightly in parchment paper, beeswax wrap, or plastic wrap. Remember to label the butter with the preparation date and check for signs of spoilage.
    • Freezer- Properly stored, homemade butter can stay fresh in the freezer for up to 9 months. When you're ready to use the frozen butter, simply thaw it in the refrigerator overnight or at room temperature for a few hours.

    How To Tell If Your Homemade Butter Has Gone Bad

    • Mold- A definite sign that your butter has gone bad is visible mold on the surface of the butter. If you see mold, discard the butter immediately.
    • Smell- If the butter smell sour or rancid, it's a good indication it is no longer good to eat.
    • Taste- Similar to smell, if the butter tastes rancid, sour, or just "off" in some way, it's likely bad.
    • Discoloration- If you notice any unusual color changes in the butter, such as yellow or brown spots, it may be a sign of spoilage. Fresh butter should have a consistent creamy light yellow color.
    • Texture- Spoiled butter may develop a slimy or greasy texture, which is different from the smooth and creamy texture of fresh butter.

    Make Ahead

    Homemade butter can easily be made ahead of time since it lasts for 3 weeks in the refrigerator and 9 months in the freezer.

    Making butter in advance is a great way to have a supply of fresh, delicious butter readily available for various dishes and recipes. It's also ideal if you're planning a party or giving homemade butter as a gift around the holidays.

    A jar of butter sitting next to slices of sourdough bread on a wooden cutting board.

    ๐ŸŽ DIY Edible Gift Idea: Homemade butter in a jar makes a delightful and thoughtful gift for any occasion. Whether it's the holiday season or a friend's birthday, you can't go wrong with delicious edible gifts.

    Frequently Asked Questions

    How much heavy cream does it take to make a pound of butter?

    In my experience, 8 fluid ounces of heavy cream makes about 3.2 ounces of butter. So, to make one pound (16 ounces) of butter, you would need about 40 fluid ounces (5 cups) of heavy cream.

    Is homemade butter healthier than store-bought butter?

    Homemade butter allows you to control the quality of ingredients, making it a healthier choice if you choose high-quality heavy cream without added stabilizers. It's free from additives and preservatives found in some store-bought butter.

    Is it cheaper to make your own butter?

    The cost-effectiveness of homemade butter varies. Compared to cheap, low-quality butter, it may be more expensive. However, when comparing to premium artisanal butter, it can be more cost-effective. Other factors like experience and quality control should also be considered alongside cost.

    Can you make butter from whole milk?

    If you want to make butter from whole milk, you need to use raw milk. Raw milk is essential, as pasteurized and homogenized milk won't separate into cream for butter-making. While making butter from whole milk is possible, it may not be as efficient or yield as much butter as using heavy cream.

    What to do with the buttermilk after making butter?

    Leftover buttermilk is a valuable byproduct that you can use in various recipes like pancakes, biscuits, salad dressings, and smoothies. Don't let it go to waste!

    Can you make butter in a stand mixer or food processor?

    Certainly! You can make butter in a stand mixer or food processor by churning heavy cream until it separates into butter and buttermilk.

    Let's Connect!

    Be sure to leave a comment below if you have any questions. You can also connect with me on Instagram, Facebook, Pinterest, or via email at [email protected].

    More Old-Fashioned Recipes

    • Three jars of refrigerator dill pickles. The front jar is open and there is a fork with a single pickle on it on top of the jar.
      Easy Refrigerator Dill Pickles
    • Sourdough discard crackers with hummus on a small white plate.
      Whole Wheat Sourdough Discard Crackers
    • A round loaf of Dutch oven sourdough bread.
      Beginner-Friendly Sourdough Bread Recipe (Dutch Oven Method)
    • Three nests of homemade sourdough pasta noodles on a flour-dusted baking sheet.
      How to Make Sourdough Pasta

    ๐Ÿ“– Recipe

    A small glass jar of butter next to slices of sourdough bread. There is a white cloth napkin laying beneath the jar of butter.
    Print Pin SaveSaved!

    How to Make Butter in a Jar

    Learn how to make butter in a jar from scratch with this easy homemade mason jar butter recipe. All you need is heavy cream, a jar, and a little arm power to shake up fresh butter the old-fashioned way. It's perfect for beginners and a fun activity for kids.
    Course Condiment, Seasonings
    Cuisine American
    Prep Time 20 minutes minutes
    Total Time 20 minutes minutes
    Servings 6 tablespoons
    Calories 102kcal
    Author Ashley Petrie, RDN, LDN

    Equipment

    • One pint glass mason jar
    • Mixing bowls

    Ingredients

    • 1 cup ice
    • 4 cups cold water
    • 8 fluid ounces heavy cream between 50-60โ„‰
    • ยผ teaspoon kosher salt optional

    Instructions

    • Prepare an ice bath by filling a mixing bowl with 1 cup of ice and 4 cups of cold water. This will be used later to knead the butter.
      1 cup ice, 4 cups cold water
    • Pour the heavy cream into the glass mason jar, filling it up to no more than halfway. Leaving room in the jar allows the cream to churn and turn into butter.
      8 fluid ounces heavy cream
    • Securely close the mason jar with its lid and shake it vigorously for about 10-12 minutes. At first, you'll hear the cream sloshing around, but after around 5 minutes, it will turn into whipped cream and become quiet. Around the 10-minute mark, you'll hear the butter thumping against the jar and buttermilk sloshing around, indicating that the butter is done!
    • Note: The time it takes to turn the cream into butter may vary depending on how vigorously you shake the jar, so be patient and keep shaking until you hear the distinct thumping sound.
    • Pour the buttermilk into a separate bowl and save it for other recipes like pancakes or biscuits. Over the sink, remove the butter from the jar and gently squeeze it together to remove excess buttermilk.
    • Place the butter into the prepared ice bath and gently knead it, further removing any remaining buttermilk.
    • Once the butter is cohesive and free of excess liquid, take it out of the ice bath and gently squeeze it to remove the water.
    • If desired, add ยผ teaspoon of kosher salt and knead it into the butter.
      ยผ teaspoon kosher salt
    • Store the homemade butter in a glass mason jar or wrap it tightly in plastic wrap or parchment paper. Keep it in the refrigerator for up to 3 weeks or freeze it for up to 9 months.

    Notes

    • Note: 8 ounces of heavy cream makes about 3 ounces of butter (about 6 tablespoons).
    • Quick Tip:ย Use fresh and high-quality heavy cream for the best results.
    • Storage: Store in an airtight container in the refrigerator for up to 3 weeks or in the freezer for up to 9 months.

    Nutrition

    Serving: 1tablespoon | Calories: 102kcal | Fat: 11.5g | Saturated Fat: 7g | Polyunsaturated Fat: 0.5g | Monounsaturated Fat: 3g | Trans Fat: 0.5g | Cholesterol: 31mg | Sodium: 48mg | Potassium: 3mg | Calcium: 3mg | Iron: -2mg
    Did you try this recipe?Let me know! Comment below, or take a picture and tag me on Instagram @everydayhomemadebyashley.

    Easy Refrigerator Dill Pickles

    July 21, 2023

    These Refrigerator Dill Pickles are fresh, crunchy, and loaded with dill and garlic flavor. Quick and easy to make with just a saucepan and a few glass jars, there is no special canning equipment required. Once you try these homemade dill pickles, youโ€™ll never go back to store-bought!

    Three jars of refrigerator dill pickles. The front jar is open and there is a fork with a single pickle on it on top of the jar.

    Last summer, my love for pickles grew exponentially. I've always thought pickles were good. But, it wasn't until I grew cucumbers in my garden, and made my own homemade pickles, that I totally fell in love with them.

    The taste of fresh pickles is incomparable to store-bought. After trying store-bought pickles again when I ran out of my own batch last year, I was disappointed by their artificial taste and crunch.

    What's even better is that making this refrigerator dill pickles recipe requires no special canning equipment, making it an approachable and beginner-friendly recipe. With just a few simple ingredients and about 20 minutes, you can have these savory dill pickles ready to store in your fridge for snacking.

    Today, Iโ€™m walking you through the entire pickling process including the best ingredients to use, tips to help you make this refrigerator pickle recipe successfully the first time, and some ways you can customize this easy pickle recipe to make it your very own.

    Love baking your own sourdough bread? These homemade pickles are the perfect mix-in for my dill pickle sourdough bread recipe.

    Disclaimer: Some links throughout this post are affiliate links. As an Amazon Associate, I earn from qualifying purchases. You can learn more by visiting my Affiliate Disclosure Page.

    Why You'll Love This Recipe

    • Fresher Taste- The fresh taste and crisp texture of these homemade dill pickles is incomparable to store-bought. Once you taste them, you'll never want to go back!
    • No Canning Required- No canning equipment? No problem! This easy refrigerator pickles recipe doesn't require any special equipment to make.
    • Quick & Easy- Making pickles at home may sound like a lot of work, but I promise it's not! In just 20 minutes, and with minimal prep work, you can easily make these homemade pickles for yourself.
    • Eco-Friendly- Growing your own cucumbers and dill for these homemade pickles is a sustainable choice. It reduces food transportation distance, which helps lower pollution levels.
    • Customizable- Change up the spices and herbs or add more sugar to customize this pickled cucumber recipe to suit your tastes.

    Ingredient Notes

    Here are some notes on the key ingredients. For the full list of ingredients, check out the recipe card below.

    • Pickling Cucumbers- Pickling cucumber varieties, such as Kirby Cucumbers, Boston Pickling Cucumbers, Calypso Cucumbers, and Wisconsin SMR 58 Cucumbers, are best for making homemade pickles. Choose small pickles with firm flesh and thin skin.
    • Garlic- Fresh garlic cloves give these pickles a bold, garlicky flavor. Feel free to use more or less garlic to suit your tastes.
    • Dill Weed- This delicate, grassy herb gives dill pickles their signature flavor. If you can't find fresh dill sprigs, you can use dried dill seeds or dill weed, though the flavor may be slightly different.
    • White Vinegar- Vinegar is essential for pickling cucumbers. I prefer white vinegar for its strong acidity and neutral flavor profile.
    • Water- Use fresh, preferably filtered water to make the brine, as the water quality will affect the taste of the pickles.
    • Kosher Salt- Use kosher salt or pickling salt for making pickles. Since table salt often contains added ingredients like anti-caking agents and iodine, it's not ideal for pickling.
    • Sugar- A small amount of sugar helps balance the acidity and saltiness of the pickling brine.
    • Spices- I like to use a combination of yellow mustard seeds, black pepper, and bay leaf to add a savory flavor to the brine. Both freshly ground black pepper and whole black peppercorn work well.

    ๐ŸŒฑ Sustainability Tip: Grow your own pickling cucumbers and dill for fresher, eco-friendly pickles. Certain cucumber varieties and dill thrive in containers, which is ideal for small spaces.

    The ingredients needed to make refrigerator dill pickles. Each ingredient is labeled with text. They include pickling cucumbers, garlic, dill, white vinegar, water, kosher salt, sugar, pepper, and spices.

    Substitutions and Variations

    Here are a few ways you can try customizing this easy pickling cucumber recipe to fit your diet and taste preferences.

    Substitutions

    • Pickling Cucumbers- If pickling cucumbers are not available, you can use other types of cucumbers. However, keep in mind that regular cucumbers may have thicker skin and more seeds.
    • Garlic- Substitute fresh garlic for shallots, chives, or garlic powder.
    • Dill Weed- If fresh dill is not accessible, you can use dried dill seeds or dried dill weed. However, the flavor may be slightly different from fresh dill.
    • White Vinegar- Swap apple cider vinegar for white vinegar for a slightly different flavor.
    • Kosher Salt- Substitute kosher salt for pickling salt in a 1:1 ratio. Both lack additives like iodine and anti-caking agents.
    • Sugar- Brown sugar, honey, and maple syrup can be used in place of granulated sugar.
    • Spices- Swap whole mustard seeds for ground mustard, or try replacing the black pepper with red pepper flakes for added heat.
    Three jars of refrigerator dill pickles. The front jar is open, showing the pickles.

    Variations

    • Gluten-Free- Homemade refrigerator dill pickles are naturally gluten-free and vegan, but always double-check ingredient labels.
    • Sweet- Add a little more sugar to make a sweeter version of this refrigerator dill pickle recipe.
    • Spicy- Red pepper flakes added to the brine or a few slices of jalapeรฑo can bring a little heat.
    • Lemony- Squeeze a bit of lemon juice into the brine for a citrusy twist on classic dill pickles.

    How to Make Refrigerator Dill Pickles

    Here is how to make the best ever refrigerator dill pickles.

    Step 1: Prepare the brining liquid. In a small saucepan, combine the kosher salt, sugar, mustard seeds, black pepper, and bay leaf. Add the water and white vinegar, and give it a good stir to mix everything together.

    Kosher salt, sugar, and pickling spices in a stainless steel pot.
    Vinegar and water pouring into a stainless steel pot with pickling spices.

    Step 2: Heat the brining liquid. Place the saucepan on the stove over medium heat. Whisk the mixture occasionally until the salt and sugar dissolve completely. The liquid does not need to come to a boil. Once dissolved, set the brining liquid aside and allow it to cool completely while you prepare the cucumbers.

    Pickling brine in a stainless steel pot.

    Step 3: Prepare the cucumbers. Before slicing the cucumbers, wash them thoroughly under cold running water to remove any dirt or residue. Slice cucumbers into uniform rounds, approximately ยผ inch thick.

    Sliced pickling cucumbers on a bamboo cutting board.

    Step 4: Fill the jars. Fill each jar halfway with the cucumber slices, pressing them in tightly. Add 4 cloves of sliced garlic and 5 sprigs of fresh dill to each jar. Continue filling the jars with the remaining cucumber slices until they are almost full. How many cucumbers you can fit will depend on their size, but try to pack them in as much as possible.

    Sliced cucumbers, sliced garlic, and fresh dill in glass mason jars.
    Glass mason jars filled with sliced cucumbers, garlic, and dill.

    Step 5: Add the brining liquid. Pour the vinegar mixture over the cucumbers. Make sure to leave about a ยฝ inch of space from the top of the jar.

    Step 6. Shake the jars. Close the jars tightly with their lids and give them a good shake. This helps ensure that each cucumber slice comes into contact with the brine.

    Brining liquid being poured from a stainless steel pot into mason jars filled with cucumber slices.

    Step 7: Brine the pickles. Store the jars upright in the refrigerator for at least 24 hours, but ideally, wait for 72 hours before enjoying your delicious homemade pickles.

    Closed mason jars filled with refrigerator dill pickles.

    Tips for Success

    Make these homemade garlic dill pickles successfully the first time using these tried and true tips.

    • Choose fresh, firm cucumbers. Select fresh, firm, and unblemished pickling cucumbers for the best results. Avoid cucumbers that are soft or wrinkled, as they may not retain their crunchiness after pickling.
    • Slice the cucumbers uniformly. Use a mandoline slicer or a sharp knife to slice the cucumbers uniformly to about ยผ inch thick.
    • Cool the brine to room temperature. If the brine is too hot, you'll end up with mushy pickles. For crunchy dill pickles, cool the brine to about room temperature before pouring it over the cucumber slices.
    • Give the jars a shake. Shaking the jars daily for the first 2-3 days ensures even pickling of all of the cucumber slices.
    • Brine for 72 hours. While you can eat these pickles after just 24 hours, waiting at least 72 hours will provide the best flavor and texture.
    • Label and date the jars. Don't forget to label and date the jars so you know when to use them up by! This is especially helpful if you're growing your own cucumbers and are making several batches of pickles.

    Can I make dill pickle spears instead of slices? Of course! Simply cut the pickling cucumbers lengthwise into spears and follow the recipe as is. Keep in mind that spears may need more time to fully pickle.

    How to Use Refrigerator Dill Pickles

    Eat them straight from the jar as a delicious snack alongside sourdough crackers and hummus. Or add them to burgers, sandwiches, and wraps - try my air fryer turkey burgers.

    A fork removing three refrigerator dill pickles from an open jar.

    How to Store

    • Refrigerator- Store pickles in the refrigerator in an airtight glass jar for up to 2 months. Remember to label the jars with the preparation date and check for any signs of spoilage.
    • Freezer- It's generally not recommended to freeze refrigerator pickles if you want to preserve their original crunchy texture.

    How To Tell If Your Refrigerator Pickles Have Gone Bad

    • Mold- If you see any signs of mold on the surface of the pickles or floating in the brine, it's an indication that the pickles have gone bad and should be discarded.
    • Slimy- Pickles that are slimy or mushy when touched are likely spoiled. Fresh refrigerator pickles should have a mostly firm and crisp texture.
    • Cloudy Brine- If the brine appears cloudy instead of clear, it may indicate bacterial growth.
    • Smell- A foul or off-putting odor is a strong indication of spoilage. Pickles should have a pleasant, tangy, and aromatic scent.

    Make Ahead

    This quick dill pickle recipe is ideal for making ahead because the pickles need at least 24 hours to brine before they are ready to eat.

    The brining process allows the pickles to absorb the flavors and develop their tangy and aromatic taste. It is recommended to refrigerate the pickles for a minimum of 24 hours, but 72 hours is best for a better flavor.

    Three closed jars of refrigerator dill pickles. The jar on the right is laying down on a white cloth napkin.

    Quick Tip: A jar of homemade pickles makes a wonderful gift. Whether it's the holiday season or a friend's birthday, you can't go wrong with homemade edible gifts.

    Frequently Asked Questions

    How long before you can eat refrigerator dill pickles?

    The pickles are ready to eat after at least 24 hours in the refrigerator, but for the best flavor, it's recommended to wait for at least 72 hours.

    Are refrigerator pickles safe for long-term storage?

    Refrigerator pickles are not canned, so they are not suitable for long-term shelf storage like traditional canned pickles. They are best enjoyed within a few months.

    How long do homemade refrigerator pickles last?

    Refrigerator pickles can last for 1 to 2 months in the refrigerator when stored properly in an airtight container and submerged in the brine.

    Can I reuse the brine for a new batch of pickles?

    Reusing brine for a new batch is not recommended as it may have lost some of its flavors and may not provide the best results for the second batch.

    Let's Connect!

    Be sure to leave a comment below if you have any questions. You can also connect with me on Instagram, Facebook, Pinterest, or via email at [email protected].

    More Snack Recipes

    • A fork holding a few slices of pickled banana peppers above a jar.
      Quick Pickled Banana Peppers
    • A bowl of sourdough cheese crackers.
      5-Ingredient Sourdough Discard Cheese Crackers (Quick & Easy!)
    • Sourdough discard crackers with hummus on a small white plate.
      Whole Wheat Sourdough Discard Crackers
    • A bowl of hummus drizzled with olive oil and sprinkled with paprika surrounded by chunks of sourdough bread.
      Homemade Hummus

    ๐Ÿ“– Recipe

    Three jars of refrigerator dill pickles. The front jar is open and there is a fork with a single pickle on it on top of the jar.
    Print Pin SaveSaved!
    5 from 1 vote

    Refrigerator Dill Pickles

    These Refrigerator Dill Pickles are fresh, crunchy, and loaded with dill and garlic flavor. Quick and easy to make with just a saucepan and a few glass jars, there is no special canning equipment required. Once you try these homemade dill pickles, youโ€™ll never go back to store-bought!
    Course Condiment, Snack
    Cuisine American
    Prep Time 20 minutes minutes
    Brine Time 1 day day
    Total Time 1 day day 20 minutes minutes
    Servings 3 pint-sized jars
    Calories 106kcal
    Author Ashley Petrie, RDN, LDN

    Equipment

    • Small saucepan
    • Cutting board
    • Chef's knife
    • 16-ounce mason jars

    Ingredients

    • 1 tablespoon kosher salt
    • ยฝ teaspoon sugar
    • ยฝ teaspoon whole mustard seeds
    • ยฝ teaspoon freshly ground black pepper
    • 1 bay leaf crushed
    • 2 cups water
    • 1 cup white vinegar
    • 6-8 pickling cucumbers
    • 6-12 cloves garlic thinly sliced, amount according to preference
    • 15 sprigs fresh dill

    Instructions

    • Optional: While not necessary for refrigerator pickles, if you want to extend their shelf life, you can sterilize the mason jars by boiling them in water for 10 minutes.
    • In a small saucepan, combine the kosher salt, sugar, mustard seeds, black pepper, and bay leaf. Add the water and white vinegar, and give it a good stir to mix everything together.
      1 tablespoon kosher salt, ยฝ teaspoon sugar, ยฝ teaspoon whole mustard seeds, ยฝ teaspoon freshly ground black pepper, 1 bay leaf, 2 cups water, 1 cup white vinegar
    • Place the saucepan on the stove over medium heat. Whisk the mixture occasionally until the salt and sugar dissolve completely. The liquid does not need to come to a boil. Once dissolved, set the brining liquid aside and allow it to cool completely while you prepare the cucumbers.
    • Before slicing the cucumbers, wash them thoroughly under cold running water to remove any dirt or residue. Prepare the pickling cucumbers by slicing them into uniform rounds, approximately ยผ inch thick.
      6-8 pickling cucumbers
    • Fill each jar halfway with the cucumber slices, pressing them in tightly. Add 2-4 cloves of sliced garlic and 5 sprigs of fresh dill to each jar.
      6-12 cloves garlic, 15 sprigs fresh dill
    • Continue filling the jars with the remaining cucumber slices until they are almost full. How many cucumbers you can fit will depend on their size, but try to pack them in as much as possible.
    • Pour the brining liquid over the cucumbers. Make sure to leave about a ยฝ inch of space from the top of the jar. This is called "headspace."
    • Close the jars tightly with their lids and give them a good shake. This helps ensure that each cucumber slice comes into contact with the brine.
    • Store the jars upright in the refrigerator for at least 24 hours, but ideally, wait for 72 hours before enjoying your delicious homemade pickles. You can shake the jars gently once a day to distribute the flavors evenly and promote even brining.
    • If stored properly, refrigerator pickles should stay good for at least 1 to 2 months.

    Notes

    • Want to make dill pickle spears instead? Simply cut the pickling cucumbers lengthwise into spears and follow the recipe as is. Keep in mind that spears may need more time to fully pickle.
    • Quick Tip: Label and date the jars so you know when they were made and how long they're good for.
    • Storage: Store in a sealed glass jar in the refrigerator for up to 2 months.

    Nutrition

    Serving: 1jar | Calories: 106kcal | Carbohydrates: 22g | Protein: 4g | Fat: 0.5g | Saturated Fat: 0.2g | Polyunsaturated Fat: 0.2g | Monounsaturated Fat: 0.1g | Sodium: 1140mg | Potassium: 732mg | Fiber: 5.5g | Sugar: 8.5g | Vitamin C: 17mg | Calcium: 109mg | Iron: 1.7mg
    Did you try this recipe?Let me know! Comment below, or take a picture and tag me on Instagram @everydayhomemadebyashley.

    Honey Garlic Brussels Sprouts

    July 19, 2023

    These Honey Garlic Brussels Sprouts are roasted to crispy perfection, then tossed with honey garlic butter for a deliciously sweet and savory side dish that will leave you craving more. With just 8 simple ingredients, you can have this easy roasted Brussels sprouts recipe ready in just 30 minutes.

    A small plateful of honey garlic Brussels sprouts.

    Here's a little secret - making crispy, delicious, restaurant-quality Brussels sprouts at home is easier than you think.

    In fact, these roasted honey garlic Brussels sprouts are so good, even the pickiest of eaters will be asking for more. I'm sure of it!

    With just 8 simple ingredients and about 30 minutes, you can have this sweet and savory vegetable side dish ready for the whole family to devour. Whether you're serving them on a busy weeknight or as part of a holiday feast, these tasty oven-roasted Brussels sprouts are sure to impress.

    Today, Iโ€™m walking you through the entire process including the best ingredients to use, tips that will guarantee you make this recipe successfully the first time, and some of my favorite ways to serve this easy roasted vegetable side dish.

    Disclaimer: Some links throughout this post are affiliate links. As an Amazon Associate, I earn from qualifying purchases. You can learn more by visiting my Affiliate Disclosure Page.

    Why You'll Love This Recipe

    • Flavorful- Convincing your family to eat vegetables is easy with these honey garlic roasted Brussels sprouts! They're the perfect balance of salty and sweet and are loaded with garlicky goodness.
    • Simple Ingredients- This recipe needs just 8 basic ingredients, most of which are pantry staples. No need to search for unfamiliar items at the store!
    • Ready in 30 Minutes- This vegetable side dish is perfect for quick and easy weeknight meals because it only takes about 30 minutes to make.
    • Versatile Side Dish- Whether it's a family dinner, a holiday feast, or a casual get-together, these honey garlic caramelized Brussels sprouts pair well with a variety of meals.
    • Healthy- Brussels sprouts are a good source of fiber, vitamins, and minerals. Plus, they're loaded with antioxidants and may help prevent some diseases. This recipe is an easy way to add Brussels sprouts to your diet without sacrificing flavor.

    Ingredient Notes

    Here are some notes on the key ingredients. For the full list of ingredients, check out the recipe card below.

    • Brussels Sprouts- Brussels sprouts are primarily in season throughout the fall and winter months. Look for Brussels sprouts that are firm and bright green with no yellowing or wilting of the leaves.
    • Garlic- Fresh garlic brings an intense garlic flavor to the honey garlic butter sauce. Grating or finely mincing the garlic gives the glaze a smoother consistency.
    • Honey- The florally sweetness of honey plays well with the caramelized flavor of these garlic roasted Brussels sprouts. Opt for pure honey for the best flavor.
    • Butter- Using unsalted butter allows for better control of the overall saltiness of the dish. Melted butter adds richness to the honey garlic glaze.
    • Olive Oil- Extra virgin olive oil has an earthy flavor that pairs well with Brussels sprouts and helps them crisp up in the oven.
    • Kosher Salt- The flaky texture of kosher salt is perfect for evenly seasoning the Brussels sprouts.
    • Black Pepper- Use freshly ground black pepper for the best flavor.

    ๐ŸŒฑ Sustainability Tip: Buy locally-grown Brussels sprouts to reduce your carbon footprint, support your community, and enjoy fresher produce.

    The ingredients to make honey garlic Brussels sprouts. Each ingredient is labeled with text. They include garlic, butter, Brussels sprouts, garlic powder, olive oil, salt, black pepper, and honey.
    Grab your own reusable produce bags at Organic Cotton Mart (affiliate link) and use the code HOMEMADE for 10% off your first order.

    Substitutions and Variations

    Here are a few ways you can try customizing this honey garlic Brussels sprouts recipe to fit your diet and taste preferences.

    Substitutions

    • Brussels Sprouts- Swap Brussels sprouts for another cruciferous vegetable, like broccoli or cauliflower.
    • Garlic- Substitute one fresh garlic clove for ยผ to ยฝ teaspoon of garlic powder.
    • Honey- Maple syrup can be used in place of honey in this recipe.
    • Butter- Use coconut oil, olive oil, or vegan butter in place of butter.
    • Olive Oil- Any neutral-flavored oil can be used to replace the olive oil in this recipe. Try avocado oil, canola oil, or vegetable oil.
    • Kosher Salt- Swap kosher salt for sea salt, pink Himalayan salt, or table salt if preferred.
    • Black Pepper- Use cayenne pepper, red pepper flakes, or hot honey to give these Brussels sprouts a spicy kick.
    Oven-roasted honey garlic Brussels sprouts on a small white plate.

    Variations

    • Gluten-Free- This recipe is naturally gluten-free. However, always double-check ingredient labels just to be sure.
    • Vegan- Make this dish vegan by swapping the butter for coconut oil and the honey for maple syrup.
    • Bacon- Fry up some bacon, crumble it, and toss it with these honey garlic Brussels sprouts for a sweet and savory dish that will have everyone coming back for more.
    • Parmesan- Sprinkle grated parmesan cheese over the finished dish to give it a nutty, cheesy flavor.
    • Balsamic- Make honey balsamic Brussels sprouts by adding a teaspoon of balsamic vinegar to the honey garlic butter mixture.
    • Spicy- Add some red pepper flakes or cayenne pepper to the Brussels sprouts before roasting or use hot honey in the honey butter mixture to give this dish a bit of heat.
    • Citrus- Add a burst of citrus flavor by stirring in the zest of an orange or lemon to the honey butter mixture.

    How to Make Honey Garlic Brussels Sprouts

    Here is how to make these roasted Brussels sprouts with honey and garlic.

    Step 1: Preheat the oven. Preheat oven to 425โ„‰ and line a rimmed baking sheet with parchment paper.

    Step 2: Season Brussels sprouts. In a large mixing bowl, toss the quartered Brussels sprouts with olive oil, garlic powder, kosher salt, and black pepper until they are evenly coated. Don't forget to include the outer leaves that might fall off during quartering โ€“ these make delicious crispy Brussels sprout chips!

    Quartered Brussels sprouts tossed with olive oil, salt, pepper, and garlic powder in a glass mixing bowl.

    Step 3: Roast Brussels sprouts. Spread the seasoned Brussels sprouts out evenly on the prepared baking sheet, arranging them so that they're cut side down. Roast the Brussels sprouts in the preheated oven for 15-20 minutes, or until they are browned and crispy. While they are roasting, proceed to the next step.

    Seasoned Brussels sprouts spread out on a parchment-lined baking sheet.
    Crispy roasted Brussels sprouts on a parchment-lined baking sheet.

    Step 4: Prepare the honey garlic mixture. In a small bowl, whisk together the melted butter, honey, and grated garlic to make the honey garlic mixture.

    A mixture of honey, butter, and grated garlic in a small glass bowl.

    Step 5: Transfer cooked Brussels sprouts. Once the Brussels sprouts are done roasting, immediately transfer them to a large mixing bowl.

    Step 6. Toss Brussels sprouts with honey garlic mixture. Drizzle the honey garlic mixture over the roasted Brussels sprouts. Toss the Brussels sprouts gently until they are well coated with the honey garlic mixture. Serve immediately and enjoy!

    Roasted Brussels sprouts tossed with honey-garlic butter in a glass mixing bowl.

    How to Make Honey Garlic Brussels Sprouts (Instructional Video)

    Tips for Success

    Make these honey garlic butter Brussels sprouts successfully the first time using these tried and true tips.

    • Cut the Brussels sprouts evenly. When quartering the Brussels sprouts, try to make them as uniform in size and thickness as possible. This ensures even cooking, so all the Brussels sprouts become crispy and browned at the same time.
    • Don't overcrowd the pan. Avoid overcrowding the baking sheet, as this can lead to steaming rather than roasting.
    • Adjust seasonings to taste. Taste the honey garlic glaze before drizzling it over the roasted Brussels sprouts. If you prefer it sweeter, add more honey; for a stronger garlic flavor, add more grated garlic.
    • Serve immediately. For the best taste and texture, serve the honey garlic Brussels sprouts immediately after tossing them with the honey garlic glaze.

    What to Serve With Honey Garlic Brussels Sprouts

    These oven-roasted honey garlic Brussels sprouts complement just about any main dish you can think of, making them a versatile vegetable side dish.

    Like most side dishes, these crispy roasted Brussels sprouts pair well with a variety of chicken recipes. This dish served alongside a simple lemon garlic roasted chicken makes for an easy, home-cooked meal. Additionally, seared chicken breast and chicken pot pie taste delicious with these Brussels sprouts.

    If you're a fan of grilling recipes, you'll want to serve these honey garlic Brussels sprouts with grilled chicken breast, grilled steak tips, or grilled shrimp.

    A spoonful of butter being drizzled over a small plate of roasted honey garlic Brussels sprouts.

    Storage and Reheating

    How to Store

    • Refrigerator- Store the leftover roasted Brussels sprouts in an airtight container in the refrigerator for 3-4 days.
    • Freezer- Brussels sprouts freeze well after cooking, and you can store them in a freezer-safe plastic bag or container for up to 12 months in the freezer.

    How to Reheat

    • Oven- Preheat the oven to 350ยฐF and line a rimmed baking sheet with parchment paper or use cooking spray. Spread the Brussels sprouts out evenly onto the prepared baking sheet. Warm them in the oven for 5-10 minutes.
    • Stovetop- Heat 1-2 teaspoons of oil or butter in a skillet over medium heat. Add the honey garlic Brussel sprouts and sautรฉ for 5-10 minutes, stirring frequently, until they are heated through.
    • Air Fryer- Preheat the air fryer to 350ยฐF. Add leftover Brussels sprouts to the air fryer basket and spread them out into a single layer. Heat for about 5-10 minutes or until the Brussels sprouts are fully warmed through.
    • Microwave- Place leftover garlic honey Brussels sprouts on a microwave-safe dish. Heat on HIGH in 30-second intervals, stirring between each, until fully warmed through.

    Make Ahead

    There are multiple ways to prepare these Brussels sprouts with honey glaze ahead of time, whether you're getting ready for a busy week or a holiday gathering.

    • Prepping Brussels Sprouts- Trim and quarter the Brussels sprouts ahead of time, storing them in an airtight container or resealable bag in the refrigerator for up to 3 days.
    • Making the Honey Garlic Mixture- Prepare the honey garlic butter mixture in advance and store it in an airtight container in the refrigerator for up to 2 weeks. When ready to use, simply reheat the glaze in the microwave or on the stovetop.
    • Roasting the Brussels Sprouts- If you want to make the entire recipe ahead of time, you can store the roasted and glazed Brussels sprouts in the refrigerator for up to 3 days. Then, reheat them in the oven to regain their crispy texture before serving.
    Crispy honey garlic Brussels sprouts on a small white plate.

    Frequently Asked Questions

    Do I need to wash Brussels sprouts?

    Brussels sprouts are generally clean vegetables, but if you wish to clean them, trim the ends, soak in cold water, drain, and pat dry before cutting and seasoning.

    Should I soak Brussels sprouts before roasting?

    There is no need to soak Brussels sprouts before roasting. Simply clean, trim, and quarter them and they'll roast up to crispy perfection.

    What gives Brussels sprouts a better taste?

    Roasting Brussels sprouts instead of boiling or steaming caramelizes the leaves and enhances their natural sweetness. Properly seasoning them also boosts their flavor.

    Can I use frozen Brussels sprouts for this recipe?

    I have only tested this recipe with fresh Brussels sprouts so, that's what I recommend. If you only have frozen Brussels sprouts on hand, give it a try! Keep in mind that frozen sprouts may take longer to cook, and the final texture might differ slightly.

    Let's Connect!

    Be sure to leave a comment below if you have any questions. You can also connect with me on Instagram, Facebook, Pinterest, or via email at [email protected].

    More Brussels Sprouts Recipes

    • Hot honey Brussels sprouts with bacon on a plate with mashed potatoes and beef.
      Hot Honey Brussels Sprouts with Bacon
    • Maple balsamic brussels sprouts on a white plate.
      Roasted Maple Balsamic Brussels Sprouts
    • A white bowl filled with crispy roasted longhorn brussels sprouts.
      Copycat Longhorn Brussels Sprouts Recipe

    ๐Ÿ“– Recipe

    A small plateful of honey garlic Brussels sprouts.
    Print Pin SaveSaved!
    5 from 1 vote

    Honey Garlic Brussels Sprouts

    These Honey Garlic Brussels Sprouts are roasted to crispy perfection, then tossed with honey garlic butter for a deliciously sweet and savory side dish that will leave you craving more. With just 8 simple ingredients, you can have this easy roasted Brussels sprouts recipe ready in just 30 minutes.
    Course Side Dish
    Cuisine American
    Prep Time 10 minutes minutes
    Cook Time 20 minutes minutes
    Total Time 30 minutes minutes
    Servings 3 servings
    Calories 204kcal
    Author Ashley Petrie, RDN, LDN

    Equipment

    • Rimmed baking sheet
    • Parchment paper

    Ingredients

    • 1 pound (about 4-5 cups) Brussels sprouts quartered, stems removed
    • 2 tablespoons extra virgin olive oil
    • ยฝ teaspoon garlic powder
    • ยฝ teaspoon kosher salt
    • ยผ teaspoon black pepper
    • 1 tablespoon unsalted butter melted
    • 1 tablespoon honey
    • 1 clove garlic grated or finely minced

    Instructions

    • Preheat the oven to 425โ„‰ and line a rimmed baking sheet with parchment paper.
    • In a large mixing bowl, toss the quartered Brussels sprouts with olive oil, garlic powder, kosher salt, and black pepper until they are evenly coated. Don't forget to include the outer leaves that might fall off during quartering โ€“ these make delicious crispy Brussels sprout chips!
      1 pound (about 4-5 cups) Brussels sprouts, 2 tablespoons extra virgin olive oil, ยฝ teaspoon garlic powder, ยฝ teaspoon kosher salt, ยผ teaspoon black pepper
    • Spread the seasoned Brussels sprouts out evenly on the prepared baking sheet, arranging them so that they're cut side down. Roast the Brussels sprouts in the preheated oven for 15-20 minutes, or until they are browned and crispy. While they are roasting, proceed to the next step.
    • In a small mixing bowl, whisk together the melted butter, honey, and grated garlic to make the honey garlic mixture.
      1 tablespoon unsalted butter, 1 tablespoon honey, 1 clove garlic
    • Once the Brussels sprouts are done roasting, immediately transfer them to a large mixing bowl.
    • Drizzle the honey garlic mixture over the roasted Brussels sprouts. Toss the Brussels sprouts gently until they are well coated with the honey garlic mixture. Serve immediately and enjoy!

    Notes

    • Cut the Brussels sprouts evenly. This ensures even cooking, so all the Brussels sprouts become crispy and browned at the same time.
    • Storage: If you have any leftovers, store them in an airtight container in the refrigerator for up to 3 days. Reheat in the oven or a skillet for a crispier texture.
    • Make Ahead
      • Prepping Brussels Sprouts- Trim and quarter the Brussels sprouts ahead of time, storing them in an airtight container or resealable bag in the refrigerator for up to 3 days.
      • Roasting the Brussels Sprouts- If you want to make the entire recipe ahead of time, you can store the roasted and glazed Brussels sprouts in the refrigerator for up to 3 days. Then, reheat them in the oven to regain their crispy texture before serving.
      • Making the Honey Garlic Mixture- Prepare the honey garlic butter mixture in advance and store it in an airtight container in the refrigerator for up to 2 weeks. When ready to use, simply reheat the glaze in the microwave or on the stovetop.

    Nutrition

    Serving: 1serving | Calories: 204kcal | Carbohydrates: 20g | Protein: 5g | Fat: 13g | Saturated Fat: 4g | Polyunsaturated Fat: 1g | Monounsaturated Fat: 8g | Cholesterol: 10mg | Sodium: 226mg | Potassium: 606mg | Fiber: 6g | Sugar: 9g | Vitamin C: 129mg | Calcium: 68mg | Iron: 2.3mg
    Did you try this recipe?Let me know! Comment below, or take a picture and tag me on Instagram @everydayhomemadebyashley.

    Dutch Oven Chicken Noodle Soup

    July 18, 2023

    This Dutch Oven Chicken Noodle Soup is the ultimate comfort food meal. Ideal for quick and easy weeknight dinners, this one-pot recipe ensures minimal cleanup and is beginner-friendly. It uses simple, fresh ingredients and is sure to be a hit with the whole family.

    A light purple Dutch oven filled with chicken noodle soup. There is a wooden spoon in the pot.

    Classic homestyle chicken noodle soup is simple, timeless, and oh-so comforting.

    Filled with hearty egg noodles, tender white meat chicken, and flavorful vegetables, every home cook should have a tried and true chicken noodle soup recipe in their collection.

    This easy Dutch oven chicken noodle soup is my go-to whenever Iโ€™m craving a warm, brothy bowl of the good stuff. 

    Itโ€™s perfect for a chilly winter evening or for whenever youโ€™re feeling a bit under the weather. Plus, itโ€™s flavorful and easy to make thanks to my one-pot cooking method.

    Today, Iโ€™m walking you through the entire process including the best ingredients to use, why I use a Dutch oven, and tips that will guarantee you make this homemade chicken noodle soup successfully the first time.

    Disclaimer: Some links throughout this post are affiliate links. As an Amazon Associate, I earn from qualifying purchases. You can learn more by visiting my Affiliate Disclosure Page.

    Why You'll Love This Recipe

    • One-Pot Meal- Using a Dutch oven to make chicken noodle soup means everything comes together in one pot. As a busy home cook, this means less time spent on cleanup and more time to enjoy the meal with family and friends.
    • Comforting- Whether youโ€™re feeling under the weather or simply want to warm up your family with a comforting, home-cooked meal, this easy chicken noodle soup is sure to hit the spot. 
    • Beginner-Friendly- If youโ€™ve ever been intimidated by making chicken soup from scratch, Iโ€™m here to show you just how easy it can be! This simple Dutch oven chicken noodle soup recipe is perfect for both beginners and seasoned home cooks.
    • Fresh Ingredients- With fresh, wholesome ingredients, like chicken breast, vegetables, and herbs, this is one of the best Dutch oven chicken noodle soup recipes youโ€™ll ever taste.
    • Ideal for Meal Prep- Prepare a large batch of this Dutch oven chicken noodle soup to enjoy throughout the busy week. Or freeze leftovers to save for when you donโ€™t have time to cook.
    • Customizable- This basic chicken noodle soup recipe is a great starting point for beginner cooks to experiment with. Get creative by adding or swapping out different ingredients to change up the flavor of the soup.
    • Budget-Friendly- This recipe uses common pantry staple ingredients so it wonโ€™t break the bank.

    Ingredient Notes

    Here are some notes on key ingredients. For a full list of ingredients, check out the recipe card below.

    • Boneless Chicken Breast- Opt for boneless, skinless chicken breast for convenience and quicker cooking.
    • Chicken Stock- Use homemade chicken stock for the richest flavor. Otherwise, choose your favorite high-quality, low-sodium chicken stock.
    • Water- Water is used to cook the egg noodles and control the overall saltiness of the soup.
    • Olive Oil- Olive oil is great for searing chicken and adds a rich flavor to the soup.
    • Mirepoix- A mix of diced onion, celery, and carrots is called a mirepoix. These classic aromatics are the base of the soup, providing a ton of flavor. Dice them evenly to ensure even cooking.
    • Garlic- Freshly minced garlic adds a bold, garlic flavor to the soup.
    • Fresh Herbs- Both thyme and rosemary add an earthy, woodsy, and rustic flavor to the soup.
    • Egg Noodles- Cook the egg noodles for half the stated cooking time on the package, then let them finish cooking off the heat to prevent them from becoming soggy.
    • Kosher Salt- Enhances flavor. Adjust according to personal taste preference.
    • Black Pepper- Opt for freshly ground black pepper for the best flavor.

    Sustainability Tip: Save chicken bones and vegetable scraps in your freezer to make a large batch of homemade chicken stock.

    The ingredients to make Dutch oven chicken noodle soup. Each ingredient is labeled with text. They include celery, water, garlic, pepper, rosemary, chicken breast, onion, chicken stock, thyme, carrots, salt, egg noodles, and olive oil.

    Substitutions and Variations

    Here are a few ways you can customize this easy Dutch oven chicken noodle soup recipe to fit your diet and taste preferences.

    Substitutions

    • Boneless Chicken Breast- Use boneless, skinless chicken thighs if you prefer dark meat. Bone-in chicken breasts and thighs, whole chicken, and pre-cooked chicken can also be used.
    • Chicken Stock- Swap chicken stock for vegetable stock or use chicken bouillon and water.
    • Water- Replace water with additional chicken stock or vegetable stock if preferred.
    • Olive Oil- Substitute olive oil for another neutral-flavored oil, such as canola oil or vegetable oil. Bacon fat can also be used.
    • Mirepoix- These vegetables can easily be customized based on personal preferences. Leeks can be used instead of onions for a milder flavor, while bell peppers or zucchini can be added alongside or instead of celery and carrots.
    • Garlic- Swap fresh garlic cloves for one teaspoon of garlic powder.
    • Fresh Herbs- Use 1 teaspoon of dried thyme and ยฝ teaspoon of dried rosemary in place of fresh.
    • Egg Noodles- Feel free to use spaghetti, linguini, elbows, or any other pasta shape you prefer. If using homemade pasta, add the noodles off the heat and serve the soup immediately so they donโ€™t become soggy.
    A bowlful of chicken noodle soup.

    Variations

    • Gluten-Free- Swap the regular egg noodles with your favorite gluten-free egg noodles, pasta, or rice to make gluten-free chicken soup.
    • Egg-Free- Use egg-free noodles or pasta in place of egg noodles.
    • Lemon-Herb- Add lemon zest and freshly-squeezed lemon juice to give this soup a pop of citrus flavor. Fresh herbs like parsley and dill pair well with lemon.
    • Parmesan- Sprinkle a bit of freshly grated parmesan cheese on top of your soup just before serving.
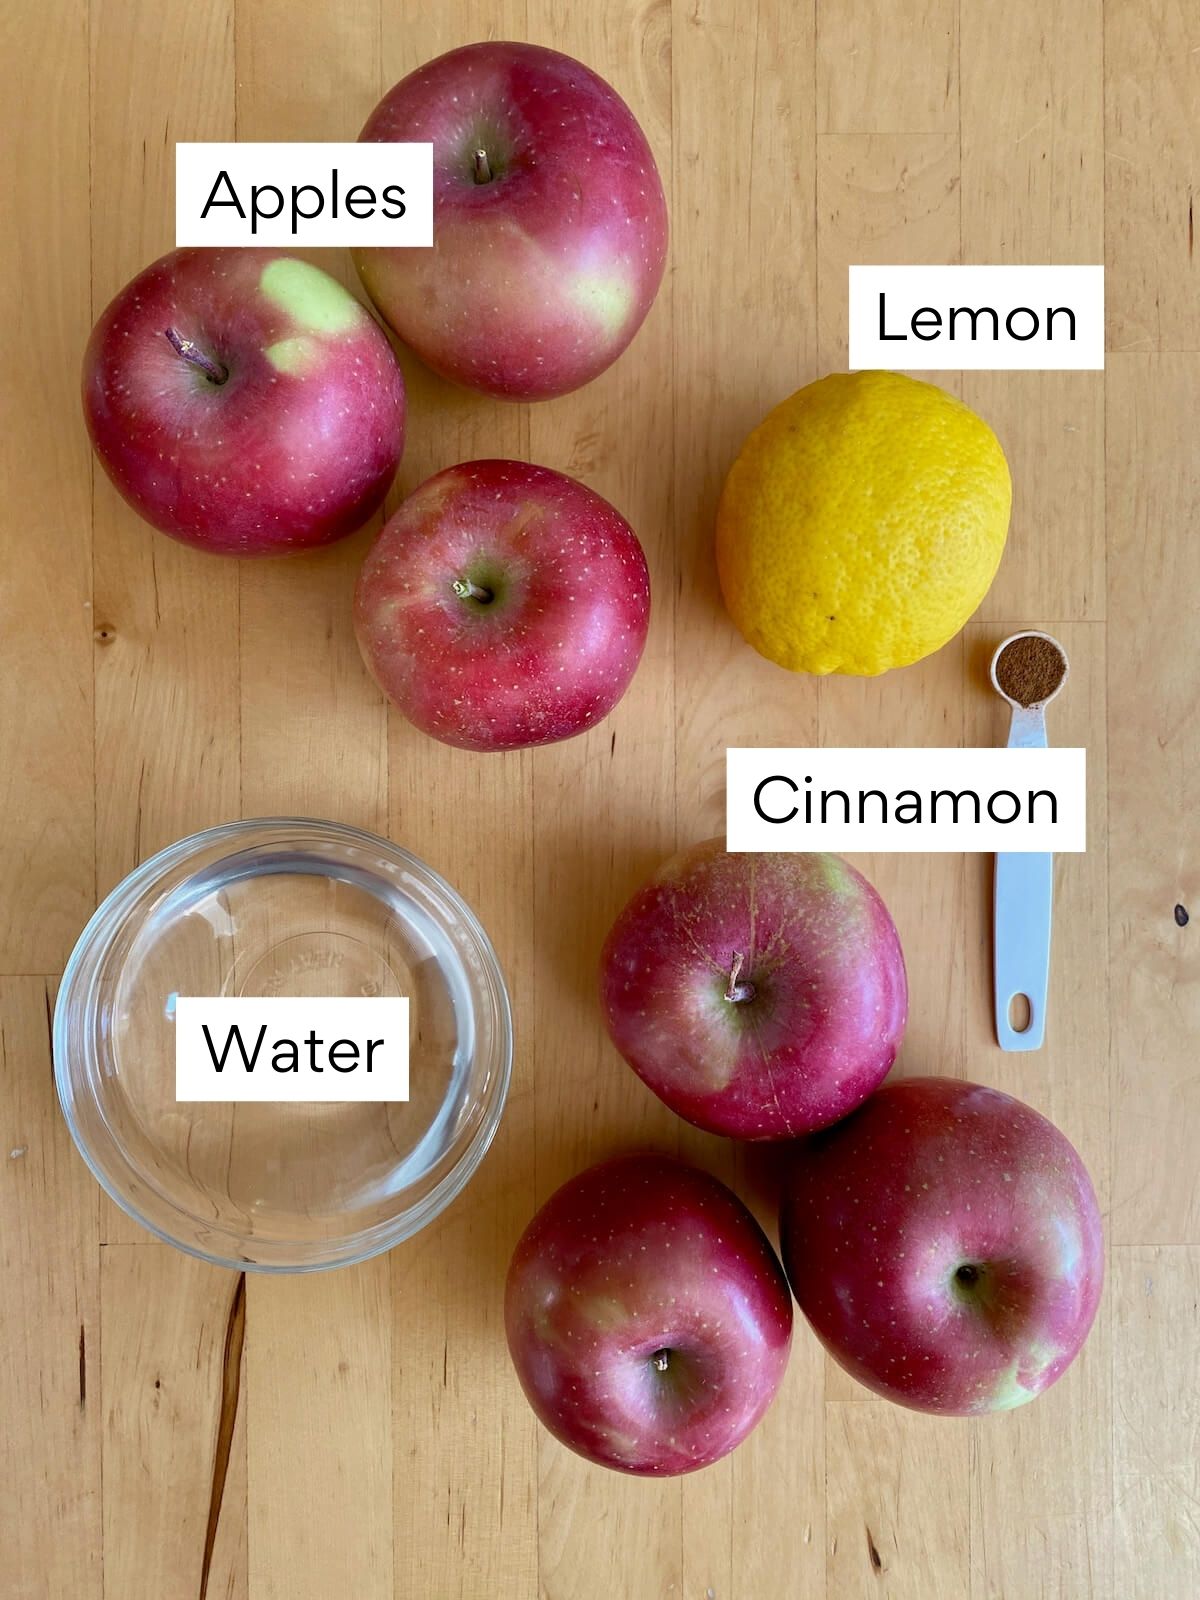
    • Creamy- Create a roux by adding flour to the vegetables just before adding the chicken stock. You can also stir in a splash of heavy cream for a richer flavor.
    • Vegetables- Add additional vegetables to the soup for more flavor, texture, and nutrition. Try vegetables like kale, spinach, green beans, tomatoes, corn, peas, zucchini, summer squash, fennel, and potatoes.
    • Beans- For a heartier, more filling soup, add white beans, kidney beans, or chickpeas.

    Equipment Notes

    Here are some notes on any special equipment I used to make this recipe.

    • Dutch Oven- A 6-quart enameled Dutch oven is the best Dutch oven for soup. Itโ€™s large enough to hold all of the ingredients and its heavy-bottomed design ensures even heat distribution. Itโ€™s the perfect pot for searing chicken and simmering soup.
    • Meat Mallet- Using a meat mallet (or the flat side of a heavy pan) to pound the chicken breasts ensures they cook evenly and become tender.

    How to Make Dutch Oven Chicken Noodle Soup

    Here is how to make classic chicken noodle soup in a Dutch oven.

    Cook the Chicken

    Step 1: Prepare the chicken. Place the chicken breasts on a cutting board. Use a sharp knife to carefully trim any excess fat or tendons from the chicken. Cut each chicken breast in half lengthwise so you have four thinner pieces.

    Step 2: Pound the chicken. To ensure even cooking and tenderness, place a piece of plastic wrap or parchment paper over the chicken. Gently pound the chicken with a meat mallet or the flat side of a heavy pan until itโ€™s about ยฝ inch thick. 

    Four chicken breasts pounded out on an orange cutting board.

    Step 3: Sear the chicken. Season the chicken breasts on both sides with ยฝ teaspoon of kosher salt and black pepper. Heat the olive oil in a large Dutch oven over medium-high heat. Once hot, place the seasoned chicken in the pot. Sear for 4-5 minutes per side or until the chicken turns golden brown. Remove the chicken from the pot and set aside.

    Four chicken breasts searing in olive oil in a Dutch oven.

    Make the Soup

    Step 4: Sweat the aromatics. Reduce the heat to medium, and in the same pot, add the diced onion, carrots, and celery. Sprinkle ยฝ teaspoon of kosher salt over the vegetables and cook for about 5 minutes or until the onions are translucent and the vegetables begin to soften. Add the minced garlic, thyme, and rosemary and cook for an additional 1-2 minutes.

    Mirepoix sautรฉing in a Dutch oven.
    Diced onion, celery, carrots, garlic, rosemary, and thyme cooking in olive oil in a Dutch oven.

    Step 5: Add the stock. Pour the chicken stock and water into the pot, scraping the bottom to release any browned bits. Increase the heat to bring the soup to a boil, then reduce it to low to maintain a gentle simmer.

    Chicken stock, vegetables, and herbs simmering in a Dutch oven.

    Step 6: Finish cooking the chicken. Return the seared chicken breasts and any accumulated juices from the plate back into the pot. Cover it with the lid and let it simmer for 20 minutes or until the chicken is fully cooked and tender.

    Step 7: Shred the chicken. Carefully transfer the cooked chicken breast to a cutting board. Shred or cut the chicken into bite-sized pieces, then add it back to the pot.

    Cooked chicken breast being held above the pot after simmering in chicken stock in a Dutch oven.
    Shredded chicken breast added to the Dutch oven chicken noodle soup.

    Step 8: Cook the noodles. Stir the dry egg noodles into the simmering soup and let them cook for half the cooking time stated on the package. Remove the pot from the heat, cover it with a lid, and let the noodles continue to cook off the heat for an additional 10 minutes.

    Step 9: Serve and enjoy. Taste for seasoning and add additional salt and pepper, if desired. Serve and enjoy!

    Dry egg noodles added to the simmering chicken soup.
    The finished Dutch oven chicken noodle soup. There is a wooden spoon sticking out of the pot to the left.

    Tips for Success

    Make this Dutch oven chicken noodle soup with egg noodles successfully the first time using these tried and true tips.

    • Pound the chicken to an even thickness. By pounding the chicken breasts out, they cook quickly and evenly and become tenderized for a delicious end result.
    • Donโ€™t overcrowd the pot. Give the chicken enough space in the Dutch oven to sear properly. Avoid overcrowding the pot, as it may cause the chicken to steam instead of achieving a nice sear.
    • Cut the vegetables uniformly. Cutting the onion, celery, and carrots uniformly is essential for even cooking, consistent texture, better flavor distribution, and a visually appealing presentation.
    • Use homemade chicken stock. For the best flavor, use homemade chicken stock in your Dutch oven chicken soup.
    • Cook the noodles just right. Avoid soggy, mushy noodles in your chicken noodle soup by cooking them for half the time stated on the package. The hot broth will continue cooking them even after simmering stops.
    • Adjust seasonings to taste. Taste the soup before serving and adjust the seasonings, if needed, with additional salt and pepper to suit individual preferences.

    What to Serve with Dutch Oven Chicken Noodle Soup

    A warm, cozy bowl of chicken noodle soup is perfect all on its own. But, it's even better when served with a little something extra.

    For a simple, yet nostalgic meal, pair this Dutch oven chicken noodle soup with crackers or bread. Sourdough discard crackers, sourdough bread bowls, sourdough garlic bread, or jalapeรฑo cheddar sourdough bread are all delicious options.

    If youโ€™re looking for a heartier meal, serve sandwiches alongside a bowl of this one-pot chicken noodle soup recipe. Some of my favorite sandwiches to pair with this soup include a BLT bagel sandwich or a turkey and egg sandwich.

    Finally, enjoy a lighter meal by pairing this homemade chicken soup with a refreshing salad. Caesar salad, spinach Caprese salad, and arugula quinoa salad are all great choices.

    A white bowl filled with chicken noodle soup.

    Storage and Reheating

    How to Store

    • Refrigerator- Store leftover chicken noodle soup in an airtight container in the refrigerator for 3-4 days.
    • Freezer- To freeze, allow the soup to cool completely. Then, store it in a freezer-safe plastic bag or storage container in the freezer for up to 3 months.

    Quick Tip: If you want to freeze chicken noodle soup, I recommend cooking the noodles separately. Then, you can freeze the soup without the noodles and add fresh noodles when youโ€™re ready to serve it.

    How to Reheat

    If you notice the leftover chicken soup has absorbed a lot of the liquid and become thick, add a bit more chicken stock or water before reheating to help thin it out.

    Thaw frozen chicken noodle soup overnight in the refrigerator before reheating.

    • Stovetop- Add leftover chicken noodle soup to a saucepan. Heat the soup over medium heat, stirring occasionally, until it is steaming hot and just starting to simmer. Remove from the heat and serve immediately.
    • Microwave- Pour leftover soup into a microwave-safe bowl. Microwave on HIGH for approximately 2-3 minutes, stirring halfway through.

    Make Ahead

    Prepare either the entire recipe or parts of it in advance to save time and streamline the cooking process.

    • Entire Recipe- Follow the recipe to make the soup, then store it in the refrigerator for up to 4 days or in the freezer for up to 3 months.
    • Vegetables- Pre-dice the vegetables and herbs to get a head start on meal prep. This will cut the preparation time down, which is perfect for those busy weeknights.
    • Chicken Stock- If you want to use homemade chicken stock, you can prepare a large batch in advance. Store it in the refrigerator for up to 4 days or in the freezer for up to 6 months. 
    • Chicken- You can cook the chicken breasts ahead of time and store them in the refrigerator. When it's time to make the soup, simply shred or cut the chicken into bite-sized pieces and add them to the pot.
    • Noodles- Fully cook the noodles in boiling water and store them in an airtight container in the refrigerator for up to 5 days. When ready to serve the soup, place a portion of cooked noodles in a bowl and ladle the hot chicken soup over the top of them.
    A large Dutch oven filled with chicken noodle soup. A wooden spoon is resting on the right side of the Dutch oven.

    Frequently Asked Questions

    What can I add to my chicken soup to make it taste better?

    To improve bland chicken soup, start by adding a pinch of salt and some fresh herbs like parsley, thyme, or rosemary. Include a splash of lemon juice for brightness or try parmesan cheese or sautรฉed mushrooms for richness.

    Do you have to cook egg noodles before adding them to soup?

    In this recipe, we cook the egg noodles for half the time in the simmering soup, allowing the residual heat to finish cooking them. This method prevents the noodles from turning mushy. Alternatively, you can pre-cook the noodles if preferred, and add them to the soup during the last few minutes of simmering for the same perfect texture.

    Should I use chicken stock or chicken broth for chicken noodle soup?

    Both chicken stock and chicken broth work for chicken noodle soup. Chicken stock has a richer flavor from simmering bones, while chicken broth is lighter in flavor. While the choice is personal, I recommend using homemade chicken stock for the best flavor.

    Can I use leftover chicken or rotisserie chicken to make this soup?

    Of course! If you want to use leftover roasted chicken or rotisserie chicken, skip the searing step and start by sautรฉing the vegetables. Then, add the shredded chicken to the pot just before you add the egg noodles.

    Can I make this Dutch oven chicken noodle soup without a Dutch oven?

    Yes, you can make this chicken noodle soup without a Dutch oven. Simply use an aluminum or stainless steel stockpot in place of the Dutch oven.

    Let's Connect!

    Be sure to leave a comment below if you have any questions. You can also connect with me on Instagram, Facebook, Pinterest, or via email at [email protected].

    More Chicken Recipes

    • Slices of dry brined chicken on a dinner plate.
      Roasted Dry Brined Chicken (Lemon-Garlic Roasted Chicken)
    • A slice of sourdough chicken pot pie on a small plate with a fork laying next to it.
      Sourdough Chicken Pot Pie
    • Four chipotle chicken tacos on a white plate.
      Shredded Chipotle Chicken Tacos (One-Skillet Recipe!)
    • Two seared chicken breasts in a cast iron skillet. A whole onion, two garlic cloves, and some parsley are in the skillet with the chicken.
      Cast Iron Skillet Chicken Breast

    ๐Ÿ“– Recipe

    A light purple Dutch oven filled with chicken noodle soup. There is a wooden spoon in the pot.
    Print Pin SaveSaved!
    5 from 1 vote

    Dutch Oven Chicken Noodle Soup

    This Dutch Oven Chicken Noodle Soup is the ultimate comfort food meal. Ideal for quick and easy weeknight dinners, this one-pot recipe ensures minimal cleanup and is beginner-friendly. It uses simple, fresh ingredients and is sure to be a hit with the whole family.
    Course Main Course, Soup
    Cuisine American
    Prep Time 15 minutes minutes
    Cook Time 55 minutes minutes
    Total Time 1 hour hour 10 minutes minutes
    Servings 5 servings
    Calories 365kcal
    Author Ashley Petrie, RDN, LDN

    Equipment

    • Meat mallet
    • 6-quart dutch oven

    Ingredients

    • 1 pound (about 2 large) boneless, skinless chicken breasts
    • 1 teaspoon kosher salt divided, plus more to taste
    • ยฝ teaspoon freshly ground black pepper
    • ยผ cup olive oil
    • 1 large yellow onion diced
    • 4 celery stalks diced
    • 2 large carrots peeled and diced
    • 4 cloves garlic minced
    • 1 tablespoon fresh thyme leaves
    • 2 teaspoons fresh rosemary chopped
    • 4 cups chicken stock low-sodium
    • 4 cups water
    • 4 cups egg noodles dry

    Instructions

    • Prepare the chicken. Place the chicken breasts on a cutting board. Use a sharp knife to carefully trim any excess fat or tendons from the chicken. Cut each chicken breast in half lengthwise so you have four thinner pieces.
      1 pound (about 2 large) boneless, skinless chicken breasts
    • Pound the chicken. To ensure even cooking and tenderness, place a piece of plastic wrap or parchment paper over the chicken. Gently pound the chicken with a meat mallet or the flat side of a heavy pan until itโ€™s about ยฝ inch thick.
    • Sear the chicken. Season the chicken breasts on both sides with ยฝ teaspoon of kosher salt and black pepper. Heat the olive oil in a large Dutch oven over medium-high heat. Once hot, place the seasoned chicken in the pot. Sear for 4-5 minutes per side or until the chicken turns golden brown. Remove the chicken from the pot and set aside.
      1 teaspoon kosher salt, ยฝ teaspoon freshly ground black pepper, ยผ cup olive oil
    • Sweat the aromatics. Reduce the heat to medium, and in the same pot, add the diced onion, celery, and carrots. Sprinkle ยฝ teaspoon of kosher salt over the vegetables and cook for about 5 minutes or until the onions are translucent and the vegetables begin to soften. Add the minced garlic, thyme, and rosemary and cook for an additional 1-2 minutes.
      1 teaspoon kosher salt, 1 large yellow onion, 4 celery stalks, 2 large carrots, 4 cloves garlic, 1 tablespoon fresh thyme leaves, 2 teaspoons fresh rosemary
    • Add the stock. Pour the chicken stock and water into the pot, scraping the bottom to release any browned bits. Increase the heat to bring the soup to a boil, then reduce it to low to maintain a gentle simmer.
      4 cups chicken stock, 4 cups water
    • Finish cooking the chicken. Return the seared chicken breasts and any accumulated juices from the plate back into the pot. Cover it with the lid and let it simmer for 20 minutes or until the chicken is fully cooked and tender.
    • Shred the chicken. Carefully transfer the cooked chicken breast to a cutting board. Shred or cut the chicken into bite-sized pieces, then add it back to the pot.
    • Cook the noodles. Stir the dry egg noodles into the simmering soup and let them cook for half the cooking time stated on the package. Remove the pot from the heat, cover it with a lid, and let the noodles continue to cook off the heat for an additional 10 minutes.
      4 cups egg noodles
    • Serve and enjoy. Taste for seasoning and add additional salt and pepper, if desired. Serve and enjoy!

    Notes

    • Quick Tip: If you want to freeze chicken noodle soup, I recommend cooking the noodles separately. Then, you can freeze the soup without the noodles and add fresh noodles when youโ€™re ready to serve it.
    • Storage: Store leftover soup in an airtight container in the refrigerator for up to 4ย  days or in the freezer for up to 3 months.

    Nutrition

    Serving: 1serving | Calories: 365kcal | Carbohydrates: 30g | Protein: 28g | Fat: 15g | Saturated Fat: 2g | Polyunsaturated Fat: 2g | Monounsaturated Fat: 9g | Cholesterol: 98mg | Sodium: 340mg | Potassium: 659mg | Fiber: 3.5g | Sugar: 4g | Vitamin C: 7mg | Calcium: 55mg | Iron: 1.8mg
    Did you try this recipe?Let me know! Comment below, or take a picture and tag me on Instagram @everydayhomemadebyashley.

    Sourdough Garlic Bread

    July 13, 2023

    This Sourdough Garlic Bread is garlicky, buttery, and crusty with the most delicious tangy flavor from homemade sourdough bread. Ready in less than 30 minutes, itโ€™s the perfect appetizer or side dish for every meal!

    Sourdough garlic bread on a piece of parchment paper.

    Who doesn't just love garlic bread?

    I could easily eat a whole loaf myself. It's crusty, buttery, garlicky, and oh-so delicious.

    But it wasn't until I started making sourdough bread at home that I truly discovered just how good garlic bread can be.

    I'm telling you, this is the best garlic bread you will ever try. Seriously. Especially with fresh, homemade sourdough bread.

    The tangy flavor and chewy, crusty texture of sourdough paired with rich, flavorful garlic butter is unbeatable.

    As my dad said, "It's the best food I've ever eaten!"

    So, if you're looking for a delicious new side dish or appetizer, give my easy sourdough garlic bread recipe a try!

    Disclaimer: Some links throughout this post are affiliate links. As an Amazon Associate, I earn from qualifying purchases. You can learn more by visiting my Affiliate Disclosure Page.

    Ingredients & Substitutions

    Here are some notes on the key ingredients. For the full list of ingredients, check out the recipe card below.

    • Sourdough Bread- Whether homemade or from your local bakery, sourdough's flavor and chewiness are perfect for making garlic bread.
    • Unsalted Butter- Softening the butter makes mixing and spreading easier.
    • Olive Oil- A little olive oil makes the garlic butter more spreadable and adds flavor.
    • Garlic- Mixing fresh garlic and garlic powder gives this sourdough garlic bread a bold garlic flavor. Finely mince the garlic so it cooks through in the oven. If you don't have fresh garlic, you can use garlic paste or minced garlic from a jar.
    • Seasonings- A blend of garlic powder, salt, dried parsley, and oregano is perfect for garlic bread. Feel free to customize the seasonings based on what you have in your pantry.

    ๐ŸŒฑ Sustainability Tip: If you don't bake sourdough bread, buy it from a local bakery or farmers' market. Supporting local businesses helps the community and the environment.

    The ingredients to make sourdough garlic bread. Each ingredient is labeled with text. They include sourdough bread, butter, dried oregano, dried parsley, kosher salt, olive oil, garlic powder, and garlic.

    Variations

    • Cheesy- Add shredded mozzarella, cheddar, or Parmesan on top of the garlic butter before baking.
    • Fresh Herbs- Mix fresh herbs like parsley, basil, thyme, oregano, or rosemary into the garlic butter.
    • Pesto- Stir some homemade pesto into the garlic butter mixture or use sourdough pesto bread as the base.
    • Spicy- Add a pinch of red pepper flakes to the garlic butter for a spicy kick.

    How to Make Sourdough Garlic Bread

    Here is how to make homemade garlic bread with sourdough.

    Step 1: Preheat oven. Preheat your oven to 425โ„‰. Line a rimmed baking sheet with aluminum foil or parchment paper.

    Step 2: Prepare bread. Using a sharp serrated knife, carefully cut the sourdough loaf in half lengthwise. Place the two halves, cut-side up, on the prepared baking sheet. If necessary, remove the ear so the top half of the bread sits flat.

    A loaf of sourdough bread sliced in half lengthwise on a cutting board.

    Step 3: Make garlic butter. In a small mixing bowl, combine the softened butter, extra virgin olive oil, finely minced garlic, dried parsley, dried oregano, garlic powder, and kosher salt. Mix well until all ingredients are fully incorporated.

    Butter, olive oil, garlic, and seasonings mixed together in a bowl.

    Step 4: Spread garlic butter. Evenly spread the garlic butter mixture over the cut sides of the sourdough halves.

    Half of a loaf of sourdough bread smeared with garlic butter on a foil-lined baking sheet.

    Step 5: Bake garlic bread. Place the baking sheet in the preheated oven and bake for 12-15 minutes, or until the edges of the bread are turning golden brown. For an extra golden top, broil on high for an additional 2 minutes, if desired.

    Step 6: Cool and serve. Once baked, remove the bread from the oven and let it cool for about 10 minutes. Cut into 12 slices and serve.

    Sourdough garlic bread cut in half on a foil-lined baking sheet with a bread knife next to it.

    Tips for Success

    • Use fresh sourdough bread. The best sourdough garlic bread starts with a fresh loaf. Ideally, bake your own with a homemade sourdough starter. If you don't bake sourdough bread, pick up a fresh loaf from a local bakery.
    • Soften the butter. Ensure your butter is at room temperature for easy mixing and spreading.
    • Adjust garlic to taste. Add more garlic for a strong flavor, or use less for a milder taste.
    • Keep an eye on the bread. Keep an eye on the bread as it bakes to prevent burning. Since oven temperatures can vary, look for golden brown edges to know when it's done.
    • Serve immediately. Sourdough garlic bread is best served fresh and hot from the oven.

    How to Store

    Store leftover sourdough garlic bread in an airtight container in the refrigerator for up to 4 days or freeze for up to 3 months.

    To reheat: Wrap garlic bread tightly in aluminum foil and bake in a 350โ„‰ oven for 10-15 minutes or until warmed through.

    Half of a loaf of homemade sourdough garlic bread.

    Let's Connect!

    Be sure to leave a comment below if you have any questions. You can also connect with me on Instagram, Facebook, Pinterest, or via email at [email protected].

    More Sourdough Recipes

    • A round loaf of Dutch oven sourdough bread.
      Beginner-Friendly Sourdough Bread Recipe (Dutch Oven Method)
    • Two mason jars of bubbly sourdough starter with text overlay that reads "Small-batch sourdough starter for beginners. How to Make Sourdough Starter. Turn simple ingredients into tangy bread."
      How to Make Sourdough Starter from Scratch (Small Batch)
    • A loaf of sourdough pull apart garlic bread with a few pieces pulled apart.
      Sourdough Pull Apart Garlic Bread
    • A slice of garlic sourdough bread on a wooden cutting board.
      Garlic Sourdough Bread with Herbs

    ๐Ÿ“– Recipe

    Sourdough garlic bread on a piece of parchment paper.
    Print Pin SaveSaved!
    5 from 1 vote

    Sourdough Garlic Bread

    This Sourdough Garlic Bread is garlicky, buttery, and crusty with the most delicious tangy flavor from homemade sourdough bread. Ready in less than 30 minutes, itโ€™s the perfect appetizer or side dish for every meal!
    Course Bread, Side Dish
    Cuisine American, Italian
    Prep Time 10 minutes minutes
    Cook Time 15 minutes minutes
    Total Time 25 minutes minutes
    Servings 12 slices
    Calories 254kcal
    Author Ashley Petrie, RDN, LDN

    Equipment

    • Rimmed baking sheet
    • Serrated knife
    • Aluminum foil or parchment paper

    Ingredients

    • 1 ยฝ-2 pound loaf sourdough bread preferably homemade
    • 8 tablespoons (1 stick or 113 grams) unsalted butter softened
    • 2 tablespoons extra virgin olive oil
    • 2 cloves garlic finely minced
    • ยฝ teaspoon dried parsley
    • ยผ teaspoon dried oregano
    • ยผ teaspoon garlic powder
    • ยผ teaspoons kosher salt

    Instructions

    • Preheat your oven to 425โ„‰. Line a rimmed baking sheet with aluminum foil or parchment paper.
    • Using a sharp serrated knife, carefully cut the sourdough loaf in half lengthwise. Place the two halves, cut-side up, on the prepared baking sheet. If necessary, remove the ear so the top half of the bread sits flat.
      1 ยฝ-2 pound loaf sourdough bread
    • In a small mixing bowl, combine the softened butter, olive oil, garlic, parsley, oregano, garlic powder, and kosher salt. Mix well until all ingredients are fully incorporated.
      8 tablespoons (1 stick or 113 grams) unsalted butter, 2 tablespoons extra virgin olive oil, 2 cloves garlic, ยฝ teaspoon dried parsley, ยผ teaspoon dried oregano, ยผ teaspoon garlic powder, ยผ teaspoons kosher salt
    • Evenly spread the garlic butter mixture over the cut sides of the sourdough halves.
    • Place the baking sheet in the preheated oven and bake for 12-15 minutes, or until the edges of the bread are turning golden brown. For an extra golden top, broil on high for an additional 2 minutes, if desired.
    • Once baked, remove the bread from the oven and let it cool for about 10 minutes. Cut into 12 slices and serve.

    Notes

    • Storage: Store leftover garlic bread in an airtight container in the refrigerator for up to 4 days or freeze for up to 3 months.

    Nutrition

    Serving: 1slice | Calories: 254kcal | Carbohydrates: 33.5g | Protein: 5.5g | Fat: 10.5g | Saturated Fat: 5g | Polyunsaturated Fat: 1g | Monounsaturated Fat: 4g | Trans Fat: 0.5g | Cholesterol: 20mg | Sodium: 377mg | Potassium: 52mg | Fiber: 1g | Calcium: 11.5mg | Iron: 2.1mg
    Did you try this recipe?Let me know! Comment below, or take a picture and tag me on Instagram @everydayhomemadebyashley.

    How to Make Sourdough Pasta

    July 1, 2023

    Homemade Sourdough Pasta is easy to make and is perfect for using up excess sourdough discard. Made with just 4 simple ingredients, this sourdough discard pasta can be ready in under an hour or left to ferment overnight in the refrigerator.

    Three nests of homemade sourdough pasta noodles on a flour-dusted baking sheet.

    Many people think of fresh homemade pasta as a dish that is only for special occasions. Making pasta at home sounds complicated, especially when grabbing a box of dried pasta off the shelf is so convenient.

    I also used to think this way, limiting my pasta-making to holidays like Christmas or Thanksgiving.

    But, then I started baking sourdough bread. I found myself with a lot of excess sourdough discard and I needed a way to use it up.

    Once I started making sourdough pasta noodles regularly, I realized how easy it is!

    Most of the time, I roll out the dough and cut it by hand, eliminating the need for special equipment. Additionally, sourdough pasta dough freezes exceptionally well, making it just as convenient as store-bought pasta.

    Now, homemade sourdough pasta is part of my regular cooking routine. I love the flavor, health benefits, and sustainability of making fermented pasta dough at home.

    Disclaimer: Some links throughout this post are affiliate links. As an Amazon Associate, I earn from qualifying purchases. You can learn more by visiting my Affiliate Disclosure Page.

    What is Sourdough Pasta?

    Sourdough pasta is fresh pasta that is made using sourdough starter, which can be either fed or unfed. The sourdough starter adds a unique tangy flavor and can potentially make the pasta easier to digest.

    Why Make Sourdough Pasta?

    There are many reasons why making sourdough pasta is a good idea.

    Not only does it allow you to use excess sourdough discard, but sourdough pasta also tastes delicious and may be easier to digest than regular pasta.

    Here are a few of the benefits of sourdough pasta:

    • Less Food Waste- By using your sourdough starter discard to make sourdough discard pasta, you're creating less waste and enjoying delicious food.
    • Flavorful- Sourdough has a unique, tangy flavor thanks to the naturally occurring yeast and bacteria in the starter. While subtle, sourdough discard noodles have a slightly tangier flavor than traditional dried pasta.
    • Digestibility- If you allow the pasta dough to ferment overnight in the refrigerator, the yeast and bacteria have a chance to break down more starches in the flour. This may make sourdough noodles easier to digest than regular pasta.

    Why You'll Love This Recipe

    • Scratch-Made- There's something so special about making fresh sourdough pasta from scratch. The flavor and texture of homemade pasta are incomparable to commercially-produced dry pasta.
    • Uses Sourdough Discard- If you bake a lot of sourdough bread, you're probably always looking for new sourdough discard recipes. Sourdough pasta is a fantastic way to use up a lot of sourdough discard without much effort.
    • Ready in 50 Minutes- You can make same-day sourdough pasta in as little as 50 minutes. Just mix the dough, rest for 30 minutes, then cook!
    • Only 4 Ingredients- Sourdough starter, flour, eggs, and salt is all you need to make the best sourdough pasta recipe ever.
    • Versatile- This easy sourdough pasta dough recipe can be turned into fettuccine, pappardelle, spaghetti, farfalle, lasagna, ravioli, tortellini, and so much more! Pair it with your favorite sauces, proteins, and vegetables for a hearty, homestyle meal.

    Ingredient Notes

    Here are some notes on the key ingredients. For the full list of ingredients, check out the recipe card below.

    • All-Purpose Flour- To keep things simple, I developed this recipe using all-purpose flour since it can be found in most home pantries.
    • Sourdough Starter Discard- Both active sourdough starter and sourdough starter discard can be used to make this recipe.
    • Eggs- Two whole eggs provide the pasta dough with structure, moisture, and color.
    • Egg Yolk- An extra egg yolk adds richness and color.
    • Kosher Salt- I prefer to use kosher salt because it doesn't typically contain added ingredients like anti-caking agents and sugar.

    ๐ŸŒฑ Sustainability Tip: Using sourdough discard is a great way to reduce food waste in your kitchen and make some delicious sourdough discard recipes!

    The ingredients to make sourdough pasta. Each ingredient is labeled with text. They include all-purpose flour, egg yolk, eggs, salt, and sourdough discard.

    Substitutions and Variations

    Here are a few ways you can try customizing this easy homemade sourdough pasta recipe to fit your diet and taste preferences.

    Substitutions

    • All-Purpose Flour- Tipo 00 flour, bread flour, semolina flour, or whole wheat flour can be used in place of all-purpose flour. If you use whole wheat flour, you may need to add a little water to the dough to achieve the right consistency.
    • Sourdough Starter Discard- If you don't have sourdough starter discard, you can add an additional egg or 1-2 tablespoons of water instead.
    • Kosher Salt- Swap kosher salt for sea salt, pink Himalayan salt, or table salt.
    A nest of flour-dusted sourdough pasta noodles on a baking sheet.

    Variations

    • Whole Wheat- Replace some or all of the flour in this recipe with whole wheat flour for healthy, high-fiber homemade pasta.
    • Herbed- Mix chopped fresh herbs or dried herbs into the pasta dough while kneading. Try basil, thyme, rosemary, and oregano.
    • Spinach- Make green spinach pasta by mixing a small amount of spinach purรฉe into the pasta dough.
    • Beetroot- Similarly to spinach pasta, you can mix a small amount of purรฉed beet into the pasta dough to make pink pasta.

    Can I scale this sourdough noodles recipe? Of course! To make more or less sourdough pasta, increase or decrease the ingredient amounts based on how much you want to make.

    Equipment Notes

    Here are some notes on any special equipment I used to make this recipe.

    • Rolling Pin- Most of the time, I just roll my pasta dough out using a tapered wooden rolling pin. It's a low-fuss way to get homemade pasta on the dinner table quickly and easily.
    • Pasta Machine- If you make pasta often, consider investing in a pasta machine. Pasta machines can roll your pasta dough into thin sheets for lasagna, ravioli, and tortellini. They also often come with attachments to make fettuccine, spaghetti, and more.
    • Kitchen Scale- I always recommend weighing your ingredients when making pasta for the best results. Kitchen scales are relatively inexpensive and come in handy if you make pasta or bread often.
    • Pasta Drying Rack- If you plan on drying your homemade pasta, a pasta drying rack is the perfect tool for you. Dry large batches of sourdough egg noodles to store at room temperature for later.

    How to Make Sourdough Pasta

    Here is how to make sourdough discard pasta.

    Step 1: Make flour well. In a large mixing bowl, add the all-purpose flour. Create a well in the center of the flour by pressing the bottom of a measuring cup into it.

    Step 2: Add remaining ingredients. Into the well, add the sourdough starter, eggs, egg yolk, and kosher salt.

    A nest of flour with sourdough discard, eggs, egg yolk, and salt in the middle.

    Step 3: Whisk the wet ingredients. Using a fork, start whisking the ingredients in the well, gradually incorporating more flour as you whisk.

    Sourdough discard pasta dough being mixed together in a bowl.

    Step 4: Transfer dough to work surface. When the dough becomes too stiff to continue whisking with a fork, transfer the dough and the remaining flour onto a clean work surface.

    The partially mixed sourdough pasta dough after being turned out onto the counter.

    Step 5: Knead the dough. Begin kneading the dough with your hands, incorporating the rest of the flour until fully blended. Keep kneading the dough, dusting it with additional flour as needed until it becomes smooth and slightly tacky, but no longer sticky. The dough is ready when you can poke it and it quickly springs back.

    Step 6: Rest the dough. Cover the dough with a bowl, towel, or plastic wrap and let it rest at room temperature for about 30 minutes. Alternatively, you can refrigerate it for up to 24 hours to ferment it.

    A sourdough pasta dough ball.

    How to Make Sourdough Pasta Dough (Instructional Video)

    Tips for Success

    • Use a mixing bowl. I recommend using a large mixing bowl for mixing pasta dough as it creates less mess compared to mixing directly on the counter.
    • Measure ingredients accurately. For best results, accurately measure ingredients by weight using a kitchen scale. Otherwise, spoon and level the flour into a measuring cup instead of scooping it.
    • Incorporate flour gradually. While whisking the wet ingredients in the flour well, gradually add the flour to avoid lumps. Mixing too quickly can cause lumps to form.
    • Adjust flour as needed. The amount of flour needed can vary based on egg size and kitchen humidity. Begin with the specified amount in the recipe and add more gradually if necessary, adjusting as needed for the right dough consistency.
    • Keep it covered. Pasta dough will dry out quickly if left uncovered. Always keep your dough covered with a bowl, towel, or plastic wrap to avoid it drying out.

    How to Shape Sourdough Pasta By Hand

    Shaping sourdough pasta by hand is a simple process.

    Step 1: Divide the pasta dough. Lightly flour a clean work surface to prevent sticking. Divide the pasta dough into 4 equal-sized portions. Work with one portion at a time, keeping the remaining pieces covered to prevent them from drying out.

    Step 2: Roll the pasta into sheets. Roll the dough into a thin and even sheet using a rolling pin. Aim for a thickness that allows you to see your hand or the surface through the dough.

    Step 3: Shape the pasta. Cut and shape the pasta dough into your preferred pasta shape.

    • For Tagliatelle or Fettuccine: Once the dough is rolled out, lightly flour the surface of the dough and loosely fold it into a rectangle. Use a sharp knife or a pizza cutter to cut the folded dough into strips of your desired width. Unfold the strips to separate the noodles.
    • For Farfalle or Bowtie: After rolling out the dough, cut it into rectangular pieces. Take each rectangle and pinch it together in the center to form a bowtie shape.
    • For Orecchiette: Roll small portions of dough into ropes, about ยผ inch in diameter. Cut the ropes into small pieces, around ยผ to ยฝ inch in length. Using a knife or your thumb, press each piece of dough to create a slight indentation, resembling a small ear shape.

    Step 4: Repeat with remaining dough portions. Arrange the shaped pasta on a floured surface or a baking sheet, making sure they are not touching to prevent sticking. Repeat the process with the remaining dough until it is all shaped.

    A rolled out sheet of sourdough discard pasta dough.
    A rolled up sheet of sourdough pasta dough cut into noodles.
    A pile of hand-cut sourdough pasta noodles.

    How to Shape Sourdough Pasta Using a Pasta Machine

    Shaping sourdough pasta using a pasta machine is a convenient method.

    Step 1: Divide the pasta dough. Divide the pasta dough into 4 equal-sized portions. Work with one portion at a time, keeping the remaining pieces covered to prevent them from drying out.

    Step 2: Laminate the pasta dough. Take one portion of the dough and flatten it into a rectangular shape with your hands. Dust it lightly with flour to prevent sticking. Adjust the pasta machine to the widest setting (usually marked as "0"). Pass the dough through the machine a couple of times, folding it into thirds each time, until it becomes smooth and pliable.

    Step 3: Press the pasta into sheets. Gradually decrease the width setting on the pasta machine while passing the dough through each time. Repeat this process until you achieve the desired thickness. For fettuccine or tagliatelle, a medium thickness setting is commonly used.

    A grid of 4 images showing the steps to roll out fresh pasta using a pasta machine.
    Rolling out sourdough pasta dough using a pasta machine.

    Step 4: Shape the pasta. Once the dough reaches the desired thickness, dust it lightly with flour and pass it through the desired pasta cutter attachment on the pasta machine. This can be a fettuccine cutter, spaghetti cutter, or any other desired shape.

    Step 5: Repeat with remaining dough. As the pasta is cut, lay it on a floured surface or a drying rack to prevent sticking. You can also sprinkle some flour between layers of pasta to prevent them from sticking together. Repeat the process with the remaining portions of dough.

    Fettuccine sourdough pasta cut by a pasta machine.
    Fettuccine sourdough noodles cut by a pasta machine.

    What Shapes Can I Make With Sourdough Pasta?

    Sourdough pasta dough can be used to make any shaped pasta you'd like!

    Fettuccine, spaghetti, and sourdough lasagna noodles are all easy to make both by hand and with a pasta maker. Filled pasta, such as ravioli or tortellini, can also be easily made by hand.

    If you make fresh pasta often and want to try something new, there are lots of tools and gadgets out there to help you shape your pasta in fun and interesting ways.

    How to Cook Sourdough Pasta

    How long you cook your sourdough pasta will depend on the final shape and thickness you chose. As a general guideline, here is how to cook fettuccine sourdough pasta.

    Step 1: Bring water to a boil. Bring a large pot of well-salted water to a rolling boil.

    Step 2: Cook the pasta. Carefully add the sourdough pasta to the boiling water. Gently stir the pasta to prevent it from sticking together. Cook the pasta for about 2-4 minutes or until it reaches your desired level of doneness.

    Step 3: Test the pasta for doneness. Test the pasta for doneness by taking a small piece and tasting it. The pasta should be al dente, which means it is cooked but still slightly firm to the bite.

    Step 4: Drain the pasta. When the pasta reaches your desired level of doneness, use a colander or pasta strainer to carefully drain the cooked pasta. Remember to save a small amount of the pasta cooking water, as it can be useful for making your sauce stick to the noodles more effectively.

    What to Serve With Sourdough Pasta

    Like regular pasta, sourdough pasta can be served with all of your favorite sauces, proteins, and vegetables.

    When it comes to choosing a flavorful pasta sauce, the possibilities are endless. Classic pairings include creamy alfredo, rich marinara, hearty bolognese, and basil pesto.

    For a heartier, more satisfying pasta dish, try pairing this sourdough pasta with your favorite protein. You can enjoy it with whole roasted chicken, pan-seared chicken, blackened salmon, pesto salmon, meatballs, or tender braised beef.

    Finally, pair your homemade sourdough pasta with healthy vegetable side dishes like spinach caprese salad, air-fried tomatoes, roasted Brussels sprouts, and sautรฉed butternut squash.

    ๐Ÿ“ Planning a romantic dinner at home? Pair this homemade pasta with chocolate-covered cheesecake strawberries for a quick and easy dessert!

    Sourdough pasta tossed with alfredo sauce on a small white plate.

    Storage and Reheating

    How to Store

    Uncooked Pasta

    • Refrigerator- Store fresh, uncooked pasta dough wrapped tightly in plastic wrap in the refrigerator for 1-2 days.
    • Freezer- Dough balls of uncooked fresh pasta can also be frozen for up to 8 months for longer storage.
    • Dried- Store dried pasta in an airtight container or airtight bags in a cool, dry place away from direct sunlight for 2-6 months. Completely dried or dehydrated fresh pasta should not bend or feel soft.

    Cooked Pasta

    • Refrigerator- Store cooked pasta in an airtight container in the refrigerator for up to 5 days.
    • Freezer- Freeze cooked pasta in a freezer-safe container for up to one month. Allow the pasta to thaw in the refrigerator before reheating.

    How to Reheat

    These methods are for reheating cooked sourdough pasta. If your leftover pasta is frozen, thaw it in the refrigerator overnight before reheating.

    • Stovetop- Heat a small amount of butter or olive oil in a saucepan over medium heat. Add the leftover pasta and toss it gently to coat it with the butter or oil. Cook the pasta, stirring occasionally, until it is heated through.
    • Microwave- Place leftover sourdough pasta into a microwave-safe dish. Cover the dish with a microwave-safe lid or damp paper towel. Microwave the pasta in 30-second intervals, stirring between each interval, until it is heated evenly.
    • Oven- Preheat oven to 300ยฐF. Place the leftover pasta in a baking dish and cover it with aluminum foil. Bake the pasta in the oven for approximately 10-15 minutes, or until it is thoroughly heated. This method works well for leftover pasta that is coated generously with sauce.
    Homemade sourdough pasta nests on a baking sheet.

    Frequently Asked Questions

    Is sourdough pasta easier to digest?

    Sourdough pasta may be easier to digest for some people. The fermentation process in sourdough breaks down carbohydrates and proteins, including gluten, making them potentially more digestible.

    Does sourdough pasta have less gluten?

    The fermentation process in sourdough helps break down gluten, making it potentially more digestible for some individuals. However, sourdough pasta still contains gluten, so it's not suitable for those with celiac disease or severe gluten intolerance.

    Do I need a pasta machine to make sourdough pasta?

    While a pasta machine can make the rolling and shaping process easier, it is not necessary. You can roll out the pasta dough with a rolling pin and then cut it into desired shapes using a knife or a pizza cutter.

    Can I make sourdough pasta in a food processor or stand mixer?

    Yes, you can make sourdough pasta using a food processor or stand mixer. Simply combine the ingredients in the bowl of the food processor or stand mixer and mix until a smooth and elastic dough forms.

    Can I dry homemade sourdough pasta?

    Yes, you can dry homemade sourdough pasta for later use. After cutting the pasta into noodles, lay them out in a single layer on a pasta drying rack or a clean surface to air dry for 12-24 hours. Once completely dry, store the pasta in an airtight container in a cool, dry place. It can be cooked directly from its dried state.

    How long should I cook sourdough pasta?

    Cooking times may vary depending on the thickness and shape of the pasta. Fresh homemade sourdough pasta typically cooks faster than store-bought dried pasta. As a general guideline, cook the pasta in boiling salted water for about 2-4 minutes, or until al dente. Taste test the pasta to determine the desired doneness.

    Let's Connect!

    Be sure to leave a comment below if you have any questions. You can also connect with me on Instagram, Facebook, Pinterest, or via email at [email protected].

    More Sourdough Discard Recipes

    • Several pieces of sourdough focaccia on a piece of wrinkled parchment paper.
      Sourdough Discard Focaccia (Same Day or Overnight)
    • Sourdough discard pizza dough stretched out on a pizza peel.
      Sourdough Discard Pizza Dough (No Yeast)
    • A bowl of sourdough cheese crackers.
      5-Ingredient Sourdough Discard Cheese Crackers (Quick & Easy!)
    • A pile of sourdough discard tortillas on a white cloth.
      Sourdough Discard Tortillas (5 Ingredients!)

    ๐Ÿ“– Recipe

    Three nests of homemade sourdough pasta noodles on a flour-dusted baking sheet.
    Print Pin SaveSaved!
    5 from 1 vote

    Sourdough Pasta

    Homemade Sourdough Pasta is easy to make and is perfect for using up excess sourdough discard. Made with just 4 simple ingredients, this sourdough discard pasta can be ready in under an hour or left to ferment overnight in the refrigerator.
    Yield: Approximately 1 pound of pasta
    Course Main Course, Pasta, Side Dish
    Cuisine Italian
    Prep Time 15 minutes minutes
    Cook Time 5 minutes minutes
    Rest Time 30 minutes minutes
    Total Time 50 minutes minutes
    Servings 6 servings
    Calories 209kcal
    Author Ashley Petrie, RDN, LDN

    Equipment

    • Wooden rolling pin
    • Pasta machine optional
    • Kitchen scale optional

    Ingredients

    • 240 grams (about 2 cups) all-purpose flour
    • 100 grams (about ยฝ cup) sourdough starter fed or unfed
    • 2 large eggs
    • 1 egg yolk
    • 4 grams (about 1 teaspoon) kosher salt

    Instructions

    • In a large mixing bowl, add the all-purpose flour. Create a well in the center of the flour by pressing the bottom of a measuring cup into it.
      240 grams (about 2 cups) all-purpose flour
    • Into the well, add the sourdough starter, eggs, egg yolk, and kosher salt.
      100 grams (about ยฝ cup) sourdough starter, 2 large eggs, 1 egg yolk, 4 grams (about 1 teaspoon) kosher salt
    • Using a fork, start whisking the ingredients in the well, gradually incorporating more flour as you whisk.
    • When the dough becomes too stiff to continue whisking with a fork, transfer the dough and the remaining flour onto a clean work surface.
    • Begin kneading the dough with your hands, incorporating the rest of the flour until fully blended. Keep kneading the dough, dusting it with additional flour as needed until it becomes smooth and slightly tacky, but no longer sticky. The dough is ready when you can poke it and it quickly springs back.
    • Cover the dough with a bowl, towel, or plastic wrap and let it rest at room temperature for about 30 minutes. Alternatively, you can refrigerate it for up to 24 hours to ferment it.
    • *To Make Fettuccine Noodles: Roll out the dough using a rolling pin or a pasta machine until it becomes thin enough for you to see your hand or the counter through it. Cut the pasta sheet into fettuccine noodles using a knife, pizza cutter, or pasta machine.
    • In a pot of boiling salted water, cook the homemade fettuccine noodles for approximately 3 minutes. Drain the cooked noodles and serve them with your favorite sauce or toppings. Enjoy!

    Notes

    • *See blog post for more detailed instructions on how to roll out, cut, and shape pasta by hand or using a pasta machine.
    • Adjust flour as needed. The amount of flour needed can vary based on egg size and kitchen humidity. Begin with the specified amount in the recipe and add more gradually if necessary, adjusting as needed for the right dough consistency.
    • Storage: Store fresh, uncooked pasta dough in the refrigerator for up to 2 days or in the freezer for up to 8 months. Dried pasta can be stored at room temperature for 2-6 months. Cooked pasta can be stored in the refrigerator for up to 5 days and frozen for up to one month.

    Nutrition

    Serving: 1serving | Calories: 209kcal | Carbohydrates: 37g | Protein: 8g | Fat: 3g | Saturated Fat: 1g | Polyunsaturated Fat: 0.5g | Monounsaturated Fat: 1g | Cholesterol: 92mg | Sodium: 210mg | Potassium: 97mg | Fiber: 2g | Calcium: 21mg | Iron: 2.4mg
    Did you try this recipe?Let me know! Comment below, or take a picture and tag me on Instagram @everydayhomemadebyashley.

    Roasted Garlic Alfredo Sauce

    June 29, 2023

    This Roasted Garlic Alfredo Sauce is made with homemade roasted garlic, heavy cream, butter, and pecorino romano cheese for a rich and flavorful sauce that pairs perfectly with pasta. It's made without flour and can also be used on pizza, chicken, and vegetables.

    A plate of fettuccine pasta coated with roasted garlic alfredo sauce.

    I'm not sure why, but making alfredo sauce at home often seems more complicated than it is.

    While it's true that store-bought alfredo sauces can be convenient, they often contain a long list of unnecessary ingredients like thickeners and preservatives to achieve their texture and shelf stability.

    But, the good news is that creating your own homemade alfredo sauce is surprisingly simple and allows you to have full control over the ingredients.

    By using basic pantry staples like butter, cream, garlic, and cheese, you can whip up a delicious and authentic roasted garlic alfredo sauce that tastes fresher and doesn't contain any artificial ingredients.

    So, if you're ready to experience the best roasted garlic alfredo sauce ever, keep reading to learn exactly how to make it for yourself!

    >> Can't get enough alfredo sauce recipes? Try this Cajun Salmon Alfredo Pasta, Creamy Chicken Broccoli Lasagna, and Parmesan Garlic Pizza.

    Disclaimer: Some links throughout this post are affiliate links. As an Amazon Associate, I earn from qualifying purchases. You can learn more by visiting my Affiliate Disclosure Page.

    Why You'll Love This Recipe

    • Rich & Creamy- By using real cream, butter, and high-quality pecorino romano cheese, you'll create a rich, creamy, and indulgent alfredo sauce that is absolutely delicious.
    • Flavorful- The roasted garlic brings a subtly sweet and complex garlicky flavor, making this classic alfredo sauce extra luxurious.
    • No Flour- This simple roasted garlic alfredo sauce recipe does not use flour as a thickening agent. Just heavy cream, butter, and cheese is all you need to create this rich, velvety pasta sauce.
    • Only 7 Ingredients- This creamy pasta sauce only requires a few simple ingredients to make.
    • Easy to Make- Despite its restaurant-quality taste, this roasted garlic cream sauce recipe is surprisingly easy to make at home.
    • Versatile- Get creative with your roasted garlic alfredo sauce! It's not just for pasta. Use it as a pizza sauce, for roasted chicken, or to elevate sautรฉed veggies. It adds a touch of decadence to any meal.

    Ingredient Notes

    Here are some notes on the key ingredients. For the full list of ingredients, check out the recipe card below.

    • Garlic- Roasting garlic brings out its natural sweetness and mellows the flavor. Choose a plump, fresh head of garlic for the best flavor.
    • Heavy Cream- Since it acts as the base of the alfredo sauce, opt for the highest-quality cream you can find.
    • Butter- Opt for unsalted butter to have better control over the overall saltiness of the sauce.
    • Pecorino Romano- Pecorino romano cheese is a hard and salty Italian cheese with a sharp flavor. Freshly grate the cheese from a block for better texture and flavor.
    • Olive Oil- Extra virgin olive oil helps enhance the garlic roasting process and gives it a richer flavor.
    • Kosher Salt- I prefer kosher salt over table salt because it typically doesn't contain added ingredients like sugar or anti-caking agents.
    • Black Pepper- Use freshly ground black pepper for the best flavor.

    Sustainability Tip: When possible, choose locally-sourced garlic, butter, cream, and cheese from farmers' markets or CSA programs. This supports your local economy and reduces the environmental impact of your meal.

    The ingredients to make roasted garlic alfredo sauce. Each ingredient is labeled with text. They include butter, heavy cream, salt, pecorino romano, garlic, black pepper, and olive oil.

    Substitutions and Variations

    Here are a few ways you can try customizing this creamy roasted garlic alfredo sauce recipe to fit your diet and taste preferences.

    Substitutions

    • Roasted Garlic- If you don't have time to roast the garlic, sautรฉ minced garlic in a small amount of olive oil or butter until golden and fragrant.
    • Heavy Cream- Substitute heavy cream for light cream, half-and-half, or whole milk. Keep in mind that the sauce may be less creamy and have a thinner consistency.
    • Butter- Swap butter for margarine, extra virgin olive oil, or coconut oil. Note that these substitutes will likely change the flavor and consistency of the finished sauce.
    • Pecorino Romano- Opt for freshly grated parmesan cheese for a milder, less salty flavor.
    • Olive Oil- Choose another neutral-flavored oil or use melted butter.
    • Kosher Salt- Use sea salt or table salt in place of kosher salt.
    A spoon holding some roasted garlic alfredo sauce above the skillet.

    Variations

    • Reduced Fat- Replace the heavy cream with light cream or use half the amount of butter for a reduced-fat version of this easy roasted garlic alfredo sauce.
    • Herbed- Add chopped fresh parsley, basil, or thyme to the sauce for additional flavor. You can also use dried Italian seasoning or oregano.
    • Lemon- Grate a little lemon zest into the alfredo sauce to give it a bright pop of citrus flavor.
    • Spicy- A few shakes of red pepper flakes can give this alfredo sauce a spicy kick.

    How to Make Roasted Garlic Alfredo Sauce

    Here is how to make alfredo sauce with roasted garlic.

    Roast the Garlic

    Step 1: Preheat the oven. Preheat oven to 400โ„‰. Peel and discard the papery outer layers of the garlic head.

    A head of garlic on a green cutting board.

    Step 2: Drizzle garlic with olive oil. Cut about half an inch from the top of the garlic head to expose the cloves. Place the garlic head on a piece of aluminum foil and drizzle the olive oil evenly over the top.

    A head of garlic with the top removed to expose the cloves.
    A head of garlic brushed with olive oil in a piece of aluminum foil.

    Step 3: Roast the garlic. Cover the garlic with the aluminum foil and roast it for 40-45 minutes, or until the cloves are soft and lightly browned. Allow the roasted garlic to cool for a few minutes before squeezing the cloves into a small bowl.

    Roasted garlic in aluminum foil.

    Make the Alfredo Sauce

    Step 1: Simmer the butter and cream. In a small saucepan, melt butter over medium-low heat. Add the heavy cream to the melted butter and bring it to a gentle simmer. Simmer the sauce, whisking frequently, for about 5 minutes.

    Butter melting in a stainless steel skillet.
    Butter and heavy cream simmering in a stainless steel skillet.

    Step 2: Add roasted garlic and seasonings. Add the roasted garlic cloves, kosher salt, and black pepper to the saucepan and continue whisking for another 1-2 minutes.

    Kosher salt, black pepper, and roasted garlic paste added to the butter and cream mixture.

    Step 3: Add pecorino romano cheese. Remove the saucepan from the heat and gradually whisk in the grated pecorino romano cheese until the sauce becomes smooth.

    Grated pecorino romano cheese added to the roasted garlic alfredo sauce.

    Step 4: Serve and enjoy! Serve the roasted garlic alfredo sauce immediately over cooked pasta. Enjoy!

    The finished roasted garlic alfredo sauce in a stainless steel skillet.

    Tips for Success

    • Use high-quality ingredients. For the best-tasting roasted garlic alfredo sauce, use high-quality ingredients. Choose locally-sourced cream and butter, fresh garlic, and premium pecorino romano cheese.
    • Simmer gently. To prevent scorching the cream, simmer it gently and whisk frequently. Avoid boiling, as it can scorch or break the sauce.
    • Taste for seasoning. Before serving the roasted garlic cream sauce, taste for seasoning and adjust as needed.
    • Adjust consistency. If you prefer a thinner sauce, you can adjust the consistency by adding a small amount of pasta water, milk, or additional cream. For a thicker sauce, simmer for a few extra minutes or add more grated cheese.

    What to Serve With Roasted Garlic Alfredo Sauce

    Of course, there's nothing better than fresh homemade sourdough pasta coated in creamy roasted garlic alfredo sauce.

    Alfredo sauce also makes a delicious pizza sauce and dip for breadsticks or garlic bread. I love making parmesan garlic white pizza using homemade alfredo sauce. Or serve it as a creamy dip alongside freshly sourdough breadsticks, garlic bread, or garlic knots.

    Finally, roasted garlic alfredo sauce can be used to take your favorite meals to the next level. Try drizzling this cream sauce over roasted chicken, grilled chicken, or grilled steak. Or toss some crispy roasted vegetables in it.

    A plate of homemade roasted garlic fettuccine alfredo topped with parsley.

    Storage and Reheating

    How to Store

    • Refrigerator- Store any leftover alfredo sauce in an airtight container in the refrigerator for 3-4 days.
    • Freezer- Alfredo sauce can be stored in the freezer for up to 3 months. Keep in mind, however, that the consistency of the sauce may change after freezing.

    How to Reheat

    • Stovetop- Transfer leftover alfredo sauce to a small saucepan set over low heat. Heat the sauce, stirring frequently, until steaming hot. Be careful not to overheat or boil the sauce, as it can cause separation or a grainy texture.
    • Microwave- Place leftover roasted garlic alfredo sauce in a microwave-safe bowl or container. Cover the container with a microwave-safe lid or paper towel, leaving a small vent for steam to escape. Heat on half-power (50%) in 30-second intervals, stirring between each, until fully warmed through.

    Make Ahead

    Roasted garlic alfredo sauce tastes best when prepared just before serving.

    You can, however, roast the garlic up to 2 weeks in advance and store it in the refrigerator until ready to use. In fact, I recommend roasting several heads of garlic at once and storing leftovers in the freezer for up to 3 months.

    Roasted garlic alfredo sauce coating homemade fettuccine noodles.

    Frequently Asked Questions

    What does roasted garlic taste like?

    Raw garlic is sharp and pungent, while roasted garlic takes on a sweeter, more buttery, and milder garlic flavor.

    Can I use roasted garlic paste instead of roasting the garlic myself?

    Yes, you can use roasted garlic paste if you have it on hand. Adjust the amount according to your taste preference and add it to the sauce as instructed.

    What can I substitute for pecorino romano cheese?

    While pecorino romano cheese adds a distinctive flavor, you can substitute it with other hard cheeses like parmesan or asiago. The taste may vary slightly, but it will still be delicious.

    Why does my alfredo sauce taste bland?

    For a flavorful roasted garlic alfredo sauce, it's important to achieve a balance between the creamy dairy, the subtle sweetness of roasted garlic, and the saltiness of pecorino romano cheese. If you feel like your sauce is lacking flavor, try adding a pinch of salt or a bit more cheese.

    How can I adjust the consistency of the alfredo sauce?

    If you prefer a thinner sauce, you can add a small amount of milk, cream, or pasta cooking water to achieve the desired consistency. For a thicker sauce, simmer it for a bit longer to reduce and thicken it.

    Do Italians use cream in alfredo sauce?

    Authentic Italian alfredo sauce traditionally consists of just parmesan cheese and butter. However, many American versions of the recipe incorporate heavy cream to achieve a creamier and more indulgent sauce.

    Let's Connect!

    Be sure to leave a comment below if you have any questions. You can also connect with me on Instagram, Facebook, Pinterest, or via email at [email protected].

    More Pasta Recipes

    • A plate of pesto rigatoni garnished with parmesan cheese and basil.
      Homemade Pesto Rigatoni (20 Minutes!)
    • A small white plate of creamy pumpkin pasta sauce on cavatappi pasta. The pasta is garnished with grated parmesan cheese, black pepper, and one whole sage leaf.
      Creamy Pumpkin Pasta Sauce
    • A plate of linguine bolognese garnished with fresh parsley and grated parmesan cheese.
      Linguine Bolognese
    • A baking dish filled with chicken and broccoli lasagna. One piece of lasagna is sitting on a small white plate to the left of the baking dish.
      Creamy Chicken and Broccoli Lasagna

    ๐Ÿ“– Recipe

    A plate of fettuccine pasta coated with roasted garlic alfredo sauce.
    Print Pin SaveSaved!
    5 from 1 vote

    Roasted Garlic Alfredo Sauce

    This Roasted Garlic Alfredo Sauce is made with homemade roasted garlic, heavy cream, butter, and pecorino romano cheese for a rich and flavorful sauce that pairs perfectly with pasta. It's made without flour and can also be used on pizza, chicken, and vegetables.
    Yield: Approximately 1 cup of sauce
    Course Sauces
    Cuisine Italian
    Prep Time 10 minutes minutes
    Cook Time 50 minutes minutes
    Total Time 1 hour hour
    Servings 4 servings (ยผ cup each)
    Calories 425kcal
    Author Ashley Petrie, RDN, LDN

    Equipment

    • Small saucepan
    • Whisk
    • Aluminum foil

    Ingredients

    Roasted Garlic Ingredients

    • 1 head garlic
    • 1 tablespoon extra virgin olive oil

    Alfredo Sauce Ingredients

    • 4 tablespoons unsalted butter
    • 1 cup heavy cream
    • ยผ teaspoon kosher salt
    • โ…› teaspoon black pepper
    • 1 cup grated pecorino romano cheese

    Instructions

    For the Roasted Garlic

    • Preheat oven to 400โ„‰. Peel and discard the papery outer layers of the garlic head.
      1 head garlic
    • Cut about half an inch from the top of the garlic head to expose the cloves. Place the garlic head on a piece of aluminum foil and drizzle the olive oil evenly over the top.
      1 tablespoon extra virgin olive oil
    • Cover the garlic with the aluminum foil and roast it for 40-45 minutes, or until the cloves are soft and lightly browned. Allow the roasted garlic to cool for a few minutes before squeezing the cloves into a small bowl.

    For the Alfredo Sauce

    • In a small saucepan, melt the butter over medium-low heat. Add the heavy cream to the melted butter and bring it to a gentle simmer. Simmer the sauce, whisking frequently, for about 5 minutes.
      4 tablespoons unsalted butter, 1 cup heavy cream
    • Add the roasted garlic cloves, kosher salt, and black pepper to the saucepan and continue whisking for another 1-2 minutes.
      ยผ teaspoon kosher salt, โ…› teaspoon black pepper
    • Remove the saucepan from the heat and gradually whisk in the grated pecorino romano cheese until the sauce becomes smooth.
      1 cup grated pecorino romano cheese
    • Serve the roasted garlic alfredo sauce immediately over cooked pasta. Enjoy!

    Notes

    • Quick Tip: If you prefer a thinner sauce, you can adjust the consistency by adding a small amount of pasta cooking water, milk, or additional cream. For a thicker sauce, simmer for a few extra minutes or add more grated cheese.
    • Storage: Store leftover alfredo sauce in the refrigerator for up to 4 days or freeze for up to 3 months. Note that freezing the sauce may result in textural and consistency changes.
    • Make Ahead: Roast the garlic ahead of time and store it in the refrigerator for up to 2 weeks or in the freezer for up to 3 months.

    Nutrition

    Serving: 1serving | Calories: 425kcal | Carbohydrates: 4g | Protein: 6g | Fat: 42g | Saturated Fat: 25g | Polyunsaturated Fat: 2g | Monounsaturated Fat: 11g | Trans Fat: 1g | Cholesterol: 118mg | Sodium: 449mg | Potassium: 91mg | Sugar: 2g | Vitamin C: 3mg | Calcium: 217mg | Iron: 0.2mg
    Did you try this recipe?Let me know! Comment below, or take a picture and tag me on Instagram @everydayhomemadebyashley.

    How to Cook Farro in a Rice Cooker

    June 16, 2023

    Making farro in a rice cooker is an easy, foolproof way to cook this chewy, nutty grain to perfection in just 45 minutes. Versatile, healthy, and freezer-friendly, rice cooker farro can be enjoyed as a side dish or added to other dishes like soups and salads.

    A white bowl of plain farro made in a rice cooker.

    If I had to choose a favorite grain-based side dish, it would easily be farro. The delightfully chewy texture and delicate, nutty flavor of farro make it a delicious alternative to rice.

    And while farro can be cooked on the stovetop, it does require a bit of babysitting.

    That's where the rice cooker comes to the rescue.

    By cooking farro in a rice cooker, you eliminate the need for constant monitoring, allowing you to focus on preparing other components of your meal. In just 45 minutes, your farro will be perfectly cooked without any fuss.

    So, keep reading to learn all of my tips and tricks to make the best farro in a rice cooker.

    Disclaimer: Some links throughout this post are affiliate links. As an Amazon Associate, I earn from qualifying purchases. You can learn more by visiting my Affiliate Disclosure Page.

    What is Farro?

    Farro is an ancient wheat grain known for its nutty flavor and chewy texture. It's a popular ingredient in Italian cuisine.

    As a whole grain, farro is a good source of fiber, protein, vitamins, and minerals. It pairs well with a variety of vegetables and proteins, offering a hearty and nutritious addition to meals.

    Is Farro Gluten-Free?

    No, farro is not gluten-free. Since farro is a type of wheat, it does contain the protein gluten. Individuals with gluten intolerance, wheat allergies, or celiac disease should avoid consuming farro.

    Why You'll Love This Recipe

    • Easy to Make- The rice cooker does most of the work, meaning you're able to focus on preparing the rest of your meal.
    • Versatile- Use this easy rice cooker farro in various recipes, such as salads, soups, risottos, pilafs, and as a side dish.
    • Healthy- Farro is packed with heart-healthy fiber, plant-based protein, B vitamins, zinc, iron, and magnesium.
    • Freezer-Friendly- I love making a big batch of rice cooker farro, then freezing half of it to use in soups, on salads, or as a risotto.

    Ingredient Notes

    Here are some notes on the key ingredients. For the full list of ingredients, check out the recipe card below.

    • Farro- This rice cooker recipe calls for Italian pearled farro. Cooking pearled farro is quicker than cooking whole farro or semi-pearled farro since some of the bran is removed.
    • Water- The ratio of water to farro in a rice cooker is 3:1. So, use 3 cups of water for every cup of farro you want to make.

    Sustainability Fact: By growing ancient grains, like farro, farmers are helping to make our food system stronger.

    The ingredients to make farro in a rice cooker. Each ingredient is labeled with text. They include pearled farro and water.

    Substitutions and Variations

    Here are a few ways you can try customizing this healthy farro in a rice cooker recipe to fit your diet and taste preferences.

    Substitutions

    • Farro- Swap farro for quinoa (2:1 ratio), freekeh (2.5:1 ratio), or wheat berries (2.5:1 ratio). Keep in mind that the cook time and water-to-grain ratio will change, depending on the grain you choose.
    • Water- Substitute water for chicken stock or vegetable stock for extra flavor.
    Rice cooker farro in a white serving bowl next to a cloth napkin.

    Seasoning Variations

    • Simple- Drizzle cooked farro with extra virgin olive oil or butter. Then, season with kosher salt and freshly cracked black pepper to taste.
    • Garlic- Add roasted or sautรฉed garlic along with butter, salt, and pepper for a flavorful side that pairs well with any meal.
    • Herbed- Chopped fresh herbs, such as rosemary, thyme, parsley, or basil, give farro a fresh, herbaceous flavor.
    • Citrus Zest- For a bright, citrusy flavor, consider adding lemon zest, lime zest, or orange zest.

    Equipment Notes

    Here are some notes on any special equipment I used to make this recipe.

    • Rice Cooker- Cooking farro becomes a breeze with the help of a rice cooker. The rice cooker easily cooks farro to perfection while you focus on preparing that rest of your meal. Personally, I highly recommend the Tiger 5.5-Cup Rice Cooker, which I love and use multiple times a week.
    • Mesh Sieve- Rinsing the excess starch off of the farro is so easy with a fine mesh sieve.

    How to Make Farro in a Rice Cooker

    Here is how to cook farro in a rice cooker.

    Step 1: Rinse the farro. Rinse the farro under cold, running water in a fine mesh sieve to remove excess starch.

    Rinsed farro in a fine mesh sieve.

    Step 2: Cook the farro. In the bowl of the rice cooker, combine the rinsed farro and water. Set the rice cooker to the "brown" or "whole grain" setting, or follow the instructions provided with your specific rice cooker model. Cooking times may vary, but it takes approximately 45 minutes for the farro in my Tiger rice cooker.

    Rinsed farro and water in the bowl of a rice cooker.
    A rice cooker set to the "brown" rice setting.

    Step 3: Fluff the farro. Once the cooking cycle is complete, carefully open the rice cooker to release the steam. Be cautious as the steam can be hot. Using a fork, fluff the farro to separate the grains, ensuring a light and fluffy texture.

    Cooked farro in the bowl of a rice cooker.

    Step 4: Season and serve. Season the cooked farro as desired. You can enjoy it as is or incorporate it into various dishes such as salads, soups, or pilafs.

    A white serving bowl of farro.

    Tips for Success

    • Rinse the farro. Rinsing the farro helps remove excess starch, resulting in fluffier cooked farro.
    • Follow your rice cooker instructions. Rice cookers vary in their settings and cooking times. Make sure to read and follow the instructions that came with your specific rice cooker.
    • Fluff the farro. When the farro is finished cooking, use a fork to gently fluff it up. This helps to separate the grains, so they don't stick together and become clumpy.
    • Season to taste. Get creative with seasoning your rice cooker farro. Try different herbs, spices, or even add-ins like vegetables, nuts, or dried fruits to customize this easy whole grain side dish to your liking.

    What to Serve With Farro in a Rice Cooker

    Farro is a versatile, chewy whole grain that can be enjoyed as a side dish or added to other recipes for heartiness and texture.

    Serve simple rice cooker farro as a side dish alongside your favorite protein and vegetables. Some of my favorite farro protein pairings include roasted chicken, grilled chicken, steak tips, pesto salmon, and grilled shrimp.

    This nutty whole grain also makes a tasty addition to salads. Try making farro salad or adding cooked farro to this Lemon Farro Salad, Spinach Caprese Salad, Arugula Quinoa Salad, or Mediterranean Black Bean Salad.

    Finally, serve the farro with Mediterranean-inspired sides like hummus, tzatziki, falafel, olives, feta cheese, and grilled pita or naan bread.

    A fork holding a bite of farro above a bowl.

    Storage and Reheating

    How to Store

    • Refrigerator- Store leftover rice cooker farro in an airtight container in the refrigerator for 4-5 days.
    • Freezer- For longer storage, freeze leftover rice cooker farro for up to 3 months.

    How to Reheat

    • Stovetop- Bring a small amount of water or broth to a simmer in a small saucepan over medium heat. Add leftover farro and heat, stirring occasionally, until the farro is warmed through.
    • Oven- Preheat the oven to 350ยฐF. Spread the leftover farro out evenly in a baking dish and drizzle with a few tablespoons of water. Cover the baking dish tightly with aluminum foil and bake for 10-15 minutes or until the farro is warmed through.
    • Microwave- Place a serving of farro in a microwave-safe bowl and drizzle with a small amount of water. Cover the bowl with a microwave-safe lid or damp paper towel. Heat the farro on HIGH in 30-second intervals, stirring between each, until the farro is hot.

    Make Ahead

    Rice cooker farro is great for meal planning and prepping because can easily be prepared and stored in the refrigerator for up to 5 days. It reheats well and is a fantastic way to add some texture and heartiness to your meals throughout the week.

    I also love keeping cooked farro in my freezer. Farro freezes well and it is easy enough to make a double batch of farro in a rice cooker. Having hearty, whole grain farro ready in my freezer is perfect for busy nights when I don't feel like cooking.

    Cooked farro in a white bowl.

    Frequently Asked Questions

    Is farro more healthy than rice?

    Farro is a healthy whole grain that is rich in fiber, protein, vitamins, and minerals. It is generally higher in both fiber and protein when compared to brown rice and white rice. However, both farro and rice can be part of a healthy, well-balanced diet.

    Why do you rinse farro before cooking?

    Rinsing farro before cooking helps remove dust, debris, and excess starch. This simple step ensures a better overall taste and texture for your farro dish.

    How much water do you use for farro in a rice cooker?

    The typical farro-water ratio for farro in a rice cooker is 3:1. For example, this recipe uses 3 cups water to 1 cup farro.

    Can I cook farro in an Instant Pot or pressure cooker?

    While this recipe focuses on using a rice cooker, you can adapt it to other cooking appliances. Follow the specific instructions for cooking farro in your chosen appliance, adjusting the liquid amounts and cooking times as needed.

    Let's Connect!

    Be sure to leave a comment below if you have any questions. You can also connect with me on Instagram, Facebook, Pinterest, or via email at [email protected].

    More Whole Grain Recipes

    • A white bowl filled with Mediterranean ancient grain salad.
      Mediterranean Ancient Grain Salad
    • A bowlful of arugula quinoa salad.
      Arugula Quinoa Salad with Maple-Dijon Vinaigrette

    ๐Ÿ“– Recipe

    A bowl of plain farro.
    Print Pin SaveSaved!

    Farro in a Rice Cooker

    Making farro in a rice cooker is an easy, foolproof way to cook this chewy, nutty grain to perfection in just 45 minutes. Versatile, healthy, and freezer-friendly, rice cooker farro can be enjoyed as a side dish or added to other dishes like soups and salads.
    Course Side Dish
    Cuisine Italian, Mediterranean
    Prep Time 5 minutes minutes
    Cook Time 45 minutes minutes
    Total Time 50 minutes minutes
    Servings 4 servings
    Calories 150kcal
    Author Ashley Petrie, RDN, LDN

    Equipment

    • Rice cooker
    • Mesh sieve

    Ingredients

    • 1 cup Italian pearled farro dry
    • 3 cups water

    Instructions

    • Rinse the farro under cold, running water in a fine mesh sieve to remove excess starch.
      1 cup Italian pearled farro
    • In the bowl of the rice cooker, combine the rinsed farro and water. Set the rice cooker to the "brown" or "whole grain" setting, or follow the instructions provided with your specific rice cooker model. Cooking times may vary, but in my rice cooker, it takes approximately 45 minutes for the farro to cook.
      3 cups water
    • Once the cooking cycle is complete, carefully open the rice cooker to release the steam. Be cautious as the steam can be hot. Using a fork, fluff the farro to separate the grains, ensuring a light and fluffy texture.
    • Season the cooked farro as desired. You can enjoy it as is or incorporate it into various dishes such as salads, soups, or pilafs.

    Notes

    • Follow your rice cooker instructions. Rice cookers vary in their settings and cooking times. Make sure to read and follow the instructions that came with your specific rice cooker.
    • Season to taste. Get creative with seasoning your rice cooker farro. Try different herbs, spices, or even add-ins like vegetables, nuts, or dried fruits to customize this easy whole grain side dish to your liking.
    • Storage: Store leftovers in an airtight container in the refrigerator for up to 5 days or in the freezer for up to 3 months.

    Nutrition

    Serving: 1serving | Calories: 150kcal | Carbohydrates: 32g | Protein: 6g | Fat: 1g | Potassium: 163mg | Fiber: 5g | Iron: 2mg
    Did you try this recipe?Let me know! Comment below, or take a picture and tag me on Instagram @everydayhomemadebyashley.

    Cilantro Lime Rice (Rice Cooker)

    June 14, 2023

    This Rice Cooker Cilantro Lime Rice elevates plain white rice into a flavorful side dish you'll want to serve with all of your summer meals. The combination of zesty lime and fresh cilantro adds a burst of flavor to every bite. Pair this easy rice side dish with Mexican-inspired dishes, grilled meats, seafood, and more.

    Rice cooker cilantro lime rice on a white dinner plate with shrimp and corn.

    My first introduction to cilantro lime rice was at Chipotle. The zesty, herbaceous rice added so much flavor to my burrito bowl. I was hooked.

    Being someone who loves making my own version of restaurant meals at home, I knew I had to try recreating Chipotle cilantro lime rice. And by far my favorite way to make this easy side dish is in a rice cooker.

    Rice cookers make cooking rice a fool-proof task. With the rice cooker doing the heavy lifting, you're free to focus on getting the rest of your meal ready while the rice cooks to perfection.

    This homemade rice cooker cilantro lime rice is the perfect side dish for all of your summer meals. It's made with just 8 simple ingredients and is ready in 30 minutes so, it's great for a quick weeknight dinner.

    So, if you're ready to make the best rice cooker cilantro lime rice, keep reading to learn everything you need to know.

    Disclaimer: Some links throughout this post are affiliate links. As an Amazon Associate, I earn from qualifying purchases. You can learn more by visiting my Affiliate Disclosure Page.

    Why You'll Love This Recipe

    • Easy to Make- This rice cooker cilantro lime rice recipe is so easy to make. With the help of a rice cooker, the rice can be cooked perfectly without much attention. Then, just season the rice and you're done!
    • Ready in 30 Minutes- Ready in just 30 minutes, this easy rice side dish is perfect for a busy weeknight dinner.
    • Versatile- This easy rice cooker cilantro lime rice pairs well with a wide variety of dishes. Serve it alongside all of your favorite Mexican, Latin American, or Tex-Mex recipes.
    • Flavorful- Fresh cilantro, tangy lime zest, and garlic powder add a vibrant and refreshing flavor to the rice. These simple ingredients elevate plain white rice into a deliciously aromatic side dish.

    Ingredient Notes

    Here are some notes on the key ingredients. For the full list of ingredients, check out the recipe card below.

    • White Rice- Long grain white rice becomes fluffy when cooked, which is perfect for creating a flavorful rice side dish. Be sure to rinse the rice before making cilantro lime rice in a rice cooker to remove excess starch.
    • Butter- Adds a buttery flavor that pairs well with the cilantro, lime, and garlic. Opt for unsalted butter for better control over the sodium.
    • Cilantro- Fresh cilantro can be sandy so, wash it thoroughly and remove any tough stems before finely chopping it.
    • Lime Juice- One lime contains about 2 tablespoons of fresh lime juice. If your lime is firm, roll it on the counter to help release more juice.
    • Lime Zest- Adding the zest intensifies the lime flavor. Use a microplane or box grater to zest the lime, being careful not to include any of the bitter white rind.
    • Seasonings- A combination of kosher salt, freshly grated black pepper, and garlic powder enhance the flavor of this cilantro lime rice cooker rice.

    Sustainability Tip: Grow your own cilantro in your garden or in a container on your windowsill for the freshest flavor and to help reduce food waste.

    The ingredients to make cilantro lime rice in a rice cooker. Each ingredient is labeled with text. They include water, black pepper, butter, white rice, garlic powder, cilantro, lime juice, lime zest, and salt.

    Substitutions and Variations

    Here are a few ways you can try customizing this flavorful rice cooker cilantro lime rice recipe to fit your diet and taste preferences.

    Substitutions

    • White Rice- Substitute long grain rice for basmati rice, jasmine rice, or brown rice. This dish can also be made using other grains such as quinoa or farro.
    • Water- Bring more flavor to this rice dish by cooking the rice in chicken stock or vegetable stock instead of water.
    • Butter- Swap butter for coconut oil, olive oil, or avocado oil.
    • Cilantro- If you're not a fan of cilantro, you can substitute it with fresh parsley.
    • Lime Juice & Zest- While it will change the flavor profile of the rice dish, you can substitute the lime juice and zest for lemon juice and lemon zest.
    • Garlic Powder- For a stronger garlic flavor, use one clove of grated or finely minced fresh garlic instead.
    Rice cooker cilantro lime rice on a dinner plate with shrimp and corn.

    Variations

    • Gluten-Free- Rice is naturally gluten-free, making this simple rice cooker cilantro lime rice recipe gluten-free as well. Of course, always double-check all labels before using any ingredient.
    • Dairy-Free- Replace the butter with olive oil, avocado oil, or coconut oil to make dairy-free vegan cilantro lime rice in the rice cooker.
    • Coconut- Swap half of the water for coconut milk and replace the butter with coconut oil to make coconut cilantro lime rice.
    • Spicy- For spicy cilantro lime rice, add finely minced fresh jalapeรฑo pepper or a few shakes of cayenne pepper.
    • Vegetables- Add black beans, corn, red bell pepper, tomato, and red onion for a flavorful, veggie-packed side dish.
    • Fruit- Diced pineapple, mango, or coconut would give this rice dish a tropical vibe.

    Equipment Notes

    Here are some notes on any special equipment I used to make this recipe.

    • Rice Cooker- Rice cookers take the guesswork out of cooking rice, making it a fool-proof task. With the rice cooker handling the cooking process, you can focus on preparing the rest of your meal while the rice effortlessly cooks to perfection. I love my Tiger 5.5-Cup Rice Cooker and use it multiple times per week.
    • Mesh Sieve- A fine mesh sieve makes rinsing rice and other grains a breeze.
    • Microplane- A stainless steel grater is perfect for zesting limes and other citrus.

    How to Make Cilantro Lime Rice in a Rice Cooker

    Here is how to make cilantro lime rice (rice cooker).

    Step 1: Rinse the rice. Rinse the rice under cold, running water in a fine mesh sieve to remove excess starch.

    Rinsed white rice in a mesh sieve.

    Step 2: Cook the rice. In the bowl of the rice cooker, combine the rinsed rice and water. Set the rice cooker to the "plain" setting or follow your rice cooker instructions.

    White rice and water in the bowl of a rice cooker.
    A closed Tiger Brand rice cooker with the "plain" button selected.

    Step 3: Fluff the rice. Once the rice is cooked, carefully open the rice cooker to release the steam. Fluff the rice with a fork to separate the grains.

    Cooked white rice in the bowl of a rice cooker.

    Step 4: Season the rice. Add the butter, cilantro, lime zest, lime juice, kosher salt, black pepper, and garlic powder to the cooked rice in the rice cooker. Mix the rice gently with the butter and seasonings until well combined, ensuring all the ingredients are evenly distributed. Serve and enjoy!

    Butter, cilantro, lime juice, lime zest, and seasonings on top of the cooked white rice in the bowl of a rice cooker.
    Cilantro lime rice in a rice cooker.

    Tips for Success

    • Rinse the rice. Rinsing the rice removes excess starch. Removing excess starch means the cooked rice will be fluffier and less mushy. Use a fine mesh sieve and rinse the rice under cold, running water until the water runs clear.
    • Fluff the rice. After the rice is cooked, use a fork to fluff it gently. This helps to separate the grains and distribute the flavors evenly throughout the rice.
    • Adjust seasonings to taste. Taste the rice after adding the seasonings and adjust according to your personal taste preferences. Don't be afraid to add more or less of any of the ingredients.

    What to Serve With Cilantro Lime Rice (Rice Cooker)

    Rice cooker cilantro lime rice is a simple, versatile rice dish that pairs well with a wide variety of Mexican-inspired main dishes. Naturally, cilantro lime rice makes an excellent side dish for tacos, burritos, burrito bowls, quesadillas, fajitas, and enchiladas.

    Additionally, the vibrant flavors in cilantro lime rice pair perfectly with many seafood dishes. Try serving this easy rice side dish with Grilled Old Bay Shrimp or Tequila Lime Shrimp Tacos.

    Finally, serve rice cooker cilantro and lime rice as a side dish alongside grilled meats such as chicken or steak tips. The zesty, herbaceous flavors provide a nice contrast to the richness of the meat.

    Cilantro lime rice on a white dinner plate. It's being served with shrimp, corn on the cob, and a lime wedge.

    Storage and Reheating

    How to Store

    • Refrigerator- Store leftover rice cooker cilantro lime rice in an airtight container in the refrigerator for 4-5 days.
    • Freezer- For longer storage, freeze leftover lime and cilantro rice for up to 3 months.

    How to Reheat

    • Stovetop- Add leftover rice and a splash of water to a saucepan or skillet set over medium heat. Heat, stirring occasionally, until the rice is fully warmed through.
    • Oven- To reheat large batches of leftover rice, the oven is a great option. Preheat the oven to 350ยฐF. Spread the rice out evenly in a baking dish and drizzle with a few tablespoons of water. Cover the dish tightly with aluminum foil and heat for 15-20 minutes or until the rice is hot.
    • Microwave- Place a serving of leftover cilantro lime rice onto a microwave-safe dish. Drizzle with a small amount of water and cover the dish with a microwave-safe lid or damp paper towel. Microwave on HIGH in 30-second intervals, stirring between each, until hot.

    Make Ahead

    While this rice dish tastes best freshly prepared, you can make lime cilantro rice in a rice cooker up to 3 days in advance. Allow the rice to cool completely before storing it in an airtight container in the refrigerator.

    To reheat, follow the instructions outlined in the section above.

    A plate of cilantro lime rice being served with grilled shrimp and a lime wedge.

    Frequently Asked Questions

    What is the ratio of water to rice in a rice cooker?

    The typical ratio of water to white rice in a rice cooker is 1:1. For example, this recipe uses 2 cups of white rice to 2 cups water.

    Can I use brown rice instead of white rice?

    Yes, you can substitute brown rice for white rice in this recipe. Keep in mind that brown rice requires a longer cooking time, so adjust the cooking settings or follow the instructions provided with your rice cooker for cooking brown rice.

    Can I use frozen rice instead of uncooked rice?

    I've never tried making frozen rice in a rice cooker before so I can't say for certain how well it turns out.

    Can I make this recipe in an Instant Pot?

    Of course! If you don't have a rice cooker, you can use an Instant Pot to make this recipe instead. Just follow the appliance instructions for cooking white rice, then add the seasonings as directed in the recipe.

    Can I double or halve this recipe?

    Yes, you can adjust the quantities to make more or less cilantro lime rice in a rice cooker. In fact, I halve this recipe all the time since it's just my fiancรฉ and I. Just ensure you maintain the proper rice-to-water ratio and adjust the seasonings accordingly.

    Let's Connect!

    Be sure to leave a comment below if you have any questions. You can also connect with me on Instagram, Facebook, Pinterest, or via email at [email protected].

    More Mexican-Inspired Recipes

    • A bowl of 4-ingredient guacamole garnished with cilantro.
      Easy 4-Ingredient Guacamole Recipe

    ๐Ÿ“– Recipe

    Rice cooker cilantro lime rice on a white dinner plate with shrimp and corn.
    Print Pin SaveSaved!
    5 from 2 votes

    Cilantro Lime Rice (Rice Cooker)

    This Rice Cooker Cilantro Lime Rice elevates plain white rice into a flavorful side dish you'll want to serve with all of your summer meals. The combination of zesty lime and fresh cilantro adds a burst of flavor to every bite. Pair this easy rice side dish with Mexican-inspired dishes, grilled meats, seafood, and more.
    Course Side Dish
    Cuisine American, Mexican
    Prep Time 5 minutes minutes
    Cook Time 25 minutes minutes
    Total Time 30 minutes minutes
    Servings 8 servings
    Calories 222kcal
    Author Ashley Petrie, RDN, LDN

    Equipment

    • Rice cooker
    • Mesh sieve
    • Microplane

    Ingredients

    • 2 cups long grain white rice uncooked
    • 2 cups water
    • 4 tablespoons unsalted butter
    • ยฝ cup cilantro finely chopped
    • Zest and juice of 1 lime
    • ยฝ teaspoon kosher salt
    • ยผ teaspoon black pepper
    • ยผ teaspoon garlic powder

    Instructions

    • Rinse the rice under cold, running water in a fine mesh sieve to remove excess starch.
      2 cups long grain white rice
    • In the bowl of the rice cooker, combine the rinsed rice and water. Set the rice cooker to the "plain" setting or follow the instructions provided with your rice cooker.
      2 cups water
    • Once the rice is cooked, carefully open the rice cooker to release the steam. Fluff the rice with a fork to separate the grains.
    • Add the butter, cilantro, lime zest, lime juice, kosher salt, black pepper, and garlic powder to the cooked rice in the rice cooker. Mix the rice gently with the butter and seasonings until well combined, ensuring all the ingredients are evenly distributed. Serve and enjoy!
      4 tablespoons unsalted butter, ยฝ cup cilantro, Zest and juice of 1 lime, ยฝ teaspoon kosher salt, ยผ teaspoon black pepper, ยผ teaspoon garlic powder

    Notes

    • Adjust seasonings to taste. Taste the rice after adding the seasonings and adjust according to your personal taste preferences. Don't be afraid to add more or less of any of the ingredients.
    • Storage: Store leftover rice in an airtight container in the refrigerator for up to 5 days or in the freezer for up to 3 months.

    Nutrition

    Serving: 1serving | Calories: 222kcal | Carbohydrates: 38g | Protein: 3.5g | Fat: 6g | Saturated Fat: 3.5g | Polyunsaturated Fat: 0.5g | Monounsaturated Fat: 2g | Cholesterol: 15mg | Sodium: 74mg | Potassium: 69mg | Fiber: 1g | Vitamin C: 2mg | Calcium: 17mg | Iron: 2mg
    Did you try this recipe?Let me know! Comment below, or take a picture and tag me on Instagram @everydayhomemadebyashley.

    Old Bay Grilled Shrimp Skewers

    June 13, 2023

    These Old Bay Grilled Shrimp are flavored with classic seafood seasoning, butter, lime juice, and garlic. They're easy to make and ready in just 45 minutes, making them perfect for a quick weeknight meal or your next summer party.

    Two skewers of Old Bay grilled shrimp on a white plate with rice and corn on the cob.

    Nothing says summer like grilled fresh shrimp. Living in Massachusetts, grilled shrimp skewers are a summertime staple at my house.

    And one of my favorite grilled shrimp seasonings is the classic Old Bay Seasoning.

    Its distinctive blend of spices adds a unique flavor that pairs perfectly with the natural sweetness of the shrimp. Add a little butter, lime juice, and garlic into the mix and you're in grilled shrimp marinade heaven.

    And the best part? You only need 5 ingredients and about 45 minutes to make this easy Old Bay shrimp recipe. Plus, it pairs well with grilled vegetables, corn on the cob, rice, potatoes, and so much more.

    So, what are you waiting for? Fire up the grill and add this succulent Old Bay grilled shrimp skewers recipe to your summer grilling menu today!

    Disclaimer: Some links throughout this post are affiliate links. As an Amazon Associate, I earn from qualifying purchases. You can learn more by visiting my Affiliate Disclosure Page.

    Why You'll Love This Recipe

    • Flavorful- Old Bay Seasoning is made with a distinct blend of spices that pair perfectly with seafood. This recipe combines the classic flavors of Old Bay with butter, lime, and garlic for an easy marinated grilled shrimp recipe that is bursting with flavor.
    • Ready in 45 Minutes- From start to finish, this Old Bay shrimp recipe is ready in just 45 minutes. It's perfect for a quick and easy weeknight summer dinner.
    • Only 5 Ingredients- With just a few simple ingredients, you can make one of the best grilled shrimp recipes you'll ever taste.
    • Versatile- Serve these shrimp alongside all of your favorite summer side dishes. From corn on the cob and salad to rice and baked potatoes, the possibilities are endless.
    • Perfect for Summer- Nothing says summer like grilled shrimp with Old Bay Seasoning. This recipe can easily be scaled up for a crowd and served at a backyard BBQ or summer cookout.

    Ingredient Notes

    Here are some notes on the key ingredients. For the full list of ingredients, check out the recipe card below.

    • Shrimp- One pound of extra jumbo shrimp will contain about 16-20 shrimp. The larger size makes the shrimp easy to skewer and ensures they stay juicy and tender during cooking.
    • Old Bay Seasoning- Old Bay Seasoning is a classic seafood seasoning blend. It consists of a combination of spices, including paprika, celery salt, and black pepper.
    • Butter- Since Old Bay Seasoning already contains plenty of salt, it's important to use unsalted butter so the shrimp don't taste too salty.
    • Garlic- Grating or finely mincing the garlic distributes its flavor evenly throughout the dish. Fresh garlic complements the other flavors in the marinade and enhances the overall taste of the shrimp.
    • Lime Juice- Adds a bright, citrusy flavor to the marinade. The acidity of the lime juice balances the richness of the butter.

    Sustainability Tip: Look for MSC certified shrimp for a sustainable, eco-friendly seafood option.

    The ingredients to make Old Bay grilled shrimp. Each ingredient is labeled with text. They include extra jumbo shrimp, garlic, butter, Old Bay Seasoning, and lime.

    Substitutions and Variations

    Here are a few ways you can try customizing this easy Old Bay grilled shrimp recipe to fit your diet and taste preferences.

    Substitutions

    • Shrimp- Substitute shrimp with scallops, cod chunks, or lobster tail. Keep in mind that the cook time for each of these substitutions will vary.
    • Old Bay Seasoning- Swap Old Bay Seasoning for your preferred seafood seasoning blend or make a homemade version.
    • Butter- Olive oil, coconut oil, or canola oil can be used in place of butter.
    • Garlic- Replace one clove of fresh garlic with ยผ teaspoon of garlic powder.
    • Lime Juice- Substitute lime juice with lemon juice or orange juice.
    Two skewers of Old Bay grilled shrimp on a white plate.

    Variations

    • Reduced Sodium- Classic Old Bay Seasoning is high in sodium. To reduce the sodium, use half the amount of Old Bay Seasoning or choose the 30% less sodium version.
    • Gluten-Free- These grilled shrimp with Old Bay and butter are naturally gluten-free. However, always double-check the label of any ingredient before using it.
    • Dairy-Free- Swap the butter for olive oil or coconut oil to make this recipe dairy-free.
    • Spicy- Use Old Bay Hot Seasoning or add a few shakes of cayenne pepper to make spicy Old Bay grilled shrimp.
    • Cajun- Swap Old Bay Seasoning for your favorite Cajun seasoning blend.
    • Herbs- Add chopped cilantro or parsley to add a fresh, herbaceous flavor.

    How to Make Old Bay Grilled Shrimp

    Here is how to make grilled Old Bay shrimp.

    Step 1: Prepare the marinade. In a medium bowl, whisk together the melted butter, lime juice, Old Bay Seasoning, and garlic until well combined.

    The Old Bay shrimp marinade in a glass bowl.

    Step 2: Marinade the shrimp. Pat the peeled and deveined shrimp dry using paper towels. Place them in the bowl of marinade and toss until the shrimp are well coated. Let the shrimp marinate at room temperature for 30 minutes.

    Raw shrimp marinating in Old Bay Seasoning marinade.

    Step 3: Soak the skewers. While the shrimp is marinating, soak the bamboo skewers in water to prevent them from burning on the grill. Preheat the grill over high heat for 10 minutes.

    Four bamboo skewers soaking in a large white bowl of water.

    Step 4: Skewer the shrimp. Thread 4-5 shrimp onto each bamboo skewer, piercing them through the tail and head. If the butter in the marinade solidified, microwave the marinade for 15 seconds to remelt it. Brush the shrimp skewers with the marinade, making sure they are evenly coated.

    Four skewers of marinated raw shrimp on a white plate.

    Step 5: Grill the shrimp. Place the shrimp skewers on the preheated grill over direct, high heat. Keep the grill lid open. Grill the shrimp for approximately 3 minutes per side, or until they turn pink and opaque. Be careful not to overcook them, as shrimp can become tough if grilled for too long.

    Step 6: Serve and enjoy. Once the shrimp are cooked through, remove them from the grill and transfer to a serving platter. Serve immediately, and enjoy!

    Four skewers of shrimp cooking on the grill.
    Cooked Old Bay shrimp on a white plate.

    Tips for Success

    • Choose high-quality shrimp. Opt for the freshest, highest-quality shrimp you can find for the best flavor and texture.
    • Don't over-marinate. Shrimp are delicate and can begin to break down quickly in a marinade. Only marinate the shrimp for about 30 minutes before cooking.
    • Soak the skewers. Soaking the bamboo skewers helps prevent them from burning on the grill.
    • Cook quickly. Keep a close eye on the shrimp as they cook quickly. Most shrimp only need about 2-3 minutes per side before they're done.

    What to Serve With Old Bay Grilled Shrimp

    Serve this easy grilled shrimp recipe alongside grilled vegetables for a light and healthy summer dinner. Try grilled corn on the cob, bell peppers, zucchini, or summer squash.

    Alternatively, if you're looking for starchy side dishes, potatoes, rice, pasta, and bread all pair well with grilled Old Bay shrimp. I love serving this recipe with baked potatoes, cilantro lime rice, or jalapeรฑo cheddar sourdough bread.

    Finally, these flavorful shrimp skewers practically beg to be served with a delicious dipping sauce or fresh salsa. Try this homemade salsa or 4-ingredient guacamole.

    A plate of Old Bay grilled shrimp, rice, and corn on the cob.

    Storage and Reheating

    How to Store

    • Refrigerator- Store leftover grilled Old Bay shrimp in an airtight container in the refrigerator for 3-4 days.
    • Freezer- For longer storage, freeze leftover grilled shrimp with Old Bay Seasoning for up to 3 months.

    How to Reheat

    • Grill- Preheat the grill over medium-high heat for 10 minutes. Place the leftover shrimp skewers on the grill and heat for 2-3 minutes per side.
    • Stovetop- Heat a small amount of butter in a skillet over medium heat. Remove the shrimp from the skewers and add them to the skillet. Heat for 2-3 minutes, stirring occasionally, until fully warmed through.
    • Oven- Preheat oven to 350ยฐF. Remove the shrimp from the skewers and place shrimp in a single layer on a rimmed baking sheet. Cover them with aluminum foil. Reheat shrimp for 5-7 minutes or until fully heated through.
    • Microwave- Remove the shrimp from the skewers and place them in a single layer on a microwave-safe dish. Cover the dish loosely with a damp paper towel or microwave-safe lid. Heat on half power (50%) in 30-second intervals until the shrimp are fully warmed through.
    • Air Fryer- Preheat air fryer to 350ยฐF. Remove the shrimp from the skewers and place them in a single layer in the air fryer basket. Heat for 3-5 minutes or until fully warmed through.

    Make Ahead

    Homemade Old Bay grilled shrimp are best prepared just before serving. But, if you're looking to get a head start on meal prep or party planning, you're in luck!

    The Old Bay marinade for shrimp can be made up to 3 days in advance, then stored in the refrigerator until ready to use. Just microwave the marinade for 15-30 second to remelt the butter before using.

    Additionally, peel and devein the shrimp up to 24 hours ahead of time. Then, store the raw shrimp in an airtight container in the refrigerator until ready to use.

    Two skewers of Old Bay grilled shrimp served with rice and corn on the cob.

    Frequently Asked Questions

    Can I use frozen shrimp?

    Yes, you can use frozen shrimp for this recipe. Thaw the shrimp completely before marinating and grilling. It's recommended to thaw shrimp in the refrigerator overnight or under cold running water. Pat them dry before proceeding with the recipe.

    Can I grill the shrimp on an indoor grill pan or skillet instead of an outdoor grill?

    Yes, you can certainly use an indoor grill pan or skillet to cook the shrimp. Preheat the grill pan or skillet over medium-high heat and cook the shrimp for 2-3 minutes per side. You can skip the skewer if cooking the shrimp in a skillet.

    Should you grill shrimp with the lid open or closed?

    It is generally recommended to grill shrimp with the lid open to prevent them from becoming overcooked or dry.

    Do you have to flip shrimp when grilling?

    Yes, flipping the shrimp is essential for even cooking. It allows both sides to come into contact with the grill grates, promoting even heat distribution and caramelization.

    Can I double or halve this recipe?

    Yes, you can easily adjust the recipe to make more or fewer servings. Just ensure that you adjust the ingredient quantities accordingly, while keeping the ratios and flavors intact.

    Let's Connect!

    Be sure to leave a comment below if you have any questions. You can also connect with me on Instagram, Facebook, Pinterest, or via email at [email protected].

    More Grilling Recipes

    • Three tequila lime shrimp tacos with red cabbage slaw on a plate.
      Easy Tequila Lime Shrimp Tacos
    • Sliced grilled steak tips next to asparagus and rice on a white plate.
      How to Make Grilled Steak Tips (Marinade)
    • Three grilled chicken breasts on a dinner plate next to a serving of rice.
      Marinated Grilled Chicken Breast (How to Grill Chicken)
    • Grilled sourdough pizza topped with tomato sauce, mozzarella cheese, and basil on a gas grill.
      Grilled Sourdough Pizza (Gas Grill)

    ๐Ÿ“– Recipe

    Two skewers of Old Bay grilled shrimp on a white plate with rice and corn on the cob.
    Print Pin SaveSaved!

    Old Bay Grilled Shrimp

    These Old Bay Grilled Shrimp are flavored with classic seafood seasoning, butter, lime juice, and garlic. They're easy to make and ready in just 45 minutes, making them perfect for a quick weeknight meal or your next summer party.
    Course Main Course
    Cuisine American
    Prep Time 10 minutes minutes
    Cook Time 5 minutes minutes
    Marinate Time 30 minutes minutes
    Total Time 45 minutes minutes
    Servings 4 servings (4-5 shrimp per serving)
    Calories 170kcal
    Author Ashley Petrie, RDN, LDN

    Equipment

    • Bamboo skewers

    Ingredients

    • 3 tablespoons unsalted butter melted
    • Juice of 1 lime about 2 tablespoons
    • 1 tablespoon Old Bay Seasoning
    • 1 clove garlic grated or finely minced
    • 1 pound (approximately 16-20) raw extra jumbo shrimp peeled and deveined

    Instructions

    • In a medium bowl, whisk together the melted butter, lime juice, Old Bay Seasoning, and garlic until well combined.
      3 tablespoons unsalted butter, Juice of 1 lime, 1 tablespoon Old Bay Seasoning, 1 clove garlic
    • Pat the peeled and deveined shrimp dry using paper towels. Place them in the bowl of marinade and toss until the shrimp are well coated. Let the shrimp marinate at room temperature for 30 minutes.
      1 pound (approximately 16-20) raw extra jumbo shrimp
    • While the shrimp is marinating, soak the bamboo skewers in water to prevent them from burning on the grill. Preheat the grill over high heat for 10 minutes.
    • Thread 4-5 shrimp onto each bamboo skewer, piercing them through the tail and head. If the butter in the marinade solidified, microwave the marinade for 15 seconds to remelt it. Brush the shrimp skewers with the marinade, making sure they are evenly coated.
    • Place the shrimp skewers on the preheated grill over direct, high heat. Keep the grill lid open. Grill the shrimp for approximately 3 minutes per side, or until they turn pink and opaque. Be careful not to overcook them, as shrimp can become tough if grilled for too long.
    • Once the shrimp are cooked through, remove them from the grill and transfer to a serving platter. Serve immediately, and enjoy!

    Notes

    • Reduced Sodium- Classic Old Bay Seasoning is high in sodium. To reduce the sodium, use half the amount of Old Bay Seasoning or choose the 30% less sodium version.
    • Don't over-marinate. Shrimp are delicate and can begin to break down quickly in a marinade. Only marinate the shrimp for about 30 minutes before cooking.
    • Storage: Store leftover cooked shrimp in an airtight container in the refrigerator for up to 4 days or in the freezer for up to 3 months.
    • Make Ahead: Prepare the marinade up to 3 days in advance. You can also peel and devein the shrimp up to 24 hours before cooking.

    Nutrition

    Serving: 1serving (4-5 shrimp) | Calories: 170kcal | Carbohydrates: 2g | Protein: 17g | Fat: 10g | Saturated Fat: 5.5g | Polyunsaturated Fat: 0.5g | Monounsaturated Fat: 2.5g | Trans Fat: 0.5g | Cholesterol: 178mg | Sodium: 792mg | Potassium: 65mg | Vitamin C: 4mg | Calcium: 61mg | Iron: 1mg
    Did you try this recipe?Let me know! Comment below, or take a picture and tag me on Instagram @everydayhomemadebyashley.

    Mediterranean Black Bean Salad

    June 8, 2023

    This Mediterranean Black Bean Salad is made with hearty black beans, flavorful fresh vegetables, and homemade vinaigrette dressing. It's healthy, easy to make, and perfect for a light lunch or summer side dish.

    A small plate of Mediterranean black bean salad.

    When you think of salad, do you think of a big, boring bowl of leafy greens that you only eat out of obligation?

    Well, this easy Mediterranean black bean salad is here to change that!

    Bursting with fresh flavors, colorful ingredients, and a tangy red wine vinaigrette, this healthy black bean salad recipe is made without corn and is totally crave-worthy. It's definitely one you'll want to make again and again.

    This delicious black bean salad can be served as a dinner side dish, light lunch, or at your next summer cookout. It pairs well with grilled meats and seafood, whole grains, flatbreads, and more.

    So, if you're looking to make the best Mediterranean black bean salad for your next potluck party, keep reading to learn everything you need to know!

    Disclaimer: Some links throughout this post are affiliate links. As an Amazon Associate, I earn from qualifying purchases. You can learn more by visiting my Affiliate Disclosure Page.

    Why You'll Love This Recipe

    • Ready in 20 Minutes- This easy black bean salad recipe only requires a few simple steps and takes just 20 minutes to make.
    • Healthy- Packed with fiber, healthy fats, vitamins, and minerals, this simple Mediterranean black bean salad is perfect for a light lunch or summer side dish.
    • Flavorful- The homemade red wine vinegar dressing, salty feta cheese, briny olives, and fresh vegetables come together to make a deliciously flavorful salad.
    • Customizable- Make this black bean salad your own by adding or substituting other vegetables like cherry tomatoes, artichoke hearts, or roasted red peppers.

    Ingredient Notes

    Here are some notes on the key ingredients. For the full list of ingredients, check out the recipe card below.

    • Black Beans- Low-sodium canned beans are a quick, healthy way to enjoy black beans without having to cook your own.
    • Cucumber- Deseeding the cucumber helps prevent the salad from becoming watery as it sits.
    • Green Bell Pepper- Chopped green bell pepper adds a crunchy texture and fresh flavor to the salad.
    • Tomato- Use one large globe tomato or two plum tomatoes. Removing the seeds prevents the salad from becoming watery.
    • Red Onion- Finely mince the onion to distribute the flavor evenly throughout the salad.
    • Parsley- Adds a fresh, herbaceous flavor.
    • Kalamata Olives- Pitted kalamata olives add a briny and tangy flavor to the salad.
    • Feta Cheese- Adds a creamy and salty element to the salad.
    • Olive Oil- Extra virgin olive oil is best for homemade vinaigrettes.
    • Red Wine Vinegar- The acidic part of the vinaigrette, red wine vinegar adds a bright, tangy flavor to the dressing.
    • Dijon Mustard- Emulsifies the salad dressing and adds a slightly tangy flavor.
    • Honey- Balances the acidity of the dressing with a touch of sweetness.
    • Garlic- Grated or finely minced fresh garlic adds a bold, garlicky flavor to the dressing and salad.
    • Seasonings- A combination of Italian seasoning, kosher salt, and black pepper gives the dressing a Mediterranean flavor.

    Sustainability Tip: Try growing your own cucumbers, peppers, tomatoes, and parsley in pots or in your garden for the freshest-tasting black bean salad.

    The ingredients to make Mediterranean black bean salad. Each ingredient is labeled with text. Some of the ingredients include black beans, tomato, cucumber, bell pepper, and feta cheese.

    Substitutions and Variations

    Here are a few ways you can try customizing this Mediterranean black bean salad recipe to fit your diet and taste preferences.

    Substitutions

    • Black Beans- Swap black beans for chickpeas, white beans, or red kidney beans.
    • Cucumber- Zucchini and yellow summer squash make good substitutes for cucumber.
    • Green Bell Pepper- Red bell pepper, roasted red pepper, or jalapeรฑo can be used in place of green bell pepper.
    • Tomato- Try using cherry tomatoes, grape tomatoes, or sun-dried tomatoes instead of a globe or plum tomato.
    • Red Onion- Replace red onion with shallots, sweet onion, or green onions.
    • Parsley- Substitute parsley with cilantro, basil, or mint to give the salad a different flavor profile.
    • Kalamata Olives- Black olives or green olives can be used in place of kalamata olives.
    • Feta Cheese- Goat cheese or queso fresco can be used as substitutes for feta cheese.
    • Olive Oil- Swap extra virgin olive oil for avocado oil, grapeseed oil, or canola oil.
    • Red Wine Vinegar- Substitute red wine vinegar for lemon juice, apple cider vinegar, balsamic vinegar, or white wine vinegar.
    • Dijon Mustard- Whole grain mustard, yellow mustard, or mustard powder can be swapped for dijon mustard.
    • Honey- Replace honey with maple syrup or granulated sugar.
    • Garlic- Substitute one fresh garlic clove for ยผ teaspoon of garlic powder.
    • Seasonings- Oregano can be used in place of Italian seasoning.
    Greek black bean salad on a small white plate.

    Variations

    • Vegan- Replace the feta cheese with dairy-free feta cheese and the honey with maple syrup to make this black bean salad vegan.
    • Grains- Add quinoa, farro, couscous, bulgur, or brown rice to make this healthy black bean salad more hearty and satisfying.
    • Nuts and Seeds- Toasted pine nuts, walnuts, or sunflower seeds can add crunch and a nutty flavor.
    • Grilled Vegetables- Grill the bell pepper, tomato, and onion before dicing and adding them to the salad.
    • Spicy- Add diced jalapeรฑo or red pepper flakes to give this salad a little heat.

    How to Make Mediterranean Black Bean Salad

    Here is how to make Mediterranean black bean salad with feta cheese.

    Step 1: Make the dressing. In a small mixing bowl, whisk together the olive oil, vinegar, garlic, mustard, honey, and seasonings. Set aside.

    Homemade red wine vinaigrette in a small glass mixing bowl.

    Step 2: Prepare salad ingredients. Drain and rinse the low-sodium black beans. Dice the green bell pepper, deseed and dice the cucumber, deseed and dice the tomato, and finely dice the red onion. Chop the fresh parsley and quarter the kalamata olives.

    Black beans being drained and rinsed in a mesh sieve.
    All of the chopped vegetables to make the salad. The cucumber and tomato are in small bowls. The red onion, green bell pepper, parsley, and olives are in small piles on a green cutting board.

    Step 3: Add dressing to the vegetables. Add the drained black beans, diced vegetables, parsley, and olives to a large mixing bowl. Drizzle the prepared dressing over the vegetables in the mixing bowl.

    Step 4: Mix the salad together. Stir gently to combine, ensuring that the dressing coats the vegetables evenly. Add the crumbled feta cheese to the mixing bowl and gently stir again to incorporate it. Serve immediately or store in the refrigerator until ready to serve.

    The finished black bean salad.

    Mediterranean Black Bean Salad (Instructional Video)

    Tips for Success

    • Use fresh, high-quality ingredients. This black bean salad tastes best when prepared using fresh, in-season vegetables, high-quality olive oil, red wine vinegar, and feta cheese.
    • Prepare the dressing in advance. Make the dressing up to one week ahead of time and allow it to sit to let the flavors meld together.
    • Chop the vegetables evenly. Cut the vegetables into equal-sized pieces, aiming for a similar size as the black beans.
    • Chill before serving. Prepare the salad at least 30 minutes in advance and allow it to chill in the refrigerator before serving for a more flavorful dish.
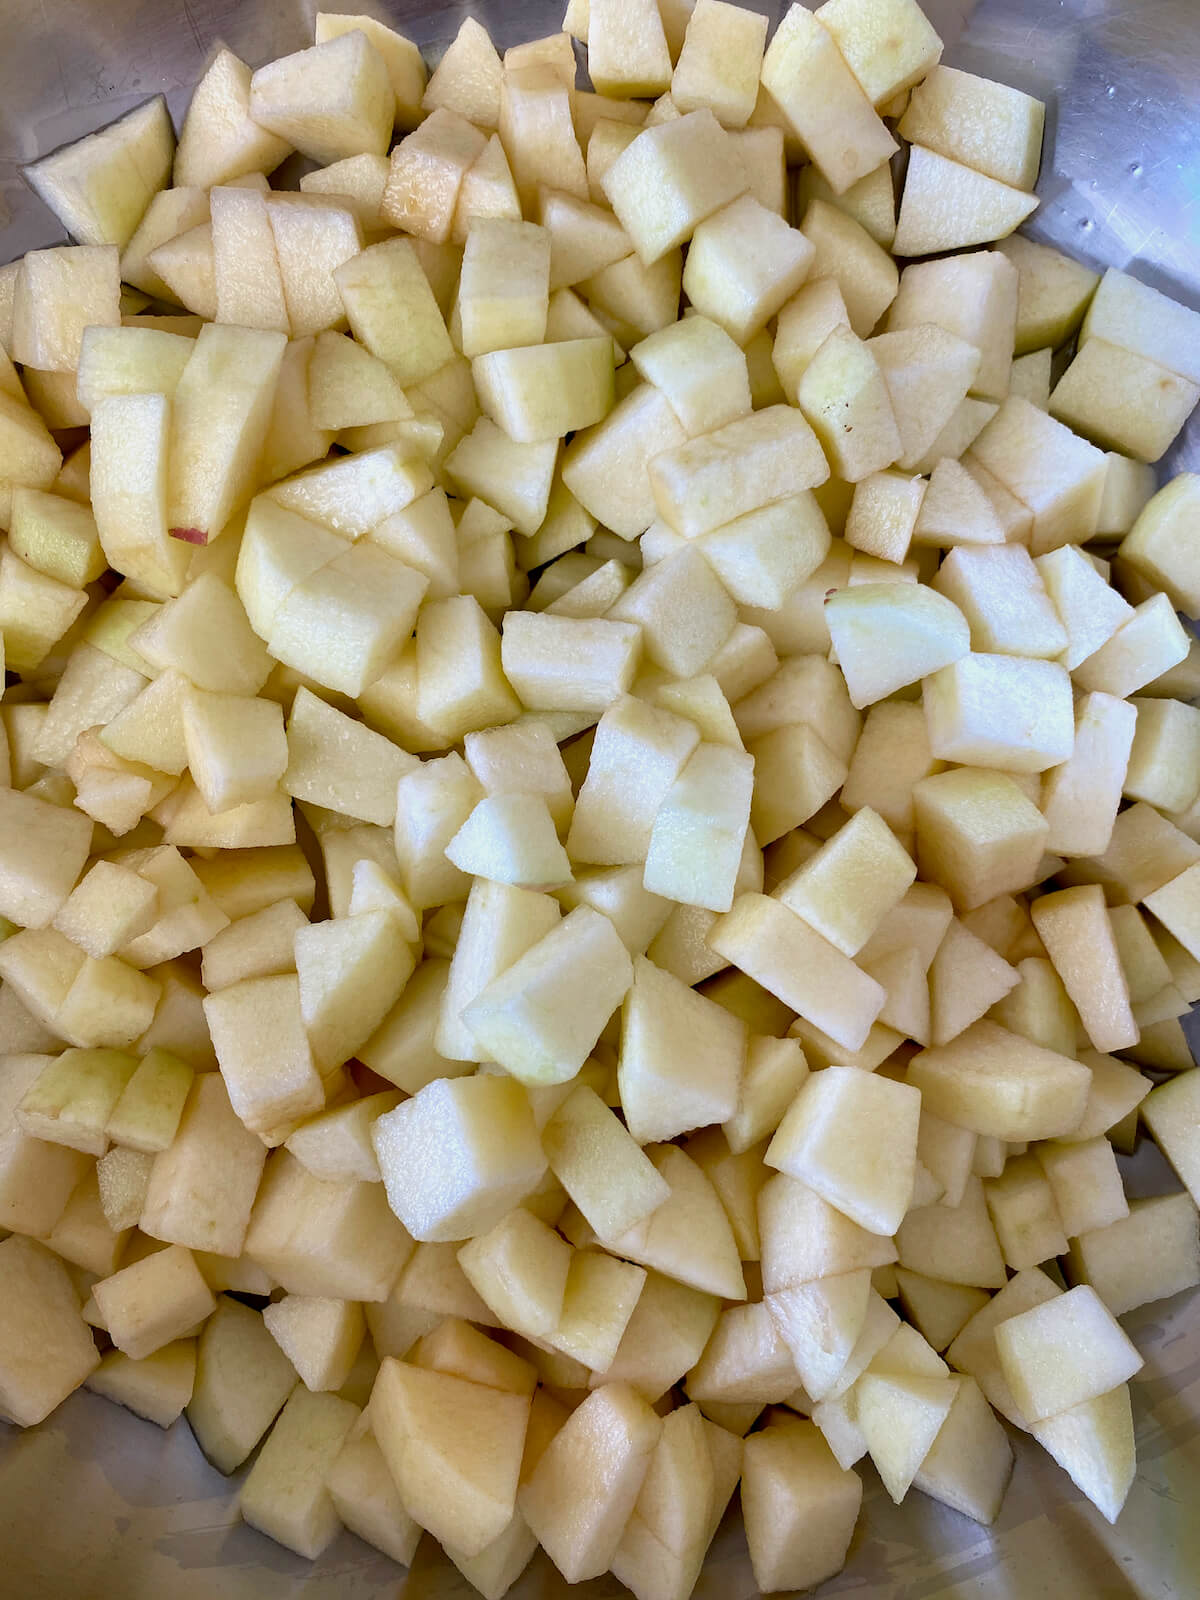
    What to Serve With Mediterranean Black Bean Salad

    This black bean salad is a fresh and flavorful Mediterranean side dish that pairs perfectly with a variety of other dishes.

    Serve it alongside your favorite grilled protein. Try grilled chicken, steak tips, salmon, shrimp, or tofu for a complete, well-balanced meal.

    Finally, grains, pastas, and breads make great vegetarian side dishes for this black bean salad. Warm pita bread or naan bread can be used to scoop up the salad and dressing. Or serve the salad over a bed of whole grains or pasta for a hearty, satisfying meal.

    A spoonful of Mediterranean black bean salad being held above a plate.

    Storage

    How to Store

    • Room Temperature- If you're serving this Mediterranean bean salad with feta at a cookout or potluck, remember to only leave the salad out at room temperature for a maximum of 2 hours to prevent foodborne illnesses.
    • Refrigerator- Store leftover Mediterranean black bean salad in an airtight container in the refrigerator for up to 4 days.
    • Freezer- I do not recommend freezing this black bean and vegetable salad. Freezing raw vegetables alters the texture, making them mushy once defrosted.

    Make Ahead

    If you want to get a jump start on preparing this black bean salad, the homemade dressing can be made up to 7 days in advance. Just give it a good shake before mixing with the vegetables.

    Additionally, you can dice the vegetables a few days ahead of time. It's important to store them separately in airtight containers in the refrigerator so they don't become watery.

    Black bean salad with feta cheese on a small white plate.

    Frequently Asked Questions

    Can I make this salad gluten-free?

    Yes, this salad is naturally gluten-free as long as the ingredients used, including the spices and condiments, are certified gluten-free. Always double-check the labels of packaged ingredients to ensure they are free from gluten or any potential cross-contamination.

    Can I use homemade black beans instead of canned black beans?

    Yes, you can absolutely use homemade black beans instead of canned black beans in this recipe. If you have cooked black beans from scratch, you can substitute them in equal amounts for the canned black beans.

    Can I customize the vegetables in this salad?

    Absolutely! This recipe serves as a great base, and you can customize it by adding or substituting vegetables according to your preference. Feel free to include additional vegetables like diced avocado, grilled corn, or roasted red peppers to personalize the salad to your taste.

    Can this salad be made ahead?

    Yes, you can make this salad in advance. However, keep in mind that the texture of the vegetables may become softer as they marinate in the dressing. It is best to add the feta cheese and fresh herbs just before serving to maintain their freshness and texture.

    Let's Connect!

    Be sure to leave a comment below if you have any questions. You can also connect with me on Instagram, Facebook, Pinterest, or via email at [email protected].

    More Mediterranean Recipes

    • A white bowl filled with Mediterranean ancient grain salad.
      Mediterranean Ancient Grain Salad
    • A plate of farro salad with lemon vinaigrette. Next to the salad is a jar of lemon vinaigrette dressing.
      Asparagus & Farro Salad with Lemon Vinaigrette

    ๐Ÿ“– Recipe

    A small plate of Mediterranean black bean salad.
    Print Pin SaveSaved!

    Mediterranean Black Bean Salad

    This Mediterranean Black Bean Salad is made with hearty black beans, flavorful fresh vegetables, and homemade vinaigrette dressing. It's healthy, easy to make, and perfect for a light lunch or summer side dish.
    Course Salad, Side Dish
    Cuisine Mediterranean
    Prep Time 20 minutes minutes
    Cook Time 0 minutes minutes
    Total Time 20 minutes minutes
    Servings 6 servings
    Calories 212kcal
    Author Ashley Petrie, RDN, LDN

    Equipment

    • Mixing bowls
    • Chef's knife
    • Whisk

    Ingredients

    Red Wine Vinaigrette Dressing Ingredients

    • 3 tablespoons extra virgin olive oil
    • 1 tablespoon red wine vinegar
    • 1 clove garlic grated or finely minced
    • ยฝ teaspoon dijon mustard
    • ยฝ teaspoon honey
    • ยผ teaspoon Italian seasoning
    • ยผ teaspoon kosher salt
    • ยผ teaspoon black pepper

    Black Bean Salad Ingredients

    • 15 ounces low-sodium black beans drained and rinsed
    • 1 green bell pepper diced
    • 1 cucumber deseeded and diced
    • 1 large globe tomato deseeded and diced
    • ยผ large red onion diced
    • ยผ cup fresh parsley chopped
    • ยผ cup kalamata olives quartered
    • ยฝ cup crumbed feta cheese

    Instructions

    • In a small mixing bowl, whisk together the olive oil, vinegar, garlic, mustard, honey, and seasonings. Set aside.
      3 tablespoons extra virgin olive oil, 1 tablespoon red wine vinegar, 1 clove garlic, ยฝ teaspoon dijon mustard, ยฝ teaspoon honey, ยผ teaspoon Italian seasoning, ยผ teaspoon kosher salt, ยผ teaspoon black pepper
    • Drain and rinse the low-sodium black beans. Dice the green bell pepper, deseed and dice the cucumber, deseed and dice the tomato, and finely dice the red onion. Chop the fresh parsley and quarter the kalamata olives.
      15 ounces low-sodium black beans, 1 green bell pepper, 1 cucumber, 1 large globe tomato, ยผ large red onion, ยผ cup fresh parsley, ยผ cup kalamata olives
    • Add the drained black beans, diced vegetables, parsley, and olives to a large mixing bowl. Drizzle the prepared dressing over the vegetables in the mixing bowl.
    • Stir gently to combine, ensuring that the dressing coats the vegetables evenly. Add the crumbled feta cheese to the mixing bowl and gently stir again to incorporate it. Serve immediately or store in the refrigerator until ready to serve.
      ยฝ cup crumbed feta cheese

    Notes

    • Quick Tip: Cut the vegetables into equal-sized pieces, aiming for a similar size as the black beans.
    • Storage: Store leftovers in an airtight container in the refrigerator for up to 4 days.
    • Make Ahead: Prepare the vinaigrette up to 7 days in advance. The vegetables can be chopped and stored separately in airtight containers for a few days before preparing the salad.

    Nutrition

    Serving: 1serving | Calories: 212kcal | Carbohydrates: 20g | Protein: 8g | Fat: 12g | Saturated Fat: 3g | Polyunsaturated Fat: 1g | Monounsaturated Fat: 6g | Cholesterol: 11mg | Sodium: 413mg | Potassium: 528mg | Fiber: 5g | Sugar: 4g | Vitamin C: 32mg | Calcium: 109mg | Iron: 1.8mg
    Did you try this recipe?Let me know! Comment below, or take a picture and tag me on Instagram @everydayhomemadebyashley.

    Turmeric Black Pepper Chicken with Asparagus

    June 7, 2023

    This Turmeric Black Pepper Chicken is healthy, flavorful, and so easy to make. Ready in just 30 minutes, this warmly-spiced chicken breast recipe is perfect for a quick weeknight meal. Serve with rice or noodles for a delicious, well-balanced dinner.

    A plate of turmeric black pepper chicken over white rice.

    I love experimenting with new flavors and spices in the kitchen.

    So, when I stumbled across The New York Times' recipe for turmeric black pepper chicken, I was excited to give it a try!

    The combination of turmeric and black pepper sounded delicious. But, I knew I wanted to add my own twist to the recipe make it even more flavorful.

    To make this black pepper turmeric chicken recipe truly my own, I incorporated other flavors like garlic, ginger, and soy sauce. The addition of garlic added a delightful aromatic punch, while ginger brought a hint of warmth and complexity. The soy sauce infused the chicken with its savory umami goodness, elevating the overall flavor profile.

    I also decided to kick up the heat by increasing the amount of black pepper. The result was a bolder, spicier, more peppery dish.

    Needless to say, I am super happy with the way this recipe turned out! The chicken is tender and juicy, coated in a vibrant golden sauce that is rich in flavor and complexity.

    So, if you want to learn how to make the best turmeric black pepper chicken, keep reading to learn everything you need to know.

    Disclaimer: Some links throughout this post are affiliate links. As an Amazon Associate, I earn from qualifying purchases. You can learn more by visiting my Affiliate Disclosure Page.

    Ingredient Notes

    Here are some notes on the key ingredients. For the full list of ingredients, check out the recipe card below.

    • Chicken Breast- Trim and cut the boneless, skinless chicken breast into one-inch cubes so they cook quickly.
    • Turmeric Powder- A vibrant yellow spice that adds a distinct earthy, floral, and slightly bitter flavor to the dish.
    • Black Pepper- Use freshly cracked black pepper for the best flavor.
    • Flour- All-purpose flour coats the chicken breast cubes, helping to create a crispy outer layer when sautรฉed.
    • Honey- Adds a sweet flavor to the chicken, which plays nicely with the savory and tangy flavors.
    • Lime Juice- Tangy, fresh, and citrusy, the flavor of lime juice balances the sweetness of the honey and the savoriness of the soy sauce.
    • Soy Sauce- Adds a savory, umami flavor. Use low-sodium soy sauce to help control the amount of sodium in the final dish.
    • Ginger- Warm and slightly spicy, ginger pairs well with turmeric and other flavors in this recipe.
    • Canola Oil- A neutral-flavored oil with a high smoke point that's perfect for sautรฉing.
    • Cornstarch- When mixed with water, cornstarch makes a slurry that acts as a thickening agent for the sauce.
    • Asparagus- Pairs well with the turmeric and black pepper flavors, and provides a fresh, crunchy texture to the dish.
    The ingredients to make turmeric black pepper chicken. Each ingredient is labeled with text. Some of the ingredients include chicken breast, honey, turmeric, soy sauce, and asparagus.

    Substitutions and Variations

    Here are a few ways you can try customizing this turmeric black pepper chicken recipe to fit your diet and taste preferences.

    Substitutions

    • Chicken Breast- Try swapping chicken breast for chicken thighs, pork, shrimp, or tofu.
    • Turmeric Powder- Replace ground turmeric with curry powder in a pinch. Keep in mind that this will alter the flavor profile of the dish.
    • Flour- To make this recipe gluten-free, you can use a gluten-free all-purpose flour or substitute with cornstarch.
    • Honey- Substitute honey with maple syrup, brown sugar, or agave nectar.
    • Lime Juice- Swap lime juice for orange juice, lemon juice, or unseasoned rice vinegar.
    • Soy Sauce- Tamari, coconut aminos, or liquid aminos can be used in place of soy sauce.
    • Ginger- Use 1 tablespoon of freshly grated ginger in place of ground ginger.
    • Canola Oil- Any neutral-flavored, high-heat oil can be used in place of canola oil. Try avocado oil, light olive oil, grapeseed oil, or sunflower oil.
    • Cornstarch- Replace cornstarch with an equal amount of arrowroot starch or potato starch as a thickening agent.
    • Asparagus- Substitute the asparagus for any vegetable you enjoy! Broccoli, cauliflower, carrots, green beans, or snap peas make great choices.
    A plate of turmeric black pepper chicken breast with asparagus and rice.

    Variations

    • Gluten-Free- Swap soy sauce for tamari, coconut aminos, or liquid aminos and the flour for cornstarch or gluten-free flour to make gluten-free turmeric black pepper chicken.
    • Spicy- Make spicy turmeric black pepper chicken by adding cayenne pepper or red pepper flakes to the sauce.
    • Coconut- Add a splash of coconut milk to the sauce for additional flavor and creaminess.
    • Herbs- Chopped fresh cilantro, parsley, basil, or mint would give this easy turmeric black pepper chicken another layer of flavor.

    How to Make Turmeric Black Pepper Chicken

    Here is how to make turmeric black pepper chicken with asparagus.

    Step 1: Make the sauce. In a small bowl, stir together the honey, soy sauce, lime juice, grated garlic, black pepper, and ground ginger. Set the honey mixture aside.

    A sauce made of soy sauce, honey, garlic, and black pepper in a small glass bowl.

    Step 2: Season the chicken. In a medium bowl, combine the flour, turmeric powder, salt, and black pepper. Toss the chicken breast cubes in the flour mixture until they are well coated.

    A mixture of flour, turmeric, salt, and pepper in a glass mixing bowl.
    Cubes of raw chicken breast tossed in a turmeric flour mixture.

    Step 3: Sautรฉ the chicken. In a large skillet, heat oil over medium heat. Add the coated chicken cubes and sautรฉ them until they turn golden brown and are cooked through, which should take about 5 minutes.

    Seasoned chicken breast cubes being cooked in oil in a sautรฉ pan.

    Step 4: Cook the asparagus. Add the asparagus pieces to the skillet and cook for an additional 5-7 minutes, until they are tender.

    Asparagus spears cut into one-inch long pieces on a green cutting board.
    Turmeric black pepper chicken breast cubes and asparagus being sautรฉed in a skillet.

    Step 5: Add the sauce. Reduce the heat to low and pour the sauce over the chicken and asparagus. Scrape the bottom of the skillet to incorporate any flavorful bits. Allow the mixture to simmer for 1-2 minutes.

    Step 6: Thicken the sauce. In a small mixing bowl, whisk together the water and cornstarch to create a cornstarch slurry. Slowly stir the slurry into the skillet, allowing it to simmer until the sauce thickens. Remove from heat and serve.

    Cornstarch slurry in a small glass bowl.
    Finished turmeric black pepper chicken and asparagus in a skillet.

    Tips for Success

    • Cut the chicken uniformly. Cutting the chicken into equal, one-inch cubes will help them cook quickly and evenly.
    • Prepare all ingredients ahead. This dish comes together quickly so, it's helpful to have all of your ingredients prepared before you start cooking. This will make for an easy and stress-free cooking experience.
    • Scrape up the crispy bits. Don't worry if the chicken sticks to the bottom of the pan. These crispy bits scape up easily once the sauce is added, making for an even more flavorful meal.
    • Add the cornstarch slowly. Slowly pour the cornstarch slurry into the simmering sauce while continuously stirring. This will prevent lumps and allow the sauce to thicken evenly.

    What to Serve With Turmeric Black Pepper Chicken

    Enjoy this turmeric black pepper chicken stir fry on its own, or pair it with a variety of side dishes for a more well-rounded meal.

    Serve this flavorful chicken and asparagus dish over your favorite rice, noodles, or other grains. Jasmine rice, brown rice, quinoa, farro, rice noodles, and udon noodles all make excellent side dishes. Try my Teriyaki Udon Noodles for a unique combination of flavors.

    Alternatively, for a low-carb dinner, pair this healthy turmeric black pepper chicken recipe with roasted or sautรฉed vegetables. Carrots and green beans, Brussels sprouts, broccoli, cauliflower, and zucchini are great choices.

    If you're looking for a bread option, serve this turmeric and black pepper chicken with fresh naan bread. These soft and pillowy flatbreads are perfect for soaking up the delicious sauce.

    Finally, serve a cooling yogurt-based dip alongside this chicken dish to complement the warm and slightly spicy flavors of the turmeric, ginger, and black pepper.

    A fork holding up two pieces of turmeric black pepper chicken.

    Storage and Reheating

    How to Store

    • Refrigerator- Store leftover turmeric black pepper chicken in an airtight container in the refrigerator for 3-4 days.
    • Freezer- For longer storage, freeze leftover black pepper and turmeric chicken for up to 6 months.

    How to Reheat

    • Stovetop- Place the chicken and asparagus in a small skillet or saucepan over low heat. Add a splash of water or chicken stock to loosen up the sauce and prevent it from sticking to the skillet. Bring to a simmer and heat until the chicken is fully heated through.
    • Oven- Preheat the oven to 350ยฐF. Place the chicken in an oven-safe casserole dish along with a few tablespoons of water. Cover the dish with foil and bake for about 15-20 minutes or until the chicken is thoroughly heated.
    • Microwave- Place the turmeric chicken in a microwave-safe bowl and cover it with a microwave-safe lid or damp paper towel. Reheat on medium power (50%) in 1-minute intervals, stirring in between, until the chicken is heated through.
    • Air Fryer- Preheat the air fryer to 350ยฐF. Spread the leftover chicken out on a piece of aluminum foil and place inside the air fryer basket. Heat for 5 minutes or until the chicken is fully warmed through.

    Quick Note: Chicken should always be cooked and reheated to an internal temperature of 165ยฐF. Using a meat thermometer is the most accurate way to determine the internal temperature of chicken.

    Make Ahead

    While this dish tastes best when freshly cooked, you can prepare the sauce up to one week in advance. You can also cut the chicken breast into cubes and store them in the refrigerator up to 24 hours before cooking.

    A small plate of turmeric black pepper chicken breast with asparagus.

    Frequently Asked Questions

    Can I use chicken thighs instead of chicken breast?

    Yes, you can substitute boneless, skinless chicken thighs for chicken breast in this recipe. Keep in mind that the cooking time may vary slightly, as chicken thighs tend to be more forgiving and take a little longer to cook through.

    Can I use frozen asparagus instead of fresh?

    While fresh asparagus is recommended for the best texture and flavor, you can use frozen asparagus as a substitute if needed. Make sure to thaw and drain it before adding it to the dish. Keep in mind that frozen asparagus might be slightly softer than fresh asparagus when cooked.

    How can I adjust the spiciness of the dish?

    If you prefer a milder or spicier version of the turmeric black pepper chicken, you can easily adjust the amount of black pepper to suit your taste. Reduce the amount for a milder flavor or increase it for a bolder, spicier kick. Feel free to experiment and find the perfect level of spiciness that you enjoy.

    Can I make this recipe gluten-free?

    Yes, you can make this recipe gluten-free by using a gluten-free all-purpose flour or a gluten-free alternative like rice flour or almond flour for coating the chicken. Also, ensure that the soy sauce you use is specifically labeled as gluten-free or replace it with a gluten-free soy sauce alternative.

    Let's Connect!

    Be sure to leave a comment below if you have any questions. You can also connect with me on Instagram, Facebook, Pinterest, or via email at [email protected].

    More Asian-Inspired Recipes

    • A small white plate with a pile of teriyaki udon noodles. The noodles are garnished with sesame seeds and chopped scallions. There is a pair of black chopsticks resting on the left side of the plate.
      Teriyaki Udon Noodles (15 Minutes!)

    ๐Ÿ“– Recipe

    A plate of turmeric black pepper chicken over white rice.
    Print Pin SaveSaved!
    4.50 from 2 votes

    Turmeric Black Pepper Chicken

    This Turmeric Black Pepper Chicken is healthy, flavorful, and so easy to make. Ready in just 30 minutes, this warmly-spiced chicken breast recipe is perfect for a quick weeknight meal. Serve with rice or noodles for a delicious, well-balanced dinner. Recipe adapted from The New York Times.
    Course Main Course
    Cuisine Asian
    Prep Time 15 minutes minutes
    Cook Time 15 minutes minutes
    Total Time 30 minutes minutes
    Servings 4 servings
    Calories 365kcal
    Author Ashley Petrie, RDN, LDN

    Equipment

    • Large skillet
    • Mixing bowls

    Ingredients

    Sauce Ingredients

    • 3 tablespoons honey
    • 2 tablespoons low-sodium soy sauce
    • Juice of 1 lime about 2 tablespoons
    • 1 clove garlic grated or finely minced
    • 1 teaspoon freshly cracked black pepper
    • ยผ teaspoons ground ginger

    Chicken Ingredients

    • 2 tablespoons all-purpose flour
    • 2 teaspoons turmeric powder
    • ยฝ teaspoon freshly cracked black pepper
    • ยผ teaspoon kosher salt
    • 1 pound boneless, skinless chicken breast cut into 1-inch cubes
    • 4 tablespoons canola oil

    Other Ingredients

    • 1 bunch (about 1 pound) asparagus spears ends trimmed, cut into 1-inch pieces
    • 2 tablespoons water
    • 1 tablespoon cornstarch

    Instructions

    • In a small bowl, stir together the honey, soy sauce, lime juice, grated garlic, black pepper, and ground ginger. Set the sauce aside.
      3 tablespoons honey, 2 tablespoons low-sodium soy sauce, Juice of 1 lime, 1 clove garlic, 1 teaspoon freshly cracked black pepper, ยผ teaspoons ground ginger
    • In a medium bowl, combine the flour, turmeric powder, salt, and black pepper. Toss the chicken breast cubes in the flour mixture until they are well coated.
      2 tablespoons all-purpose flour, 2 teaspoons turmeric powder, ยฝ teaspoon freshly cracked black pepper, ยผ teaspoon kosher salt, 1 pound boneless, skinless chicken breast
    • Heat the canola oil in a large skillet over medium heat. Add the coated chicken cubes and sautรฉ them until they turn golden brown and are cooked through, which should take about 5 minutes.
      4 tablespoons canola oil
    • Add the asparagus pieces to the skillet and cook for an additional 5-7 minutes, until they are tender.
      1 bunch (about 1 pound) asparagus spears
    • Reduce the heat to low and pour the sauce over the chicken and asparagus. Scrape the bottom of the skillet to incorporate any flavorful bits. Allow the mixture to simmer for 1-2 minutes.
    • In a small mixing bowl, whisk together the water and cornstarch to create a cornstarch slurry. Slowly stir the slurry into the skillet, allowing it to simmer until the sauce thickens. Remove from heat and serve.
      2 tablespoons water, 1 tablespoon cornstarch

    Notes

    • Quick Tip: This dish comes together quickly so, it's helpful to have all of your ingredients prepared before you start cooking. This will make for an easy and stress-free cooking experience.
    • Storage: Store leftovers in an airtight container in the refrigerator for up to 4 days or in the freezer for up to 6 months.
    • Make Ahead: Prepare the sauce up to one week in advance. The chicken can be cubed up to 24 hours before cooking.

    Nutrition

    Serving: 1serving | Calories: 365kcal | Carbohydrates: 25g | Protein: 30g | Fat: 17g | Saturated Fat: 2g | Polyunsaturated Fat: 4.5g | Monounsaturated Fat: 9.5g | Cholesterol: 83mg | Sodium: 412mg | Potassium: 710mg | Fiber: 3g | Sugar: 15g | Vitamin C: 10mg | Calcium: 47mg | Iron: 4.2mg
    Did you try this recipe?Let me know! Comment below, or take a picture and tag me on Instagram @everydayhomemadebyashley.

    Peanut Salad Dressing (For Salads, Noodles, and Bowls)

    May 31, 2023

    This Peanut Salad Dressing is made with natural peanut butter, soy sauce, fresh ginger, garlic, and lime juice. It pairs perfectly with Asian-inspired salads, noodles, grain bowls, and more. Plus, it's ready in just 5 minutes!

    A bowl of peanut salad dressing with a spoon sticking out to the left.

    I love peanut butter in all its forms, from peanut butter sandwiches to peanut butter cups.

    But, did you know that peanut butter can also be used in savory dishes?

    This Asian peanut salad dressing is the perfect example. It combines the creamy, nutty goodness of peanut butter with the savory flavors of soy sauce, sesame oil, garlic, and ginger.

    It's fantastic drizzled over Asian-inspired salads, slaws, noodles, and grain bowls. And it also makes a great marinade or dip.

    So, keep reading if you want to learn how to make the best peanut salad dressing recipe!

    Disclaimer: Some links throughout this post are affiliate links. As an Amazon Associate, I earn from qualifying purchases. You can learn more by visiting my Affiliate Disclosure Page.

    Ingredient Notes

    Here are some notes on the key ingredients. For the full list of ingredients, check out the recipe card below.

    • Natural Peanut Butter- Look for creamy peanut butter that only lists peanuts or peanuts and salt on the ingredient label. My favorite peanut butter brand is Teddie (they're from Massachusetts, like me!)
    • Soy Sauce- I always use low-sodium soy sauce to help control the amount of sodium in the dressing.
    • Rice Vinegar- Slightly sweet and tangy, rice vinegar balances the savory, umami flavors of the soy sauce and peanut butter.
    • Lime Juice- Fresh lime juice adds a bright, citrusy note to the dressing.
    • Honey- A little sweetness from honey balances the other flavors.
    • Sesame Oil- Adds a rich, nutty flavor that plays well with peanut butter.
    • Garlic- Grated garlic blends easily into the dressing, adding lots of savory garlic flavor.
    • Ginger- Freshly grated ginger tastes fresh and slightly spicy.
    The ingredients to make peanut salad dressing. Each ingredient is labeled with text.

    Tips for Success

    • Check peanut butter consistency. The consistency of natural peanut butter can vary quite a bit. If your peanut butter is too thick, simply microwave it for a few seconds until softened.
    • Whisk or shake well. The peanut butter takes a few minutes to completely dissolve and emulsify into the dressing.
    • Grate the garlic and ginger. Grated garlic and ginger blend easily into the dressing, giving it the best texture and flavor.
    • Shake before using. If you've stored your peanut ginger salad dressing in the refrigerator, give it a good shake or stir it before serving.
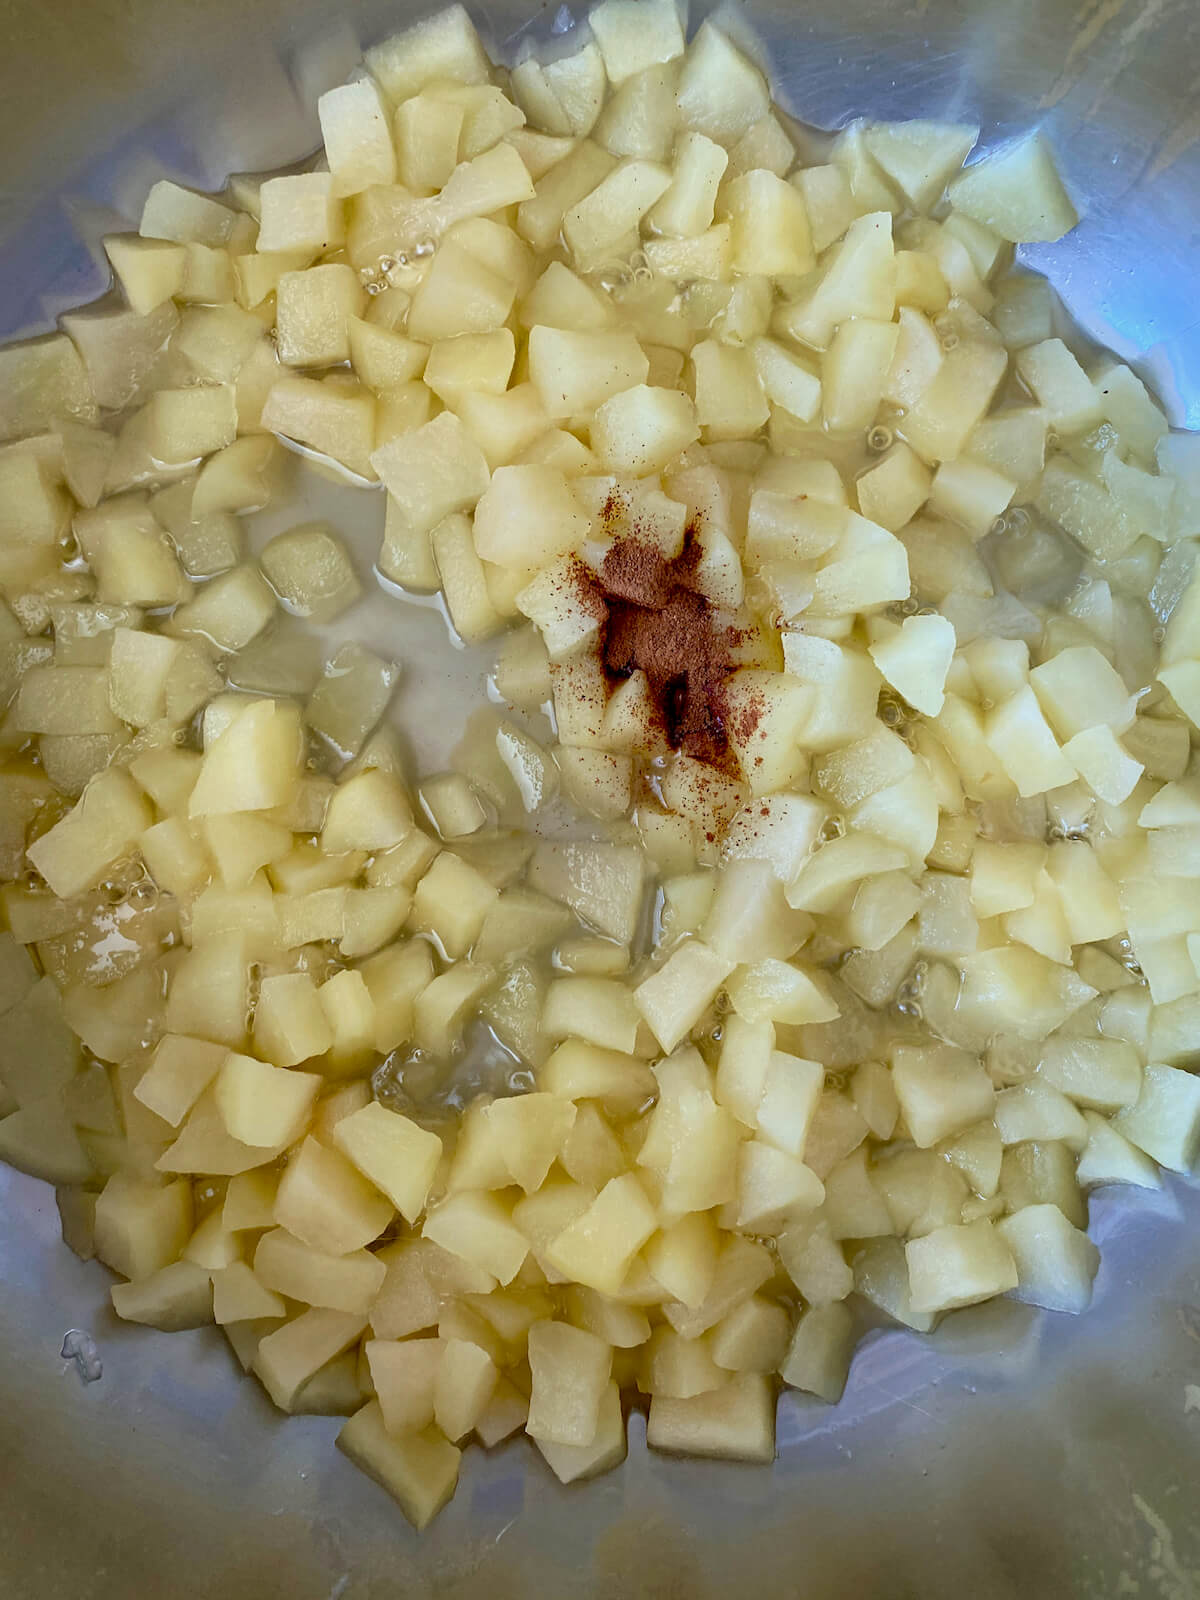
    • Get creative. Don't be afraid to experiment and make this homemade salad dressing your own. That's half the fun of cooking!

    How to Make Peanut Salad Dressing

    Here is how to make peanut butter dressing.

    Step 1: Combine all ingredients. Combine all ingredients in a small bowl or mason jar.

    Peanut salad dressing in a bowl before being mixed.

    Step 2: Mix ingredients together. Whisk or shake ingredients together until well combined. Use immediately or store in the refrigerator for up to 7 days.

    Peanut salad dressing in a glass mixing bowl after being whisked together.

    How to Store

    • Refrigerator- Store leftover peanut salad dressing in an airtight container in the refrigerator for up to 7 days.
    • Freezer- For longer storage, freeze leftover peanut salad dressing for up to 3 months. Keep in mind that the consistency of the dressing may change after thawing.
    Peanut butter salad dressing in a clear glass bowl.

    Let's Connect!

    Be sure to leave a comment below if you have any questions. You can also connect with me on Instagram, Facebook, Pinterest, or via email at [email protected].

    More Salad Dressing Recipes

    • A jar of basil balsamic vinaigrette with a spoonful of dressing resting on top of it. You can see bits of fresh basil in the spoonful of vinaigrette. Out of focus in the background is a small plate of salad.
      Basil Balsamic Vinaigrette (For Salad, Marinating, and More!)
    • A jar of red wine vinegar salad dressing next to a bowl of salad.
      Red Wine Vinegar Salad Dressing (Marinade)
    • A bowlful of Caesar dressing without anchovies.
      How to Make Caesar Dressing Without Anchovies
    • A mason jar filled with strawberry balsamic vinaigrette next to a strawberry spinach salad.
      5-Minute Strawberry Balsamic Vinaigrette

    ๐Ÿ“– Recipe

    A bowl of peanut salad dressing with a spoon sticking out to the left.
    Print Pin SaveSaved!

    Peanut Salad Dressing

    This Peanut Salad Dressing is made with natural peanut butter, soy sauce, fresh ginger, garlic, and lime juice. It pairs perfectly with Asian-inspired salads, noodles, grain bowls, and more. Plus, it's ready in just 5 minutes!
    Course Condiment, Salad
    Cuisine Asian
    Prep Time 5 minutes minutes
    Cook Time 0 minutes minutes
    Total Time 5 minutes minutes
    Servings 6 servings (2 tablespoons each)
    Calories 102kcal
    Author Ashley Petrie, RDN, LDN

    Equipment

    • Mixing bowls
    • Whisk

    Ingredients

    • ยผ cup natural creamy peanut butter
    • ยผ cup rice wine vinegar
    • 3 tablespoons low-sodium soy sauce
    • 1 tablespoon honey
    • 1 tablespoon sesame oil
    • Juice of ยฝ lime
    • 1 clove garlic grated or finely minced
    • 2 teaspoons ginger root grated or finely minced

    Instructions

    • Combine all ingredients in a small bowl or mason jar. Whisk or shake ingredients together until well combined. Use immediately or store in the refrigerator for up to 7 days.

    Notes

    • Quick Tip: If your peanut butter is too thick, microwave it for a few seconds until softened.
    • Storage: Store dressing in an airtight container in the refrigerator for up to 7 days.

    Nutrition

    Serving: 2tablespoons | Calories: 102kcal | Carbohydrates: 7g | Protein: 3.5g | Fat: 8g | Saturated Fat: 1g | Polyunsaturated Fat: 2g | Monounsaturated Fat: 4g | Sodium: 287mg | Potassium: 113mg | Fiber: 1g | Sugar: 4g | Vitamin C: 1mg | Calcium: 11mg | Iron: 0.5mg
    Did you try this recipe?Let me know! Comment below, or take a picture and tag me on Instagram @everydayhomemadebyashley.

    Black Bean Corn Feta Dip

    May 24, 2023

    This Black Bean Corn Feta Dip is an easy and delicious dip recipe that's perfect for all of your summer parties. It's made with a creamy base of feta cheese, Greek yogurt, and garlic, and it's loaded with sweet fresh corn, black beans, and scallions.

    A bowl of black bean corn feta dip surrounded by pita chips.

    Do you ever make a dish that's so delicious, you just can't stop eating it?

    You know you need something to serve your family and friends, but like... it's just too good to stop.

    This easy black bean corn feta dip is one of those dishes. Savory, sweet, and satisfying, I couldn't stop scarfing down bite after bite of this creamy dip as I was testing this recipe.

    The combination of hearty black beans, sweet corn, tangy feta cheese, and creamy Greek yogurt is simply delicious. It's perfect for dipping tortilla chips, pita bread, or vegetables.

    So, if you're looking for a fun party appetizer to bring to all of your potlucks this summer, keep reading to learn how to make the best black bean corn feta dip recipe ever.

    Disclaimer: Some links throughout this post are affiliate links. As an Amazon Associate, I earn from qualifying purchases. You can learn more by visiting my Affiliate Disclosure Page.

    Why You'll Love This Recipe

    • Easy to Make- This easy summer dip comes together in under 30 minutes and uses only a few simple ingredients. It's so easy to make, you'll want to take it to all of your summer parties!
    • Flavorful- Sweet corn, tangy feta cheese, and savory scallions and garlic come together to make a flavorful dip that's both creamy and refreshing.
    • Versatile- This corn feta black bean dip can be served with a variety of dippers, such as tortilla chips, pita bread, or vegetables. It can also be used as a spread for sandwiches or wraps.
    • Healthy- Made with fresh, whole ingredients, this flavorful dip is a well-balanced and healthy snack that is full of protein, fiber, and vitamins.
    • Customizable- Add your own personal touch to this dip by adding other ingredients, such as jalapeรฑos, cumin, or chili powder.

    Ingredient Notes

    Here are some notes on the key ingredients. For the full list of ingredients, check out the recipe card below.

    • Feta Cheese- A block of full-fat feta cheese will give you the richest flavor and creamiest dip.
    • Greek Yogurt- I use 2% plain Greek yogurt, which makes the dip nice and creamy.
    • Black Beans- Opt for a can of low-sodium black beans or homemade black beans. Drain and rinse the canned black beans before adding them to the dip.
    • Corn on the Cob- Fresh corn on the cob is a summertime staple, and for good reason. It's sweet, flavorful, and easy to cook. I typically boil the corn because it's quick and easy, but grilled corn would be delicious too.
    • Scallions- Scallions, also known as green onions, add a pleasant, mild onion flavor to this creamy feta dip.
    • Cilantro- Adds a bold, herbaceous, citrus flavor to the dip that pairs well with the rest of the ingredients.
    • Garlic- Grated or finely minced garlic blends easily into the whipped feta base, adding a strong garlic flavor.
    • Kosher Salt- I prefer kosher salt or sea salt because they don't contain added sugars and anti-caking agents like table salt often does.
    • Black Pepper- Freshly cracked black pepper is best.

    Sustainability Tip: For the freshest, most flavorful dip, try growing your own cilantro and scallions at home. These herbs are easy to grow both in an outdoor garden and in a container.

    The ingredients to make black bean corn feta dip on a butcher block countertop. Each ingredient is labeled with text. They include corn, pepper, cilantro, salt, feta cheese, Greek yogurt, scallions, garlic, and black beans.

    How to Choose Fresh Corn on the Cob

    Crispy, sweet, and juicy - what's not to love about fresh corn on the cob? But, when the corn is all wrapped up in layers of husks, how can you tell if it's going to be as delicious as you hope?

    Here are a few signs to look for:

    • Look for bright yellow corn with tightly-wrapped husks. Avoid corn that has soft spots or brown spots.
    • Squeeze the kernels. The kernels should be plump and firm.
    • Pull back the husks and check the silks. The silks should be brown and sticky.
    • Smell the corn. Fresh corn will have a sweet, corn-like smell.
    • Buy corn that is in season. Corn is in season from late summer to early fall.

    How to Shuck Corn on the Cob (Video)

    Substitutions and Variations

    Here are a few ways you can try customizing this creamy black bean corn feta dip recipe to fit your diet and taste preferences.

    Substitutions

    • Feta Cheese- Substitute goat cheese, queso fresco, or another type of salty cheese in place of feta cheese.
    • Greek Yogurt- Swap Greek yogurt for sour cream. Alternatively, use a combination of yogurt or sour cream and mayonnaise.
    • Black Beans- Pinto beans, cannellini beans, kidney beans, chickpeas, or any other type of bean you prefer can be swapped for black beans.
    • Corn on the Cob- Thawed frozen corn or drained canned corn can be used in place of fresh corn on the cob.
    • Scallions- Substitute green onion with chives or shallots.
    • Cilantro- If you're not a fan of cilantro, swap it for fresh parsley or chives.
    • Garlic- Replace fresh garlic with ยผ teaspoon of garlic powder.
    Feta black bean corn dip in a small white serving bowl inside of a larger serving bowl filled with pita chips.

    Variations

    • Dairy-Free- While I haven't tested making this recipe dairy-free myself, you can try swapping the feta cheese for vegan feta cheese and the Greek yogurt for dairy-free sour cream or yogurt.
    • Spicy- Add minced jalapeรฑo or cayenne pepper to give this creamy dip a spicy kick.
    • Grilled Corn- For more depth of flavor, grill the corn instead of boiling it.
    • Seasonings- Chili powder, cumin, cayenne pepper, onion powder, garlic powder, and smoked paprika all pair well with the flavors in this dip.

    How to Make Black Bean Corn Feta Dip

    Here is how to make feta dip with corn and black beans.

    Step 1: Cook and shuck the corn. Bring a large pot of salted water to a boil over medium-high heat. Once boiling, add the peeled corn and reduce the heat to medium. Simmer for 4-5 minutes, or until the corn is tender. Remove the corn from the water and let it cool for a few minutes. Once cool enough to handle, cut the kernels off the cob.

    Two ears of corn cooking in a boiling pot of water.
    Two cooked ears of fresh corn on the cob on a bamboo cutting board next to a knife.
    Two cooked ears of corn on a cutting board. One of the ears of corn has been partially shucked with the loose kernels next to it.

    Step 2: Whip the feta cheese. In the bowl of a large food processor fitted with the blade attachment, combine the crumbled feta cheese, Greek yogurt, garlic, salt, and pepper. Process on high until a smooth mixture is formed.

    Whipped feta cheese, Greek yogurt, garlic, salt, and pepper inside the bowl of a food processor.

    Step 3: Mix the dip together. Transfer the whipped feta mixture into a large mixing bowl. Add the corn kernels, black beans, scallions, and cilantro to the bowl. Stir well to combine. Serve immediately with tortilla chips, pita bread, or vegetables.

    The finished dip mixed in a glass mixing bowl. There is a rubber spatula sticking out of the bowl to the right.

    Tips for Success

    • No food processor? Use a blender or mash the feta cheese with a fork until it's smooth.
    • Use fresh ingredients. Fresh corn, cilantro, scallions, and garlic make this dip extra flavorful and delicious.
    • Don't overmix. Overmixing can cause the feta cheese to break down and become grainy. This is because feta cheese is a soft cheese that contains small curds.
    • Adjust the seasonings to taste. Taste the dip before serving and add more salt, pepper, or spices to taste.

    What to Serve With Black Bean Corn Feta Dip

    This simple black bean corn feta dip recipe is perfect for serving as a snack, appetizer, or sandwich spread. Naturally, it pairs well with classic dippers like tortilla chips, pita chips, naan bread, crackers, pretzels, and fresh vegetables.

    Another option is to use this summer dip recipe as a satisfying spread for sandwiches and wraps. Or, if you're looking for something on the lighter side, feta dip makes a deliciously creamy salad dressing. Thin the dip with apple cider vinegar, buttermilk, or olive oil, then toss it with your favorite salad greens.

    Finally, serve this creamy feta corn and bean dip recipe alongside all of your favorite Mexican dishes, like tacos, quesadillas, and burritos.

    Black bean corn feta dip in a small white serving bowl with a pita chip sticking out of it. The small serving bowl is inside of a larger serving bowl filled with pita chips.

    Storage and Reheating

    How to Store

    • Room Temperature- If you're serving this corn black bean feta dip at a summer cookout or potluck, keep in mind that it should only remain at room temperature for a maximum of two hours.
    • Refrigerator- Store leftover feta corn black bean dip in an airtight container in the refrigerator for 3-4 days.
    • Freezer- I do not recommend freezing this homemade black bean corn feta dip. Freezing dairy and fresh vegetables may cause unappealing textural and flavor changes.

    Make Ahead

    This easy black bean corn feta dip is perfect for parties because you can easily make it ahead of time and store it in the fridge for up to 2 days. In fact, the flavors will meld and become even more delicious if you let the dip chill in the refrigerator for at least 30 minutes before serving.

    A bowl of corn black bean feta dip inside of a large serving bowl filled with pita chips.

    Frequently Asked Questions

    Can I use frozen or canned corn?

    If you don't have access to fresh corn, using frozen corn or canned corn as a substitute works well. Thaw frozen corn before adding it to the salsa. Canned corn should be drained and rinsed.

    Can I use a different type of cheese instead of feta cheese?

    Yes, you can use a different type of cheese instead of feta cheese. Some good options include goat cheese or queso fresco.

    Can I make this black bean and corn dip with feta recipe ahead of time?

    Of course! You can easily make this healthy black bean dip recipe ahead of time and store it in the refrigerator in an airtight container for up to 2 days. When ready to serve, allow the dip to sit at room temperature for about 20 minutes to soften, then give it a good stir.

    How long does black bean corn feta dip last in the refrigerator?

    This creamy black bean feta corn dip will last up to 4 days in the refrigerator. Although, the dip will begin to break down and become watery the longer it sits.

    Can you freeze feta dip with black beans and corn?

    Technically, you can freeze this dip for up to 3 months. However, because it's made mostly of dairy, fresh vegetables, and herbs, the texture of the dip will likely become unpleasant after freezing.

    Let's Connect!

    Be sure to leave a comment below if you have any questions. You can also connect with me on Instagram, Facebook, Pinterest, or via email at [email protected].

    More Dip Recipes

    • A skillet filled with Greek yogurt buffalo chicken dip garnished with green onions and hot sauce.
      Greek Yogurt Buffalo Chicken Dip
    • A bowl of 4-ingredient guacamole garnished with cilantro.
      Easy 4-Ingredient Guacamole Recipe
    • A skillet of mayo-free spinach artichoke dip surrounded by tortilla chips.
      Baked Spinach Artichoke Dip (No Mayo)

    ๐Ÿ“– Recipe

    A bowl of black bean corn feta dip surrounded by pita chips. There is a pita chip sticking out of the dip.
    Print Pin SaveSaved!

    Black Bean Corn Feta Dip

    This Black Bean Corn Feta Dip is an easy and delicious dip recipe that's perfect for all of your summer parties. It's made with a creamy base of feta cheese, Greek yogurt, and garlic, and it's loaded with sweet fresh corn, black beans, and scallions.
    Course Appetizer, Snack
    Cuisine American, Mexican
    Prep Time 20 minutes minutes
    Cook Time 5 minutes minutes
    Total Time 25 minutes minutes
    Servings 8 servings
    Calories 203kcal
    Author Ashley Petrie, RDN, LDN

    Equipment

    • Food processor

    Ingredients

    • 2 ears (about 1 ยฝ cups of kernels) corn on the cob husks and silks removed
    • 8 ounces feta cheese crumbled
    • 1 cup plain Greek yogurt
    • 1 clove garlic grated or finely minced
    • ยผ teaspoon kosher salt
    • ยผ teaspoon black pepper
    • 15 ounces low-sodium black beans drained and rinsed
    • ยฝ cup scallions (green onions) chopped
    • ยฝ cup cilantro chopped

    Instructions

    • To cook corn on the cob, bring a large pot of salted water to a boil over medium-high heat. Once boiling, add the peeled corn and reduce the heat to medium. Simmer for 4-5 minutes, or until the corn is tender. Remove the corn from the water and let it cool for a few minutes. Once cool enough to handle, cut the kernels off the cob.
      2 ears (about 1 ยฝ cups of kernels) corn on the cob
    • In the bowl of a large food processor fitted with the blade attachment, combine the crumbled feta cheese, Greek yogurt, garlic, salt, and pepper. Process on high until a smooth mixture is formed.
      8 ounces feta cheese, 1 cup plain Greek yogurt, 1 clove garlic, ยผ teaspoon kosher salt, ยผ teaspoon black pepper
    • Transfer the whipped feta mixture into a large mixing bowl. Add the corn kernels, black beans, scallions, and cilantro to the bowl. Stir well to combine. Serve immediately with tortilla chips, pita bread, or vegetables.
      15 ounces low-sodium black beans, ยฝ cup scallions (green onions), ยฝ cup cilantro

    Notes

    • No food processor? Use a blender or mash the feta cheese with a fork until it's smooth.
    • Don't overmix.ย Overmixing can cause the feta cheese to break down and become grainy. This is because feta cheese is a soft cheese that contains small curds.
    • Adjust the seasonings to taste.ย Taste the dip before serving and add more salt, pepper, or spices to taste.
    • Storage: Store leftover dip in an airtight container in the refrigerator for up to 4 days.

    Nutrition

    Serving: 1serving | Calories: 203kcal | Carbohydrates: 23g | Protein: 13g | Fat: 8g | Saturated Fat: 4g | Polyunsaturated Fat: 1g | Monounsaturated Fat: 2g | Trans Fat: 0.5g | Cholesterol: 28mg | Sodium: 370mg | Potassium: 357mg | Fiber: 7g | Sugar: 4g | Vitamin C: 4mg | Calcium: 222mg | Iron: 1.7mg
    Did you try this recipe?Let me know! Comment below, or take a picture and tag me on Instagram @everydayhomemadebyashley.

    Arugula Quinoa Salad with Maple-Dijon Vinaigrette

    May 9, 2023

    This Arugula Quinoa Salad is a versatile and easy-to-make salad that can be served as either a main or side dish. Made with creamy goat cheese, crunchy walnuts, chewy dried cranberries, and roasted sweet potatoes, this healthy salad recipe is jam-packed with flavor.

    A white bowl filled with arugula quinoa salad.

    I'm obsessed with a good salad. A salad with a variety of delicious toppings, tons of flavor, and a bunch of healthy ingredients? Sign me up!

    And this sweet potato arugula quinoa salad with maple dijon vinaigrette dressing is my latest salad obsession.

    It's jam-packed with fall-inspired toppings like roasted sweet potato, creamy goat cheese, dried cranberries, and crunchy walnuts. Then, it's drizzled with a flavorful homemade maple dijon vinaigrette. It really doesn't get much better than that.

    But the best part? This quinoa arugula goat cheese salad is easy to customize to suit your preferences. Want to add some grilled chicken or tofu for extra protein? Go for it! Prefer pecans over walnuts? Switch them out. The possibilities are endless!

    Trust me, once you try this arugula and quinoa salad, you'll be hooked. It's the perfect meal for any day of the week and is sure to become a staple in your recipe collection.

    Disclaimer: Some links throughout this post are affiliate links. As an Amazon Associate, I earn from qualifying purchases. You can learn more by visiting my Affiliate Disclosure Page.

    Why You'll Love This Recipe

    • Healthy- This salad is full of nutritious ingredients like quinoa, arugula, sweet potato, and walnuts, meaning it's jam-packed with healthy fats, fiber, plant-based protein, vitamins, and minerals.
    • Simple Ingredients- Many of the ingredients in this recipe are simple pantry staples you likely already have on hand.
    • Ready in Just 50 Minutes- By multitasking, this recipe comes together in under an hour. Perfect for a quick and easy weeknight meal.
    • Full of Flavorful- Each part of this salad is loaded with flavor, from the homemade vinaigrette dressing to the roasted sweet potatoes.
    • Versatile- Whether you're looking for a light, yet satisfying lunch to bring to work or an easy weeknight dinner, this easy arugula quinoa salad certainly hits the spot.

    Ingredient Notes

    Here are some notes on the key ingredients. For the full list of ingredients, check out the recipe card below.

    • Arugula- Arugula has a mild peppery flavor that takes well to a tangy vinaigrette. Baby arugula is perfect for this salad recipe because the leaves are small and tender.
    • Quinoa- A high-protein, high-fiber grain, quinoa adds a nutty flavor to the salad. Quinoa is easy to make, filling, and naturally gluten-free.
    • Sweet Potato- Roasted sweet potato adds a caramelized sweetness and wonderful textural contrast to this homemade arugula quinoa salad.
    • Goat Cheese- Soft, creamy, and tangy, goat cheese pairs well with the rest of the flavors in this dish.
    • Dried Cranberries- Another topping that adds both texture and a little sweetness to this fall-inspired arugula salad recipe.
    • Walnuts- Chopped walnuts lend a bit of crunch to this easy salad recipe. For more flavor, try toasting the walnuts before chopping them.
    • Red Onion- Red onion adds a nice pop of color and flavor to the salad. It has a bold onion flavor that balances out the sweetness of the sweet potato and cranberries.
    • Extra Virgin Olive Oil- With its fruity, slightly bitter flavor, extra virgin olive oil is my go-to oil for any homemade vinaigrette.
    • Apple Cider Vinegar- The acidity of the apple cider vinegar balances out the sweet elements of the dish.
    • Maple Syrup- Adds a slight sweetness to the dressing that compliments the rest of the flavors in the dish.
    • Dijon Mustard- Emulsifies the dressing and adds a slightly tangy flavor.
    • Garlic- For flavor.

    Sustainability Tip: Grow your own arugula at home for a flavorful option that's low-waste. Arugula can easily be grown indoors in a container or outside in a garden.

    The ingredients to make arugula quinoa salad. Each ingredient is labeled with text. They include goat cheese, maple syrup, cranberries, arugula, salt, walnuts, red onion, garlic, dijon, quinoa, olive oil, acv, black pepper, and sweet potato.

    Substitutions and Variations

    Here are a few ways you can try customizing this simple arugula quinoa salad recipe to fit your diet and taste preferences.

    Substitutions

    • Arugula- Swap arugula for baby spinach, kale, mixed greens, romaine lettuce, or green leaf lettuce.
    • Quinoa- Try using bulgur, farro, wild rice, or couscous in place of the quinoa.
    • Sweet Potato- Roasted or sautรฉed butternut squash, pumpkin, or acorn squash can be used instead of sweet potato.
    • Goat Cheese- Substitute goat cheese for feta cheese, blue cheese, gorgonzola cheese, or parmesan cheese.
    • Dried Cranberries- Dried cherries, apricots, or apples all make great substitutes for dried cranberries.
    • Walnuts- Replace walnuts with slivered almonds, pecans, pistachios, pumpkin seeds, or sunflower seeds.
    • Red Onion- Swap red onion for shallots, green onion, or chives for a more mild onion flavor.
    • Extra Virgin Olive Oil- Use any salad dressing oil you prefer. Some options include avocado oil, walnut oil, canola oil, or sunflower oil.
    • Apple Cider Vinegar- Substitute apple cider vinegar for white wine vinegar, red wine vinegar, balsamic vinegar, or lemon juice.
    • Maple Syrup- Try using honey or brown sugar in place of the maple syrup.
    • Dijon Mustard- Whole grain mustard, brown mustard, or mustard powder can be swapped for dijon mustard.
    • Garlic- Use ยผ teaspoon of garlic powder in place of one fresh clove of garlic.
    Goat cheese and quinoa arugula salad in a white bowl.

    Variations

    • Gluten-Free- This fall-inspired arugula quinoa salad is naturally gluten-free, but it's always a good idea to double-check labels.
    • Dairy-Free- For a dairy-free version of this dish, simply leave out the goat cheese or swap it for dairy-free feta cheese.
    • Add Protein- Grilled chicken, grilled steak tips, shrimp, tofu, or white beans are all delicious protein options that can make this healthy arugula quinoa salad more satisfying.
    • Spicy- Add red pepper flakes or cayenne pepper to the vinaigrette to give this salad a little heat.

    How to Make Arugula Quinoa Salad

    Here is how to make arugula salad with quinoa.

    Step 1: Roast the sweet potato cubes. Preheat the oven to 425ยฐF and line a baking sheet with parchment paper. Toss the cubed sweet potatoes with olive oil and seasonings, then spread out them evenly onto the parchment-lined baking sheet. Roast for 20-25 minutes, stirring halfway through.

    Raw, cubed sweet potato on a parchment-lined baking sheet.
    Roasted sweet potato cubes on a parchment-lined baking sheet.

    Step 2: Cook the quinoa. While the sweet potatoes are roasting, cook one cup of quinoa according to the package instructions. Set aside to cool for a few minutes.

    Cooked quinoa in a stainless steel pot.

    Step 3: Make the maple dijon vinaigrette. While the sweet potatoes and quinoa are cooking, whisk together all of the vinaigrette ingredients until well combined. Set aside. 

    Maple dijon vinaigrette dressing in a glass mixing bowl.

    Step 4: Assemble the salad. Toss the arugula, quinoa, and sweet potatoes with the maple dijon vinaigrette in a large salad bowl until well coated. Top the salad with goat cheese, dried cranberries, walnuts, and red onion. Serve immediately.

    Arugula quinoa salad assembled in a wooden salad bowl.

    Tips for Success

    • Rinse the quinoa before cooking. Quinoa is naturally coated in a bitter substance called saponin. Rinsing the quinoa before cooking helps remove this coating.
    • Use fresh ingredients. The best arugula quinoa salad is made with fresh ingredients. Use fresh baby arugula, red onion, and sweet potato to ensure the best flavor and texture. The dressing is also best made with fresh garlic and black pepper.
    • Adjust the seasoning to taste. Before you mix everything together, taste the salad dressing and adjust it to suit your tastes.
    • Dress the salad just before serving. To prevent the salad from becoming soggy, it's best to dress it just before serving.
    • Plan ahead. To get a head start on preparation, make the quinoa and sweet potatoes up to 4 days in advance and the vinaigrette up to 2 weeks in advance.

    What to Serve With Arugula Quinoa Salad

    Quinoa arugula salad makes a healthy and refreshing option that works both as a main dish and a side dish.

    One of my favorite ways to serve this salad is with some additional protein. Grilled chicken, pan-seared chicken, or roasted chicken are all great options. Marinated grilled steak tips are also delicious with quinoa salad with arugula.

    For vegetarians, roasted chickpeas, tofu, or tempeh are good sources of additional plant-based protein.

    In addition to protein, you could also serve quinoa and arugula salad with some crusty sourdough bread or a side of roasted Brussels sprouts to make it a more substantial meal.

    Quinoa arugula salad in a small white bowl.

    Storage and Reheating

    How to Store

    • Room Temperature- If you're serving this quinoa salad with arugula at a dinner party, keep in mind that it should only remain at room temperature for a maximum of two hours.
    • Refrigerator- Store leftover arugula quinoa salad in an airtight container in the refrigerator for up to 3 days. If you know you'll probably have leftovers, I recommend storing each ingredient separately until ready to serve.
    • Freezer- I do not recommend freezing this arugula quinoa salad with maple dijon vinaigrette.

    Make Ahead

    While I don't recommend assembling the salad until just before serving, each component of the salad is easy to prepare ahead of time. Making each of the ingredients ahead makes this salad perfect for meal prep because all you have to do is assemble and serve!

    • Sweet Potatoes- Roast the sweet potatoes and store them in an airtight container in the refrigerator up to 4 days in advance.
    • Quinoa- Cook the quinoa ahead of time and store it in the refrigerator for up to one week before serving. Quinoa can also be frozen for up to 6 months.
    • Maple Dijon Vinaigrette- Make and store the homemade maple dijon vinaigrette dressing in the refrigerator for up to 2 weeks.
    A white bowl of arugula quinoa salad with goat cheese and sweet potato.

    Frequently Asked Questions

    What happens if you forget to rinse quinoa?

    If you forgot to rinse your quinoa, don't worry! Quinoa that hasn't been rinsed is still safe to eat but may have a slightly bitter taste. However, many brands of quinoa now come "pre-rinsed."

    Is there a substitute for goat cheese if I don't like it or can't eat it?

    Yes! Feta cheese, blue cheese, and gorgonzola cheese all make great substitutes for goat cheese. Or use dairy-free feta cheese if you follow a dairy-free or vegan diet.

    Why is my quinoa salad with arugula mushy?

    If you accidentally overcooked your quinoa, it may have a slightly mushy texture. To ensure perfectly cooked quinoa, follow the package instructions exactly as written. Additionally, allow the quinoa some time to cool before tossing it with the dressing so that it doesn't absorb too much of it.

    Can I serve this salad warm instead of chilled?

    Arugula quinoa salad is meant to be served at room temperature or lightly chilled. If the quinoa or sweet potatoes are too hot, the arugula will wilt quickly and the goat cheese will melt.

    Let's Connect!

    Be sure to leave a comment below if you have any questions. You can also connect with me on Instagram, Facebook, Pinterest, or via email at [email protected].

    More Salad Recipes

    • A white bowl filled with Mediterranean ancient grain salad.
      Mediterranean Ancient Grain Salad
    • Buffalo chicken Caesar Salad in a white bowl.
      Buffalo Chicken Caesar Salad (Grilled or Pan-Seared)
    • A small white plate of spinach Caprese salad.
      Spinach Caprese Salad

    ๐Ÿ“– Recipe

    A bowlful of arugula quinoa salad.
    Print Pin SaveSaved!

    Arugula Quinoa Salad

    This Arugula Quinoa Salad is a versatile and easy-to-make salad that can be served as either a main or side dish. Made with creamy goat cheese, crunchy walnuts, chewy dried cranberries, and roasted sweet potatoes, this healthy salad recipe is jam-packed with flavor.
    Course Main Course, Salad, Side Dish
    Cuisine American
    Prep Time 20 minutes minutes
    Cook Time 30 minutes minutes
    Total Time 50 minutes minutes
    Servings 4 servings
    Calories 496kcal
    Author Ashley Petrie, RDN, LDN

    Equipment

    • Rimmed baking sheet
    • Small saucepan
    • Mixing bowls

    Ingredients

    For the Roasted Sweet Potatoes

    • 1 large sweet potato peeled and cut into ยพ-inch cubes
    • 1 tablespoon olive oil
    • ยฝ teaspoon garlic powder
    • ยฝ teaspoon kosher salt
    • ยผ teaspoon black pepper

    For the Quinoa

    • 1 cup quinoa dry

    For the Maple Dijon Vinaigrette

    • ยผ cup extra virgin olive oil
    • 2 tablespoons apple cider vinegar
    • 1 clove garlic grated or finely minced
    • 1 tablespoon maple syrup
    • 1 tablespoon dijon mustard
    • ยฝ teaspoon kosher salt
    • ยผ teaspoon black pepper

    For the Salad

    • 4 packed cups baby arugula
    • ยฝ cup crumbled goat cheese
    • ยผ cup dried cranberries
    • ยผ cup chopped walnuts
    • ยผ cup red onion chopped

    Instructions

    Roast the Sweet Potato Cubes

    • Preheat the oven toย 425ยฐF and line a baking sheet with parchment paper. Toss the cubed sweet potatoes with olive oil and seasonings, then spread out them evenly onto the parchment-lined baking sheet. Roast for 20-25 minutes, stirring halfway through.

    Cook the Quinoa

    • While the sweet potatoes are roasting, cook one cup of quinoa according to the package instructions. Set aside to cool for a few minutes.

    Make the Maple Dijon Vinaigrette

    • While the sweet potatoes and quinoa are cooking, whisk together all of the vinaigrette ingredients until well combined. Set aside.ย 

    Assemble the Salad

    • Toss the arugula, quinoa, and sweet potatoes with the maple dijon vinaigrette in a large salad bowl until well coated. Top the salad with goat cheese, dried cranberries, walnuts, and red onion. Serve immediately.

    Notes

    • Rinse the quinoa before cooking. Quinoa is naturally coated in a bitter substance called saponin. Rinsing the quinoa before cooking helps remove this coating.
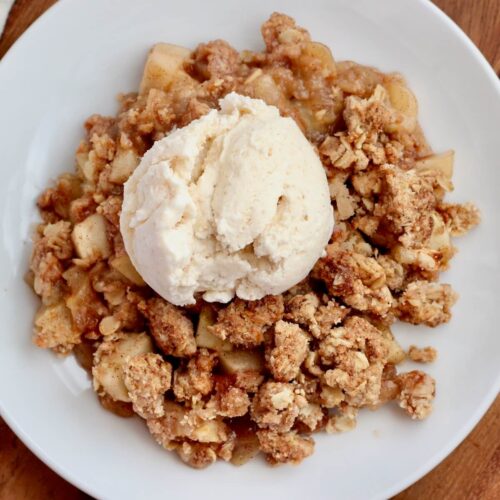
    • Adjust the seasoning to taste. Before you mix everything together, taste the salad dressing and adjust it to suit your tastes.
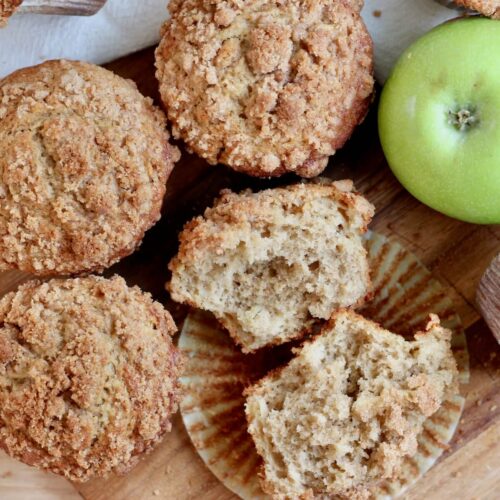
    • Dress the salad just before serving. To prevent the salad from becoming soggy, it's best to dress it just before serving.
    • Storage: Store each ingredient separately for best results. Leftovers can be stored in an airtight container for up to 3 days. Do not freeze or leave out at room temperature for longer than 2 hours.
    • Make Ahead. Prepare the quinoa up to one week in advance, the sweet potatoes up to 4 days in advance, and the vinaigrette up to 2 weeks in advance.

    Nutrition

    Serving: 1serving | Calories: 496kcal | Carbohydrates: 52g | Protein: 12g | Fat: 28g | Saturated Fat: 6g | Polyunsaturated Fat: 7g | Monounsaturated Fat: 15g | Cholesterol: 8mg | Sodium: 489mg | Potassium: 567mg | Fiber: 6g | Sugar: 16g | Vitamin C: 5mg | Calcium: 111mg | Iron: 3.4mg
    Did you try this recipe?Let me know! Comment below, or take a picture and tag me on Instagram @everydayhomemadebyashley.

    Honey Baked Beans From Scratch

    May 9, 2023

    These Honey Baked Beans are a classic and delicious summer side dish that's perfect for barbecues, potlucks, or any summer gathering. Made from scratch with dried navy beans, this homemade baked bean recipe is a healthier and more flavorful alternative to canned honey baked beans.

    A small white plate full of honey baked beans next to a casserole dish filled with the rest of the baked beans.

    Are you ready to be the star of your next summer party or barbecue? Make baked beans from scratch! No, seriously... do it!

    Sure, you could grab a can of baked beans off the shelf, but where's the fun in that? Not to mention, the taste of store-bought baked beans simply can't compare to the real deal.

    Making honey baked beans from scratch is surprisingly easy. With just a few simple ingredients and a little bit of time, you can create a sweet summer side dish that is full of flavor. And, by making your own baked beans, you have complete control over the ingredients and can adjust the sweetness level to suit your tastes.

    Plus, these sweet honey baked beans perfectly complement all of your favorite barbecue staples, including hot dogs, hamburgers, grilled chicken, and steak.

    Trust me, everyone will be asking you for this recipe at your next backyard BBQ or summer cookout.

    Disclaimer: Some links throughout this post are affiliate links. As an Amazon Associate, I earn from qualifying purchases. You can learn more by visiting my Affiliate Disclosure Page.

    Ingredients & Substitutions

    Here are some notes on the key ingredients. For the full list of ingredients, check out the recipe card below.

    • Dried Navy Beans- Soak dried navy beans overnight on the counter the day before you plan to make your honey baked beans. For a quicker option, use drained and rinsed canned navy beans. If using alternative beans like cannellini, great northern, black, or kidney beans, cooking times may vary.
    • Bacon- Thick-cut bacon adds a slightly smoky flavor to the dish.
    • Onion- Sautรฉ until caramelized to add depth of flavor to the baked beans.
    • Garlic- A few cloves of minced garlic add a subtle garlic taste.
    • Tomato Paste- Using tomato paste offers better control over the sugar content and gives the beans an intense tomato flavor. You can also use ketchup if preferred.
    • Honey- Honey is the primary sweetener in these scratch-made honey baked beans. Use the highest-quality honey you can find.
    • Brown Sugar- A touch of brown sugar gives these baked beans a caramel-like flavor and enhances the natural sweetness of the honey.
    • Molasses- Enhances the depth of flavor, adds complexity, and balances the sweetness of the honey and brown sugar.
    • Apple Cider Vinegar- Balances the sweetness of the baked beans with a bit of acidity.
    • Water- Thins out the baked bean sauce so that it mixes easily with the cooked navy beans.
    • Mustard Powder- A little mustard powder adds a tangy note to these honey baked beans.
    The ingredients to make honey baked beans. Each ingredient is labeled with text. They include bacon, apple cider vinegar, brown sugar, molasses, tomato paste, onion, navy beans, garlic, honey, mustard powder, pepper, and salt.

    Tips for Success

    • Don't skip soaking the beans. Soaking beans before cooking results in creamier, more evenly cooked beans.
    • Cook the beans until tender. Check the beans for doneness by tasting a few before you drain them to ensure they're perfectly tender.
    • Use quality ingredients. Splurge on high-quality ingredients like thick-cut bacon and pure, raw honey for the best flavor and texture.
    • Adjust the sauce before baking. Taste the sauce for sweetness and tanginess before you bake the beans. Add more sugar if you prefer a sweeter dish or more apple cider vinegar for a bit more tang.
    • Bake low and slow. Baking the beans at a low temperature for a longer time allows the flavors to develop and the sauce to thicken.
    • Rest the beans before serving. Let the baked honey beans cool and rest for a few minutes after baking to allow the sauce to thicken and the flavors to meld together.
    • Plan ahead. The beans can be soaked and cooked several days in advance for easier preparation on the day you plan to make these honey baked beans.

    How to Make Honey Baked Beans

    Here is how to make baked beans with honey.

    Step 1: Soak the beans overnight. Add the dried navy beans to a bowl and cover them with water by about 1 inch. Allow them to soak at room temperature for at least 4 hours, or preferably overnight.

    A bowl of dried navy beans soaking in water.
    Before soaking
    Dried navy beans in a bowl of water after soaking overnight.
    After soaking overnight

    Step 2: Cook the beans. Preheat the oven to 300ยฐF. Place the soaked beans in a large pot and cover completely with water. Bring to a boil, then reduce heat to low and simmer for 45 minutes, or until the beans are tender. Drain in a colander and set aside.

    Dried navy beans in a pot of water on the stove.
    Cooked navy beans draining in a red colander.

    Step 3: Sautรฉ the bacon. While the beans are cooking, sautรฉ the diced bacon over medium heat until browned and crispy. Add the diced onion and minced garlic and cook until the onion is softened and caramelized, about 5-7 minutes. Remove from heat and drain any excess bacon fat, if necessary.

    Chopped bacon, onion, and garlic sautรฉing in a cast iron skillet.

    Step 4: Make the sauce. Whisk together the water, tomato paste, sweeteners, vinegar, and seasonings in a 2-quart baking dish. Add the cooked bacon, onion, and garlic to the sauce and stir to combine.

    The baked bean sauce mixed together in a glass casserole dish.
    The honey baked bean sauce mixed with the sautรฉed bacon mixture.

    Step 5: Bake the beans. Add the cooked navy beans to the casserole dish. Stir until the beans are well coated with the sauce. Cover the baking dish with a lid or aluminum foil. Bake covered for 2 hours. Then, remove the cover and bake for an additional 30 minutes or until the beans reach your desired consistency.

    The cooked navy beans mixed with the sauce in a casserole dish before baking.
    The cooked honey baked beans.

    How to Store

    Store leftover honey baked beans in the refrigerator for up to 4 days or freeze for up to 3 months.

    A round glass casserole dish filled with honey baked beans. There is a large serving spoon sticking out of the beans to the left.

    Let's Connect!

    Be sure to leave a comment below if you have any questions. You can also connect with me on Instagram, Facebook, Pinterest, or via email at [email protected].

    More Summer Side Dishes

    • Three pieces of sourdough discard cornbread on a plate with a pat of butter on top.
      Sourdough Discard Cornbread (No Added Flour)
    • A sourdough corn muffin split in half on the wrapper with a piece of butter on each half.
      Sourdough Corn Muffins
    • Red cabbage slaw on shrimp tacos.
      Creamy Red Cabbage Slaw for Tacos (No Mayo)
    • Rice cooker cilantro lime rice on a white dinner plate with shrimp and corn.
      Cilantro Lime Rice (Rice Cooker)

    ๐Ÿ“– Recipe

    A small white plateful of honey baked beans.
    Print Pin SaveSaved!

    Honey Baked Beans

    These Honey Baked Beans are a classic and delicious summer side dish that's perfect for barbecues, potlucks, or any summer gathering. Made from scratch with dried navy beans, this homemade baked bean recipe is a healthier and more flavorful alternative to canned honey baked beans.
    Course Side Dish
    Cuisine American
    Prep Time 15 minutes minutes
    Cook Time 3 hours hours 25 minutes minutes
    Soak Time 4 hours hours
    Total Time 7 hours hours 40 minutes minutes
    Servings 8 servings
    Calories 246kcal
    Author Ashley Petrie, RDN, LDN

    Equipment

    • 2-quart baking dish with lid

    Ingredients

    • 1 ยผ cups (ยฝ pound) navy beans dry
    • 2 slices thick-cut bacon chopped
    • 1 large yellow onion chopped
    • 2 cloves garlic minced
    • 1 cup water
    • 6-ounce can (heaping ยฝ cup) tomato paste
    • ยฝ cup honey
    • ยผ cup dark brown sugar packed
    • 2 tablespoons unsulphured molasses
    • 2 tablespoons apple cider vinegar
    • 2 teaspoons mustard powder
    • 1 teaspoon kosher salt
    • ยฝ teaspoon black pepper

    Instructions

    • One Day Before: Add the dried navy beans to a bowl and cover them with water by about 1 inch. Allow them to soak at room temperature for at least 4 hours, or preferably overnight.
      1 ยผ cups (ยฝ pound) navy beans
    • Preheat the oven to 300ยฐF. Place the soaked beans in a large pot and cover completely with water. Bring to a boil, then reduce heat to low and simmer for 45 minutes, or until the beans are tender. Drain in a colander and set aside.
    • While the beans are cooking, sautรฉ the diced bacon over medium heat until browned and crispy. Add the diced onion and minced garlic and cook until the onion is softened and caramelized, about 5-7 minutes. Remove from heat and drain any excess bacon fat, if necessary.
      2 slices thick-cut bacon, 1 large yellow onion, 2 cloves garlic
    • Whisk together the water, tomato paste, sweeteners, vinegar, and seasonings in a 2-quart baking dish. Add the cooked bacon, onion, and garlic to the sauce and stir to combine.
      1 cup water, 6-ounce can (heaping ยฝ cup) tomato paste, ยฝ cup honey, ยผ cup dark brown sugar, 2 tablespoons unsulphured molasses, 2 tablespoons apple cider vinegar, 2 teaspoons mustard powder, 1 teaspoon kosher salt, ยฝ teaspoon black pepper
    • Add the cooked navy beans to the casserole dish. Stir until the beans are well coated with the sauce. Cover the baking dish with a lid or aluminum foil. Bake covered for 2 hours. Then, remove the cover and bake for an additional 30 minutes or until the beans reach your desired consistency.

    Notes

    • Adjust the sauce before baking.ย Taste the sauce for sweetness and tanginess before you bake the beans. Add more sugar if you prefer a sweeter dish or more apple cider vinegar for a bit more tang.
    • Storage: Store leftovers in an airtight container in the refrigerator for up to 4 days or in the freezer for up to 3 months.
    • Make Ahead: Prepare the entire dish up to 3 days in advance or soak and cook the navy beans up to 3 days in advance.

    Nutrition

    Serving: 1serving | Calories: 246kcal | Carbohydrates: 51g | Protein: 8g | Fat: 2.5g | Saturated Fat: 1g | Cholesterol: 4mg | Sodium: 207mg | Potassium: 633mg | Fiber: 6g | Sugar: 32g | Vitamin C: 6mg | Calcium: 65mg | Iron: 2.7mg
    Did you try this recipe?Let me know! Comment below, or take a picture and tag me on Instagram @everydayhomemadebyashley.

    Marinated Grilled Chicken Breast (How to Grill Chicken)

    May 4, 2023

    This Grilled Chicken Breast recipe is made with boneless, skinless chicken breast and a homemade red wine vinaigrette marinade for the most tender, juicy, and flavorful grilled chicken you'll ever try.

    Three grilled chicken breasts on a white dinner plate with rice and asparagus.

    Grilled chicken is a summertime staple. Whether you're at home or at a backyard barbecue, it's hard not to get excited when marinated grilled chicken is on the menu.

    And today, I'm sharing my favorite grilled chicken breast recipe with you!

    Marinated in a savory red wine vinaigrette dressing, these chicken breasts are tender, succulent, and oh-so flavorful. And best of all, grilled chicken breasts pair well with just about any side dish. So, it's easy to turn them into a quick and easy dinner recipe the whole family will love.

    If you want to learn how to make perfectly grilled chicken breast using my go-to method, keep reading. With just a few simple steps, you'll have juicy and flavorful chicken that's sure to impress everybody at your next cookout.

    Disclaimer: Some links throughout this post are affiliate links. As an Amazon Associate, I earn from qualifying purchases. You can learn more by visiting my Affiliate Disclosure Page.

    Why You'll Love This Recipe

    • Perfectly Tender- By pounding the chicken breasts and marinating them in vinaigrette, the meat fibers are broken down and infused with flavor, resulting in tender, juicy, and moist chicken when grilled.
    • Flavorful- Infused with tangy red wine vinegar, garlic, and herbs, this easy grilled chicken recipe is bursting with flavor.
    • Easy to Make- Marinating chicken breast is a fuss-free way to add flavor, without the need for special skills, techniques, or equipment.
    • Versatile- Grilled chicken breast pairs well with just about any side dish you can think of. It's also a fantastic ingredient to have on hand to create other dishes throughout the week.
    • Grilling Season Staple- In my house, grilled chicken breast is a must-have during the summer season. It just wouldn't be complete without it!

    Ingredient Notes

    Here are some notes on the key ingredients. For the full list of ingredients, check out the recipe card below.

    • Chicken Breast- Pounding the chicken breast to an even thickness is crucial for this recipe. It ensures even cooking and tenderizes the meat for a more juicy and flavorful grilled chicken breast.
    • Red Wine Vinegar- With its bold, tangy, and slightly fruity flavor, red wine vinegar is one of my favorite chicken marinades.
    • Extra Virgin Olive Oil- The rich, peppery flavor of extra virgin olive oil rounds out the sharpness of the vinegar.
    • Dijon Mustard- Dijon mustard not only adds a delightful touch of tanginess to your chicken marinade, but it also serves as an emulsifier.
    • Honey- Balances the acidity of the vinegar by adding a touch of sweetness to the chicken marinade.
    • Garlic- Freshly sliced garlic packs a flavorful punch in homemade chicken marinades.
    • Italian Seasoning- Adds a savory, herby flavor to the marinade.
    • Kosher Salt- Kosher salt is a type of salt that doesn't usually contain any extra stuff like sugar or anti-clumping agents.
    • Black Pepper- Use freshly ground black pepper for the best flavor.
    The ingredients to make grilled chicken breast. Each ingredient is labeled with text. They include chicken breast, honey, garlic, red wine vinegar, olive oil, Italian seasoning, dijon mustard, pepper, and salt.

    Substitutions and Variations

    Here are a few ways you can try customizing this easy grilled chicken breast recipe to fit your diet and taste preferences.

    Substitutions

    • Chicken Breast- Use chicken thighs or chicken drumsticks in place of boneless, skinless chicken breasts. Keep in mind that cooking times may vary depending on the substitute used, so be sure to adjust accordingly.
    • Red Wine Vinegar- You can substitute red wine vinegar with white wine vinegar, apple cider vinegar, white distilled vinegar, or balsamic vinegar in the chicken marinade.
    • Extra Virgin Olive Oil- Experiment with other neutral-flavored oils, such as avocado oil, grapeseed oil, sunflower oil, or canola oil.
    • Dijon Mustard- Substitute dijon mustard with whole grain, honey, yellow or brown mustard, or 2 teaspoons of dry mustard powder.
    • Honey- Swap honey for maple syrup, agave syrup, brown sugar, or granulated sugar, or omit the sweetener altogether.
    • Garlic- Substitute fresh garlic with ยฝ teaspoon of garlic powder.
    • Italian Seasoning- Replace Italian seasoning with dried oregano or create a custom seasoning blend using any dried herbs you have in your spice cabinet.
    Three marinated and grilled chicken breasts on a white dinner plate with asparagus and rice.

    Variations

    • Fresh Herbs- Chopped fresh herbs like thyme, rosemary, or basil can add a burst of fresh flavor to the marinade.
    • Citrus- Mix the red wine vinegar with some lemon juice, lime juice, or orange juice for a bright, citrusy chicken marinade.
    • Balsamic- Create a marinade with a sweet and complex taste by mixing some balsamic vinegar with red wine vinegar.
    • Soy- Add a splash of soy sauce to the marinade for a savory, umami flavor.
    • Spicy- Add some heat to your chicken marinade with red pepper flakes or cayenne pepper.
    • Smoky- You can add smoked paprika, chipotle powder, or adobo sauce to the marinade for a smoky and spicy taste.

    Equipment Notes

    Here are some notes on any special equipment I used to make this recipe.

    • Grill- I use a propane gas grill to grill my marinated chicken breasts.
    • Meat Mallet- Using a meat mallet to pound the chicken is crucial to achieving evenly cooked and tender chicken breasts.
    • Meat Thermometer- Using a meat thermometer to check the temperature of the chicken helps you know when it's fully cooked.

    How to Make Grilled Chicken Breast

    Here is how to make grilled chicken breast on a gas grill.

    Step 1: Make the red wine vinaigrette marinade. In a large mixing bowl, whisk together all ingredients except the olive oil. Place the mixing bowl on top of a damp dish towel to keep it steady. While whisking continuously, slowly drizzle in the olive oil until smooth. Set aside.

    Red wine vinegar salad dressing whisked together in a glass bowl.

    Step 2: Prepare the chicken breast. Cut the chicken breast lengthwise into equal-sized pieces, trimming and discarding any excess fat. Lay a piece of plastic wrap over the chicken breasts and pound chicken into an even, ยฝ-inch thickness.

    Four trimmed and cut chicken breasts on an orange cutting board.
    Four pounded chicken breasts on an orange cutting board.

    Step 3: Marinate the chicken breast. Place chicken breast into the bowl of marinade and toss until evenly coated. Cover the bowl with beeswax wrap or plastic wrap and refrigerate for at least 2 hours or up to 2 days. You can turn the chicken breast every few hours for more even marinade coverage.

    Chicken breasts marinating in red wine vinaigrette in a blue bowl.

    Step 4: Preheat the grill. Remove the marinated chicken breasts from the refrigerator about 30 minutes prior to cooking to bring them closer to room temperature. Preheat grill on high heat for 15 minutes.

    Step 5: Grill chicken breasts. Reduce the heat to medium-high. Remove the chicken breast from the marinade, allowing the excess marinade to drip back into the bowl. Place the chicken breasts on the grill and close the lid. Cook chicken for about 4-5 minutes per side. The chicken is done when it reaches an internal temperature of 165โ„‰.

    Chicken breast cooking on a grill.

    Step 6: Rest the chicken. Transfer the chicken breasts to a plate and allow them to rest for 10 minutes before serving.

    Several grilled chicken breasts resting on a gray plate.

    Tips for Success

    • Marinate for at least 2 hours. Thinly pounded chicken breasts can be marinated in as little as 30 minutes, but I recommend at least 2 hours. However, if you've planned ahead, overnight is even better.
    • Take the chicken out before cooking. Take the chicken out of the refrigerator 30 minutes before grilling to allow it to come to room temperature.
    • Preheat the grill. To sear the outside of the chicken while keeping the inside tender and juicy, it's important to get the grill grates really hot. This will also help you achieve those classic grill marks.
    • Don't overcook the chicken. To avoid tough, dry chicken breasts, it's important to cook them to the correct temperature. Use a meat thermometer to ensure that the internal temperature of the chicken reaches 165ยฐF. This ensures that your chicken is safe to eat and helps it retain its juiciness.
    • Let the chicken rest after cooking. Letting the chicken rest for a few minutes after grilling will help to keep them juicy and tender. Cover them loosely with foil to keep them warm while they rest.

    What to Serve With Grilled Chicken Breast

    Summer is the perfect time to grill up some juicy chicken breasts and enjoy them with a variety of delicious side dishes.

    Grilled chicken breast naturally pairs well with a variety of leafy green salads and other cold salads. Some of my favorites include Strawberry Spinach Salad, Spinach Caprese Salad, and Caesar Salad.

    If you want to serve pasta as a side dish, try this Pesto Rigatoni. The bright, fresh flavors of the pesto complement the grilled chicken perfectly. Alternatively, this Sourdough Mac and Cheese is a satisfying side dish for grilled chicken breast.

    Finally, pairing your tender grilled chicken breast with grilled, roasted, or sautรฉed vegetables, such as asparagus, Brussels sprouts, or green beans creates a wonderful combination of textures and flavors.

    Sliced grilled chicken breast on top of a leafy green salad.

    How to Use Leftover Grilled Chicken Breast

    Whenever I grill chicken, I always make enough to have leftovers. Grilled chicken breast is a great ingredient to have on hand for quick and easy meals throughout the week.

    Here are a few of my favorite ways to use leftover grilled chicken breast:

    • Quesadillas, burritos, tacos, enchiladas, and nachos
    • Chicken salad sandwiches
    • Grilled chicken sandwich
    • Leafy green salads topped with grilled chicken
    • Stir fries or fried rice
    • Pasta dishes
    • Chicken noodle soup, chicken tortilla soup, or chicken ramen

    Storage and Reheating

    How to Store

    • Refrigerator- According to the USDA, grilled chicken breast can be stored in the refrigerator in an airtight container for 3-4 days.
    • Freezer- Freeze leftover grilled chicken by wrapping them tightly in plastic wrap and storing them inside a freezer-safe plastic bag or container for up to 4 months.

    How to Reheat

    When reheating, let the leftover chicken sit out for 20-30 minutes to reach room temperature. This helps prevent it from overcooking and drying out.

    • Stovetop- Add a small amount of water or chicken stock to a skillet and lay the leftover grilled chicken breast in a single layer in the liquid. Cover the skillet with a lid and heat the chicken for about 3-4 minutes per side or until fully warmed through.
    • Oven- Preheat the oven to 350ยฐF. Place the leftover grilled chicken in a baking dish and cover with foil. Drizzle with a small amount of water or chicken stock for added moisture. Bake for 10-15 minutes or until heated through.
    • Microwave- Place the chicken breasts on a microwave-safe plate and cover with a damp paper towel. Microwave on HIGH for 30-60 seconds or until fully heated through.
    • Grill- Preheat the grill to medium-high heat. Brush the chicken with some oil or marinade and grill for 3-4 minutes on each side or until heated through.
    • Air Fryer- Preheat your air fryer to 375ยฐF. Place the leftover chicken in a single layer in the air fryer basket. Heat for 3-5 minutes, flipping halfway through.

    Make Ahead

    Save yourself some time and effort by preparing the red wine vinaigrette marinade in advance and storing it in the refrigerator for up to 2 weeks. This is especially helpful if you're planning on meal prepping or hosting a barbecue, as you'll be able to focus on other tasks while the chicken is marinating.

    Grilled chicken breast with asparagus and rice on a white dinner plate.

    Frequently Asked Questions

    How long do you grill chicken breast?

    The amount of time it takes to grill chicken breast will depend on the thickness of the chicken breast. For this recipe, I recommend pounding the chicken breasts out into an even ยฝ-inch thickness so that they cook in about 8-10 minutes total.

    How do you know when grilled chicken breast is done?

    Use an instant read thermometer to know exactly when your grilled chicken breast is done cooking. It should reach an internal temperature of 165ยฐF.

    How do you grill chicken breast without drying it out?

    To achieve tender and juicy grilled chicken, follow these simple steps: Use a meat thermometer to avoid overcooking, marinate the chicken in an acidic mixture, and pound it to an even thickness.

    How often do you flip chicken on the grill?

    When grilling chicken breast, flip it only once, about halfway through cooking.

    Let's Connect!

    Be sure to leave a comment below if you have any questions. You can also connect with me on Instagram, Facebook, Pinterest, or via email at [email protected].

    More Grilling Recipes

    • Sliced grilled steak tips next to asparagus and rice on a white plate.
      How to Make Grilled Steak Tips (Marinade)
    • Three tequila lime shrimp tacos with red cabbage slaw on a plate.
      Easy Tequila Lime Shrimp Tacos
    • Buffalo chicken Caesar Salad in a white bowl.
      Buffalo Chicken Caesar Salad (Grilled or Pan-Seared)

    ๐Ÿ“– Recipe

    Three grilled chicken breasts on a dinner plate next to a serving of rice.
    Print Pin SaveSaved!

    Grilled Chicken Breast

    This Grilled Chicken Breast recipe is made with boneless, skinless chicken breast and a homemade red wine vinaigrette marinade for the most tender, juicy, and flavorful grilled chicken you'll ever try.
    Course Main Course
    Cuisine American
    Prep Time 30 minutes minutes
    Cook Time 10 minutes minutes
    Marinate Time 2 hours hours
    Total Time 2 hours hours 40 minutes minutes
    Servings 6 servings
    Calories 264kcal
    Author Ashley Petrie, RDN, LDN

    Equipment

    • Gas grill
    • Meat mallet
    • Meat thermometer

    Ingredients

    For the Red Wine Vinaigrette Marinade

    • ยผ cup red wine vinegar
    • 2 cloves garlic thinly sliced
    • 1 tablespoon dijon mustard
    • ยฝ teaspoon honey
    • ยฝ teaspoon Italian seasoning
    • ยฝ teaspoon kosher salt
    • ยผ teaspoon black pepper
    • ยฝ cup extra virgin olive oil

    For the Grilled Chicken Breast

    • 2 pounds boneless, skinless chicken breast

    Instructions

    • In a large mixing bowl, whisk together all ingredients except the olive oil.ย Place the mixing bowl on top of a damp dish towel to keep it steady. While whisking continuously, slowly drizzle in the olive oil until smooth. Set aside.
      ยผ cup red wine vinegar, 2 cloves garlic, 1 tablespoon dijon mustard, ยฝ teaspoon honey, ยฝ teaspoon Italian seasoning, ยฝ teaspoon kosher salt, ยผ teaspoon black pepper, ยฝ cup extra virgin olive oil
    • Cut the chicken breast lengthwise into equal-sized pieces, trimming and discarding any excess fat. Lay a piece of plastic wrap over the chicken breasts and pound them into an even, ยฝ-inch thickness.
      2 pounds boneless, skinless chicken breast
    • Add the chicken breast to the bowl of marinade and toss until evenly coated. Cover the bowl with beeswax wrap or plastic wrap and refrigerate for at least 2 hours or up to 2 days. You can turn the chicken breast every few hours for more even marinade coverage.
    • Remove the marinated chicken breasts from the refrigerator about 30 minutes prior to cooking to bring them closer to room temperature. Preheat your grill on high heat for 15 minutes.
    • Reduce the heat to medium-high. Remove the chicken breast from the marinade, allowing the excess marinade to drip back into the bowl. Place the chicken breasts on the grill and close the lid. Cook chicken for about 4-5 minutes per side. The chicken is done when it reaches an internal temperature of 165โ„‰.
    • Transfer the chicken breasts to a plate and allow them to rest for 10 minutes before serving.

    Notes

    • Storage: Store leftovers in an airtight container in the refrigerator for up to 4 days or in the freezer for up to 4 months.
    • Make Ahead: Prepare the red wine vinaigrette marinade up to 2 weeks in advance.

    Nutrition

    Serving: 1serving | Calories: 264kcal | Carbohydrates: 0.5g | Protein: 34g | Fat: 13g | Saturated Fat: 2g | Polyunsaturated Fat: 1.5g | Monounsaturated Fat: 8g | Cholesterol: 110mg | Sodium: 145mg | Potassium: 511mg | Sugar: 0.5g | Calcium: 10mg | Iron: 0.7mg
    Did you try this recipe?Let me know! Comment below, or take a picture and tag me on Instagram @everydayhomemadebyashley.

    How to Make Grilled Steak Tips (Marinade)

    May 4, 2023

    These Grilled Steak Tips are marinated in a red wine vinaigrette for the most tender, juicy, and flavorful grilled steak you'll ever try. Pair with potatoes, salad, or grilled vegetables for an easy steak tip dinner you'll want to have on repeat all summer long.

    Sliced grilled steak tips next to asparagus spears on a white dinner plate.

    As a New Englander, grilled steak tips have been a summertime staple for as long as I can remember. And it was only recently I discovered that steak tips are not well-known outside of New England.

    Not only was I shocked, but also sad for everyone who has never had the pleasure of trying the amazingness that is marinated and grilled steak tips.

    So, I'm here to change that by sharing my favorite grilled steak tip recipe with you!

    Marinated grilled sirloin steak tips are my favorite way to enjoy steak. The marinade tenderizes and infuses the steak with flavor before grilling, resulting in juicy perfection. The tangy, savory marinade and smoky char from the grill create an irresistible combination of flavors.

    So, whether you're a lifelong New Englander like me or just looking to try something new, keep reading for my best grilled steak tips recipe.

    Let's fire up the grill and get cooking!

    Disclaimer: Some links throughout this post are affiliate links. As an Amazon Associate, I earn from qualifying purchases. You can learn more by visiting my Affiliate Disclosure Page.

    What Are Steak Tips?

    Steak tips are a quintessential summer dish that can be found all over New England. These tender and juicy pieces of sirloin beef are perfect for marinating and grilling, making them a backyard BBQ staple.

    Sirloin steak tips are usually sold in long strips that can be cut into smaller pieces for grilling or serving.

    Why You'll Love This Recipe

    • Perfectly Tender- Marinating steak tips in vinaigrette tenderizes them, keeping them juicy and moist during grilling.
    • Flavorful- Well-marinated grilled steak tips have a delicious, complex flavor that's hard to beat.
    • Easy to Make- Marinating steak tips is a simple and easy way to add flavor to your meal. And, best of all, it doesn't require any special cooking skills, techniques, or equipment.
    • Versatile- Steak tips pair well with a wide variety of side dishes, meaning you can create a steak tip dinner that will please just about everyone in your family.
    • Grilling Season Staple- Is it even summer if you don't make grilled steak tips? Not in my household, it isn't!

    Ingredient Notes

    Here are some notes on the key ingredients. For the full list of ingredients, check out the recipe card below.

    • Sirloin Steak Tips- Sirloin steak tips are a summer staple in New England. They're typically sold in long strips that can be cut into smaller "tips" for grilling. However, I suggest keeping your steak tip strips whole until after grilling for easier marinating and grilling.
    • Red Wine Vinegar- Red wine vinegar is one of my favorite ingredients to use in a steak marinade, with its punchy, tangy, and slightly fruity flavor profile.
    • Extra Virgin Olive Oil- With its robust, peppery flavor, extra virgin olive oil is the perfect complement to the zesty tang of red wine vinegar in a steak marinade.
    • Dijon Mustard- Dijon mustard adds a slightly tangy flavor and emulsifies the marinade.
    • Honey- Adds sweetness to balance the vinegar's acidity.
    • Garlic- Fresh garlic adds so much flavor to this homemade steak marinade. I prefer to thinly slice the garlic so that it's easier to remove before grilling.
    • Italian Seasoning- Adds a savory, herby flavor to the marinade.
    • Kosher Salt- Kosher salt is typically free from any added ingredients like sugar or anti-clumping agents.
    • Black Pepper- Freshly ground black pepper adds a delightful spicy and peppery flavor.
    The ingredients to make grilled steak tips. Each ingredient is labeled with text. They include sirloin steak, honey, garlic, red wine vinegar, olive oil, Italian seasoning, dijon mustard, pepper, and salt.

    Substitutions and Variations

    Here are a few ways you can try customizing this easy grilled steak tips recipe to fit your diet and taste preferences.

    Substitutions

    • Sirloin Steak Tips- Use flank steak, skirt steak, tri-tip steak, chuck roast, filet mignon, New York strip steak, or ribeye in place of sirloin tips.
    • Red Wine Vinegar- Swap red wine vinegar for white wine vinegar, apple cider vinegar, white distilled vinegar, or balsamic vinegar.
    • Extra Virgin Olive Oil- Substitute extra virgin olive oil for any neutral-flavored oil you prefer. Avocado oil, grapeseed oil, sunflower oil, or canola oil are great options.
    • Dijon Mustard- Use whole grain mustard, honey mustard, yellow mustard, or brown mustard to replace dijon mustard. Alternatively, use 2 teaspoons of dry mustard powder.
    • Honey- Swap honey for maple syrup, agave syrup, brown sugar, or granulated sugar. Or you can leave the sweetener out entirely if preferred.
    • Garlic- Substitute fresh garlic with ยฝ teaspoon of garlic powder.
    • Italian Seasoning- Dried oregano can be swapped for Italian seasoning. Or create your own seasoning blend with whichever dried herbs you have on hand.
    Marinated and grilled steak tips on a white dinner plate with white rice and asparagus.

    Variations

    • Lemon- Mix together red wine vinegar and lemon juice for a bright, citrusy steak marinade that pairs well with fresh greens and roasted vegetables.
    • Balsamic- Combine red wine vinegar with balsamic vinegar for a marinade with a slightly sweeter, more complex flavor.
    • Soy- Replace the kosher salt with soy sauce, the red wine vinegar with rice wine vinegar, and the Italian seasoning with ground ginger for an Asian-inspired marinade.
    • Spicy- Add some heat to your steak marinade with red pepper flakes or a diced jalapeรฑo pepper.
    • Smoky- Smoked paprika, chipotle powder, or adobo sauce will give the marinade a smoky and spicy flavor.

    Equipment Notes

    Here are some notes on any special equipment I used to make this recipe.

    • Grill- I use a propane gas grill to grill my marinated steak tips.
    • Meat Thermometer- Using a meat thermometer to check the temperature of the steak helps you know when it's cooked to your desired doneness.

    How to Make Grilled Steak Tips

    Here is how to make grilled steak tips on a gas grill.

    Step 1: Make the red wine vinaigrette marinade. In a large mixing bowl, whisk together all ingredients except the olive oil. Place the mixing bowl on top of a damp dish towel to keep it steady. While whisking continuously, slowly drizzle in the olive oil until smooth.

    Red wine vinegar salad dressing whisked together in a glass bowl.

    Step 2: Marinate the steak tips. Add the steak tips to the bowl and toss until evenly coated with the marinade. Cover the bowl with beeswax wrap or plastic wrap and refrigerate for at least 4 hours or up to 2 days. You can turn the steak tips every few hours for more even marinade coverage.

    Raw strips of sirloin steak marinating in a red wine vinaigrette in a glass bowl.

    Step 3: Preheat the grill. Remove the steak tips from the refrigerator about 30 minutes prior to cooking to bring them closer to room temperature. Preheat your grill on high heat for 15 minutes.

    Step 4: Grill the steak tips. Reduce the heat to medium-high. Remove the steak tips from the marinade, allowing the excess marinade to drip back into the bowl. Place the steak on the grill and close the lid. Cook steak tips for about 4 minutes per side for medium-rare doneness. The actual cook time will depend on the thickness of the steak and your desired doneness.

    Strips of sirloin steak cooking on a grill.

    Step 5: Rest the steak. Transfer the steak tips to a plate and allow them to rest for 10 minutes before cutting them into smaller pieces.

    Strips of grilled sirloin steak tips resting on a gray plate.

    Steak Doneness Chart

    DonenessRareMedium-RareMediumMedium-WellWell-Done
    Temperature120-125ยฐF130-135ยฐF140-145ยฐF150-155ยฐF160ยฐF+
    Cook Time (approx.)3 minutes per side4 minutes per side5 minutes per side6 minutes per side8-10 minutes per side

    Tips for Success

    • Choose the right cut of meat. The best steak tips are made with sirloin steak, but other cuts of beef can also be used. Choose steak that is tender and flavorful with a little marbling of fat throughout.
    • Cut the steak into tips after grilling. I prefer to marinate and grill my steak tips in larger strips instead of smaller pieces. This makes it easier to handle when marinating and grilling and also makes it easier to achieve your desired doneness.
    • Marinate for at least 4 hours. Steak tips are often thick and benefit from a longer marinating time. I recommend at least 4 hours but overnight is even better.
    • Preheat the grill. To sear the outside of the steak while keeping the inside tender and juicy, it's important to get the grill grates really hot.
    • Don't overcook the steak. Overcooking the steak tips can make them tough and chewy. Use a meat thermometer to check the internal temperature of the steak, and remove them from the grill when they reach your desired level of doneness.
    • Let the steak rest after cooking. Letting the beef tips rest for a few minutes after grilling will help to keep them juicy and tender. Cover them loosely with foil to keep them warm while they rest.
    • Slice against the grain. When slicing the steak tips, be sure to cut against the grain. This will help to make them more tender and easier to chew.

    What to Serve With Grilled Steak Tips

    Summer is the perfect time to grill up delicious steak tips and enjoy them with some mouthwatering side dishes.

    A classic side that pairs well with grilled steak tips is potatoes. Whether you like them baked, mashed, roasted, or in potato salad, you really can't go wrong with steak and potatoes. Sweet potatoes are also a great option for a sweet and savory twist.

    Salads are another refreshing and healthy side dish that pairs perfectly with grilled steak tips. Spinach Caprese salad, strawberry spinach salad, Caesar salad, or a simple green salad with a vinaigrette dressing can add a light and fresh element to the meal.

    Alternatively, a hearty pasta salad or ancient grain salad can be a satisfying side that complements the grilled meat. Additionally, honey baked beans provide a sweet and tangy contrast to the rich steak tips.

    Slices of medium rare grilled steak tips on a white dinner plate with asparagus and rice.

    Storage and Reheating

    How to Store

    • Refrigerator- According to the USDA, grilled steak tips can be stored in the refrigerator in an airtight container for 3-4 days.
    • Freezer- Freeze leftover steak tips by wrapping them tightly in plastic wrap and storing them inside a freezer-safe plastic bag or container for up to 6 months.

    How to Reheat

    To reheat steak, it's best to use medium-rare cooked steak. When reheating, let the leftover steak sit out to reach room temperature. This helps prevent overcooking and drying out.

    • Stovetop- Heat a skillet over medium heat and add a little bit of oil. Once hot, add the steak tips and cook for 2-3 minutes on each side, or until they are heated through.
    • Oven- Preheat your oven to 250ยฐF. Place your steak tips on a baking sheet and cover them with foil to prevent them from drying out. Heat them for about 15-20 minutes or until they reach your desired temperature.
    • Microwave- Place your steak tips on a microwave-safe dish and cover them with a damp paper towel or lid. Heat on HIGH for 30-60 seconds or until they are hot.
    • Grill- Preheat the grill to medium-high heat. Add the steak tips and cook for 2-3 minutes per side or until they are warmed through.
    • Air Fryer- Preheat your air fryer to 350ยฐF. Place the leftover steak tips in a single layer in the air fryer basket. Heat for 3-5 minutes, flipping halfway through.

    Make Ahead

    Make the red wine vinaigrette marinade ahead of time and store it in the fridge for up to 2 weeks. This saves time and effort, especially if you're meal prepping or hosting a backyard barbecue.

    Grilled steak tips, asparagus, and rice on a white dinner plate.

    Frequently Asked Questions

    How long do you grill steak tips?

    How long you grill steak tips will depend on your desired doneness and the thickness of the steak. On average, steak tips need to cook for 4 minutes per side to achieve medium-rare doneness.

    See the "Steak Doneness Chart" above for more details.

    How hot should the grill be for steak tips?

    Preheat your grill over high heat for 15 minutes before reducing the heat to medium-high and adding the steak tips. You want the grill to be around 500ยฐF for grilling steak tips.

    Do you grill steak tips open or closed?

    Keep the lid closed while grilling steak tips so that the temperature of the grill stays consistently around 500ยฐF.

    How do you keep steak tips tender?

    Marinating the steak tips overnight and not overcooking them is key to keeping them tender. The acid and salt in the marinate help break down the protein, tenderizing it.

    How do you know when steak tips are done?

    Use a meat thermometer and refer to the "Steak Doneness Chart" above to know when your steak tips are done. For medium-rare steak tips, cook them for about 4 minutes per side or until their internal temperature reaches about 130-135ยฐF.

    Let's Connect!

    Be sure to leave a comment below if you have any questions. You can also connect with me on Instagram, Facebook, Pinterest, or via email at [email protected].

    More Grilling Recipes

    • Three grilled chicken breasts on a dinner plate next to a serving of rice.
      Marinated Grilled Chicken Breast (How to Grill Chicken)
    • Two skewers of Old Bay grilled shrimp on a white plate with rice and corn on the cob.
      Old Bay Grilled Shrimp Skewers
    • Grilled sourdough pizza topped with tomato sauce, mozzarella cheese, and basil on a gas grill.
      Grilled Sourdough Pizza (Gas Grill)

    ๐Ÿ“– Recipe

    Sliced grilled steak tips next to asparagus and rice on a white plate.
    Print Pin SaveSaved!

    Grilled Steak Tips

    These Grilled Steak Tips are marinated in a red wine vinaigrette for the most tender, juicy, and flavorful grilled steak you'll ever try. Pair with potatoes, salad, or grilled vegetables for an easy steak tip dinner you'll want to have on repeat all summer long.
    Course Main Course
    Cuisine American
    Prep Time 30 minutes minutes
    Cook Time 10 minutes minutes
    Marinate Time 4 hours hours
    Total Time 4 hours hours 40 minutes minutes
    Servings 4 servings
    Calories 471kcal
    Author Ashley Petrie, RDN, LDN

    Equipment

    • Gas grill

    Ingredients

    For the Red Wine Vinaigrette Marinade

    • ยผ cup red wine vinegar
    • 2 cloves garlic thinly sliced
    • 1 tablespoon dijon mustard
    • ยฝ teaspoon honey
    • ยฝ teaspoon Italian seasoning
    • ยฝ teaspoon kosher salt
    • ยผ teaspoon black pepper
    • ยฝ cup extra virgin olive oil

    For the Steak Tips

    • 1 ยฝ pounds sirloin steak tips

    Instructions

    • In a large mixing bowl, whisk together all ingredients except the olive oil.ย Place the mixing bowl on top of a damp dish towel to keep it steady. While whisking continuously, slowly drizzle in the olive oil until smooth.
      ยผ cup red wine vinegar, 2 cloves garlic, 1 tablespoon dijon mustard, ยฝ teaspoon honey, ยฝ teaspoon Italian seasoning, ยฝ teaspoon kosher salt, ยผ teaspoon black pepper, ยฝ cup extra virgin olive oil
    • Add the steak tips to the bowl and toss until evenly coated with the marinade. Cover the bowl with beeswax wrap or plastic wrap and refrigerate for at least 4 hours or up to 2 days. You can turn the steak tips every few hours for more even marinade coverage.
      1 ยฝ pounds sirloin steak tips
    • Remove the steak tips from the refrigerator about 30 minutes prior to cooking to bring them closer to room temperature. Preheat your grill on high heat for 15 minutes.
    • Reduce the heat to medium-high. Remove the steak tips from the marinade, allowing the excess marinade to drip back into the bowl. Place the steak on the grill and close the lid. Cook the steak tips for about 4 minutes per side for medium-rare doneness. The actual cook time will depend on the thickness of the steak and your desired doneness.
    • Transfer the steak tips to a plate and allow them to rest for 10 minutes before cutting them into smaller pieces.

    Notes

    • Doneness Temperatures: Rare- 120-125ยฐF; Medium-Rare- 130-135ยฐF; Medium- 140-145ยฐF; Medium-Well- 150-155ยฐF; Well-Done- 160ยฐF+.
    • Quick Tip: Cut the steak into tips after grilling. This makes it easier to handle when marinating and grilling and also makes it easier to achieve your desired doneness.
    • Storage: Store leftovers in an airtight container in the refrigerator for up to 4 days or freeze for up to 6 months.
    • Make Ahead: The red wine vinaigrette marinade can be prepared up to 2 weeks in advance.

    Nutrition

    Serving: 1serving | Calories: 471kcal | Carbohydrates: 0.5g | Protein: 52g | Fat: 29g | Saturated Fat: 8g | Polyunsaturated Fat: 2g | Monounsaturated Fat: 17g | Trans Fat: 1g | Cholesterol: 153mg | Sodium: 186mg | Potassium: 438mg | Sugar: 0.5g | Calcium: 15mg | Iron: 4.5mg
    Did you try this recipe?Let me know! Comment below, or take a picture and tag me on Instagram @everydayhomemadebyashley.

    Red Wine Vinegar Salad Dressing (Marinade)

    May 3, 2023

    This Red Wine Vinegar Salad Dressing is an easy homemade salad dressing recipe that's made with simple ingredients and is ready in just 5 minutes. It's perfect for drizzling over leafy greens, roasted vegetables, grilled meats, and more.

    A jar of red wine vinegar salad dressing next to a salad with grilled chicken.

    Have you ever looked at the ingredient list on a bottle of salad dressing? Yikes!

    While convenience foods like bottled salad dressing certainly have their place, they may come at a cost. Many store-bought dressings contain ingredients that may negatively impact our health, such as high fructose corn syrup, unhealthy oils, artificial flavors, and preservatives.

    But, you don't have to settle for sub-par salad dressing anymore!

    Making your own salad dressing at home is actually quite easy. In fact, this red wine vinegar salad dressing only takes 5 minutes to make and uses mostly pantry ingredients.

    The tangy, fresh flavor of the red wine vinegar pairs perfectly with a variety of greens, veggies, and proteins, making it a great choice for any type of salad. It also makes a delicious meat marinade - I especially love it with chicken and steak.

    So, what are you waiting for? Say goodbye to store-bought dressings and hello to the fresh, tangy flavor of the best red wine vinaigrette salad dressing ever.

    Keep reading for the recipe!

    Disclaimer: Some links throughout this post are affiliate links. As an Amazon Associate, I earn from qualifying purchases. You can learn more by visiting my Affiliate Disclosure Page.

    Why You'll Love This Recipe

    • Ready in 5 Minutes- If you think making homemade salad dressing is too much effort, think again! This red wine vinaigrette recipe couldn't be any quicker or easier to make.
    • Only 8 Ingredients- Again, this homemade vinaigrette is so simple and requires just a few ingredients, most of which are pantry staples.
    • No Preservatives- If you've ever checked out the back of a salad dressing bottle, you know store-bought salad dressing is loaded with preservatives and other added ingredients. Making it yourself gives you complete control over every ingredient.
    • Flavorful- Garlicky, tangy, and herbaceous, this red wine vinegar dressing recipe is bold and flavorful. It makes everything taste good!
    • Dressing or Marinade- Like many vinaigrettes, this red wine vinaigrette doubles as a marinade.

    Benefits of Making Your Own Salad Dressing

    While making your own salad dressing may seem like a lot of work, it's actually quite easy! And with so many benefits, it's definitely worth the effort.

    Here are a few of the best reasons to make salad dressing at home:

    • You have control over the ingredients. When you make your own salad dressing, you get to choose what goes into it. That means you can use fresh ingredients and skip the preservatives and artificial stuff that are often added to store-bought dressings.
    • Better flavor. Homemade dressings often taste better than store-bought options because you can customize the flavors to your liking. You can use fresh herbs, and adjust the levels of salt, sweetness, and acidity to create a unique flavor that suits your taste buds.
    • Healthier. Homemade dressings are often healthier than store-bought options because they often contain less sugar and less sodium. You can also use healthier oils like olive oil and add nutrient-dense ingredients like garlic, lemon juice, or apple cider vinegar.
    • Saves money. Making your own salad dressing saves money because you can buy ingredients in bulk and use them for other recipes too.

    Ingredient Notes

    Here are some notes on the key ingredients. For the full list of ingredients, check out the recipe card below.

    • Red Wine Vinegar- Punchy, tangy, and slightly fruity, red wine vinegar is one of my favorites to use in salad dressing.
    • Extra Virgin Olive Oil- Peppery and herbal in flavor, extra virgin olive oil is a classic oil for salad dressing. It pairs well with the other flavors in the dressing and is good for you, too!
    • Dijon Mustard- Mustard is an emulsifying ingredient, meaning it helps hold the oil and vinegar together.
    • Honey- Just a touch of sweetness helps balance out the acidity of the vinegar.
    • Garlic- Fresh garlic adds so much flavor to this homemade dressing. I prefer to grate the garlic on a microplane so that it mixes into the dressing easily. We don't want to end up with any big bites of garlic.
    • Italian Seasoning- Usually a blend of dried oregano, basil, rosemary, marjoram, and thyme, Italian seasoning adds a savory, herby flavor to the dressing.
    • Kosher Salt- Opt for kosher salt, as it is usually less processed than table salt. Additionally, look for salt that doesn't contain added ingredients like sugar or anti-clumping agents.
    • Black Pepper- Freshly ground black pepper is best and adds a wonderfully spicy, peppery kick.
    The ingredients to make red wine vinegar salad dressing. Each ingredient is labeled with text. They include honey, garlic, red wine vinegar, Italian seasoning, olive oil, dijon mustard, pepper, and salt.

    Substitutions and Variations

    Here are a few ways you can try customizing this simple red wine vinegar salad dressing recipe to fit your diet and taste preferences.

    Substitutions

    • Red Wine Vinegar- Swap red wine vinegar for white wine vinegar, apple cider vinegar, white distilled vinegar, or balsamic vinegar.
    • Extra Virgin Olive Oil- Substitute extra virgin olive oil for any neutral-flavored oil you prefer. Avocado oil, grapeseed oil, sunflower oil, or canola oil are great options.
    • Dijon Mustard- Use whole grain mustard, honey mustard, yellow mustard, or brown mustard to replace dijon mustard. Alternatively, use 2 teaspoons of dry mustard powder.
    • Honey- Swap honey for maple syrup, agave syrup, brown sugar, or granulated sugar. Or you can leave the sweetener out entirely if preferred.
    • Garlic- Substitute fresh garlic with ยฝ teaspoon of garlic powder.
    • Italian Seasoning- Dried oregano can be swapped for Italian seasoning. Or create your own Italian seasoning blend with whichever dried herbs you have on hand.
    An open jar of red wine vinegar dressing with a spoon sticking out in front of a white bowl of salad.

    Variations

    • Lemon- Mix together red wine vinegar and lemon juice for a bright and zesty dressing that pairs well with fresh greens and roasted vegetables.
    • Balsamic- Combine red wine vinegar with balsamic vinegar for a dressing with a slightly sweeter, more complex flavor.
    • Shallot & Fresh Herbs- Combine red wine vinegar, minced shallot, and chopped fresh herbs (such as parsley, basil, or thyme). This dressing is perfect for marinating meat or for drizzling over a simple green salad, grilled vegetables, or grilled steak.
    • Spicy- Add a few shakes of red pepper flakes to give this vinaigrette a spicy kick. I often do this when using this dressing as a meat marinade.

    How to Make Red Wine Vinegar Salad Dressing

    Here is how to make this red wine vinaigrette dressing recipe.

    Step 1: Combine red wine vinegar with seasonings. In a medium-sized mixing bowl, whisk together all ingredients except the olive oil until well combined.

    A glass bowl of red wine vinegar mixed with mustard, honey, and seasonings.

    Step 2: Whisk in the olive oil. Place the mixing bowl on top of a damp dish towel to keep it steady. While whisking continuously, slowly drizzle in the olive oil until a smooth, creamy emulsion forms. Use immediately or refrigerate for up to 2 weeks. The dressing will separate as it sits - just whisk it up again before serving.

    Red wine vinegar salad dressing whisked together in a glass bowl.

    Red Wine Vinaigrette Salad Dressing Video

    Tips for Success

    • Drizzle the oil very slowly. To make salad dressing smooth and creamy, add oil very slowly while whisking. Use a bowl or cup with a pour spout to make it easier.
    • Use a kitchen towel for stability. Putting a wet kitchen towel under and around the mixing bowl can help prevent it from moving around when you mix in the oil.
    • Chill before serving. Chilling the olive oil and red wine vinegar dressing for at least 30 minutes before serving will allow the flavors to fuse together and result in a creamier, more flavorful dressing.
    • Make ahead. Oil-based vinaigrettes will last in the refrigerator for up to 2 weeks. Make your life easier by making your homemade red wine vinegar salad dressing ahead of time.

    How to Use Red Wine Vinegar Salad Dressing

    Of course, this homemade red wine vinegar salad dressing is a perfect match for various salads, such as a leafy green salad like kale salad, or an ancient grain salad. Additionally, it makes a delicious pasta salad dressing, especially if you're not a fan of mayo.

    But, this homemade vinaigrette is more than just a simple salad dressing recipe. In fact, it's my go-to marinade for grilled chicken and steak throughout the summer.

    You can also drizzle red wine vinaigrette dressing over roasted or grilled vegetables, such as carrots, broccoli, and Brussels sprouts, for an extra boost of flavor.

    Finally, oil-based vinaigrettes make delicious dipping sauces for crusty bread. Pair it with my Dutch oven sourdough bread for the ultimate dinner party appetizer.

    A green salad with grilled chicken next to an open jar of homemade red wine vinegar salad dressing.

    Storage

    How to Store

    • Refrigerator- Store red wine vinegar salad dressing in an airtight container or mason jar for up to 2 weeks in the refrigerator.
    • Freezer- While the consistency of the dressing may change slightly after thawing, it is possible to freeze an oil-based vinaigrette for up to 6 months. After thawing, whisk or shake the salad dressing vigorously to help re-emulsify it.

    Make Ahead

    Prepare the red wine vinegar olive oil dressing up to 2 weeks in advance and store it in the fridge to let the flavors meld, creating a more flavorful dressing. Preparing the dressing in advance can save time and effort, especially when meal prepping or hosting a dinner party.

    A spoon drizzling red wine vinaigrette dressing over a bowl of salad.

    Frequently Asked Questions

    Is red wine vinaigrette salad dressing good for you?

    Yes! Homemade red wine vinaigrette salad dressing is a healthy option for your salads. Not only is it made with heart-healthy olive oil, but making it at home means it's free from preservatives and other added ingredients.

    Do you have to refrigerate oil and vinegar salad dressing?

    Yes, refrigerating red wine vinaigrette salad dressing is necessary to prevent the oil, garlic, and other ingredients from turning rancid.

    Is red or white wine vinegar better for salad dressing?

    Both are great options for salad dressing. White wine vinegar is typically described as brighter in flavor, while red wine vinegar is slightly fruitier tasting.

    Is there any alcohol in red wine vinegar?

    Red wine vinegar is made by fermenting red wine using good bacteria. Through the fermentation process, the alcohol is broken down by the bacteria, meaning red wine vinegar contains no alcohol or an insignificant amount of alcohol.

    Let's Connect!

    Be sure to leave a comment below if you have any questions. You can also connect with me on Instagram, Facebook, Pinterest, or via email at [email protected].

    More Salad Dressing Recipes

    • A jar of basil balsamic vinaigrette with a spoonful of dressing resting on top of it. You can see bits of fresh basil in the spoonful of vinaigrette. Out of focus in the background is a small plate of salad.
      Basil Balsamic Vinaigrette (For Salad, Marinating, and More!)
    • A mason jar filled with strawberry balsamic vinaigrette next to a strawberry spinach salad.
      5-Minute Strawberry Balsamic Vinaigrette
    • A bowl of peanut salad dressing with a spoon sticking out to the left.
      Peanut Salad Dressing (For Salads, Noodles, and Bowls)
    • A glass jar filled with lemon thyme vinaigrette. Out of focus in the background is a plate of salad, a whole lemon, and a few sprigs of thyme.
      Lemon Thyme Vinaigrette

    ๐Ÿ“– Recipe

    A jar of red wine vinegar salad dressing next to a bowl of salad.
    Print Pin SaveSaved!

    Red Wine Vinegar Salad Dressing

    This Red Wine Vinegar Salad Dressing is an easy homemade salad dressing recipe that's made with simple ingredients and is ready in just 5 minutes. It's perfect for drizzling over leafy greens, roasted vegetables, grilled meats, and more.
    Course Salad
    Cuisine American, French
    Prep Time 5 minutes minutes
    Cook Time 0 minutes minutes
    Total Time 5 minutes minutes
    Servings 12 servings (2 tablespoons per serving)
    Calories 167kcal
    Author Ashley Petrie, RDN, LDN

    Equipment

    • Mixing bowls
    • Whisk

    Ingredients

    • ยฝ cup red wine vinegar
    • 2 tablespoons dijon mustard
    • 2 cloves garlic grated or finely minced
    • 1 teaspoon honey
    • 1 teaspoon Italian seasoning
    • ยฝ teaspoon kosher salt
    • ยฝ teaspoon black pepper
    • 1 cup extra virgin olive oil

    Instructions

    • In a medium-sized mixing bowl, whisk together all ingredients except the olive oil until well combined.
      ยฝ cup red wine vinegar, 2 tablespoons dijon mustard, 2 cloves garlic, 1 teaspoon honey, 1 teaspoon Italian seasoning, ยฝ teaspoon kosher salt, ยฝ teaspoon black pepper
    • Place the mixing bowl on top of a damp dish towel to keep it steady. While whisking continuously, slowly drizzle in the olive oil until a smooth, creamy emulsion forms. Use immediately or refrigerate for up to 2 weeks. The dressing will separate as it sits - just whisk it up again before serving.
      1 cup extra virgin olive oil

    Notes

    • Storage: Store dressing in an airtight container in the refrigerator for up to 2 weeks.

    Nutrition

    Serving: 1serving (2 tablespoons) | Calories: 167kcal | Carbohydrates: 1g | Fat: 18g | Saturated Fat: 2.5g | Polyunsaturated Fat: 2g | Monounsaturated Fat: 13g | Sodium: 108mg | Potassium: 14mg | Sugar: 0.5g | Calcium: 5mg | Iron: 0.3mg
    Did you try this recipe?Let me know! Comment below, or take a picture and tag me on Instagram @everydayhomemadebyashley.

    Buffalo Chicken Caesar Salad (Grilled or Pan-Seared)

    April 19, 2023

    This Buffalo Chicken Caesar Salad is a spicy and flavorful twist on the classic recipe. It's made with crispy romaine lettuce, homemade Caesar dressing, crunchy croutons, and grilled or pan-seared buffalo chicken breast for the best Caesar salad you'll ever taste.

    A bowlful of buffalo chicken Caesar salad.

    Chicken Caesar salad is one of my go-to summer dinner recipes. It's flavorful, satisfying, and doesn't require me to turn on my oven when it's way too hot outside.

    But, even if I don't want to heat up my kitchen, there are days when I just can't resist a little bit of spice in my salad.

    That's where this spicy buffalo chicken Caesar salad comes in. It's the perfect balance of classic Caesar salad flavors with a kick of heat from the buffalo chicken.

    The combination of crisp romaine lettuce, creamy homemade Caesar dressing, crunchy croutons, and spicy buffalo chicken, creates a dish that's both refreshing and hearty enough to satisfy.

    Whether you're serving it up for a weeknight dinner, a backyard BBQ, or just for yourself, this spicy chicken Caesar salad is sure to be a crowd-pleaser. So, grab your favorite salad bowl, and let's get cooking!

    Disclaimer: Some links throughout this post are affiliate links. As an Amazon Associate, I earn from qualifying purchases. You can learn more by visiting my Affiliate Disclosure Page.

    Ingredient Notes

    Here are some notes on the key ingredients. For the full list of ingredients, check out the recipe card below.

    • Chicken Breast- I prefer to use boneless, skinless chicken breast for my buffalo chicken. Pounding the chicken to even thickness allows it to cook quickly and evenly, tenderizes it, and helps it absorb more flavor.
    • Romaine Lettuce- The classic lettuce for Caesar salad. Buying a head of romaine lettuce is less expensive and more flavorful than pre-chopped, bagged lettuce.
    • Caesar Dressing- Did you know it only takes 10 minutes to make homemade Caesar salad dressing? Make this buffalo chicken Caesar salad extra special and give my Easy Caesar Dressing recipe a try!
    • Croutons- I love making homemade croutons whenever I make Caesar salad. They're super simple to make and will really take your salad to the next level.
    • Parmesan Cheese- No Caesar salad is complete without tons of parmesan cheese. I always recommend grating your own cheese at home, both for flavor and cost savings.
    • Hot Sauce- My go-to hot sauce for buffalo sauce is Frank's RedHot Sauce. It's a cayenne pepper hot sauce that is spicy without being overwhelming.
    • Butter- Homemade buffalo wing sauce uses butter to achieve that rich and decadent flavor. I use unsalted butter since Frank's RedHot Sauce is already quite salty.
    • Vinegar- Just a splash of white vinegar in the buffalo sauce marinade helps tenderize the chicken.
    • Garlic Powder- Adds a delicious garlic flavor to the buffalo marinated and pairs well with the rest of the flavors in the Caesar salad.
    The ingredients to make buffalo chicken caesar salad. Each ingredient is labeled with text. They include romaine lettuce, vinegar, hot sauce, butter, caesar dressing, croutons, parmesan, chicken breast, and garlic powder.

    Substitutions and Variations

    Here are a few ways you can try customizing this buffalo chicken Caesar salad recipe to fit your diet and taste preferences.

    Substitutions

    • Chicken Breast- Swap chicken breast for chicken thighs for a richer, more succulent chicken flavor.
    • Romaine Lettuce- Substitute romaine lettuce for any type of green you enjoy. Try spinach, mixed greens, kale, arugula, green leaf lettuce, or iceberg lettuce.
    • Caesar Dressing- Blue cheese dressing, ranch dressing, or creamy Italian dressing make great Caesar dressing substitutes in this buffalo Caesar salad recipe.
    • Croutons- Replace traditional croutons with roasted chickpeas, nuts, or seeds for a tasty alternative.
    • Parmesan Cheese- Since this is a buffalo chicken salad, blue cheese is a natural substitute for parmesan cheese. Feta cheese, gorgonzola cheese, or Asiago cheese are also great choices.
    • Hot Sauce- Swap Frank's RedHot Sauce for your preferred buffalo wing sauce.
    • Butter- Replace the butter with a dairy-free butter alternative, if preferred.
    • Vinegar- Lemon juice or apple cider vinegar can be used in place of white vinegar.
    • Garlic Powder- Substitute the garlic powder for 3-4 cloves of grated garlic.
    Sliced buffalo chicken breast atop a homemade caesar salad.

    Variations

    • Gluten-Free- Replace traditional bread croutons with gluten-free croutons. Additionally, ensure that you choose a gluten-free Caesar dressing and gluten-free hot sauce.
    • Extra Spicy- Use a spicier hot sauce, such as Frank's RedHot Xtra Hot Sauce, or add a few shakes of cayenne pepper powder.
    • Crispy- Coat the chicken breast in breadcrumbs before pan-searing it. Then, toss the cooked, crispy chicken in homemade buffalo sauce.

    Equipment Notes

    Here are some notes on any special equipment I used to make this recipe.

    • Grill- I use a propane gas grill to grill the chicken for this recipe.
    • Cast Iron Skillet- If pan-searing the chicken breast, I recommend using a well-seasoned cast iron skillet. It's naturally non-stick and its even heat distribution cooks the chicken to perfection.
    • Meat Mallet- A meat mallet is an essential tool for making tender, juicy chicken breast that cooks evenly.
    • Meat Thermometer- Using a meat thermometer to check the temperature of the chicken helps you know when it's done cooking.

    How to Make Buffalo Chicken Caesar Salad

    Here is how to make buffalo chicken Caesar salad.

    Marinate the Chicken

    Step 1: Make the buffalo sauce marinate. Cube the butter and place it in a large, microwave-safe mixing bowl. Heat the butter on HIGH for 30 seconds. Stir, then heat for an additional 30 seconds. Whisk the butter until fully melted. Add the hot sauce, vinegar, and garlic powder to the melted butter and whisk until smooth. Set aside.

    Cubed butter in a glass bowl.
    Melted butter in a glass bowl.
    Homemade buffalo sauce in a glass bowl.

    Step 2: Prepare the chicken. Cut the chicken breast into 4 equal-sized pieces, trimming and discarding any excess fat. Lay a piece of plastic wrap over the chicken breasts and pound them into an even, ยฝ-inch thickness.

    Four trimmed and cut chicken breasts on an orange cutting board.
    Four pounded chicken breasts on an orange cutting board.

    Step 3: Marinate the chicken. Place the prepared chicken breasts in the bowl of buffalo sauce marinade. Marinate the chicken breast for at least 30 minutes, or for up to 2 days in the refrigerator. The butter will solidity in the marinated - that's okay. It will melt when the chicken is cooked.

    Chicken breasts marinating in homemade buffalo sauce in a glass bowl.

    Grilling Instructions

    Step 4 (Option 1): Grill the chicken. Preheat the grill to 450ยฐF for 15 minutes. Place the marinated chicken breasts on the grill over high, direct heat. Grill for 4-5 minutes per side or until a meat thermometer inserted into the chicken breast reads 165ยฐF. Transfer the chicken breasts to a plate and allow them to rest for 10 minutes before slicing.

    Two buffalo chicken breasts cooking on a grill.

    Stovetop Instructions

    Step 4 (Option 2): Pan-sear the chicken. Heat a small amount of olive oil or butter in a skillet over medium heat. Lay the chicken breasts flat in the skillet, making sure not to overcrowd them. Sear for 4-5 minutes per side or until a meat thermometer reads 165ยฐF. If the sauce begins burning in the skillet, add a small amount of water. Transfer the chicken breasts to a plate and allow them to rest for 10 minutes before slicing.

    Two buffalo chicken breasts searing in a cast iron skillet.

    Salad Assembly

    Step 5: Prepare the lettuce. Chop the romaine lettuce and place it in a large colander. Rinse the lettuce thoroughly under cold, running water to get rid of any dirt and other debris. Dry the lettuce using a salad spinner, a clean tea towel, or paper towels.

    Chopped romaine lettuce in a red colander in a sink.

    Step 6: Assemble the salad. In a large mixing bowl, toss the chopped lettuce with Caesar dressing until well-coated. Top with croutons, parmesan cheese, and cooked buffalo chicken. Serve immediately.

    A large salad bowl of romaine lettuce surrounded by the rest of the ingredients to make buffalo chicken caesar salad.
    Romaine lettuce tossed with caesar dressing in a large wooden salad bowl.
    Buffalo chicken caesar salad assembled in a large wooden salad bowl.

    Tips for Success

    • Don't skip the chicken prep. I know it's tempting to just toss the chicken breasts in the marinated as-is, but I promise, taking a few extra minutes to prepare them correctly is so worth it. Pounding the chicken breasts not only helps them cook evenly but also tenderizes them.
    • Marinate the chicken overnight for the best flavor. The longer you give the chicken to marinate, the more flavor it will absorb. I've found that marinating the chicken the day before cooking yields the best results.
    • Use a meat thermometer. A meat thermometer takes the guesswork out of knowing when your chicken is cooked through. No more worrying about overcooking or undercooking your chicken.
    • Don't buy pre-chopped lettuce. Lettuce wilts faster and loses a lot of flavor once it's been cut. For the freshest, best buffalo chicken Caesar salad, opt for a head of romaine lettuce instead.
    • Assemble just before serving. Nothing is less appealing than soggy lettuce. Wait until you're ready to eat before assembling your hot chicken Caesar salad.

    What to Serve With Buffalo Chicken Caesar Salad

    A side of sourdough bread or garlic bread is perfect for soaking up any extra dressing.

    Roasted or sautรฉed vegetables, such as green beans, asparagus, and Brussels sprouts, are also great side dishes as they balance out the spicy flavors of the buffalo chicken.

    Buffalo chicken caesar salad in a small white bowl.

    Storage and Reheating

    If you think you may end up with leftover buffalo chicken Caesar salad, it's best to store the ingredients separately so the lettuce doesn't become wilted.

    How to Store

    • Dressed Salad- Refrigerate dressed salad leftovers for up to 24 hours, as lettuce becomes unappetizingly wilted beyond that.
    • Undressed Salad- Leave the undressed salad if you expect leftovers. Store it in the refrigerator in an airtight container with a dry paper towel for up to 3 days.
    • Buffalo Chicken Breast- Store leftover buffalo chicken breast separately from the rest of the salad ingredients. Cooked chicken can be stored in an airtight container in the refrigerator for up to 4 days.

    How to Reheat

    If you prefer warm chicken on your Caesar salad, here are some easy ways to reheat buffalo chicken breast.

    • Stovetop- Bring a small amount of water or chicken broth to a simmer in a skillet over medium-low heat. Add sliced buffalo chicken breast to the skillet and cover with a lid. Heat for 2-3 minutes or until the chicken is fully warmed through.
    • Oven- Preheat the oven to 350ยฐF. Place the leftover chicken in a baking dish, adding a little bit of chicken broth or water to keep it moist. Cover with foil and bake for 10-15 minutes or until heated through.
    • Microwave- Slice the chicken breast and place it on a microwave-safe plate covered with a damp paper towel. Microwave on HIGH in 30-second intervals until heated through.
    • Air Fryer- Preheat the air fryer to 350ยฐF. Place chicken breasts in the air fryer basket in a single layer. Heat for 4-5 minutes or until fully warmed through.

    Make Ahead

    Preparing some of the salad ingredients beforehand is an excellent way to jumpstart dinner preparation. Here's how:

    • Buffalo Chicken Breast- Marinate the chicken breast up to 2 days ahead of time or cook it up to 4 days in advance.
    • Caesar Dressing- Homemade Caesar salad dressing can be prepared ahead of time and stored in the refrigerator for up to one week.
    • Croutons- Scratch-made croutons will last up to 2 weeks at room temperature when stored in an airtight container.
    A large wooden salad bowl filled with buffalo chicken caesar salad.

    Frequently Asked Questions

    Is buffalo chicken Caesar salad healthy?

    Caesar salad, when enjoyed in moderation, can be part of a healthy diet. Because of the creamy Caesar dressing and parmesan cheese, Caesar salad is generally high in calories and fat. However, chicken Caesar salad is also a good source of protein, fiber, vitamins, and minerals.

    Is buffalo chicken Caesar salad spicy?

    The spice from the buffalo chicken is balanced out by the rich, creamy Caesar dressing and the cool and crispy romaine lettuce. So, while the chicken is spicy, once it's combined with the salad, it's very tolerable.

    Can I add other toppings to buffalo chicken Caesar salad?

    Yes! I kept this recipe simple, but feel free to get creative and experiment with other toppings. Some great options include blue cheese, shredded carrots, red onion, tomatoes, avocado, and crispy bacon bits.

    Let's Connect!

    Be sure to leave a comment below if you have any questions. You can also connect with me on Instagram, Facebook, Pinterest, or via email at [email protected].

    More Buffalo Chicken Recipes

    • Three homemade buffalo chicken flatbreads on a wooden pizza peel.
      The Best Buffalo Chicken Flatbread Pizzas
    • A skillet filled with Greek yogurt buffalo chicken dip garnished with green onions and hot sauce.
      Greek Yogurt Buffalo Chicken Dip

    ๐Ÿ“– Recipe

    Buffalo chicken Caesar Salad in a white bowl.
    Print Pin SaveSaved!
    5 from 1 vote

    Buffalo Chicken Caesar Salad

    This Buffalo Chicken Caesar Salad is a spicy and flavorful twist on the classic recipe. It's made with crispy romaine lettuce, homemade Caesar dressing, crunchy croutons, and grilled or pan-seared buffalo chicken breast for the best Caesar salad you'll ever taste.
    Course Main Course, Salad
    Cuisine American
    Prep Time 20 minutes minutes
    Cook Time 10 minutes minutes
    Marinate Time 30 minutes minutes
    Total Time 1 hour hour
    Servings 4 servings
    Calories 563kcal
    Author Ashley Petrie, RDN, LDN

    Equipment

    • Cast iron skillet or grill
    • Meat mallet
    • Meat thermometer

    Ingredients

    For the Buffalo Chicken

    • 4 tablespoons unsalted butter cut into ยฝ-inch cubes
    • ยฝ cup hot sauce such as Frank's RedHot Sauce
    • 2 tablespoons white vinegar
    • 1 teaspoon garlic powder
    • 1 pound boneless, skinless chicken breast
    • 1 tablespoon butter or olive oil optional, if pan-searing

    For the Caesar Salad

    • 1 large head (about 5-6 cups chopped) romaine lettuce
    • ยฝ cup Caesar dressing
    • 1 cup croutons
    • ยฝ cup parmesan cheese shaved or grated

    Instructions

    Marinate the Chicken

    • Cube the butter and place it in a large, microwave-safe mixing bowl. Heat the butter on HIGH for 30 seconds. Stir, then heat for an additional 30 seconds. Whisk the butter until fully melted. Add the hot sauce, vinegar, and garlic powder to the melted butter and whisk until smooth. Set aside.
    • Cut the chicken breast into 4 equal-sized pieces, trimming and discarding any excess fat. Lay a piece of plastic wrap over the chicken breasts and pound them into an even, ยฝ-inch thickness.
    • Place the prepared chicken breasts in the bowl of buffalo sauce marinade. Marinate the chicken breast for at least 30 minutes, or for up to 2 days in the refrigerator. The butter will solidity in the marinated - that's okay. It will melt when the chicken is cooked.

    Grilling Instructions

    • Preheat the grill to 450ยฐF for 15 minutes. Place the marinated chicken breasts on the grill over high, direct heat. Grill for 4-5 minutes per side or until a meat thermometer inserted into the chicken breast reads 165ยฐF. Transfer the chicken breasts to a plate and allow them to rest for 10 minutes before slicing.

    Stovetop Instructions

    • Heat a small amount of olive oil or butter in a skillet over medium heat. Lay the chicken breasts flat in the skillet, making sure not to overcrowd them. Sear for 4-5 minutes per side or until a meat thermometer reads 165ยฐF. If the sauce begins burning in the skillet, add a small amount of water. Transfer the chicken breasts to a plate and allow them to rest for 10 minutes before slicing.

    Salad Assembly

    • Chop the romaine lettuce and place it in a large colander. Rinse the lettuce thoroughly under cold, running water to get rid of any dirt and other debris. Dry the lettuce using a salad spinner, a clean tea towel, or paper towels.
    • In a large mixing bowl, toss the chopped lettuce with Caesar dressing until well-coated. Top with croutons, parmesan cheese, and cooked buffalo chicken. Serve immediately.

    Notes

    • Storage: Store leftover dressed salad in an airtight container in the refrigerator for up to 24 hours. If you think there will be leftovers, it's best to store all of the ingredients separately so the lettuce doesn't get too soggy to be enjoyable.
    • Make Ahead: The chicken can be marinated 2 days in advance, the Caesar dressing can be prepared a week in advance, and the croutons can be made 2 weeks in advance.

    Nutrition

    Serving: 1serving | Calories: 563kcal | Carbohydrates: 18g | Protein: 36g | Fat: 39g | Saturated Fat: 13g | Polyunsaturated Fat: 5.5g | Monounsaturated Fat: 17g | Trans Fat: 0.5g | Cholesterol: 162mg | Sodium: 1661mg | Potassium: 836mg | Fiber: 4g | Sugar: 3g | Vitamin C: 8mg | Calcium: 271mg | Iron: 3mg
    Did you try this recipe?Let me know! Comment below, or take a picture and tag me on Instagram @everydayhomemadebyashley.

    How to Make Caesar Dressing Without Anchovies

    April 18, 2023

    This Caesar Dressing Without Anchovies is easy to make, ready in just 10 minutes, and bursting with flavor. Made by hand, this simple dressing recipe requires no special equipment. Take your Caesar salad game to the next level with this easy Caesar salad dressing recipe.

    A bowlful of Caesar dressing without anchovies.

    I stopped buying bottled salad dressing years ago when I realized how easy it is to make at home. Salad dressing is one of those foods that, once you try the homemade version, there's no going back to the store-bought stuff.

    Not only does homemade salad dressing taste fresher, but it's also free from preservatives, added sugars, and other ingredients we don't want in our salad dressing.

    This Caesar dressing without anchovies is my go-to Caesar salad dressing recipe. While I don't mind anchovies, I don't always have them in my pantry. So, this anchovy-free version allows me to make Caesar dressing whenever I want.

    It's a versatile dressing you can use on salads, sandwiches, and wraps. It's also great as a dip for vegetables, or even as a marinade for chicken or fish.

    So, grab your whisk and get ready to make a batch of this easy Caesar dressing that's sure to become a staple in your kitchen.

    Disclaimer: Some links throughout this post are affiliate links. As an Amazon Associate, I earn from qualifying purchases. You can learn more by visiting my Affiliate Disclosure Page.

    What Is Caesar Dressing?

    Caesar dressing is a creamy, emulsified dressing that is commonly used in Caesar salads. It is typically made with ingredients such as olive oil, egg yolks, garlic, lemon juice, anchovy paste, and fresh parmesan cheese.

    What is a Substitute For Anchovies in Caesar Dressing?

    Whether you're not a fan of anchovies, can't find any at the store, or avoid them for specific dietary reasons, there are a few substitutes for anchovies in Caesar dressing. Here are some common ones:

    • Worcestershire Sauce- The most common substitute for anchovy filets or anchovy paste in Caesar dressing is Worcestershire sauce. It is typically made with anchovies and provides a similar savory, umami flavor.
    • Soy Sauce- Soy sauce has a salty, savory flavor that can provide a similar umami boost to your homemade Caesar dressing.
    • Miso Paste- Miso paste is made from fermented soybeans and has a salty, savory flavor that can provide a similar depth of flavor to anchovies. It's usually found in the Asian section of the grocery store.
    • No Anchovy Substitute- Like in this recipe, you can simply leave the anchovies out altogether without adding a substitute ingredient. While it may not be authentic Caesar dressing, it still tastes just as delicious.

    Why You'll Love This Recipe

    • No Anchovies- If you're not a fan of anchovies or simply can't find them at the store, this recipe is perfect for you. This recipe also contains no Worcestershire sauce and no mayo.
    • Ready in 10 Minutes- Even whisking by hand, this easy Caesar dressing only takes 10 minutes to make. Perfect for a quick weeknight dinner.
    • Requires No Special Equipment- This recipe is made by hand using a simple whisk and mixing bowl.
    • Flavorful- Fresh garlic, lemon juice, and parmesan cheese make all the difference when it comes to flavor.

    Ingredient Notes

    Here are some notes on the key ingredients. For the full list of ingredients, check out the recipe card below.

    • Egg Yolks- Egg yolks are one of the primary emulsifying ingredients in Caesar dressing. Since the egg yolks are being consumed raw, opt for the freshest eggs you can find. Local, farm-fresh eggs are your best option.
    • Garlic- Garlic is the primary flavor in Caesar dressing. Grate the garlic cloves on a microplane or mince them as finely as you can so they blend seamlessly into the salad dressing.
    • Lemon Juice- Adds freshness and a bit of acidity, which balances out the richness of the dressing.
    • Dijon Mustard- Another emulsifying ingredient, dijon mustard adds a slightly tangy flavor.
    • Canola Oil- A neutral-flavored oil that lets the flavors of the other ingredients shine through.
    • Extra Virgin Olive Oil- Adding a small amount of extra virgin olive oil gives the dressing a richer, more complex flavor.
    • Parmesan Cheese- Freshly-grated parmesan cheese is a must for homemade Caesar dressing.
    • Kosher Salt- Flavor enhancer.
    • Black Pepper- I recommend using freshly ground black pepper for the best flavor.
    The ingredients to make Caesar dressing without anchovies. Each ingredient is labeled with text. They include canola oil, olive oil, kosher salt, garlic, lemon, dijon mustard, parmesan cheese, black pepper, egg yolks.

    Substitutions and Variations

    Here are a few ways you can try customizing this Caesar dressing recipe without anchovies to fit your diet and taste preferences.

    Substitutions

    • Egg Yolks- Swap the egg yolks for 2 tablespoons of dijon mustard. While the dressing may taste tangier, it should still emulsify well.
    • Garlic- Use ยฝ teaspoon of garlic powder in place of fresh garlic in a pinch.
    • Lemon Juice- White vinegar, apple cider vinegar, or red wine vinegar may be substituted for lemon juice.
    • Dijon Mustard- Replace dijon mustard with stone-ground mustard, yellow mustard, or brown mustard.
    • Canola Oil- Any neutral-flavored oil can be used in place of canola oil. Try sunflower oil, grapeseed oil, vegetable oil, or light olive oil instead.
    • Extra Virgin Olive Oil- Swap extra virgin olive oil for avocado oil, walnut oil, or additional canola oil.
    • Parmesan Cheese- Dairy-free parmesan cheese, ground cashews, or nutritional yeast may be used in place of parmesan cheese.
    A glass bowl full of Caesar dressing without anchovies.

    Variations

    • Gluten-Free- This recipe for Caesar salad dressing without anchovies is naturally gluten-free.
    • Egg-Free- Replace the egg yolks with 2 tablespoons of dijon mustard.
    • Dairy-Free- Swap the parmesan cheese for nutritional yeast or dairy-free parmesan cheese.
    • Extra Creamy- Add a dollop of Greek yogurt or mayonnaise for an extra creamy Caesar dressing.
    • Bacon- Stir crumbled bacon into the dressing for a salty, smoky flavor.
    • Lemony- Grate some lemon zest into your homemade dressing for a bright, citrusy flavor.
    • Spicy- Add cayenne pepper, red pepper flakes, or hot sauce to the Caesar dressing for a spicy kick.

    How to Make Caesar Dressing Without Anchovies

    Here is how to make homemade Caesar salad dressing without anchovies.

    Step 1: Whisk together emulsifying ingredients. In a medium-sized mixing bowl, whisk together the egg yolks, lemon juice, garlic, and dijon mustard until well combined.

    Egg yolks, dijon mustard, lemon juice, and garlic whisked together in a bowl.

    Step 2: Drizzle in oil. Combine the canola oil and olive oil in a cup or bowl, preferably one with a pour spout. Place the mixing bowl on a damp kitchen towel to prevent it from sliding around. While whisking continuously, slowly drizzle the oil into the egg yolk mixture until the dressing is fully emulsified.

    The salad dressing after whisking in the oil.

    Step 3: Season the dressing. Add the parmesan cheese, kosher salt, and ground black pepper to the dressing and stir to combine. Taste for seasoning and adjust as needed.

    Step 4: Chill and serve. Use the dressing immediately or cover the bowl with plastic wrap and refrigerate for at least 30 minutes to allow the flavors to meld together.

    The finished Caesar salad dressing.
    A spoonful of Caesar dressing over a bowl of dressing.

    Food Processor Instructions

    While I prefer to make my Caesar dressing with a simple bowl and whisk for easier cleanup, it is possible to make this anchovy-free Caesar dressing recipe in a food processor.

    Here is how to make Caesar dressing without anchovies in a food processor.

    1. Add the egg yolks, lemon juice, garlic, and dijon mustard to the bowl of a food processor and pulse until well combined.
    2. With the food processor running continuously on low speed, slowly drizzle in the canola oil and olive oil until the mixture is smooth and emulsified.
    3. Add the parmesan cheese, kosher salt, and black pepper. Pulse a few more times until everything is mixed together.
    4. Serve immediately or refrigerate for up to one week.

    Caesar Dressing Without Anchovies Video

    Tips for Success

    • Start with fresh ingredients. Using fresh lemon juice, garlic, and parmesan cheese is essential for a flavorful Caesar dressing. Avoid using pre-grated parmesan cheese, bottled lemon juice, or pre-minced garlic as they may not provide the same depth of flavor.
    • Drizzle the oil very slowly. The key to emulsifying salad dressing is to whisk the oil in as slowly as possible. Use a bowl or measuring cup with a pour spout to make it easier.
    • Use a kitchen towel for stability. Place a damp kitchen towel under and around the mixing bowl helps keep it from moving all over the place while you whisk in the oil.
    • Chill before serving. Chilling the Caesar dressing for at least 30 minutes before serving will allow the flavors to meld together and result in a more flavorful dressing.

    How to Use Caesar Dressing Without Anchovies

    Homemade Caesar dressing naturally pairs well with Caesar salad. One of my favorite ways to use this Caesar dressing without anchovies is in this Buffalo Chicken Caesar Salad recipe.

    Caesar dressing can also be used as a dip for vegetables, crackers, and fresh bread or as a spread on your favorite sandwiches. Additionally, it makes a delicious dressing for roasted or grilled vegetables.

    I also love using this Caesar dressing as a marinade for grilled chicken or fish throughout the summer. And if you're making pasta salad for a cookout, why not swap the dressing out for homemade Caesar salad dressing instead?

    Sourdough croutons on a homemade buffalo chicken Caesar salad.
    Buffalo Chicken Caesar Salad

    Storage

    How to Store

    • Refrigerator- Store leftover Caesar salad dressing without anchovies in an airtight container or glass jar in the refrigerator for up to one week.
    • Freezer- Homemade Caesar salad dressing can be frozen, but freezing it may affect the texture and flavor of the dressing. Once frozen, the ingredients may separate and the dressing may become watery. For best results, use the dressing within one month of freezing.

    Make Ahead

    Make and store Caesar dressing without anchovies in the refrigerator up to one week in advance. In fact, making Caesar dressing ahead of time is a great way to let the flavors meld together, which results in a more flavorful dressing.

    Making Caesar dressing ahead of time can also save you time and effort when preparing meals, especially if you're planning a dinner party or meal prep for the week.

    A glass mason jar half filled with homemade Caesar salad dressing.

    Frequently Asked Questions

    Is Caesar dressing without anchovies still considered authentic?

    Authentic Caesar dressing contains anchovies as a key ingredient. However, Caesar dressing without anchovies is a valid variation preferred by some due to personal taste or dietary restrictions.

    Will Caesar dressing taste different without anchovies?

    Yes, Caesar dressing will taste slightly different without anchovies. Anchovies give Caesar dressing a fishy, umami flavor that's hard to replicate without them. However, Caesar dressing without anchovies is still a delicious salad dressing you'll be drooling over.

    Is Caesar dressing without anchovies suitable for vegetarians/vegans?

    This Caesar dressing without anchovies recipe is okay for vegetarians who consume eggs and dairy. Unless you swap the eggs and parmesan cheese for a vegan-friendly alternative, this recipe is not suitable for vegans.

    What store-bought Caesar dressing does not have anchovies?

    Many bottled Caesar salad dressings do contain anchovies in some form. However, Brianna's Asiago Caesar Dressing, Daiya Creamy Caesar Dressing, and Trader Joe's Vegan Caesar Dressing are a few brands that do not contain anchovies.

    Let's Connect!

    Be sure to leave a comment below if you have any questions. You can also connect with me on Instagram, Facebook, Pinterest, or via email at [email protected].

    More Salad Dressing Recipes

    • A jar of basil balsamic vinaigrette with a spoonful of dressing resting on top of it. You can see bits of fresh basil in the spoonful of vinaigrette. Out of focus in the background is a small plate of salad.
      Basil Balsamic Vinaigrette (For Salad, Marinating, and More!)
    • A mason jar filled with strawberry balsamic vinaigrette next to a strawberry spinach salad.
      5-Minute Strawberry Balsamic Vinaigrette
    • A bowl of peanut salad dressing with a spoon sticking out to the left.
      Peanut Salad Dressing (For Salads, Noodles, and Bowls)
    • A jar of red wine vinegar salad dressing next to a bowl of salad.
      Red Wine Vinegar Salad Dressing (Marinade)

    ๐Ÿ“– Recipe

    A bowlful of Caesar dressing without anchovies.
    Print Pin SaveSaved!
    5 from 1 vote

    Caesar Dressing Without Anchovies

    This Caesar Dressing Without Anchovies is easy to make, ready in just 10 minutes, and bursting with flavor. Made by hand, this simple dressing recipe requires no special equipment. Take your Caesar salad game to the next level with this easy Caesar salad dressing recipe. Recipe yields a total of 1 ยผ cups of salad dressing.
    Course Condiment, Salad
    Cuisine American
    Prep Time 10 minutes minutes
    Cook Time 0 minutes minutes
    Total Time 10 minutes minutes
    Servings 10 servings (2 tablespoons per serving)
    Calories 168kcal
    Author Ashley Petrie, RDN, LDN

    Equipment

    • Mixing bowl
    • Whisk

    Ingredients

    • 2 large egg yolks
    • 2 tablespoons fresh lemon juice
    • 2 cloves garlic grated or finely minced
    • 1 teaspoon dijon mustard
    • ยฝ cup canola oil
    • ยผ cup extra virgin olive oil
    • ยผ cup parmesan cheese grated
    • ยฝ teaspoon kosher salt
    • ยฝ teaspoon black pepper

    Instructions

    • In a medium-sized mixing bowl, whisk together the egg yolks, lemon juice, garlic, and dijon mustard until well combined.
      2 large egg yolks, 2 tablespoons fresh lemon juice, 2 cloves garlic, 1 teaspoon dijon mustard
    • Combine the canola oil and olive oil in a cup or bowl, preferably one with a pour spout. Place the mixing bowl on a damp kitchen towel to prevent it from sliding around. While whisking continuously, slowly drizzle the oil into the egg yolk mixture until the dressing is fully emulsified.
      ยฝ cup canola oil, ยผ cup extra virgin olive oil
    • Add the parmesan cheese, kosher salt, and ground black pepper to the dressing and stir to combine. Taste for seasoning and adjust as needed.
      ยผ cup parmesan cheese, ยฝ teaspoon kosher salt, ยฝ teaspoon black pepper
    • Use the dressing immediately or cover the bowl with plastic wrap and refrigerate for at least 30 minutes to allow the flavors to meld together.

    Food Processor Instructions

    • Add the egg yolks, lemon juice, garlic, and dijon mustard to the bowl of a food processor and pulse until well combined.
    • With the food processor running continuously on low speed, slowly drizzle in the canola oil and olive oil until the mixture is smooth and emulsified.
    • Add the parmesan cheese, kosher salt, and black pepper. Pulse a few more times until everything is mixed together.

    Notes

    • Quick Tip: Using fresh lemon juice, garlic, and parmesan cheese is essential for a flavorful Caesar dressing. Avoid using pre-grated parmesan cheese, bottled lemon juice, or pre-minced garlic as they may not provide the same depth of flavor.
    • Storage: Store leftovers in an airtight container in the refrigerator for up to one week.

    Nutrition

    Serving: 2tablespoons | Calories: 168kcal | Carbohydrates: 1g | Protein: 1g | Fat: 18g | Saturated Fat: 2g | Polyunsaturated Fat: 4g | Monounsaturated Fat: 11g | Cholesterol: 38mg | Sodium: 115mg | Potassium: 16mg | Vitamin C: 1mg | Calcium: 28mg | Iron: 0.2mg
    Did you try this recipe?Let me know! Comment below, or take a picture and tag me on Instagram @everydayhomemadebyashley.

    Easy Seasoned Sourdough Bread Croutons (Made with Stale Bread)

    April 18, 2023

    These Sourdough Croutons are an easy, delicious way to use up leftover sourdough bread. Crispy and seasoned to taste, theyโ€™re perfect for topping salads and soups.

    Sourdough croutons on an aluminum baking sheet.

    Croutons are one of those things we usually grab at the store without a second thought. But making them at home is so easy. And they taste so much better, too!

    If you love to bake sourdough like I do, this recipe is a perfect way to use up any stale bread, from classic loaves to whole wheat or even dinner rolls.

    These sourdough croutons are tossed with oil or butter, seasoned with salt and your favorite herbs or spices, then baked until golden and crispy. Theyโ€™re perfect on salads, soups, or even eaten as a crunchy snack.

    If youโ€™ve got some leftover sourdough, give this recipe a try. I promise itโ€™s worth it!

    Disclaimer: Some links throughout this post are affiliate links. As an Amazon Associate, I earn from qualifying purchases. You can learn more by visiting my Affiliate Disclosure Page.

    Ingredients & Substitutions

    Here are some notes on the key ingredients. For the full list of ingredients, check out the recipe card below.

    • Sourdough Bread- Use any day-old, slightly stale sourdough. Classic sourdough, whole wheat, garlic & herb, sandwich bread, or even dinner rolls all work beautifully.
    • Oil or Butter- Use your preferred oil (olive, avocado, etc.) or melted butter.
    • Kosher Salt- I use Diamond Crystal Kosher Salt. If using Morton's or table salt, reduce slightly to avoid oversalting.
    • Seasonings- Customize to taste! Garlic powder, onion powder, Italian seasoning, rosemary, black pepper, or a mix.
    The ingredients to make sourdough croutons on a butcher block countertops. Each ingredient is labeled with text. They include sourdough bread, seasonings, and olive oil.

    Tips for Success

    • Use slightly stale bread. Itโ€™s easier to cut and absorbs oil and seasonings better. If your sourdough is fresh, let it sit out for a few hours or overnight.
    • Cut evenly. Cubes of uniform size bake more evenly.
    • Donโ€™t overcrowd the pan. Spread the bread in a single layer to ensure every cube gets crispy.
    • Toss for even browning. Stir once or twice during baking so all sides crisp evenly.
    • Watch closely. Croutons can go from golden to burnt quickly.
    • Cool completely. Let them cool fully on the baking sheet; theyโ€™ll continue to crisp as they cool.
    • Store properly. Keep croutons in an airtight container at room temperature to maintain crunch for up to 1 week.

    How to Make Sourdough Croutons

    Follow these simple step-by-step photos to make your own crunchy, seasoned sourdough bread croutons. Full instructions are in the recipe card below.

    Step 1: Cube the bread. Cut sourdough into ยฝโ€“1-inch pieces.

    Two hands cubing sourdough bread on a cutting board with a baking sheet to the right.

    Step 2: Season the bread pieces. Toss the cubes with oil or melted butter, salt, and your favorite seasonings. Spread in a single layer.

    A hand seasoning the cubed sourdough bread on a baking sheet.

    Step 3: Bake the croutons. Bake for 45โ€“60 minutes, stirring once or twice, until golden and crisp. Let the croutons cool completely.

    Two hands tossing the cubed bread with oil and seasonings.
    Baked sourdough bread croutons on an aluminum baking sheet.

    How to Store

    Store croutons in an airtight container at room temperature for up to 1 week.

    For longer storage, freeze in a freezer-safe container for up to 2 months. Allow them to thaw at room temperature and refresh in the oven before using.

    Serving Suggestions

    These sourdough croutons are perfect on salads, like spinach caprese, strawberry walnut, or arugula. They also add a satisfying crunch to creamy soups, such as pumpkin, broccoli, or potato.

    A bowl of salad topped with sourdough croutons.

    Let's Connect!

    Be sure to leave a comment below if you have any questions. You can also connect with me on Instagram, Facebook, Pinterest, or via email at [email protected].

    More Sourdough Recipes

    • A round loaf of Dutch oven sourdough bread.
      Beginner-Friendly Sourdough Bread Recipe (Dutch Oven Method)
    • Sourdough breadcrumbs on a baking sheet with a metal spoon scooping some up.
      How to Make Sourdough Breadcrumbs
    • A white bowl filled with sourdough stuffing. The stuffing is garnished with two leaves of fresh sage.
      Sourdough Bread Stuffing
    • A baking dish of sourdough french toast casserole with a few pieces missing and a spatula removing a piece.
      Sourdough French Toast Casserole

    ๐Ÿ“– Recipe

    Sourdough croutons on an aluminum baking sheet.
    Print Pin SaveSaved!

    Seasoned Sourdough Bread Croutons

    These Sourdough Croutons are an easy, delicious way to use up leftover sourdough bread. Crispy and seasoned to taste, theyโ€™re perfect for topping salads and soups.
    Course Bread, Salad
    Cuisine American
    Prep Time 10 minutes minutes
    Cook Time 1 hour hour
    Total Time 1 hour hour 10 minutes minutes
    Servings 6 cups
    Calories 422kcal
    Author Ashley Petrie, RDN, LDN

    Equipment

    • Serrated knife
    • Cutting board
    • Rimmed baking sheet
    • Parchment paper (optional)

    Ingredients

    • 1 ยฝ-2 pounds sourdough bread any type, preferably a day or two old
    • ยผ cup oil or melted butter
    • 1 teaspoon Diamond Crystal Kosher Salt reduce to ยฝ teaspoon if using Morton's or table salt
    • ยฝ-1 teaspoon seasonings of choice such as garlic powder, onion powder, black pepper, or rosemary

    Instructions

    • Preheat the oven to 325ยฐF and line a rimmed baking sheet with parchment if desired.
    • Cut sourdough bread into ยฝโ€“1-inch pieces and place them on the prepared baking sheet.
      1 ยฝ-2 pounds sourdough bread
    • Drizzle the cubes with oil or melted butter. Sprinkle with salt and your favorite seasonings, such as garlic powder, onion powder, black pepper, or rosemary. Toss gently to coat evenly, then spread the cubes in a single layer.
      ยผ cup oil or melted butter, 1 teaspoon Diamond Crystal Kosher Salt, ยฝ-1 teaspoon seasonings of choice
    • Bake for 45โ€“60 minutes, stirring once or twice, until the croutons are golden brown and crisp. Keep an eye on them near the end to prevent burning.
    • Let the croutons cool completely on the baking sheet. They will continue to crisp as they cool.

    Notes

    • Storage: Store in an airtight container at room temperature for up to 1 week or freeze for up to 2 months.

    Nutrition

    Serving: 1cup | Calories: 422kcal | Carbohydrates: 67g | Protein: 13g | Fat: 10.5g | Saturated Fat: 1.5g | Polyunsaturated Fat: 1.5g | Monounsaturated Fat: 6.5g | Sodium: 859mg | Potassium: 123mg | Fiber: 2g | Calcium: 20mg | Iron: 5.2mg
    Did you try this recipe?Let me know! Comment below, or take a picture and tag me on Instagram @everydayhomemadebyashley.

    Homemade Apricot BBQ Sauce

    April 12, 2023

    This Apricot BBQ Sauce is great for grilling, glazing, and dipping. Made with apricot preserves, tomato paste, and brown sugar, this easy fruit BBQ sauce recipe is the perfect balance of sweet and tangy. Make a big batch in just 15 minutes and use it for all of your favorite summer recipes.

    A bowl of apricot bbq sauce with a blue basting brush in it. The bowl is next to some burgers on a plate.

    Are you tired of store-bought BBQ sauces that all taste the same? If so, it's time to try this homemade apricot BBQ sauce!

    This delicious and easy-to-make sauce is a perfect addition to any grilled or smoked meats. The apricot preserves add a unique flavor to the fruit-based BBQ sauce that pairs well with all of your summer favorites.

    Plus, homemade fruit barbecue sauces make wonderful gifts. Take some to your next summer potluck party to share with friends and family.

    So, if you're ready to fire up the grill and get saucy with this easy apricot BBQ sauce recipe, keep reading to learn how to make it!

    Disclaimer: Some links throughout this post are affiliate links. As an Amazon Associate, I earn from qualifying purchases. You can learn more by visiting my Affiliate Disclosure Page.

    What Are Apricot Preserves?

    Apricot preserves are a sweet, slightly tangy spread made from apricots and sugar. They are often used as a topping for toast, bagels, or crackers or as a filling for pastries, cakes, or cookies.

    The flavor of apricot preserves compliments the sweet and tangy flavor of barbecue sauce.

    Apricot Preserves vs Apricot Jam

    While apricot preserves and apricot jam may seem similar, there is a subtle difference between the two.

    Apricot preserves are typically made with larger pieces of fruit and may be left chunky. On the other hand, apricot jam is often made with mashed fruit and has a smoother consistency.

    Can I Use Fresh Apricots For This Recipe?

    Fresh apricots can be difficult to find at the grocery store. But, if you happen to come across some fresh apricots and you want to use them to make apricot BBQ sauce, you certainly can.

    You can either turn them into homemade apricot preserves or dice them and cook them directly into the barbecue sauce.

    Just note that using fresh fruit to make this recipe may make it take a little longer than just 15 minutes. It also may require some adjustments to the other ingredients, such as brown sugar.

    Why You'll Love This Recipe

    • Sweet & Tangy- Apricots play well with the sweet and tangy characteristics of barbecue sauce because their flavor is sweet with a hint of sourness.
    • Homemade- Making barbecue sauce from scratch means you get to control the ingredients that go into it. No artificial flavors or preservatives here.
    • Ready in 15 Minutes- Homemade apricot barbecue sauce couldn't be easier to make. Just mix all of the ingredients in a saucepan and simmer until thickened.
    • Versatile- Use it to marinate meat, as a dipping sauce for fries, as a burger condiment, or as a sauce for pulled pork.

    Ingredient Notes

    Here are some notes on the key ingredients. For the full list of ingredients, check out the recipe card below.

    • Apricot Preserves- Apricot preserves can easily be found year-round at the grocery store with the rest of the jams and jellies. But, if you can, I highly recommend making your own apricot jam when apricots are in season.
    • Tomato Paste- Instead of ketchup, I opted to use tomato paste in this recipe. The tomato paste lends a richer, tangier tomato flavor to the BBQ sauce.
    • Brown Sugar- Along with the sweetness from the apricot preserves, brown sugar is used to balance the tanginess from some of the other ingredients.
    • Apple Cider Vinegar- The acidic component of this apricot barbeque sauce, the flavor of apple cider vinegar plays nicely with the flavor of the apricot preserves.
    • Worcestershire Sauce- Adds a salty, umami flavor to the barbecue sauce that helps balance the sweet and tangy flavors.
    • Seasonings- A blend of smoked paprika, garlic powder, onion powder, ground mustard, black pepper, cayenne pepper, and kosher salt gives this apricot preserves BBQ sauce a smoky, savory flavor.

    Did you know? Fresh apricots are typically in season from May-July. If you see fresh apricots at your local grocery store, take advantage while you can. Then, preserve them by making homemade apricot jam.

    The ingredients to make apricot bbq sauce. Each ingredient is labeled with text. They include spices, kosher salt, apple cider vinegar, apricot preserves, brown sugar, tomato paste, and Worcestershire sauce.

    Substitutions and Variations

    Here are a few ways you can try customizing this apricot BBQ sauce recipe to fit your diet and taste preferences.

    Substitutions

    • Apricot Preserves- Use apricot jam or jelly interchangeably in this recipe. Or experiment with other jam flavors like grape jelly, strawberry apple jam, and blueberry jam.
    • Tomato Paste- Swap tomato paste with ketchup, if preferred. However, you may want to reduce the sugar slightly if you do this.
    • Brown Sugar- Substitute brown sugar for granulated sugar, honey, or maple syrup.
    • Apple Cider Vinegar- Use white vinegar, red wine vinegar, balsamic vinegar, or lemon juice (in a pinch) to replace the apple cider vinegar.
    • Worcestershire Sauce- Swap Worcestershire sauce with soy sauce, tamari, or liquid aminos if desired.
    • Ground Mustard Powder- Replace 1 teaspoon of mustard powder with 1 tablespoon of dijon mustard or yellow mustard.
    • Seasonings- Substitute the garlic and onion powder for the real thing, if preferred. Smoked paprika can be replaced with chipotle chili powder or a few teaspoons of smoky adobo sauce.
    A glass bowl of apricot barbecue sauce on a white plate with two burgers.

    Variations

    • Gluten-Free- Use gluten-free Worcestershire sauce, tamari, or liquid aminos to make this apricot BBQ glaze gluten-free.
    • Reduced Sugar- Reduce the brown sugar to ยฝ cup for a lower-sugar version of this recipe. Additionally, making your own apricot jam from scratch can help reduce the amount of sugar in the recipe as well.
    • Spicy- Add a few teaspoons of hot sauce or increase the amount of cayenne pepper to give this barbecue sauce a little heat.

    Equipment Notes

    Here are some notes on any special equipment I used to make this recipe.

    • Saucepan- A heavy-bottomed, stainless steel saucepan is my preferred saucepan. But, any saucepan you typically use will work well as long as it can hold about 3 cups of simmering liquid.
    • Glass Jar- I store all of my homemade sauces in 16-ounce wide-mouth mason jars. Using a glass jar for food storage is great because it's reusable and non-toxic.

    How to Make Apricot BBQ Sauce

    Here is how to make homemade apricot BBQ sauce.

    Step 1: Add all ingredients to a saucepan. In a small saucepan, whisk together all of the ingredients until well combined.

    Step 2: Simmer to thicken. Set the saucepan over medium heat on the stovetop and bring to a gentle simmer. Reduce the heat to low and simmer the barbecue sauce for 10-15 minutes, whisking occasionally to prevent scorching, until your desired consistency is achieved. Keep in mind that the sauce will thicken up as it cools.

    The sauce simmering in a stainless steel pot on the stove.

    Step 3: Use or store the sauce. Use the sauce right away or store it in the refrigerator to use later.

    To store: Cool the sauce slightly before transferring it to a large glass jar. Label and date the jar. Store in the refrigerator for up to 2 weeks or in the freezer for up to 6 months.

    The homemade BBQ sauce in a glass jar on a wooden countertop.
    A glass mason jar filled with apricot BBQ sauce.

    Tips for Success

    • Use homemade apricot preserves. Unfortunately, many brands of store-bought apricot preserves are made with high fructose corn syrup. So, if you can find fresh apricots in season, try making homemade apricot preserves.
    • Taste and adjust. Everyone has different taste preferences. Some prefer sweeter sauces, while others enjoy a more tangy flavor. Taste the barbecue sauce before storing it to see if you want to add a little more sugar, salt, vinegar, or spices.
    • Use a splatter screen. In my experience, splatter screens are helpful in preventing a mess when simmering thick sauces.

    How to Scale This Apricot BBQ Sauce Recipe

    This recipe makes approximately 3 cups of apricot barbecue sauce.

    Depending on your needs, you may consider adjusting the amount of barbecue sauce you prepare. Try making a half batch if it's just for you or a double batch if you're hosting a backyard barbecue.

    Luckily, this recipe is easy to adjust simply by using half or double the amount of each ingredient.

    How to Use Apricot BBQ Sauce

    Homemade apricot BBQ sauce pairs well with all of your summer favorites thanks to its sweet, tangy, and smoky flavors. It is a great multipurpose condiment that can be used for marinating, grilling, glazing, roasting, and dipping.

    Brush apricot BBQ sauce onto meats, such as grilled chicken, pork chops, or steak. You can also spread it on vegetables or burgers during the last few minutes of cooking to add a flavorful glaze. Or use it as a dip for chicken tenders.

    Alternatively, mix it with chicken thighs or pork to make flavorful shredded BBQ tacos or used it as a condiment for sandwiches, pizzas, or calzones.

    A burger coated with homemade apricot BBQ sauce.

    Storage

    How to Store

    • Room Temperature- If you're planning to leave some apricot BBQ sauce out at room temperature during a party or cookout, only keep it out for a maximum of 2 hours to prevent the growth of bacteria.
    • Refrigerator- Store in a sealable glass jar or airtight container for up to 2 weeks in the refrigerator.
    • Freezer- Allow the sauce to cool completely, then freeze for up to 6 months. Consider freezing the barbecue sauce in small, usable portions for easier defrosting.
    • Canning- Many people use the water bath canning method to can homemade barbecue sauce recipes due to their high acidity and sugar content. However, I have not tested canning this apricot BBQ sauce recipe.

    Make Ahead

    Since homemade barbecue sauce has a relatively long shelf-life due to the sugar and acid, you can easily prepare it up to 2 weeks ahead of time.

    A bowlful of apricot BBQ sauce next to a couple of burgers.

    Frequently Asked Question

    Can you freeze barbecue sauce?

    Yes, homemade barbecue sauce can be frozen for up to 6 months. Store barbecue sauce in small containers or ice cube trays for easier defrosting.

    What is apricot BBQ sauce made of?

    Apricot BBQ sauce consists of apricot preserves, tomato paste, brown sugar, apple cider vinegar, and other seasonings.

    What do apricots taste like?

    Apricots have a similar flavor to other stone fruits like peaches and nectarines. However, they tend to be less sweet and slightly more tart or sour than other types of stone fruits.

    Why are apricots so expensive?

    Apricots are typically more expensive and harder to find in grocery stores because they are more difficult for farmers to grow. They're also not as sweet as peaches so there is not as much consumer demand for them.

    When are apricots in season?

    Most of the apricots in the United States are produced in California between May and July. Depending on where you live, you may be able to find fresh, local apricots as late as August.

    What brand of apricot preserves does not contain high fructose corn syrup?

    Unfortunately, many household name brands use high fructose corn syrup to make their apricot preserves. However, Bonne Maman Apricot Preserves are made without the use of high fructose corn syrup.

    Let's Connect!

    Be sure to leave a comment below if you have any questions. You can also connect with me on Instagram, Facebook, Pinterest, or via email at [email protected].

    More Summer Recipes

    • Four chipotle chicken tacos on a white plate.
      Shredded Chipotle Chicken Tacos (One-Skillet Recipe!)
    • An air fryer turkey burger topped with cheese and vegetables on a small white plate.
      Juicy Air Fryer Turkey Burgers (No Breadcrumbs)
    • Three tequila lime shrimp tacos with red cabbage slaw on a plate.
      Easy Tequila Lime Shrimp Tacos

    ๐Ÿ“– Recipe

    A bowl of apricot bbq sauce with a blue basting brush in it. The bowl is next to some burgers on a plate.
    Print Pin SaveSaved!

    Apricot BBQ Sauce

    This Apricot BBQ Sauce is great for grilling, glazing, and dipping. Made with apricot preserves, tomato paste, and brown sugar, this easy fruit BBQ sauce recipe is the perfect balance of sweet and tangy. Make a big batch in just 15 minutes and use it for all of your favorite summer recipes.
    Course Sauces
    Cuisine American
    Prep Time 5 minutes minutes
    Cook Time 10 minutes minutes
    Total Time 15 minutes minutes
    Servings 48 tablespoons (approx. 3 cups)
    Calories 35kcal
    Author Ashley Petrie, RDN, LDN

    Equipment

    • Saucepan
    • Whisk
    • Large glass jar for storing
    • Splatter screen optional

    Ingredients

    • 12 ounce jar (about 1 cup) apricot preserves
    • ยพ cup brown sugar packed
    • 6 ounce can (heaping ยฝ cup) tomato paste
    • ยฝ cup apple cider vinegar
    • 2 tablespoons Worcestershire sauce
    • 1 tablespoon smoked paprika
    • 1 teaspoon ground mustard
    • 1 teaspoon garlic powder
    • 1 teaspoon onion powder
    • ยฝ teaspoon kosher salt
    • ยฝ teaspoon black pepper
    • ยผ teaspoon cayenne pepper

    Instructions

    • In a small saucepan, whisk together all of the ingredients until well combined.
    • Set the saucepan over medium heat on the stovetop and bring to a gentle simmer. Reduce the heat to low and simmer the barbecue sauce for 10-15 minutes, whisking occasionally to prevent scorching, until your desired consistency is achieved. Keep in mind that the sauce will thicken up as it cools.
    • Use the sauce right away or store it in the refrigerator to use later.
      To store: Cool the sauce slightly before transferring it to a large glass jar. Label and date the jar. Store in the refrigerator for up to 2 weeks or in the freezer for up to 6 months.

    Notes

    • Taste and adjust. Everyone has different taste preferences. Some prefer sweeter sauces, while others enjoy a more tangy flavor. Taste the barbecue sauce before storing it to see if you want to add a little more sugar, salt, vinegar, or spices.
    • Quick Tip: Use a splatter screen to prevent the simmering sauce from splattering all over your stovetop.
    • Storage: Store sauce in a glass jar or airtight container for up to 2 weeks in the refrigerator or up to 6 months in the freezer.

    Nutrition

    Serving: 1tablespoon | Calories: 35kcal | Carbohydrates: 9g | Sodium: 24mg | Potassium: 50mg | Sugar: 8g | Vitamin C: 1mg | Calcium: 5.5mg | Iron: 0.2mg
    Did you try this recipe?Let me know! Comment below, or take a picture and tag me on Instagram @everydayhomemadebyashley.

    How to Cook Bacon in a Cast Iron Skillet (Cast Iron Bacon)

    April 8, 2023

    This Cast Iron Bacon is cooked to crispy, golden brown perfection in a cast iron skillet on the stovetop. Ready in just 15 minutes, bacon is a versatile ingredient that can be served as a breakfast side dish or crumbled over soups, salads, and more. Learn everything you need to know about how to cook bacon in a cast iron skillet.

    Five strips of cooked bacon in a cast iron skillet.

    Cast iron skillets are the perfect tool for cooking bacon. They distribute heat evenly, resulting in crispy, perfectly cooked bacon every time. Plus, cast iron skillets are versatile and durable, making them a great investment for any home cook.

    But the real secret to getting that crispy, flat bacon that doesn't stick to your skillet is all in the technique.

    Starting with a cold cast iron skillet and cooking the bacon low and slow produces crispier, more evenly cooked bacon. It also keeps it from curling up and sticking to the skillet, resulting in flat slices without needing a cast iron bacon press.

    So, keep reading to learn how to cook bacon in a cast iron skillet and impress your family and friends as you serve up mouthwatering cast iron bacon for breakfast.

    Disclaimer: Some links throughout this post are affiliate links. As an Amazon Associate, I earn from qualifying purchases. You can learn more by visiting my Affiliate Disclosure Page.

    Why You'll Love This Recipe

    • Cooked to Perfection- The bacon is rendered low and slow in a cast iron skillet so you can cook it to perfection every time. Whether you prefer your bacon chewy or crispy, this cast iron bacon recipe has you covered.
    • Easy- With minimal splattering and guaranteed crispiness, even beginner home cooks can master this easy bacon recipe.
    • Ready in 15 Minutes- From start to finish, it only takes 15 minutes to get crispy bacon on your breakfast table.
    • Versatile- This simple bacon recipe is perfect not only as a breakfast side dish but can also be used in soups, salads, sandwiches, and more.

    Ingredient Notes

    Here are some notes on the key ingredients. For the full list of ingredients, check out the recipe card below.

    • Good-Quality Bacon- When it comes to bacon, quality matters. Look for thick-cut bacon that doesn't contain a lot of sugar or other added ingredients. I typically use uncured bacon because it contains only naturally-occurring nitrates. Applegate Naturals Uncured Sunday Bacon is my favorite.
    Three long strips of raw bacon on a sheet of parchment paper.

    Cured vs Uncured Bacon

    At the grocery store, you may notice certain types of bacon labeled as "uncured." The difference between cured and uncured bacon comes down to the method used to preserve it.

    Traditionally, bacon is cured in a mixture of salt, sugar, and nitrates. These ingredients are added to the bacon to help prevent the growth of harmful bacteria.

    On the other hand, uncured bacon is not preserved using the traditional curing process. Instead, it's preserved using salt and celery powder, which only contains naturally-occurring nitrates.

    Equipment Notes

    Here are some notes on any special equipment I used to make this recipe.

    • Cast Iron Skillet- A cast iron skillet is an excellent tool for cooking up crispy and delicious bacon. Of course, the larger your skillet, the more bacon you can cook at one time.
    • Tongs- The perfect tool for flipping bacon, a good pair of tongs comes in handy for this recipe.

    Tips for Buying a Cast Iron Skillet

    Many people like to find antique cast iron skillets at thrift stores or antique shops and refinish them at home. Alternatively, you can often find restored cast iron skillets on online marketplaces like Etsy.

    If you want to buy new, I recommend Lodge brand products. Lodge cast iron skillets are affordable, high-quality, and made in the United States.

    How to Cook Bacon in a Cast Iron Skillet

    Here is how to cook bacon in a cast iron skillet.

    Step 1: Assemble bacon in cast iron skillet. Start the bacon in a cold cast iron skillet. Add as many strips as you can fit without overlapping too much. Fry the bacon in batches or use multiple skillets, if necessary. You can also cut the bacon strips in half to ensure the entire piece of bacon is able to make contact with the skillet.

    Five pieces of raw bacon in a cast iron skillet on the stovetop.

    Step 2: Cook the bacon. Turn the burner on your stovetop to medium-low. Cook the bacon for 10 minutes, then flip. Allow the bacon to cook for an additional 3 minutes before flipping again. Continue cooking and flipping the bacon until your desired doneness is achieved.

    Bacon starting to cook in a cast iron skillet on the stovetop.
    Partially cooked bacon in a cast iron skillet.
    Bacon cooking in a cast iron skillet on the stovetop.

    Step 3: Drain the bacon. Transfer the bacon from the skillet to a plate lined with paper towels to absorb any excess fat. Allow the fat in the skillet to cool slightly before discarding it or transferring it to a container to reserve.

    Cooked bacon on paper towels.

    Tips for Success

    • Use high-quality bacon. Look for thick-cut, naturally smoked, uncured or dry-cured bacon for the best flavor and texture.
    • Start with a cold skillet. Letting the bacon and the skillet heat up together renders out more fat, leading to crispier bacon that won't stick to your cast iron skillet.
    • Avoid overcrowding. Each piece of bacon should be able to make contact with the skillet. Overlapping the bacon slices will result in parts that are undercooked.
    • Cook low and slow. Cooking the bacon over medium-low melts the fat slowly, which leads to crisper bacon. It also means less splattering.
    • Don't overcook the bacon. Bacon can quickly go from perfect to burnt, so make sure you keep an eye on it. It will also continue to crisp up slightly after it's removed from the skillet.

    How Do You Clean a Cast Iron Skillet After Cooking Bacon?

    If you start your bacon in a well-seasoned, unheated cast iron skillet, cleaning it after cooking the bacon should be relatively easy.

    To Clean:

    1. Pour any excess bacon fat into a storage container to save for other recipes.
    2. Scrape off any pieces of bacon that are stuck to the skillet using a spatula or wooden spoon.
    3. Use a paper towel or tea towel to wipe up any remaining grease and pieces of bacon.
    4. That's it! There's no need to wash the rest of the grease out of the skillet. In fact, that small amount of leftover bacon fat will add to the seasoning of your cast iron skillet, helping to make it non-stick.

    How to Season a Cast Iron Skillet With Bacon Grease

    If you don't want to cook with the leftover bacon grease, you can always use it to season your cast iron skillet.

    A "seasoned" skillet is a skillet that has a small amount of fat bonded to the metal, resulting in a naturally non-stick surface. Using leftover bacon grease is an effective, economical, and easy way to season your cast iron skillet.

    Here's how to season a cast iron skillet with bacon grease:

    1. Preheat the oven to 350ยฐF.
    2. Pour a small amount of bacon fat into the cast iron skillet. Use a paper towel to spread the fat around, coating the entire surface of the pan in a very thin layer of fat (including the sides, bottom, and handle).
    3. Place the skillet upside down on the top rack of the oven with a rimmed baking sheet on the lower rack to catch any fat drippings.
    4. Bake the skillet for one hour.
    5. Turn off the oven and allow the skillet to cool completely inside of the oven before removing it.
    6. Repeat these steps one or two more times for the best results.
    Bacon cooking in a cast iron skillet.

    How to Cook Bacon Without a Cast Iron Skillet

    Don't have a cast iron skillet? I highly recommend investing in one!

    But, in the meantime - how do you make bacon without a cast iron skillet?

    It's easy! There are a variety of other methods you can use to cook bacon without a cast iron skillet. They include:

    • Stainless Steel Skillet- Follow the same instructions outlined in this recipe.
    • Non-Stick Skillet- Opt for a Teflon-free non-stick skillet for bacon. Then, follow the instructions outlined in this recipe.
    • Oven- Cook bacon on a parchment-lined baking sheet in an oven preheated to 400ยฐF for 10-15 minutes.
    • Microwave- Place bacon on a paper towel-lined, microwave-safe plate and cook on high for 6 minutes, flipping halfway through.
    • Air Fryer- Cook bacon in an air fryer preheated to 350หšF for 7-10 minutes.

    What to Serve With Cast Iron Skillet Bacon

    I think a better question is what can't you serve with bacon? Naturally, bacon pairs well with all kinds of breakfast dishes. Some of my favorite breakfast pairings include Southwestern Frittata, Sourdough Breakfast Sandwiches, and Buttermilk Sourdough Pancakes.

    Bacon can also take your side dishes to the next level. Try mixing crumbled bacon into some Maple Balsamic Brussels Sprouts, Sourdough Macaroni and Cheese, Sautรฉed Sweet Potatoes, or Roasted Green Beans and Carrots.

    It also makes a great topping for all kinds of potato dishes, such as Baked Potatoes and Potato Soup.

    Bacon strips on a small white plate with a piece of frittata.

    How to Use Leftover Bacon Fat

    After enjoying all of that deliciously crispy bacon, we can't forget about the bacon fat. Often discarded, bacon fat is liquid gold in the kitchen.

    Bacon fat is perfect for sautรฉing and can be used to replace butter or oil in a lot of your favorite savory recipes. I sometimes use bacon fat to make 4-Ingredient Potato Soup, Ground Turkey Shepherd's Pie, and Chipotle Chicken Tacos.

    Or use it to enhance the flavor of your favorite vegetable sides. Some of my favorites include Sautรฉed Asparagus and Honey-Chipotle Brussels Sprouts.

    You can also swap the butter for bacon fat in these Sourdough Tortillas.

    Storage and Reheating

    How to Store

    • Refrigerator- Store leftover bacon in an airtight container in the refrigerator for up to 5 days.
    • Freezer- Allow the bacon to cool completely before storing it in a freezer-safe plastic bag or container. Freeze leftover cooked bacon for up to 3 months.

    How to Reheat

    • Stovetop- Preheat a skillet over medium heat. Add the leftover strips of bacon to the skillet and heat for 1-2 minutes per side.
    • Oven- Preheat the oven to 400ยฐF. Lay strips of bacon out on a parchment or foil-lined rimmed baking sheet. Heat for 5-7 minutes or until fully warmed through.
    • Microwave- Place strips of bacon on a paper towel-lined, microwave-safe dish. Microwave on high for 30-60 seconds or until heated through.
    • Air Fryer- Lay strips of leftover bacon in an air fryer basket. Set the air fryer to 400ยฐF and cook the bacon for 2 minutes or until hot.

    Make Ahead

    Did you know that you can cook bacon up to four days in advance and reheat it just before serving?

    If you're considering making bacon ahead of time, my suggestion would be to cook it until it's just about to turn crispy. This way, when you reheat it, you can easily achieve that perfect crispy texture without overcooking it.

    It's a great time-saving hack for any breakfast or brunch party!

    Several strips of bacon on a white plate next to frittata.

    Frequently Asked Questions

    Does bacon stick to cast iron?

    If you start with a well-seasoned, cold pan, you should have no problems with the bacon sticking to your cast iron skillet. However, if your bacon contains a lot of added sugar, you may run into issues with the sugar burning and sticking to the skillet.

    Do you grease a cast iron skillet for bacon?

    No, a cast iron skillet does not need to be greased before frying bacon. Starting the bacon in a cold skillet and setting it over low heat cooks the bacon in its own fat.

    Can bacon grease be used to season cast iron?

    Yes, bacon grease can be used to season cast iron. See the "How to Season a Cast Iron Skillet With Bacon Grease" section above for instructions.

    How long does bacon last in the refrigerator after opening?

    According to the USDA, an open package of bacon will last up to one week in the refrigerator. For longer storage, you can freeze raw bacon for up to 4 months.

    How do I make turkey bacon in a cast iron skillet?

    Cook turkey bacon following the instructions outlined in this recipe. Keep in mind that turkey bacon typically contains less fat than regular bacon and may cook more quickly.

    Let's Connect!

    Be sure to leave a comment below if you have any questions. You can also connect with me on Instagram, Facebook, Pinterest, or via email at [email protected].

    More Breakfast Recipes

    • A bacon, egg, and cheese sourdough breakfast sandwich with avocado cut in half on a small white plate.
      Sourdough Breakfast Sandwich (Bacon, Egg & Cheese)
    • A piece of sourdough strata on a small white plate.
      Sourdough Strata (Breakfast Casserole)
    • Three sourdough discard biscuits stacked in a triangle shape on top of a wooden pizza peel. Out of focus in the background is a skillet of biscuits and a small glass jar of butter.
      Sourdough Discard Biscuits
    • Sourdough cinnamon rolls in a baking pan. One of the corner rolls is removed and there is an offset spatula resting in the open spot.
      Sourdough Discard Cinnamon Rolls

    ๐Ÿ“– Recipe

    Five strips of bacon in a cast iron skillet.
    Print Pin SaveSaved!
    5 from 1 vote

    How to Cook Bacon in a Cast Iron Skillet

    This Cast Iron Bacon is cooked to crispy, golden brown perfection in a cast iron skillet on the stovetop. Ready in just 15 minutes, bacon is a versatile ingredient that can be served as a breakfast side dish or crumbled over soups, salads, and more.
    Course Breakfast
    Cuisine American
    Prep Time 0 minutes minutes
    Cook Time 15 minutes minutes
    Total Time 15 minutes minutes
    Servings 8 servings (2 slices each)
    Calories 265kcal
    Author Ashley Petrie, RDN, LDN

    Equipment

    • 12-inch cast iron skillet
    • Tongs

    Ingredients

    • 1 pound good-quality bacon see notes

    Instructions

    • Start the bacon in a cold cast iron skillet. Add as many strips as you can fit without overlapping too much. Fry the bacon in batches or use multiple skillets, if necessary. You can also cut the bacon strips in half to ensure the entire piece of bacon is able to make contact with the skillet.
    • Turn the burner on your stovetop to medium-low. Cook the bacon for 10 minutes, then flip. Allow the bacon to cook for an additional 3 minutes before flipping again. Continue cooking and flipping the bacon until your desired doneness is achieved.
    • Transfer the bacon from the skillet to a plate lined with paper towels to absorb any excess fat. Allow the fat in the skillet to cool slightly before discarding it or transferring it to a container to reserve.

    Notes

    • What is considered good-quality bacon? Look for thick-cut, naturally smoked, uncured or dry-cured bacon for the best flavor and texture.
    • Quick Tip: Bacon can quickly go from perfect to burn, so make sure you keep an eye on it. It also continues to crisp up slightly after it's removed from the skillet.
    • Storage: Store leftover cooked bacon in the refrigerator for up to 5 days or in the freezer for up to 3 months.

    Nutrition

    Serving: 2slices | Calories: 265kcal | Carbohydrates: 1g | Protein: 19g | Fat: 20g | Saturated Fat: 7g | Polyunsaturated Fat: 3.5g | Monounsaturated Fat: 9g | Cholesterol: 56mg | Sodium: 955mg | Potassium: 283mg | Sugar: 0.5g | Calcium: 6mg | Iron: 0.5mg
    Did you try this recipe?Let me know! Comment below, or take a picture and tag me on Instagram @everydayhomemadebyashley.
    • « Go to Previous Page
    • Page 1
    • Interim pages omitted …
    • Page 4
    • Page 5
    • Page 6
    • Page 7
    • Page 8
    • Go to Next Page »

    Primary Sidebar

    Ashley wearing a colorful jacket and jeans standing in a boat harbor smiling at the camera.

    Hi, I'm Ashley!

    Welcome to Everyday Homemade, where I share fun and easy sourdough recipes, creative ways to use discard, and homemade meals that pair perfectly with fresh-baked sourdough bread.

    More about me

    Subscribe for new sourdough recipes every Saturday!

    Trending Recipes

    • Sourdough discard pizza dough stretched out on a pizza peel.
      Sourdough Discard Pizza Dough (No Yeast)
    • Sourdough discard brownies in an aluminum baking pan.
      Sourdough Discard Brownies
    • A stack of five sourdough granola bars with more bars out of focus in the background.
      Sourdough Granola Bars (Peanut Butter Chocolate Chip)
    • A plate of sourdough soft pretzels with honey mustard dipping sauce.
      Sourdough Soft Pretzels (or Pretzel Bites)

    Sourdough Recipes

    • Several sourdough chocolate chip cookies on a piece of wrinkled parchment paper on a wooden cutting board.
      Sourdough Chocolate Chip Cookies (No Chill)
    • A bowl of sourdough cheese crackers.
      5-Ingredient Sourdough Discard Cheese Crackers (Quick & Easy!)
    • Three nests of homemade sourdough pasta noodles on a flour-dusted baking sheet.
      How to Make Sourdough Pasta
    • A pile of sourdough discard tortillas on a white cloth.
      Sourdough Discard Tortillas (5 Ingredients!)
    ALL RECIPES

    Footer

    โ†‘ back to top

    Legal

    • Privacy Policy
    • Terms & Conditions
    • Affiliate Disclosure

    Newsletter

    • Sign Up! for emails and updates

    About

    • About
    • Contact
    • Work With Me

    As an Amazon Associate I earn from qualifying purchases.

    Copyright ยฉ 2025 Everyday Homemade