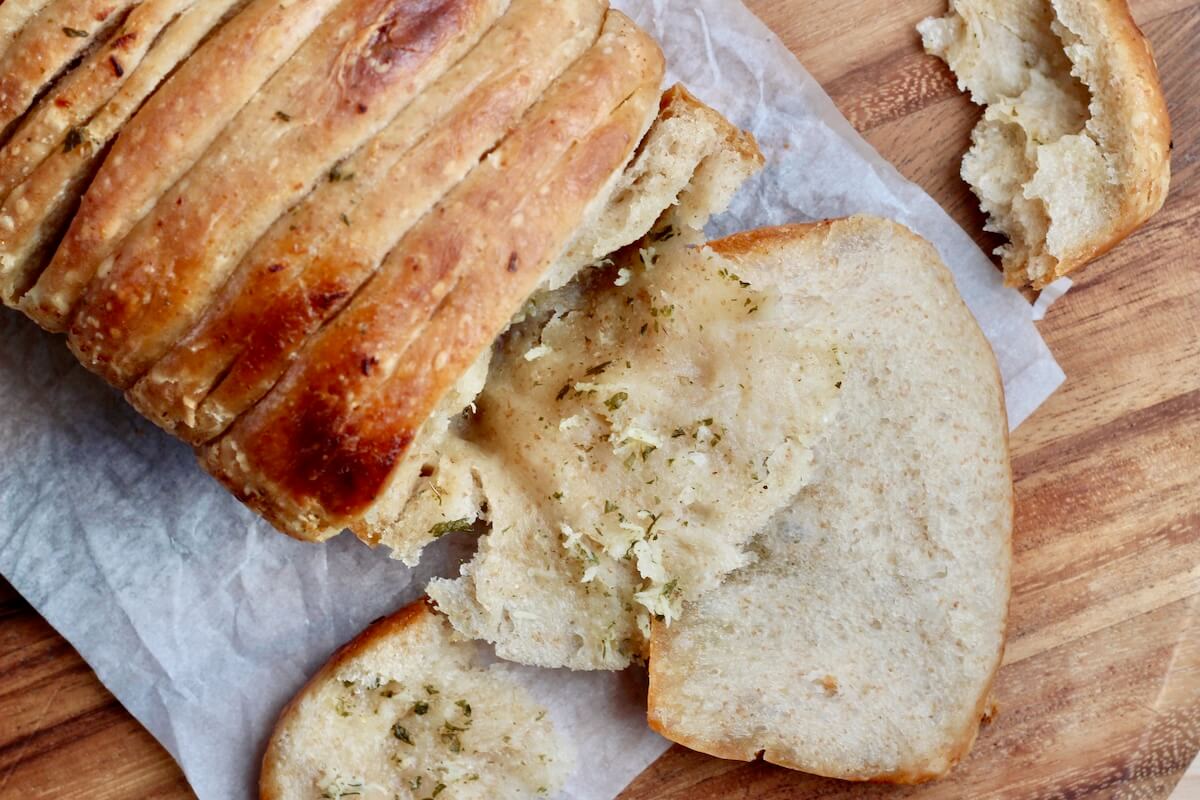
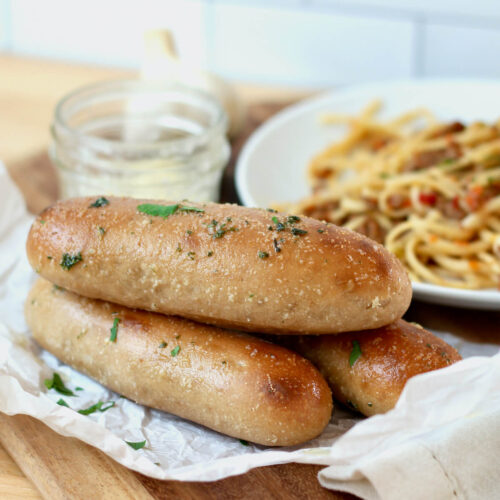
This Sourdough Pull Apart Garlic Bread is soft, fluffy, and layered with homemade garlic butter. Easy enough for beginners and irresistibly fun to pull apart at the dinner table!
Who doesn’t love warm, garlicky bread that you can pull apart piece by piece?
I experimented with this sourdough pull apart garlic bread for months before I finally made a loaf I was completely happy with. Luckily, my dad being Italian means he LOVES garlic, so he happily taste-tested every single batch.
This bread is soft and fluffy on the inside with golden, buttery edges and layers of rich, garlicky flavor in every bite.
I especially love this recipe because it pairs a simple, low-hydration dough with a homemade garlic butter for a fun, interactive side dish. And it’s easier than it looks, making it perfect for beginner sourdough bakers.
Serve it alongside your favorite comfort food, or enjoy it as a holiday appetizer or side.
I hope you love it as much as my dad and I do!
Disclaimer: Some links throughout this post are affiliate links. As an Amazon Associate, I earn from qualifying purchases. You can learn more by visiting my Affiliate Disclosure Page.
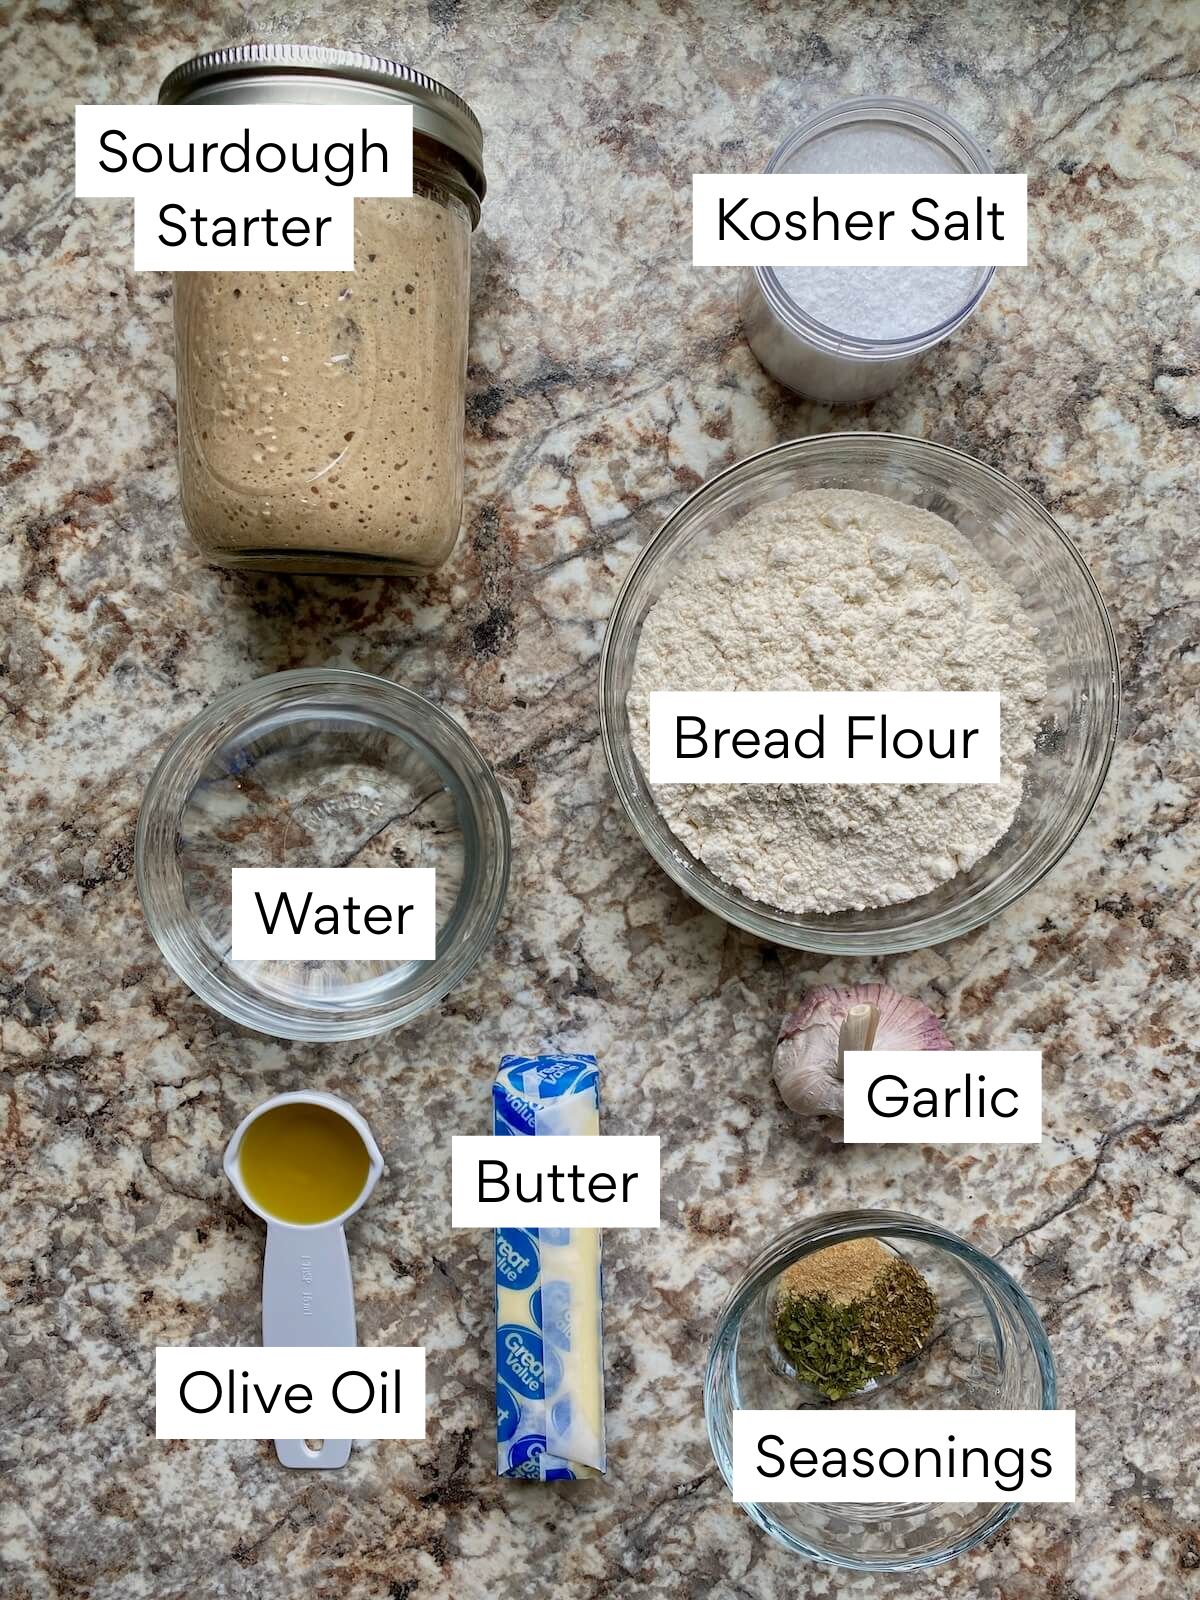
Ingredients & Substitutions
Here are some notes on key ingredients. For a full list of ingredients, check out the recipe card below.
- Active Sourdough Starter- Make sure it’s bubbly and active before mixing. You can use fresh discard (2–3 days old), but the dough may take longer to rise.
- Bread Flour- Gives the bread a soft, chewy texture and helps it rise nicely thanks to the extra gluten.
- Water- Use lukewarm or room-temperature water to encourage fermentation. Adjust slightly based on your preferred dough hydration or your kitchen’s humidity.
- Butter- Added to the dough for extra softness and tenderness. And of course, it’s key in the garlic butter filling.
- Extra Virgin Olive Oil- Makes the garlic butter more spreadable and adds flavor.
- Garlic- Fresh garlic and a touch of garlic powder give this bread a bold, savory flavor.
- Seasonings- A mix of garlic powder, parsley, oregano, and salt adds classic garlic-herb flavor. You can swap or add seasonings like basil, red pepper flakes, or black pepper.
- Kosher Salt- Enhances flavor. I use Diamond Crystal Kosher Salt (2.8 grams per teaspoon). If you’re using Morton’s or table salt, use half as much or weigh it for best results.
Tips for Success
- Use an active starter. A bubbly, well-fed starter gives the dough strength for a good rise and soft, airy texture. You can also use fresh discard (less than 3 days old), but the dough may take a bit longer to rise.
- Weigh your ingredients. A kitchen scale ensures accuracy and helps you get the dough’s hydration and texture just right.
- Be patient during bulk fermentation. Let the dough get puffy and nearly doubled—this is what makes your pull apart bread soft and fluffy.
- Try a straight-sided container. It’s easier to track the rise and know when the dough is ready if your container has straight sides and a marked starting point.
- Use a rimmed baking sheet under the loaf pan. This catches any drips of butter or oil and keeps your oven clean.
- Serve warm. Sourdough pull apart garlic bread is at its best straight from the oven, when the bread is soft and the garlic butter is melty and fragrant.
How to Make Sourdough Pull Apart Garlic Bread
Follow these step-by-step instructions with photos to see exactly how to make sourdough garlic pull apart bread.
Step 1: Feed starter. Make sure your sourdough starter is bubbly and active by feeding it 6–12 hours before mixing the dough. If using discard, skip this step.

Step 2: Mix the dough. Whisk warm water, starter, and melted butter. Add flour and salt, knead until no dry flour remains. Cover and rest 20 minutes.


Step 3: Stretch and fold. Do 4 sets of stretch and folds every 15 minutes until the dough is smooth and elastic.

Step 4: Bulk fermentation. Cover and let dough double in size. This can take 4–12+ hours.


Step 5: Make garlic butter. Mix softened butter, olive oil, garlic, parsley, oregano, garlic powder, and salt.

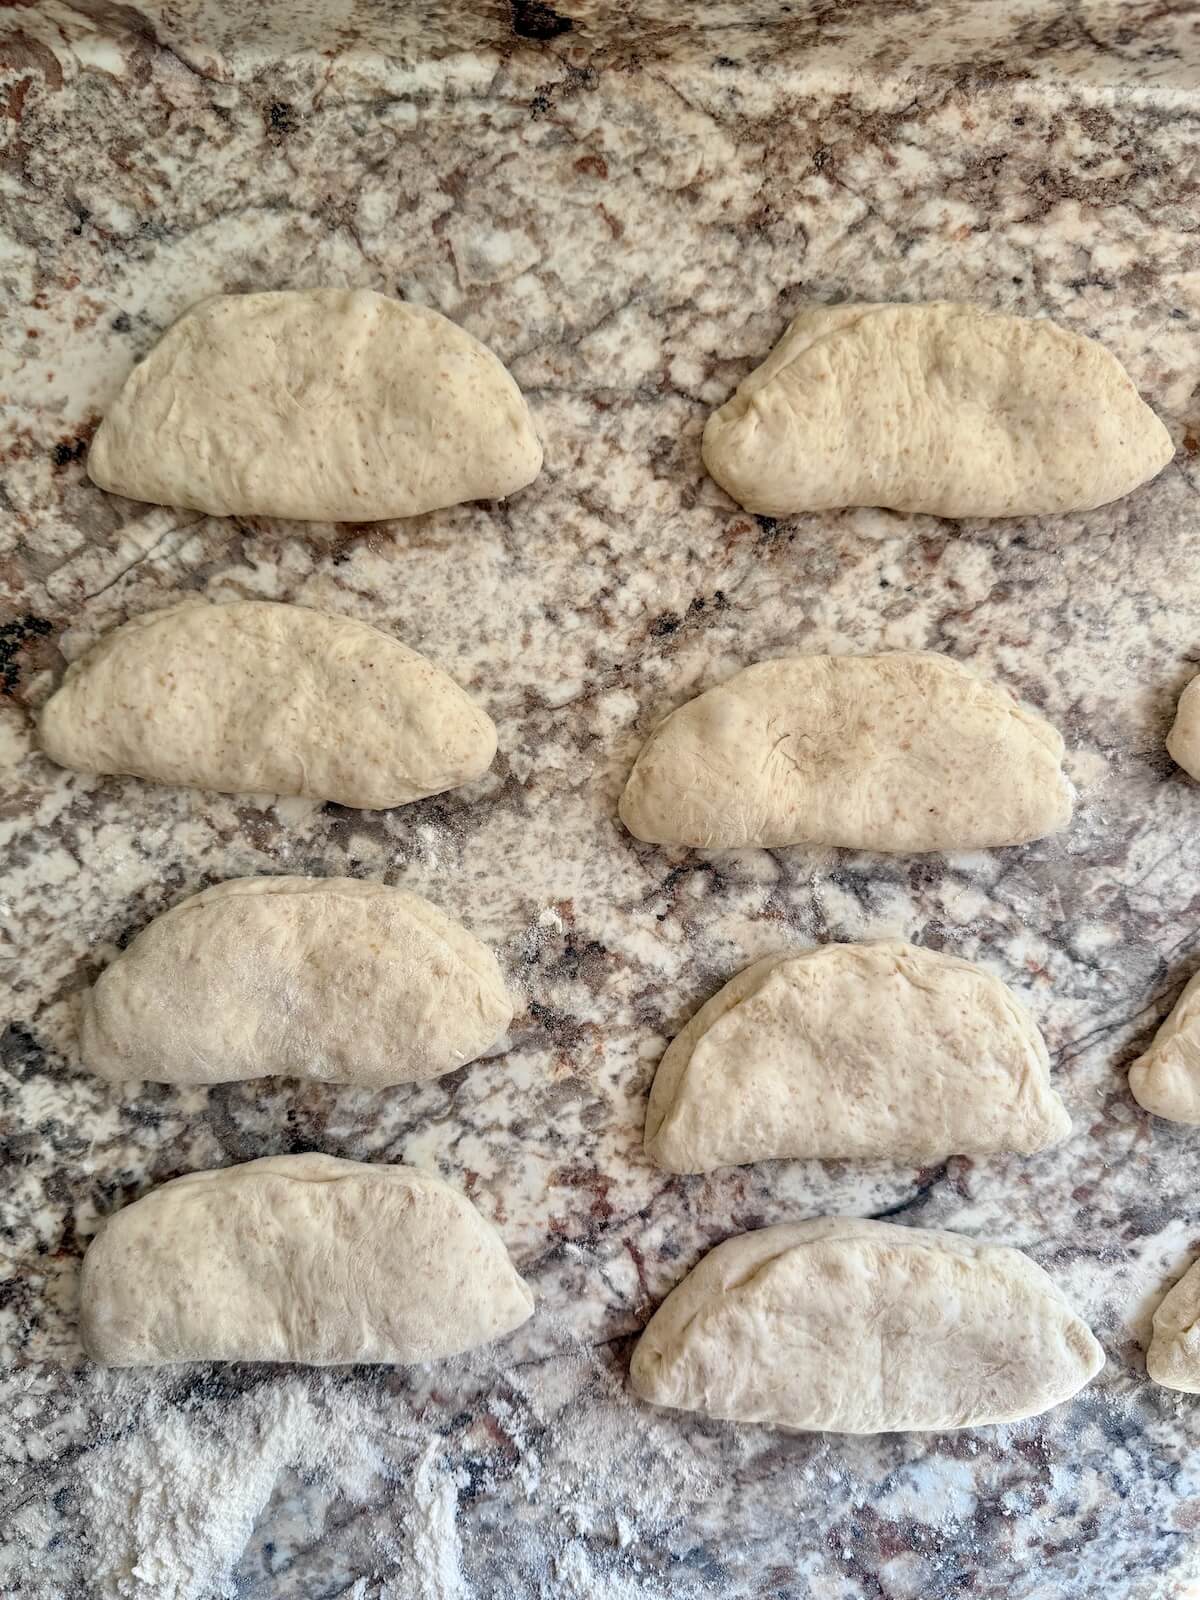
Step 6: Shape and fill with garlic butter. Divide dough into 12 pieces, pinch edges to form balls, then roll seam side down. Flatten each ball, spread about 1 tablespoon garlic butter, fold in half, and pinch edges.


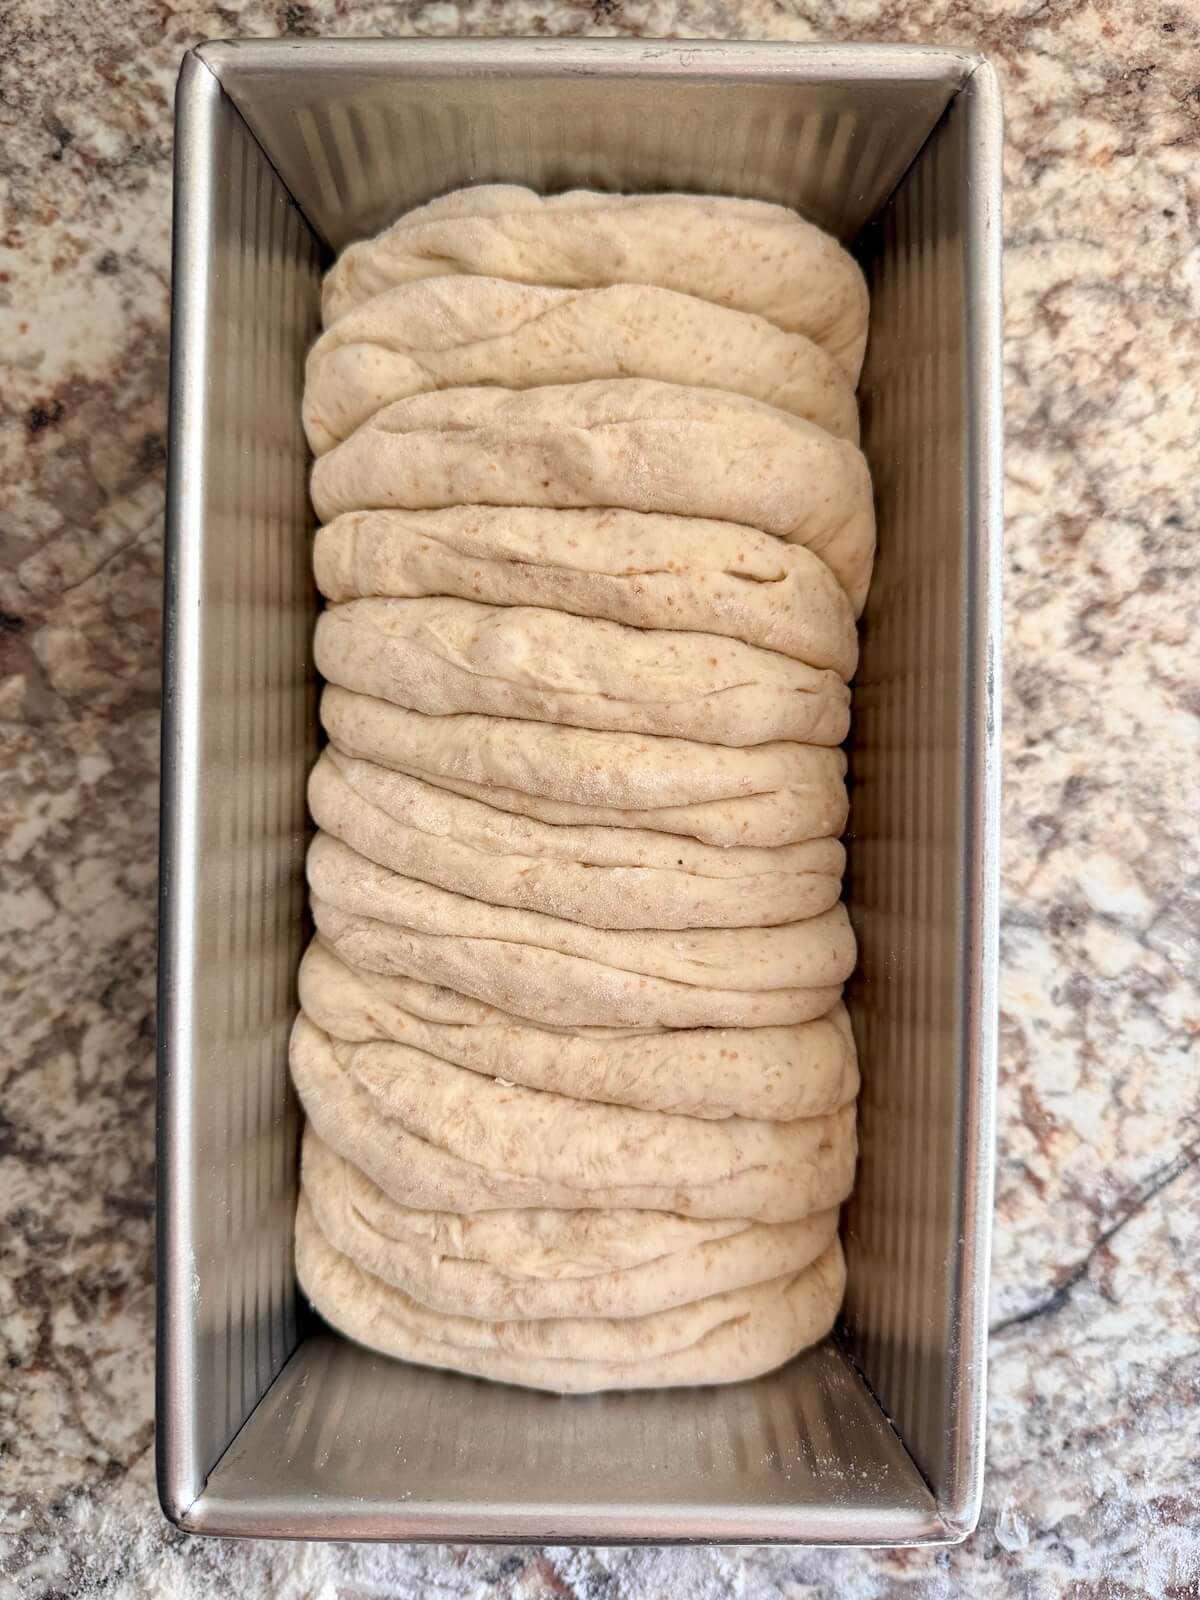
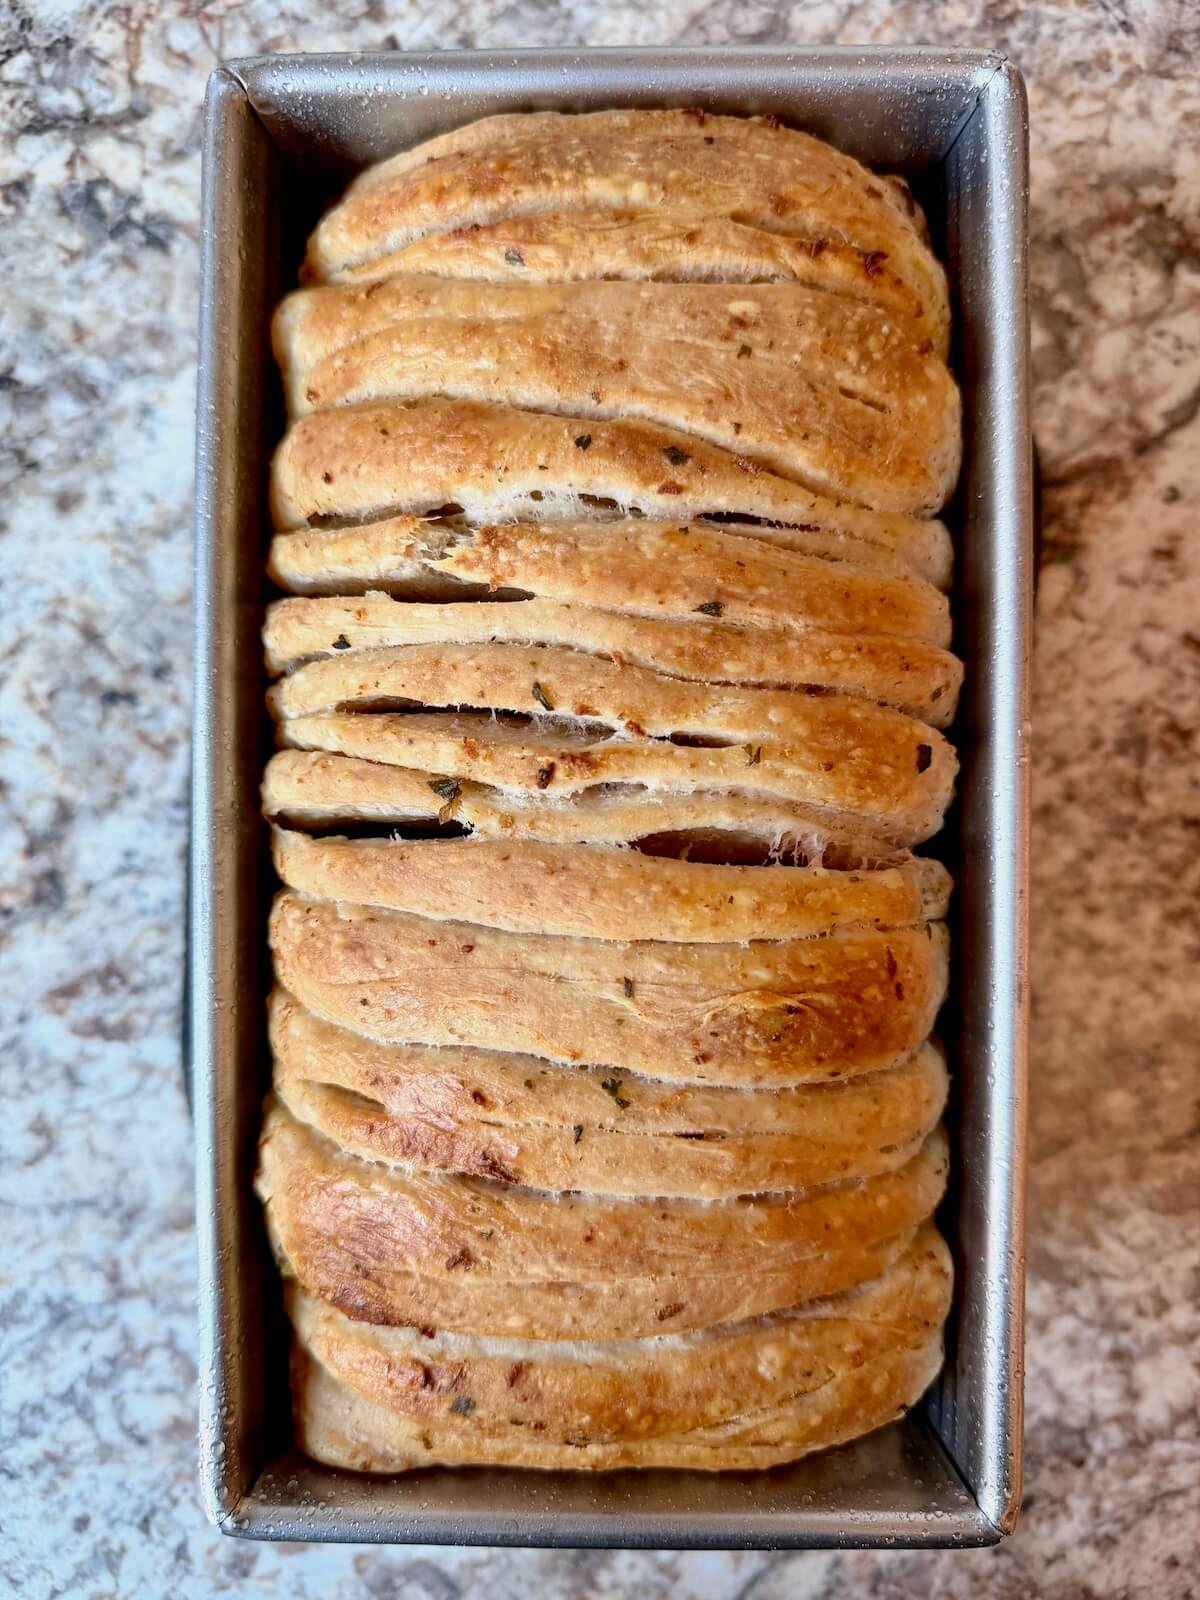
Step 7: Proof. Place filled dough in a loaf pan, flat side down. Cover and proof 1–3 hours until puffy.

Step 8: Bake. Preheat oven to 375°F. Cover pan with foil, bake 20 minutes, then uncover and bake 30 more minutes until golden. Cool 10 minutes in the pan, then transfer to a wire rack 30–45 minutes before serving.
Baker's Timeline
Use this sample timeline to help plan your sourdough pull apart garlic bread:
- 8:00 PM (Night Before): Feed your starter (if not using discard).
- 6:00–6:30 AM: Mix the dough, then rest 20 minutes.
- 6:30–7:30 AM: Complete stretch and folds.
- 7:30 AM–2:30 PM (varies): Bulk fermentation (until doubled in size).
- 2:30–3:00 PM: Shape the dough + fill with garlic butter.
- 3:00–5:00 PM (varies): Proof.
- 5:00–5:45 PM: Bake at 375°F.
- 5:45–6:15 PM: Cool before serving.
Note: Rise times can vary depending on the strength of your starter and the temperature of your kitchen and dough. Use visual cues—like when your dough has doubled in size—rather than the clock.
How to Store
Wrap any leftover garlic pull apart sourdough bread in foil or keep it in an airtight container at room temperature for up to 2 days.
For longer storage, wrap tightly in foil and freeze in a freezer-safe bag for up to 3 months. Thaw at room temperature.
To Reheat: Wrap in foil and warm in a 300°F oven for 10–15 minutes until soft.
Serving Suggestions
This sourdough pull apart garlic bread is perfect with sourdough mac and cheese, sourdough chicken pot pie, meatballs, bolognese, or alfredo pasta.


Are you tired of watching your sourdough discard go to waste?
It’s time to turn excess discard into something delicious with my new ebook - Everyday Sourdough!
Inside, you’ll find 27 tried-and-true sourdough discard recipes that will transform your leftover starter into mouthwatering creations your family and friends will love.
No more guilt about wasting your discard - with Everyday Sourdough, you have endless options to quickly make something amazing anytime.
Let's Connect!
Be sure to leave a comment below if you have any questions. You can also connect with me on Instagram, Facebook, Pinterest, or via email at [email protected].
📖 Recipe

Sourdough Pull Apart Garlic Bread
Equipment
- Straight-sided container (optional, for bulk fermentation)
Ingredients
Dough
- 1 cup (240 grams) warm water 80-90℉
- ½ cup (100 grams) active sourdough starter or "fresh" discard less than 3 days old
- 2 tablespoons (28 grams) unsalted butter melted
- 3 ¼ cups (390 grams) bread flour
- 2 ¾ teaspoons (8 grams) Diamond Crystal Kosher Salt if using Morton's brand or table salt, measure in grams or use 1 ½ teaspoons
Garlic Butter
- 8 tablespoons (113 grams; 1 stick) unsalted butter softened
- 2 tablespoons extra virgin olive oil
- 2 cloves garlic grated or finely minced
- ½ teaspoon dried parsley
- ¼ teaspoon dried oregano
- ¼ teaspoon garlic powder
- ¼ teaspoon Diamond Crystal Kosher Salt
Instructions
- About 6–12 hours before mixing, feed your starter so it’s bubbly, active, and doubled in size. Skip this step if using fresh discard (less than 3 days old).
- In a large bowl, whisk together warm water, sourdough starter, and melted butter. Add the bread flour and salt, kneading until no dry flour remains. Cover and rest for 20 minutes.1 cup (240 grams) warm water, ½ cup (100 grams) active sourdough starter, 2 tablespoons (28 grams) unsalted butter, 3 ¼ cups (390 grams) bread flour, 2 ¾ teaspoons (8 grams) Diamond Crystal Kosher Salt
- Lightly wet your hands. Lift one side of the dough, stretch it without tearing, and fold it across the top. Rotate the bowl 90° and repeat for all four sides. Rest 15 minutes. Repeat this stretch-and-fold set 3 more times (4 sets total), resting 15 minutes between each.
- Cover the dough and let it rise until doubled, bubbly, and jiggly—about 4–12 hours, depending on kitchen temperature. For easier tracking, transfer to a straight-sided container and mark the starting point.
- In a small bowl, combine softened butter, olive oil, grated garlic, parsley, oregano, garlic powder, and salt. Set aside.8 tablespoons (113 grams; 1 stick) unsalted butter, 2 tablespoons extra virgin olive oil, 2 cloves garlic, ½ teaspoon dried parsley, ¼ teaspoon dried oregano, ¼ teaspoon garlic powder, ¼ teaspoon Diamond Crystal Kosher Salt
- Turn the dough onto a lightly floured surface and divide into 12 equal pieces (about 63 g each). Shape each piece into a ball by pinching the edges together like a dumpling, then roll seam side down on the counter to create surface tension.
- Flatten each dough ball into a 4–5 inch circle. Spread about 1 tablespoon of garlic butter over the dough, leaving a small border around the edges. Fold in half and pinch edges to seal. Repeat for all 12 pieces.
- Place the filled dough pieces in the loaf pan flat side down, layering one by one. Cover and proof for 1–3 hours or until noticeably puffy.
- About 20 minutes before the dough is done proofing, preheat the oven to 375°F. Place the loaf pan on a rimmed baking sheet to catch any butter that might leak. Cover the loaf with foil and bake for 20 minutes, then remove the foil and bake another 30 minutes, or until golden brown.
- Let the bread cool in the pan for 10 minutes, then transfer to a wire rack for 30–45 minutes before serving.
Notes
- Storage: Store in an airtight container at room temperature for up to 2 days or freeze for up to 3 months. Thaw at room temp. Reheat in a 300°F oven for 10-15 minutes until soft.


Comments
No Comments