Learning how to make sourdough starter from scratch is easier than you might think. And it’s the first step to making delicious homemade sourdough bread! This small, low-waste starter uses minimal flour, so you don’t end up with a lot of discard.
A sourdough starter is a living mix of flour and water that captures wild yeast and bacteria from the environment. This tiny culture is what makes sourdough bread rise naturally and gives it that signature tangy flavor.
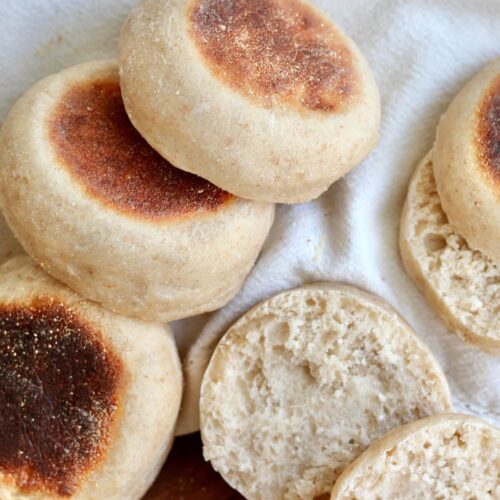
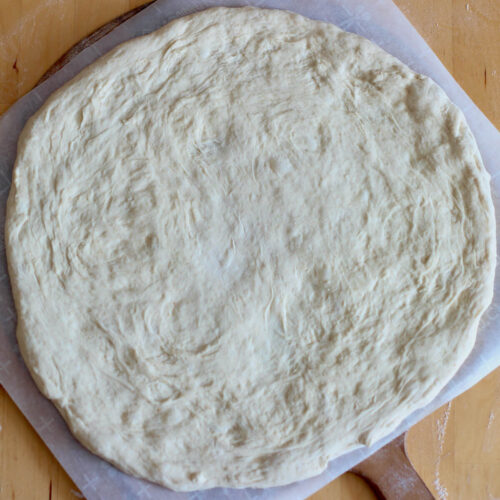
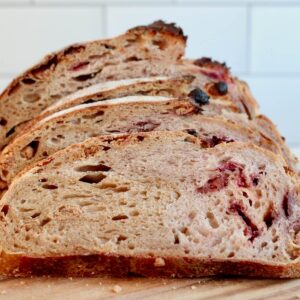
Once your starter is active, you can use it for a variety of homemade baked goods - from crusty loaves to pancakes, muffins, and even pizza dough. You can also reduce waste by using what’s leftover in sourdough discard recipes.
I’ve been baking sourdough for years, and I love how a simple starter can transform everyday ingredients into something truly special.
It might seem intimidating at first, but with a little patience and consistency, anyone can make a strong, bubbly starter at home. And once yours is ready, you’ll be able to try simple recipes like classic sourdough bread and see your starter in action.
Disclaimer: Some links throughout this post are affiliate links. As an Amazon Associate, I earn from qualifying purchases. You can learn more by visiting my Affiliate Disclosure Page.
Ingredients
- Whole wheat flour– Helps jumpstart fermentation because it naturally contains more wild yeast and bacteria. You don’t need much; even a small amount can give your starter a boost.
- Bread flour– Provides structure and food for the yeast as your starter grows. You can use all-purpose flour if that’s what you have on hand.
- Warm water (80–90°F)– Helps the yeast and bacteria wake up and start working. Too cold, and fermentation slows; too hot, and you risk harming them.
Tools
- Glass jar– A clear jar makes it easy to watch your starter bubble and rise.
- Kitchen scale– Accurate measurements are key for a healthy, consistent starter.
- Rubber spatula– Perfect for scraping down the sides and mixing thoroughly.
- Chopstick or spoon– Great for mixing. Chopsticks in particular do a great job of getting into the corners of the jar.
- Thermometer (optional)– Handy for checking your water temperature.
Tips for Success
- Use filtered water– Chlorine in tap water can slow down or harm the yeast and bacteria in your starter.
- Choose unbleached flour– Bleached flour may contain chemicals that affect the good microbes your starter needs.
- Keep the jar lightly covered– Your starter needs to breathe as it ferments. Cover loosely to prevent drying out but allow gas to escape.
- Maintain a consistent temperature– Store your starter in the warmest spot in your kitchen for predictable results.
- Avoid direct sunlight– The UV rays from the sun can harm the yeast and bacteria in your starter.
How to Make Sourdough Starter from Scratch
Making a sourdough starter from scratch is easier than you might think. Follow along with these step-by-step instructions and photos.
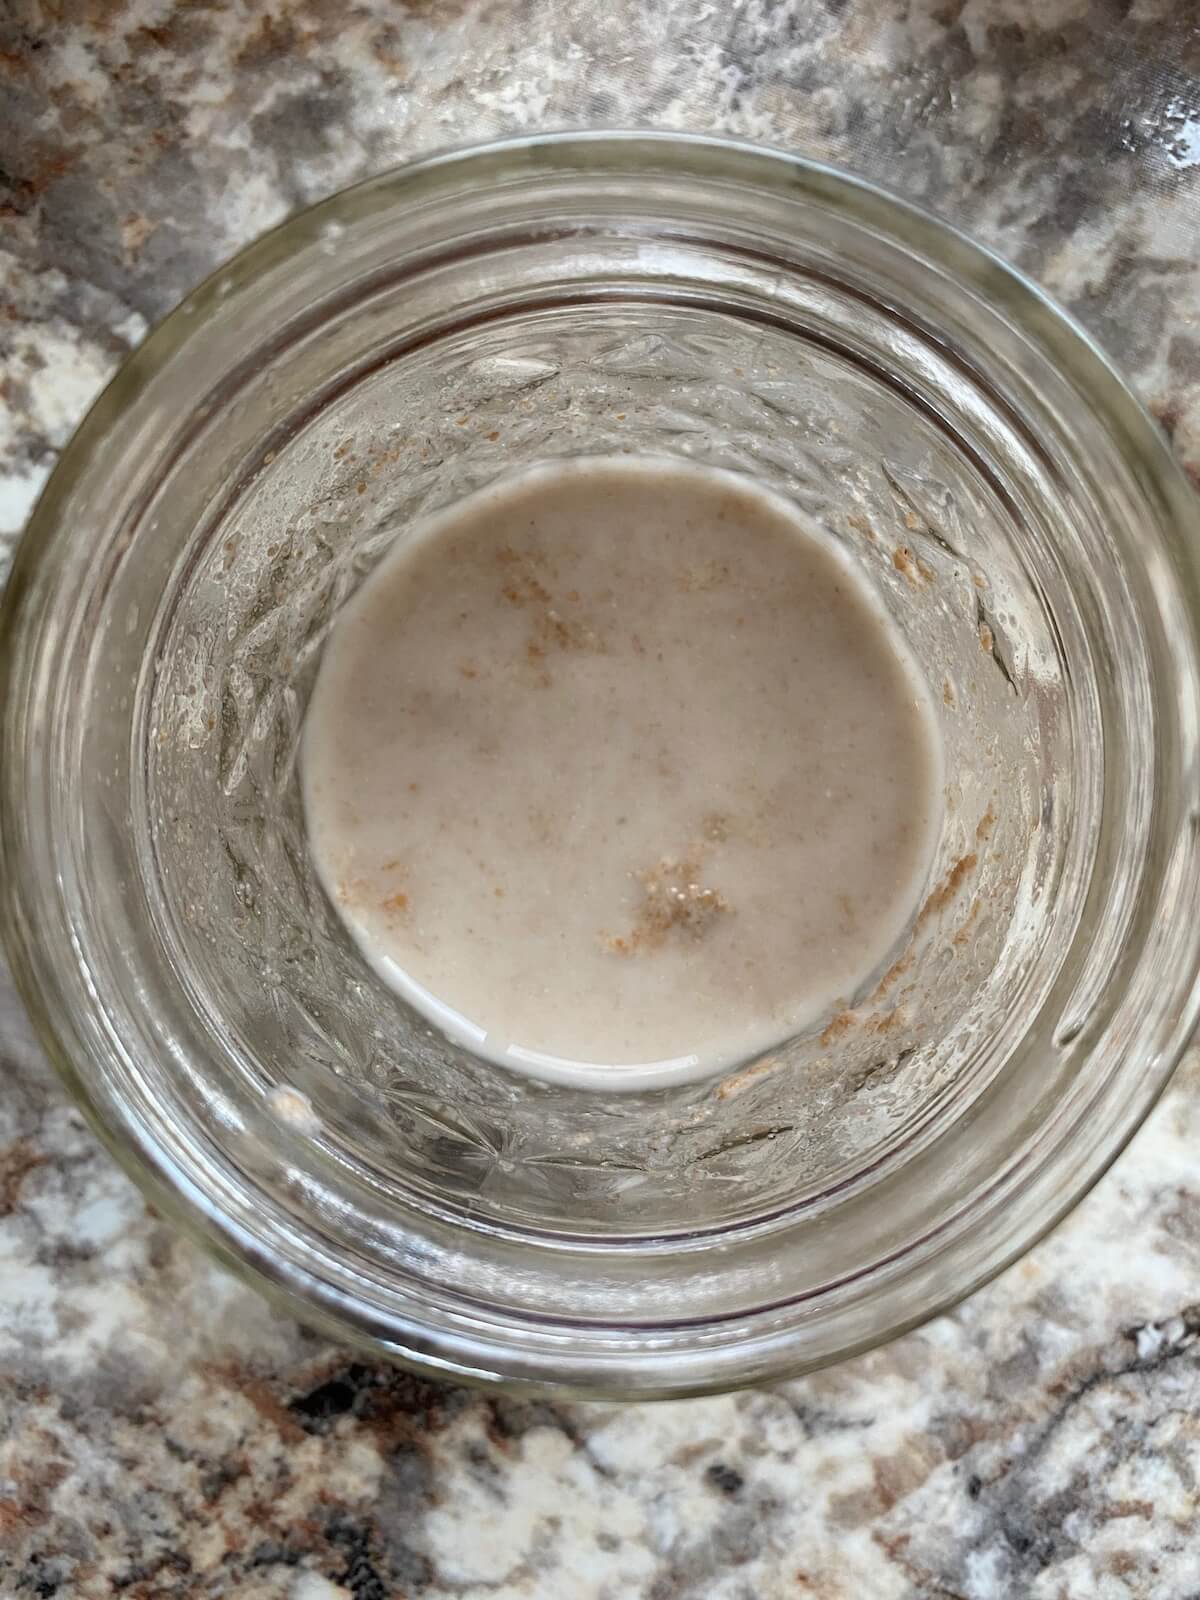
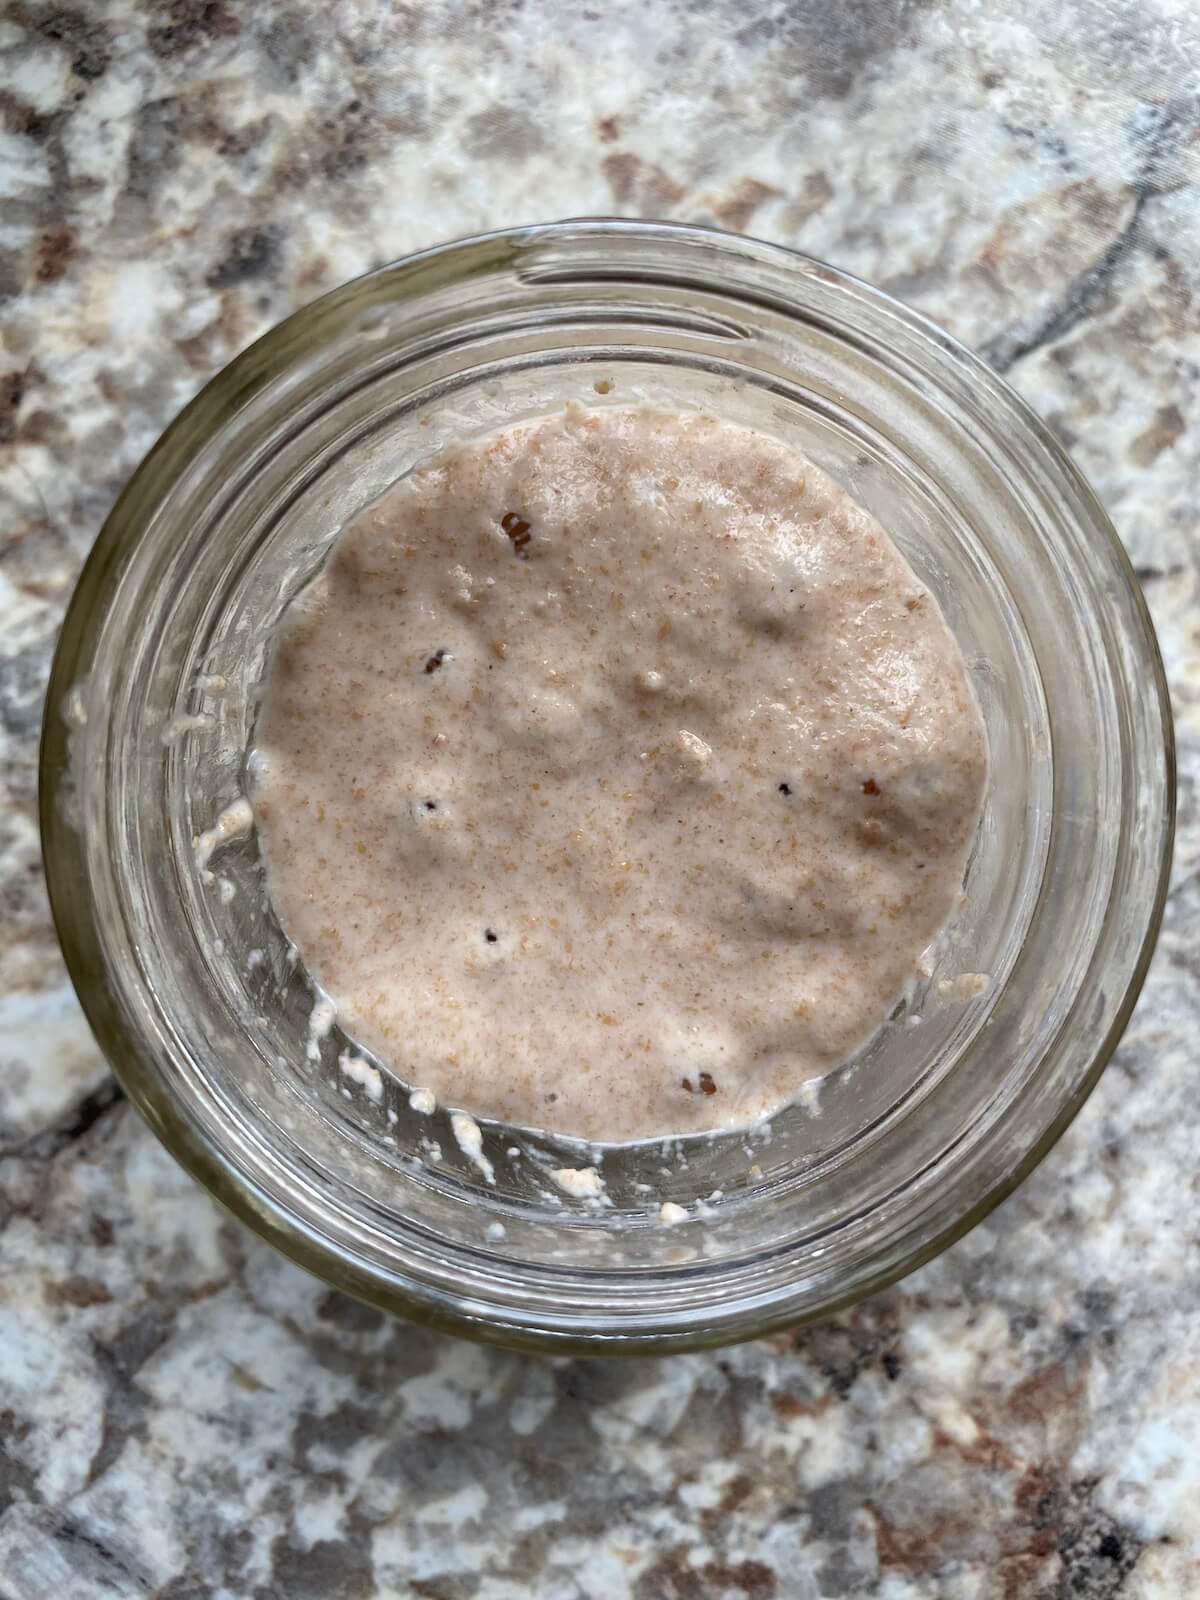
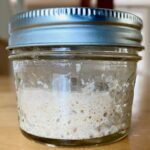
Day 1: Make the Starter
Mix 5 grams whole wheat flour + 5 grams warm water in a glass jar. Make sure no dry flour remains. Cover loosely and leave at room temperature (70–80°F) for 24 hours.


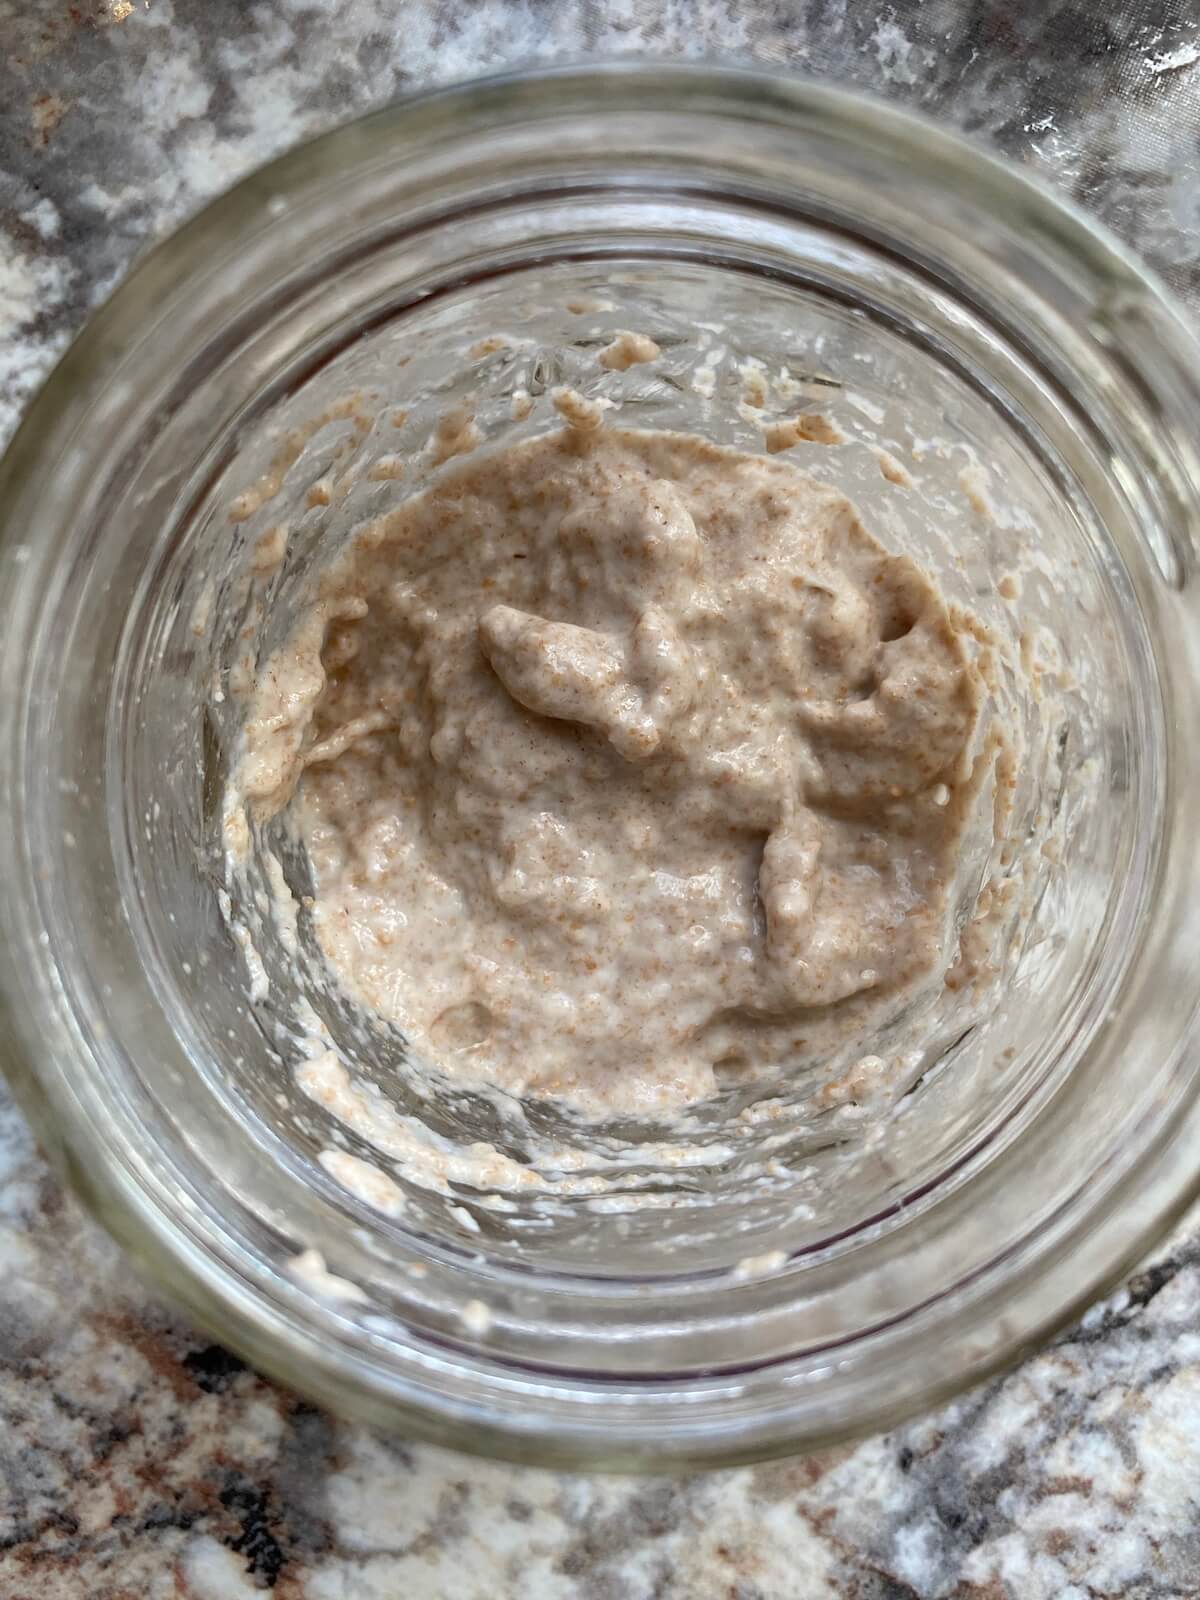
Day 2: Feed Without Discarding
Without discarding, add 5 grams whole wheat flour + 5 grams bread flour + 10 grams warm water. Stir well, cover, and leave at room temperature for 24 hours.

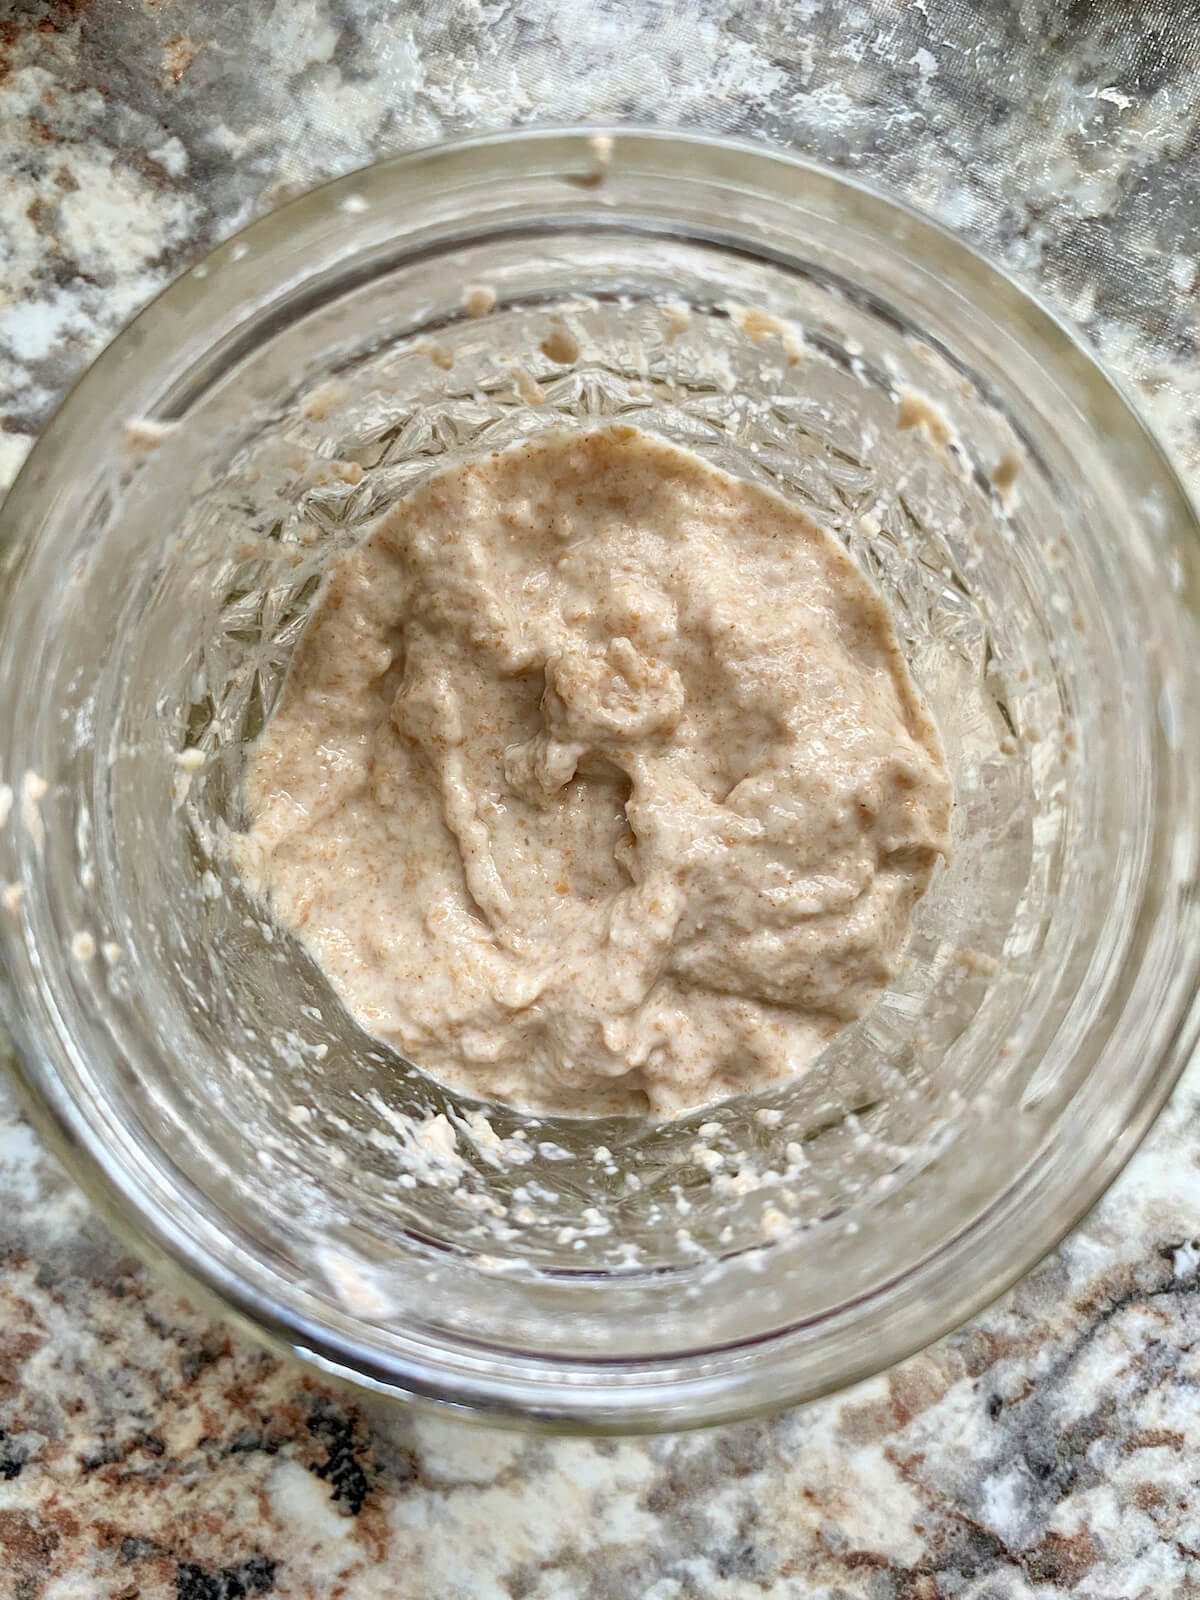
Day 3: Discard and Feed
You should have about 30 grams of starter now. Discard all but 5 grams.
Feed with 5 grams whole wheat flour + 5 grams bread flour + 10 grams warm water. Stir well and cover.
Day 3 may show a surge of bubbles that slows around day 5—this is normal as your starter’s yeast and bacteria balance out.


Day 4–6: Continue Feeding
The next several days of feedings are going to be the exact same.
Discard all but 5 grams of starter. Feed with 10 grams whole wheat flour + 5 grams bread flour + 15 grams warm water. Stir, cover, and leave at room temperature.
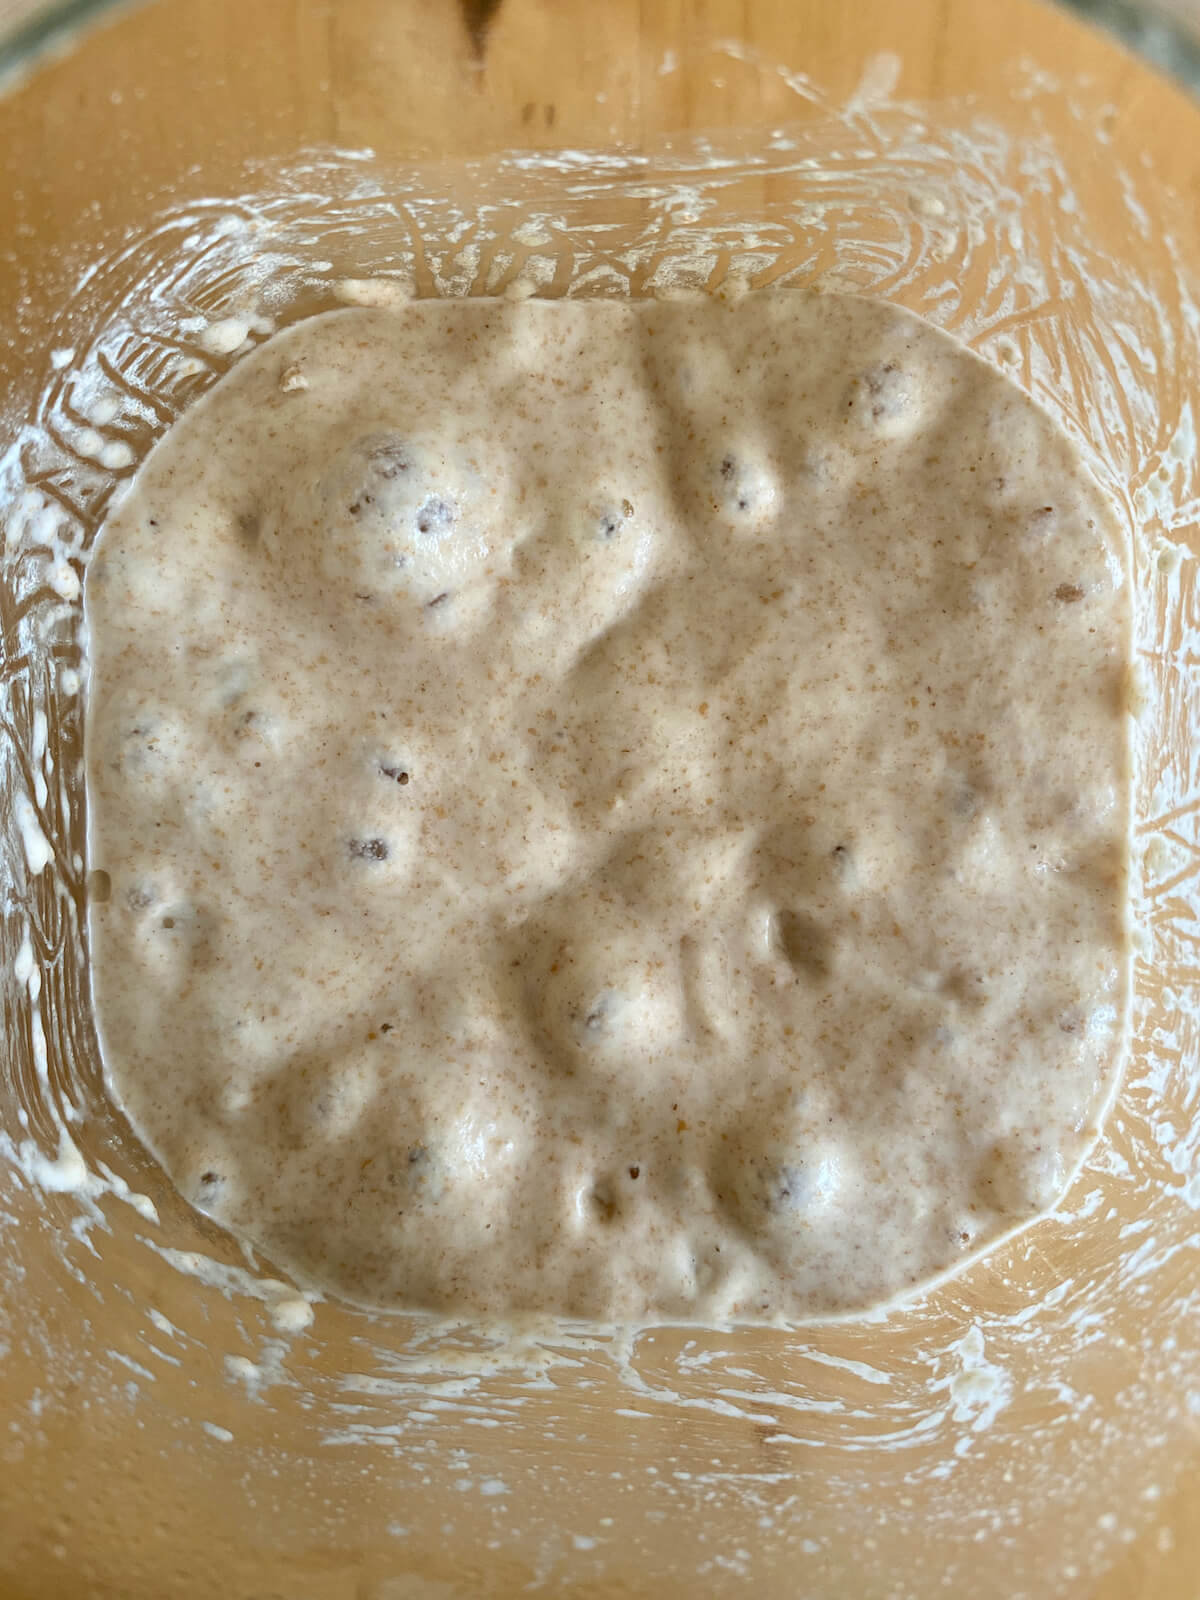
Day 7: Evaluate
By day 7, your starter should be bubbly and double in size 6–12 hours after feeding, depending on the temperature of your kitchen. If it isn’t there yet, keep feeding it the same way you’ve been for the past few days until it’s active.


How to Tell If Your Starter Is Ready
Here’s how to tell when your sourdough starter is bubbly, strong, and good to go.
- Bubbles- Lots of bubbles = active starter
- Size- Should double in ~6-12 hours
- Doming- Slight doming on top
- Aroma- Pleasantly yeasty and mildly sour
- Float Test- Drop a small piece in water—if it floats, it’s ready
What is Sourdough Discard?
Sourdough discard is the portion of your starter that’s removed before each feeding.
While it’s called “discard,” it doesn’t actually have to go to waste. Once your starter is established, this unfed portion can be used in a variety of recipes.
We discard part of the starter to keep it healthy and manageable. Without removing some, the starter would grow exponentially, which isn’t practical if you’re not baking every day.
It’s important to note that discard from the first 7 days of your starter isn’t ready for baking. During this time, the yeast and bacteria are still developing, and the mix may contain microbes that aren’t ideal for eating.
That’s why my small-batch starter method uses only a tiny amount of flour to produce minimal discard.
Troubleshooting Your Sourdough Starter
Getting a sourdough starter going can be tricky. I know from experience! But with a few adjustments, you can turn a sluggish starter into a happy, bubbly one.
- Use Whole Grains- Adding whole wheat or rye flour can make your starter more active and healthy.
- Feed More- If your starter isn’t rising well on a 1:1:1 ratio, try 1:3:3 (starter:flour:water) to give the yeast more food.
- Keep It Warm- Store your starter around 70–80°F (21–26°C) for best results.
- Avoid the Fridge- When building strength, keep your starter on the counter. Cold slows it down.
Understanding Feeding Ratios
Feeding ratios determine how much flour and water (the “food”) you give your sourdough starter. They help you control how active your starter is and how often you need to feed it.
For example, if you have 10 grams of starter, adding 10 grams of flour and 10 grams of water creates a 1:1:1 feeding ratio—equal parts starter, flour, and water by weight. This is the minimum ratio you should use to keep your starter healthy.
The ratio you choose depends on how often you want to feed your starter. Generally, giving your starter more food means you can feed it less frequently. Personally, I feed my starter at a 1:3:3 ratio every 24 hours, which keeps it strong and predictable.
Here’s a chart showing what different feeding ratios look like in actual amounts, starting with 10 grams of starter:
| Feeding Ratio | Starter | Flour | Water | Total Starter |
| 1:1:1 | 10 grams | 10 grams | 10 grams | 30 grams |
| 1:2:2 | 10 grams | 20 grams | 20 grams | 50 grams |
| 1:3:3 | 10 grams | 30 grams | 30 grams | 70 grams |
| 1:4:4 | 10 grams | 40 grams | 40 grams | 90 grams |
| 1:5:5 | 10 grams | 50 grams | 50 grams | 110 grams |
*Note that the amounts shown in this chart are based on starting with 10 grams of sourdough starter. You can adjust the amounts based on the size of your starter.
How Much Starter Do You Really Need?
You don’t need to keep a lot of starter if you’re not baking every day.
A small amount is enough. You can always grow more when you’re ready to bake. This saves flour and keeps your starter healthy.
For example, on non-baking days, I feed just 5 grams of starter with a 1:3:3 feeding ratio (about 35 grams total). When I’m ready to bake, I feed 25 grams of starter at the same ratio to get 175 grams of active starter to work with.
Maintaining Your Sourdough Starter
Once your starter is active, regular feeding is key to keeping it strong and healthy. How often and how much you feed depends on how you plan to store it and how often you bake.
Feeding Routine:
- Keep a small portion of starter (about 5 grams or whatever you need if you plan on baking).
- Add warm water and stir.
- Feed with a mix of bread and whole wheat flour, stirring until smooth.
- Cover loosely and store at room temperature.
Storage Options
- Room Temperature- Best if you bake multiple times a week. Feed about every 24 hours.
- Refrigerator- Ideal if you bake a few times a month. Feed every 7–10 days. Pull out 2–3 days before baking and feed regularly to reactivate.
- Freezer- Use only for mature starters (3+ months old). Can last up to 12 months.
Tips & Notes
- The gray liquid that sometimes forms on top is called hooch. It’s normal and safe; stir it back in or pour it off.
- Keep your starter at a consistent, warm temperature (70–80°F).
- If your starter smells musty or shows mold, discard it and start fresh.

Conclusion
Making your own sourdough starter from scratch might take a little patience, but the reward is huge.
Sure, you could buy a starter, but there’s nothing quite like nurturing your own and watching it come to life. Once it’s bubbly and strong, every loaf, cracker, or pizza dough feels that much more special.
Let's Connect!
Be sure to leave a comment below if you have any questions. You can also connect with me on Instagram, Facebook, Pinterest, or via email at [email protected].


📖 Recipe
How to Make Sourdough Starter
Ingredients
- 55 grams whole wheat flour
- 30 grams unbleached bread flour
- 85 grams warm water 80-90°F
Instructions
- Day 1: Mix together 5 grams of whole wheat flour and 5 grams of warm water in a small glass jar, making sure no dry flour remains. Cover loosely with a lid, cloth, or plastic wrap and store at room temperature for 24 hours.
- Day 2: Without discarding, add 5 grams of whole wheat flour, 5 grams of bread flour, and 10 grams of warm water to the jar. Stir until well combined and store covered at room temperature for 24 hours.
- Day 3: Discard all except 5 grams of starter. Add 5 grams of whole wheat flour, 5 grams of bread flour, and 10 grams of warm water to the remaining starter and stir well to combine. Store covered at room temperature for 24 hours.
- Days 4-7: Discard all except 5 grams of starter. Add 10 grams of whole wheat flour, 5 grams of bread flour, and 15 grams of warm water to the remaining starter. Stir well to combine, cover, and store at room temperature for 24 hours.
- Maintenance: By day 7, your starter should be very bubbly and doubling in volume roughly 6-8 hours after feeding when stored around 75℉. If not, continue feeding 5 grams of starter with 10 grams of whole wheat flour, 5 grams of bread flour, and 15 grams of warm water until your starter is active and bubbly.When you're ready to bake bread, you can increase the amount of starter by keeping and feeding 25 grams of starter with 75 grams of flour (a blend of 50 grams whole wheat flour and 25 grams bread flour) and 75 grams of warm water, which will give you about 175 grams of active starter to work with. Just don't forget to keep a small amount to feed again!
- Storage: If you bake often, store your starter at room temperature and feed it every 24 hours. If not, you may consider storing your starter in the refrigerator and only feeding it every 7-10 days. If you store it in the refrigerator, you will need to feed it for a day or two before baking with it to make sure it is nice and active.
Notes
- Avoid chlorinated water: Chlorine can slow down your starter and make it harder for your bread to rise
- Use unbleached flour: Bleached flour has fewer natural microbes, making it harder for your starter to get going.
- Keep a consistent temperature: Store your starter in a warm spot for predictable results.
- Avoid direct sunlight: Sunlight can damage the yeast and bacteria in your starter.

Heather says
Hi 👋 I have been baking with sourdough for about six months now with a starter that my friend gave me. It has been a great experience and I enjoy it so much! There is nothing wrong with my current starter, I just thought it would be fun to try making my own from scratch. My question is, how vital is it that I use bread flour with the whole wheat flour? I have a good quality unbleached all purpose flour that I always use that I can get a great price on. I would rather use it with the whole wheat flour, would that be sufficient?
Thanks for your help!
Heather
Ashley Petrie, RDN, LDN says
Hi Heather! You can use unbleached all-purpose flour in your starter instead. I just use bread flour because I always have it on hand, but unbleached all-purpose will work just as well. Hope this helps! 🙂
Sherry says
I've been trying to make the starter for 10 days now and it seems very sticky/dry should it not be more wet/liquid? I live at 5000 feet in New Mexico near Albuquerque. I don't know if the altitude is my problem. In regular baking alt. adjustments sometime require more liquid.. My starter on day 8 showed the most bubbles, since then it as just been sticky/gummy /dry
Thank you for any help. I'm continuing the feeding a 1:1:1: to see what happens.
Ashley Petrie, RDN, LDN says
Hi! When you first mix a starter, it does tend to be thick and sticky—almost like a thick paste—but you should be able to mix it until there's no visible "dry" flour. As it ferments and the natural yeast begins feeding on the flour, it will usually loosen up and become more liquidy, which is a sign it's time to feed it again.
While I don’t have specific experience with high-altitude baking, if your starter feels too dry when you first mix it (to the point that it’s hard to mix in all the flour), you could try adding just a few grams more water to see if that helps. It’s definitely normal for a starter to take some time to get active enough for baking—up to 2 weeks, or even longer to get fully "strong."
To help encourage yeast activity, try using either all whole wheat or a mix of whole wheat and all-purpose flour in your feedings, which can help boost activity. Another trick is to feed it at a 1:3:3 ratio (1 part starter to 3 parts water and 3 parts flour) so it won’t need as frequent feedings. With the 1:1:1 ratio you’re using, you might find it needs feeding more than once a day, as it can start to weaken if it goes too long between feeds.
Hang in there, and let me know if you notice any changes!
Sherry says
Thanks for the information but unfortunately my attempt for a starter developed mold so I tossed it and will try again. Thank you
Ashley Petrie, RDN, LDN says
Aww that's a bummer! I hope your next try works out better for you - don't give up! 🙂
Corbin says
Hi, this is day 3 of my starter however, I put it in the oven last night with the light on and wow, did it get warmer than expected - bubbly, liquidy and pungent smell… is it a possibility that it is ruined?
Ashley Petrie, RDN, LDN says
Hi Corbin! No need to worry - your starter probably isn’t ruined. On day 3, it’s still in the very early stages, and the yeast and bacteria you want haven’t fully established yet. The warmth from the oven likely made it overly active, which is why it’s bubbly, liquidy, and smells pungent. Give it a good stir, discard all but 5 grams, and feed it with fresh flour and water. Let it sit at room temperature moving forward. Keep feeding it daily for at least a week before you consider using it - this will give the right yeast and bacteria time to develop. You’re on the right track!
Wajiha Ashraf says
Hi! I have few questions! What temperature do you bake your sourdough bread and for how long?
Do I continue feeding the starter on day 8 and so on ? And when will the starter be ready
Thank you for your time !!
Ashley Petrie, RDN, LDN says
Hi! Typically a starter will be ready sometime after about 7-10 days but can take up to 14 days. Each starter is a bit different so it's hard to give an exact day. But if it's doubling in about 6-12 hours after feeding, then you can definitely try baking with it! And yes, you'd continue feeding on day 8 and continue feeding daily if you're storing it at room temperature. If you store it in the fridge, you can feed it weekly. But it may take a few feedings to "wake up" from the fridge. And for baking time/temp for sourdough bread, you can check out my beginner sourdough bread recipe. 🙂
Wajiha Ashraf says
Thank you for explaining so beautifully! Quick question can I use oat flour as a starter and then switch to bread flour when ready to bake ? Or can I just use oat flour for a starter and baking
Ashley Petrie, RDN, LDN says
You're welcome! And I'm actually not sure about the oat flour! I've never tried using it in sourdough starter. Might be a fun experiment to try this week though!
Diane says
If storing your starter in the fridge and when you want to use it and you're feeding it, do you continue to leave it in the fridge or can you use the starter in a recipe directly from the fridge?
Ashley Petrie, RDN, LDN says
Hi Diane! If you want to use your starter that's been stored in the refrigerator in a bread recipe, I'd recommend taking it out about a day ahead of time and feeding it at least once to get it going again. If you're making a discard recipe that doesn't depend on the starter to make it rise then you can use it straight from the fridge.