This Sourdough Discard Pizza Dough requires no yeast and is ready the same day! It’s made with just 4 ingredients and uses nearly 2 cups of unfed starter for a tangy, flavorful pizza crust.
This sourdough discard pizza dough is the recipe that really changed everything for me.
When I first started my blog, I didn’t really have a niche. But then this pizza dough took off on Pinterest, and more and more people started finding my sourdough recipes.
That’s when I realized - I loved baking with sourdough. And so did you!
So I leaned in and started creating more sourdough recipes, from creative ways to use up discard to sourdough loaves and everything in between.
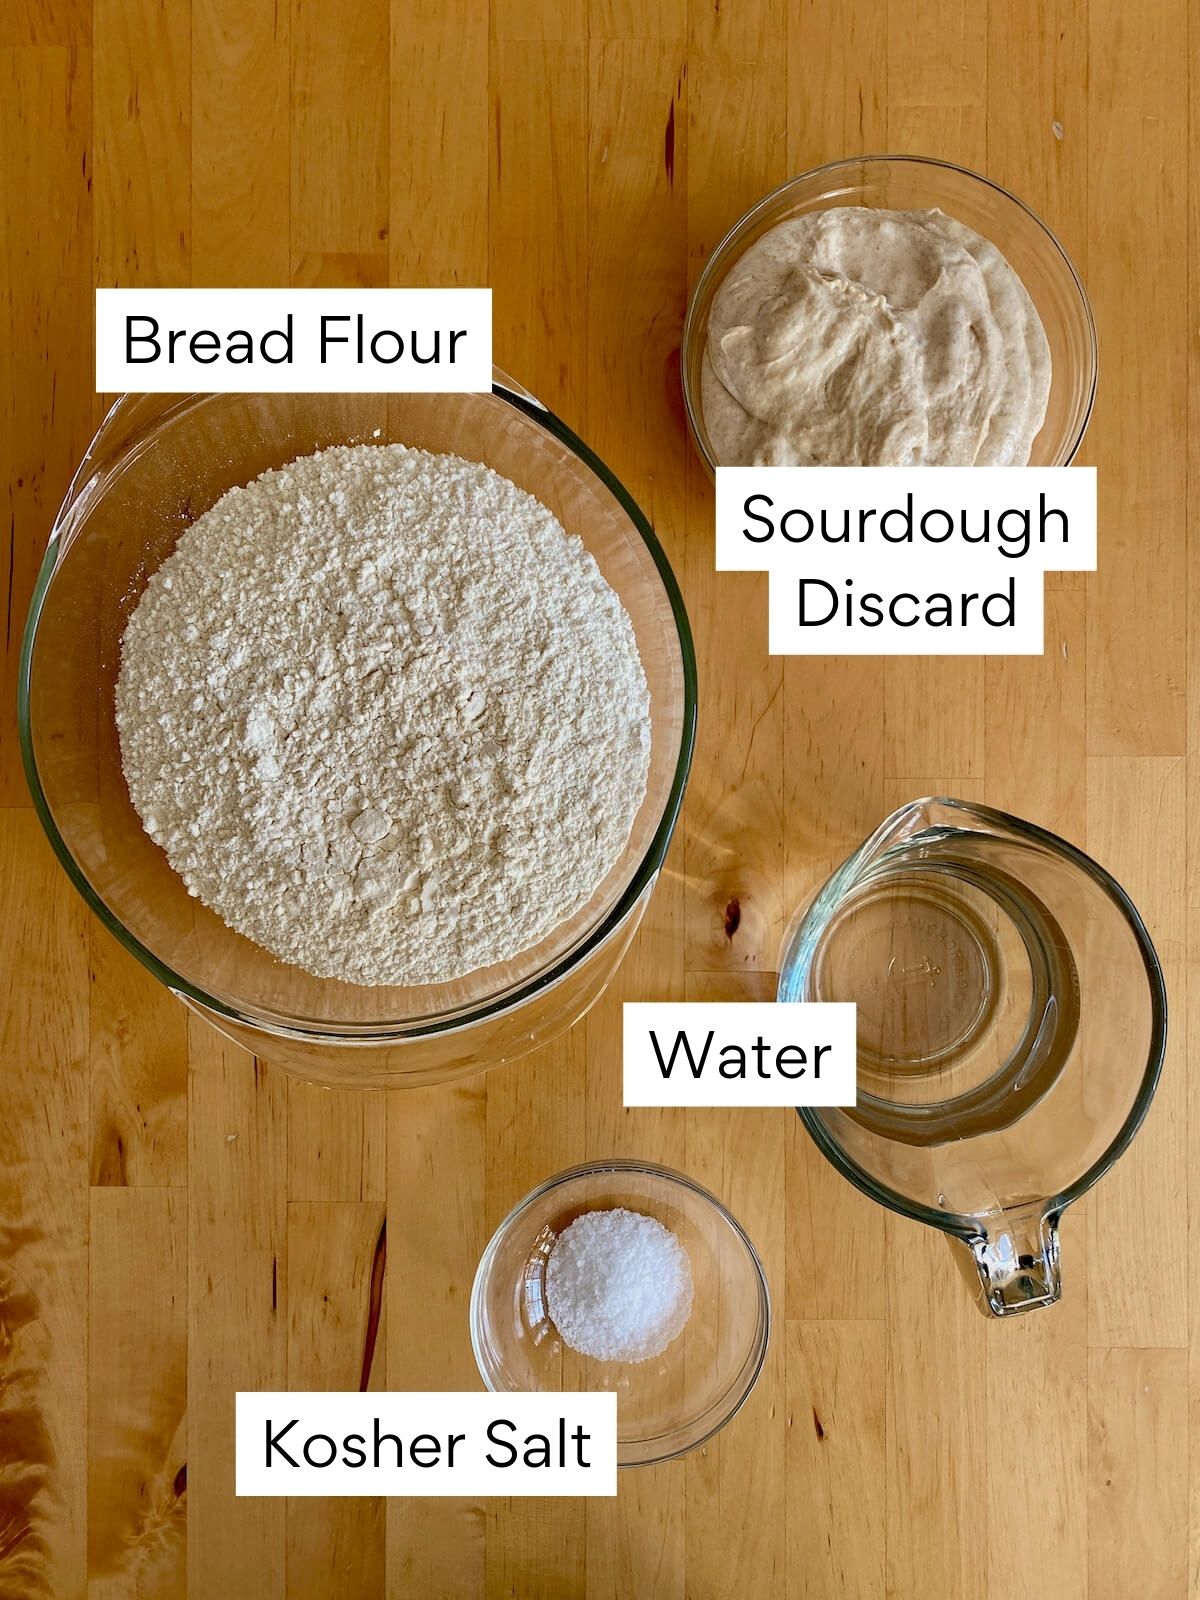
I still make this pizza dough all the time because it’s just so easy. It’s made with only four ingredients (flour, water, salt, and nearly two cups of sourdough discard) and no added yeast.
The discard adds flavor and speeds up fermentation, so it’s ready the same day. This recipe also uses the stretch and fold method, so there’s no kneading involved.
It’s been a staple in my kitchen for years, and based on the feedback I’ve gotten, it’s become a favorite for so many of you too.
I hope you give it a try and love it as much as I do!
Disclaimer: Some links throughout this post are affiliate links. As an Amazon Associate, I earn from qualifying purchases. You can learn more by visiting my Affiliate Disclosure Page.
⭐ What Readers Are Saying
- “I love your recipe! Comes out perfect every time.” ⭐⭐⭐⭐⭐ - Brandy
- “My family absolutely loves this pizza dough!!” ⭐⭐⭐⭐⭐ - Makayla
- “Made this recipe same day and had one fermented for 5 days. Everyone loveeeeeed the fermented pizza! The same day pizza came out more thin crust. But the fermented one was so full of bubbles and flavor!!! I used Parchment Paper to roll out on given its texture. Hands down will be making this again but definitely ahead of time in the week to let it get happy.” - Theresa on Pinterest
Ingredients & Substitutions
Here are some notes on key ingredients. For a full list of ingredients, check out the recipe card below.
- Sourdough Discard- This recipe uses a generous amount of sourdough discard to help speed up fermentation and add that signature sourdough tang. For best results, use discard that’s less than 7–10 days old, or substitute with active sourdough starter if you prefer.
- Bread Flour- Bread flour is ideal for pizza dough because of its higher protein content, which helps build gluten and gives the crust a chewy, satisfying texture. You can use all-purpose flour instead, but the crust may be a little softer. Prefer whole grains? Try my 100% whole wheat sourdough pizza dough recipe!
- Water- Use water that’s around 80-90°F to encourage fermentation and help the dough come together smoothly. This dough has a higher hydration level and can feel sticky - especially if you’re new to sourdough. If you want something easier to handle, reduce the water to 250 grams.
- Kosher Salt- I use Diamond Crystal Kosher Salt (2.8g per teaspoon). If you're using Morton’s kosher salt or table salt, reduce the volume by half or measure by weight to avoid oversalting.
Topping Ideas
This sourdough discard pizza dough is perfect for any topping. Try these ideas:
- Sauces- Start with marinara, bolognese, pesto, or alfredo.
- Classic Combos- Go for pepperoni, buffalo chicken, garlic parmesan white pizza, or mushroom pizza.
- Calzones- Make a pepperoni and cheese calzone.
Tips for Success
- Weigh your ingredients. For the most consistent results, use a kitchen scale to measure your ingredients. If you're using measuring cups, spoon the flour into the cup and level it off - don’t scoop!
- Use fresh discard or active starter. For best texture and rise, use discard that's less than 7–10 days old. You can also use active sourdough starter if you have some ready.
- Find a warm spot for bulk fermentation. Sourdough loves warmth! Aim for around 75–80°F. If your kitchen is chilly, try placing the covered dough in your oven with just the light on.
- Stretch the dough by hand. Skip the rolling pin—gently stretch the dough using your hands to keep those beautiful air bubbles intact.
- Flour as needed while shaping. Lightly dust your hands and work surface with flour to prevent sticking while stretching the dough. It’ll make shaping much easier and help avoid tearing.
- Bake right after topping. Once your pizza is assembled, bake it right away. Letting it sit too long can lead to a soggy crust.
How to Make Sourdough Discard Pizza Dough
This step-by-step guide (with photos) walks you through how to make sourdough discard pizza dough with just 4 simple ingredients - no yeast required!
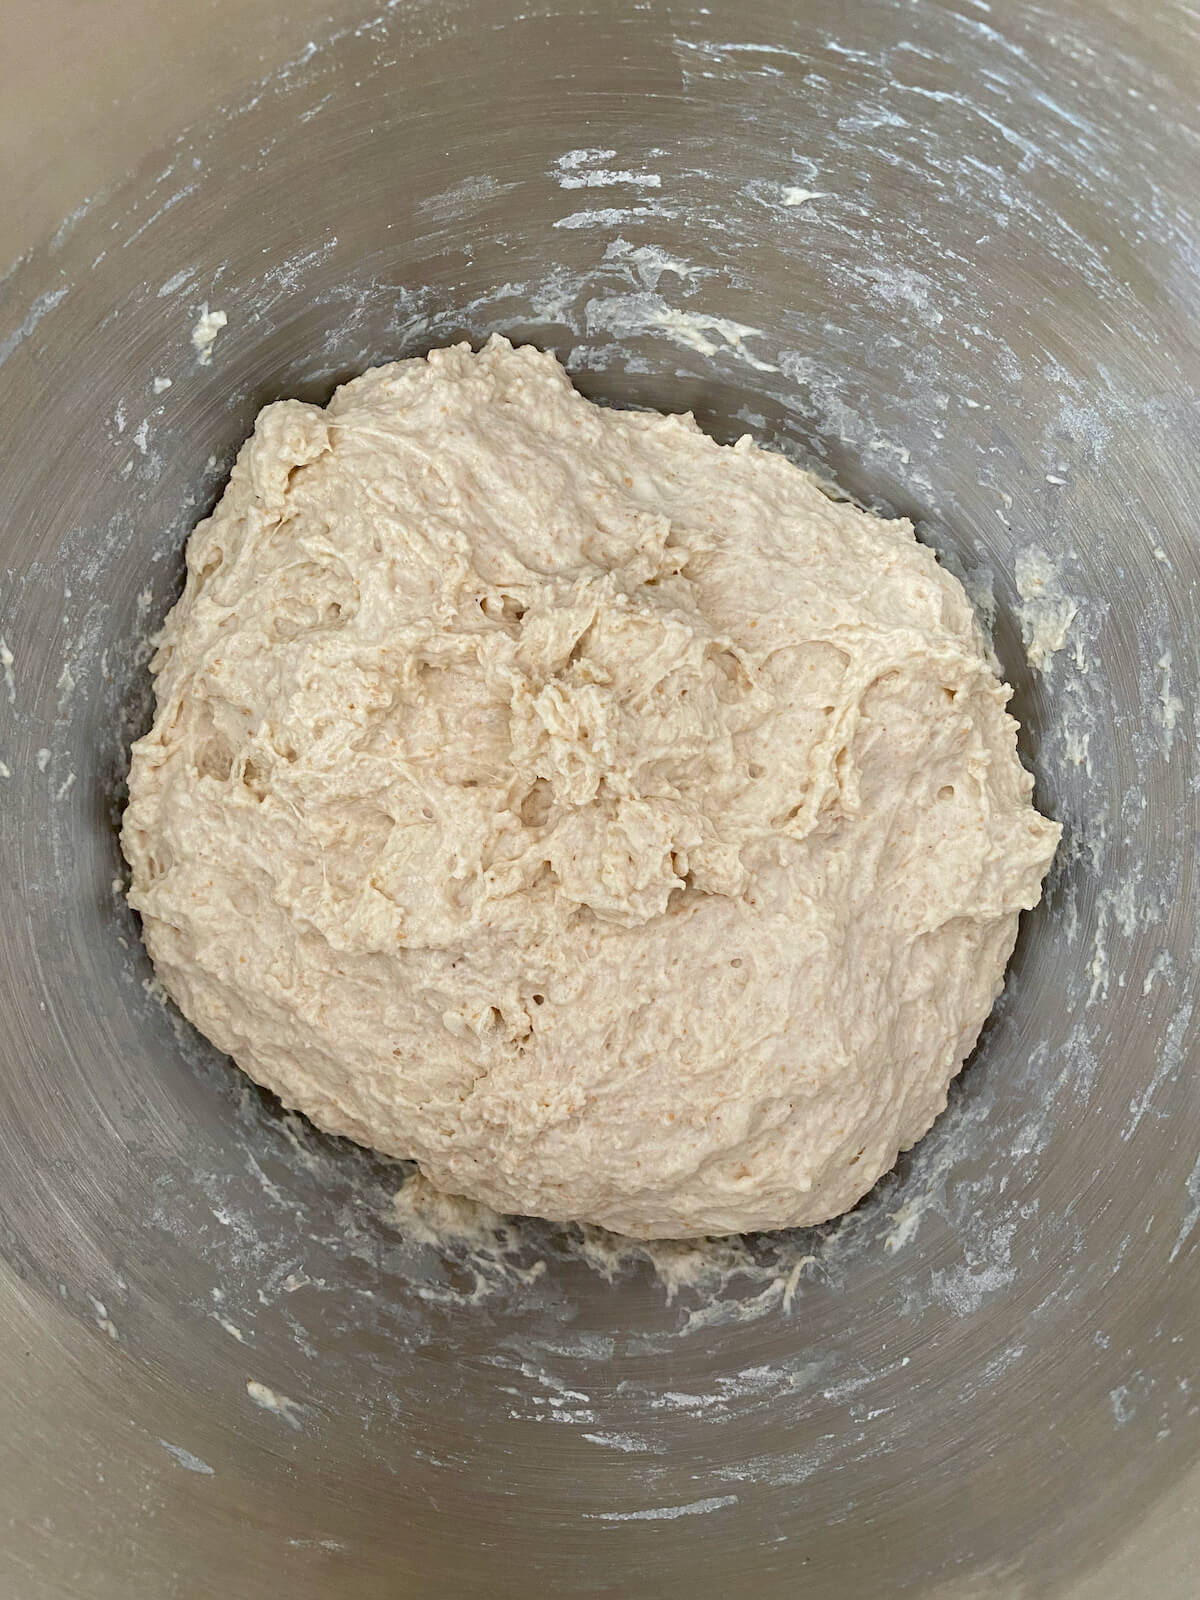
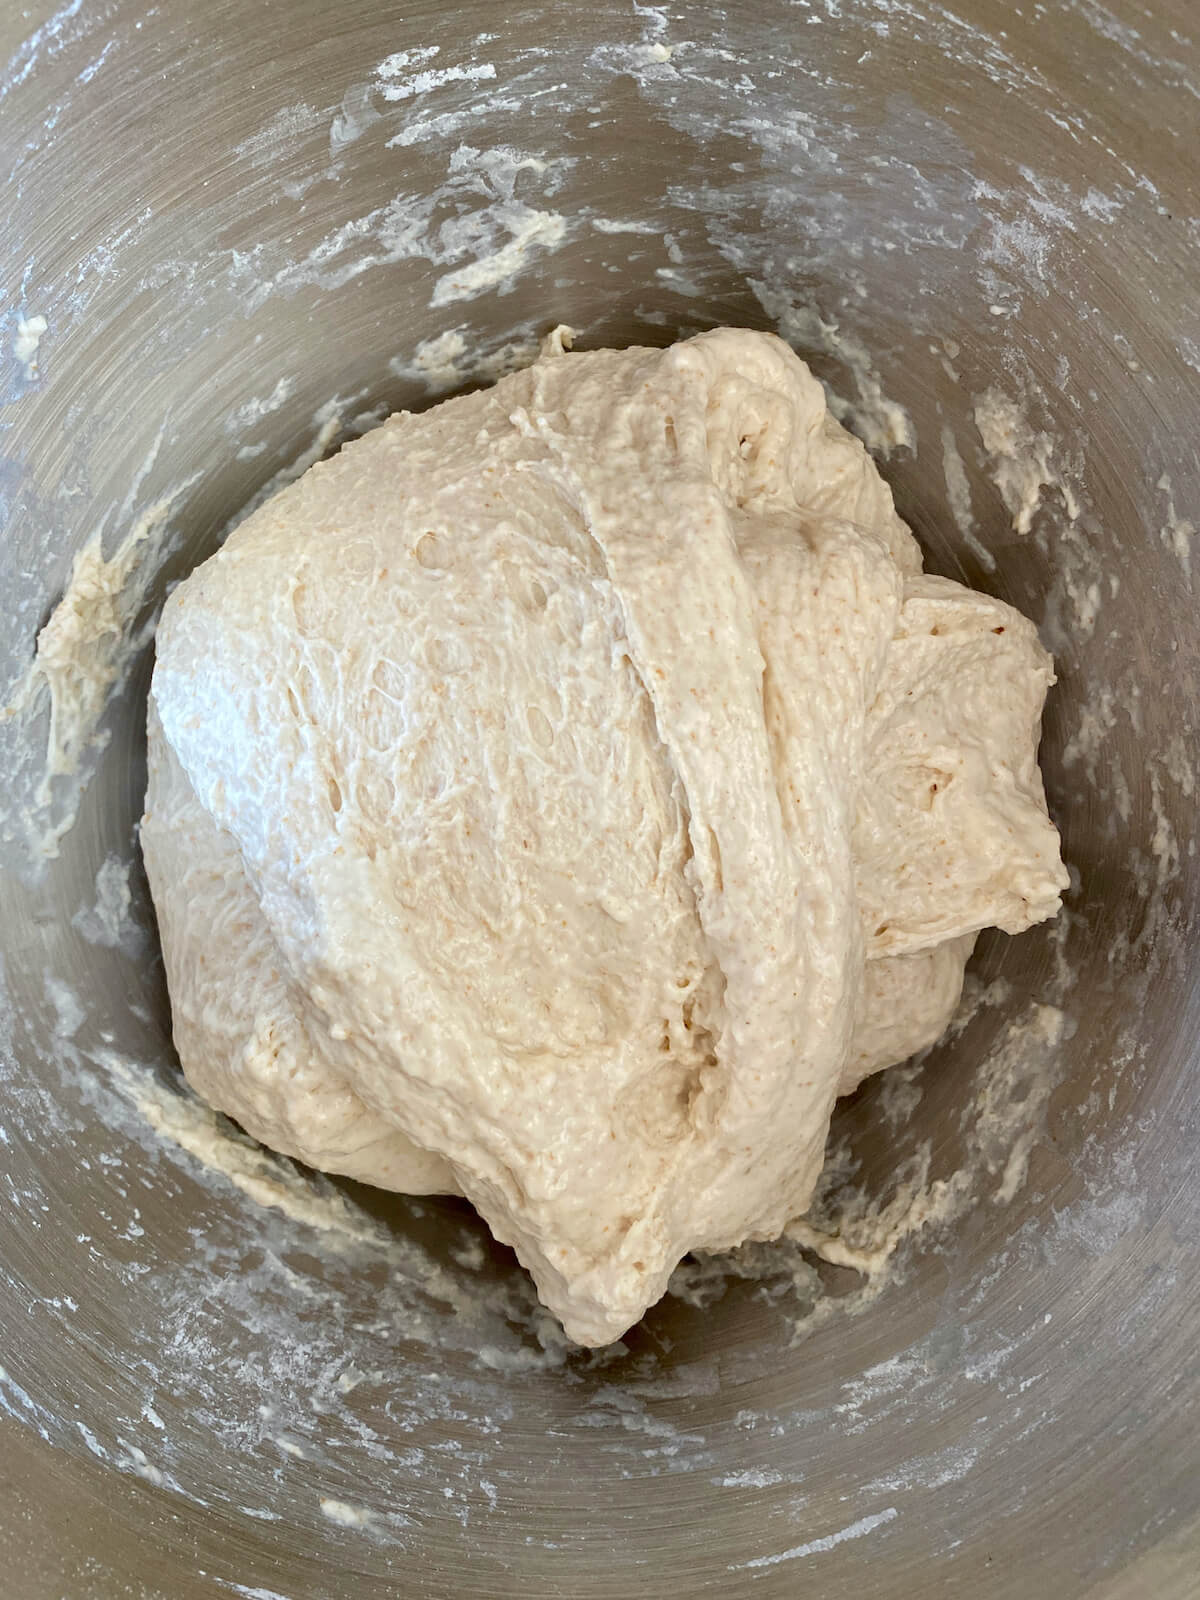
Step 1: Mix the dough. In a large bowl, mix bread flour, warm water, sourdough discard, and salt until no dry flour remains. Cover and let rest for 20 minutes.
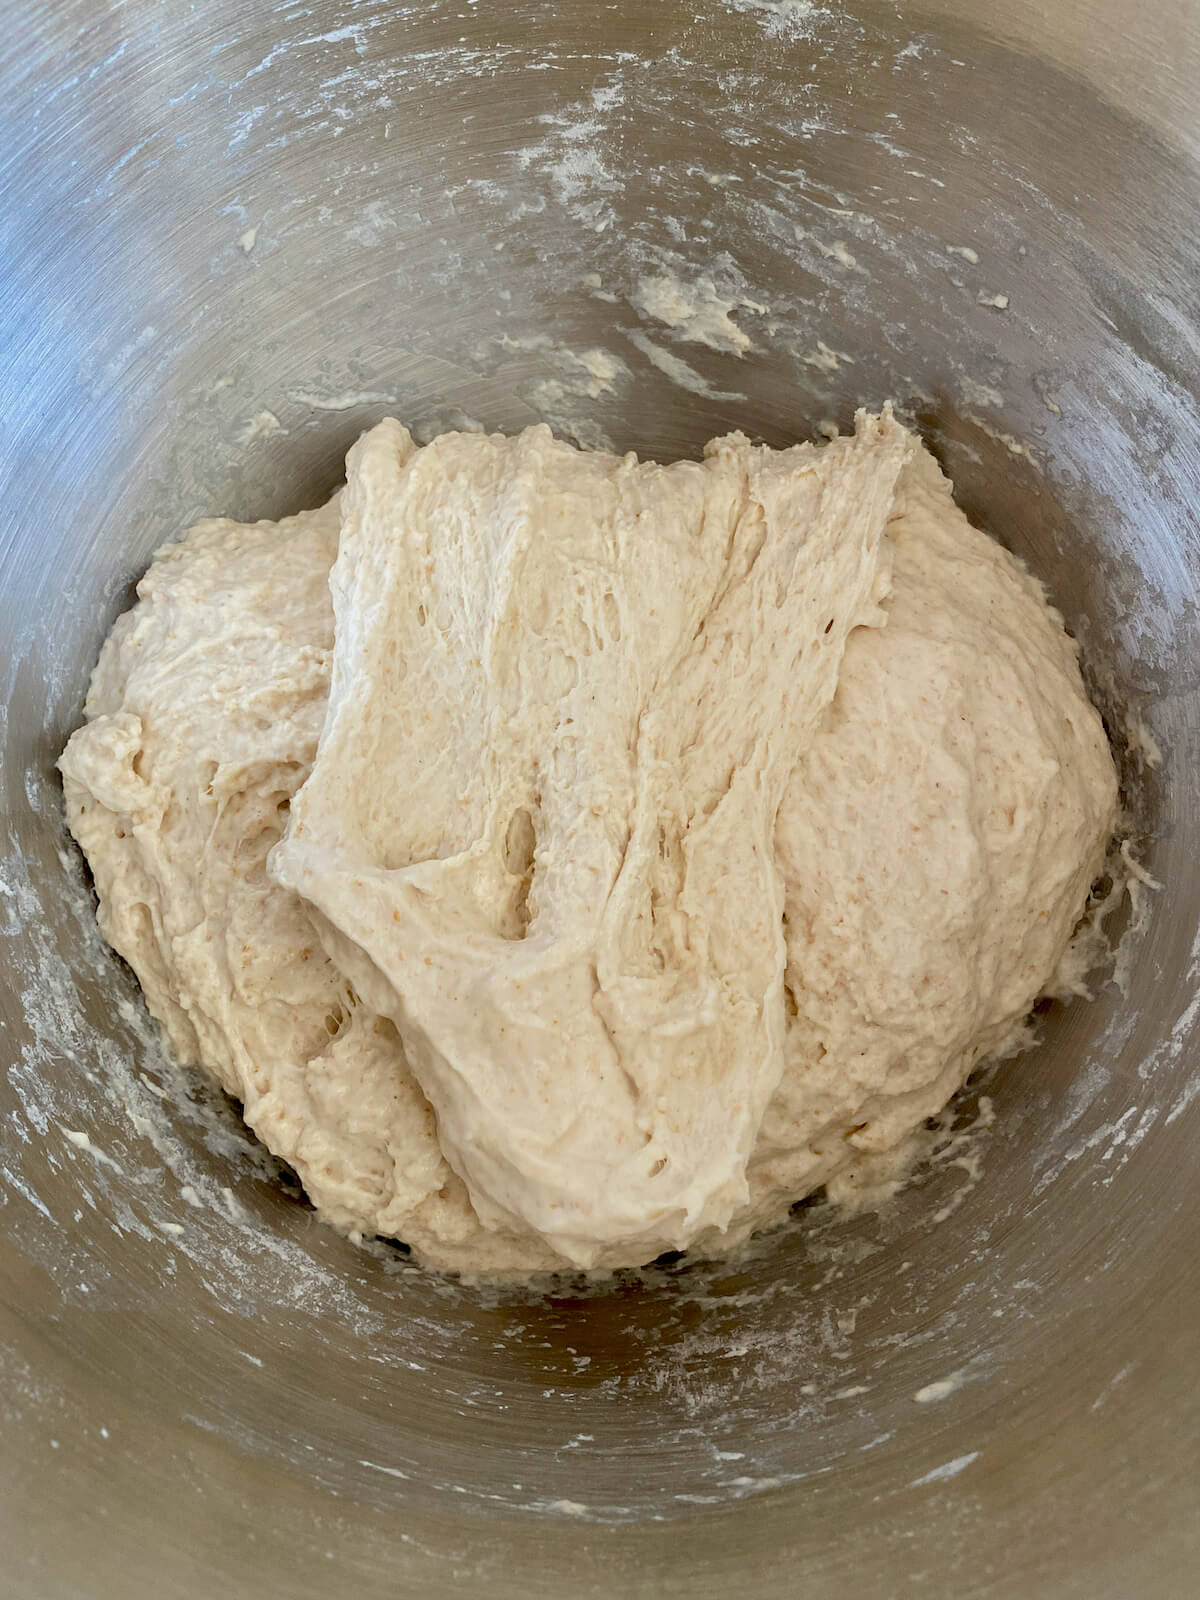
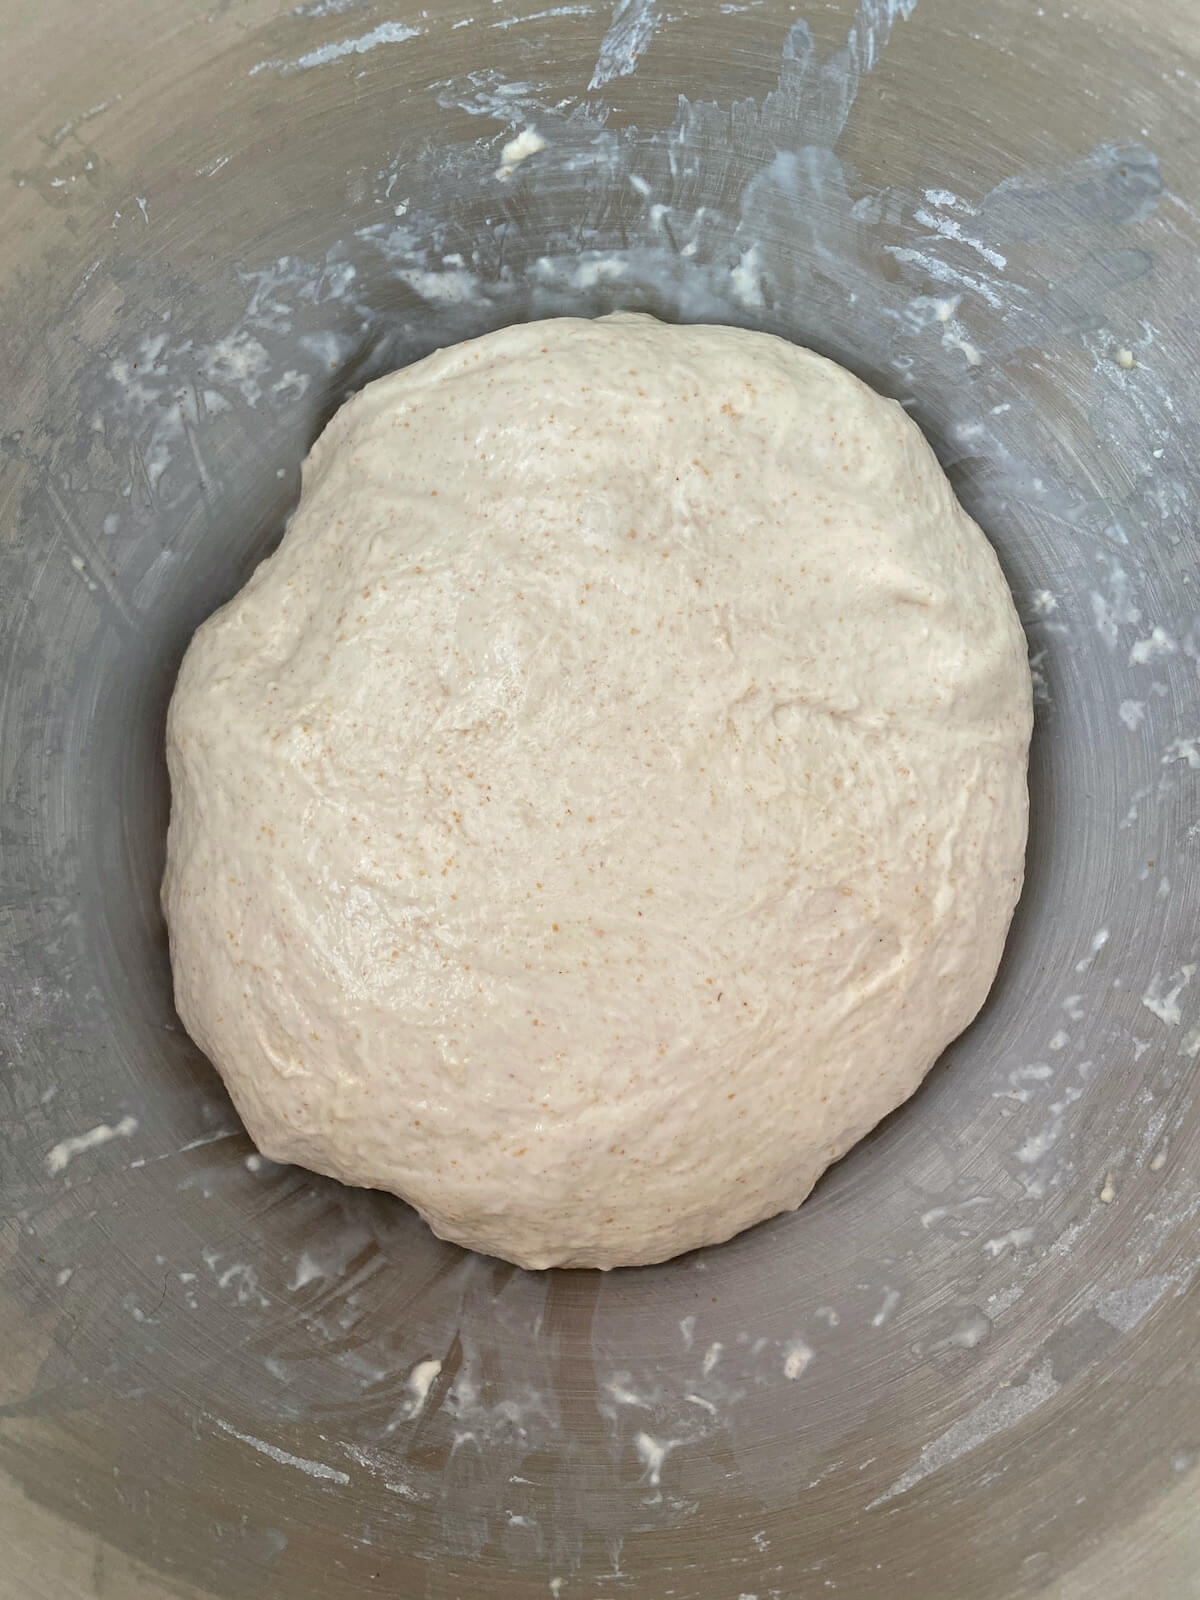
Step 2: Stretch and fold. With damp hands, stretch one side of the dough up and fold it over. Rotate the bowl and repeat three more times. Flip the dough so the seam side is down. Cover and rest for 15 minutes. Repeat this process 4–6 times, resting between each set, until the dough is smooth and elastic.

Step 3: Bulk ferment. Cover the bowl and let the dough rise at room temperature (70–75°F) for 2–4 hours, or until doubled in size.
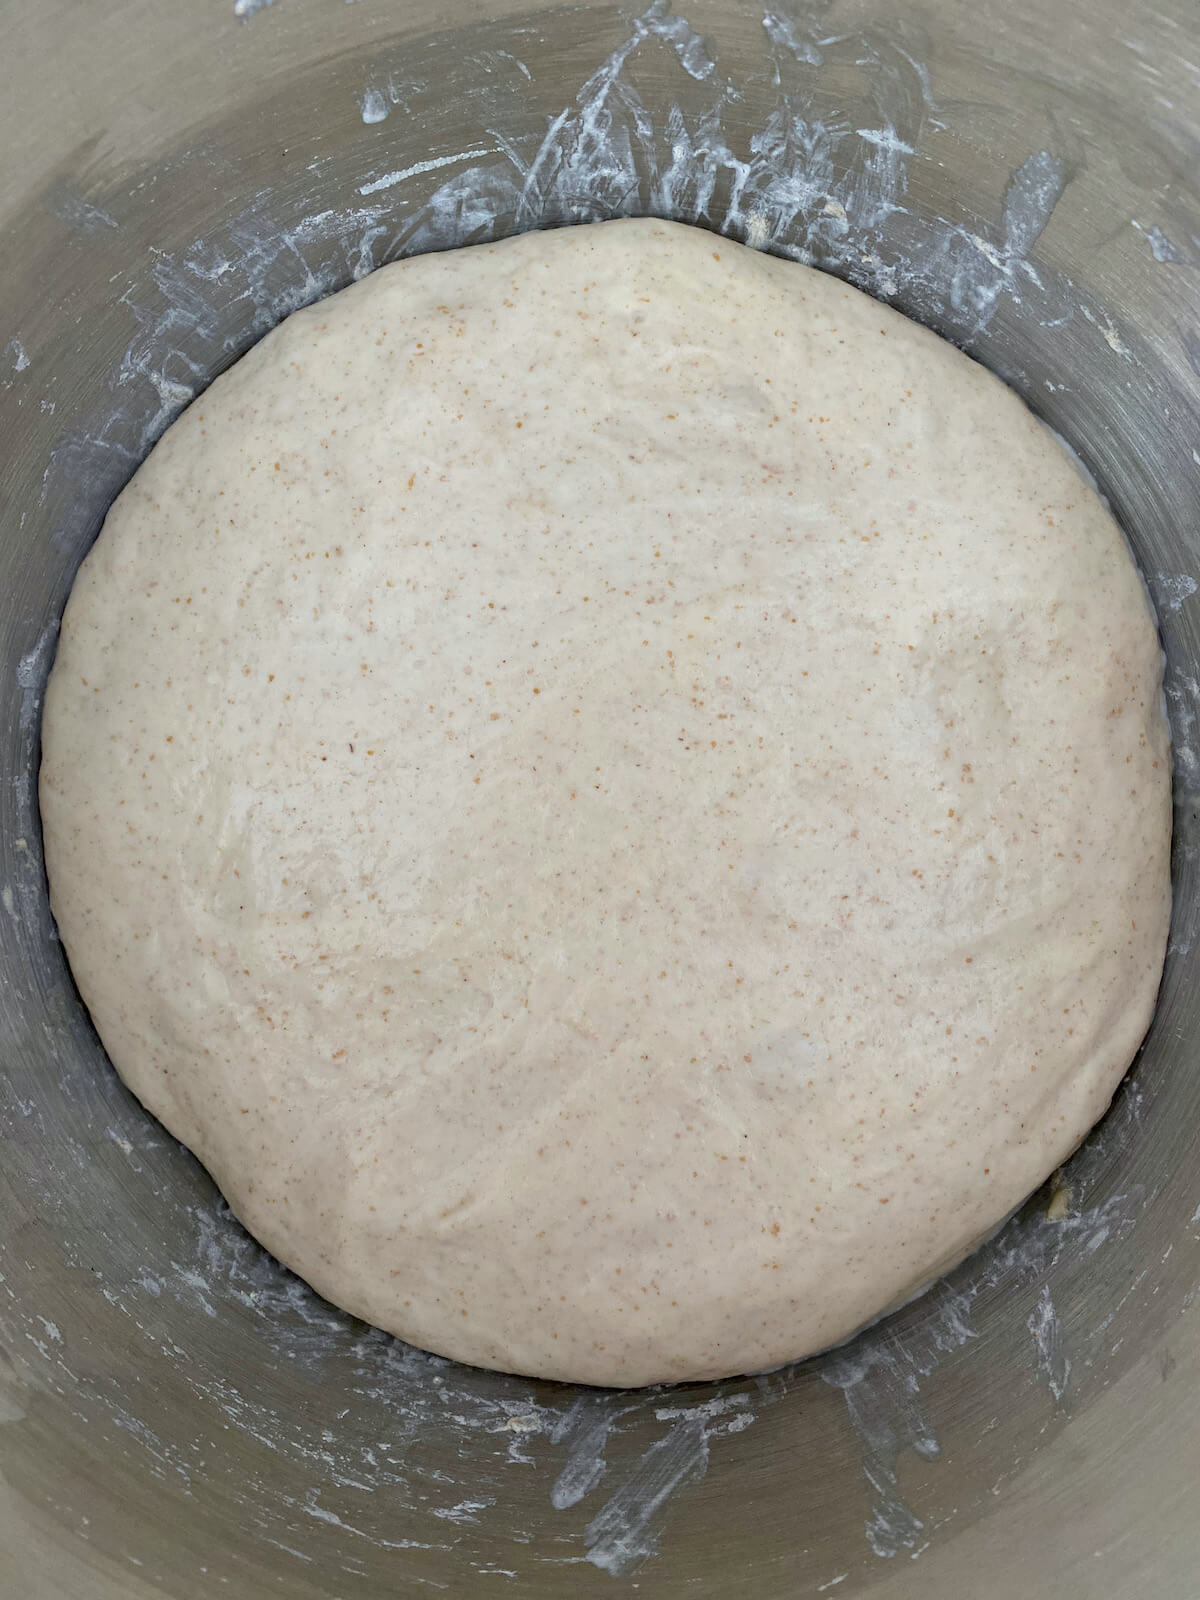
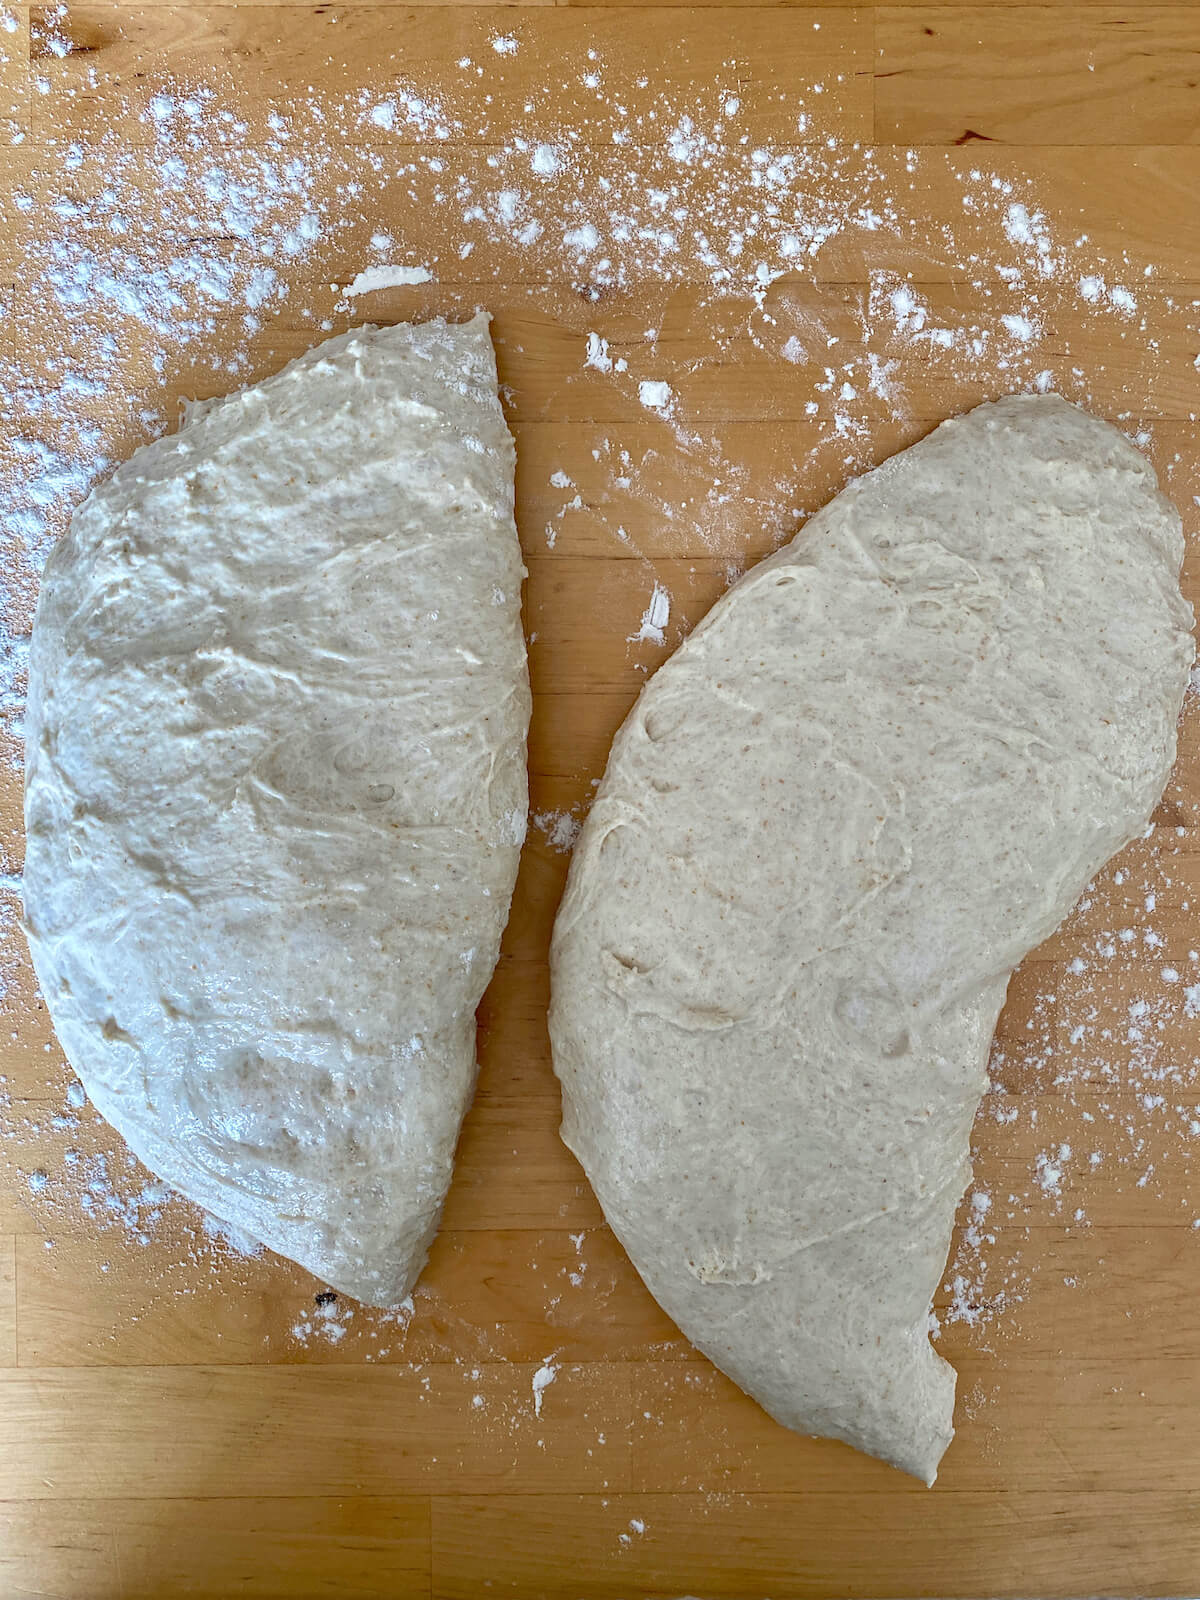
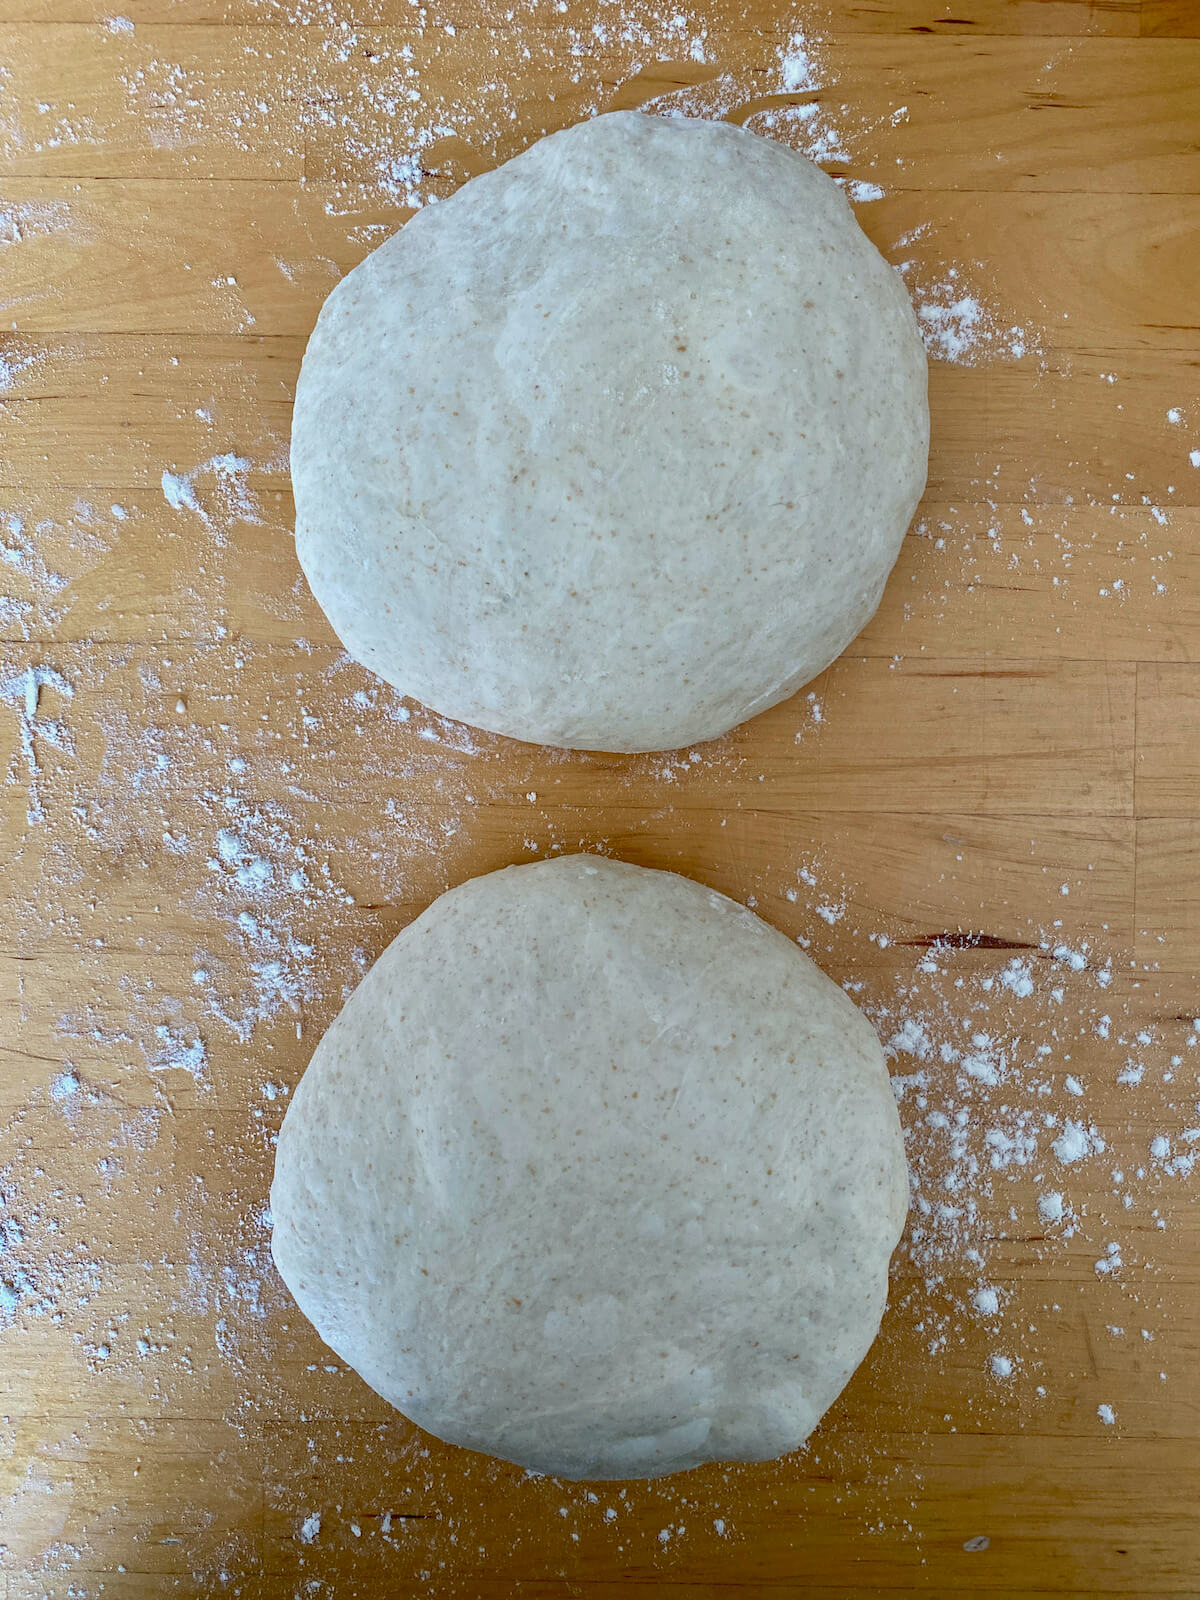
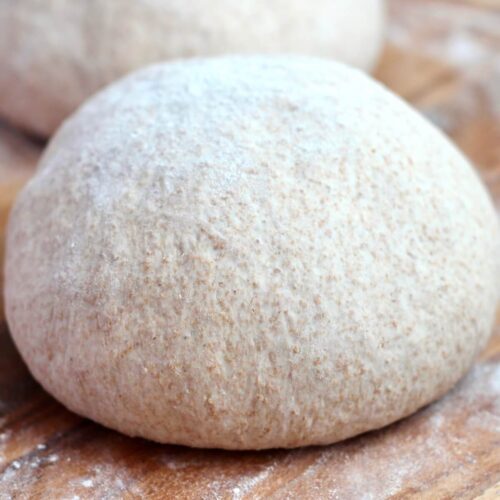
Step 4: Divide and shape. Turn the dough out onto a floured surface and divide it into two equal pieces. Shape each into a round ball by folding the edges toward the center, then flip seam-side down.
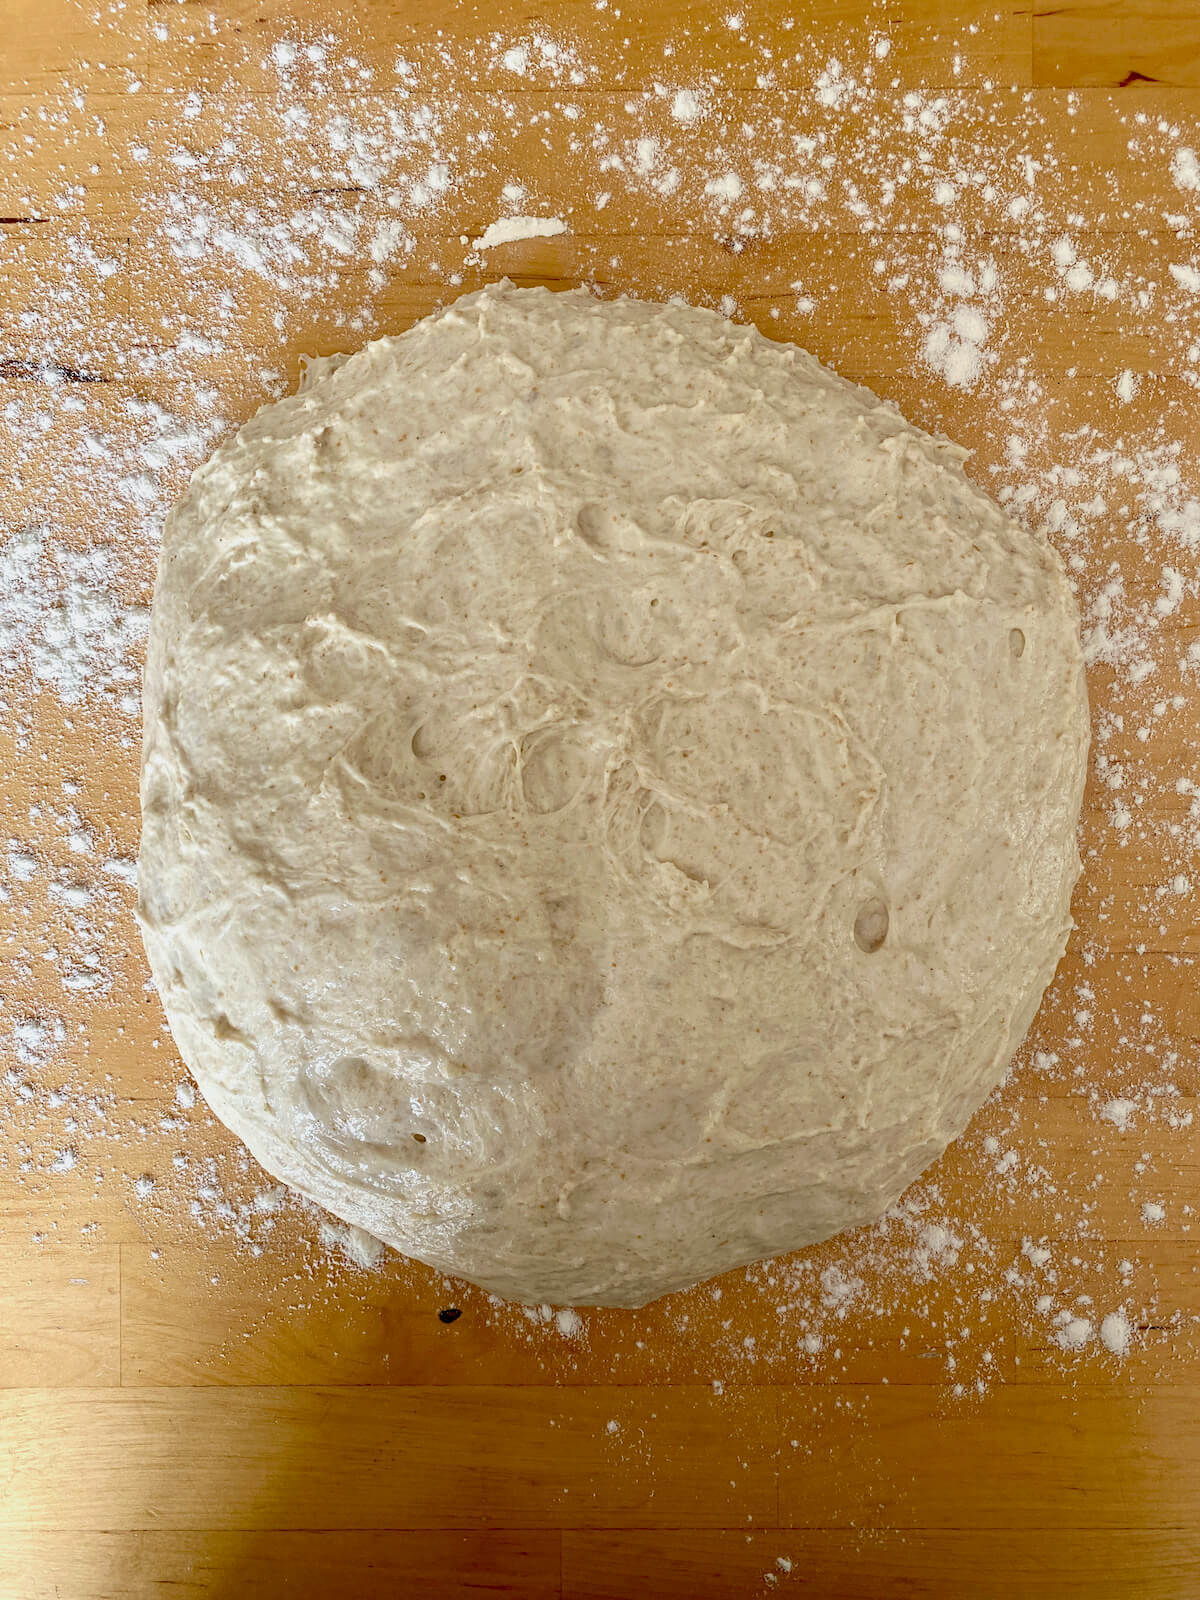

Step 5: Proof. Place the dough balls on a floured surface or parchment. Cover and let rest for 15-20 minutes at room temperature, or refrigerate for up to 4 days for more flavor.
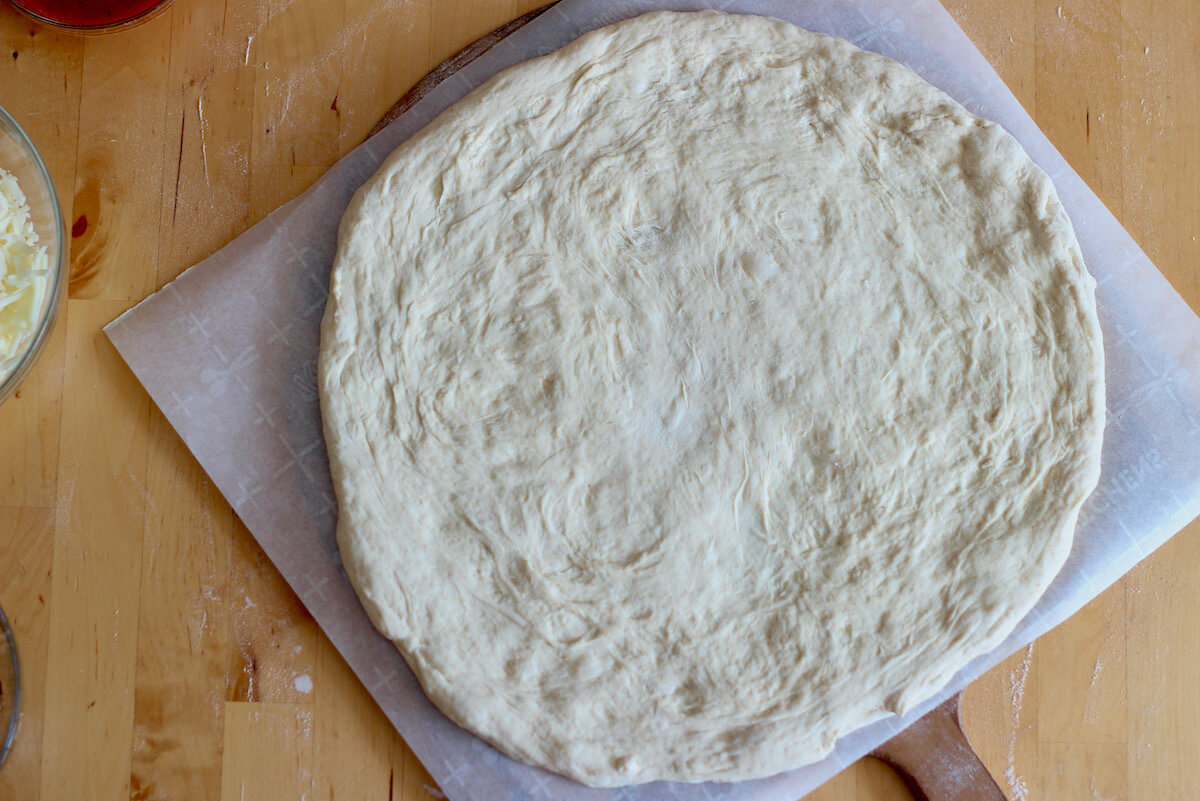
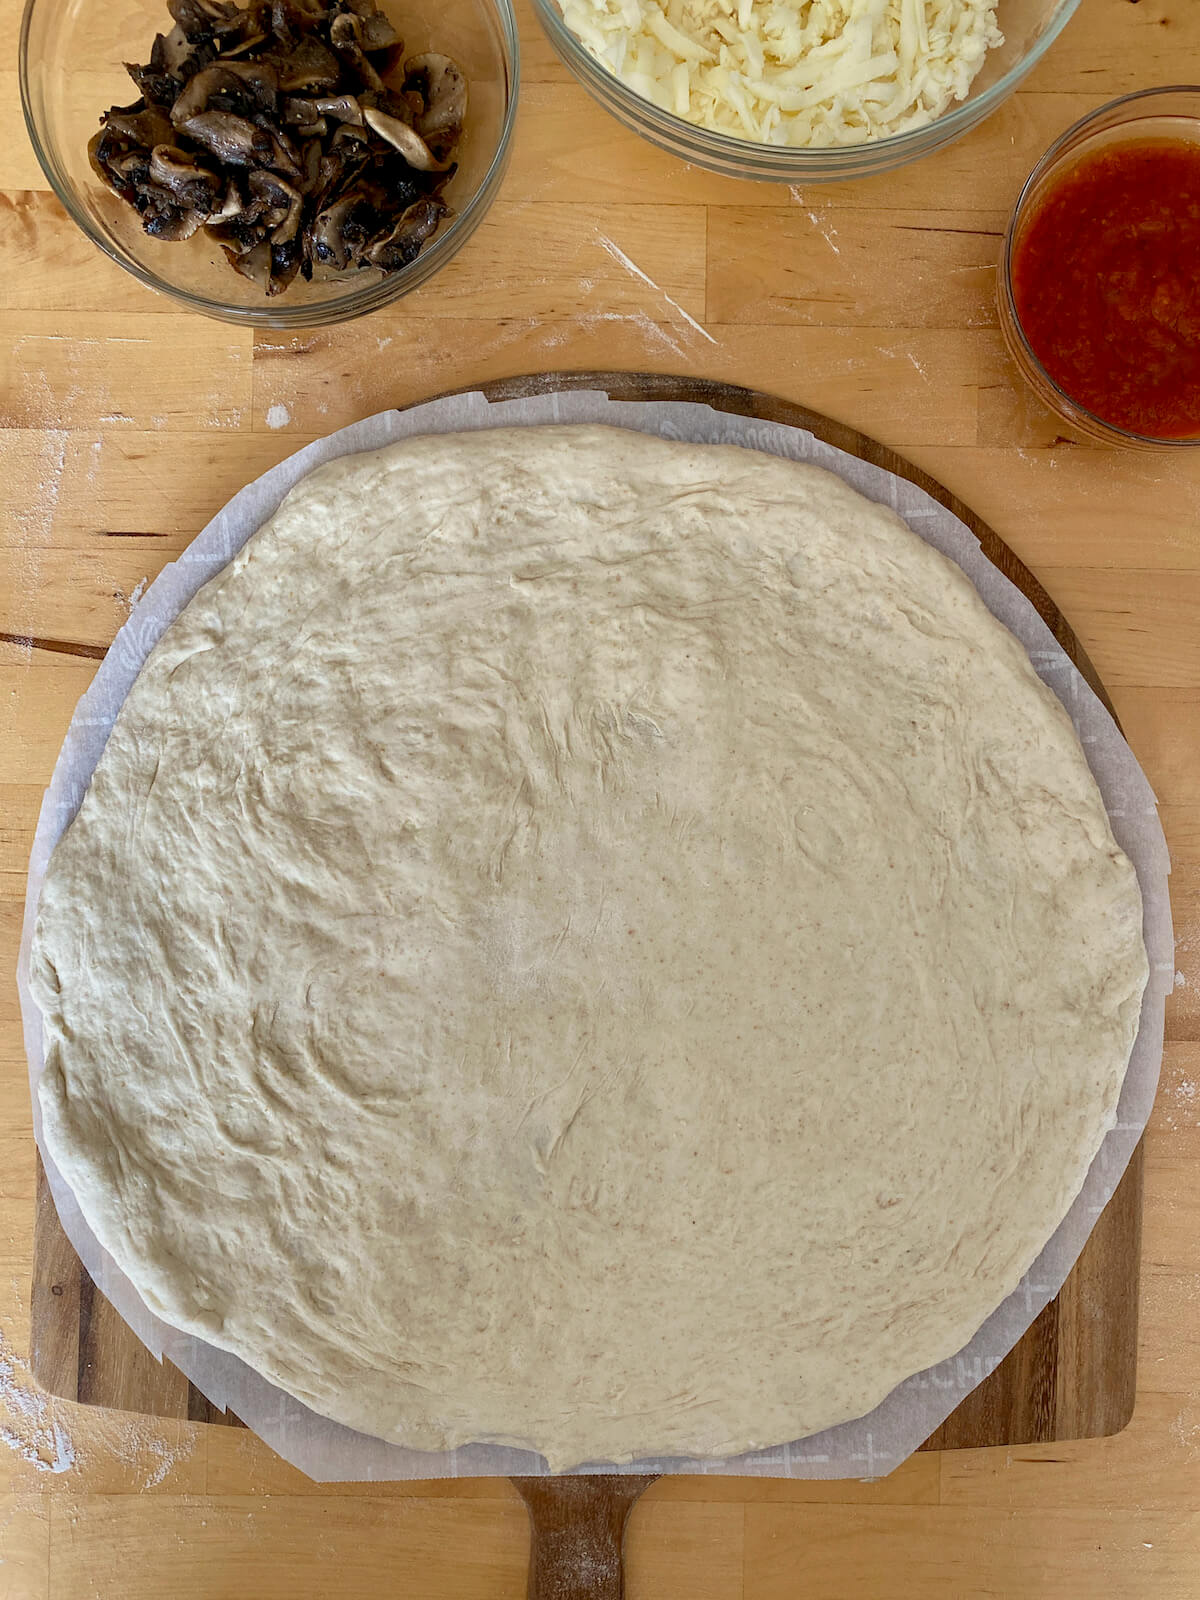
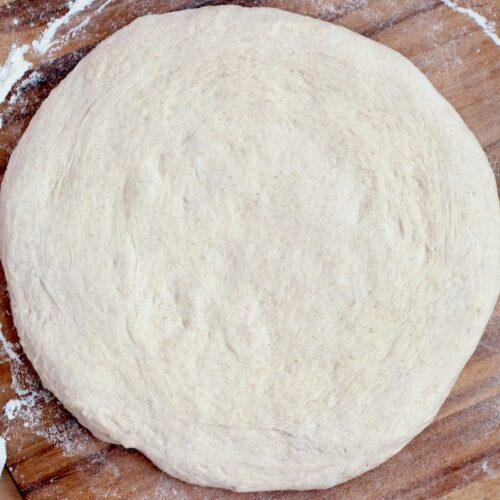
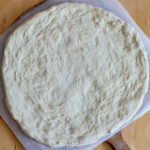
Step 6: Stretch the dough. Place a dough ball on a floured surface or parchment. Lightly flour your hands and the dough to prevent sticking. Press about an inch from the edge to form a crust, then gently stretch and rotate until it reaches your desired size and thickness.
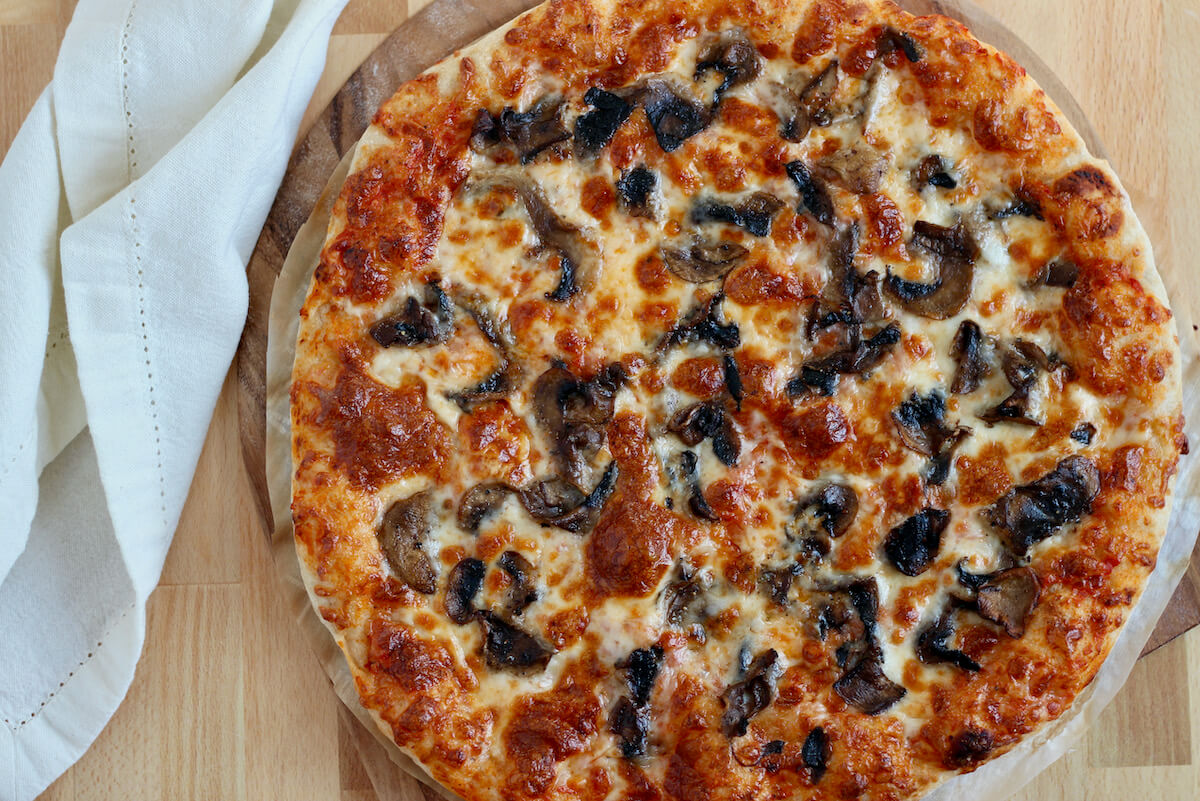
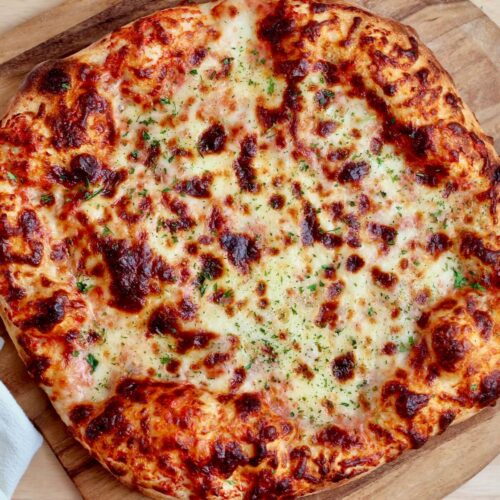
Step 7: Top and bake. Add your favorite sauce, cheese, and toppings. Bake using your preferred method - see the notes below for suggested cooking techniques.
Timeline for Making Same Day Sourdough Pizza Dough
If you're craving homemade pizza but forgot to plan ahead, this same day sourdough discard pizza dough recipe has you covered. Starting at noon, follow this timeline to have delicious, tangy pizza ready for dinner.
- 12:00 PM: Mix the dough and let it rest for 20 minutes.
- 12:20 PM: Perform the first set of stretch and folds.
- 12:35-1:05 PM: Perform three additional sets of stretch and folds every 15 minutes.
- 1:05-1:35 PM: Perform additional stretch and folds if needed until the dough appears smooth and feels elastic.
- 1:35-3:35 PM: Cover the dough and let it rise in a warm environment for about 2 hours.
- 3:35-3:50 PM: Divide the dough into 2 equal pieces and shape each piece into a ball.
- 3:50-4:10 PM: Cover the dough balls and let them rest for 15-20 minutes.
- 4:10-4:30 PM: Stretch each dough ball into a pizza crust.
- 4:30-5:00 PM: Add pizza toppings, bake, and enjoy!
Please note that this timeline is a general guide and may vary based on the temperature of your kitchen and the strength and age of your sourdough starter. Adjust the timeline as needed to fit your schedule.
How to Store
- Refrigerator- Wrap your dough tightly in plastic wrap and keep it in the fridge for up to 4 days. The flavor will develop more as it rests.
- Freezer- For longer storage, wrap each dough ball in plastic wrap, then place them in a freezer-safe bag. Freeze sourdough pizza dough for up to 3 months. When you're ready to use one, thaw it in the fridge overnight.
Cooking Methods
Once your dough is stretched and topped, it's time to bake! Here are a few different ways you can cook your pizza at home:
- Pizza Stone (Oven)- Preheat the oven to 550°F with a pizza stone. Transfer the pizza onto the stone and bake for 8-10 minutes until the crust is golden and crisp.
- Sheet Pan (Oven)- Preheat to 500°F. Assemble the pizza on an oiled sheet pan and bake for 15 minutes until golden and bubbly.
- Cast Iron Skillet (Oven)- Preheat the skillet to 450°F. Add butter, place the dough in the skillet, top it, and bake for 45 minutes until crispy. Check out my full sourdough pizza in a cast iron skillet recipe for more detailed instructions!
- Grill Pan (Grill)- Preheat the grill to 500°F. Place the pizza on a grill pan, turn the direct heat burner to low, close the lid, and cook for 8-10 minutes.
- Directly on the Grill- Place the dough directly on the grill grates. Grill one side for 1-2 minutes, flip, add toppings, and cook another 2-3 minutes until the crust is crisp and cheese is melted. Keep a close eye on it - grilled pizza cooks fast!
Troubleshooting
This dough is meant to be a little sticky, but it should still be manageable when generously dusted with flour. Don’t be afraid to use flour when handling and stretching the dough to prevent it from sticking.
If it’s so sticky that you can’t work with it, your measurements may have been off slightly, or your sourdough discard might have been more liquidy than expected. If you notice this before bulk fermentation, try adding a little more flour to the dough to get it to the right consistency.
If your dough tears while stretching, it could be that enough gluten wasn’t developed during the stretch and fold phase.
It may also need more rest time - let it sit for 5-10 minutes to allow the gluten to relax. When stretching, handle it gently by pressing and pulling the edges outward, and let the dough rest if it resists.
If your dough isn't rising, it could be because your sourdough discard isn't active enough. Make sure you're using fresh discard (less than 7-10 days old) or an active starter.
Also, check the temperature of your environment - yeast prefers warmth (around 75°F). If your kitchen is cold, try placing the dough in an oven with the light on or on top of a warm appliance.
Yes, you can use a stand mixer to make sourdough pizza dough. Fit the mixer with a dough hook and mix the dough on low speed until the ingredients come together. Once combined, increase the speed to medium and knead for about 5-7 minutes, or until the dough is smooth and elastic.

Are you tired of watching your sourdough discard go to waste?
It’s time to turn excess discard into something delicious with my new ebook - Everyday Sourdough!
Inside, you’ll find 27 tried-and-true sourdough discard recipes that will transform your leftover starter into mouthwatering creations your family and friends will love.
No more guilt about wasting your discard - with Everyday Sourdough, you have endless options to quickly make something amazing anytime.
Let's Connect!
Be sure to leave a comment below if you have any questions. You can also connect with me on Instagram, Facebook, Pinterest, or via email at [email protected].

📖 Recipe
Sourdough Discard Pizza Dough
Ingredients
- 4 ⅛ cups (500 grams) bread flour
- 1 ¾ cups (400 grams) sourdough starter discard preferably "fresh" discard (less than 7-10 days old) or use active starter
- 1 ¼ cups (300 grams) warm water 80-90°F
- 3 ½ teaspoons (10 grams) Diamond Crystal Kosher Salt if using Morton's brand or table salt, reduce volume by half or measure by weight
Instructions
- Mix Dough: In a large mixing bowl, combine the bread flour, warm water, sourdough starter discard, and kosher salt. Mix everything together until no dry flour remains and a cohesive dough forms. Cover the bowl and let the dough rest for 20 minutes.4 ⅛ cups (500 grams) bread flour, 1 ¾ cups (400 grams) sourdough starter discard, 1 ¼ cups (300 grams) warm water, 3 ½ teaspoons (10 grams) Diamond Crystal Kosher Salt
- Stretch & Folds: After 20 minutes, lightly wet your hands with water. Gently stretch one edge of the dough up and fold it over onto itself. Rotate the bowl 90 degrees and repeat, stretching and folding the dough a total of four times. After the fourth fold, flip the dough over so that the seam side is facing down. Cover the bowl again and let the dough rest for 15 minutes. Repeat the stretching and folding process for a total of 4-6 sets or until the dough appears smooth and feels elastic.
- Bulk Fermentation: Cover the dough and allow it to rise in a warm environment (70-75°F) for about 2-4 hours. Note that it may take more or less time to rise depending on factors such as the warmth of your kitchen and the age of your discard. The dough should double in size and have noticeable gas bubbles forming on the surface. If your kitchen is cooler, consider placing the covered bowl inside an off oven with just the light on to provide gentle warmth.
- Divide & Shape: Carefully turn the dough out onto a lightly floured work surface. Using a bench scraper, divide the dough into 2 equal pieces. Shape each piece by gently pulling the dough into a rough rectangle. Then, fold the top edge of the rectangle down towards the center, pressing lightly to seal. Repeat this process with the bottom edge, folding it up towards the center and pressing lightly to seal. Next, fold the left and right sides of the rectangle towards the center, overlapping slightly, and press lightly to seal. Finally, flip the dough over so that the seam side is facing down, and use your hands to gently shape it into a smooth, round ball.
- Proof: Place the dough balls on a lightly floured surface or parchment paper and cover them with plastic wrap. Let them rest at room temperature for 15-20 minutes before using them for pizza. Alternatively, transfer it to the refrigerator for up to 4 days for a more tangy flavor or freeze it for up to 3 months.
- Stretch: To stretch the dough, take one of the proofed dough balls and place it on a floured surface or a piece of parchment paper. Dust your hands and the dough lightly with flour as needed to prevent sticking while you work. Gently press down about an inch from the edge of the dough with your fingertips to create a crust, working your way around the dough, to start stretching it into a round shape. Continue to stretch the dough by gently pressing and pulling the edges outward, rotating the dough as needed, until you've reached your desired size and thickness for the pizza crust. If the dough starts to resist stretching or springs back, let it rest for a few minutes and then continue stretching.
- Top and bake: Add your favorite sauce, cheese, and toppings, then bake the pizza using your preferred method. See the notes below for suggested cooking methods.
Video
Notes
- Measure ingredients by weight. For the most accurate and consistent results, measure your ingredients by weight using a food scale. If using measuring cups for flour, spoon it into the cup rather than scooping it from the container.
- Flour for stretching. Lightly dust your hands, the dough, and your surface with flour as needed while shaping to avoid sticking. This helps keep the dough easy to work with and prevents tearing.
- Storage: Store dough in an airtight container for up to 4 days in the refrigerator or 3 months in the freezer.
- Make Ahead: The dough develops more flavor the longer it sits in the refrigerator and can be made up to 4 days ahead.
- Suggested Cooking Methods:
- Pizza Stone in the Oven- Preheat the oven with a pizza stone inside to 550°F. Build the pizza on a pizza peel and transfer it directly onto the hot pizza stone. Cook pizza for approximately 8-10 minutes.
- Sheet Pan in the Oven- Preheat oven to 500°F. Build pizza on the sheet pan, then transfer the baking sheet to the preheated oven. Bake pizza for 15 minutes.
- Cast Iron Skillet (Oven)- Preheat the skillet to 450°F. Add butter, place the dough in the skillet, top it, and bake for 45 minutes until crispy. Check out my full sourdough pizza in a cast iron skillet recipe for more detailed instructions!
- Grill Pan on the Grill- Preheat grill to 500°F. Build pizza on a grill pan, then transfer the grill pan to the preheated grill. Turn down the middle burner to medium-low to prevent the bottom of the pizza from burning. Close the grill lid and cook for 8-10 minutes.
- Directly on the Grill

Heather says
I'm just trying out this recipe but I have never made sourdough pizza crust that does not call for oil?
Ashley Petrie, RDN, LDN says
Hi Heather! I've never added oil to my sourdough pizza dough, and I love the way it turns out every time. However, I have made other pizza dough recipes that do call for oil and they also turn out great. Feel free to add a tablespoon or two of oil to your dough, if you prefer! You can also coat the bowl in oil while the dough rises. Hope that helps and that you enjoy your pizza! Ashley 🙂
Anne says
Love the recipe. How long (roughly) to thaw from frozen before use?
Ashley Petrie, RDN, LDN says
Hi Anne! Thank you so much. I would say it takes about 12 hours to thaw the dough in the refrigerator or about 2-3 hours on the counter. I hope this helps! 🙂
Briana says
Love this recipe! What temperature do you cook yours on? 400°? I've made this twice before but can never remember the temp and don't see it listed above! Thank you in advance
Ashley Petrie, RDN, LDN says
Hi Briana! Thank you so much, I'm so glad you love the recipe! 🙂
I cook my pizza at either 550°F in the oven on a pizza stone or around 450-500°F on a grill pan on the grill (when it's too hot to cook in the summer). Both of these methods cook the pizza in about 8-10 minutes. I've also used this dough on a baking sheet in the oven at around 450°F and in a cast iron skillet to make pan pizza. When it comes to pizza, the hotter the better. The trick is to cook the crust quickly so that it doesn't become soggy from the toppings. I hope this helps! Let me know if you have any more questions 🙂
Briana says
Oh my gosh, THANK YOU!! I was definitely struggling with the soggy part! Appreciate your reply 🫶
Ashley Petrie, RDN, LDN says
Of course! Good luck in your future pizza endeavors! Let me know if you ever have any other questions 🙂
Chelsea says
Hi when using cast iron skillet do you put that in the oven? At 450? I do not have a pizza stone... need to order one...
Ashley Petrie, RDN, LDN says
Hi Chelsea! I would recommend preheating the cast iron skillet either in the oven at 500°F or on the stovetop before putting the dough in. Once hot, you can build your pizza inside of the skillet, then bake until the cheese is golden-brown and bubbling. Hope this helps!
Jennifer says
This turned out perfectly! I have tried at least 2 other pizza dough recipes that have failed. I’m so happy I found this one. The stretch and folds worked out so much better for me than kneading in other recipes. Crust was perfectly chewy and delicious. Thank you!
Ashley Petrie, RDN, LDN says
Hi Jennifer! So glad you enjoyed it and that the stretch and fold method worked for you. Thanks for sharing! 🙂
kristina says
How old of sourdough discard can you use.
Ashley Petrie, RDN, LDN says
Hi Kristina! If the discard has been stored in the refrigerator, it can easily last for up to 2 weeks or longer. I've used month-old discard without issue. Hope this helps! Ashley
Whitney says
I’m new to sourdough and learning along the way. My dough is very sticky and tears when I stretch it. Any suggestions of what happened and what to change for next time? Thank you!
Ashley Petrie, RDN, LDN says
Hi Whitney,
This pizza dough is on the higher side for hydration and is meant to be a bit sticky. It gives it a wonderful texture but can be challenging to work with if you’re newer to sourdough.
I’d recommend being generous with the flour when you’re stretching it out for pizza so it doesn’t stick to your hands or the counter.
As for the tearing, make sure you’re building a strong gluten structure during the “stretching and folding” stage - if you haven’t noticed a significant change in how the dough feels after 4 sets, you can do a few more. You can also try the windowpane test to see if you’ve built enough gluten structure in the dough.
Another tip is to take your time stretching out the dough for pizza, giving it a few minutes to relax if it feels like it’s resisting.
I like shaping the dough into a round by using my fingertips to create the crust. Then, I’ll gently pull around the edges to stretch it evenly, paying attention to areas where the dough is thicker. I find this helps me evenly stretch the dough out and avoid creating any thin spots that might tear.
I hope this helps!
Ashley
Keely says
Do you have to let the dough come to room temperature after you take it out of the refrigerator? Or can you just use it right away even though it’s cold?
Ashley Petrie, RDN, LDN says
Hi Keely! It's a little easier to stretch out if you let it warm up a bit, but I usually just use it straight from the fridge. Hope this helps! 🙂
Victoria Jones says
Have you ever par baked your crust? That seems to be the way to
make it not soggy in the middle for me. The flavor and texture are excellent.
Karen says
What size pizza do YOU ( the author) make from this, please? 2 12” or larger?
And do you feed your start a/p or bread flour?
If I have 1/2cup of starter in the fridge, do I feed it 16 oz and use that for discard?
Thank you!
Ashley Petrie, RDN, LDN says
Hi Karen! Great questions! I use this recipe to make 2 large 14-inch pizzas.
For feeding my starter, I usually use a mix of whole wheat and bread flour, but all bread flour or all all-purpose will work just fine too.
If you have about ½ cup of starter in the fridge (roughly ~100 g), you can feed it with about 200 g water + 200 g flour, let it become active, and then use 400 g of that in the recipe. Just keep in mind that at that point it’s technically active starter, not discard — which is totally fine and will work, it may just ferment a little faster.
Hope that helps — enjoy pizza night! 🍕
Lindsay says
When would u add in herbs or garlic to the dough?
Ashley Petrie, RDN, LDN says
Hi Lindsay! You definitely can add herbs and garlic if you'd like! I'd start with 1-2 teaspoons of dried Italian seasoning and 1-2 cloves of finely minced garlic and adjust from there. Hope this helps! 🙂
Melissa says
Can I make this without salt? My husband has to eat low salt.
Ashley Petrie, RDN, LDN says
Hi Melissa! It will still act like pizza dough without salt, but the flavor will be different. You can try it and see how you like it! If it's too bland, maybe try adding some garlic powder and herbs to give it a little more flavor. Hope this helps! Ashley
Brandy Waldo says
I love your recipe! Comes out perfect every time. Can I parbake this dough and add toppings later? If so how long do you recommend parbaking and at what temperature?
Ashley Petrie, RDN, LDN says
Hi Brandy! Thanks so much, I'm so glad you enjoy this recipe. 🙂 I personally have never tried par-baking it, but I don't see why you couldn't! I'd recommend docking it with a fork, then baking it on a preheated pizza stone at 450F for 3-5 minutes or until set and lightly golden brown. If you try par-baking it, let me know how it turns out for you! I'd love to hear.
Jillian says
Hi! I measured by grams and 400g of discard seems like SO much and I needed to add a little extra flour but my dough is still SUPER sticky. Is that normal?!
Ashley Petrie, RDN, LDN says
Hi Jillian! Yes, it's normal. It's a wet dough so building a strong gluten structure using the stretch and fold method is important to make it easier to work with (but it can still be challenging). Building tension while shaping it into dough balls also helps. It's okay to add some flour if that makes it easier for you to work with. I usually don't add any additional flour until I'm stretching it out, then I generously flour the dough and my work surface so it doesn't stick. Hope this helps!
Jillian Gurrola says
Is it alright to bulk ferment overnight if the rise doesn’t happen in the 2 hours per the instructions?
Ashley Petrie, RDN, LDN says
Yes, you can leave it overnight to rise.
Cassee says
I just fed my starter because I want to make this for tonight, but I didn't have any discard. Should I modify it at all? Can I still use this recipe? 😅 thanks!
Ashley Petrie, RDN, LDN says
Hi Cassee! Yes, you can still use the recipe. You shouldn't need to modify anything other than keeping an eye on the rise time - it may be quicker with an active starter. Hope this helps! 🙂
Christian says
My starter isn’t 100% hydration will it still work?
Ashley Petrie, RDN, LDN says
Hi Christian! You would have to adjust the amount of water in the recipe to match the difference in your starter.
Makayla streeter says
My family absolutely loves this pizza dough!! Is the calorie count 1,264 for the entire batch? Or is it 1,264 per dough, making the entire batch 2,528? Thank you!!
Ashley Petrie, RDN, LDN says
Hi Makayla! I'm so happy to hear you and your family love this recipe!! 🙂 Yes, the calorie count is approximately 1,264 for one dough or 2,528 for the entire batch. Hope this helps!
Jacque Entzminger says
Perfect the first try! Great helpful instructions. Thanks so much.
Ashley Petrie, RDN, LDN says
Hi Jacque! I'm so happy it turned out well for you 🙂
Lauren says
Hey there! I always get a little confused with the stretching & folds part.
So would it look something like this?
1st set after the 20 min: stretch fold, rotate bowl stretch fold. Wait 15 min.
2nd stretch fold repeat wait 15min
3rd stretch fold repeat wait 15min
4th stretch fold repeat move on to bulk ferment.
Is that right when you are saying to do 4sets?
Ashley Petrie, RDN, LDN says
Hi Lauren! So each "set" of stretch and folds involves 4 folds, which then is repeated 4 times every 15 minutes (16 folds total over an hour or so). I can totally see how that can be confusing. Try to think of the dough in the bowl as a square - you want to pull all 4 sides of the square up and towards the center, wait 15 minutes, then repeat x4. I hope that helps! If it's still confusing, let me know and I can try to help some more!
Ashley
Jamie says
Can I use AP flour in place of the bread flour?
Ashley Petrie, RDN, LDN says
Hi Jamie! Yes, you can use all-purpose flour. The crust might not be as chewy, but it should still work well!
Charisma Horton says
this was a great recipe. Of course we are all always looking for great discard recipes. But I am also always looking for a great recipe to use in my outdoor pizza oven. It's been a learning curve to figure out all of the ins & outs of pizza dough. The outdoor ovens get hot so fast and I had found a great dough to use for Neapolitan style pizza but it takes 3 days to get the good results. I wanted to try this same day dough and see if I could use it in my pizza oven. It came out delicious. I had the stone at about 500-600 degrees and it cooked up in 5-6 minutes and it was cooked all the way through. A little crisp on the bottom which was perfect. I will also say that this recipe yielded 3 good size pizzas for us. I did let it rise a little longer because I keep our house a little colder. Thank you for sharing your process with us. I am thankful! I will make some dough balls and freeze them to keep on hand now that I know they will work for our system.:)
Ashley Petrie, RDN, LDN says
Hi Charisma! There is so much to making pizza at home and so many different ways to do it! It's a lot of fun to learn about. I'm so happy this pizza dough worked well for you - I also cook mine on my pizza stone and love it! Thank you so much for sharing and for your kind words, I appreciate it! - Ashley 🙂
Dana says
My dough is very liquidy, to the point where I had to add flour. I was being lazy and let the dough knead in my bread machine, so maybe I over mixed it? I hoping it turns out, but if anyone has some tips for next time that would be great!
Ashley Petrie, RDN, LDN says
Hi Dana! I'm not sure what happened as I've never used a bread machine with this recipe. It is a wetter dough, but shouldn't be liquid - could possibly be over-kneaded. Sorry I can't be more help with this! - Ashley
Mary says
Thank you so much for sharing this recipe! We love it! I’m making it again and this time freezing the other dough. Really excited for that. We will let you know how it goes.
Ashley Petrie, RDN, LDN says
Hi Mary! I'm so glad you enjoyed it! I love freezing the extra dough for an easy dinner another day. Thanks for sharing 🙂
Mary E says
Update on the frozen dough. It was just as good!! I was so nervous. We did end up leaving it out a little longer because it would expand and shrink, but once it warmed to room temp the dough was as good as the day we made it!
Ashley Petrie, RDN, LDN says
Hi Mary! I'm so happy that freezing the dough worked well for you. Thanks so much for sharing 🙂
Carly says
Very yummy! Nice chew.
Ashley Petrie, RDN, LDN says
Hi Carly! So glad you enjoyed 🙂
Jasmin says
This was perfection. Thank you for this recipe.
Ashley Petrie, RDN, LDN says
Hi Jasmin! I'm so glad you enjoyed it - thank you for sharing! 🙂
Ashley says
Beat pizza I have ever made! I wanted to make personal pizzas and I was able to make 4 with thus recipe.
Ashley Petrie, RDN, LDN says
Hi Ashley - so happy you enjoyed it! 🙂
Shelley says
Hello,
Do you refrigerate after bulk fermentation or do I go ahead and make them into balls and refrigerate? I’m making it right now. Very excited about this recipe.
Thank you
Shelley
Ashley Petrie, RDN, LDN says
Hi Shelley! You can shape them right after bulk fermentation. Then, you can either refrigerate them or use them immediately, depending on how much sourdough flavor you want there to be. Hope this helps! 🙂
Lucy Gammenthaler says
Hi! What do you use to store your pizza dough in?!
Ashley Petrie, RDN, LDN says
Hi Lucy! I usually store the dough balls in a freezer-safe, gallon-sized storage bag. They will usually flatten out a little bit, but can easily be reshaped and formed into a pizza crust. Hope this helps!
Christy Sowders says
I made this for dinner tonight and it was very good. Started at noon and we were eating by 5:30pm. The dough is very sticky, I have only worked with lower hydration doughs, but was able to figure it out. Instead of splitting the dough, I used my 15 inch stoneware bar pan and made one deep dish pizza. I was a little worried that the dough would not bake all the way through since it was much thicker than the recipe planned for. I let it bake about 15 minutes and it was great. The bottom was nice and brown. Nice puffy edges and was strong enough to be able to hold a large piece without flopping over. Thank you so much!
Ashley Petrie, RDN, LDN says
Hi Christy! Deep dish pizza sounds delicious - thank you so much for sharing! I'm glad it worked well for you and that you enjoyed it 🙂
Jillian says
I made this exactly as written. Put one ball in an oiled bowl in the fridge for two days before using. Took out an hour or two before to let it come to room temp. Easily stretched to my pan.
Put the other in an oiled bag and put in the freezer.
This baked up beautifully. I put in an approx 425-450 oven for 10-12 min.
Ashley Petrie, RDN, LDN says
Hi Jillian! So glad you enjoyed 🙂
Jenna says
So is there no pre-bake needed for the crust?
Ashley Petrie, RDN, LDN says
Hi Jenna! You can pre-bake the crust if you prefer, but I never do. This is a recipe for pizza dough, not any specific type of pizza, so you can use it however you'd like!
Jay Lee says
Are you able to place pizza toppings on once proofing/shaping done, refrigerator a few hours and then bake?
Ashley Petrie, RDN, LDN says
Hi Jay! Ideally, you should place the pizza toppings on after you stretch the dough out into the shape you want it to be, just before baking the pizza. I wouldn't put toppings on the raw pizza dough and then stick it in the refrigerator because they'll likely make it soggy. If you want to add toppings in advance, I'd try par-baking the dough instead in a 400-500˚F oven until it just begins to turn brown (usually a few minutes). Hope this helps!
Cindi says
I love this recipe! I ran out of time allowing the dough to rise and put it directly in the refrigerator for 3 days. It had a nice sourdough taste and great texture. It made 2 fairly large pizzas.
Ashley Petrie, RDN, LDN says
Hi Cindi! That's wonderful, I'm so happy to hear it worked well for you even without letting it rise before refrigerating. 🙂 Thanks for sharing!
Mariah says
Could I speed up the process by kneading in a stand mixer instead of doing stretches and folds, or would that not work for this recipe?
Ashley Petrie, RDN, LDN says
Hi Mariah! I've never tried it, but you could definitely try - I don't see why it wouldn't work!
Vanessa says
I used my Kitchen Aid mixer and so far so good. Mine is in the oven at the moment.
Ashley Petrie, RDN, LDN says
Hi Vanessa - good to know! Thank you for sharing 🙂
Jeremy J. says
If I would like a more sourdough flavor, do I put it in the refrigerator after the bulk fermentation or after the last set of stretch and folds? Also, is it ok to half all of your measurements to get a smaller batch and not have any impact on the quality and taste/flavor?
Ashley Petrie, RDN, LDN says
Hi Jeremy! Yes, you can halve the recipe - I do it all the time. As far as refrigerating it for more flavor, I recommend doing it after bulk fermentation. I shape the dough into a ball after it ferments, then refrigerate it for up to 3 days for better flavor. Hope this helps! 🙂
Sylvia says
If you don’t separate the into two pieces could the dough work for focaccia?
Ashley Petrie, RDN, LDN says
Hi Sylvia! I've never tried this myself, but I don't see why not. If you try it, let me know how it turns out for you! 🙂
Barbie says
I have made this pizza several times and we prefer to eat in and save lots and lots of money and enjoy this homemade quality meal. Win win
Ashley Petrie, RDN, LDN says
Hi Barbie! I'm so glad you enjoy it! We also prefer to eat in and save money 🙂
Mary Griffiths says
If I don’t have 400 gems of discard, could I just 1/2 the recipe?
Ashley Petrie, RDN, LDN says
Hi Mary! Yes, you can 1/2 the recipe - I do all the time. 🙂
Kelly says
Love it!
When storing in the fridge, do you oil the container for easy removal?
Ashley Petrie, RDN, LDN says
Hi Kelly! I don't always, but you absolutely can! Personal preference 🙂 so glad you enjoyed!
Corinne says
Thank you for helping with the sourdough discard and pizza dough recipe. I did several things - I didn’t heat the pizza stone, I was unable to heat my oven to 550 degrees, I did to 500. Even with these changes, I took a look and a few minutes before it was done and I thought it looked too hot. I turned the oven down to 350 to finish the time. It was still over-cooked even though the above adjustments should have led to under-cooking.
The dough is a good recipe, just watch your oven and consider whether your pizza needs to come out earlier and the temp adjusted down earlier.
Cbell says
This dough was extremely sticky, I had to add an extra cup of flour.
Ashley Petrie, RDN, LDN says
Hi! Yes, this is a high-hydration pizza dough. While it can sometimes be challenging to work with, building up enough gluten and using a generous dusting of flour on the work surface can help. A higher-hydration pizza dough means more bubbles and a lighter texture when baked. Hope this helps!
Candice says
Is there anything I can do if I’m 50 grams short on discard?
Ashley Petrie, RDN, LDN says
Hi Candice! You can make the dough without the 50 grams of starter - it shouldn't make a huge difference. If you want to keep the dough's weight the same, add 25 grams of flour and 25 grams of water to make up the difference. I hope this helps! 🙂
Candice says
Awesome, thank you!
Also, if the dough is way too hard to work with due to hydration can it be made
Into focaccia?
Ashley Petrie, RDN, LDN says
You're welcome! Yes, if you're struggling to work with the dough because of the high hydration, you can definitely turn it into focaccia.
Shanda says
Literally takes hours to make then I go to make the pizza it’s SO sticky and just keeps ripping apart. Loss of 4 hours and had to pay for dinner
Ashley Petrie, RDN, LDN says
Hi Shanda! I’m so sorry to hear the dough didn’t turn out as expected. This recipe uses a high-hydration dough, which can be tricky to handle. Proper stretch and folds are essential for gluten development, and chilling the dough overnight can make it easier to work with. Generously flouring your hands and surface when stretching can also help prevent sticking and tearing. Again, I'm sorry this recipe didn't work for you and I truly appreciate your feedback.
NJ says
Great dough!! I’ve had great success with it! Easy to work with and a great way to use up discard!!
Ashley Petrie, RDN, LDN says
So glad you enjoyed it!! 🙂
Betty says
I have a cast iron pizza pan and would like to know if it should be preheated, temperature and etc.
thanks
Ashley Petrie, RDN, LDN says
Hi Betty! I would recommend preheating the cast iron skillet in the oven at 500 degrees Fahrenheit, then oiling lightly (and very carefully) and assembling your pizza in the hot cast iron skillet. You may want to have the dough stretched out prior to assembling, then just transfer the dough to the skillet and quickly add your sauce and pizza toppings (make sure they're ready to go as well!). Bake for 12-15 minutes or until done to your liking. Hope this helps! 🙂
Samantha says
How do you freeze? I see where it says you can but do you wrap in dough ball in plastic? Airtight container? Thanks!
Ashley Petrie, RDN, LDN says
Hi Samantha! I freeze my pizza dough balls individually in a gallon-sized, freezer-safe plastic bags. You could also flash freeze them on a parchment-lined baking sheet until solid, then transfer them to any container you'd like. Hope this helps! 🙂
Laura says
Great recipe and delicious results! The hints about flouring fingers while working with the dough were especially helpful.
The first try with this recipe we used a pizza screen and the crust ended up sticking very badly (my son had worked in a pizza place and we followed his technique). Second time we sprayed the screen with oil, and parbaked for 2 minutes, then proceeded with assembly and baking. The results were amazing!!!
Thanks for the recipe and to the commenters who mentioned parbaking. For a screen it is helpful.
Ashley Petrie, RDN, LDN says
Hi Laura - I'm so glad you enjoyed this recipe. And thank you so much for the tips about using a pizza screen! 🙂
Betty says
Does this receipe make 2-12 inch or 15 ins pizzas?
Ashley Petrie, RDN, LDN says
Hi Betty! I would say it makes two approximately 12-14 inch pizzas depending on how thin you stretch it. Hope this helps! 🙂
Selina says
Do you have to use bread flour? Can I just you AP flour?
Ashley Petrie, RDN, LDN says
Hi Selina! Yes, you can use AP flour - the crust might have a little less chew to it, but it should still turn out tasty! 🙂
Hannah Avery says
Will all purpose flour work for this recipe?
Ashley Petrie, RDN, LDN says
Hi Hannah! Yes, you can use AP flour - the crust might have a little less chew to it, but it should still turn out tasty! 🙂
Debbie says
Can i use pizza flour? I have some from an Italian specialty store near by - thank you
Ashley Petrie, RDN, LDN says
Hi Debbie! I haven't tried it myself, but I don't see why not. 🙂
Brigitte says
This pizza dough is by far the best I have tasted! ♥️
We truly love it.
I used rice flour while handling the dough…would bread flour be better? It is quite hydrated so naturally it is sticky ☺️
Ashley Petrie, RDN, LDN says
I think either works, but bread or AP flour might make it a little less sticky because it's usually ground finer and can more evenly coat the dough. I'm so glad you enjoy this pizza dough! 🙂
Betty says
For the conversion table using sourdough, do you us it right out of fridge or room temperature?
Thanks
Ashley Petrie, RDN, LDN says
Hi Betty! I use my discard straight from the refrigerator. The only time I sometimes let it warm up to room temp is if I'm making a batter (like muffins or cake) that uses butter and I want the butter to stay soft/melted. Hope this helps! 🙂
Lisa says
This dough is amazing!
Ashley Petrie, RDN, LDN says
Hi Lisa! So glad you enjoyed it! 🙂
Caroline says
Baking sourdough for many years and I have been baking discard recipes for the same amount of time because let’s face it. There’s always discard! I had a lot of discard this time and I found this recipe and I can’t tell you how amazing it. The best discard pizza dough recipe I have ever used. I topped my pie with leftover homemade carbonara sauce, broccoli, and mozzarella and a little shout. absolutely delicious! The stove recipe does make more than I would use, but I formed all the dough and stuck it in the freezer and now I have pizza dough for the next three weeks. I can have pizza once a week without having to freak out about it. Oh yeah, and my meal cost me pennies! Thanks for the great recipe!
Ashley Petrie, RDN, LDN says
Hi Caroline! Your comment totally made my day - thank you so much for sharing! I love the topping combo you went with. Carbonara sauce, broccoli, and mozzarella sounds amazing! I'm so happy the dough worked out well for you, and it’s great to hear it helped make your pizza nights easier. Freezing the extra dough is such a smart idea, too. Enjoy your weekly pizza, and thanks again for your kind words! 🙂
Deon says
This dough is wonderful!! Thank you so much. This will be our go-to recipe in the future.
Ashley Petrie, RDN, LDN says
Hi Deon! So glad you enjoyed it - thanks for sharing! 🙂
Kay says
This was my first sourdough recepie I tried. Now it’s a bi-weekly recepie I use! 🙂 thanks!
Ashley Petrie, RDN, LDN says
That’s amazing, Kay! I’m so happy it’s become part of your regular rotation — that makes my day! Thanks for sharing! 🙂
Melissa says
I tried this recipe for the first time today. Mixed the dough at 1:00 on a lunch break and then did the stretch and folds as directed. I am new to sourdough… the dough was still super sticky but I had to give it a try because I had guests coming for dinner. I added flour before shaping it for my pan and it turned out beautiful! I did par-bake the dough because I used it all in one big pan and it was super thick. I added multiple layers of toppings… pepperoni, Canadian bacon, pork/deer burger (seasoned and pre-cooked), mushrooms, sweet peppers, onions, jalapeños, cheese…) I wish I could post a picture! It turned out perfect and everyone loved it!
Ashley Petrie, RDN, LDN says
Hi Melissa! Thanks so much for the wonderful rating and for sharing how it turned out. I’m so glad to hear the pizza was a hit with your guests! Your toppings sound amazing. Thanks again for trying the recipe! 🙂
Stephanie says
I've made this and it's a game changer 🙌 Absolutely love the texture and taste of the dough. Thank you for sharing it 😊
I've just made it again and am getting ready to stretch it out and top it. Yum 😋
Ashley Petrie, RDN, LDN says
Hi Stephanie! This makes me so happy to hear - I'm glad you enjoyed it! Thank you so much for sharing! 🙂
Denise says
I have used this recipe several times and enjoyed it. However, one of the things I loved was the timeline and I don’t see that anywhere on the blog post anymore. Did you remove it?
Ashley Petrie, RDN, LDN says
Thanks so much, Denise! I’m so glad you’ve been enjoying the recipe. You’re right—I did recently update the post to make it a little more concise and easier to scroll through, and I ended up removing the timeline. But I love that you found it helpful, so I’ll be sure to add it back in! Thanks for the reminder.
Denise says
THANK YOU SOOO MUCH! It really is the best recipe! Everyone asks for it after trying it! That timeline really helps simplify it for me. I usually double the recipe and put two in the freezer.
Ashley Petrie, RDN, LDN says
Aww that makes my day!! I’m so glad the timeline helps simplify things for you. And I love hearing how much everyone loves the recipe. Doubling it and freezing extra is such a smart move - I do the same! 🙂
Deanna Vacha says
550 degrees killed my pizza stone. It looks burnt and my house filled with smoke. I turned the oven down to 450 once I put the pizza in. However, the pizza was delicious.
Ashley Petrie, RDN, LDN says
Hi Deanna! I’m so glad you enjoyed the pizza, but I’m sorry to hear about your pizza stone! I use mine at 550°F regularly and haven’t had issues unless cheese or oil drips onto the stone—that can definitely cause smoke and leave burnt spots. My stone has dark spots on it from use too, but it’s still completely usable. Was there any oil on yours, or do you think some cheese may have melted off onto it?
Suzanne says
A really good pizza dough, thankyou.
I will definitely be using this recipe again. I didn't have enough starter so halved the recipe. I do have one question though. I cooked it in my cast iron skillet in the oven, preheated skillet and added butter but had trouble transferring shaped dough into the hot skillet. Any tips appreciated.
Ashley Petrie, RDN, LDN says
Hi Suzanne! I’m so glad you enjoyed the recipe and plan to make it again! 😊 Transferring the dough into a hot skillet can definitely be tricky. One thing that helps is shaping the dough on a floured piece of parchment paper or a pizza peel and sliding it off into the skillet—that gives you a bit more control. You can also lightly flour your hands and the dough to make it easier to handle. Hope that helps for next time!
Kendall says
I forgot to do stretch and folds will my pizza turn out ok?
Ashley Petrie, RDN, LDN says
Hi Kendall! It should still turn out just fine—stretch and folds help build gluten, so without them, the dough might be a little trickier to shape or stretch out for pizza. The crust may also be a bit softer or less chewy, but it’ll still be delicious. Let me know how it goes!
Karen says
Hi Ashley,
I just made your Sourdough discard pizza dough and pizza and wanted you to know this was one of the best easiest recipes ever and came great. My husband and I just loved it! I will be using your recipes from now on when we want pizza. Thanks for another great one!
Karen🙂❤️
Ashley Petrie, RDN, LDN says
Hi Karen,
Thank you so much for taking the time to share this! I’m so happy to hear you and your husband loved the sourdough discard pizza—it’s one of my favorites, too. I’m thrilled you’ll be using my recipes for your pizza nights. Happy baking and enjoy every bite! ❤️🍕😊
Karen says
Hi Ashley,
Been loving your delicious recipes and just made pizza using your Sourdough discard pizza dough recipe. I have to say it was the easiest and best one yet and definitely will be making this regularly when making pizza. Thanks for all your wonderful recipes!
Karen🌞❤️
Mary says
This is my go to pizza dough recipe. Thanks for sharing!
Ashley Petrie, RDN, LDN says
Hi Mary! This makes me so happy to hear - so glad you enjoy it! 🙂
Debbie says
I plan to make this on a Thursday morning and refrigerate until Saturday afternoon. A couple questions (apologies if they are already answered but I didn't see it):
1. Do I refrigerate the dough tightly wrapped in saran wrap or in a bowl with saran wrap across the top (trapping air in)? I assume with the freezer ball it should be tightly wrapped with no air but I'm confused on the fridge one.
2. How long in advance do I need to bring the dough to temp before I stretch it out to make it?
Thanks!
Ashley Petrie, RDN, LDN says
Hi Debbie,
Sorry for the delay! For the fridge, you can do either—tightly wrapped in plastic or in a bowl covered with saran wrap works fine.
As for stretching it, I often go straight from the fridge, but it can be a bit easier to work with if you let it sit 20–30 minutes to warm up slightly.
Hope that helps!
Best,
Ashley
Jessica says
Hi what if you don’t have enough starter for this recipe?
Ashley Petrie, RDN, LDN says
Feed it more! Or cut the recipe in half to make one dough. 🙂
Brittany says
I have tried freezing the dough and using later. Every time the dough comes out uncooked with my toppings burnt, or tough and chewy. When I make it fresh it works perfectly. When frozen, I thaw in fridge for a day or two, set on counter few hours before using to get the room temp. From here I've tried making pizza directly, I've also tried lightly kneading and letting sit before spreading. What's the best approach so I can use this as a quick meal during the week! Help!
Ashley Petrie, RDN, LDN says
That's so interesting! I freeze it all the time and have honestly never had this happen. I'm genuinely not sure what would cause this. Possibly it's overproofing from being in the fridge a few days then on the counter for a few hours? Other than that I'm not totally sure. What are you baking it on (like stone, baking sheet, etc.) and what temp are you baking it at?