Make your first loaf of sourdough bread without the stress! This easy recipe is perfect for beginners—simple steps, low hydration, and baked in a Dutch oven for a delicious, crusty loaf every time.
Recipe updated January 21, 2026: Recipe and instructions have been slightly tweaked to better reflect my beginner-friendly method.
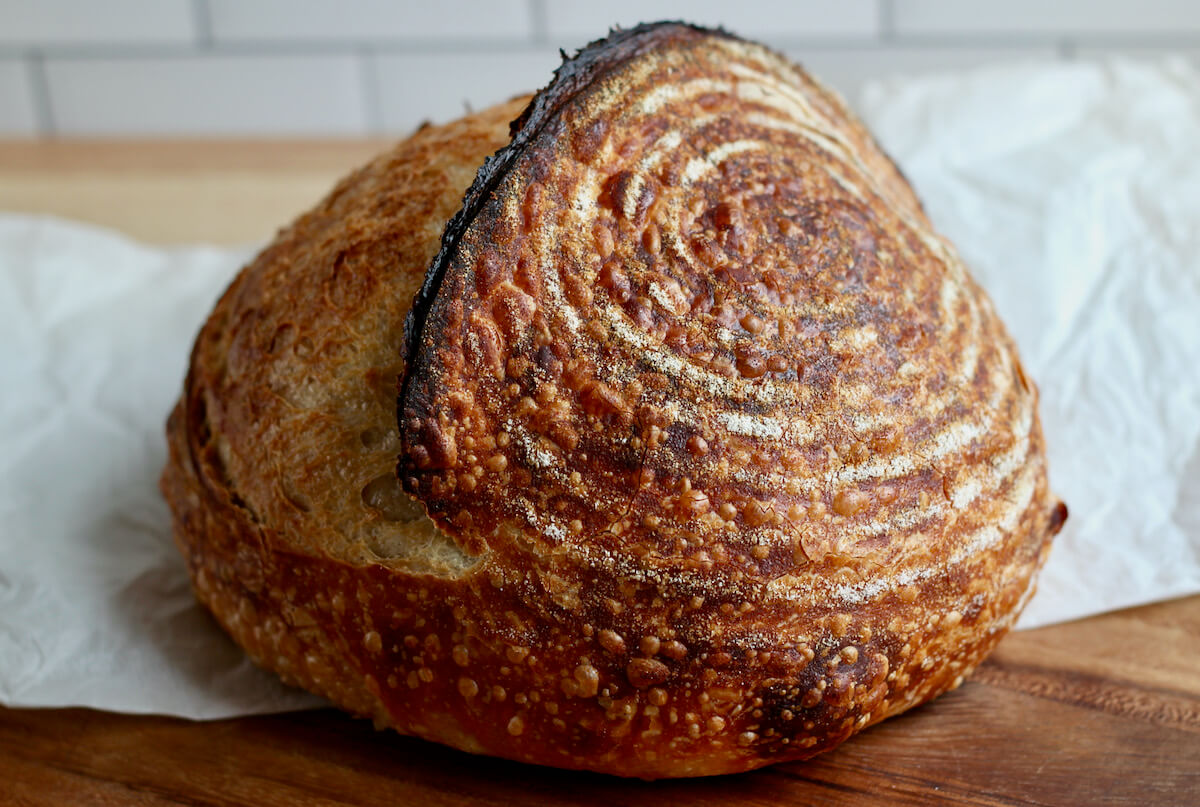
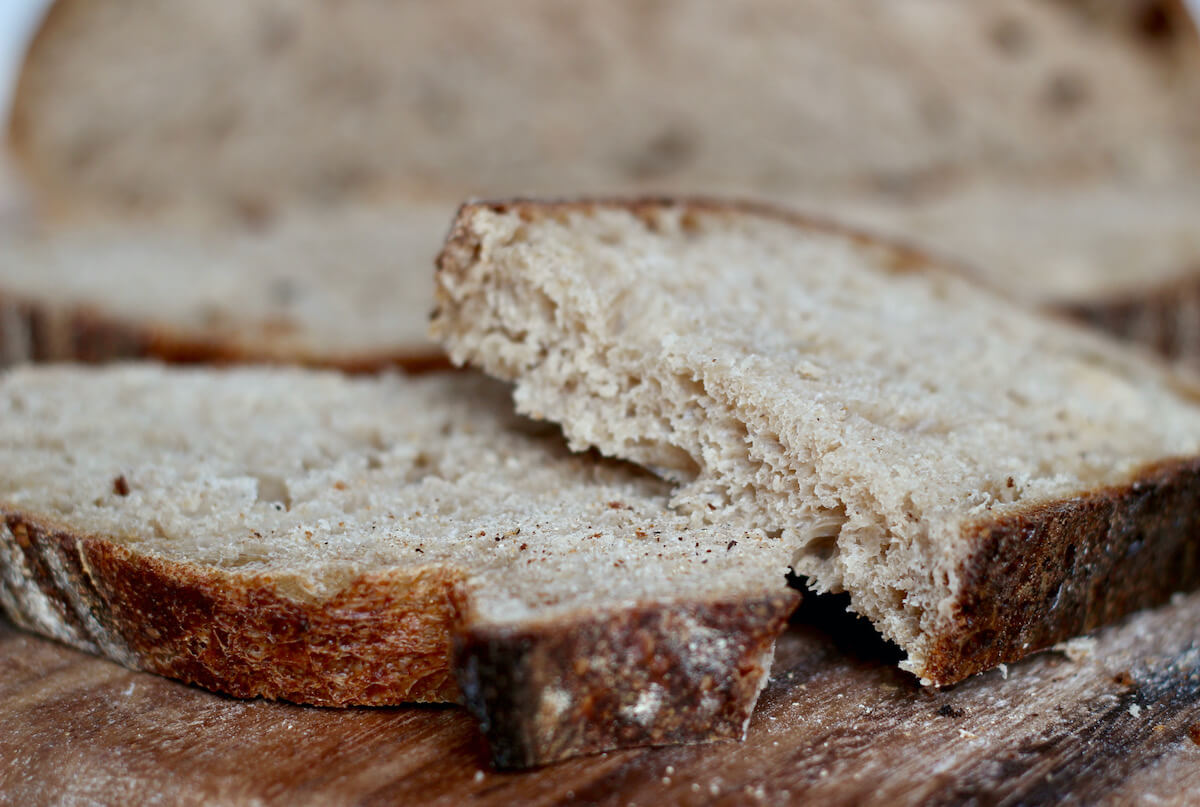
There’s nothing quite like a crusty, rustic loaf of sourdough. With its tangy flavor and chewy texture, it’s easy to see why it’s a favorite among bread bakers.
But let’s be honest... baking sourdough at home can feel intimidating. It took me years to finally bake a loaf I was proud of!
No worries, my friend! This easy sourdough bread recipe is perfect for beginners. I’ve simplified it to the essentials—no autolyse, no preshaping—so you can build confidence while baking a delicious loaf.
The lower-hydration dough is easy to handle, and baking it in a Dutch oven gives you beautiful oven spring and a golden, crusty crust. With a strong, healthy starter, this recipe is almost foolproof.
If you’re curious about baker’s math, hydration, and how it affects your bread, I’ve included some helpful notes below. Otherwise, feel free to skip straight to the recipe.
And once you’ve mastered this beginner-friendly loaf, you might want to try my faster, same-day or high-protein version!
Disclaimer: Some links throughout this post are affiliate links. As an Amazon Associate, I earn from qualifying purchases. You can learn more by visiting my Affiliate Disclosure Page.
Understanding Baker's Percentages
Before we dive into making a loaf of sourdough bread, it's important to understand baker's percentages. For me, learning about baker's percentages was a game-changer for my sourdough bread baking.
Baker's percentages (or baker's math) are used to develop bread recipes.
These percentages compare the amount of each ingredient in the recipe as it relates to the amount of flour. The flour is always set at 100%.
Baker's Percentages Formula: (weight of ingredient [in grams]/weight of flour [in grams]) X 100 = baker's percentage
Example Formula Using Baker's Percentages
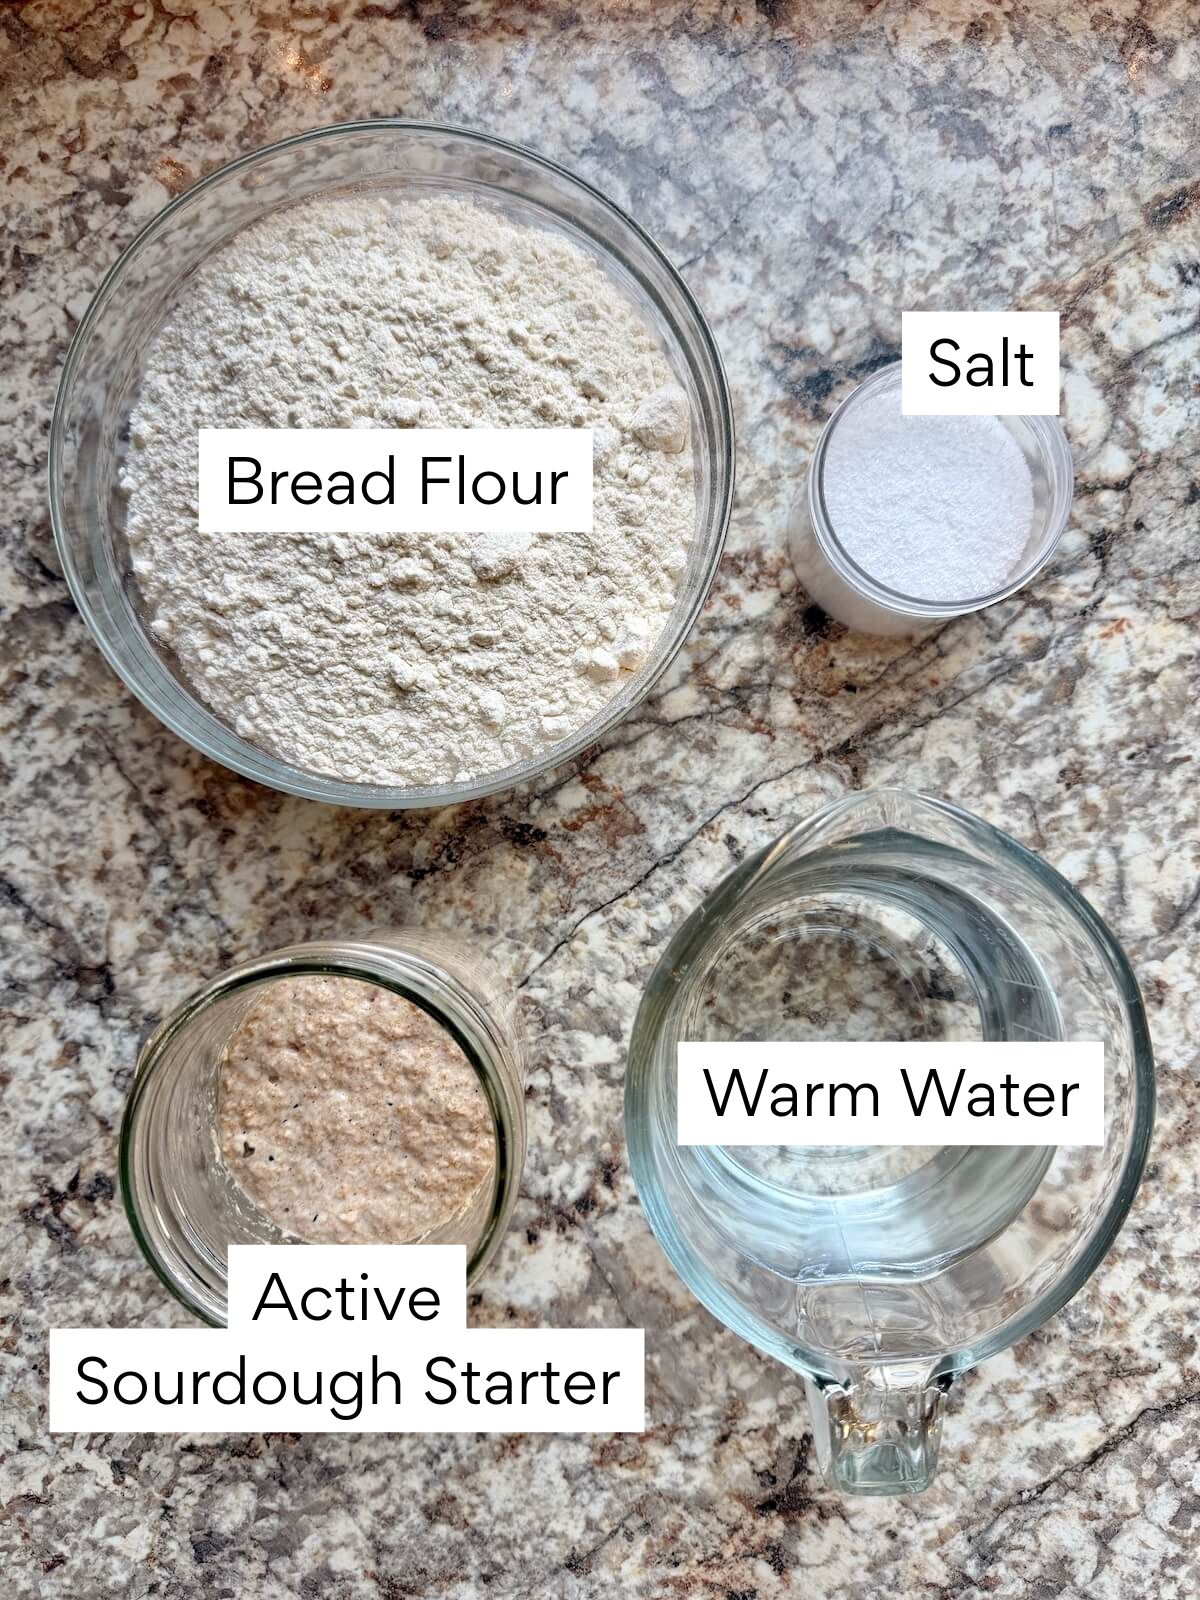
A basic loaf of sourdough bread is made using only flour, water, starter, and salt.
Typically, sourdough bread formulas use 20% starter, 2% salt, and anywhere from 60-100% water. The amount of water in the recipe is often referred to as the hydration level of the dough (more on that later).
Here is a table showing the breakdown of baker's percentages for a basic loaf of sourdough bread.
| Ingredient | Amount | Percentage |
| Flour | 500 grams | 100% |
| Water | 325 grams | 65% |
| Starter | 100 grams | 20% |
| Salt | 10 grams | 2% |
Understanding Hydration Level
As previously mentioned, the amount of water in the dough is often referred to as the hydration level. Sourdough bread recipes can range anywhere from 60-100% hydration or more.
Since this recipe calls for 330 grams of water and 480 grams of flour, the dough is a "69% hydration dough."
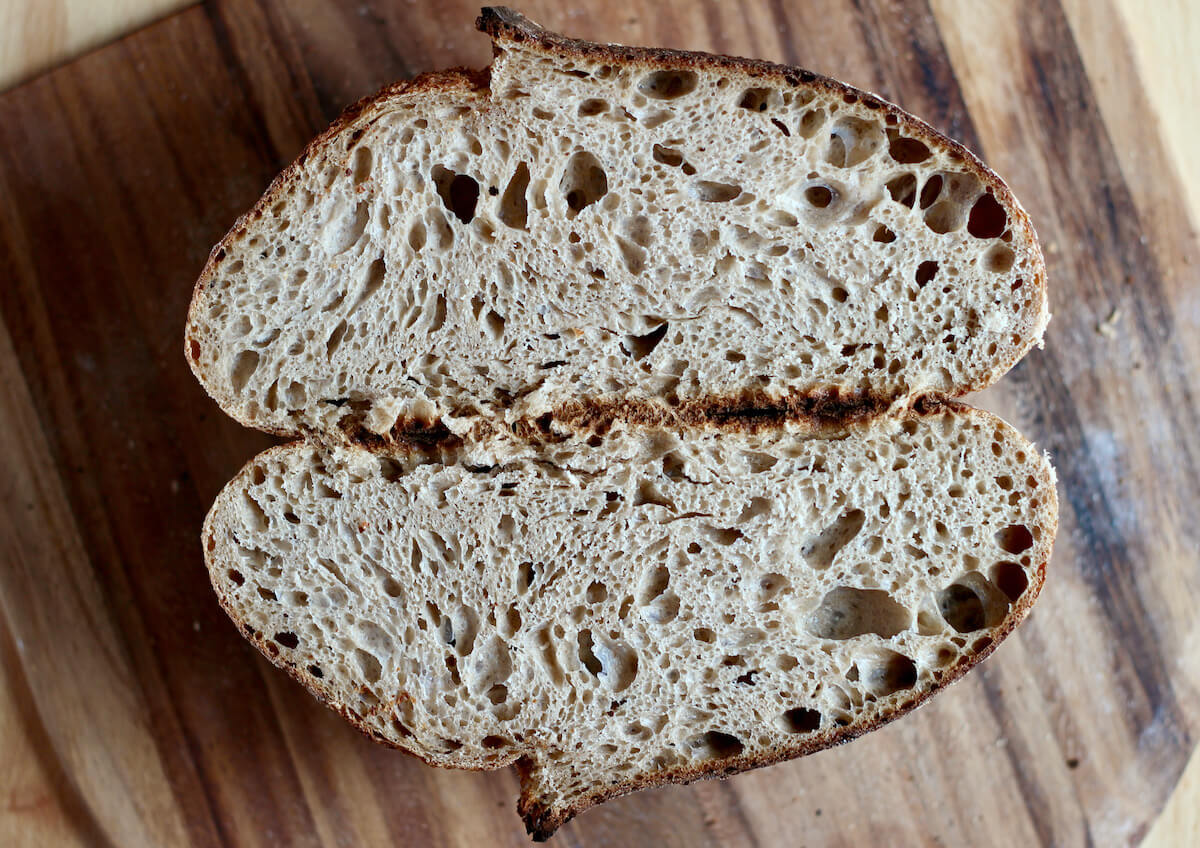
The hydration level of the dough is important because it affects the final texture of your bread.
Lower hydration doughs generally have a more closed crumb while higher hydration doughs have a more open and airy crumb.
Hydration level also affects how easy it is to work with your dough.
The higher the hydration, the stickier and more difficult it is to work with the dough. If you're new to sourdough, I recommend starting on the lower end and working your way up to higher-hydration doughs.
Ingredient Notes
Here are some notes on key ingredients. For a full list of ingredients, check out the recipe card below.
- Sourdough Starter- Make sure your starter is strong and bubbly before using it. If you’re using discard, opt for some that’s less than 3 days old. The dough may take a little longer to rise. If your starter is sluggish, try feeding it some whole wheat flour.
- Bread Flour- Preferred for its higher protein, but unbleached all-purpose works too.
- Water- This recipe makes a 69% hydration dough. If you’d like an easier-to-handle dough, you can reduce the water to 300 g (1 ¼ cups) for about 63% hydration. Use warm, non-chlorinated water to help the fermentation process along.
- Kosher Salt- I use Diamond Crystal (2.8 g per tsp). If using Morton’s or table salt, halve the volume or measure by weight.
Equipment Notes
- Dutch Oven- A 6-quart cast iron Dutch oven holds heat and traps steam for a better rise and crust.
- Kitchen Scale- Essential for accurate measurements and consistent sourdough results.
- Banneton Basket- Supports the dough during proofing and gives a classic shape.
- Bench Scraper- Makes shaping dough and cleaning the counter easier.
- Lame- Used for easily and precisely scoring dough.
- Straight-Sided Container- Optional, but highly recommended. Helps track dough rise during bulk fermentation.
Tips for Success
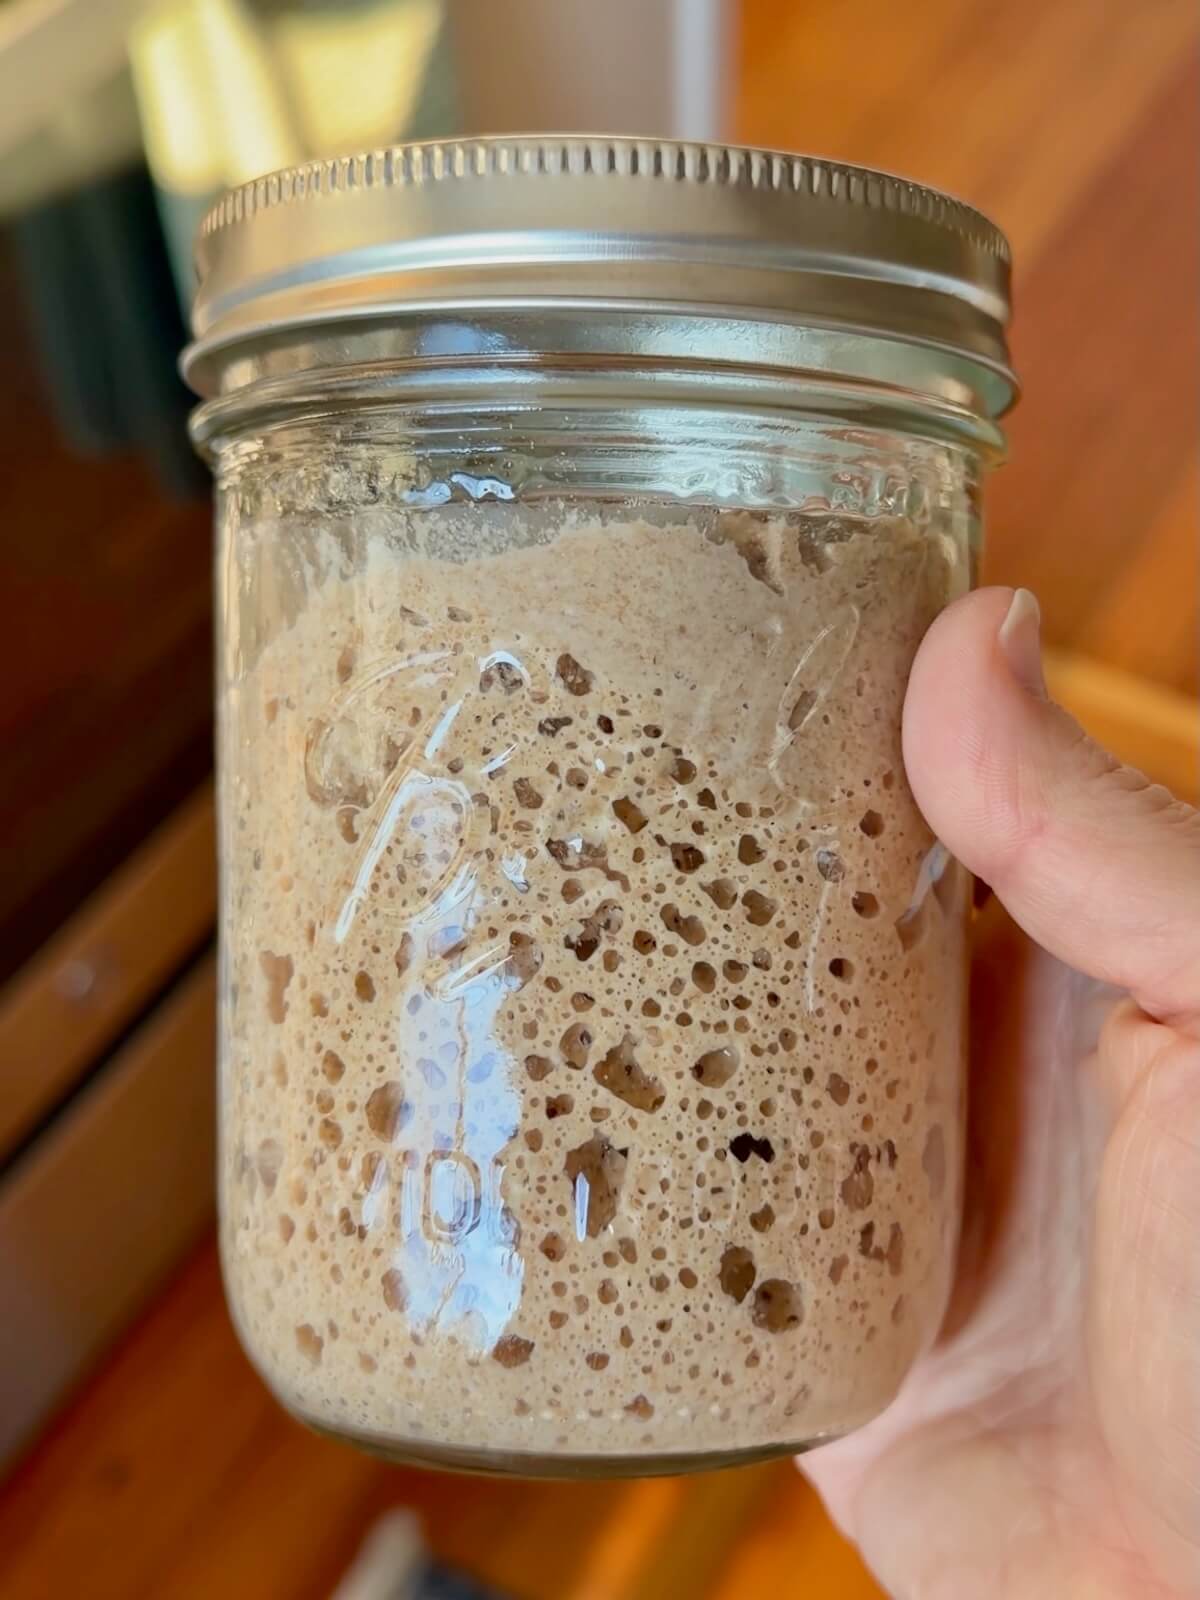
- Use an active starter. Your starter should be bubbly and active before mixing the dough.
- Weigh ingredients. Measuring by weight gives more consistent results than cups.
- Find a warm spot. Let your starter and dough rise in the warmest spot in your kitchen, out of direct sunlight.
- Keep hands wet. A little water prevents sticking during stretch and folds and shaping.
- Watch the dough. Look for signs of readiness instead of following a strict timeline.
- Preheat the Dutch oven. Heat it in a 450°F oven for at least 45 minutes before baking.
How to Make Sourdough Bread
Follow these simple steps (with pictures!) to bake your own loaf of sourdough bread. More detailed instructions can be found in the recipe card below.
Step 1: Feed sourdough starter. Feed your starter 6–12 hours before mixing, until bubbly, active, and doubled in size.
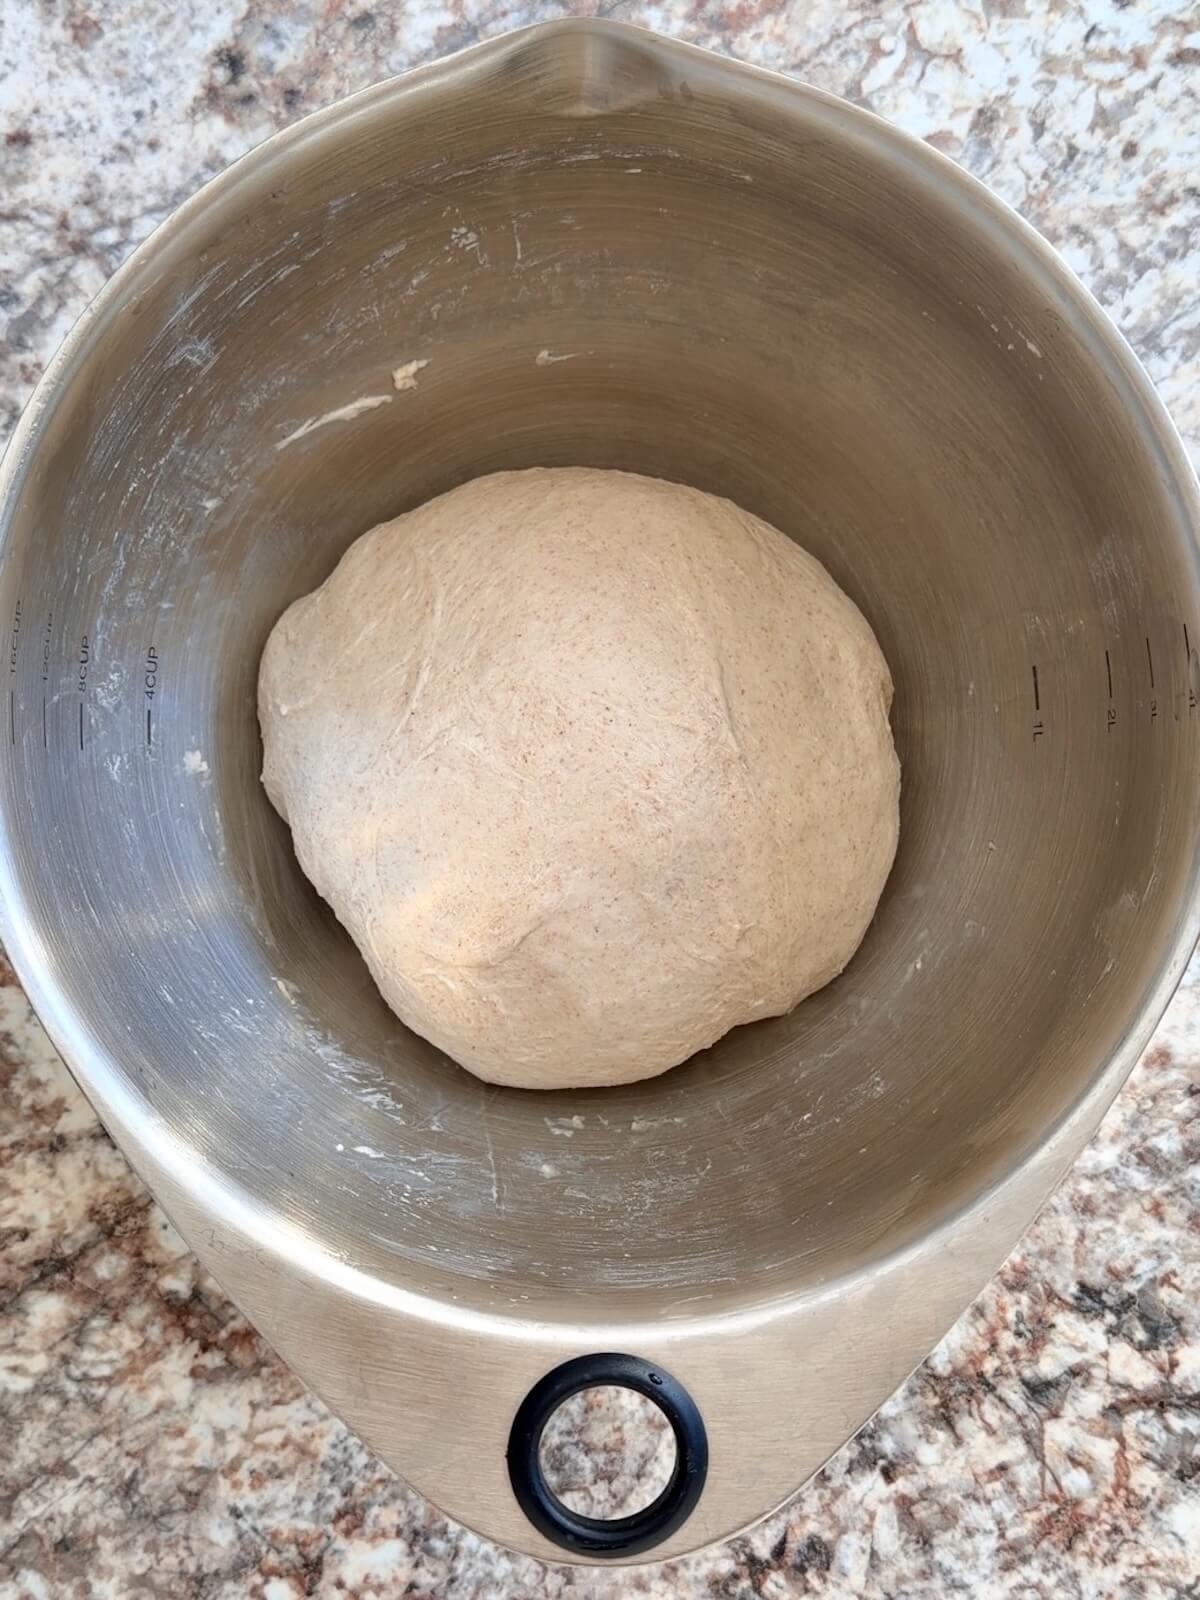
Step 2: Mix the dough. Mix warm water and starter, then add flour and salt. Knead until no dry flour remains. Cover and rest for 20 minutes.
Step 3: Stretch and folds. Perform 4 sets of stretch and folds, resting 15 minutes between each set.
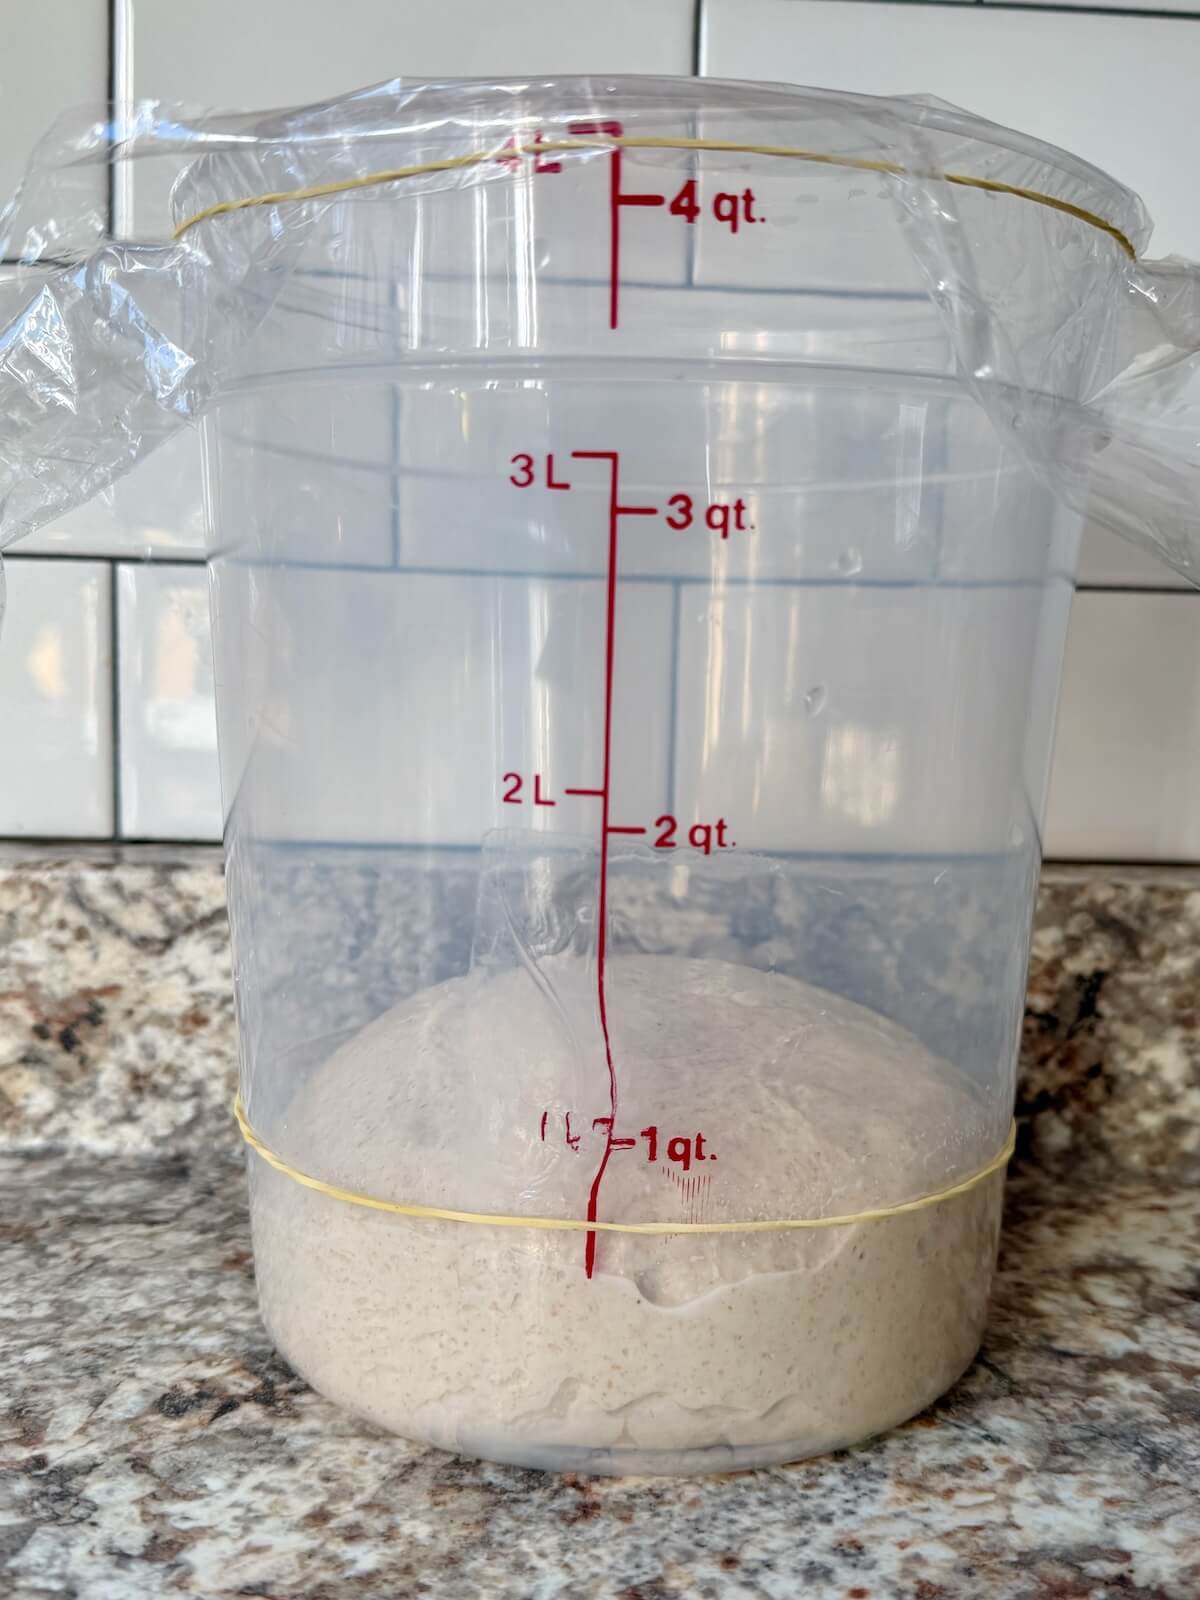
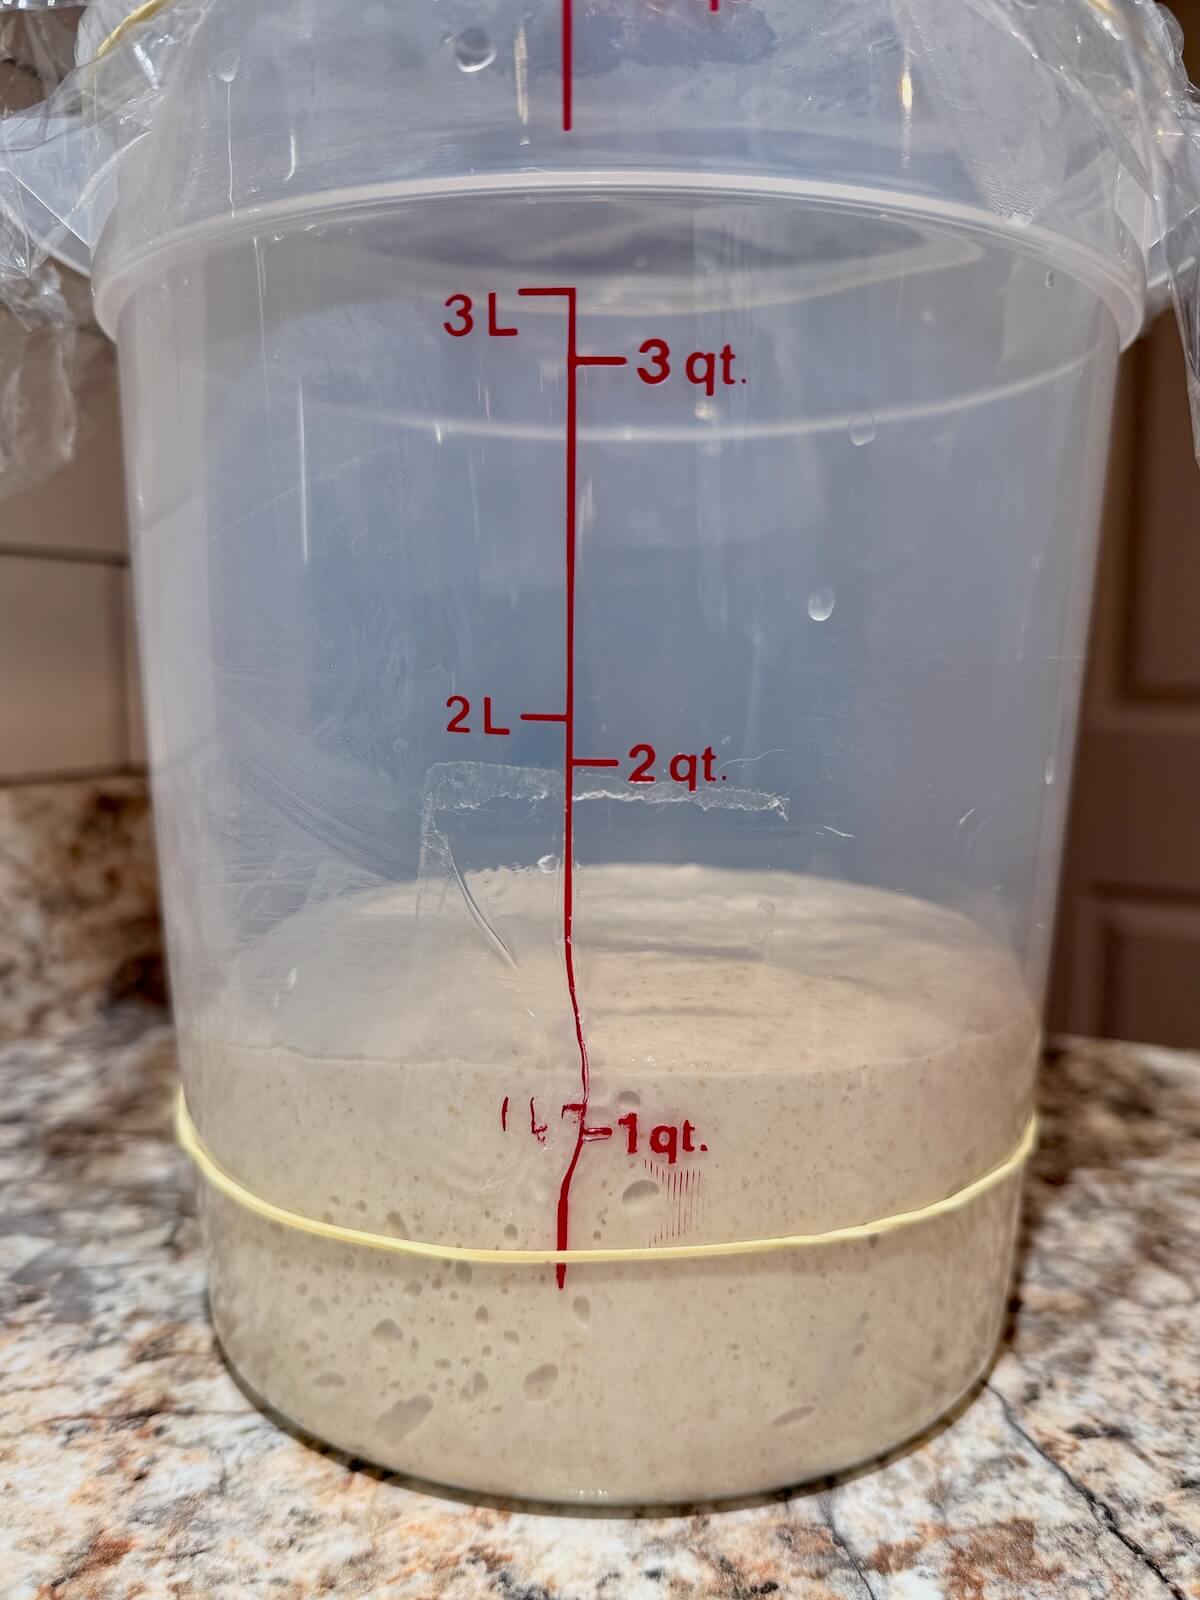
Step 4: Bulk fermentation. Let the dough rise at room temperature until doubled and bubbly, 4–12 hours depending on temperature.
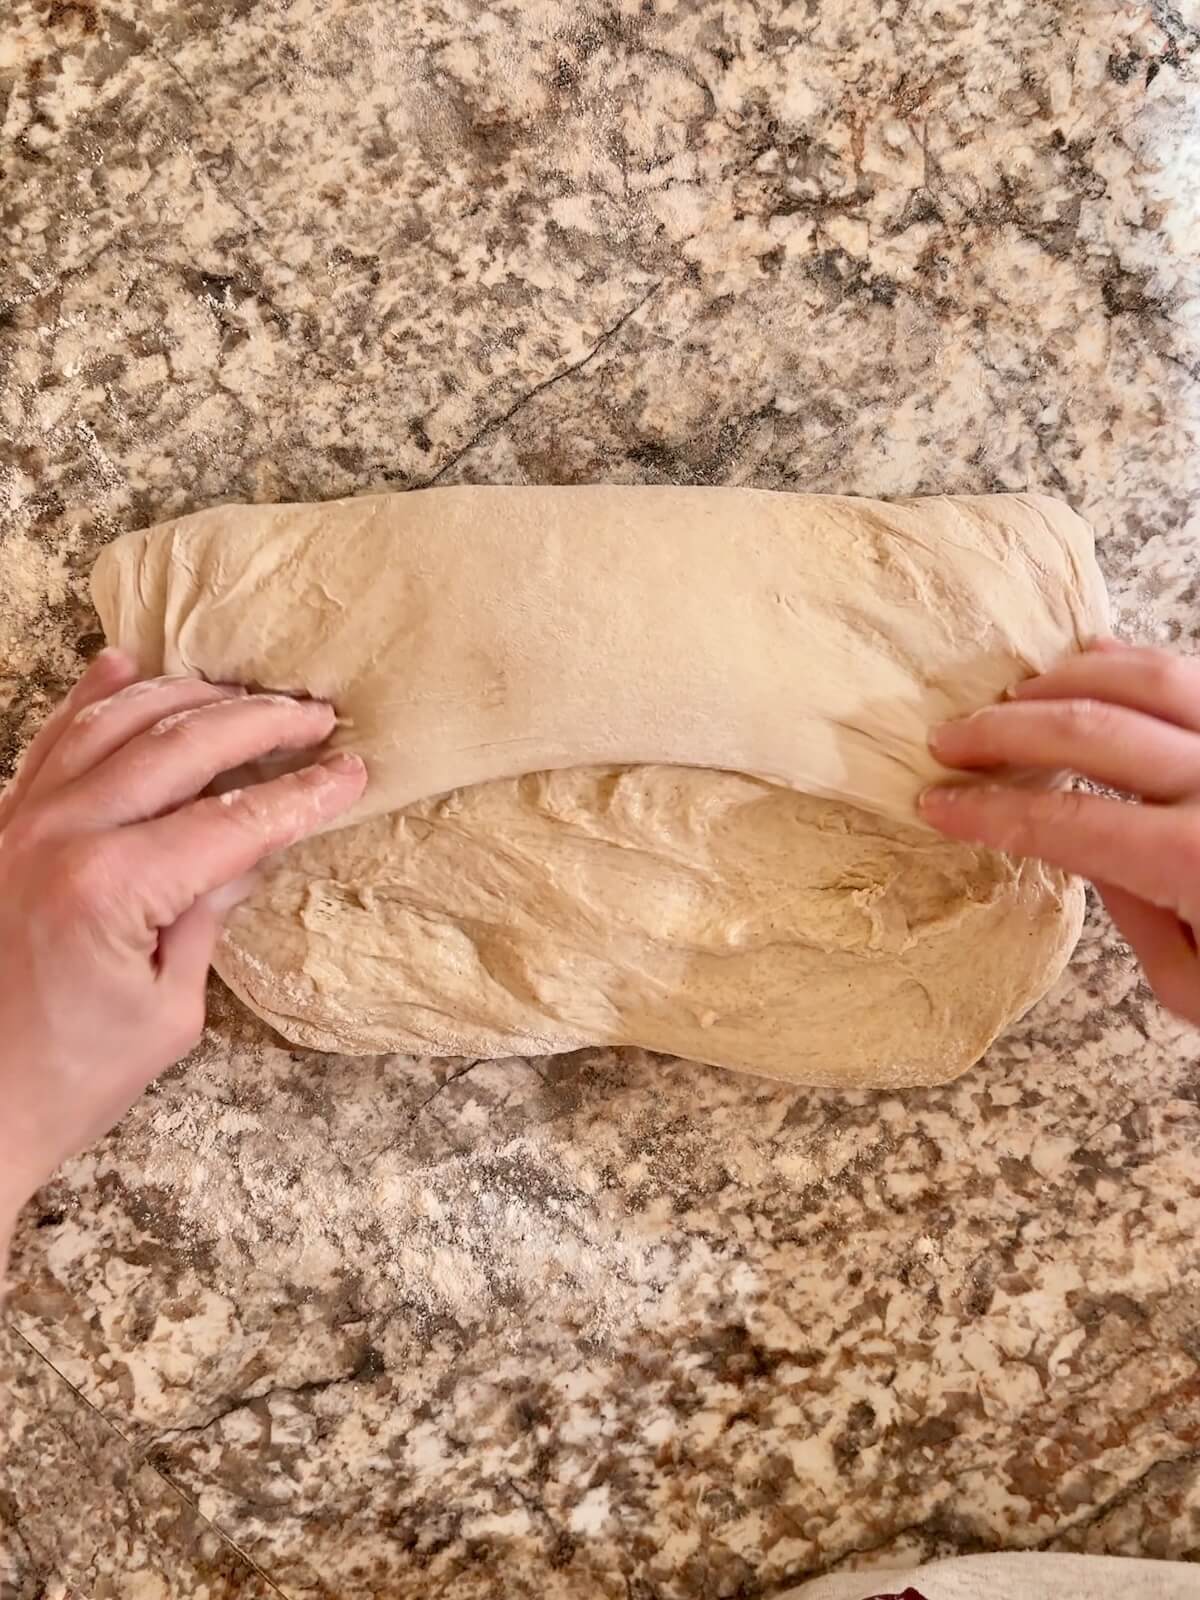
Step 5: Shape. Gently shape the dough into a round (or oval if using an oval basket), creating surface tension.
Step 6: Cold proof. Place the dough seam-side up in a floured proofing basket. Cover and refrigerate for 12–16 hours.


Step 7: Bake. Preheat the oven to 450°F with a lidded Dutch oven inside for 1 hour. Turn the dough out, score, and transfer to the hot Dutch oven. Add 2 ice cubes, cover, and bake 40 minutes. Uncover and bake 5–10 minutes more. Cool on a wire rack for at least 2 hours before slicing.
Baker's Timeline
Use this sample timeline to help plan out your homemade sourdough bread:
- 8:00 PM (Night Before): Feed your starter.
- 8:00–9:00 AM: Mix the dough. Rest 20 minutes.
- 9:00–10:00 AM: Do stretch and folds.
- 10:00 AM–6:00 PM (varies): Bulk fermentation (until doubled in size).
- 6:00–6:30 PM: Shape the dough.
- 6:30 PM–6:30 AM (Next Day): Cold proof in the fridge overnight.
- 6:30–7:15 AM: Bake at 450°F.
- 7:15–9:15 AM: Cool completely before slicing.
Note: Rise times can vary depending on the strength of your starter and the temperature of your kitchen and dough. Use visual cues—like when your dough has doubled in size—rather than the clock.
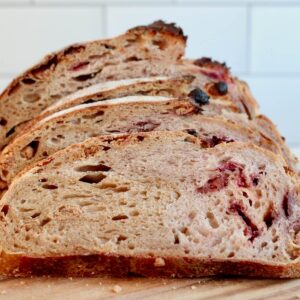
Adding Mix-ins
Typically, mix-ins are added during the stretch and fold or shaping phase. How much you use depends on the ingredient and your preference.
Popular mix-in ideas:
- Seeds: sesame, sunflower, pumpkin, flax, multigrain
- Nuts: walnuts, pecans, almonds
- Dried fruit: raisins, cranberries, apricots
- Herbs & spices: rosemary, thyme, cinnamon, cumin
- Cheese: cheddar, parmesan, gouda
- Vegetables: jalapeños, garlic, caramelized onions, sun-dried tomatoes
💡 Tip: Mix-ins can affect hydration and rise, so you may need to slightly adjust the water.

How to Store
Because homemade sourdough doesn’t contain preservatives, it’s best enjoyed within the first 24-48 hours after baking.
An uncut loaf can be stored at room temperature for up to 3 days. Once sliced, keep it in an airtight container for up to 3 days, then freeze any remaining bread for up to 3 months.
Skip the refrigerator as cold, dry air causes sourdough to stale quickly.
Let's Connect!
Be sure to leave a comment below if you have any questions. You can also connect with me on Instagram, Facebook, Pinterest, or via email at [email protected].

📖 Recipe

Basic Sourdough Bread
Equipment
- Banneton or bowl lined with tea towel
- Bread sling or parchment paper
- Lame or sharp knife
- Straight-sided container (optional, for bulk fermentation)
Ingredients
- 330 grams (1 ⅓ cups) warm water 80-90°F
- 100 grams (½ cup) active sourdough starter
- 480 grams (4 cups) bread flour
- 10 grams (3 ½ teaspoons) Diamond Crystal Kosher Salt
- Rice flour for dusting proofing basket
- 2 ice cubes for steam
Instructions
- Feed your sourdough starter 6–12 hours before mixing the dough, until it’s bubbly, active, and has doubled in size.
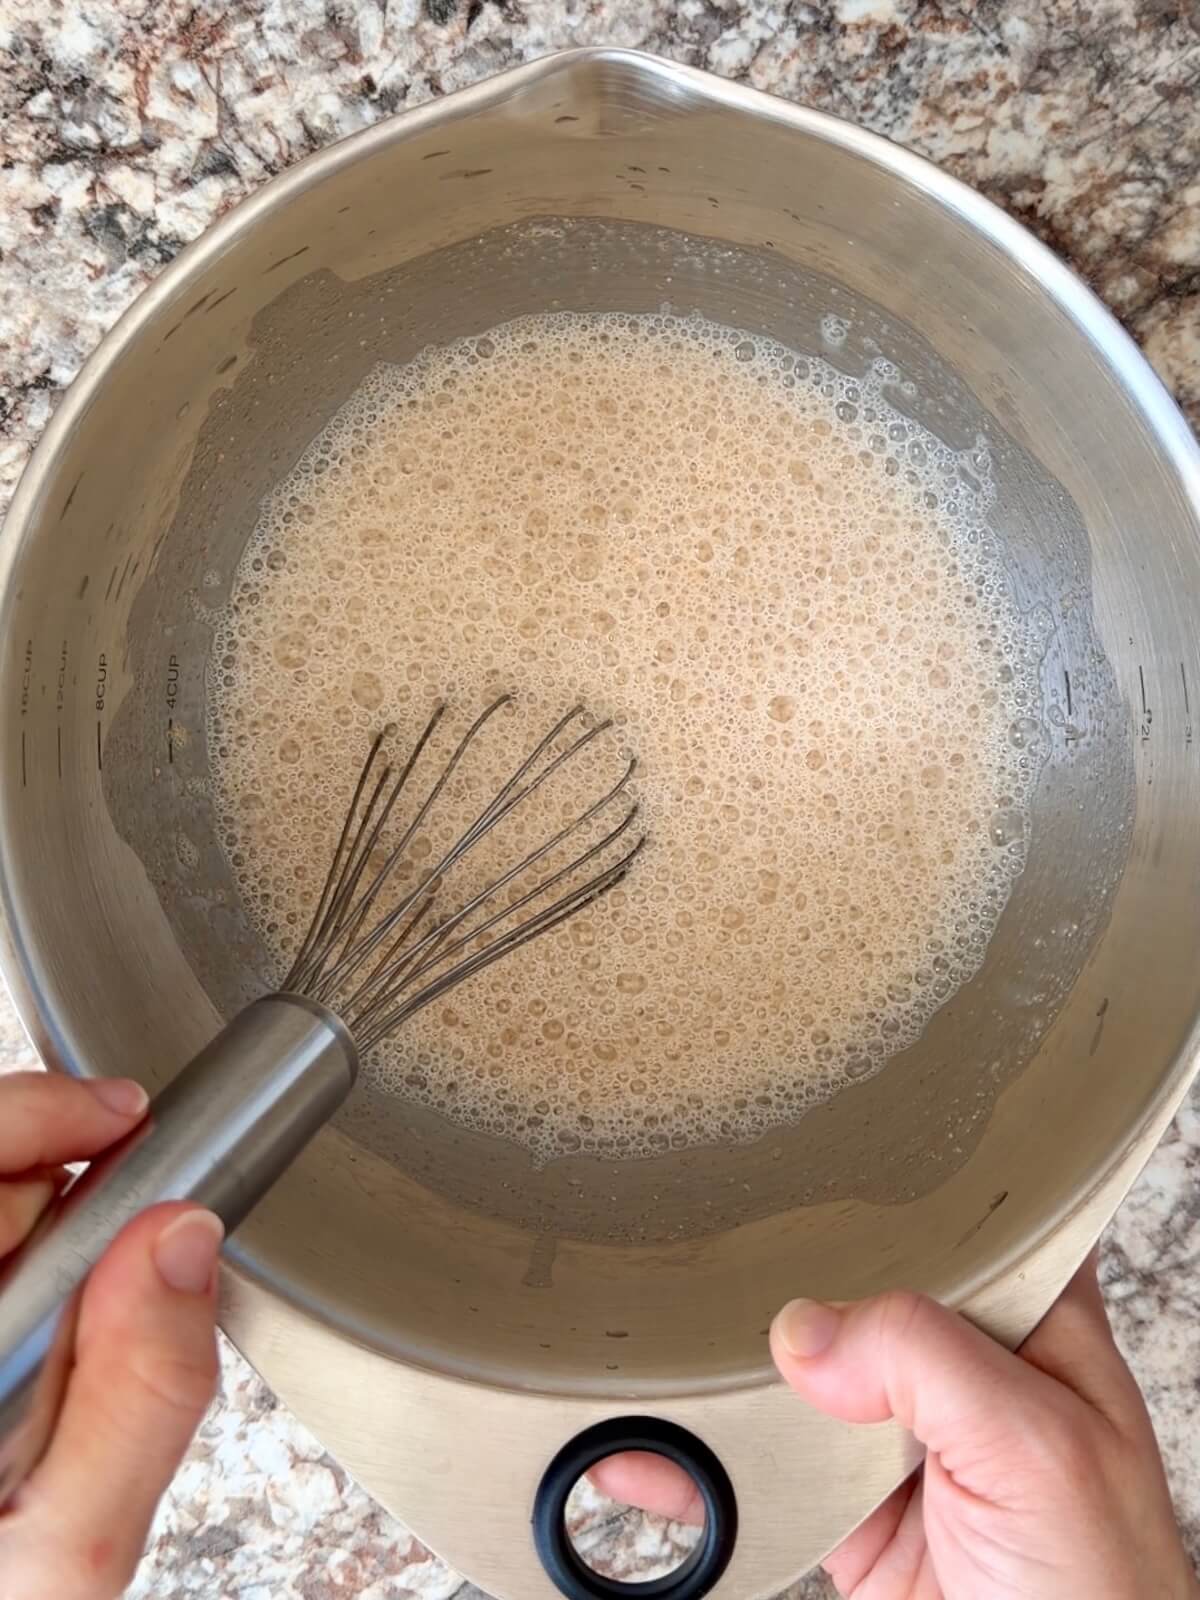
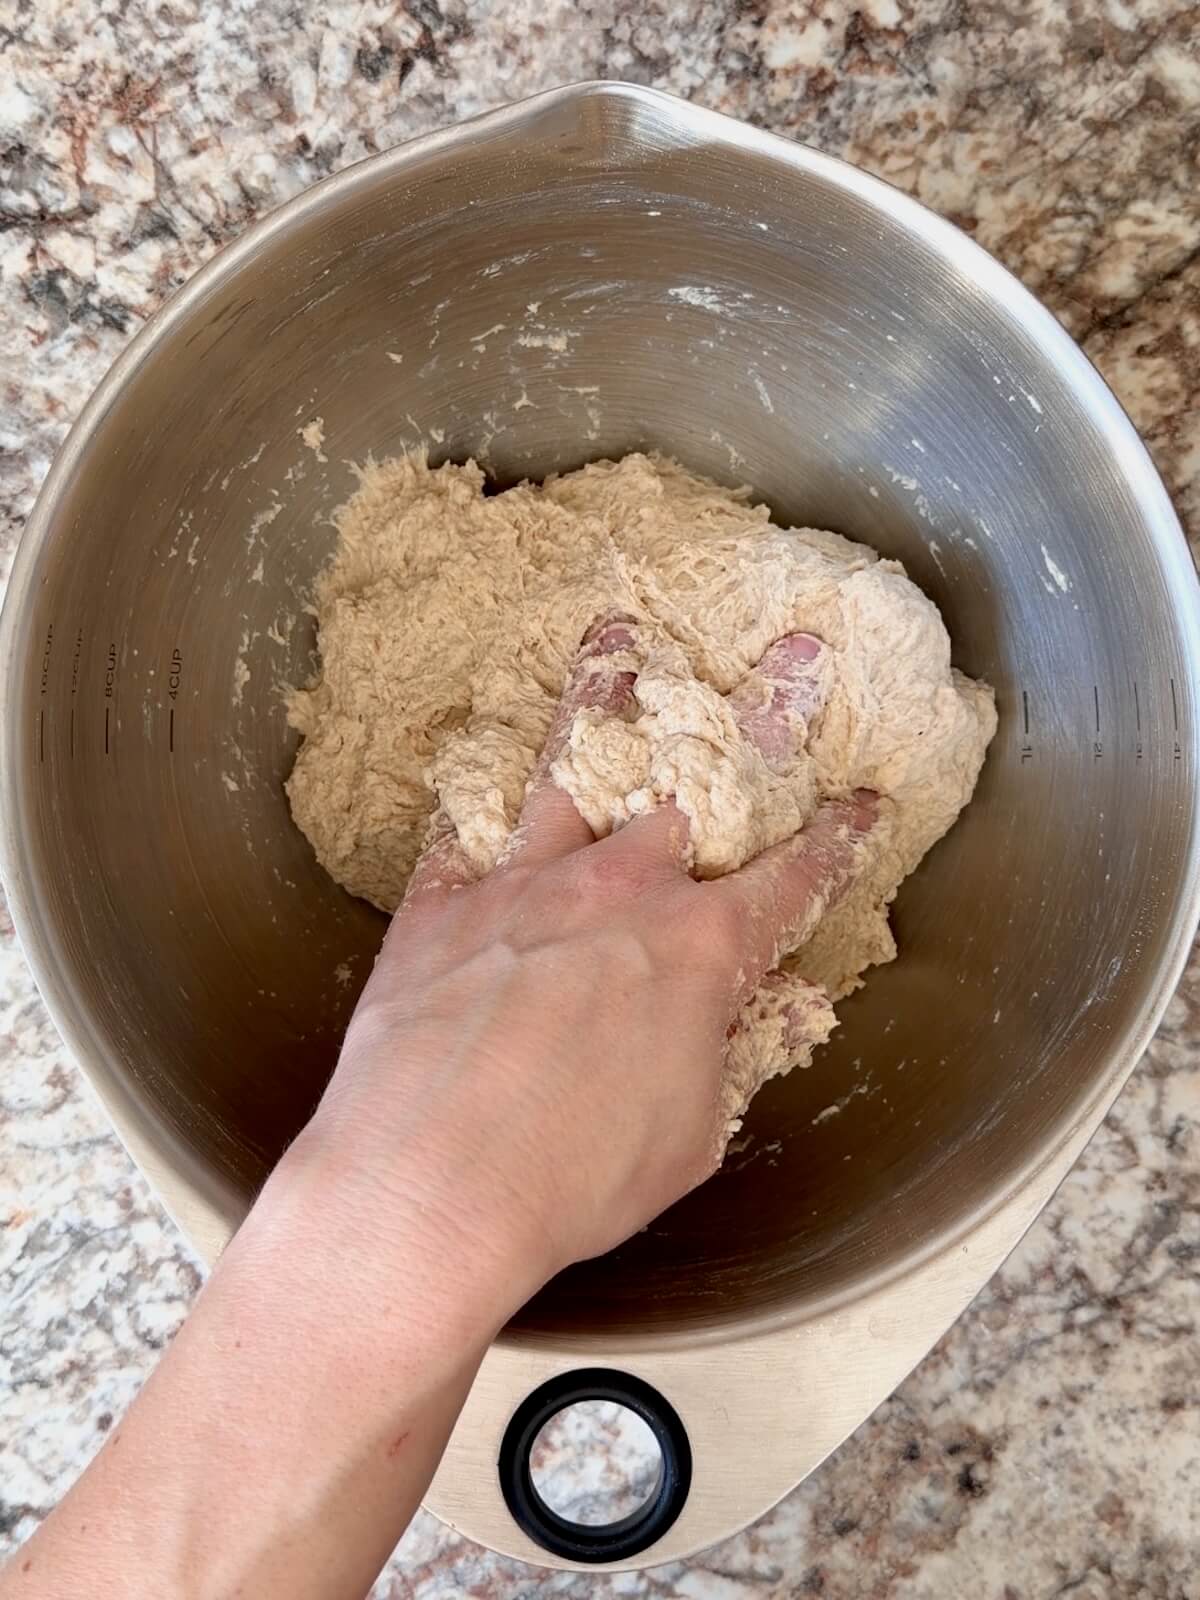
- In a large bowl, whisk together the warm water and active starter. Add the bread flour and salt. Mix with your hands until no dry flour remains and a shaggy dough forms. Cover the bowl and let the dough rest for 20 minutes.480 grams (4 cups) bread flour, 100 grams (½ cup) active sourdough starter, 10 grams (3 ½ teaspoons) Diamond Crystal Kosher Salt, 330 grams (1 ⅓ cups) warm water
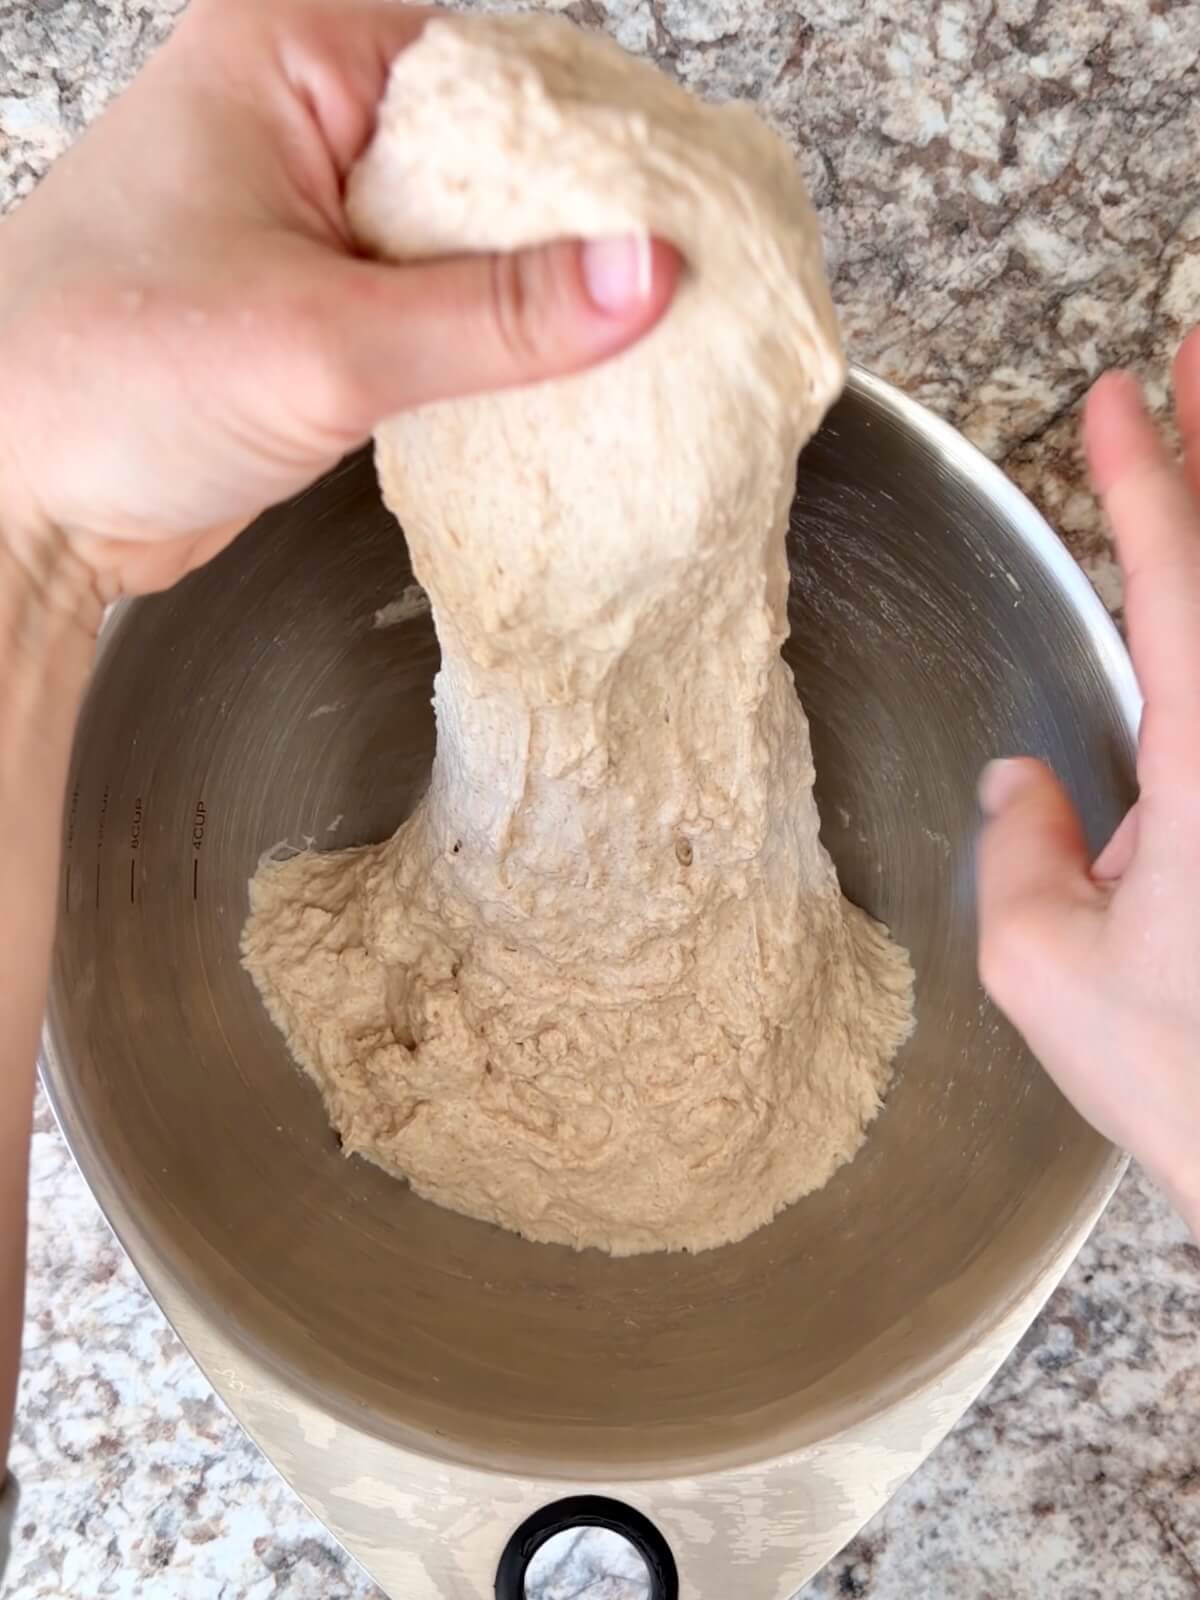
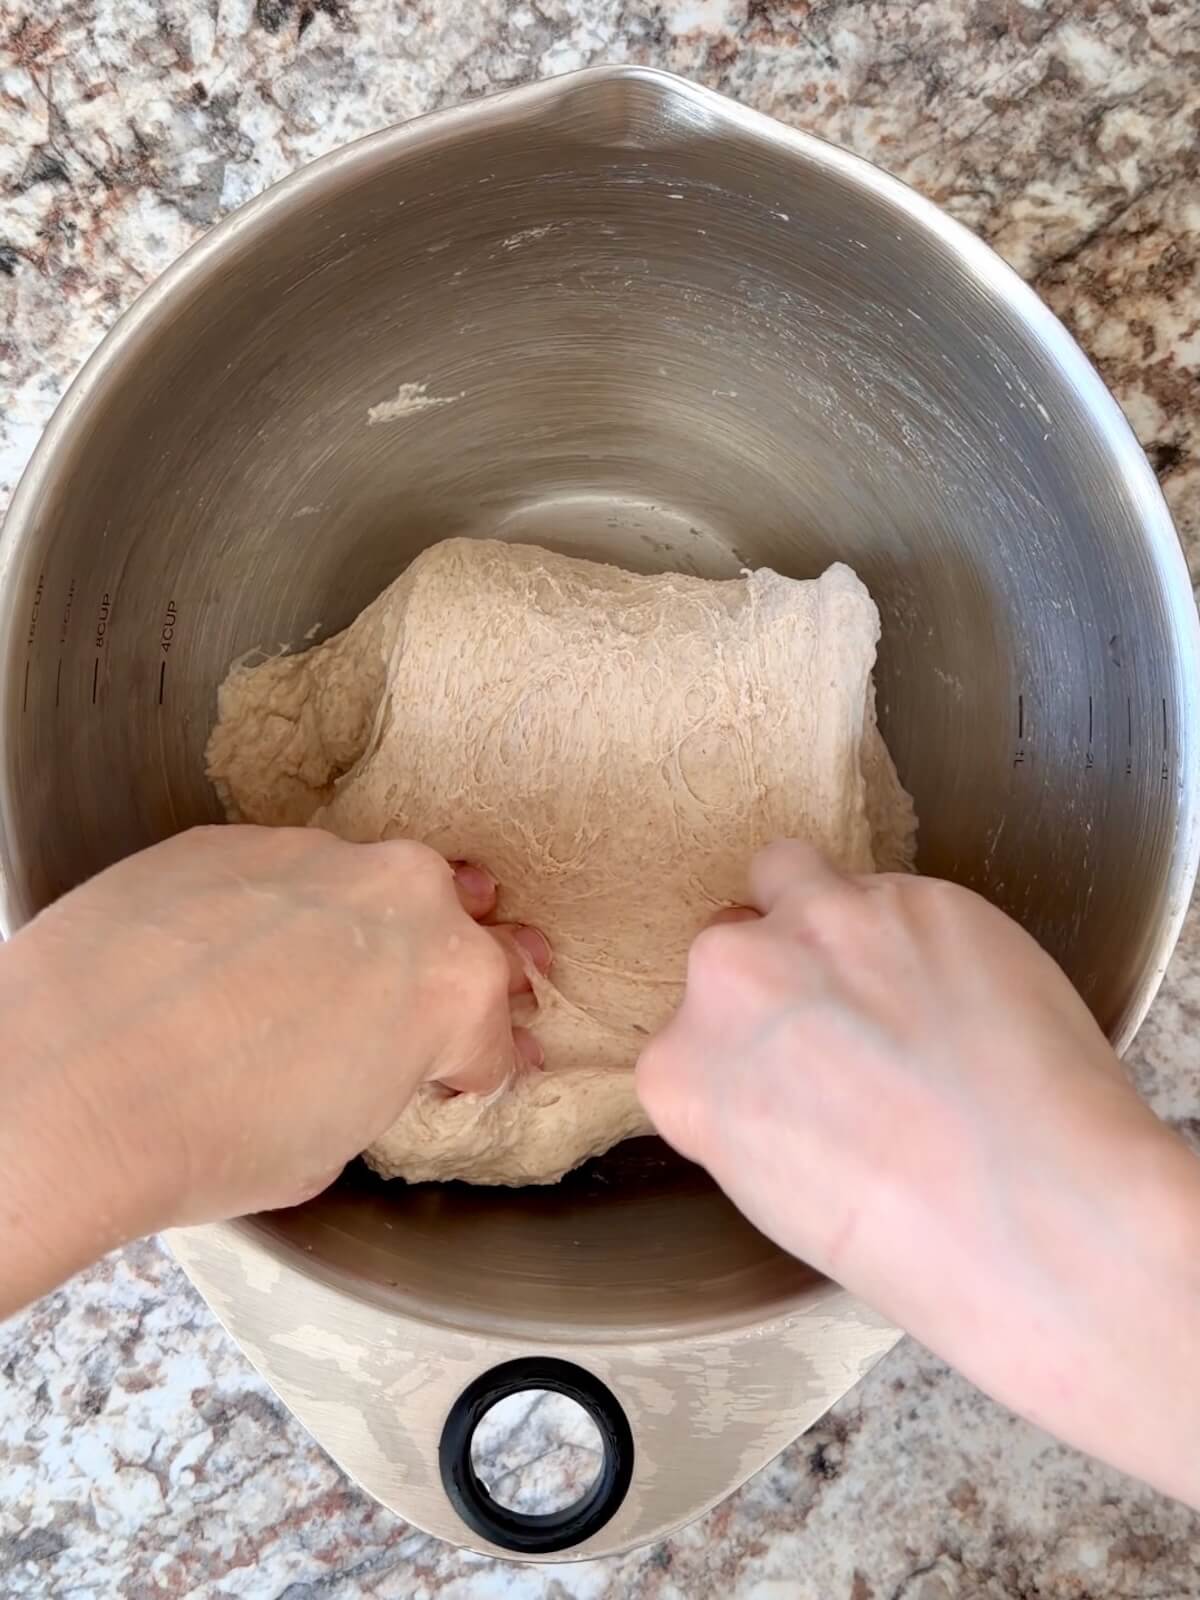
- Lightly wet your hand to prevent sticking. Grab one side of the dough, gently stretch it upward, and fold it over the center. Rotate the bowl 90° and repeat. Continue until all four sides have been folded. Cover and rest for 15 minutes. Repeat this process for a total of 4 sets of stretch and folds, resting 15 minutes between each set.
- Cover the dough and let it rise at room temperature until it doubles in size and you see bubbles on the surface and along the sides of the dough. This can take 4–12 hours, depending on your kitchen temperature. A straight-sided container can help you track when the dough has doubled.
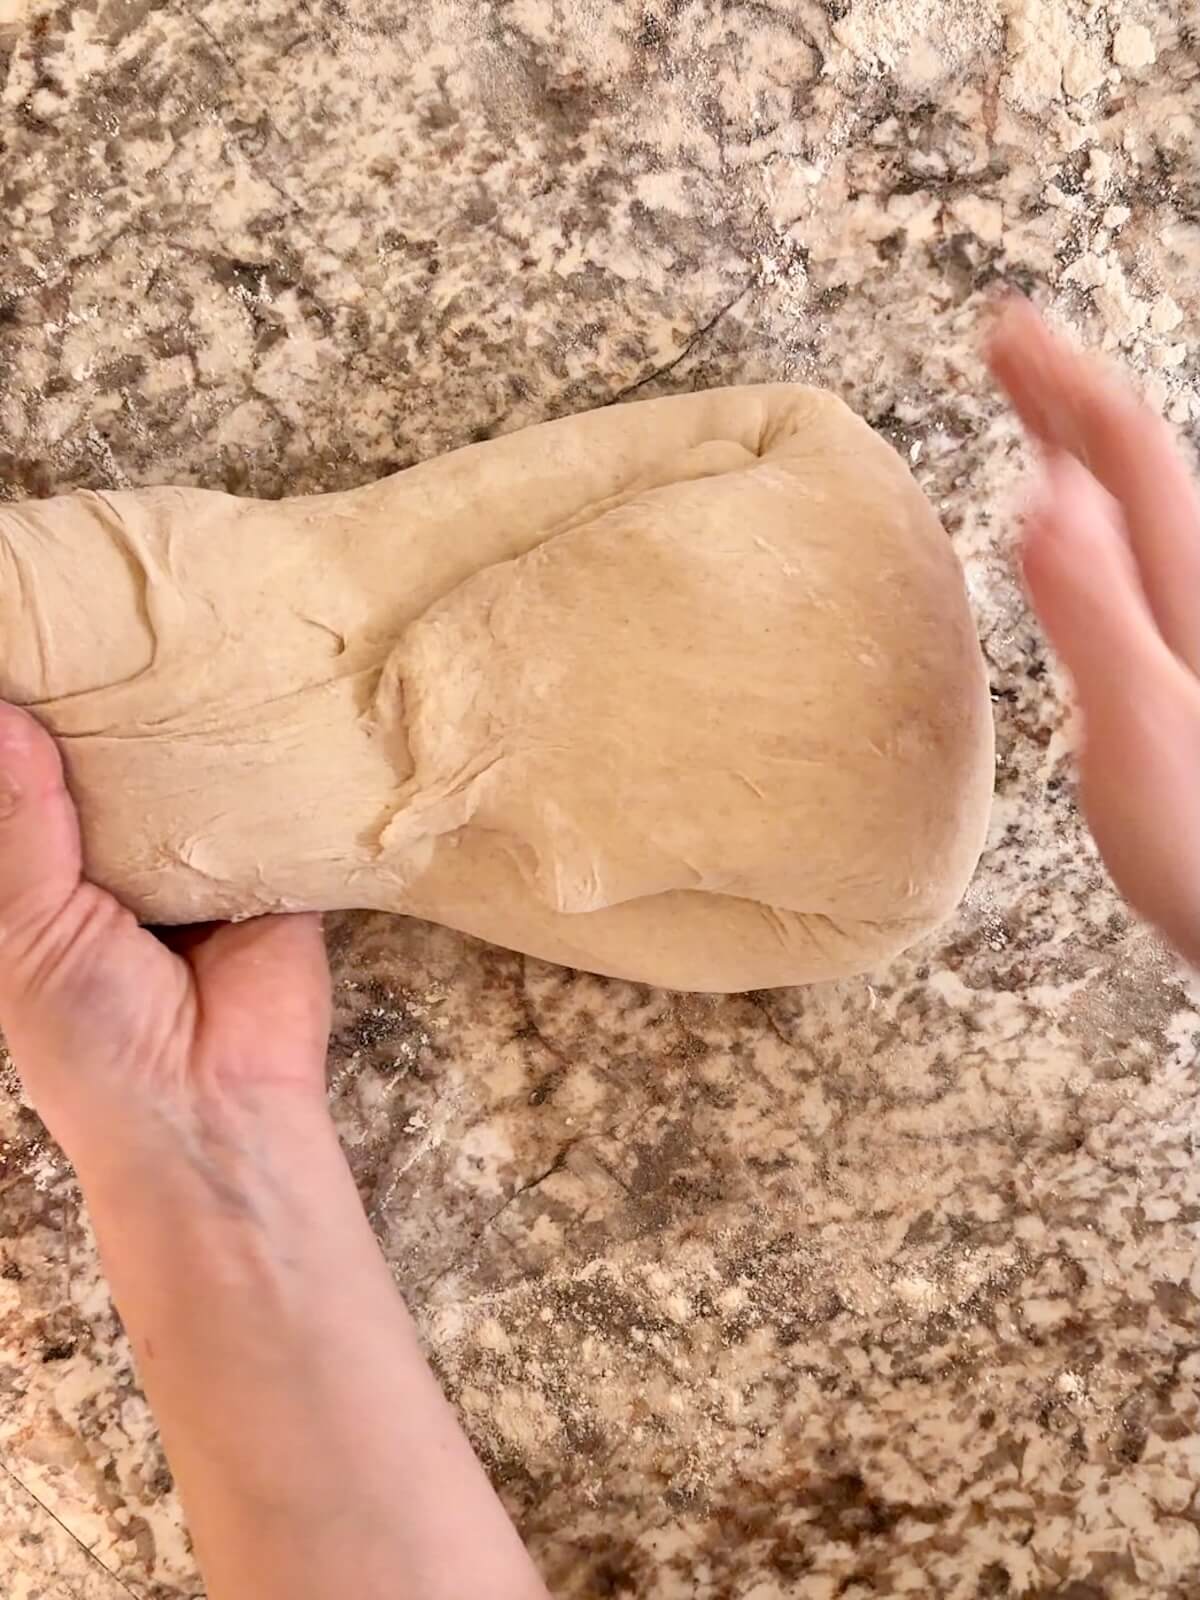
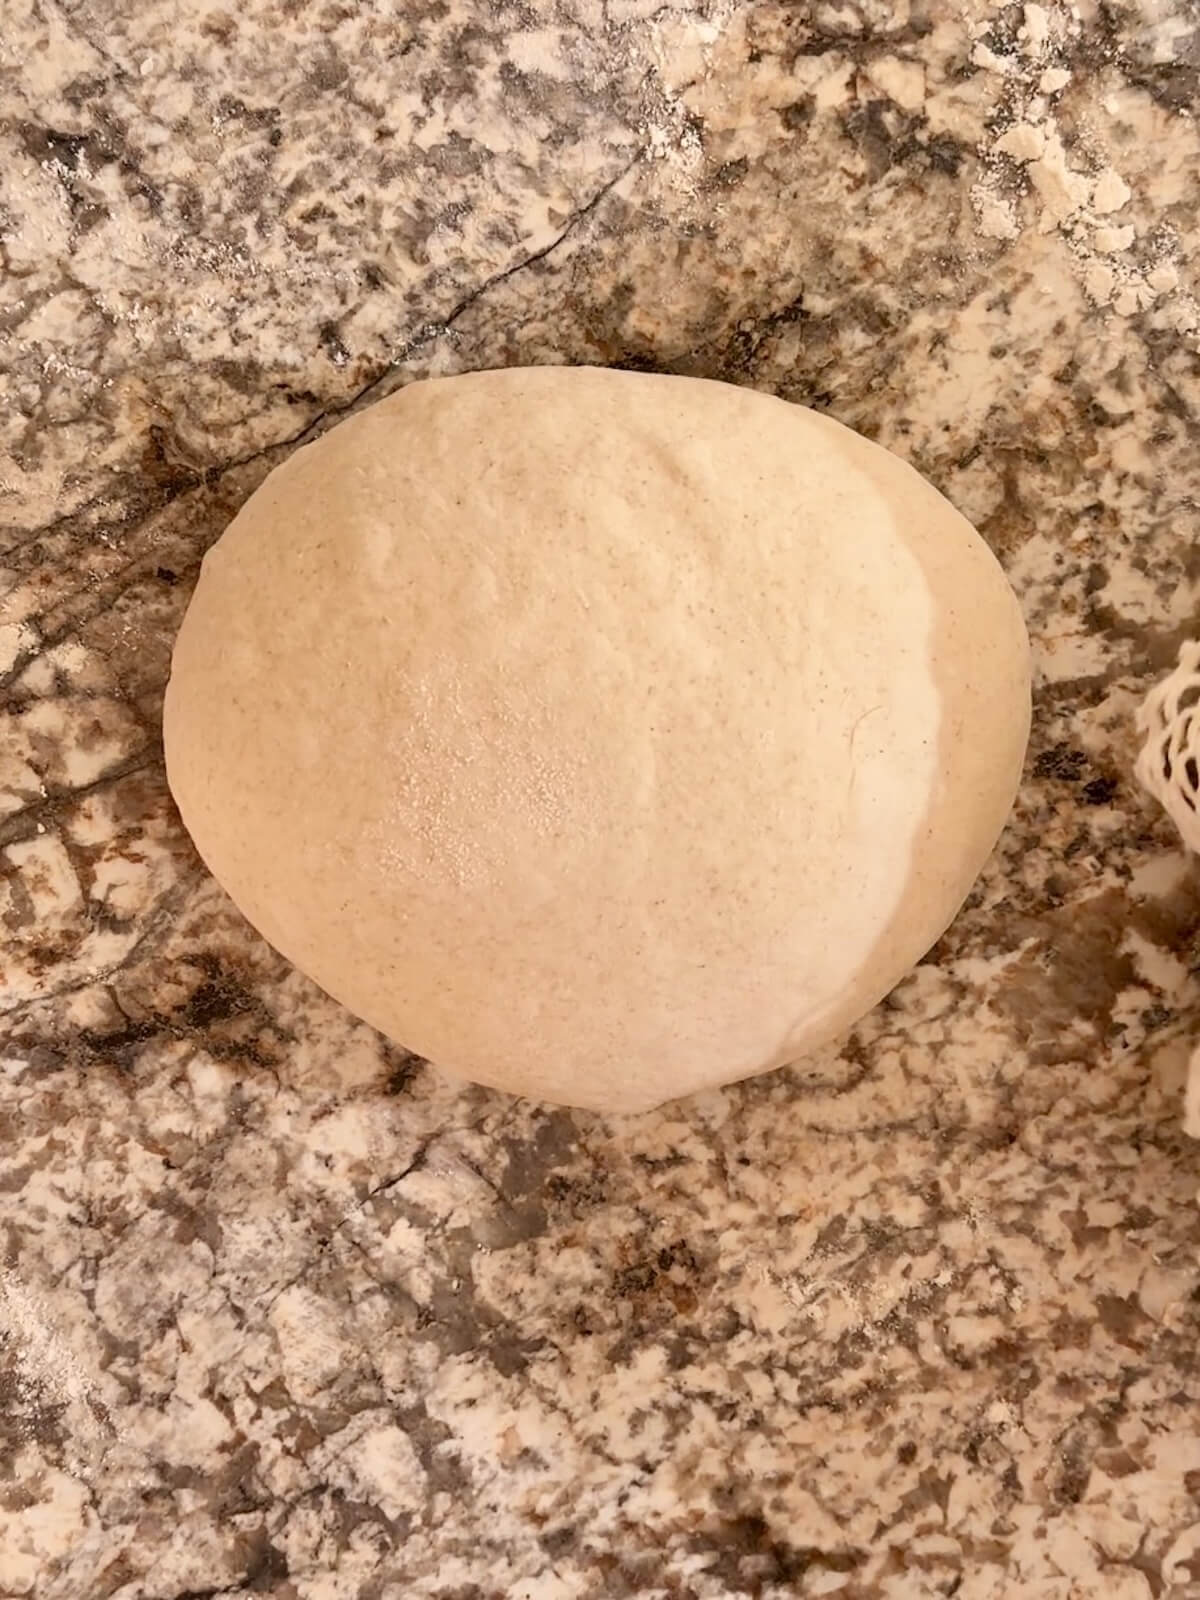
- Turn the dough out onto a lightly floured surface. Gently stretch it into a rectangle. Fold one short side toward the center, then fold the opposite short side over it. Next, pull one long side up slightly and fold it toward the center. Repeat with the other long side. Flip the dough seam-side down. Using your hands or a bench scraper, gently tuck the edges underneath while rotating the dough to create surface tension and form a round loaf.If shaping for an oval basket, gently elongate the dough slightly by pulling it towards yourself with the bench scraper.
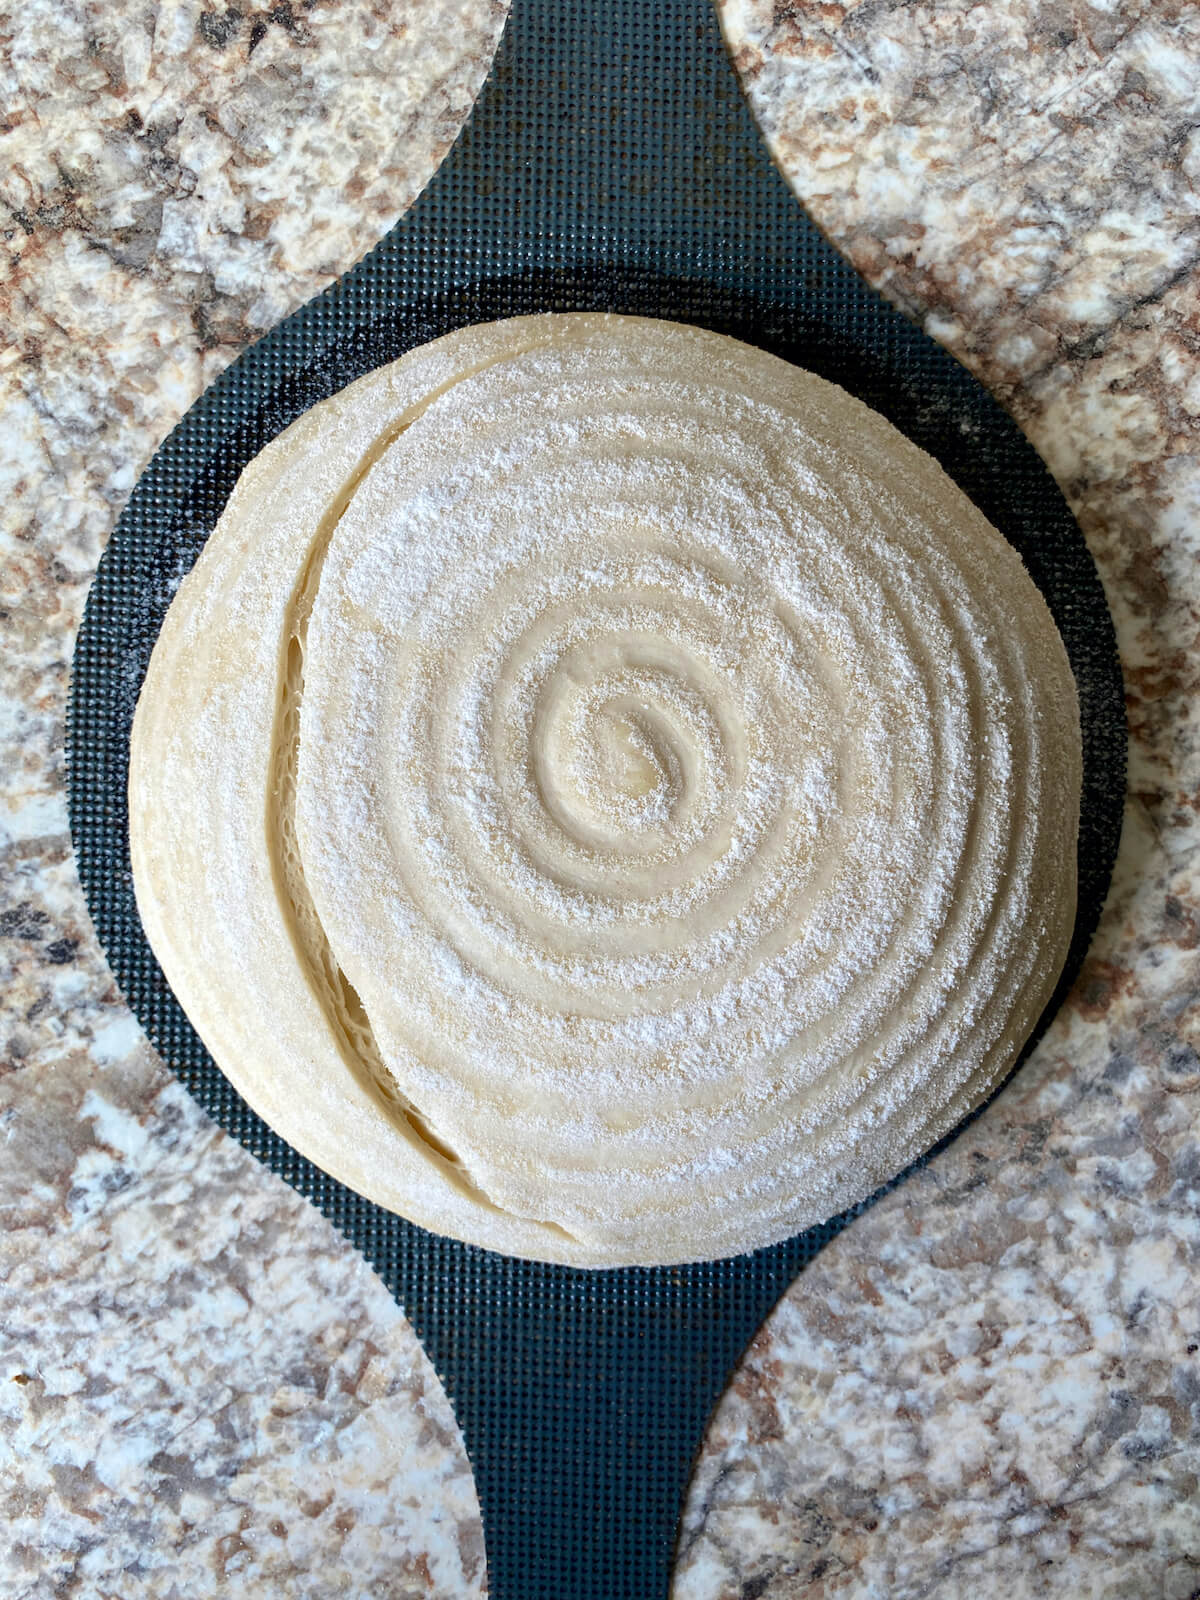
- Generously dust your proofing basket with rice flour. Place the dough seam-side up, pinching the seam closed if needed. Cover and transfer the dough to the refrigerator. Let it cold ferment for 12–16 hours. This step improves flavor and helps the dough hold its shape.Rice flour
- About 1 hour before baking, place a lidded Dutch oven in your oven and preheat to 450°F.
- Remove the dough from the refrigerator and turn it out onto parchment paper or a bread sling. Score the dough about ½-inch deep along one side using a lame or sharp knife.
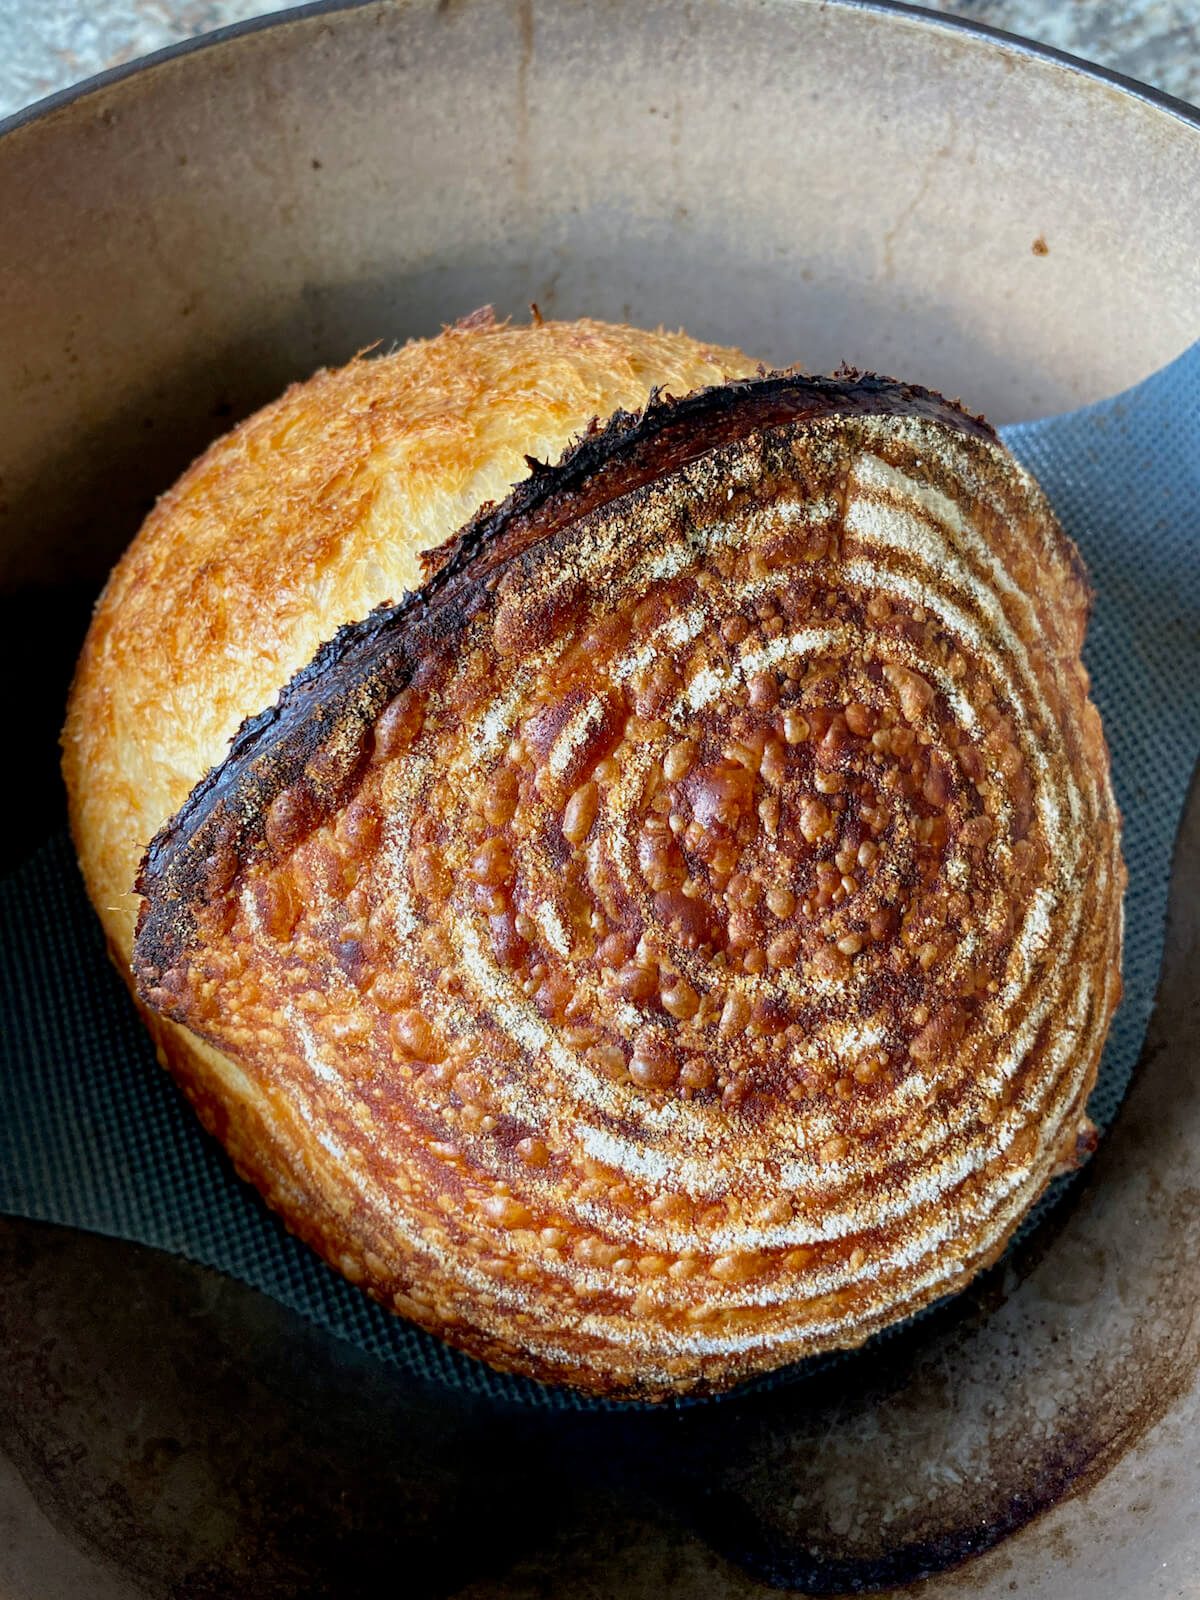
- Carefully remove the hot Dutch oven from the oven. Drop 2 ice cubes inside to create steam, then quickly transfer the dough into the Dutch oven. Cover immediately with the lid. Bake covered for 40 minutes. Remove the lid and bake uncovered for 5–10 minutes, until the crust reaches your desired level of browning.2 ice cubes
- Remove the bread from the Dutch oven and transfer it to a wire rack. Let it cool for at least 2 hours before slicing.
Notes
- Recipe updated January 21, 2026: Recipe and instructions have been slightly tweaked to better reflect my beginner-friendly method.
- Note: Sourdough baking is flexible—factors like temperature and starter strength affect timing. Watch your starter and dough, not the clock, and see the blog post for step-by-step images.
- Storage: Store bread in an airtight container at room temperature for up to 3 days or freeze for up to 3 months.


Maggie says
I have this in the oven. So far, it’s been a good process. Was in the fridge for 20 hrs though, so I hope the flavor holds. Thank you! For this recipe. I’ll take a pic when done and cooled and post to the group page.
Ashley Petrie, RDN, LDN says
Hi Maggie! So glad you gave this recipe a try - I hope it turned out well for you 🙂
Van says
I put mine in fridge up ton36 hours.
Kimberlee Kolb says
This is my favorite bread recipe! Can it be doubled without losing the flavor or texture?
Ashley Petrie, RDN, LDN says
Hi Kimberlee - I'm so glad you love it! 🙂 Yes, this recipe can be doubled. Just divide the dough into two loaves before shaping and proofing. Hope this helps!
Tonya says
Do you think I can add fresh blueberries and lemon zest during stretch & folds? If so, any changes to recipe?
Ashley Petrie, RDN, LDN says
Hi Tonya - yes, you certainly can! I actually have a recipe for that on my blog if you want to check it out: https://enwnutrition.com/blueberry-sourdough-bread/. Hope this helps 🙂
Ada says
This was the best sourdoughwhite loaf. Great instructions and delicious to taste. Thanks so much for the great recipe.
Ashley Petrie, RDN, LDN says
Hi Ada! Thank you so much! I’m so glad you loved the recipe and found the instructions easy to follow. I really appreciate you taking the time to comment - happy baking! 🙂
Marj says
Great article and pictures. Enjoying the process and as you do it more and more it’s easier. I think my starter is a little immature because I had to refrigerate it a couple of times. But bread is good. I think it’s a little dense but I will keep trying and learning.
Ashley Petrie, RDN, LDN says
Hi Marj! Thank you so much for your kind comment. I’m glad you’re enjoying the process—it really does get easier the more you bake! It sounds like you’re on the right track. An immature starter can sometimes cause a denser loaf, but it’ll continue to get stronger with regular feedings. Keep at it, and feel free to reach out if you have any questions along the way! 🙂
Rebecca says
I am very new to sour dough baking so I have a couple of questions.
I feed my starter last and started my bread the next morning with a bubbly starter. I am going to follow all your steps. It is going to end up being in the fridge over night for longer than 12 hours. Will that be ok or do I need to cook it this afternoon. I started the bread at 9.00am.
Ashley Petrie, RDN, LDN says
Hi Rebecca! Sorry for the delay—I hope your bread turned out great! I’ve left my dough in the fridge for up to 48 hours with good results, but I haven’t tested it much beyond that.