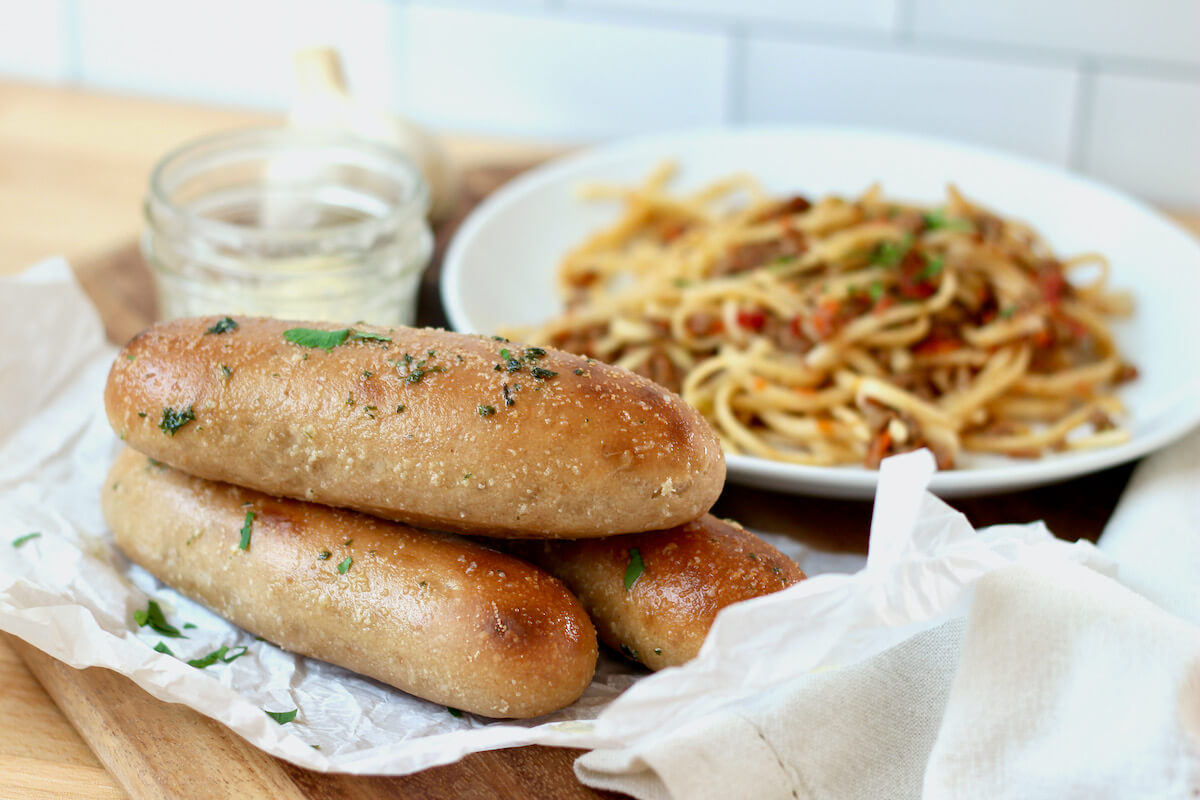
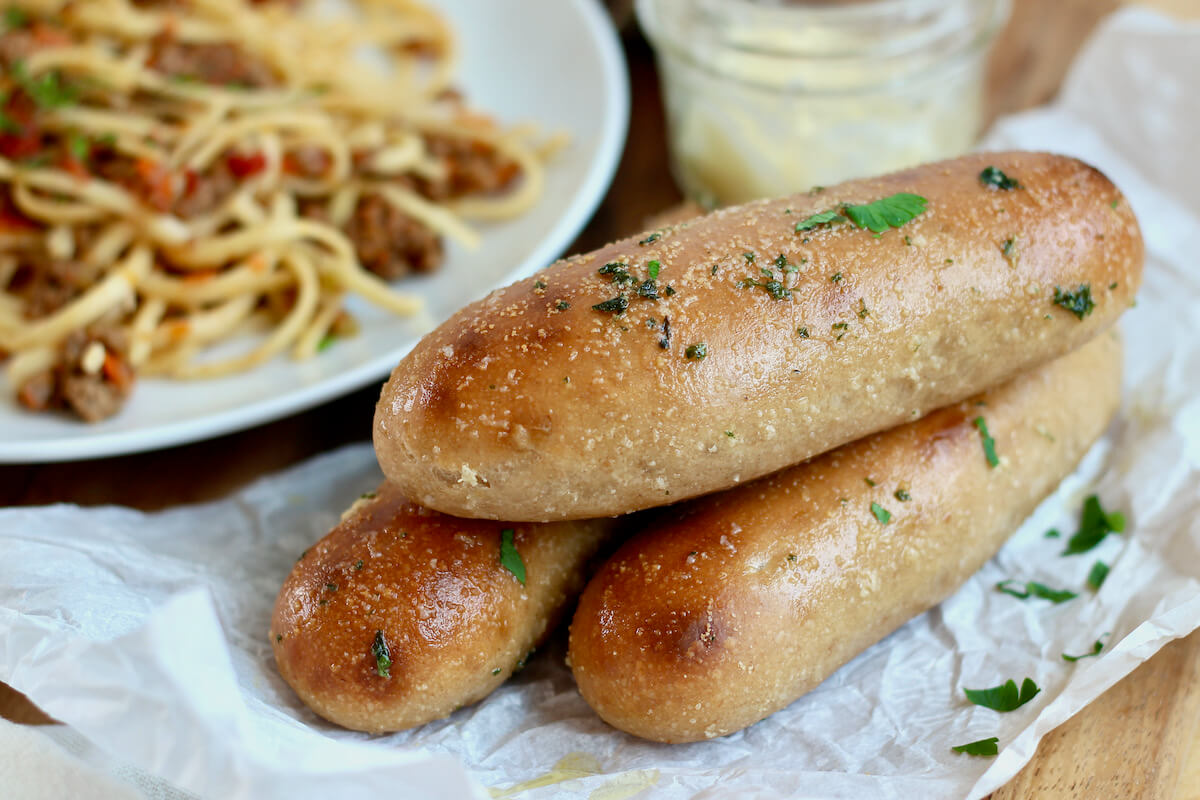
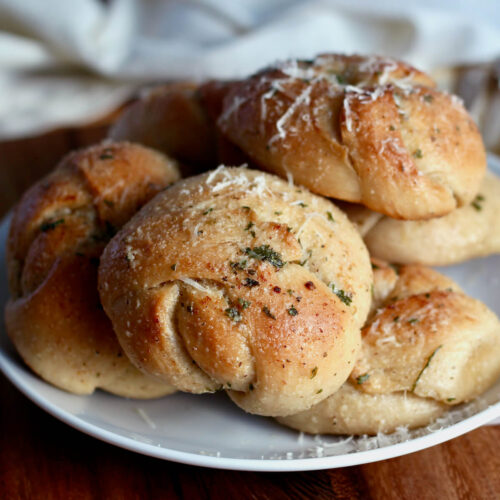
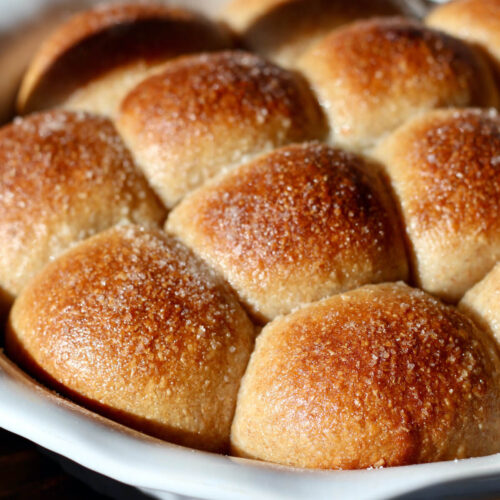
These Sourdough Breadsticks are irresistibly soft and chewy with a savory garlic-butter flavor. Perfect for beginners, this easy side dish pairs well with pasta dishes, soups, salads, and more.
When I first made these breadsticks, my fiancé couldn't stop raving about them. He called them the best breadsticks ever and even said they were a more delicious homemade version of Olive Garden's breadsticks.
Buttery, garlicky, soft, and chewy, these sourdough breadsticks are my favorite side dish for any Italian meal. I especially love serving them at the Italian feast I prepare for Christmas dinner each year.
What I love about this recipe in particular is how easy the dough is to handle. With a lower hydration of around 55%, it's not too sticky, making it ideal for beginner sourdough bakers.
So, whether you're hosting a holiday feast or just enjoying a cozy weeknight dinner, this sourdough breadstick recipe is sure to become a new family favorite.
I hope you enjoy it as much as I do!
Looking for an easy sourdough bread recipe? Try my classic Dutch oven sourdough bread.
Disclaimer: Some links throughout this post are affiliate links. As an Amazon Associate, I earn from qualifying purchases. You can learn more by visiting my Affiliate Disclosure Page.
Ingredient Notes
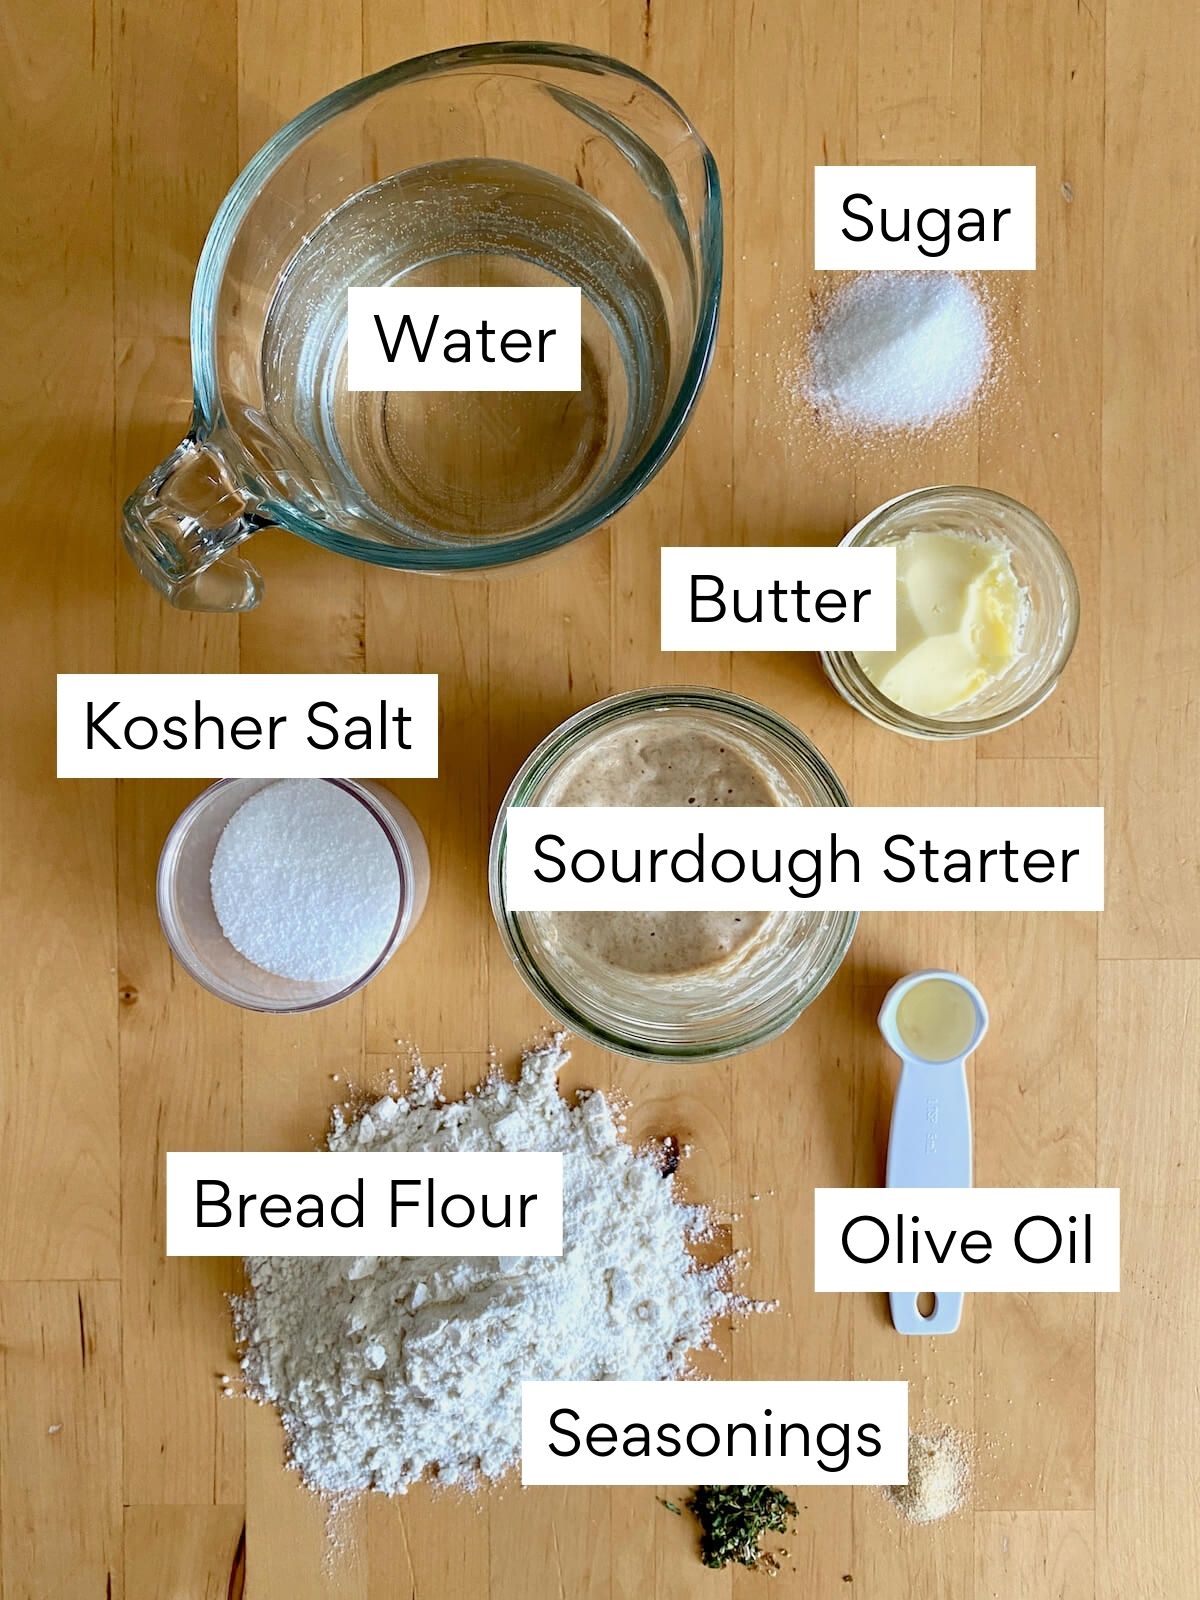
Here are some notes on the key ingredients. For the full list of ingredients, check out the recipe card below.
- Bread Flour- Bread flour has a higher protein content, which helps the breadsticks rise and gives them a chewy texture.
- Sourdough Starter- This recipe relies solely on sourdough for leavening (no yeast), so make sure your starter is healthy and active.
- Water- I used a lower hydration level to make the dough easier for beginners to handle, but you can adjust the water amount if desired.
- Kosher Salt- Enhances the flavor of the breadsticks without added sugar or anti-caking agents, which are often found in table salt.
- Granulated Sugar- Adds a subtle sweetness to the breadsticks.
- Olive Oil- A bit of fat in the dough keeps the breadsticks soft and fluffy after baking.
- Garlic Butter- Melted butter mixed with garlic powder, kosher salt, and dried herbs makes a delicious topping, similar to Olive Garden's breadsticks.
Tips for Success
- Use active sourdough starter. For the best results, use a mature, recently fed sourdough starter rather than discard.
- Weigh your ingredients. A kitchen scale ensures accurate measurements and consistent results.
- Knead well. Knead the dough until it becomes smooth and elastic - you'll notice the consistency of the dough change if you do this by hand. It's important to develop enough gluten to help the breadsticks rise.
- Don't focus on the clock. Sourdough is more about the process than strict timing. Although I provide a sample schedule, the dough's rise time will vary based on your starter's strength and the temperature of your dough and kitchen.
- Take pictures. Take photos of your dough to track its rise and progress, which can be helpful, especially when you're new to sourdough.
How to Make Sourdough Breadsticks
Here is how to make these sourdough garlic breadsticks.
Step 1: Feed sourdough starter. Feed your sourdough starter about 6-12 hours before making the dough.
Step 2: Mix the dough. In a large mixing bowl, whisk together the bread flour, salt, and sugar. Add the warm water, sourdough starter, and olive oil. Mix until there’s no dry flour left.


Step 3: Knead the dough. Knead the dough by hand for 15-20 minutes, or use a stand mixer, until it becomes smooth and elastic.
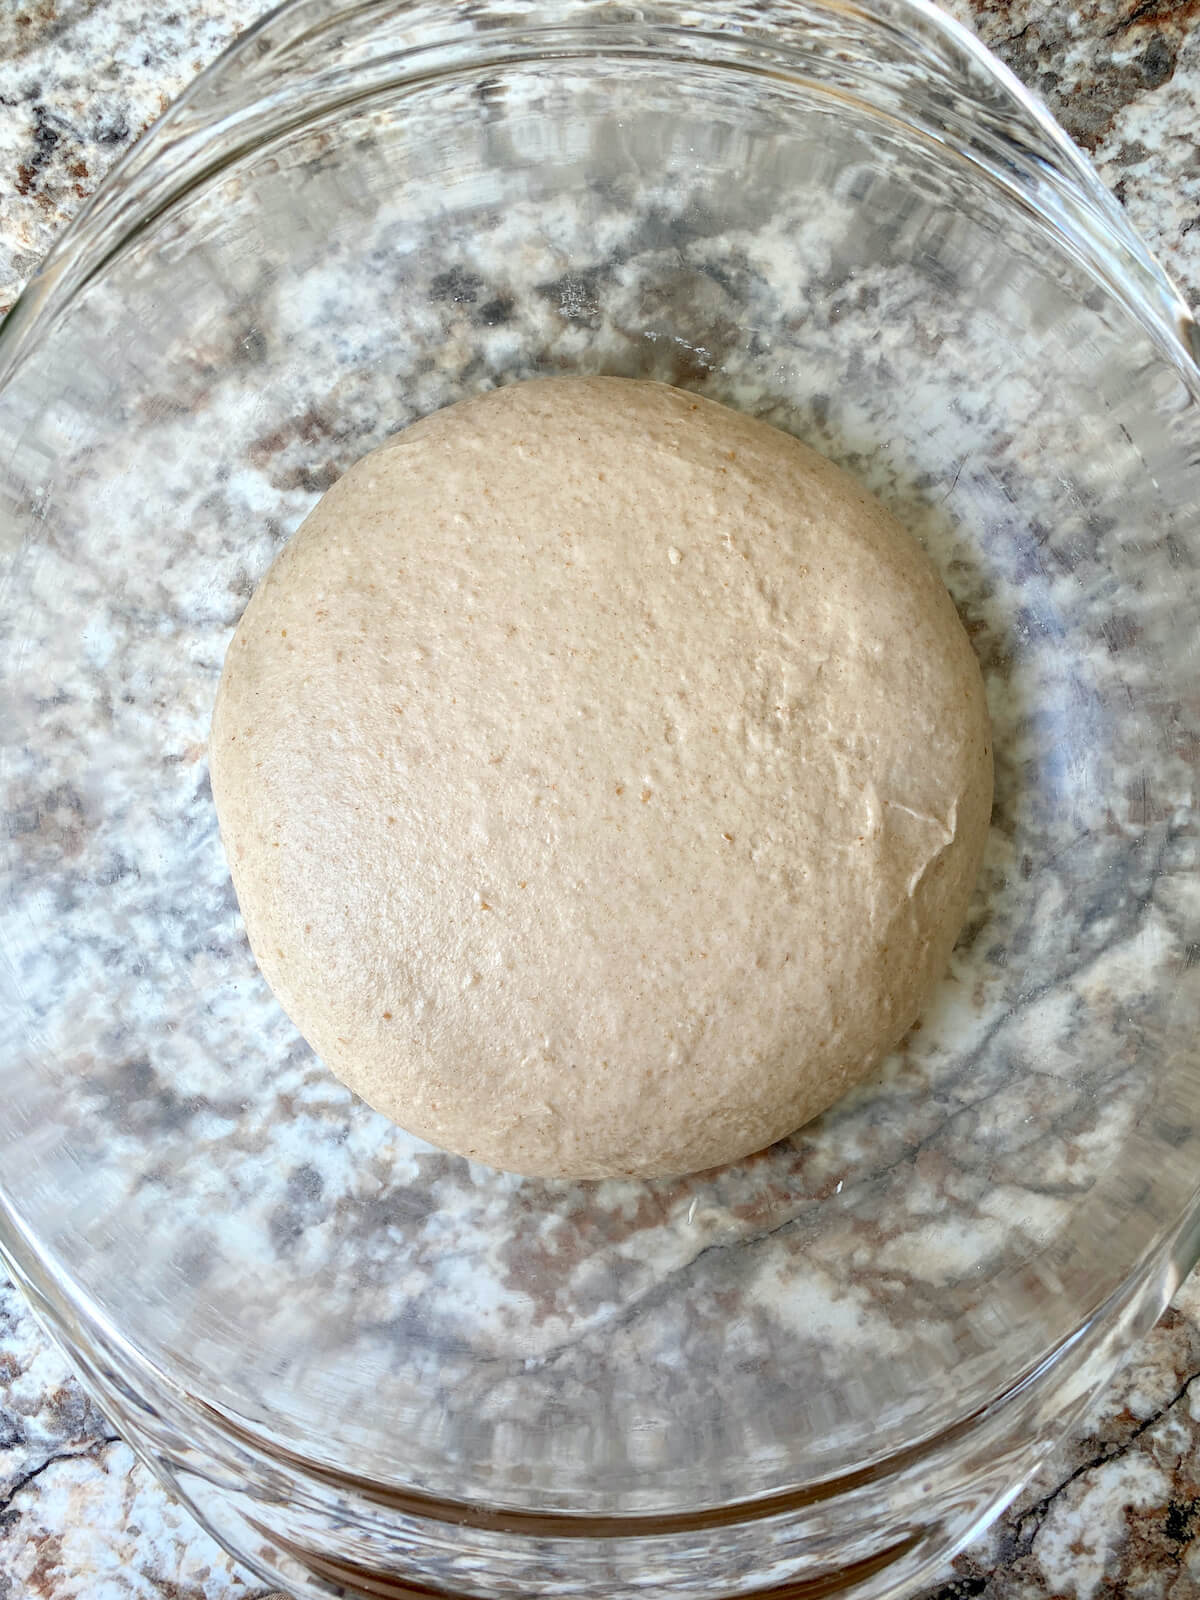
Step 4: Bulk fermentation. Place the dough back in the mixing bowl, cover, and let it rise until puffy and doubled in size, about 6 hours at 75°F.

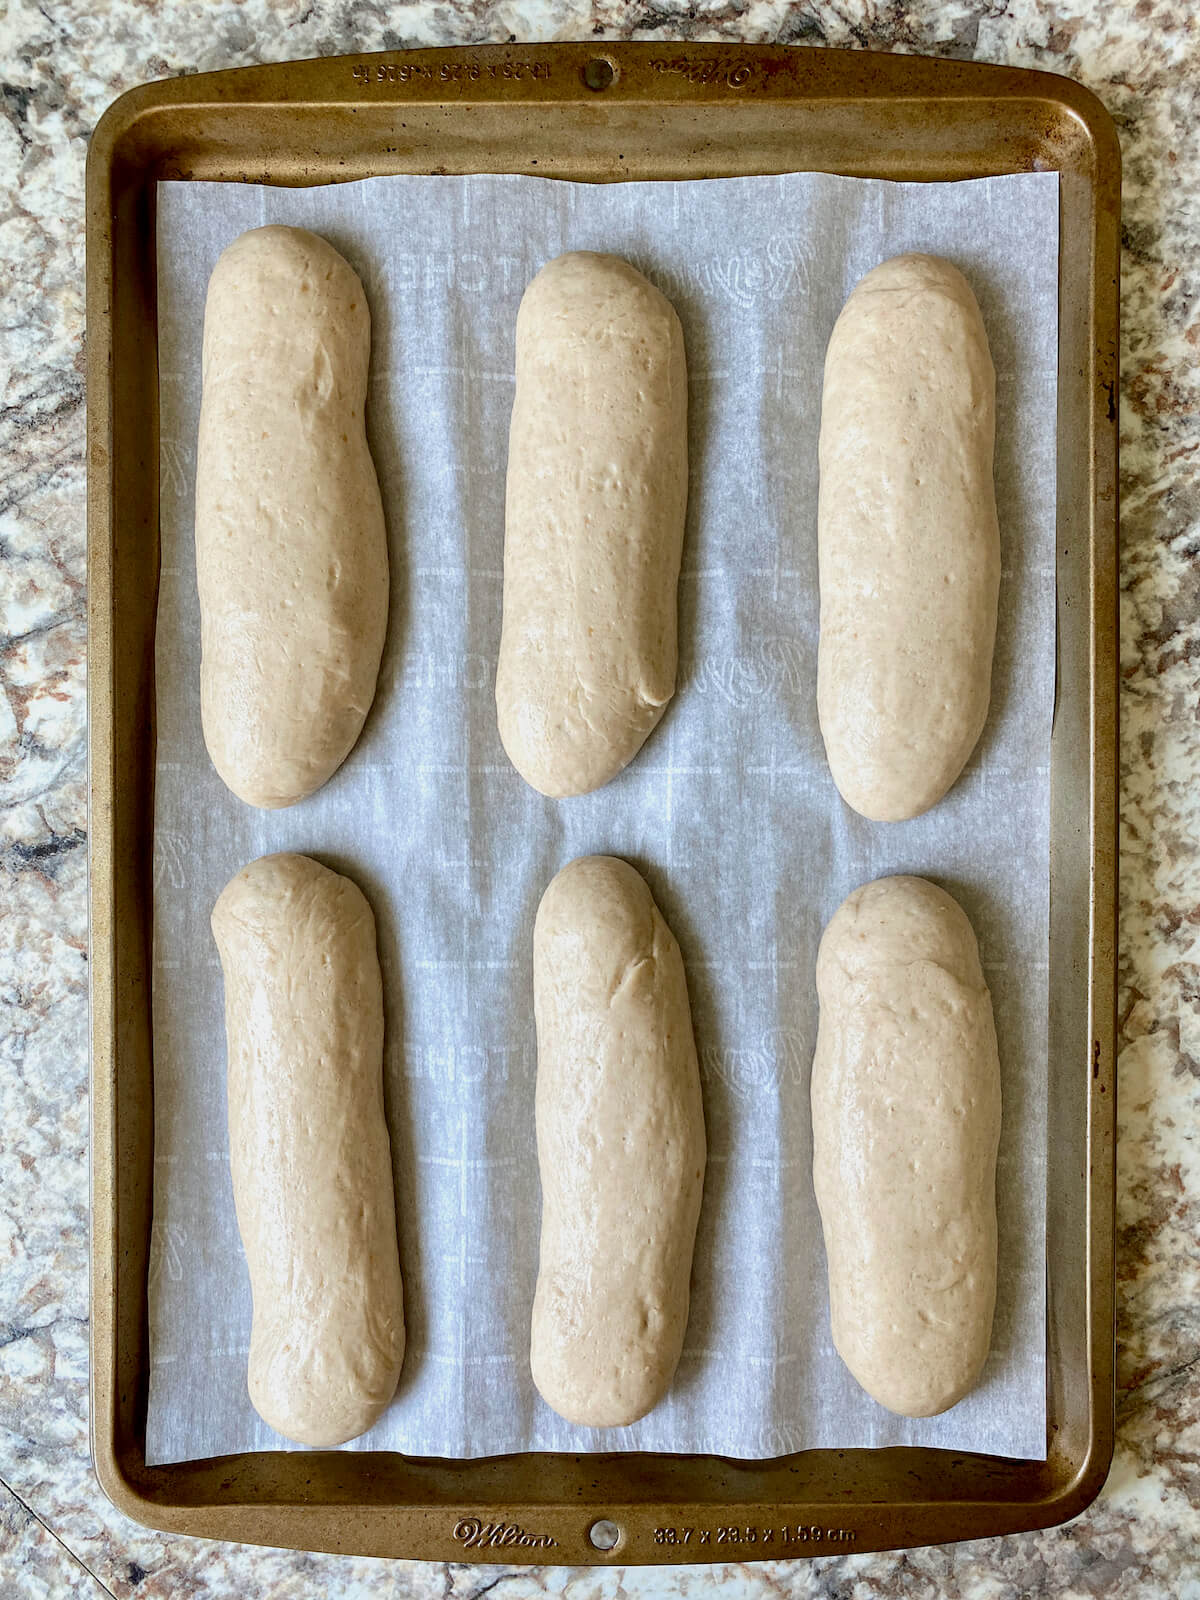
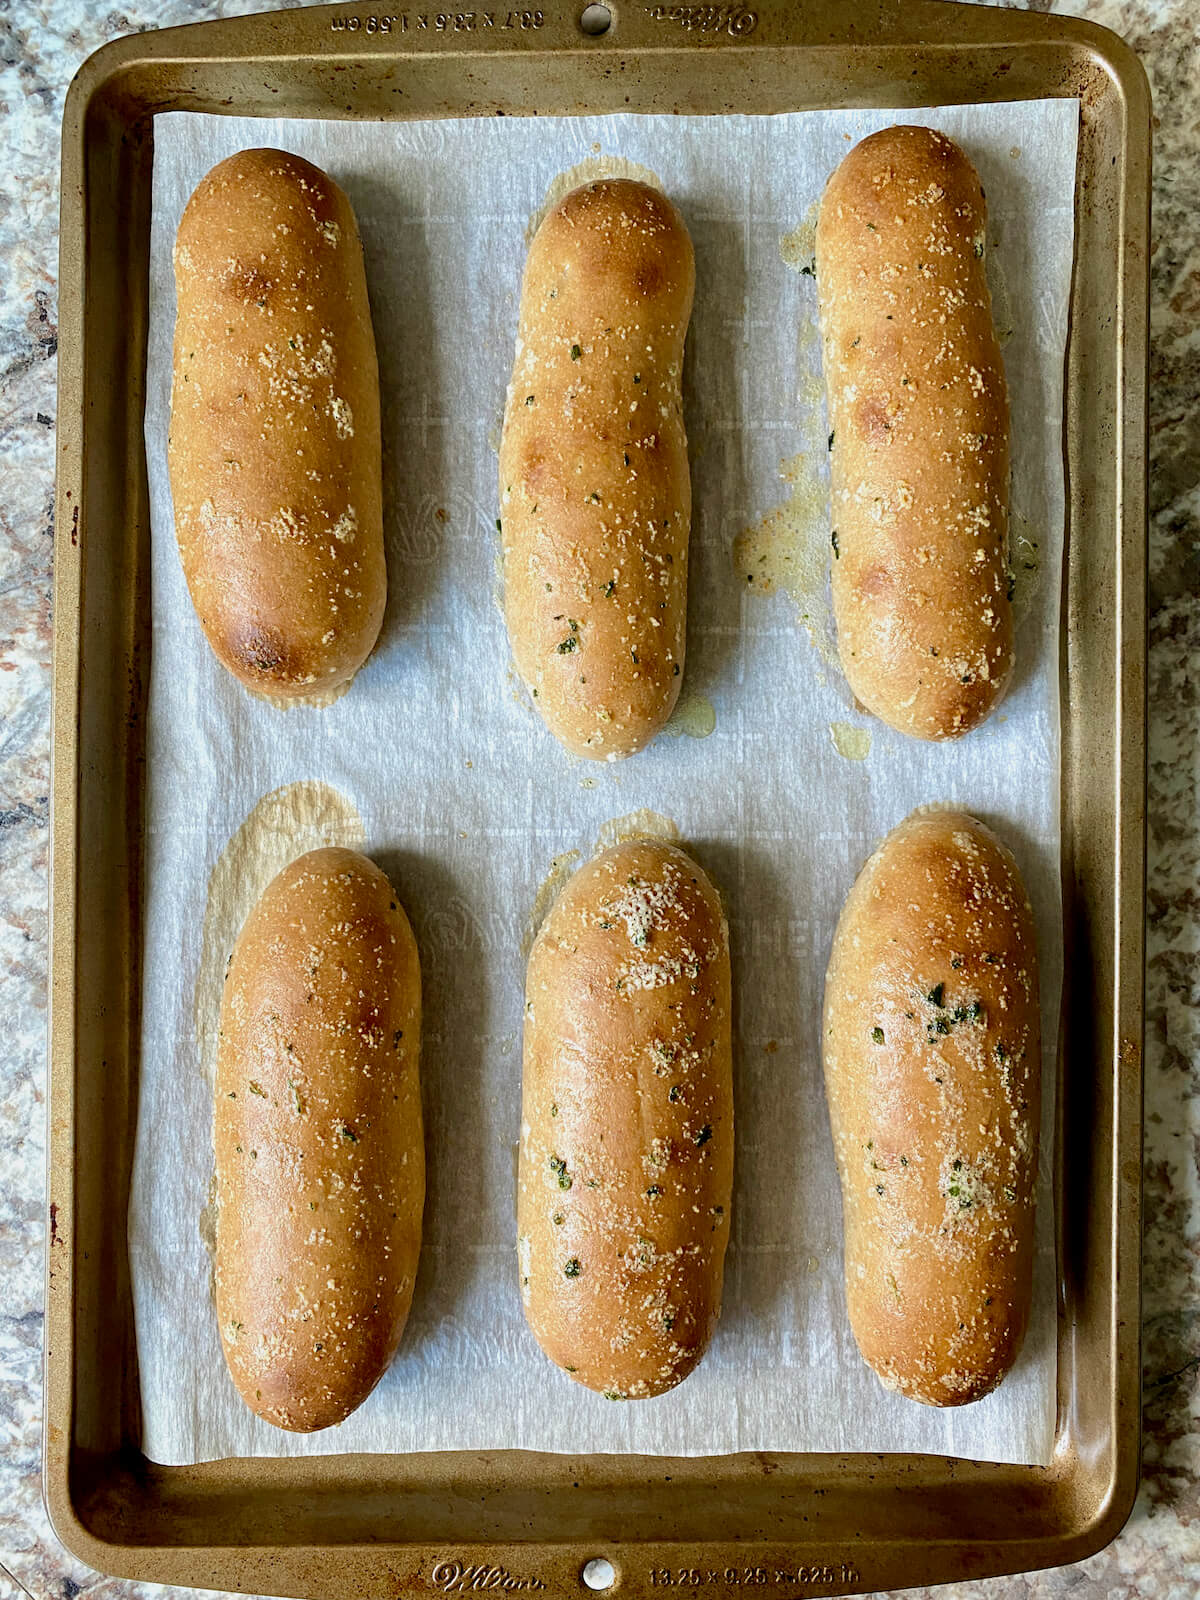
Step 5: Shape the breadsticks. Line a baking sheet with parchment paper. Turn the dough onto a floured surface and divide into 12 equal pieces. Shape each piece into a tight ball by gathering the edges together and rolling seam side down on the counter. Let the dough balls rest for 10 minutes, then roll them into a 6-inch long breadstick. Place the breadsticks evenly spaced on the baking sheet.


Step 6: Proof the breadsticks. Cover and let proof for about 2 hours or until noticeably puffy. Alternatively, you can refrigerate the breadsticks overnight. When ready to bake, let them proof for 2-3 hours at room temperature.
Step 7: Bake the breadsticks. Preheat the oven to 400°F about 20 minutes before the breadsticks finish proofing. Bake for 20 minutes or until golden brown.
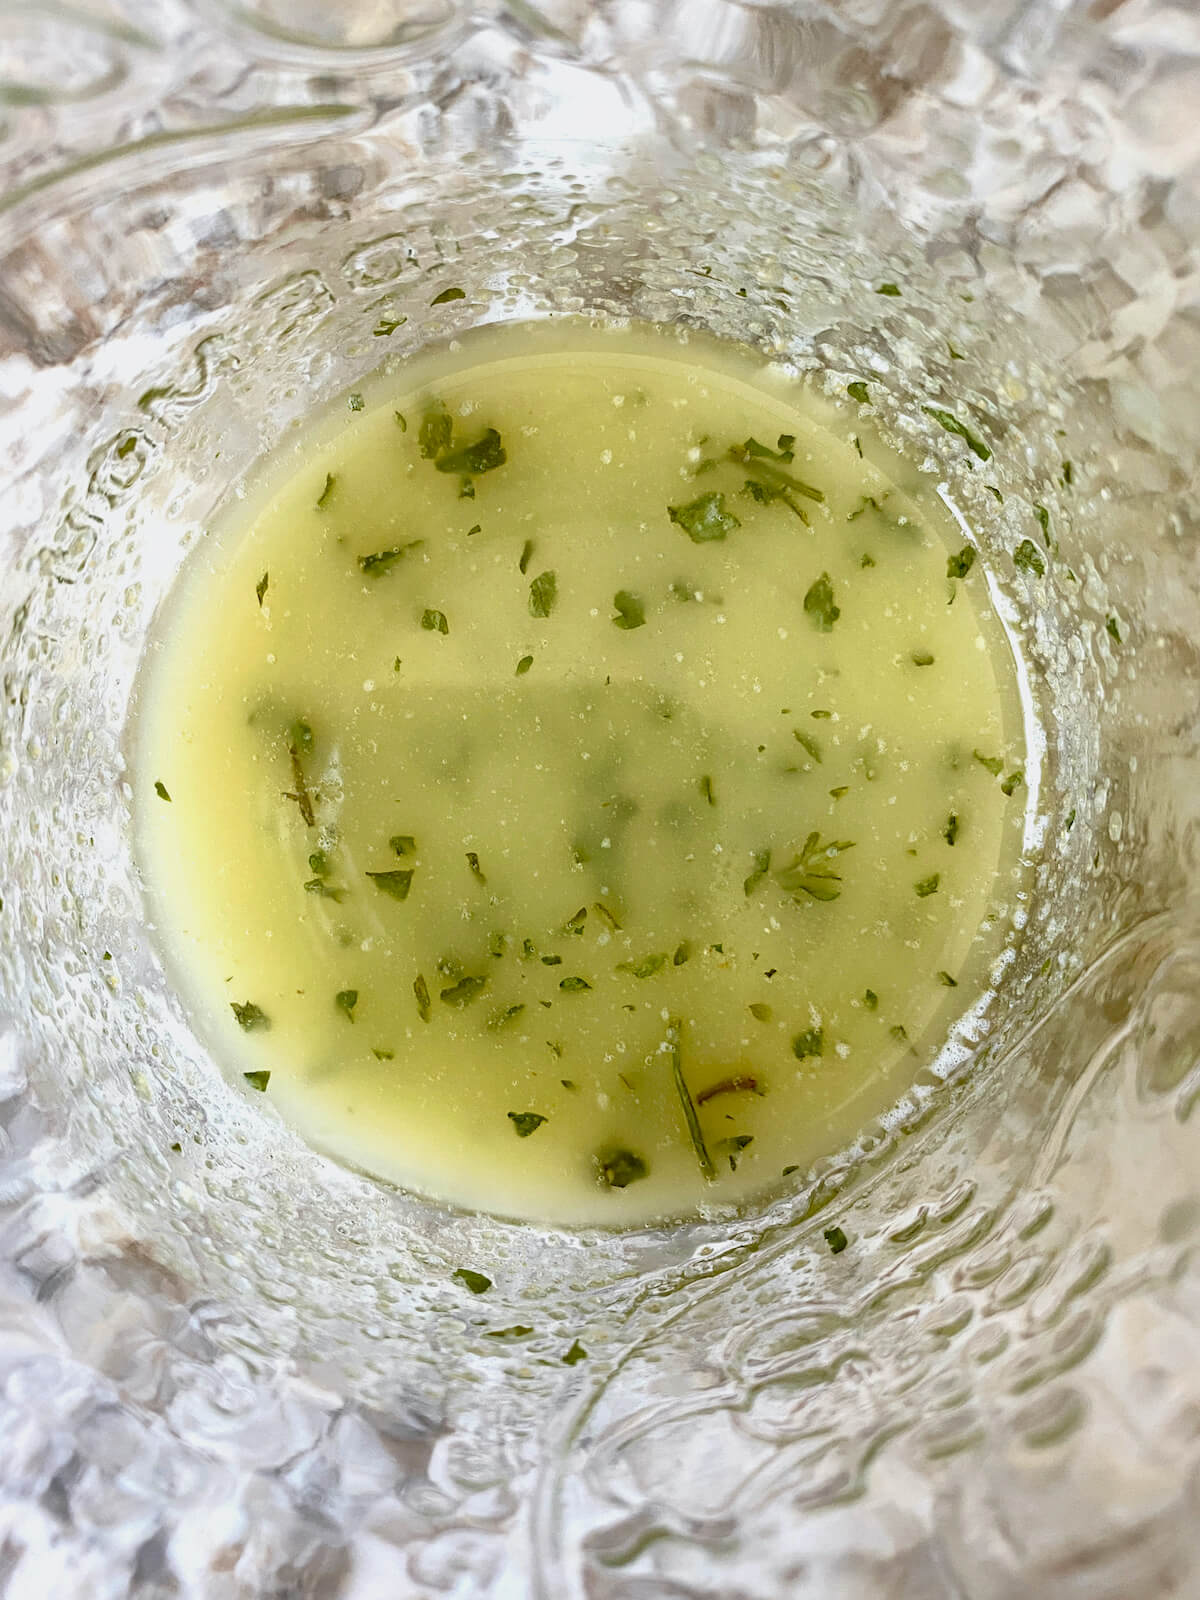
Step 8: Prepare the garlic butter. While baking, whisk together melted butter, salt, garlic powder, and Italian seasoning.
Step 9: Butter breadsticks and serve. Brush the hot breadsticks with garlic butter immediately after baking. Serve warm.

Sample Schedule
Here is an example of a schedule you can use to make these sourdough garlic breadsticks. The kitchen in this example is approximately 70-75°F.
Night Before
10:00 PM: Feed sourdough starter.
Day Of
8:00 AM: Mix dough together and knead.
8:30 AM-2:30 PM: Bulk fermentation.
2:30 PM: Shape breadsticks.
3:00-5:00 PM: Proof breadsticks.
5:00 PM: Bake breadsticks.
Note: Timing will vary based on the strength of your sourdough starter and the temperature of your kitchen and dough.
What to Serve With Sourdough Breadsticks
Breadsticks are perfect for dipping into sauces and dips like marinara, hummus, spinach artichoke dip, or buffalo chicken dip. They also complement pasta dishes such as linguine bolognese, meatballs, Alfredo, creamy pumpkin pasta, and Cajun salmon pasta.
For a lighter meal, pair them with soups and salads like chicken noodle soup, broccoli asparagus soup, Caesar salad, arugula quinoa salad, farro salad, or spinach Caprese salad.
How to Store
Store breadsticks in an airtight container at room temperature for up to 2 days.
For longer storage, transfer to a freezer-safe container and freeze for up to 3 months. Thaw at room temperature before reheating in the oven for best results.

Are you tired of watching your sourdough discard go to waste?
It’s time to turn excess discard into something delicious with my new ebook - Everyday Sourdough!
Inside, you’ll find 27 tried-and-true sourdough discard recipes that will transform your leftover starter into mouthwatering creations your family and friends will love.
No more guilt about wasting your discard - with Everyday Sourdough, you have endless options to quickly make something amazing anytime.
Let's Connect!
Be sure to leave a comment below if you have any questions. You can also connect with me on Instagram, Facebook, Pinterest, or via email at [email protected].
📖 Recipe

Sourdough Breadsticks
Ingredients
For the Dough
- 500 grams bread flour
- 12 grams kosher salt
- 12 grams granulated sugar
- 275 grams warm water 80-90℉
- 100 grams active sourdough starter 100% hydration
- 30 grams extra virgin olive oil
For the Garlic Butter
- 3 tablespoons unsalted butter melted
- ½ teaspoon kosher salt
- ½ teaspoon garlic powder
- ¼ teaspoon Italian seasoning
Instructions
- Feed your sourdough starter about 6-12 hours before making the dough.
- In a large mixing bowl, whisk together the bread flour, salt, and sugar. Add the warm water, sourdough starter, and olive oil. Mix until there’s no dry flour left.500 grams bread flour, 12 grams kosher salt, 12 grams granulated sugar, 275 grams warm water, 100 grams active sourdough starter, 30 grams extra virgin olive oil
- Knead the dough by hand for 15-20 minutes, or use a stand mixer, until it becomes smooth and elastic.
- Place the dough back in the mixing bowl, cover, and let it rise until puffy and doubled in size, about 6 hours at 75°F.
- Line a baking sheet with parchment paper. Turn the dough onto a floured surface and divide into 12 equal pieces. Shape each piece into a tight ball by gathering the edges together and rolling seam side down on the counter. Let the dough balls rest for 10 minutes, then roll them into a 6-inch long breadstick. Place the breadsticks evenly spaced on the baking sheet.
- Cover and let proof for about 2 hours or until noticeably puffy. Alternatively, you can refrigerate the breadsticks overnight. When ready to bake, let them proof for 2-3 hours at room temperature.
- Preheat the oven to 400°F about 20 minutes before the breadsticks finish proofing. Bake for 20 minutes or until golden brown.
- While baking, whisk together melted butter, salt, garlic powder, and Italian seasoning.3 tablespoons unsalted butter, ½ teaspoon kosher salt, ½ teaspoon garlic powder, ¼ teaspoon Italian seasoning
- Brush the hot breadsticks with garlic butter immediately after baking. Serve warm.
Notes
- Storage: Store leftover breadsticks in an airtight container for up to 2 days at room temperature or freeze for up to 3 months.
Morticia says
Imperial measurements would be so nice to have. I have never had a baking fail using them.
Thank you!
Ashley Petrie, RDN, LDN says
Hi Morticia! I appreciate the feedback. I currently develop and test all of my recipes using mostly gram measurements, which is why they're usually written that way. It ensures that they're as repeatable as possible from my kitchen to yours. However, I am working on going back through some of my older recipes and converting them to imperial measurements so both options are available. 🙂
Jennifer says
Just baked these to go with our lunch and they were so good! Thank you for the recipe! I keep my house really cool so I was actually able to let my bulk dough sit on the counter overnight.
Ashley Petrie, RDN, LDN says
Hi Jennifer! So glad you enjoyed them 🙂 I love a good overnight bulk ferment!