This Sourdough Discard Pita Bread recipe is made only with starter - no yeast required! Ready the same day, this no-knead flatbread is an easy way to prevent sourdough discard waste.

At this point, I've made many things with my sourdough discard - everything from chocolate chip cookies and pancakes to soft pretzels and garlic knots. While all of these recipes are fantastic (and you should definitely make them!), they're not necessarily things I want to eat all the time.
But, as someone who experiments a lot with sourdough recipes, I'm always dealing with leftover discard in my fridge. So, what's the solution? Pita bread! Almost every week, I make a batch of these sourdough discard pita bread.
Pita bread is simple to make, freezes nicely, and can be used in various ways. Fill it for sandwiches, pair it with soup or salad, or dip it in hummus - the possibilities are endless!
Today, I’m walking you through how to make these easy sourdough discard pita bread with no yeast, including which ingredients to use, tips for success, and some of my favorite recipes to serve with this simple flatbread.
Disclaimer: Some links throughout this post are affiliate links. As an Amazon Associate, I earn from qualifying purchases. You can learn more by visiting my Affiliate Disclosure Page.
Why You'll Love This Recipe
- Made with Sourdough Discard- Use up excess sourdough starter discard and prevent food waste by making these homemade sourdough discard pita bread.
- No Yeast- These sourdough pita are naturally risen without any added commercial yeast.
- Same Day- Ready in less than 4 hours, you can have homemade pita bread for lunch or dinner the same day.
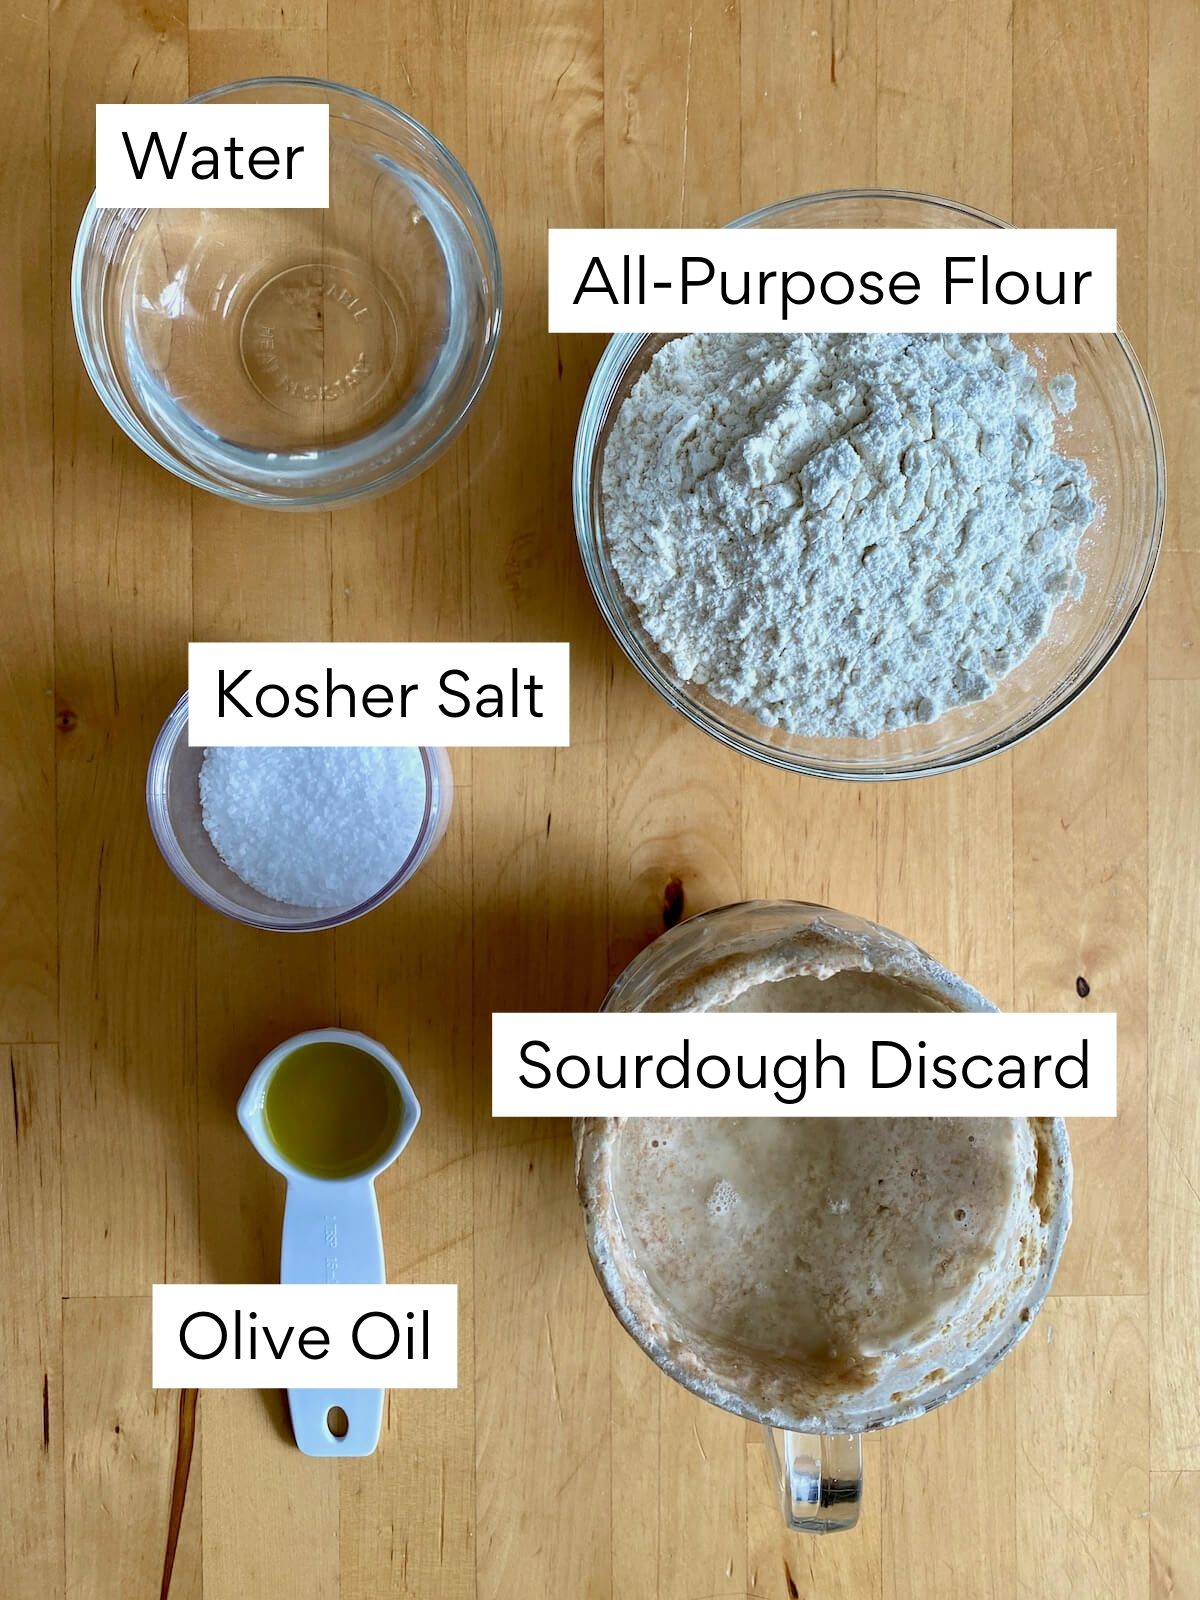
- Only 5 Ingredients- This sourdough pita recipe is made using simple pantry staples like all-purpose flour, water, olive oil, and salt.
- Cooked in a Skillet- I like making my pita on the stovetop instead of baking them in the oven. I find it easier and more convenient, especially in the summer when I don't want to heat up the oven.
- Fun to Make- What's more fun than watching pita bread puff up into a beautiful, pillowy pocket right on your stovetop? Well, filling those pita pockets with all of your favorite fillings, of course!
Tips for Success
- Measure ingredients with a scale. I developed and tested this recipe using weight measurements (grams) instead of volume measurements (cups). Use a food scale when making these sourdough discard pita for best results.
- Use fresh discard or active starter. Since this sourdough discard pita bread recipe uses no yeast, it's best to use discard that is less than two weeks old. If your discard is a lot older, opt for active sourdough starter instead.
- Find a warm spot for fermentation. If your kitchen is cool, place the dough in your oven with the light on to help it rise.
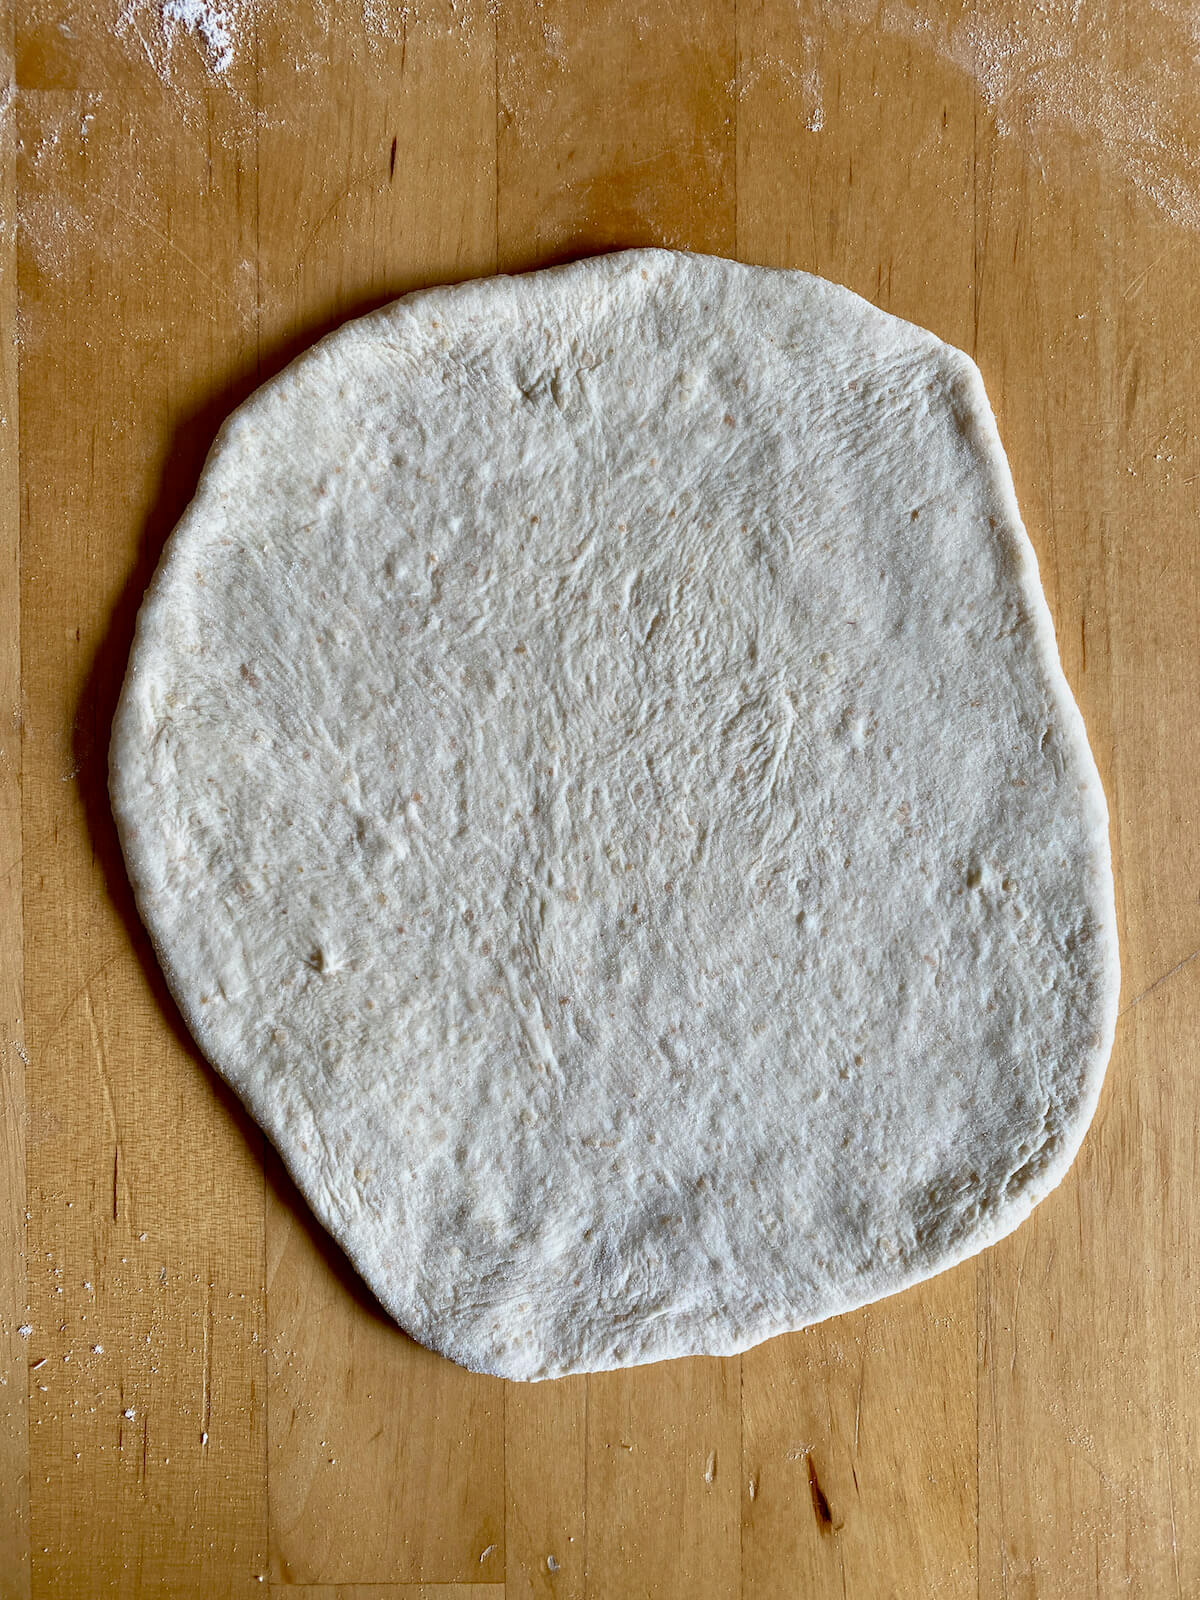
- Roll the pita out thin. Thinner pita puffs up better when cooked because steam builds inside, forming the pocket. If it's too thick, it might not puff up evenly, ending up dense instead of light and airy.
- Preheat the skillet. Ensure your skillet is properly preheated before cooking the pitas so that they puff up quickly and evenly.
- Alternative cooking methods. You can also bake pita in a 500℉ oven on a pizza stone or in a pizza oven.
- Use a wire rack. After cooking, transfer the pitas to a wire rack to cool to prevent them from becoming soggy.
- Make ahead. Pita dough balls can be covered and refrigerated overnight for up to 24 hours before cooking.
Ingredient Notes
Here are some notes on key ingredients. For a full list of ingredients, check out the recipe card below.
- Sourdough Discard- This recipe uses discard from my 100% hydration whole wheat flour starter. You can also use active sourdough starter if you'd like. New to sourdough? Check out my guide on making starter from scratch.
- All-Purpose Flour- All-purpose flour is perfect for making soft, easily tearable pita bread.
- Water- Using warm water provides the ideal temperature for yeast activity. Aim for a temperature between 80-90°F for best results.
- Extra Virgin Olive Oil- Adds a subtle flavor while also helping to create softer, more tender pita bread.
- Kosher Salt- Enhances the flavor of the pita.
How to Make Sourdough Discard Pita Bread
Here is how to make quick sourdough pita bread with starter discard.
Mix the Dough
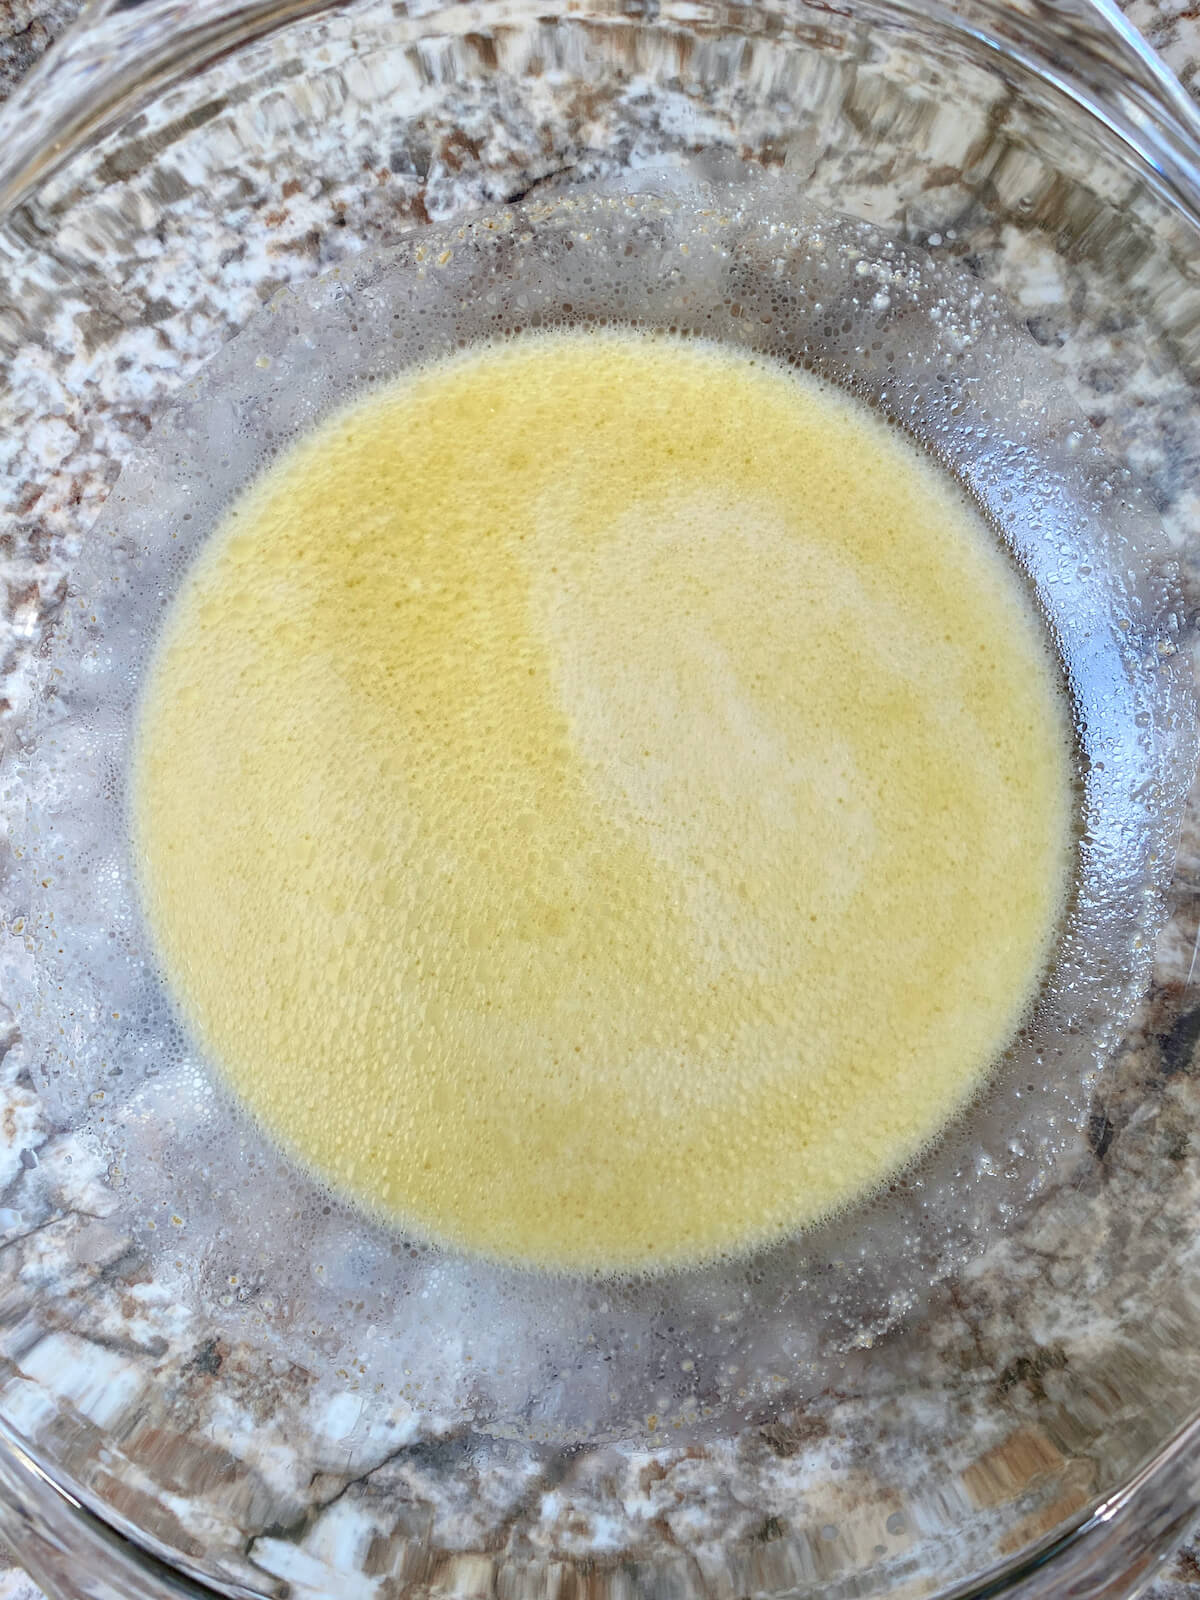
- In a large mixing bowl, combine warm water, sourdough discard (or active starter), and olive oil. Whisk until the discard is dissolved.
- Add the flour and salt to the bowl.
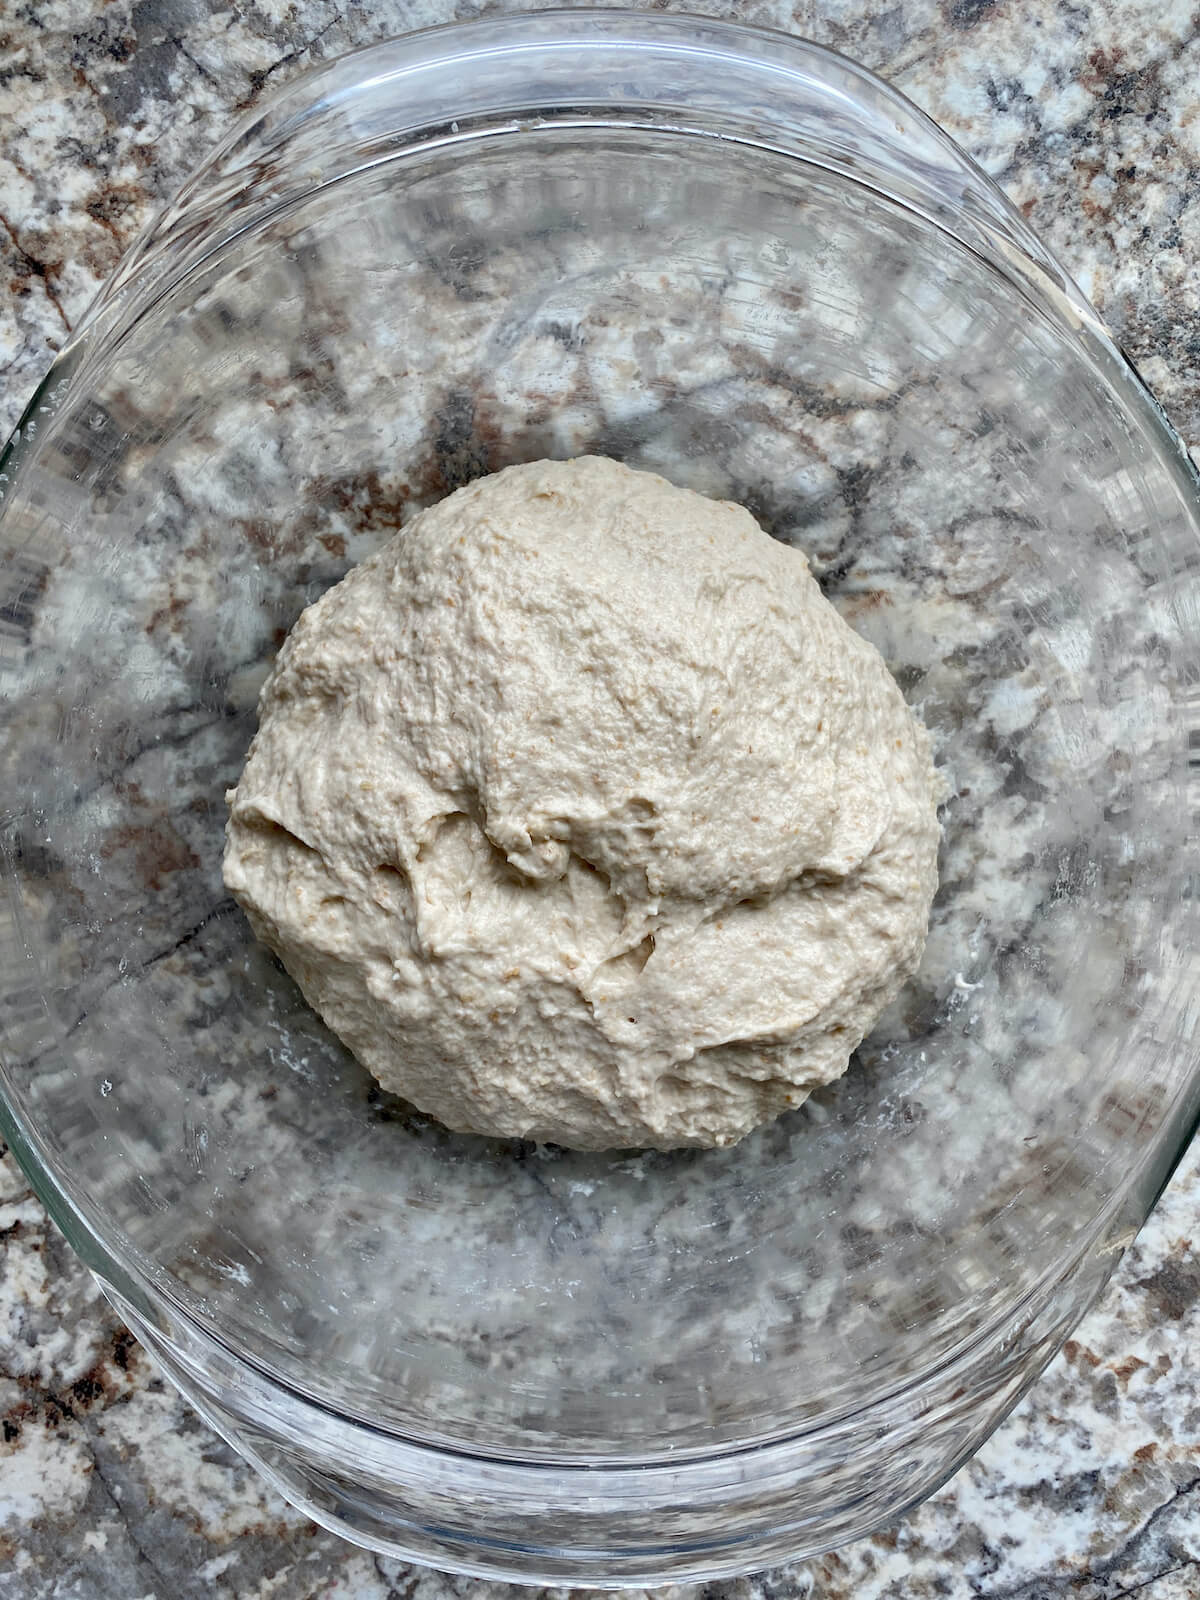
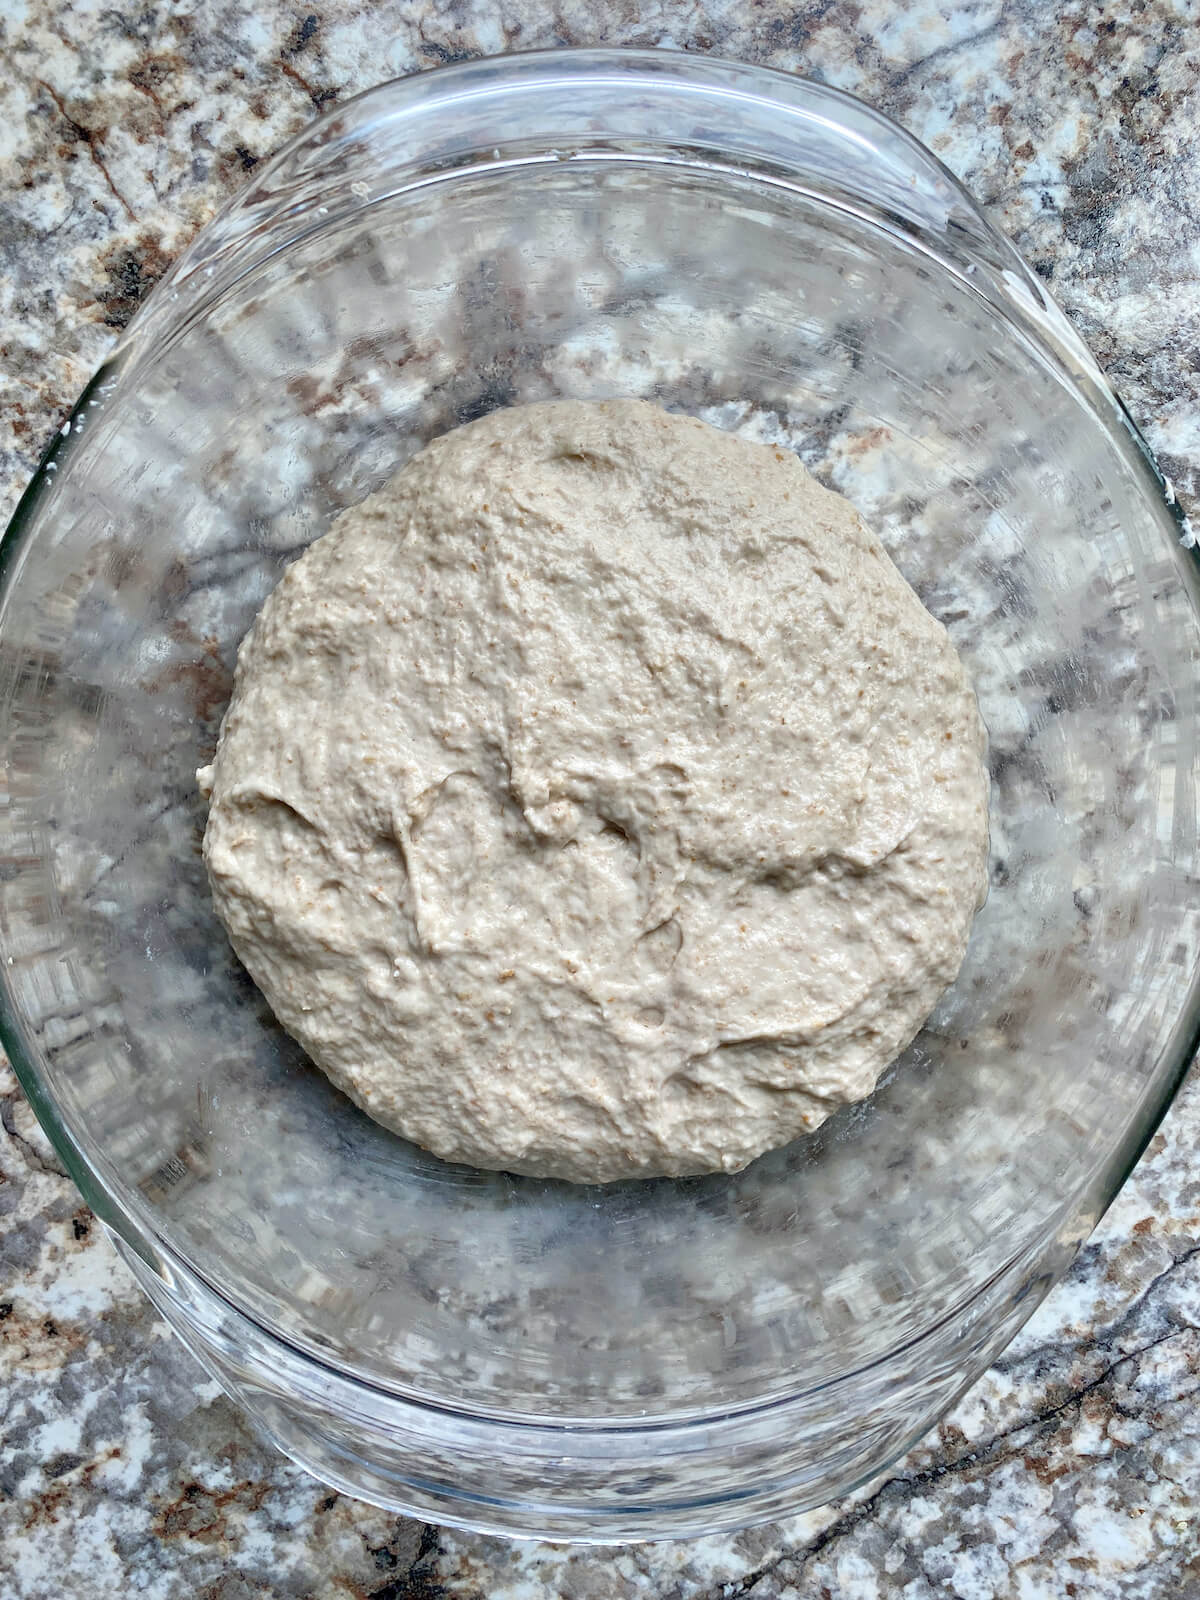
- Mix everything together until a smooth, sticky dough forms.
Bulk Fermentation
- Cover the bowl and let the dough proof for about 2 hours at room temperature (70-75℉), or until it doubles in size.
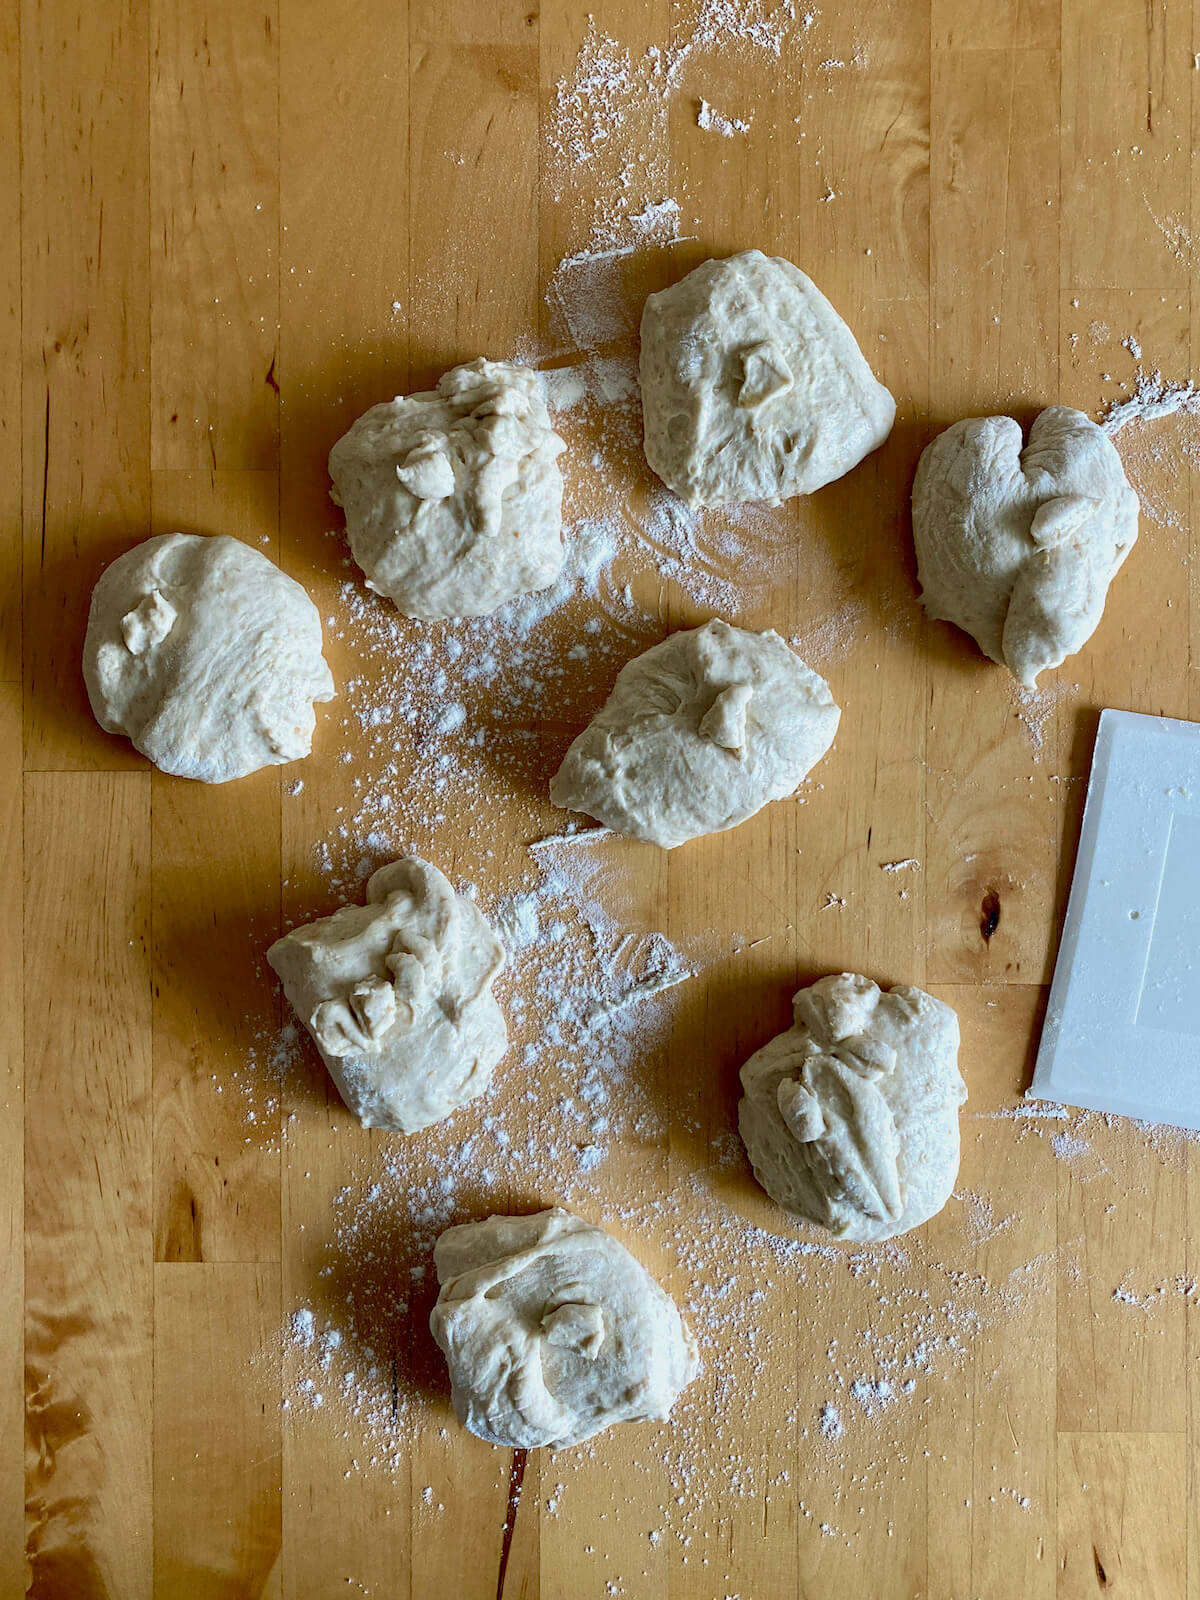
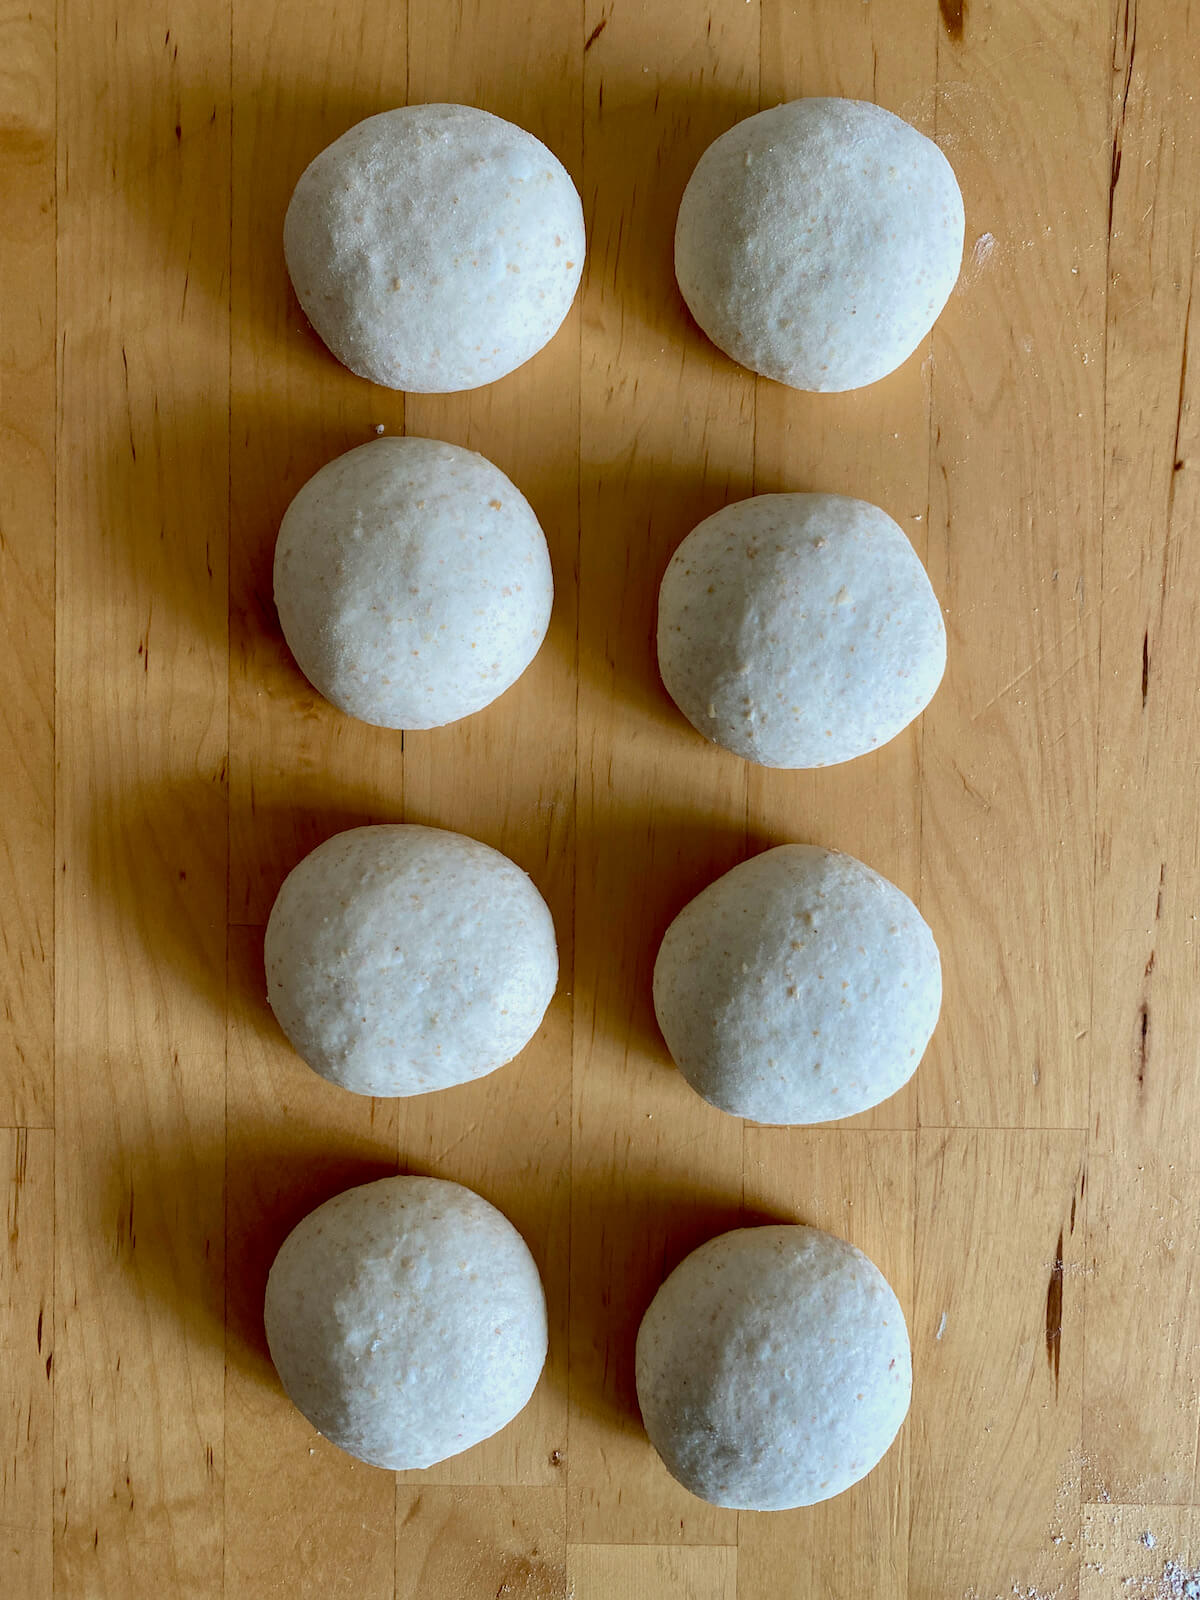
Divide and Shape
- Transfer the dough to a lightly floured surface.
- Divide it into 8 equal-sized pieces (about 76 grams each).
- Shape each piece into a ball by bringing the edges to the center and rolling seam-side-down on the counter to seal them.
- Cover and let the dough balls rest for 20 minutes to relax the gluten.
Roll Out Dough Balls
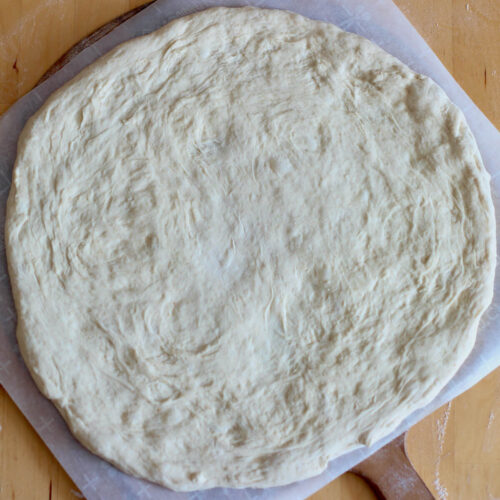
- Roll out each dough ball into a 6-inch wide circle that's about ⅛-inch thick. It's helpful to roll out most or all of the pitas before cooking.
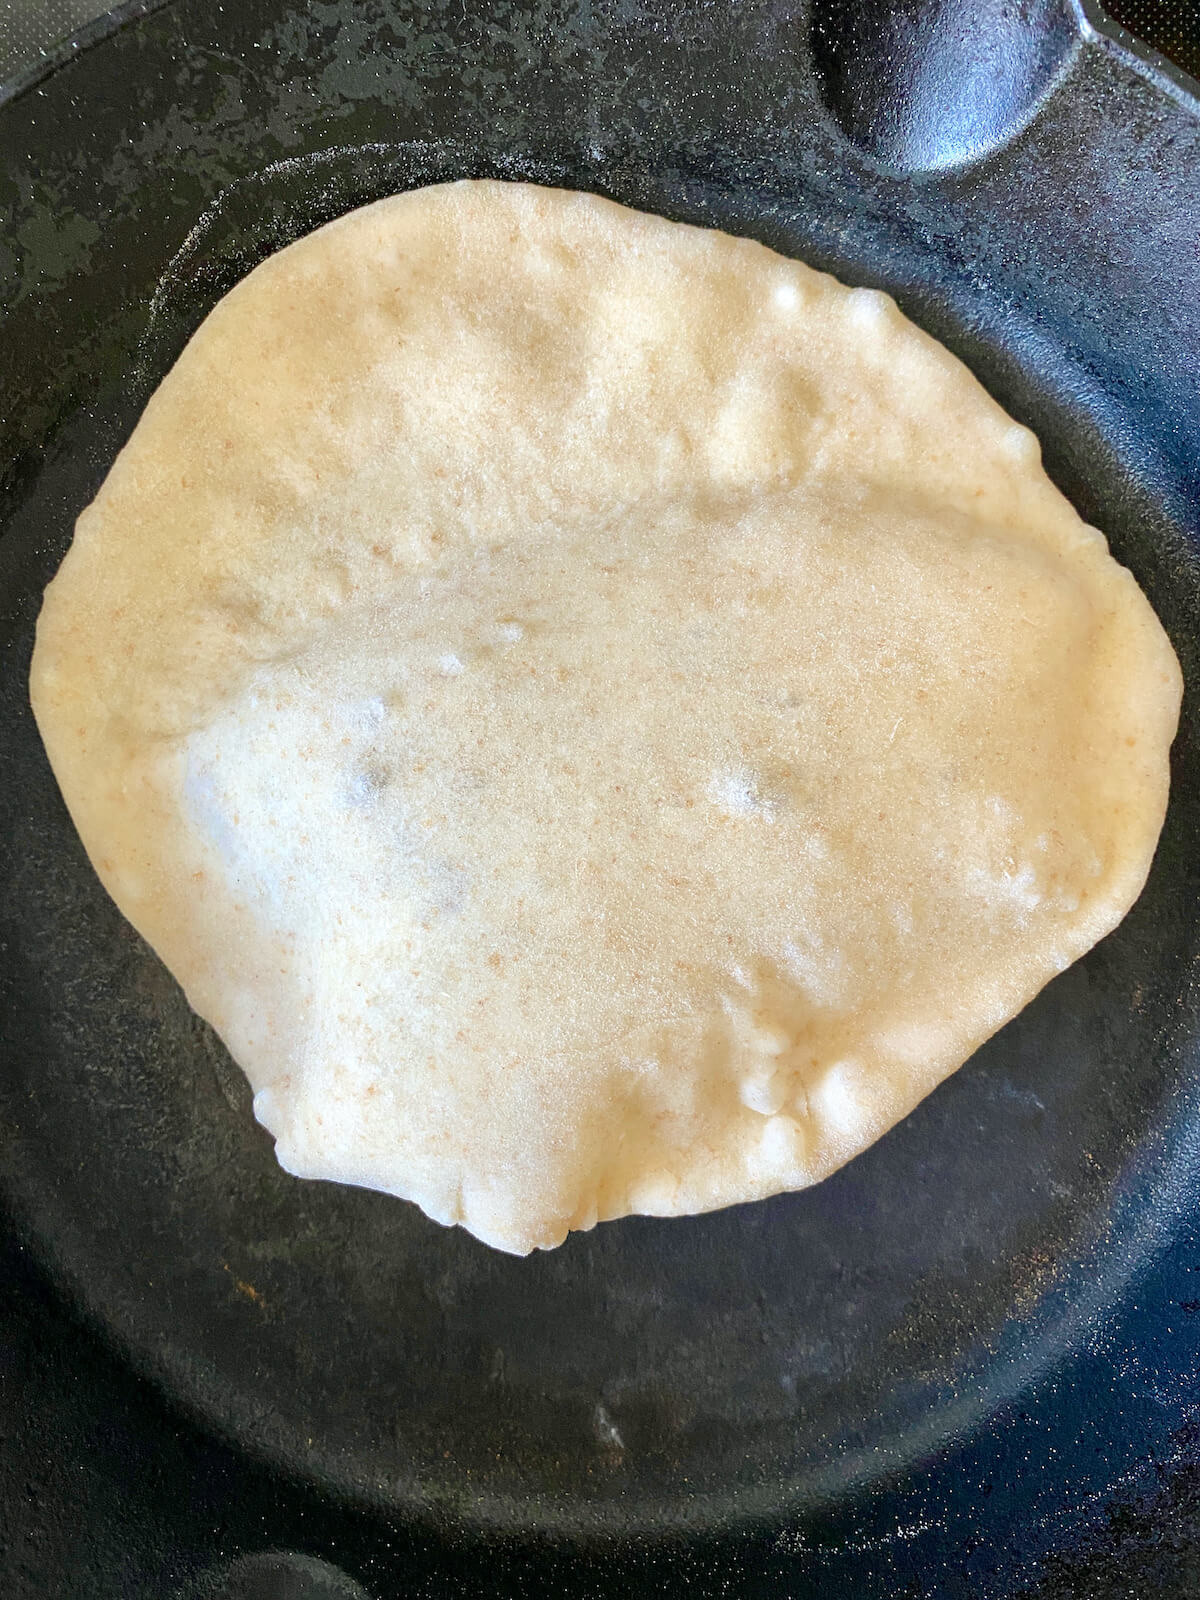
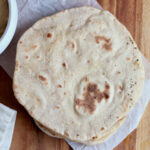
Cook the Pita
- Preheat a cast iron or stainless steel skillet over medium heat. Do not add oil to the skillet.
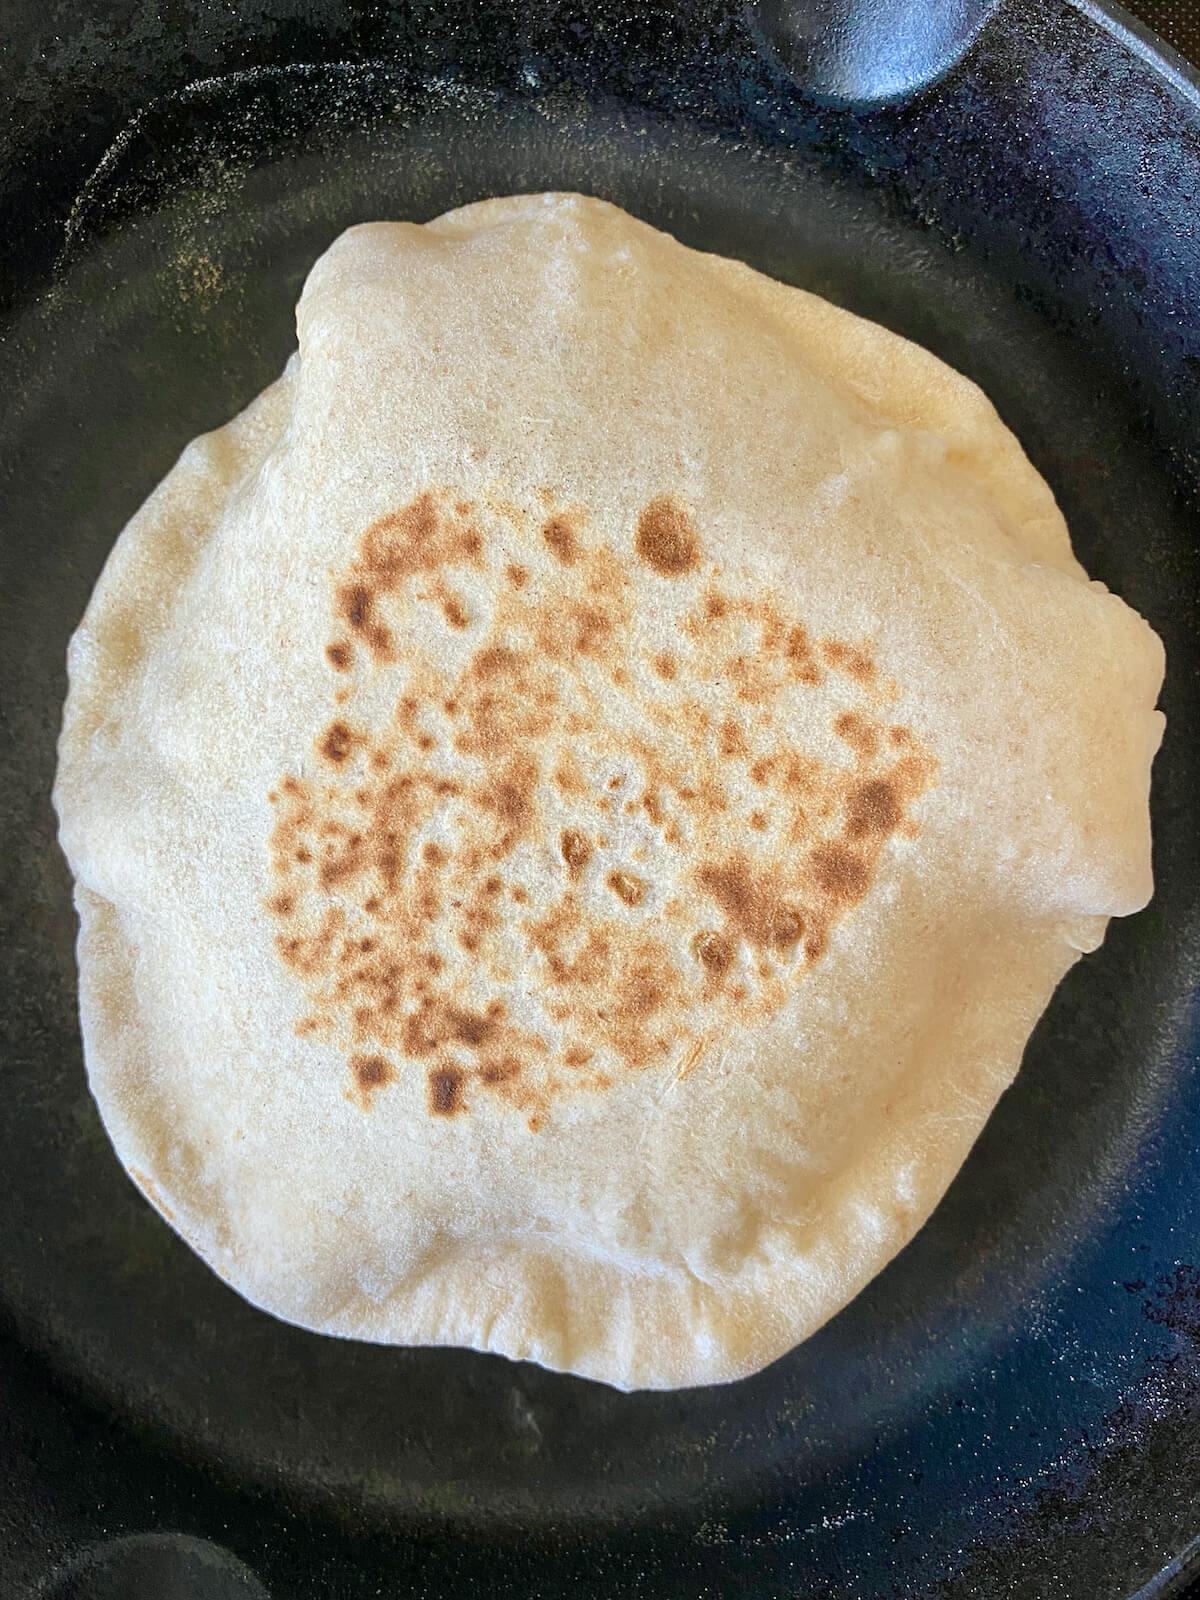
- Once the skillet is hot, place the first pita in it. Cook for about 30 seconds, or until bubbles start forming on the surface and it begins to puff up.
- Then, flip and cook for another 30 seconds on the other side.
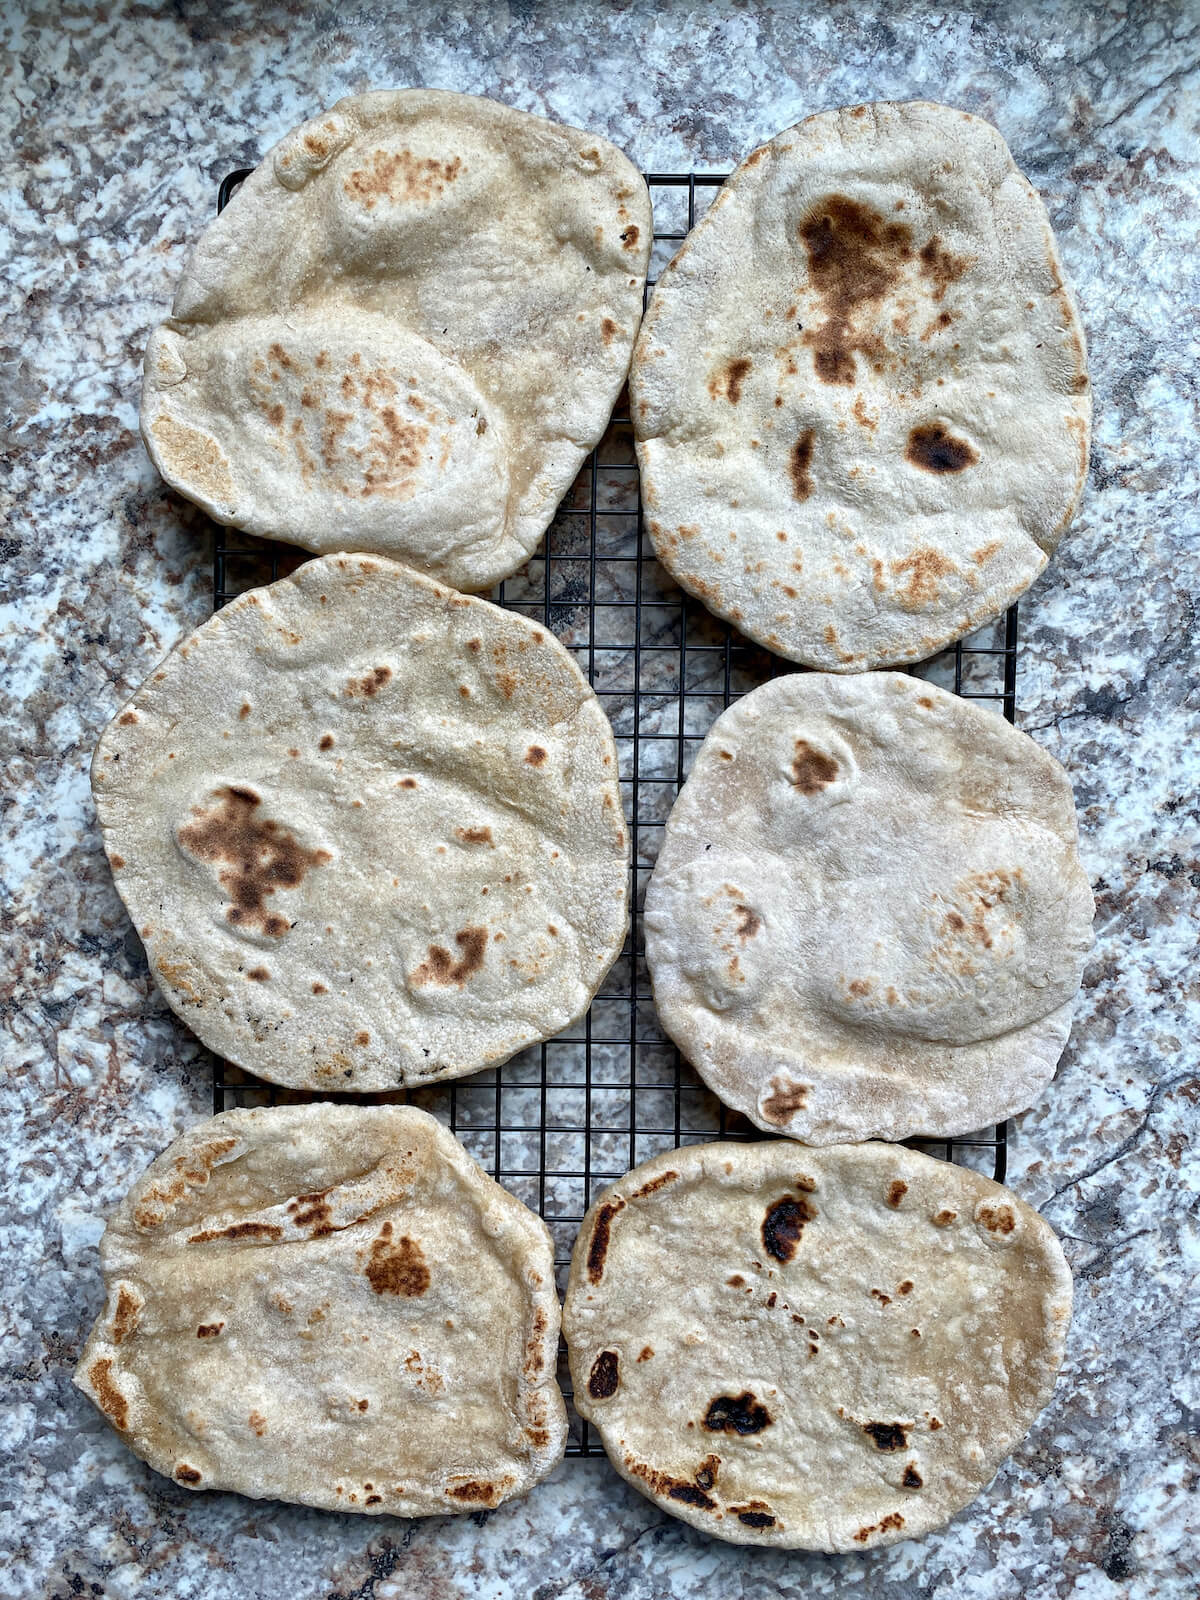
- Repeat the cooking process with the remaining pitas.
🌡️ Quick Note: The first one or two pita are usually paler and don't puff up quite as nicely. This happens when the skillet isn't quite up to the right temperature yet. Cook a few and adjust the temperature of your burner accordingly.
Serve
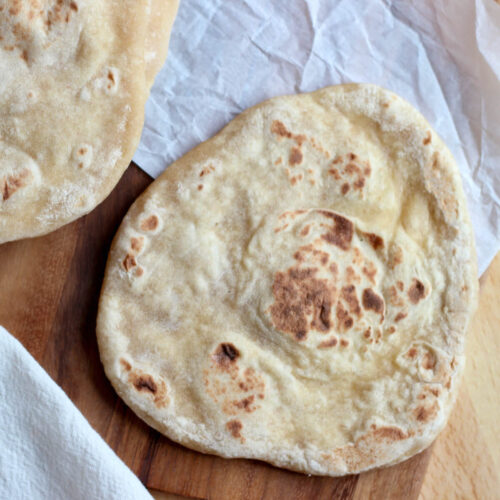
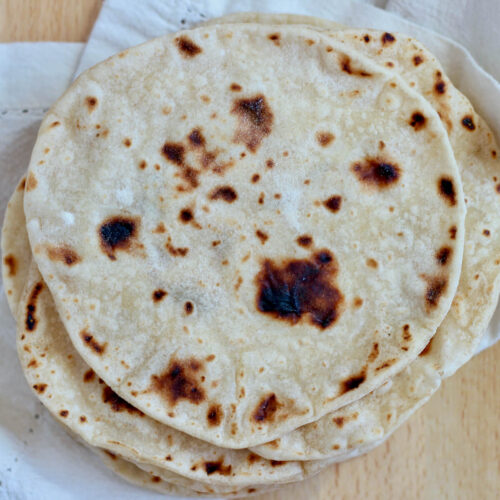
- Transfer the cooked pitas to a wire rack to cool.
- Serve them with hummus, sandwich fillings, or enjoy them on their own!
How to Serve Sourdough Discard Pita Bread
Sandwich- Fill your pita with falafel, grilled chicken, grilled steak, or Mediterranean black bean salad.
Dip- Serve sourdough pita bread with hummus, black bean feta dip, spinach artichoke dip, or buffalo chicken dip for a tasty appetizer or snack.
Salad- Enjoy your pita bread as a side dish alongside strawberry spinach salad, arugula quinoa salad, Caesar salad, or spinach caprese salad.

How to Store
Let your pita bread cool completely, then store them in a sealed container or bag. They'll stay fresh at room temperature for 2 days.
Alternatively, freeze them on a baking sheet, then transfer them to a freezer-safe bag or container for up to 3 months.
Frequently Asked Questions
Your pita bread may not be puffing up properly if your skillet isn't hot enough or if the dough is rolled out too thick.
If your dough didn't rise, it may be because your kitchen was too cold or your discard was older than two weeks. Discard from a young sourdough starter may also lack the strength to rise adequately.
I've used sourdough discard stored for over a month, but it's best to use discard less than two weeks old for recipes like this one that rely on it for rising. If yours is older, use it in recipes not dependent on it rising or pair it with dry active yeast.
Let's Connect!
Be sure to leave a comment below if you have any questions. You can also connect with me on Instagram, Facebook, Pinterest, or via email at [email protected].

📖 Recipe
Sourdough Discard Pita Bread
Equipment
- 10-inch cast iron skillet or stainless steel skillet
- Bench scraper (optional)
Ingredients
- ¾ cups + 1 ½ tablespoons (200 grams) warm water 80-90℉
- ½ cup (100 grams) sourdough starter discard or active starter (100% hydration)
- 1 tablespoon (14 grams) extra virgin olive oil
- 2 ½ cups (300 grams) all-purpose flour
- 2 teaspoons (8 grams) kosher salt
Instructions
- In a large mixing bowl, combine warm water, sourdough discard (or active starter), and olive oil. Whisk until the discard is dissolved.¾ cups + 1 ½ tablespoons (200 grams) warm water, ½ cup (100 grams) sourdough starter discard, 1 tablespoon (14 grams) extra virgin olive oil
- Add the flour and salt to the bowl. Mix everything together until a smooth, sticky dough forms.2 ½ cups (300 grams) all-purpose flour, 2 teaspoons (8 grams) kosher salt
- Cover the bowl and let the dough proof for about 2 hours at room temperature (70-75℉), or until it doubles in size.
- Transfer the dough to a lightly floured surface. Divide it into 8 equal-sized pieces (about 76 grams each). Shape each piece into a ball by bringing the edges to the center and rolling seam-side-down on the counter to seal them.
- Cover and let the dough balls rest for 20 minutes to relax the gluten.
- Roll out each dough ball into a 6-inch wide circle that's about ⅛-inch thick. It's helpful to roll out most or all of the pitas before cooking.
- Preheat a cast iron or stainless steel skillet over medium heat. Do not add oil to the skillet.
- Once the skillet is hot, place the first pita in it. Cook for about 30 seconds, or until bubbles start forming on the surface and it begins to puff up. Then, flip and cook for another 30 seconds on the other side. Repeat the cooking process with the remaining pitas.
- Note: The first one or two pita are usually paler and don't puff up quite as nicely. This happens when the skillet isn't quite up to the right temperature yet. Cook a few and adjust the temperature of your burner accordingly.
- Transfer the cooked pitas to a wire rack to cool. Serve them with hummus, sandwich fillings, or enjoy them on their own!
Notes
- Important Note: This recipe was written and tested using weight measurements (grams) instead of volume measurements (cups). For best results, use a food scale when making these sourdough discard pita bread.
- Storage: Store leftover pita in an airtight container at room temperature for up to 2 days or freeze for up to 3 months.
- Make Ahead: Dough balls can be covered and refrigerated for up to 24 hours before rolling out.
Hannah says
Basically tortillas but a wee bit thicker! Still good!
Ashley Petrie, RDN, LDN says
Hi Hannah! Glad you liked them!
Alejandra says
Delicious! I added a tsp of baking powder because I like my pitas a bit fluffier but either way this recipe is great! (I also like how the measurements are listed below each step- little detail but a very thoughtful one)
Ashley Petrie, RDN, LDN says
Hi Alejandra! So glad you enjoyed the recipe. 🙂 Great idea adding the baking powder to make them a bit fluffier.
Stephanie Ginett says
Great! Even worked well with my weak starter that won’t double in size while I try to strengthen it. Didn’t rise during proof but end result was still good! I might try adding some Italian seasonings next!
Ashley Petrie, RDN, LDN says
Hi Stephanie! So glad you enjoyed and it worked out for you - Italian seasoning sounds delicious 🙂
Lina Bedard says
I made these with my sourdough discard, (my starter is fed with whole wheat strong flour) used 400 g of all purpose flour and 200 g of rye flour in this recipe because I doubled the recipe.
Doubled all the other ingredients also.
This is definitely one I will use again.
Ashley Petrie, RDN, LDN says
Hi Lina! Thank you so much for your comment and rating—I really appreciate it! I love that you used a mix of all-purpose and rye flour. I bet the rye added such a nice depth of flavor. So glad you enjoyed the recipe and plan to make it again! 🙂
Terry M says
These are fantastic! I’ve made pitas before, but not from discard. I’ll never make them any other way from now on! Lots of flavor and a little spongy, just how I like them. Just like the ones from out local Mediterranean grocery!
Ashley Petrie, RDN, LDN says
That’s amazing, Terry! I’m so happy you loved them! Using discard really does add such great flavor. And what a compliment that they remind you of the ones from your local Mediterranean grocery - thank you! 😊
Tara says
I loved this no-nonsense, low maintenance recipe. I used whole wheat pastry flour, all weight measurements and my cast iron skillet and the pitas turned out really nice. They puffed up beautifully and we filled them with hummus, tomato, cucumber, olives and lettuce for a lovely vegan twist. The flavor was perfectly sour and next time I will use half bread flour for chewiness and go for more sourness by refrigerating the balls of dough overnight. This was a win for me! Thank you!
Ashley Petrie, RDN, LDN says
Hi Tara! I'm so glad the recipe worked out for you! Thank you so much for your kind comment and rating. 😊
Queen AshJo says
Delicious!!! I did add about a teaspoon of baking powder. Perfecto.
I wonder why all other recipes for sourdough pita take so much longer.
Ashley Petrie, RDN, LDN says
Thanks so much for the kind comment and rating - I'm so glad you enjoyed!! 🙂
Holly says
Was excited to try this, but after proofing, the dough was really sticky. I formed it into a sandwich loaf instead. Second proof happening now and then into the oven instead.
Ashley Petrie, RDN, LDN says
Hi Holly! Yes, this dough is naturally a bit on the sticky side — that’s totally normal for this recipe. The higher hydration actually helps create the steam pockets that make pita puff up in the oven. If you want to try again, you can use a little extra flour when shaping and rolling to keep it from sticking, or even fold in a few extra tablespoons of flour next time for a slightly easier-to-handle dough. I’m glad you were still able to turn it into a loaf of bread at least! 🙂
Georgia says
So I believe this is a trial and error thing.. not the recipe itself but pita breads!! I made the recipe following instructions using a scale.. I agree it is sticky to roll out so made sure I used plenty of flour.. turns out I rolled them too thin and made semi crunchy wraps.. ? Realised my mistake and made a thicker one, made a beautiful pocket.. I forgot about it and burnt it!! In the end I figured that if I used a thicker piece on a slightly lower heat and turned it more frequently.. browning the first side slightly then flipping and flipping a couple more times it puffed up perfectly!! I may have only made one decent pita but the crunchy wrap things taste great and I will definitely be using them as dips or just to make a thinner sandwhich possibly.. I stuffed my good pita with some leftover chicken cacciatore I had and salad and it was delicious.. Will definitely be making again, also may leave them to proof on the side a bit longer once rolled out to help them puff up a bit.. very nice thank you for the recipe!
Ashley Petrie, RDN, LDN says
Hi Georgia! Pita definitely has a little trial-and-error to it, so you're not alone there. It sounds like you figured things out perfectly — thickness and heat make such a big difference, and giving them a short rest after rolling can absolutely help with puffing. And honestly, even the “crunchy wrap things” sound delicious! I’m so glad you enjoyed the flavor and that you’ll make them again.
Jenny Guthrie says
If you are using discard why do you have to let it bulk ferment??
Ashley Petrie, RDN, LDN says
Great question, Jenny! Since there’s no other leavening agent in the recipe, the dough still needs some time to ferment. The remaining yeast in the discard does a little work during bulk fermentation, which helps make the pita bread lighter and airier instead of dense. 😊
Mandy says
I consider myself a pretty good baker and experienced tortilla maker, so I figured these would be fun to make. However, by the time I was done, I was questioning all my life choices. I followed your recipe exactly, measured in grams and I questioned how sticky the dough was initially but I wanted to trust the process. The dough was stayed horribly sticky, even after bulk fermentation. I had to heavily flour everything! The dough still stuck. It was so thin, I had to use a bench scraper to tranfer to the pan and then it stuck to the scraper! I had 1 successful puff but it it is comically covered in raw flour. I will seek out other recipes but would advise adding much more flour to the initial mix or you'll be yelling explitives in your kitchen too.
Ashley Petrie, RDN, LDN says
Hi Mandy! So sorry you had such a frustrating experience. I've made these several times and the dough was sticky but manageable from what I can remember. However, it's been a while so I'm going to revisit/retest this recipe this weekend and troubleshoot. Thanks for the feedback!
Elaine Stevenson says
Tasty but mine didn’t turn out as expected…I believe I need to mix my dough longer as the oil separated when cooking on a cast iron skillet. The last two turned out the best…i kneaded these dough balls…
Ashley Petrie, RDN, LDN says
Oh interested! Glad you enjoyed the flavor! It does sound like the dough may have needed a bit more mixing or kneading at the start — that helps fully incorporate the oil and develop the structure. Makes sense that the last ones turned out better after kneading 😊
Gertrude says
I never comment on recipes I make but I've made an exception for this one. Quick, easy, no fuss, no yeast pits breads. I've tried a few sticky messes in the past.
This recipes seems pretty bombproof. Soft, delicious and actually looked like the picture!
I used these pita as wraps - not pita to stuff but you probably could, I didnt try to split mine open and I rolled quite thin.
Thank you for this recipe!
Ashley Petrie, RDN, LDN says
Hi Gertrude! So glad you enjoyed them and they turned out well for you. Thanks for commenting and rating! 🙂