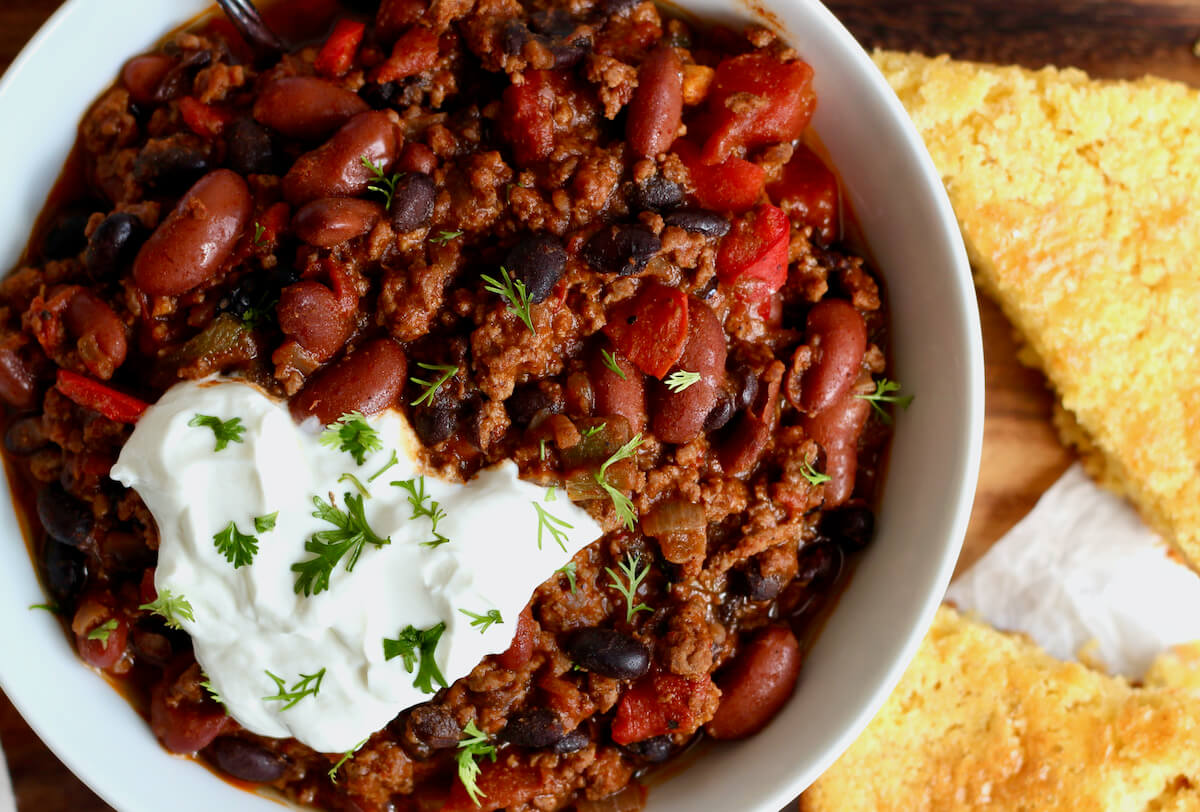
This Dutch Oven Chili is rich, hearty, and loaded with flavorful ground beef, beans, and spices. Easy to make with just one pot, this stovetop chili recipe is perfect for a quick weeknight meal. Serve it with sour cream, cheddar cheese, and cilantro for the ultimate comfort food dish.

What's your go-to comfort meal for a chilly fall or winter night?
For me, it’s a warm, hearty bowl of homemade chili.
With countless regional variations across the United States, chili is a quintessential American comfort food. And this Dutch oven recipe is my version, made with lean ground beef, two types of beans, peppers, tomatoes, and a homemade spice blend.
It's a healthy and satisfying dish that’s perfect for cozying up on the couch on a chilly October evening.
Today, I’m walking you through how to make the best Dutch oven chili, including which ingredients to use, tips that will guarantee it turns out right the first time, and some of my favorite side dishes to serve with this healthy chili recipe.
Disclaimer: Some links throughout this post are affiliate links. As an Amazon Associate, I earn from qualifying purchases. You can learn more by visiting my Affiliate Disclosure Page.
Why You'll Love This Recipe
- Made in One-Pot- Easier prep, less cleanup, and more flavor - this one-pot chili recipe is sure to be a winner on busy weeknights.
- Quick Weeknight Meal- Speaking of busy weeknights, did I mention that this classic chili recipe only takes about an hour to make? It’s perfect for a quick weeknight dinner.
- Hearty & Healthy- Packed with lean protein, fiber-rich beans, and a variety of vegetables, this hearty chili will leave you feeling full and satisfied.
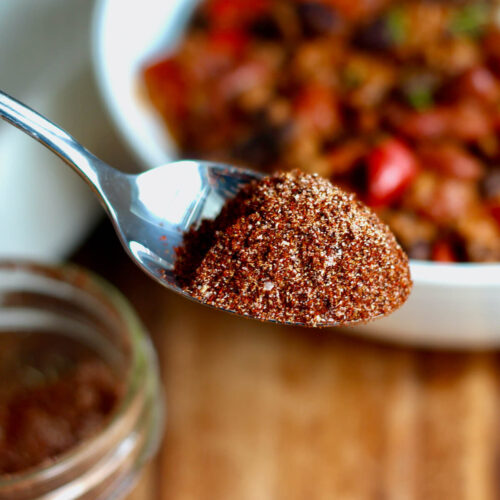
- Flavorful Seasoning- Ditch the store-bought chili seasoning packet and use my flavorful, filler-free homemade chili seasoning blend.
- Perfect for Parties- Whether it’s game day, movie night, or a casual dinner party, a big batch of homemade chili is sure to hit the spot.
Ingredient Notes
Here are some notes on key ingredients. For a full list of ingredients, check out the recipe card below.
- Ground Beef- Using lean ground beef helps keep the dish light, but you can use higher fat content for a richer flavor if preferred.
- Beans- A mix of black beans and kidney beans adds diverse texture and flavor to the chili. Be sure to rinse and drain the beans to reduce sodium and starch content.
- Diced Tomatoes- Diced tomatoes add to the chunky texture and flavor of the chili. Opt for 'no-salt-added' canned tomatoes to have more control over the sodium content.
- Water- Adds moisture to the chili for simmering and cooking the vegetables.
- Onion- Yellow onions have a balanced, slightly sweet onion flavor that adds depth to the chili.
- Garlic- Use freshly minced garlic for the best flavor.
- Jalapeño- Adjust the amount of jalapeño based on your spice preference. Removing the seeds and membranes will reduce the heat.
- Bell Pepper- Any variety of bell peppers can be used in this chili recipe. Red bell peppers are sweeter, while green peppers are more vegetal tasting.
- Chili Seasoning Blend- I use my homemade chili seasoning for this Dutch oven chili recipe, which contains chili powder, cumin, smoked paprika, garlic powder, onion powder, kosher salt, cayenne pepper, and black pepper.
- Olive Oil- A heart-healthy cooking oil used to sauté the aromatics, cook the ground beef, and allow the spices to release their flavor.
🌱 Sustainability Tip: Growing your own food is a great way to cultivate a sustainable kitchen. Bell peppers, jalapeños, beans, and tomatoes can easily be grown both in a garden and in containers.

Substitutions and Variations
Here are a few ways you can customize this easy Dutch oven chili recipe to fit your diet and taste preferences.
Substitutions
- Ground Beef- Substitute ground beef with ground turkey, ground chicken, cooked brown lentils, or soy crumbles.
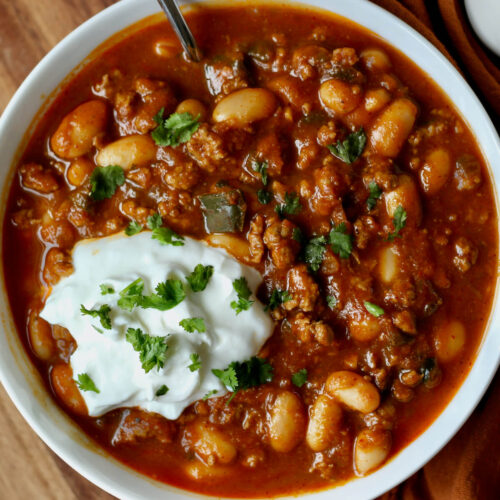
- Beans- Swap the beans in this recipe for pinto beans, cannellini beans, navy beans, or any other bean you prefer.
- Diced Tomatoes- For a smoother chili, opt for tomato puree or crushed tomatoes. If you like your chili on the chunkier side, use stewed tomatoes or whole tomatoes.
- Water- Replace water with chicken stock, beef stock, or vegetable broth for additional flavor.
- Onion- One tablespoon of onion powder can be used in place of fresh onion.
- Garlic- Use ½ teaspoon of garlic powder to replace two fresh cloves of garlic.
- Jalapeño- Swap the jalapeño for green bell pepper or poblano pepper if you prefer a milder chili. For more heat, try using a chipotle pepper or habanero pepper.
- Bell Peppers- Substitute bell peppers for poblano peppers, zucchini, corn, kale, or spinach.
- Chili Seasoning Blend- Use a packet of chili seasoning in place of the individual spices. Or simply use chili powder, cumin, cayenne pepper, and salt.
- Olive Oil- Avocado oil, sunflower oil, canola oil, or any other neutral-flavored cooking oil can be used in place of olive oil.

Variations
- Vegan- Swap the ground beef for your favorite plant-based protein to make vegan chili. Try soy crumbles, brown lentils, or beans.
- Ground Turkey- Substitute the ground beef with ground turkey for a leaner option.
- Spicy- Amp up the heat by adding extra jalapeños, chipotle peppers in adobo sauce, cayenne pepper, or hot sauce.
- Smoky- Give the chili a smoky flavor by swapping the diced tomatoes for fire-roasted tomatoes and adding minced chipotle in adobo sauce.
- Southwestern- Add ingredients like corn, roasted poblano peppers, and adobo sauce for a Tex-Mex flavor profile.
- Vegetables- Make this Dutch oven chili more nutritious by adding extra vegetables such as corn, zucchini, carrots, spinach, kale mushrooms, sweet potato, butternut squash, or pumpkin.
Equipment Notes
Here are some notes on any special equipment I used to make this recipe.
- Dutch Oven- A cast iron Dutch oven, like this Lodge 6-Quart Enameled Dutch Oven, is ideal for cooking chili due to its even heat distribution, moisture retention, versatility, and ample capacity.
How to Make Dutch Oven Chili
Here is how to make homemade chili on the stovetop.
Step 1: Sauté the aromatics. Heat the olive oil in a large Dutch oven over medium heat. Add the diced onion, minced jalapeño, and minced garlic. Sauté for 5-7 minutes or until the vegetables are softened and beginning to brown.

Step 2: Brown ground beef. Push the vegetables aside and add the ground beef. Cook, breaking it up into small pieces with a wooden spoon, until it is browned and cooked through.


Step 3: Season ground beef. Sprinkle in the chili seasoning blend and mix it thoroughly with the ground beef until well coated. Cook for an additional 2 minutes to let the spices release their flavor.

Step 4: Add remaining ingredients. Reduce the heat to medium-low and pour in the diced tomatoes and water, scraping any cooked-on bits from the bottom of the pot. Stir in the diced bell pepper, black beans, and kidney beans until well combined.


Step 5: Simmer the chili. Bring the chili to a simmer, then cover and reduce the heat to low. Simmer for 25-30 minutes or until the peppers and tomatoes have softened.
Step 6: Reduce the chili. Remove the lid and crush some of the beans to release their starches, naturally thickening the chili. Simmer, uncovered, for an additional 5-10 minutes or until it reaches your desired consistency.
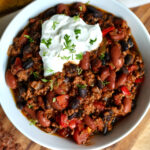
Step 7. Serve. Serve with sourdough cornbread, corn muffins, tortilla chips, and your choice of toppings. Enjoy!

Tips for Success
Make this slow cooked Dutch oven chili successfully the first time using these helpful kitchen tips.
- Prepare ingredients ahead of time. Chop the vegetables, drain the beans, and measure the spices before you start for a smoother, more efficient cooking process.
- Don't drain the beef. After browning the ground beef, there may be a small amount of fat left in the pot. Cooking this fat into the chili creates a richer, more flavorful finished dish.
- Use your own chili seasoning. Store-bought chili seasoning often includes additives like anti-caking agents, thickeners, and sugars. Making your own chili seasoning blend gives you full control over the flavor without these extras.
- Thicken the chili naturally. Gently crush some of the beans to release their starches and naturally thicken the chili without the need for flour, cornstarch, or tomato paste.
- Simmer for more flavor. The longer the chili simmers, the more the flavors meld together.
- Adjust the consistency. If you prefer a thicker chili, simmer uncovered for a bit longer. For a slightly thinner consistency, add a touch more water.
Classic Chili Topping Ideas
Personalize your Dutch oven chili with a fun and flavorful twist. Here are some of my favorite topping ideas!
- Shredded Cheddar Cheese
- Sour Cream or Greek Yogurt
- Fresh Salsa or Pico de Gallo
- Guacamole or Diced Avocado
- Cilantro Garlic Sauce
- Fresh or Pickled Jalapeños
- Diced Red Onions
- Pickled Banana Peppers
- Roasted Corn
- Black Olives
- Cilantro
- Green Onion
- Lime Wedges
- Tortilla Chips
- Hot Sauce
- Red Pepper Flakes
What to Serve with Dutch Oven Chili
Beef and bean chili is a hearty and comforting meal that pairs perfectly with a variety of side dishes. From classic cornbread to a light salad, your side dish options are as diverse as they are delicious.
Some of the most comforting side dishes for chili include various types of bread and crackers. Cornbread, corn muffins, warm tortillas, tortilla chips, garlic bread, breadsticks, and crusty sourdough bread are great options.
Other starchy side dishes that complement chili include cilantro lime rice, baked potatoes, and macaroni and cheese.
To balance out the meal, consider serving chili with a side of salad or vegetables. Options like arugula quinoa salad, honey garlic Brussels sprouts, buttery green beans, or sautéed butternut squash offer a lighter, refreshing contrast to the hearty chili.
🎉 Hosting a party? Set up a chili toppings bar with options like shredded cheese, sour cream, avocado slices, chopped cilantro, and lime wedges for a customizable experience.

How to Use Up Leftover Chili
Using leftover chili is an easy way to save time and minimize food waste. It's a versatile ingredient that can be repurposed into various dishes, providing quick and flavorful meals for busy days.
Here are some of my favorite ways to repurpose leftover chili:
- Nachos
- Tacos, Burritos, or Quesadillas
- Baked Potatoes or Sweet Potatoes
- Chili Fries
- Macaroni and Cheese
- Stuffed Peppers
- Omelets
- Burgers
Storage and Reheating
How to Store
- Room Temperature- If serving chili at a party, remember that it should only be kept at room temperature for a maximum of 2 hours.
- Refrigerator- Store leftover chili in an airtight container in the refrigerator for 3-4 days.
- Freezer- For more extended storage, place the chili in a freezer-safe plastic bag or container for up to 6 months. I like to portion leftover chili into individual or meal-sized servings for easier reheating.
How to Reheat
- Stovetop- Transfer leftover chili to a small saucepan and set it over medium-low heat. Add a splash of water to help loosen the chili and prevent it from drying out. Heat, stirring occasionally, until it just begins to simmer.
- Microwave- Place chili in a microwave-safe bowl. Add a splash of water and cover the bowl with a lid or plate to keep it from splattering. Microwave on HIGH for one minute. Stir, then continue microwaving in 30-second intervals until warmed through.
- Oven- Preheat the oven to 325°F. Spread the chili into a baking dish, drizzling it with a bit of water if it seems dry. Cover the dish tightly with aluminum foil and bake for 20-30 minutes or until fully warmed through.
🌶️ Quick Tip: Trying to keep the chili warm for a game day party or holiday gathering? Place the chili in a slow cooker and set it to "keep warm."
Make Ahead
Preparing chili in advance is perfect for busy weeks, as it allows flavors to meld for a tastier dish upon reheating—many even prefer it after a day or two in the refrigerator.
To make this chili ahead of time, follow the recipe in its entirety. Once it cools completely, transfer it into airtight containers. Refrigerate for up to 2 days or freeze for longer storage.
Frequently Asked Questions
While a Dutch oven is recommended for this recipe, you can still make the chili using a large, heavy-bottomed pot with a lid. The key is to have a vessel that can comfortably accommodate all the ingredients and maintain even heat during the cooking process.
It's advised to use an enameled cast iron Dutch oven for chili to avoid potential reactivity with acidic ingredients. If using a regular cast iron pot, it's best not to let the chili sit for an extended period to prevent any reactions with the pan's surface.
Yes, you can make this recipe in a slow cooker. Brown the meat and sauté the vegetables in a pan first, then transfer everything to the slow cooker and cook on low for 6-8 hours.
Absolutely! This recipe is flexible and can be easily adjusted to suit your needs. If you'd like to double the batch for a larger crowd or to have leftovers, simply double all the ingredient quantities. Conversely, if you'd like to make a smaller batch, you can halve the ingredient amounts. Just be sure to adjust cooking times and pot size accordingly.
Let's Connect!
Be sure to leave a comment below if you have any questions. You can also connect with me on Instagram, Facebook, Pinterest, or via email at [email protected].
More Chili Recipes
📖 Recipe
Dutch Oven Chili
Ingredients
- 2 tablespoons olive oil
- 1 medium yellow onion diced
- 1 jalapeño minced
- 2 cloves garlic minced
- 1 pound ground beef 90-93% lean
- 4 tablespoons chili seasoning blend
- 1 14.5-ounce can diced tomatoes
- 1 cup water
- 1 large red or green bell pepper diced
- 1 15.5-ounce can black beans drained and rinsed
- 1 15.5-ounce can kidney beans drained and rinsed
Instructions
- Heat the olive oil in a large Dutch oven over medium heat. Add the diced onion, minced jalapeño, and minced garlic. Sauté for 5-7 minutes or until the vegetables are softened and beginning to brown.2 tablespoons olive oil, 1 medium yellow onion, 1 jalapeño, 2 cloves garlic
- Push the vegetables aside and add the ground beef. Cook, breaking it up into small pieces with a wooden spoon, until it is browned and cooked through.1 pound ground beef
- Sprinkle in the chili seasoning blend and mix it thoroughly with the ground beef until well coated. Cook for an additional 2 minutes to let the spices release their flavor.4 tablespoons chili seasoning blend
- Reduce the heat to medium-low and pour in the diced tomatoes and water, scraping any cooked-on bits from the bottom of the pot. Stir in the diced bell pepper, black beans, and kidney beans until well combined.1 14.5-ounce can diced tomatoes, 1 cup water, 1 large red or green bell pepper, 1 15.5-ounce can black beans, 1 15.5-ounce can kidney beans
- Bring the chili to a simmer, then cover and reduce the heat to low. Simmer for 25-30 minutes or until the peppers and tomatoes have softened.
- Remove the lid and crush some of the beans to release their starches, naturally thickening the chili. Simmer, uncovered, for an additional 5-10 minutes or until it reaches your desired consistency.
- Serve with tortilla chips and your choice of toppings. Enjoy!
Notes
- Use your own chili seasoning. Store-bought chili seasoning often includes additives like anti-caking agents, thickeners, and sugars. Making your own chili seasoning blend gives you full control over the flavor without these extras.
- Storage: Store leftover chili in an airtight container for up to 4 days in the refrigerator or up to 6 months in the freezer.


Comments
No Comments