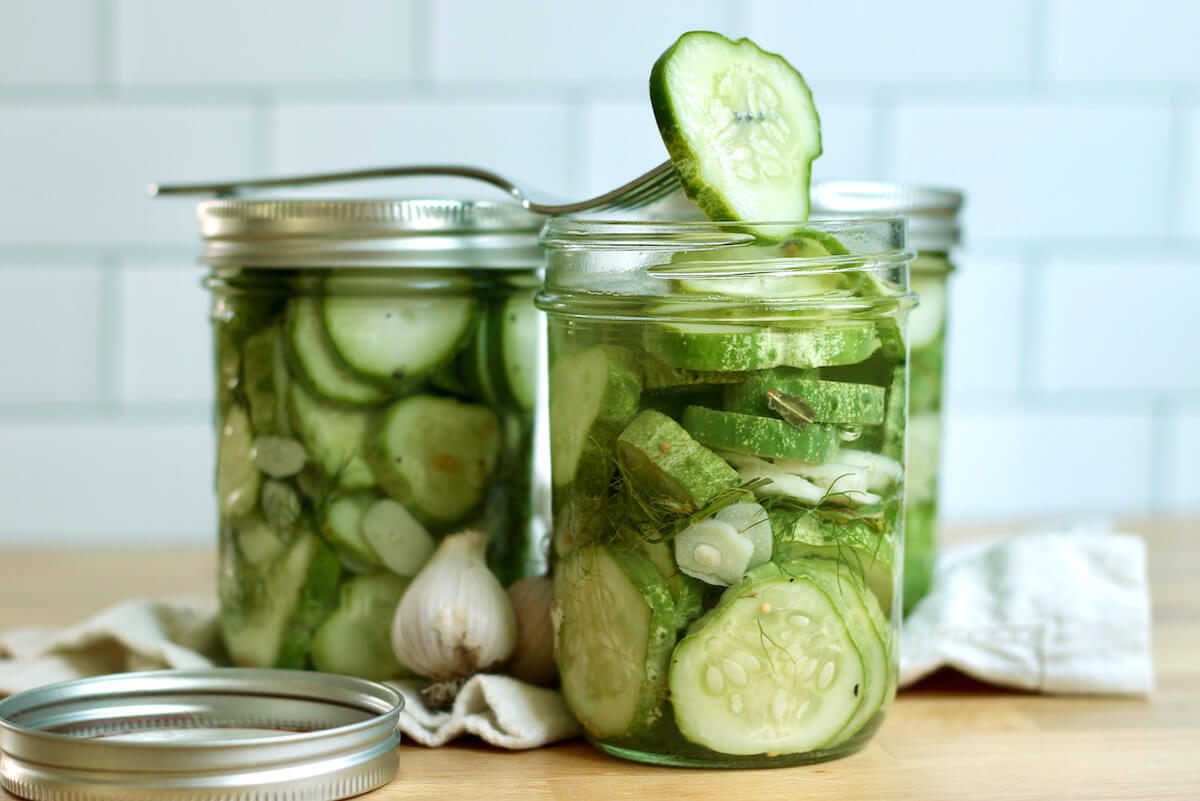
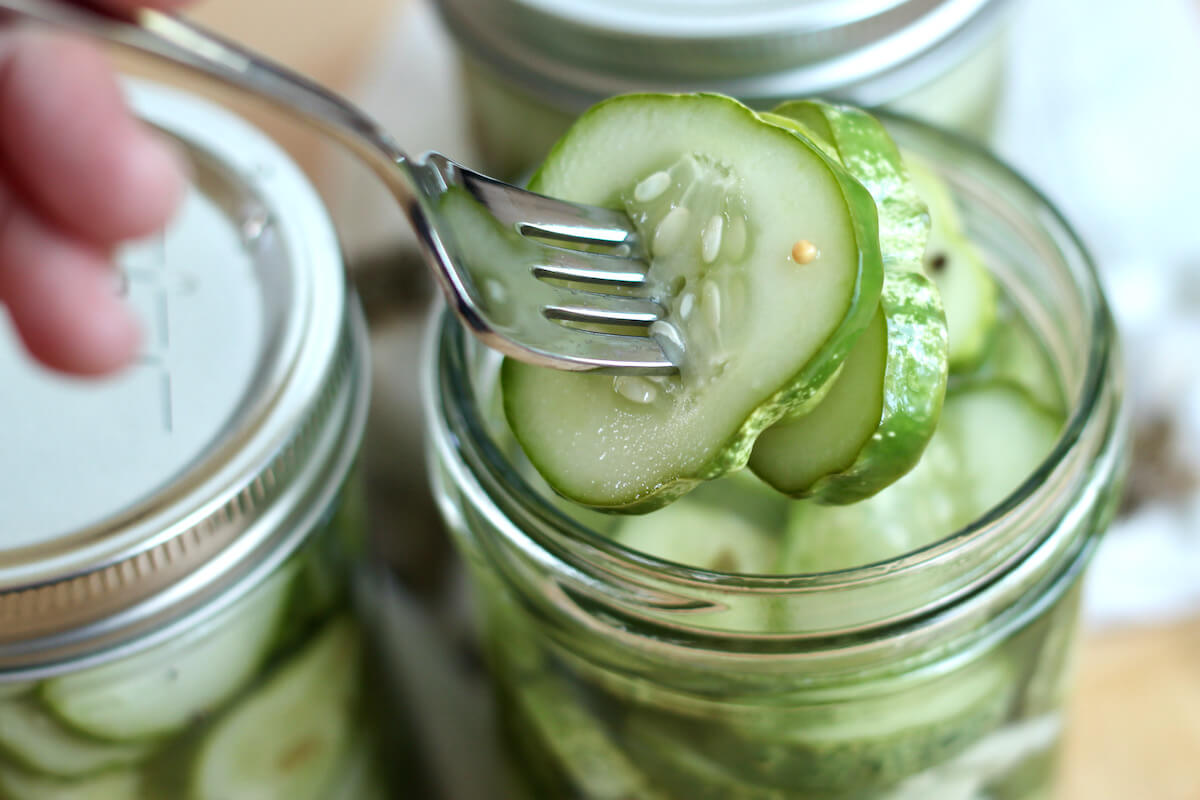
These Refrigerator Dill Pickles are fresh, crunchy, and loaded with dill and garlic flavor. Quick and easy to make with just a saucepan and a few glass jars, there is no special canning equipment required. Once you try these homemade dill pickles, you’ll never go back to store-bought!
Last summer, my love for pickles grew exponentially. I've always thought pickles were good. But, it wasn't until I grew cucumbers in my garden, and made my own homemade pickles, that I totally fell in love with them.
The taste of fresh pickles is incomparable to store-bought. After trying store-bought pickles again when I ran out of my own batch last year, I was disappointed by their artificial taste and crunch.
What's even better is that making this refrigerator dill pickles recipe requires no special canning equipment, making it an approachable and beginner-friendly recipe. With just a few simple ingredients and about 20 minutes, you can have these savory dill pickles ready to store in your fridge for snacking.
Today, I’m walking you through the entire pickling process including the best ingredients to use, tips to help you make this refrigerator pickle recipe successfully the first time, and some ways you can customize this easy pickle recipe to make it your very own.
Love baking your own sourdough bread? These homemade pickles are the perfect mix-in for my dill pickle sourdough bread recipe.
Disclaimer: Some links throughout this post are affiliate links. As an Amazon Associate, I earn from qualifying purchases. You can learn more by visiting my Affiliate Disclosure Page.
Why You'll Love This Recipe
- Fresher Taste- The fresh taste and crisp texture of these homemade dill pickles is incomparable to store-bought. Once you taste them, you'll never want to go back!
- No Canning Required- No canning equipment? No problem! This easy refrigerator pickles recipe doesn't require any special equipment to make.
- Quick & Easy- Making pickles at home may sound like a lot of work, but I promise it's not! In just 20 minutes, and with minimal prep work, you can easily make these homemade pickles for yourself.
- Eco-Friendly- Growing your own cucumbers and dill for these homemade pickles is a sustainable choice. It reduces food transportation distance, which helps lower pollution levels.
- Customizable- Change up the spices and herbs or add more sugar to customize this pickled cucumber recipe to suit your tastes.
Ingredient Notes
Here are some notes on the key ingredients. For the full list of ingredients, check out the recipe card below.
- Pickling Cucumbers- Pickling cucumber varieties, such as Kirby Cucumbers, Boston Pickling Cucumbers, Calypso Cucumbers, and Wisconsin SMR 58 Cucumbers, are best for making homemade pickles. Choose small pickles with firm flesh and thin skin.
- Garlic- Fresh garlic cloves give these pickles a bold, garlicky flavor. Feel free to use more or less garlic to suit your tastes.
- Dill Weed- This delicate, grassy herb gives dill pickles their signature flavor. If you can't find fresh dill sprigs, you can use dried dill seeds or dill weed, though the flavor may be slightly different.
- White Vinegar- Vinegar is essential for pickling cucumbers. I prefer white vinegar for its strong acidity and neutral flavor profile.
- Water- Use fresh, preferably filtered water to make the brine, as the water quality will affect the taste of the pickles.
- Kosher Salt- Use kosher salt or pickling salt for making pickles. Since table salt often contains added ingredients like anti-caking agents and iodine, it's not ideal for pickling.
- Sugar- A small amount of sugar helps balance the acidity and saltiness of the pickling brine.
- Spices- I like to use a combination of yellow mustard seeds, black pepper, and bay leaf to add a savory flavor to the brine. Both freshly ground black pepper and whole black peppercorn work well.
🌱 Sustainability Tip: Grow your own pickling cucumbers and dill for fresher, eco-friendly pickles. Certain cucumber varieties and dill thrive in containers, which is ideal for small spaces.

Substitutions and Variations
Here are a few ways you can try customizing this easy pickling cucumber recipe to fit your diet and taste preferences.
Substitutions
- Pickling Cucumbers- If pickling cucumbers are not available, you can use other types of cucumbers. However, keep in mind that regular cucumbers may have thicker skin and more seeds.
- Garlic- Substitute fresh garlic for shallots, chives, or garlic powder.
- Dill Weed- If fresh dill is not accessible, you can use dried dill seeds or dried dill weed. However, the flavor may be slightly different from fresh dill.
- White Vinegar- Swap apple cider vinegar for white vinegar for a slightly different flavor.
- Kosher Salt- Substitute kosher salt for pickling salt in a 1:1 ratio. Both lack additives like iodine and anti-caking agents.
- Sugar- Brown sugar, honey, and maple syrup can be used in place of granulated sugar.
- Spices- Swap whole mustard seeds for ground mustard, or try replacing the black pepper with red pepper flakes for added heat.
Variations
- Gluten-Free- Homemade refrigerator dill pickles are naturally gluten-free and vegan, but always double-check ingredient labels.
- Sweet- Add a little more sugar to make a sweeter version of this refrigerator dill pickle recipe.
- Spicy- Red pepper flakes added to the brine or a few slices of jalapeño can bring a little heat.
- Lemony- Squeeze a bit of lemon juice into the brine for a citrusy twist on classic dill pickles.
How to Make Refrigerator Dill Pickles
Here is how to make the best ever refrigerator dill pickles.
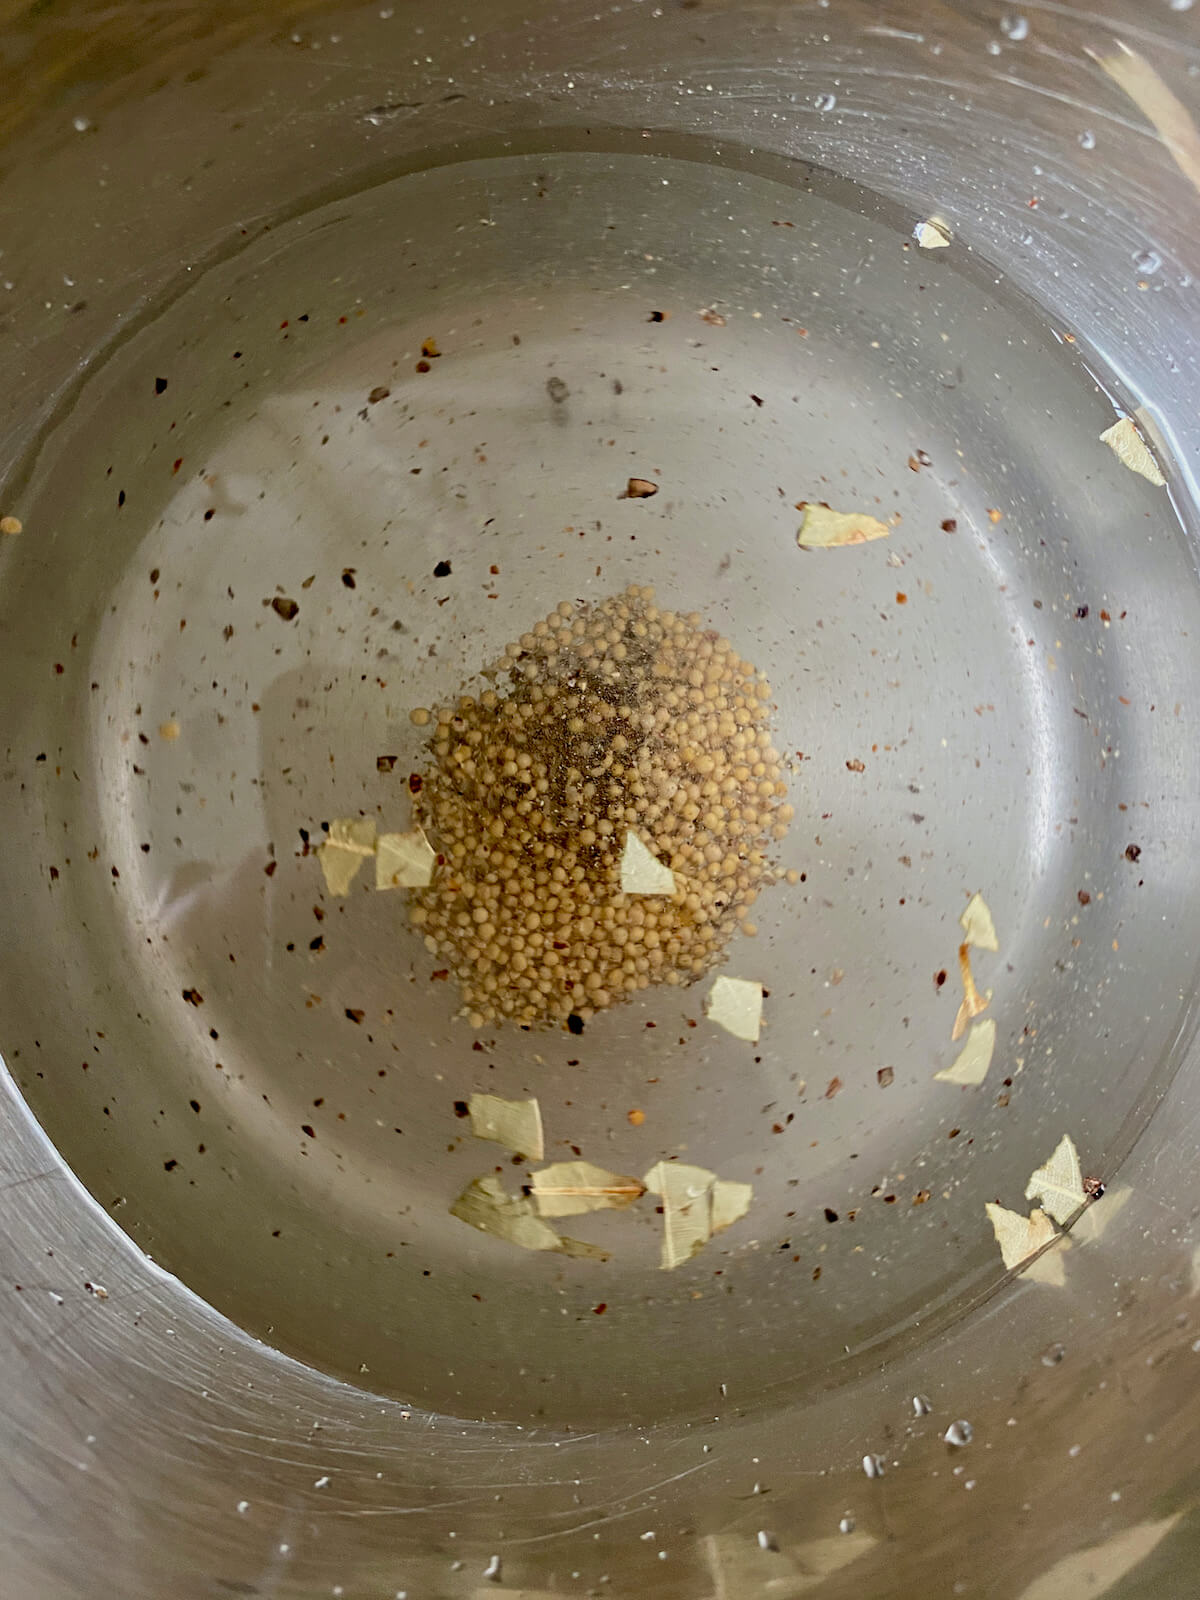
Step 1: Prepare the brining liquid. In a small saucepan, combine the kosher salt, sugar, mustard seeds, black pepper, and bay leaf. Add the water and white vinegar, and give it a good stir to mix everything together.


Step 2: Heat the brining liquid. Place the saucepan on the stove over medium heat. Whisk the mixture occasionally until the salt and sugar dissolve completely. The liquid does not need to come to a boil. Once dissolved, set the brining liquid aside and allow it to cool completely while you prepare the cucumbers.
Step 3: Prepare the cucumbers. Before slicing the cucumbers, wash them thoroughly under cold running water to remove any dirt or residue. Slice cucumbers into uniform rounds, approximately ¼ inch thick.

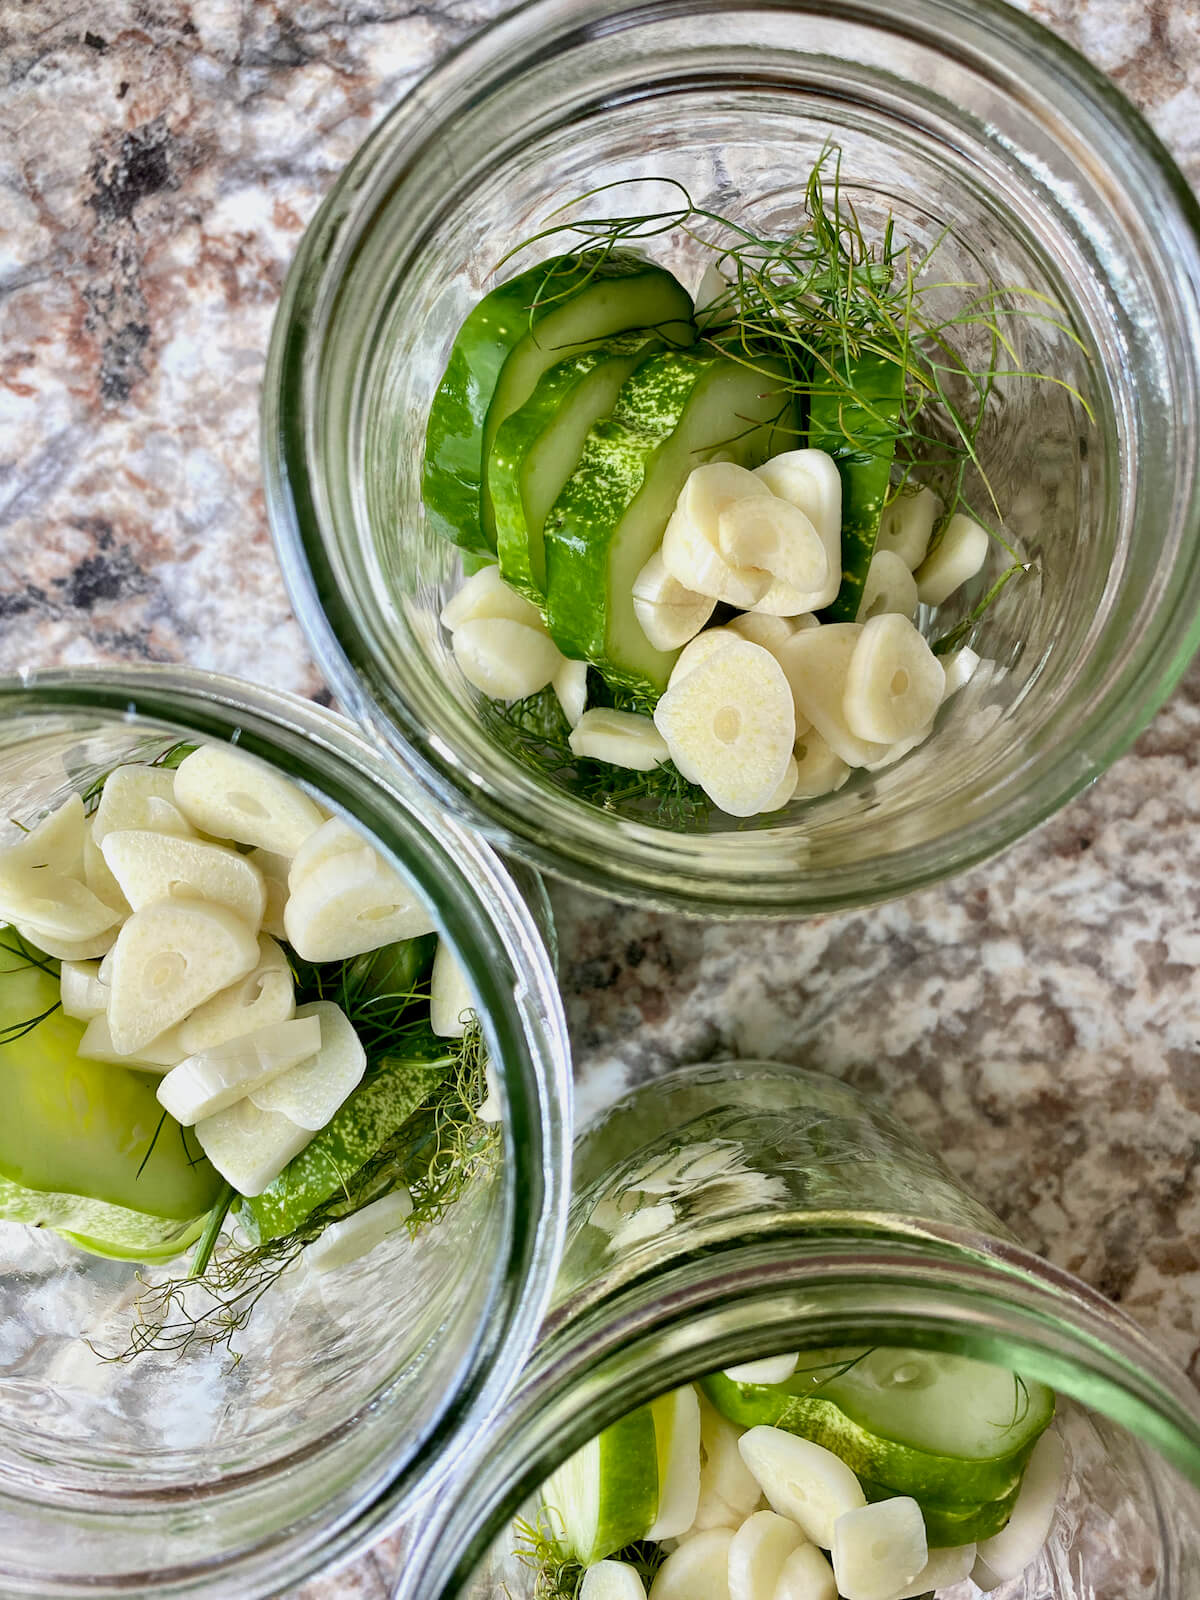
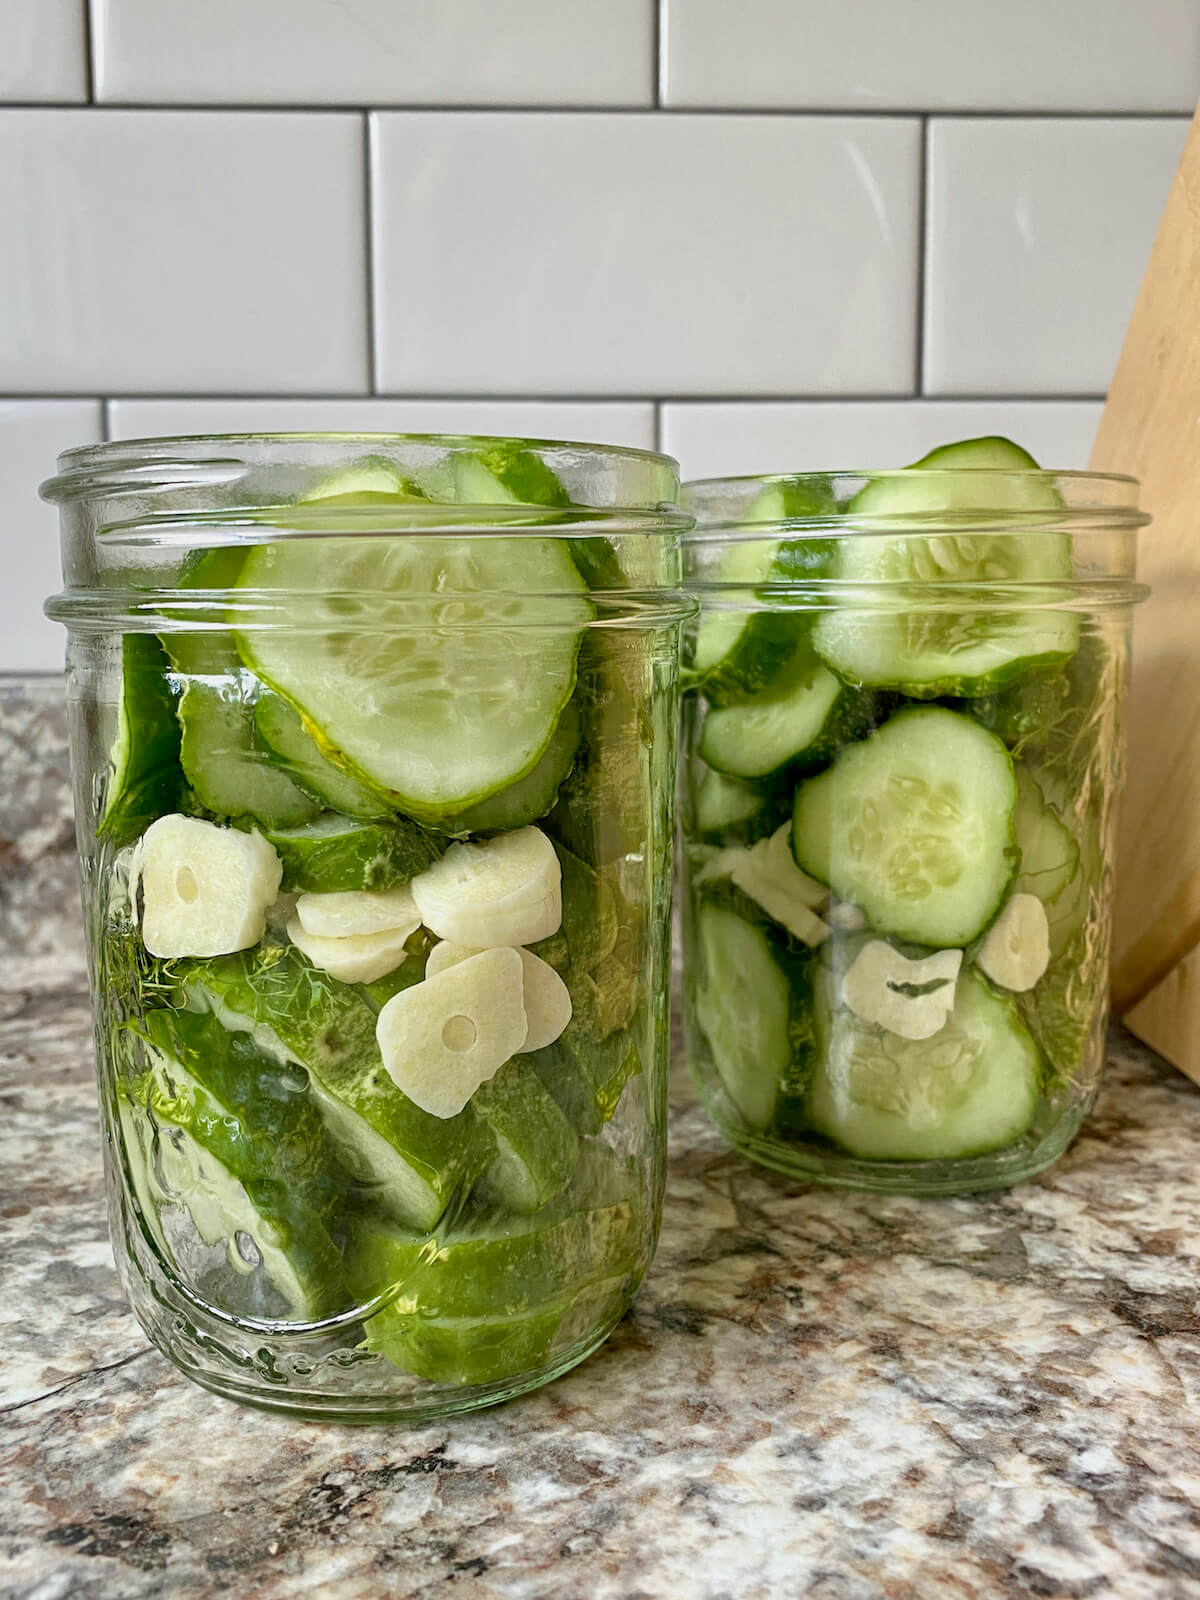
Step 4: Fill the jars. Fill each jar halfway with the cucumber slices, pressing them in tightly. Add 4 cloves of sliced garlic and 5 sprigs of fresh dill to each jar. Continue filling the jars with the remaining cucumber slices until they are almost full. How many cucumbers you can fit will depend on their size, but try to pack them in as much as possible.
Step 5: Add the brining liquid. Pour the vinegar mixture over the cucumbers. Make sure to leave about a ½ inch of space from the top of the jar.
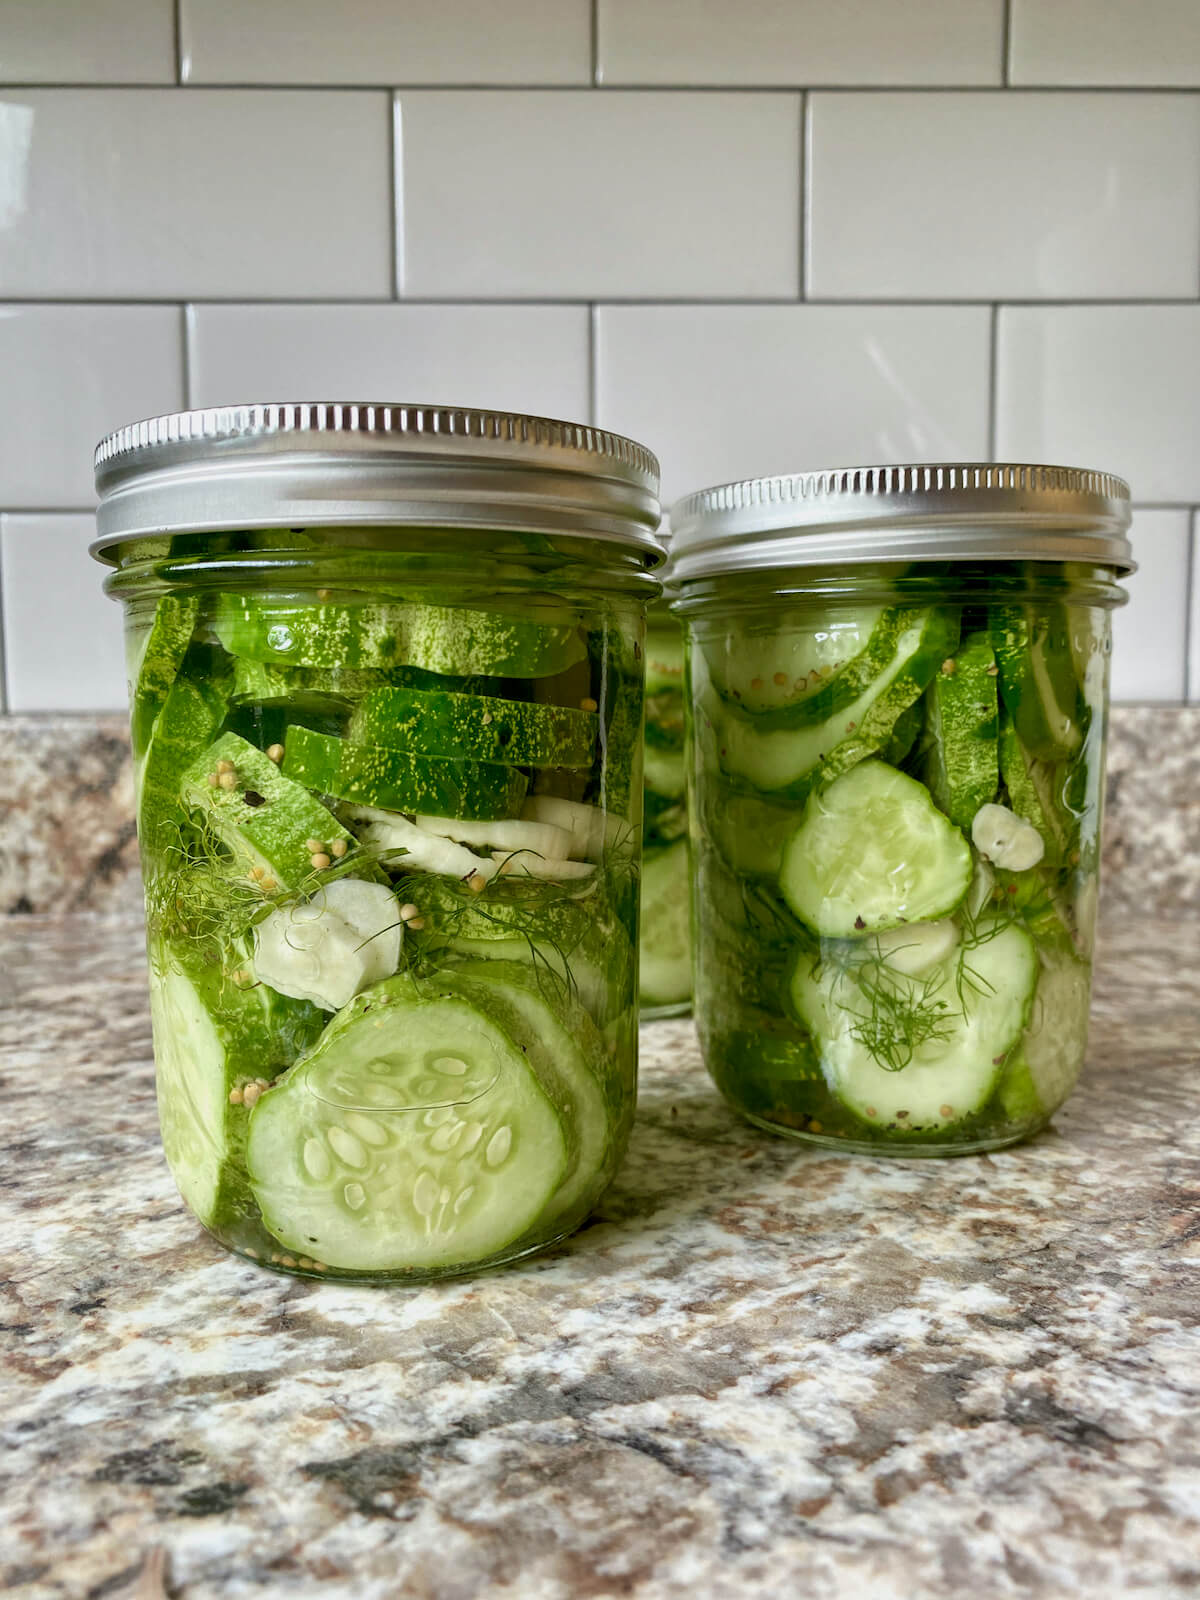
Step 6. Shake the jars. Close the jars tightly with their lids and give them a good shake. This helps ensure that each cucumber slice comes into contact with the brine.

Step 7: Brine the pickles. Store the jars upright in the refrigerator for at least 24 hours, but ideally, wait for 72 hours before enjoying your delicious homemade pickles.
Tips for Success
Make these homemade garlic dill pickles successfully the first time using these tried and true tips.
- Choose fresh, firm cucumbers. Select fresh, firm, and unblemished pickling cucumbers for the best results. Avoid cucumbers that are soft or wrinkled, as they may not retain their crunchiness after pickling.
- Slice the cucumbers uniformly. Use a mandoline slicer or a sharp knife to slice the cucumbers uniformly to about ¼ inch thick.
- Cool the brine to room temperature. If the brine is too hot, you'll end up with mushy pickles. For crunchy dill pickles, cool the brine to about room temperature before pouring it over the cucumber slices.
- Give the jars a shake. Shaking the jars daily for the first 2-3 days ensures even pickling of all of the cucumber slices.
- Brine for 72 hours. While you can eat these pickles after just 24 hours, waiting at least 72 hours will provide the best flavor and texture.
- Label and date the jars. Don't forget to label and date the jars so you know when to use them up by! This is especially helpful if you're growing your own cucumbers and are making several batches of pickles.
Can I make dill pickle spears instead of slices? Of course! Simply cut the pickling cucumbers lengthwise into spears and follow the recipe as is. Keep in mind that spears may need more time to fully pickle.
How to Use Refrigerator Dill Pickles
Eat them straight from the jar as a delicious snack alongside sourdough crackers and hummus. Or add them to burgers, sandwiches, and wraps - try my air fryer turkey burgers.
How to Store
- Refrigerator- Store pickles in the refrigerator in an airtight glass jar for up to 2 months. Remember to label the jars with the preparation date and check for any signs of spoilage.
- Freezer- It's generally not recommended to freeze refrigerator pickles if you want to preserve their original crunchy texture.
How To Tell If Your Refrigerator Pickles Have Gone Bad
- Mold- If you see any signs of mold on the surface of the pickles or floating in the brine, it's an indication that the pickles have gone bad and should be discarded.
- Slimy- Pickles that are slimy or mushy when touched are likely spoiled. Fresh refrigerator pickles should have a mostly firm and crisp texture.
- Cloudy Brine- If the brine appears cloudy instead of clear, it may indicate bacterial growth.
- Smell- A foul or off-putting odor is a strong indication of spoilage. Pickles should have a pleasant, tangy, and aromatic scent.
Make Ahead
This quick dill pickle recipe is ideal for making ahead because the pickles need at least 24 hours to brine before they are ready to eat.
The brining process allows the pickles to absorb the flavors and develop their tangy and aromatic taste. It is recommended to refrigerate the pickles for a minimum of 24 hours, but 72 hours is best for a better flavor.

Quick Tip: A jar of homemade pickles makes a wonderful gift. Whether it's the holiday season or a friend's birthday, you can't go wrong with homemade edible gifts.
Frequently Asked Questions
The pickles are ready to eat after at least 24 hours in the refrigerator, but for the best flavor, it's recommended to wait for at least 72 hours.
Refrigerator pickles are not canned, so they are not suitable for long-term shelf storage like traditional canned pickles. They are best enjoyed within a few months.
Refrigerator pickles can last for 1 to 2 months in the refrigerator when stored properly in an airtight container and submerged in the brine.
Reusing brine for a new batch is not recommended as it may have lost some of its flavors and may not provide the best results for the second batch.
Let's Connect!
Be sure to leave a comment below if you have any questions. You can also connect with me on Instagram, Facebook, Pinterest, or via email at [email protected].

📖 Recipe

Refrigerator Dill Pickles
Equipment
- 16-ounce mason jars
Ingredients
- 1 tablespoon kosher salt
- ½ teaspoon sugar
- ½ teaspoon whole mustard seeds
- ½ teaspoon freshly ground black pepper
- 1 bay leaf crushed
- 2 cups water
- 1 cup white vinegar
- 6-8 pickling cucumbers
- 6-12 cloves garlic thinly sliced, amount according to preference
- 15 sprigs fresh dill
Instructions
- Optional: While not necessary for refrigerator pickles, if you want to extend their shelf life, you can sterilize the mason jars by boiling them in water for 10 minutes.
- In a small saucepan, combine the kosher salt, sugar, mustard seeds, black pepper, and bay leaf. Add the water and white vinegar, and give it a good stir to mix everything together.1 tablespoon kosher salt, ½ teaspoon sugar, ½ teaspoon whole mustard seeds, ½ teaspoon freshly ground black pepper, 1 bay leaf, 2 cups water, 1 cup white vinegar
- Place the saucepan on the stove over medium heat. Whisk the mixture occasionally until the salt and sugar dissolve completely. The liquid does not need to come to a boil. Once dissolved, set the brining liquid aside and allow it to cool completely while you prepare the cucumbers.
- Before slicing the cucumbers, wash them thoroughly under cold running water to remove any dirt or residue. Prepare the pickling cucumbers by slicing them into uniform rounds, approximately ¼ inch thick.6-8 pickling cucumbers
- Fill each jar halfway with the cucumber slices, pressing them in tightly. Add 2-4 cloves of sliced garlic and 5 sprigs of fresh dill to each jar.6-12 cloves garlic, 15 sprigs fresh dill
- Continue filling the jars with the remaining cucumber slices until they are almost full. How many cucumbers you can fit will depend on their size, but try to pack them in as much as possible.
- Pour the brining liquid over the cucumbers. Make sure to leave about a ½ inch of space from the top of the jar. This is called "headspace."
- Close the jars tightly with their lids and give them a good shake. This helps ensure that each cucumber slice comes into contact with the brine.
- Store the jars upright in the refrigerator for at least 24 hours, but ideally, wait for 72 hours before enjoying your delicious homemade pickles. You can shake the jars gently once a day to distribute the flavors evenly and promote even brining.
- If stored properly, refrigerator pickles should stay good for at least 1 to 2 months.
Notes
- Want to make dill pickle spears instead? Simply cut the pickling cucumbers lengthwise into spears and follow the recipe as is. Keep in mind that spears may need more time to fully pickle.
- Quick Tip: Label and date the jars so you know when they were made and how long they're good for.
- Storage: Store in a sealed glass jar in the refrigerator for up to 2 months.


R. Smith says
You said it would make three jars. Are those pint jars or quart jars?
Ashley Petrie, RDN, LDN says
Pint-sized jars! Sorry, that should be in the recipe card. Thanks for letting me know! 🙂
Deborah says
My mom used to can (and still does) refrigerator pickles. They were always so yummy. Thank you for the reminder of how easy they are to make!
Ashley Petrie, RDN, LDN says
Hi Deborah! That's wonderful! They really are so easy and delicious. Thank you for sharing 🙂