These Sourdough Bread Bowls are made with just 4 simple ingredients, including active sourdough starter. Baked in a Dutch oven to crispy perfection, they're great for soup, dips, baked brie, and more.

How cute are these sourdough bread bowls?!
I got the idea to add this recipe to the blog after seeing it pop up as one of the most requested in my sourdough Facebook group.
To keep it simple, I used my basic sourdough bread recipe as the base. I tested dividing the dough into 2, 4, and 6 pieces. I also tried open baking on a pizza stone versus in a Dutch oven.
In the end, I loved the size of 4 bread bowls, but you can make them smaller or larger based on your needs. I also found that baking in a Dutch oven gave the best results - crispy crust and great oven spring. But if you don’t have a Dutch oven or prefer open baking, that works too.
These sourdough bread bowls are perfect for soup. They're also great for dips (like buffalo chicken dip), baked brie, or even as a fun way to serve salads.
I hope you give them a try and enjoy it as much as I do!
Disclaimer: Some links throughout this post are affiliate links. As an Amazon Associate, I earn from qualifying purchases. You can learn more by visiting my Affiliate Disclosure Page.
Ingredients & Substitutions
Here are some notes on key ingredients. For a full list of ingredients, check out the recipe card below.
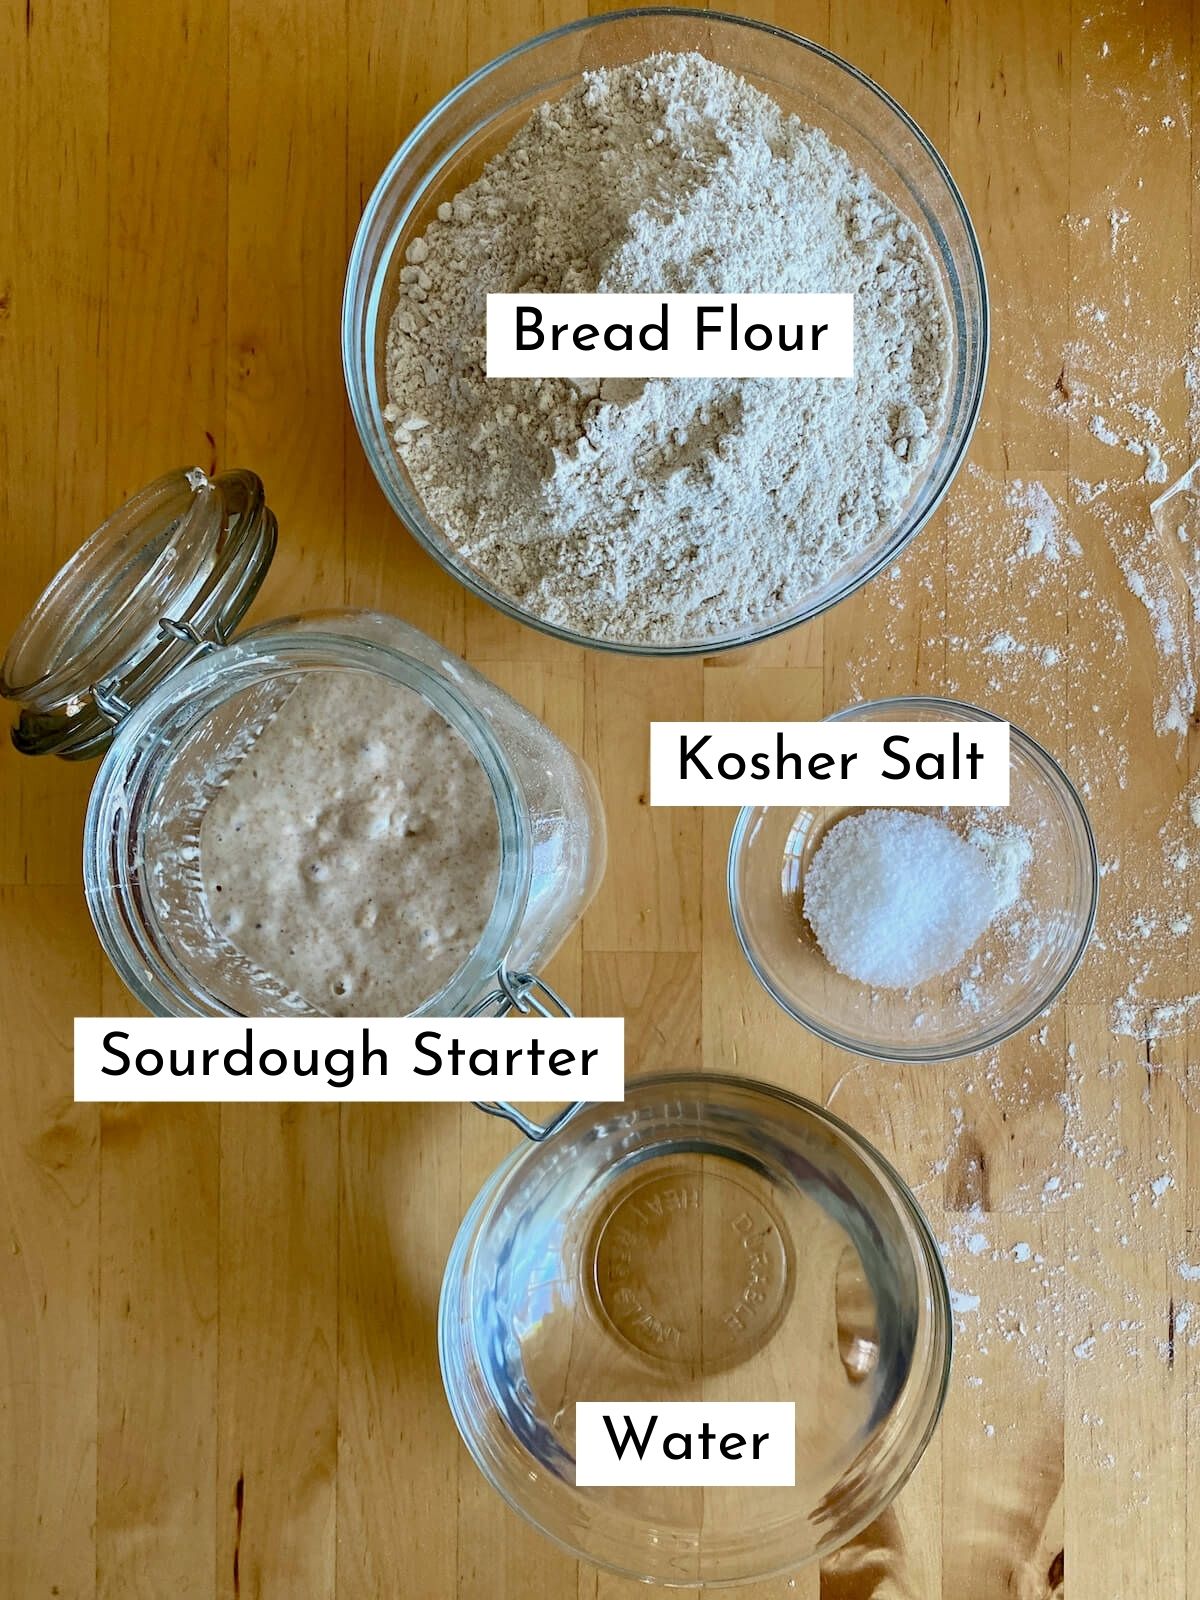
- Active Sourdough Starter- Use a strong, active starter for best results with this recipe. If you prefer to use discard, opt for some that’s only a few days old - just be aware that the dough may take longer to rise.
- Bread Flour- Bread flour gives the bowls a chewy texture and helps them rise higher. If you prefer a softer, less chewy texture, you can use all-purpose flour instead.
- Water- This recipe uses about 65% hydration, which gives you a dough that’s easy to handle and a nice, even crumb. You can adjust the water amount to make the dough drier or wetter, depending on your preference.
- Kosher Salt- Enhances the bread's flavor. I use Diamond Crystal Kosher Salt (8.4 grams per tablespoon). If using table salt or Morton's, measure by weight or use roughly half the amount by volume.
Tips for Success
- Measure ingredients by weight. Use a kitchen scale for accuracy, especially for flour and water, to ensure the right dough hydration.
- Use active sourdough starter. For the best results, use an active sourdough starter. If you want to use discard, opt for some that is only a few days old and keep in mind that it may take longer for your dough to rise.
- Find a warm spot to rise. Let the dough rise in a warm (but not hot) place to speed up fermentation, especially in cooler weather.
- Build tension when shaping. When shaping, create surface tension on the dough without tearing it. This helps the bread bowls rise up rather than spread out in the oven.
- Bake in batches if needed. If your Dutch oven is small, bake the bowls in batches, keeping the unbaked dough refrigerated until you're ready to bake.
- Cool completely. Wait at least one hour before cutting and using the bread bowls to avoid a dense, gummy texture.
How to Make Sourdough Bread Bowls
Here is how to make homemade bread bowls with sourdough starter.
1. Feed Sourdough Starter
- Feed your sourdough starter 6-12 hours before starting. It should be bubbly and active by the time you're ready to bake.
- In cooler kitchens (around 65-68°F), it might take 10-12 hours. In warmer kitchens (around 75°F), it might take just 6 hours.

2. Mix the Dough
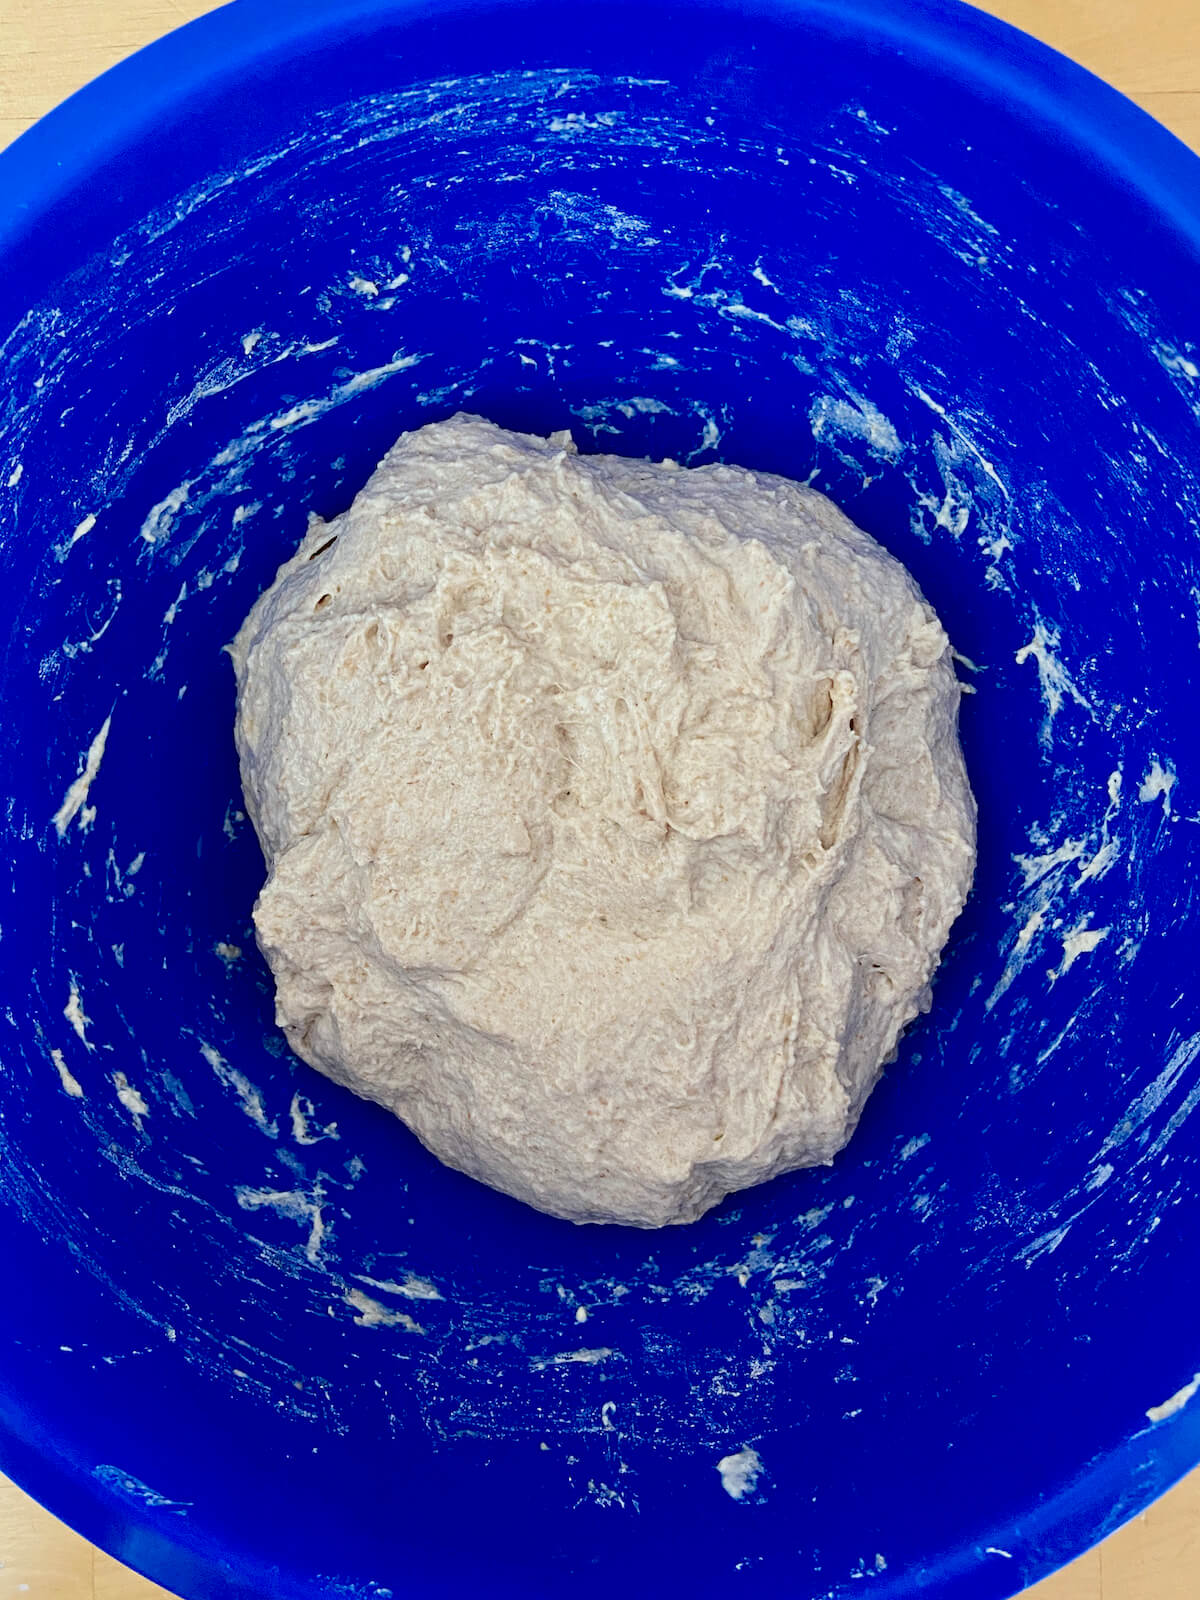
- In a large mixing bowl, combine the bread flour, warm water (80-90°F), active sourdough starter, and kosher salt.
- Mix with your hands for about 5 minutes until everything is fully combined.
- Cover the bowl and let the dough rest for 20 minutes.
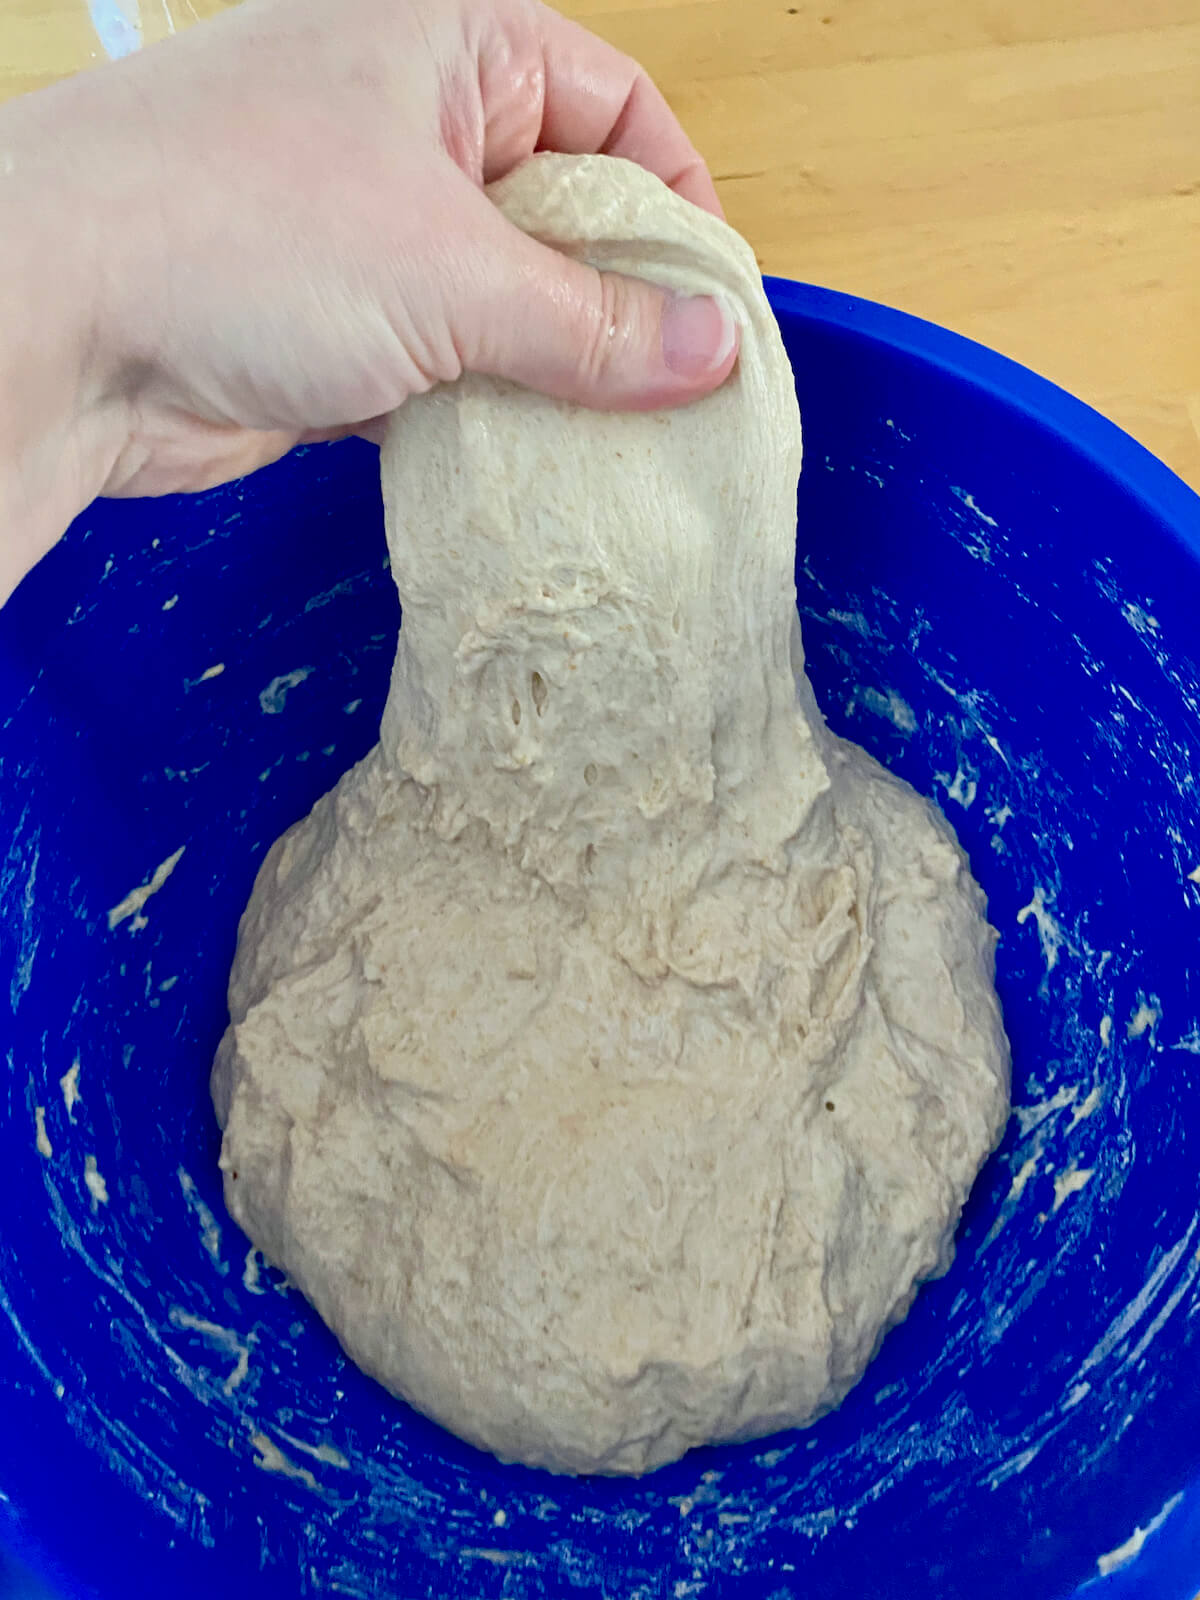
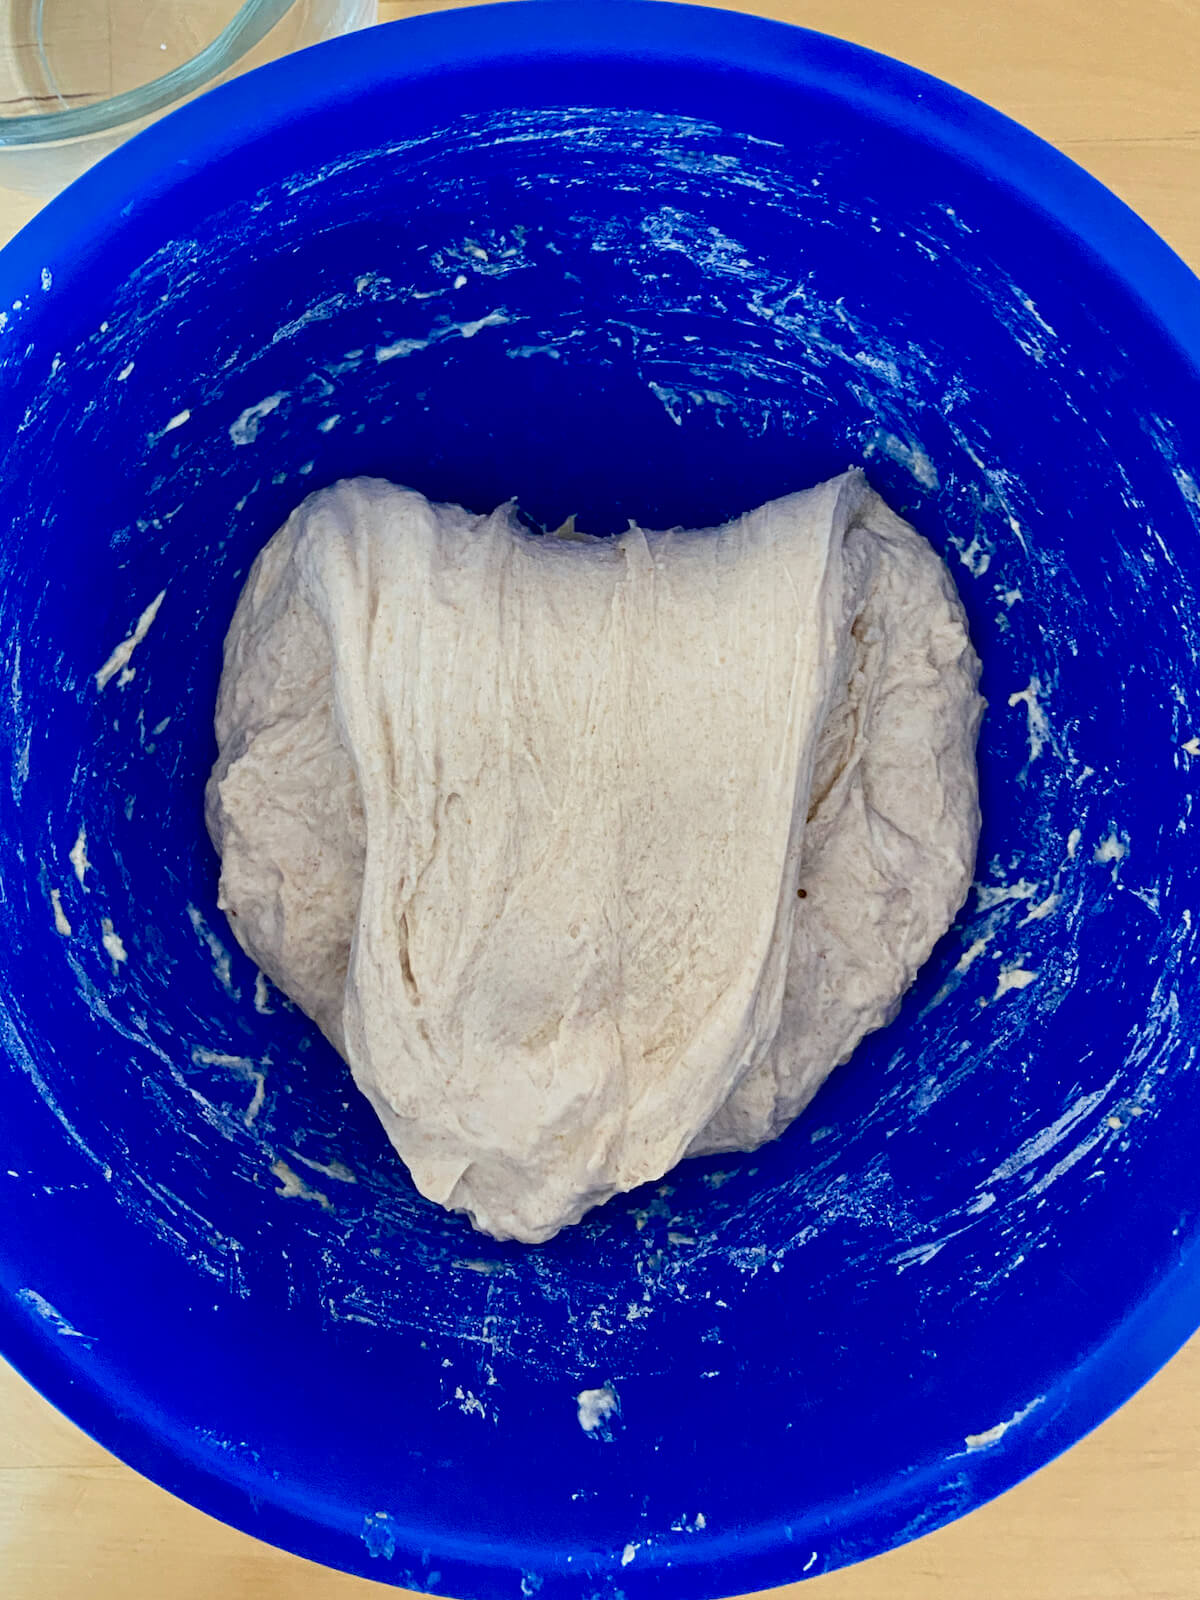
3. Stretch and Fold
- Lightly wet your hands to prevent sticking.
- Grab one edge of the dough, stretch it up without tearing it, then fold it over the top of the dough.
- Rotate the bowl 90° and repeat on all four sides. After completing all four folds, gather the dough into a ball, flip it seam-side down, and cover it.
- Let it rest for 20 minutes.
- Repeat this stretching and folding process 3 more times (for a total of 4 rounds), allowing 20-minute rests between each round.
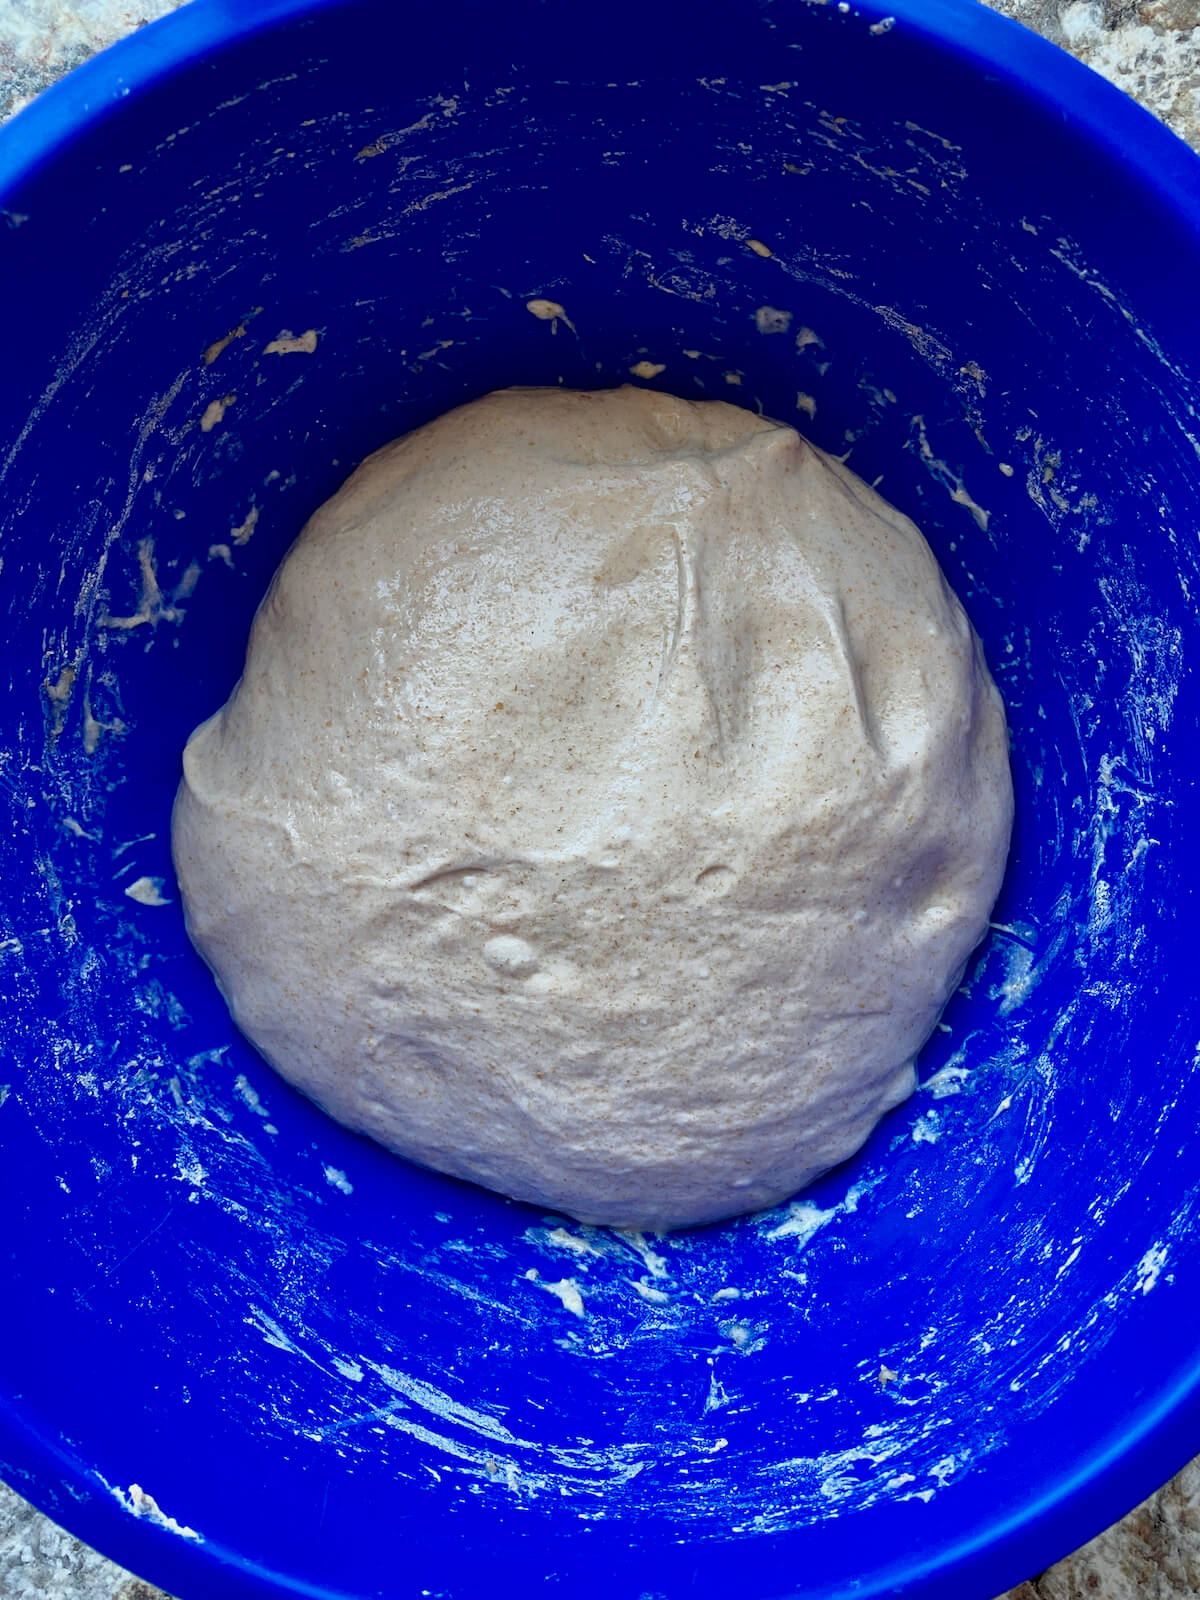
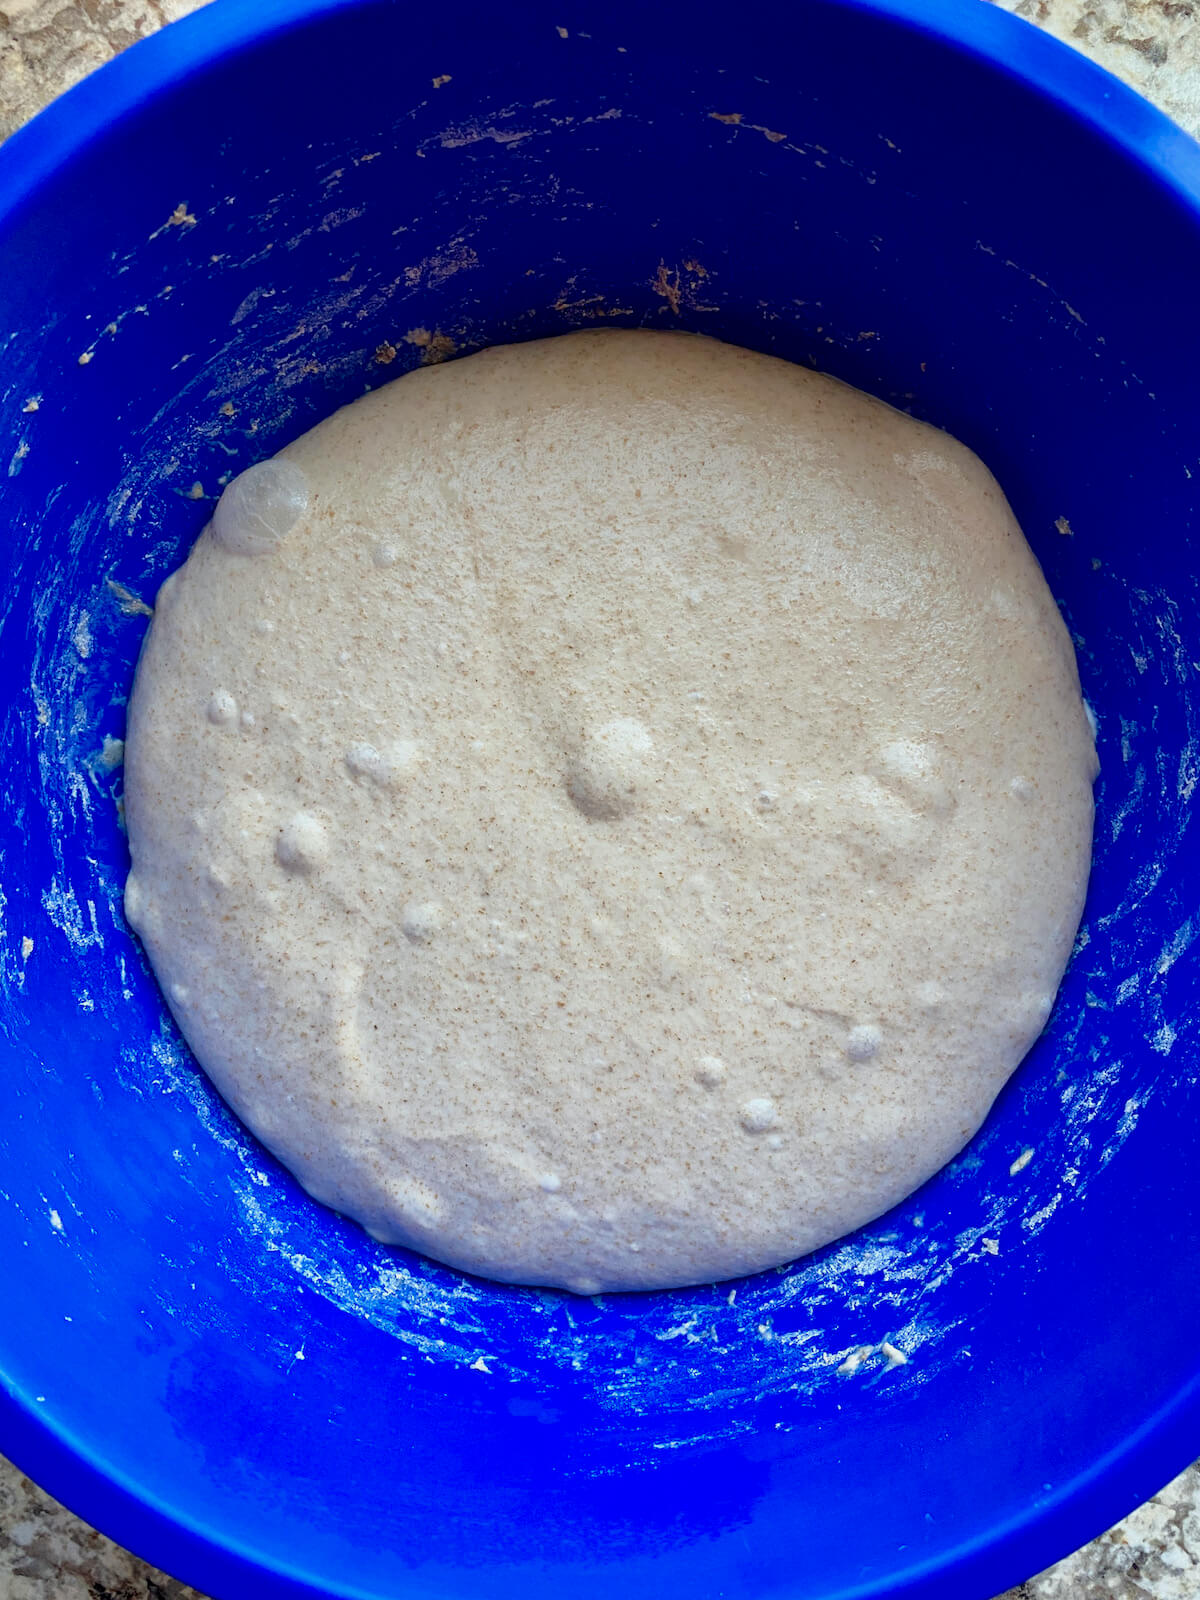
4. Bulk Fermentation
- Cover the dough and let it rise until it doubles in size and develops visible fermentation bubbles on the surface.
- The rise time can vary, taking anywhere from 4 to 8 hours or more, depending on the temperature of the dough and your kitchen, and the strength of your starter.
- For an easy way to track its progress, use a straight-sided container and mark the starting level of the dough.
5. Shape
- Turn the fermented dough out onto a lightly floured surface.
- Divide it into 2-6 equal pieces, depending on the size of the bread bowls you want.
- To shape each piece, fold the edges into the center, pinch them together, then flip the dough ball seam-side down. Roll the dough on the counter to create surface tension and seal the seam.


6. Cold Proof
- Line your proofing baskets (or small bowls) with a clean tea towel and dust them generously with rice flour to prevent sticking.
- Place the shaped dough balls seam-side up in the baskets. If needed, pinch the seams to seal them.
- Cover the baskets and place them in the refrigerator for a cold proof overnight (12-16 hours).

7. Bake the Bread
- Preheat a lidded Dutch oven to 450°F, heating for an additional 30-60 minutes once the oven reaches temperature.
- Remove the dough from the refrigerator. Turn each dough out onto individual squares of parchment paper.
- Score a long line down the center of each dough ball.
- Add 2 ice cubes to the preheated Dutch oven to create steam. Carefully transfer the dough (with parchment paper) into the hot Dutch oven.
- Cover the Dutch oven with its lid and bake at 450°F for 25 minutes.
- After 25 minutes, remove the lid and bake for an additional 5-10 minutes, or until the crust is golden brown.
- Transfer the baked bread bowls to a wire rack and let them cool for at least 1 hour before cutting or serving.


Baker's Timeline
Here is an example of a schedule you can use to make these sourdough bread bowls.
- 8:00 PM (Night Before): Feed your starter.
- 8:00 AM: Mix the dough.
- 8:30-10:00 AM: Stretch and fold.
- 10:00 AM-4:00 PM: Bulk fermentation.
- 4:00-4:30 PM: Shape.
- 4:30 PM-8:00 AM (Next Day): Cold proof.
- 8:00-8:30 AM: Bake.
- 8:30-9:30 AM: Cool.
Note: Rise times will vary depending on the strength of your starter and the temperature of your kitchen and dough. It's best to use visual cues from your starter and dough rather than sticking to a strict timeline.
How to Store
Allow the bread bowls to cool completely before storing them. Once cooled, place them in a paper bag or wrap them loosely in a clean kitchen towel. Store at room temperature for up to 2-3 days.
For longer storage, freeze bread bowls for up to 3 months. To freeze, wrap each bread bowl tightly in plastic wrap or aluminum foil. Place the wrapped bread bowls in a freezer-safe bag or airtight container.
When ready to enjoy, thaw at room temperature or heat them in the oven at 350°F for about 10-15 minutes to restore their crusty texture.


Are you tired of watching your sourdough discard go to waste?
It’s time to turn excess discard into something delicious with my new ebook - Everyday Sourdough!
Inside, you’ll find 27 tried-and-true sourdough discard recipes that will transform your leftover starter into mouthwatering creations your family and friends will love.
No more guilt about wasting your discard - with Everyday Sourdough, you have endless options to quickly make something amazing anytime.
Let's Connect!
Be sure to leave a comment below if you have any questions. You can also connect with me on Instagram, Facebook, Pinterest, or via email at [email protected].


📖 Recipe

Sourdough Bread Bowls
Equipment
- Mini proofing baskets or small bowls lined with tea towels
Ingredients
- 4 ¼ cups (510 grams) bread flour
- 1 ¼ cups + 2 tablespoons (330 grams) warm water 80-90℉
- ½ cup (100 grams) active sourdough starter
- 3 ½ teaspoons (10 grams) Diamond Crystal Kosher Salt
- Rice flour for proofing baskets
- Ice cubes for steam
Instructions
- Feed your sourdough starter 6-12 hours before starting. It should be bubbly and active by the time you're ready to bake. In cooler kitchens (around 65-68°F), it might take 10-12 hours. In warmer kitchens (around 75°F), it might take just 6 hours.
- In a large mixing bowl, combine the bread flour, warm water (80-90°F), active sourdough starter, and kosher salt. Mix with your hands for about 5 minutes until everything is fully combined. Cover the bowl and let the dough rest for 20 minutes.4 ¼ cups (510 grams) bread flour, 1 ¼ cups + 2 tablespoons (330 grams) warm water, ½ cup (100 grams) active sourdough starter, 3 ½ teaspoons (10 grams) Diamond Crystal Kosher Salt
- Lightly wet your hands to prevent sticking. To develop gluten, perform a “stretch and fold.” Grab one edge of the dough, stretch it up without tearing it, then fold it over the top of the dough. Rotate the bowl 90° and repeat on all four sides. After completing all four folds, gather the dough into a ball, flip it seam-side down, and cover it. Let it rest for 20 minutes. Repeat this stretching and folding process 3 more times (for a total of 4 rounds), allowing 20-minute rests between each round.
- Cover the dough and let it rise until it doubles in size and develops visible fermentation bubbles on the surface. The rise time can vary, taking anywhere from 4 to 8 hours or more, depending on the temperature of the dough and your kitchen, and the strength of your starter. For an easy way to track its progress, use a straight-sided container and mark the starting level of the dough.
- Turn the fermented dough out onto a lightly floured surface. Divide it into 2-6 equal pieces, depending on the size of the bread bowls you want. To shape each piece, fold the edges into the center, pinch them together, then flip the dough ball seam-side down. Roll the dough on the counter to create surface tension and seal the seam.
- Line your proofing baskets (or small bowls) with a clean tea towel and dust them generously with rice flour to prevent sticking. Place the shaped dough balls seam-side up in the baskets. If needed, pinch the seams to seal them. Cover the baskets and place them in the refrigerator for a cold proof overnight (12-16 hours).Rice flour
- The next day, place a lidded Dutch oven inside the oven and preheat it to 450°F. Let the Dutch oven heat for an extra 30-60 minutes once the oven reaches temperature.
- When you’re ready to bake, remove the dough from the refrigerator. Depending on the size of your Dutch oven, you may need to bake in batches - keep any unbaked dough in the refrigerator until you're ready to use it. Turn the dough out from the proofing baskets onto small individual squares of parchment paper. Use a lame (or a sharp knife) to score a long line down the center of each dough ball. Add 2 ice cubes to the preheated Dutch oven to create steam. Carefully transfer the doughs, with the parchment paper, into the hot Dutch oven.Ice cubes
- Cover the Dutch oven with its lid and bake at 450°F for 25 minutes. After 25 minutes, remove the lid and bake for an additional 5-10 minutes, or until the crust is golden brown.
- Transfer the baked bread bowls to a wire rack and let them cool for at least 1 hour before cutting or serving.
Notes
- Storage: Store uncut bread bowls at room temperature for 2-3 days or freeze for up to 3 months.
Lynn says
This is one of my favorite sourdough recipes! I make two mini loaves, and they are perfect every time. If I used add-ins, is there anything I should do differently, and at which point do I add the ingredients?
Ashley Petrie, RDN, LDN says
Hi Lynn! I’m so glad you love the recipe 🥰 For add-ins, I usually mix them in during the stretch and folds so they get well incorporated into the dough. That said, some ingredients (like cinnamon) are better added during shaping since they can slow down fermentation. It really depends on what you’re adding! Hope this helps 🙂