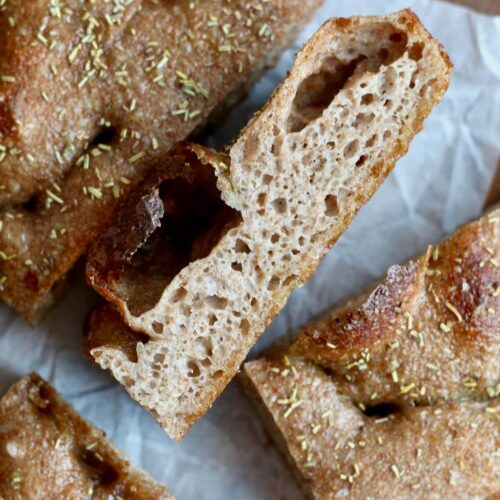
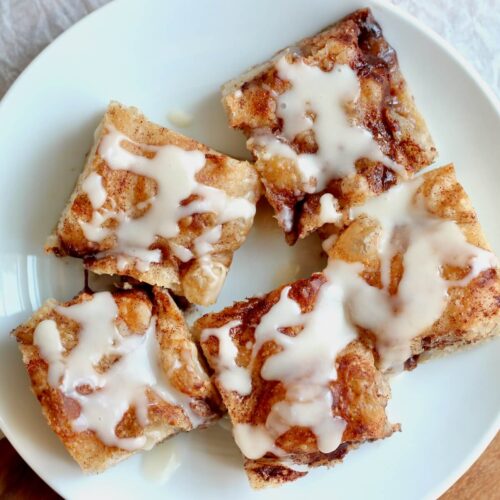
This Sourdough Discard Focaccia is light and fluffy with big beautiful bubbles and a crispy, golden brown crust. Made with just five ingredients, it can be prepared the same day or fermented overnight for a tangier flavor.

If you're new to sourdough and feeling a bit intimidated by baking a loaf of sourdough bread, sourdough focaccia is a great place to start.
Its fermentation is more forgiving than traditional sourdough, and you don't need to worry about any complex shaping techniques.
My sourdough focaccia recipe can be made using either sourdough discard or active starter. The high-hydration dough yields a light, airy focaccia bread with a crispy, golden brown crust.
But the best part? You can start the dough in the morning and bake it by dinner, or refrigerate it overnight for better flavor and convenience.
So, if you're looking for an easy sourdough discard focaccia recipe that delivers fluffy, crusty bread every time, read on to learn exactly how I make mine!
Disclaimer: Some links throughout this post are affiliate links. As an Amazon Associate, I earn from qualifying purchases. You can learn more by visiting my Affiliate Disclosure Page.
Ingredients & Substitutions
Here are some notes on key ingredients. For a full list of ingredients, check out the recipe card below.
- Sourdough Starter Discard- Use either sourdough discard or active sourdough starter to make this sourdough focaccia recipe. If using discard, make sure it's less than a week old to ensure you get the best rise.
- Bread Flour- The extra gluten-forming proteins in bread flour produce a light and airy sourdough focaccia with a wonderfully chewy texture. While the texture will be slightly different, all-purpose flour can also be used.
- Water- This recipe uses a high-hydration dough (90% water) to create a light and airy focaccia with large bubbles. Initially, the dough will seem more batter-like, but as you develop gluten with a few sets of stretch and folds, it will start to have more structure.
- Olive Oil- Olive oil adds flavor to focaccia and keeps it from sticking to the pan. Choose the highest quality extra virgin olive oil available to you.
- Kosher Salt- Enhances the flavor of the dough. I like to sprinkle a little extra on top as well, along with my herbs and olive oil.
- Herbs- Fresh or dried rosemary is a classic choice for focaccia. Feel free to choose whichever herbs you like best.

Choosing the Size of Your Baking Pan
Choosing the size of your baking pan will depend on your preference for the thickness and texture of your sourdough focaccia. Here are a few options to help you decide:
- 9"x13" Baking Pan: Ideal for a thicker focaccia with crispy edges and a soft, fluffy interior.
- Half Sheet Pan (18"x13"): Produces a thinner focaccia with more crispy edges - perfect for making sandwiches!
- Two 8"x8" Square Pans: Great for making thicker focaccia and experimenting with different toppings on each.
Tips for Success
- Use fresh sourdough discard. For the best rise, choose discard that is less than a week old.
- Wet your hands. Keep your hands wet when handling the dough to prevent it from sticking and to make stretching and folding easier.
- Use an aluminum baking pan. Aluminum baking pans produce a more evenly baked focaccia with a crispy, golden brown crust on every surface.
- Line the pan with parchment paper. Lining the bottom of the baking pan with parchment paper adds a little extra insurance against sticking.
- Proof overnight for more flavor. For a more pronounced sourdough flavor, refrigerate the dough overnight after spreading it in the pan.
- Get creative with toppings. Focaccia can be topped with just about anything you'd like! Try it with garlic, summer garden veggies, or turn it into a focaccia pizza with tomato sauce and cheese.
How to Make Sourdough Discard Focaccia
Here is how to make focaccia with sourdough starter discard.
Step 1: Mix the dough. In a large mixing bowl, combine the bread flour, warm water, sourdough starter discard, and kosher salt until well mixed. The dough will have a batter-like consistency. Cover and let it rest for 15 minutes.

Step 2: Stretch and folds. Wet your hand and grab one edge of the dough. Pull it up and over itself. Rotate the bowl 90 degrees and repeat up to 16 times around the bowl. Cover and rest for 15 minutes. Repeat this stretching and folding process 5 more times (6 sets total) every 15 minutes. Alternatively, use a stand mixer with a dough hook for faster kneading.
Step 3: Bulk fermentation. Add 2 tablespoons of olive oil to a clean bowl. Transfer the dough to the oiled bowl, ensuring it doesn't stick to the sides. Brush some oil on top of the dough. Cover and let it rise at room temperature until doubled, about 4 hours in a 75°F kitchen.


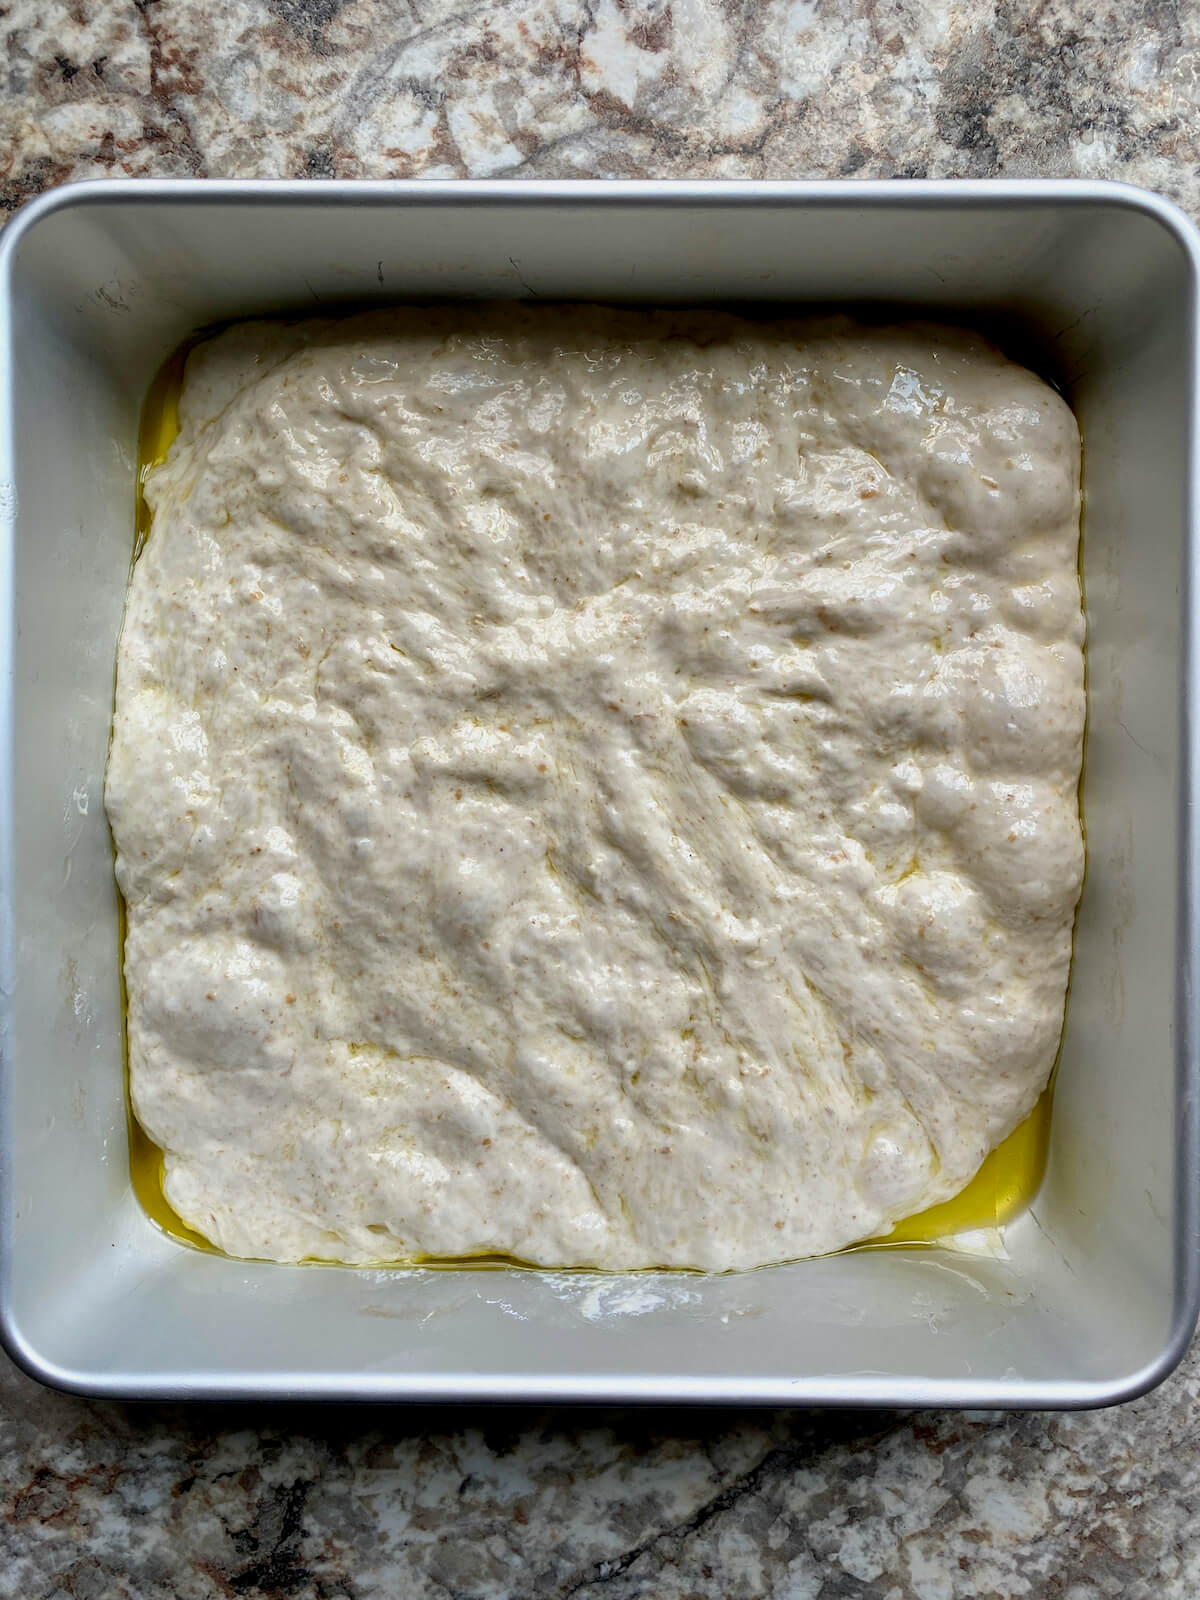
Step 4: Transfer dough to baking pan. Line your baking pan(s) with parchment paper and oil it with 2 more tablespoons of olive oil. Transfer the dough to the prepared pan. Use your fingers to gently spread it out. If it springs back, let it rest for 10 minutes and try again.
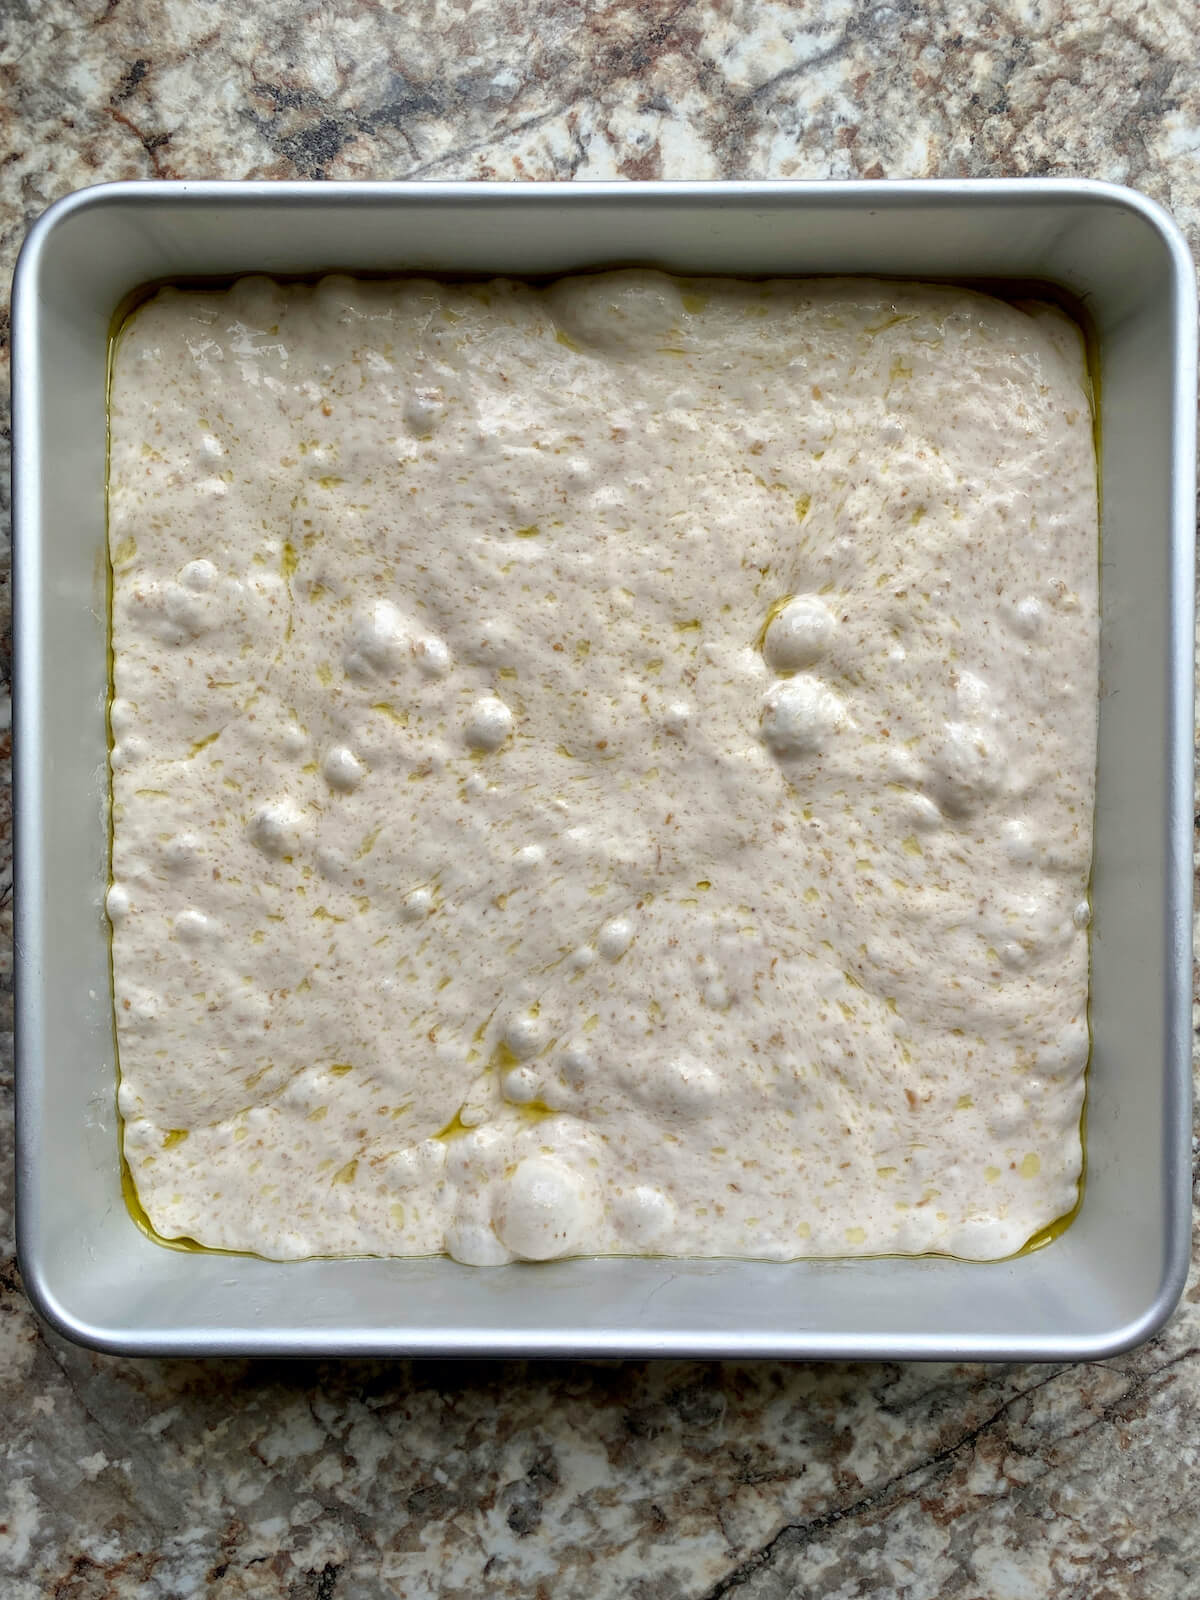
Step 5: Proof. Cover the dough and let it proof until noticeably puffy, about 2 hours. For a tangier flavor, refrigerate overnight after spreading in the pan, then allow it to warm to room temperature and proof for 2-4 hours before baking.
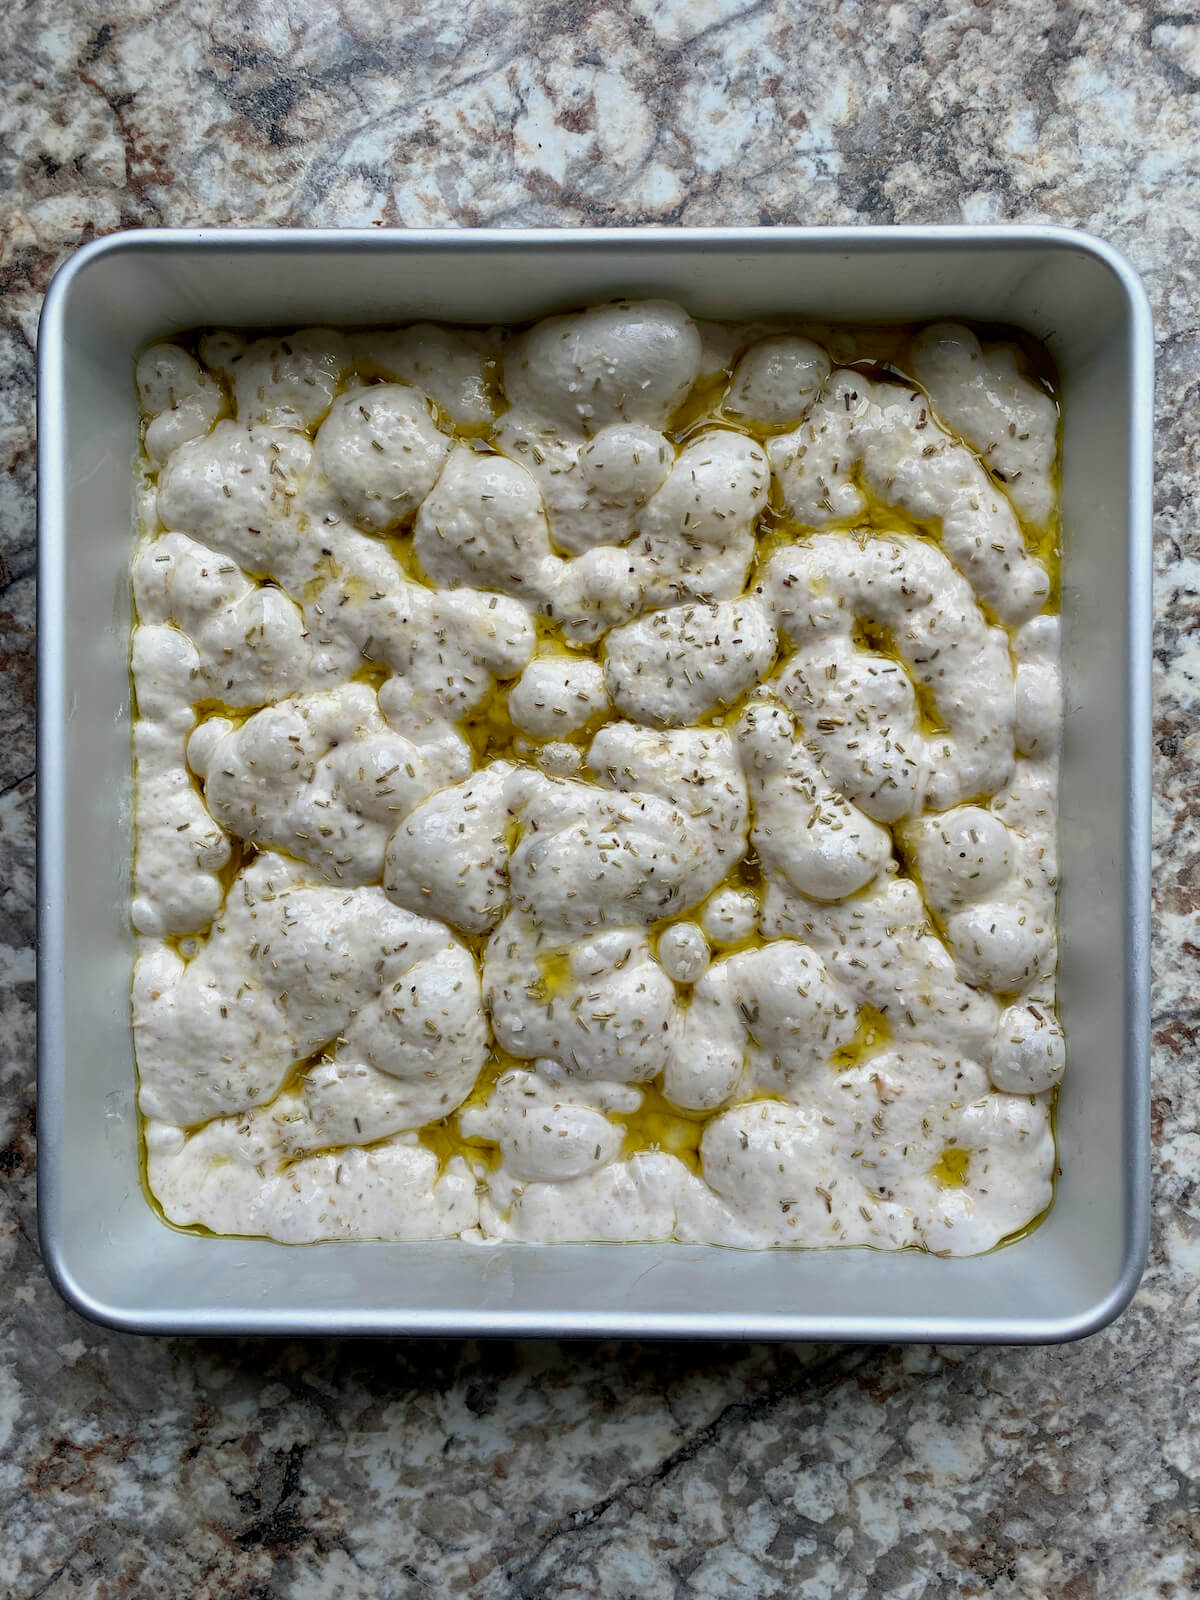
Step 6: Poke the dough. About 20 minutes before baking, preheat the oven to 375°F and adjust the rack to the middle position. Lightly oil your hands and use your fingertips to poke the dough all over to redistribute air bubbles.
Step 7: Add toppings and bake. Drizzle the top of the focaccia with the remaining 2 tablespoons of olive oil. Sprinkle with kosher salt and herbs of your choice. Bake in the preheated oven for 25-30 minutes until golden brown on top.
Step 7: Cool and serve. Allow the focaccia to cool in the pan for 10 minutes before removing. Cut into pieces and serve warm.

Storage
Store completely cooled sourdough discard focaccia in an airtight container at room temperature for up to 2 days or freeze for up to 3 months.
To reheat: Wrap leftover focaccia in aluminum foil and warm it in a 350°F for about 10 minutes.

What to Serve with Sourdough Discard Focaccia
Sourdough focaccia is the perfect side dish for a variety of meals. Here are a few of my favorites:
- Soups- Minestrone, tomato basil, or chicken noodle soup.
- Salads- Caesar, spinach caprese, or strawberry goat cheese salad.
- Pasta Dishes- Meatballs, bolognese, alfredo, or classic marinara with homemade sourdough pasta.

Are you tired of watching your sourdough discard go to waste?
It’s time to turn excess discard into something delicious with my new ebook - Everyday Sourdough!
Inside, you’ll find 27 tried-and-true sourdough discard recipes that will transform your leftover starter into mouthwatering creations your family and friends will love.
No more guilt about wasting your discard - with Everyday Sourdough, you have endless options to quickly make something amazing anytime.
Let's Connect!
Be sure to leave a comment below if you have any questions. You can also connect with me on Instagram, Facebook, Pinterest, or via email at [email protected].
More Sourdough Focaccia Recipes

📖 Recipe

Sourdough Discard Focaccia
Equipment
- 9"x13" aluminum baking pan (or an 18"x13" half sheet pan for thinner focaccia; or two 8"x8" aluminum baking pans), glass or ceramic may also be used
- Parchment paper optional
Ingredients
- 500 grams (4 cups + 3 tablespoons) bread flour
- 450 grams (1 ¾ cups + 2 tablespoons) warm water 80-90℉
- 100 grams (½ cup) sourdough starter discard less than one week old (or active sourdough starter)
- 10 grams (2 ½ teaspoons) kosher salt plus more for sprinkling on top
- 6 tablespoons extra virgin olive oil divided
- Fresh or dried herbs for sprinkling on top
Instructions
- In a large mixing bowl, combine the bread flour, warm water, sourdough starter discard, and kosher salt until well mixed. The dough will have a batter-like consistency. Cover and let it rest for 15 minutes.500 grams (4 cups + 3 tablespoons) bread flour, 450 grams (1 ¾ cups + 2 tablespoons) warm water, 100 grams (½ cup) sourdough starter discard, 10 grams (2 ½ teaspoons) kosher salt
- Wet your hand and grab one edge of the dough. Pull it up and over itself. Rotate the bowl 90 degrees and repeat up to 16 times around the bowl. Cover and rest for 15 minutes. Repeat this stretching and folding process 5 more times (6 sets total) every 15 minutes. Alternatively, knead using a stand mixer with a dough hook attachment on medium-low speed for 10-15 minutes or until the dough is smooth and elastic.
- Add 2 tablespoons of olive oil to a clean bowl. Transfer the dough to the oiled bowl, ensuring it doesn't stick to the sides. Brush some oil on top of the dough. Cover and let it rise at room temperature until doubled, about 4 hours in a 75°F kitchen.
- Line your baking pan(s) [one larger pan or two 8"x8" pans] with parchment paper and oil it with 2 more tablespoons of olive oil. Transfer the dough to the prepared pan. Use your fingers to gently spread it out. If it springs back, let it rest for 10 minutes and try again.
- Cover the dough and let it proof until noticeably puffy, about 2 hours. For a tangier flavor, refrigerate overnight after spreading in the pan, then allow it to warm to room temperature and proof for 2-4 hours before baking.
- About 20 minutes before baking, preheat the oven to 375°F and adjust the rack to the middle position. Lightly oil your hands and use your fingertips to poke the dough all over to redistribute air bubbles.
- Drizzle the top of the focaccia with the remaining 2 tablespoons of olive oil. Sprinkle with kosher salt and herbs of your choice. Bake in the preheated oven for 25-30 minutes until golden brown on top.10 grams (2 ½ teaspoons) kosher salt, 6 tablespoons extra virgin olive oil, Fresh or dried herbs
- Allow the focaccia to cool in the pan for 10 minutes before removing. Cut into pieces and serve warm.
Notes
- Storage: Store cooled leftover focaccia in an airtight container at room temperature for up to 2 days or freeze for up to 3 months.

Morticia says
Imperial measurements would be appreciated. Thank you!
Ashley Petrie, RDN, LDN says
Hi Morticia - thank you for the suggestion! Since I test all of my recipes in grams, that's generally how I write my recipes as well. However, I have started providing imperial measurements on some of my recipes already and will update this one to do the same. I appreciate you visiting my blog! 🙂
LC says
Is it necessary to use an aluminum pan or would a glass baking dish work as well?
Ashley Petrie, RDN, LDN says
You can use a glass pan no problem! It might not crisp up and brown as evenly, but will still be perfectly delicious. Hope this helps! 🙂
T. Houchins says
What about stoneware?
Ashley Petrie, RDN, LDN says
I haven’t tested this recipe in stoneware, but it should still bake fine! The texture might be a little different since stoneware doesn’t conduct heat as quickly as aluminum, so the bottom may not get as crispy. You might also need to adjust the baking time slightly. If you try it, I’d love to hear how it goes!
Allana says
Hi, sorry I haven't tried this recipe yet. I will in a minute. I was reading these comments and seen a question about using stoneware. Well, this placed me down a wee rabbit hole, lol. As I've made two focaccia in a dish that we've had for many many years. Not really knowing what it was made of. I suspected it was stoneware and low and behold it is! Apparently it's even vintage; like me, lol. Both times its come out awesome! I will admit the first time was a little stuck but I just used a metal spatula and it was nice and crisp. The second time I used enough olive oil and didn't have a problem. I'm new to all this amazing and fun sourdough journey! I started my wild yeast July 7, 2025 and so far I've learned sooo much. Hubby and our neighbours thought my focaccia was delicious! I'm excited that google suggested this blog and looking forward to visiting all of your wonderful recipes! And, thank you for this recipe. I'm off to make this with my discard! Yippie!
Ashley Petrie, RDN, LDN says
Hi Allana! So glad your vintage stoneware is working well — that’s awesome! Welcome to the sourdough world, and I’m excited you’re giving this focaccia a try. Can’t wait to hear how it turns out! Yippie indeed! 😊
Ashley says
This is my second time preparing this focaccia and it’s delicious! My husband devoured it last time. I’m adding some halved cherry tomatoes this round with rosemary and garlic salt. I’m sure it will be a hit again. Great recipe!
Ashley Petrie, RDN, LDN says
Hi Ashley! I'm so glad you and your husband enjoy it! 🙂
Robin Thompson says
When using a stand mixer how long and at what speed?
Ashley Petrie, RDN, LDN says
Hi Robin! I’d recommend mixing on medium to medium-low speed until the dough transforms from a cake batter-like texture to something smoother and more elastic - this usually takes about 10-15 minutes. Be gentle, but work it enough to build gluten strength so it can hold onto those big, airy bubbles. Hope that helps!
Brooke says
Im in the process of making this but when I was kneading the dough it seemed really wet and wouldn't come together I put in the olive oil bowl to double but it doesn't look like it will rise ? Any idea what could have gone wrong ?
Ashley Petrie, RDN, LDN says
Hi Brooke! This focaccia dough is meant to be super wet (90% hydration), so it needs plenty of stretching and folding to build up that gluten network. It starts out kind of like cake batter but should turn into a smooth, elastic (but still pretty slack) dough as you go. If it’s not quite coming together, you could toss it in a stand mixer with a dough hook for a bit to help. Also just make sure you’re using bread flour - it has the higher gluten content that really helps. Hope that clears things up!
Sarah Shafer says
Well poop, maybe that's my issue. I use AP flour almost exclusively. It's definitely not looking good and my mixer is in the dishwasher after making brownies yesterday. Lol. Fingers crossed!!!
Ashley Petrie, RDN, LDN says
Hi Sarah! AP flour can work, but bread flour is best for focaccia since it has more protein, which helps with structure and chew. If your dough seems extra slack, giving it a few extra stretch and folds can help. At least you have brownies lol! Hope it turned out! 🤞
Maura says
Can I half this recipe?
Ashley Petrie, RDN, LDN says
Hi Maura! Yes, you absolutely can halve this recipe. When I do, I usually bake it in an 8x8" square pan or in a cake pan. Hope this helps! 🙂
Meagan says
Normally I measure by grams but I went with the cup measurements this go around since they were provided and when I first mixed it together it was SO DRY. It said it'd be a batter like consistency but mine was clumpy with chunks of flour that still didn't have enough hydration. What did I do wrong?
Ashley Petrie, RDN, LDN says
Hi Meagan! I provide cup measurements for those who don’t have a scale, but if you do, I strongly recommend weighing your ingredients in grams since it’s much more accurate, especially with flour. It sounds like there may have been too much flour in the dough, which can happen if the flour was packed into the measuring cup rather than lightly spooned in and leveled off. If this happens again, you can add a little extra water, a tablespoon at a time, until you reach the batter-like consistency. Hope that helps!
Danielle says
I went by the recipe and although it tasted great it was a bit dense and did not brown well on top. What do you think I did wrong?
Ashley Petrie, RDN, LDN says
Hi Danielle! It sounds like your dough might have been a little underproofed. It may have needed more time for bulk fermentation or proofing in the pan. If your starter is still on the newer side, it might just need more time to build strength for a better rise. Hope this helps! 🙂
Evelyn McChesney says
Can I half this recipe and just make one 8x8 pan?
Ashley Petrie, RDN, LDN says
Hi Evelyn! Yes, you absolutely can - I do this all the time! 🙂
Brittny says
This recipe is easy to follow. I used the base then added apples and cinnamon right before baking which came out delicious. Will definitely be making moee.
Ashley Petrie, RDN, LDN says
That sounds amazing! I love the idea of adding apples and cinnamon. So glad you enjoyed it and will be making more! 😊
Gail S says
After 4 hours the dough had doubled but it was so liquidy when I put it in a tin. Not sure that this is going to turn out. That was a lot of water in this recipe. Instead of stretches I used the mixer with the dough hook for kneading using the recommended time of 15-20 minutes on Medium . (Actually it was so liquidy after I put all the ingredients together, not sure I could do stretches). I did use All purpose flour.
Ashley Petrie, RDN, LDN says
Hi Gail! High hydration doughs like this focaccia rely on the extra protein in bread flour to build a strong gluten network, which helps create the right dough consistency. If you’re using all-purpose flour instead, you might try reducing the water a bit, kneading more gently and for a shorter time, and keeping in mind that the texture of the baked focaccia may turn out a little different. Hope this helps! 🙂
Samantha Miller says
Excellent focaccia! It was my first time making it. I chose to do the method with the stand mixer for 10-15 min and then I did the overnight in the refrigerator option - it came out very yummy and was easy enough, especially with the mixer! The dough was more hydrated than I expected but it still turned out well. I also used an 11x15 glass baking dish and that worked just fine (it’s all I have).
Ashley Petrie, RDN, LDN says
Hi Sam! Yay so glad you tried it! Thanks for sharing and good to know the glass dish worked too! 🙂
Alison Green says
#MarchSourdoughBakingChallenge
I made the Focaccia for the first time and hubby loved it.
I will definitely be making it again. Before refrigerating the dough, I spread it in a 10x14 casserole with olive oil. I did refrigerate the dough from 9:30 pm through the following afternoon about 3:30 pm. I brought it to room temperature, dimpled it with more olive oil sprinkled it very well with Trader Joe Sofritto Italian seasoning.
Ashley Petrie, RDN, LDN says
Hi Alison! I’m so glad you and your husband enjoyed the focaccia, and I appreciate you sharing your process. The Trader Joe's Sofritto Italian seasoning sounds like it would be so good, too! 🙂
Sherry says
Loved how this turned out! I’m a novice. Just started a month ago and this is idiot proof! Try it, you will love it!
Ashley Petrie, RDN, LDN says
That’s awesome, Sherry! I love hearing that it turned out so well for you - especially since you’re new to sourdough! Focaccia is such a fun and forgiving bake. Thanks for giving it a try and sharing your experience! 🙂
Alison Green says
#MarchSourdoughBakingChallenge
This is the Focaccia I made but didn’t know how to post both the pictures and the hashtag at the same time. It was my first attempt to make Focaccia ever and it did not disappoint! I used Trader Joe’s Sofritto Italian seasoning.
Alison Green says
This recipe was very easy to follow and I will be making it again soon. It was absolutely delicious.
#MarchSourdoughBakingChallenge
Andrea Brooks says
Super soft dough, easy to work with and came out great.
Ashley Petrie, RDN, LDN says
Hi Andrea! So glad you enjoyed 🙂
Katerine says
I mixed my dough and it was batter like, really liquid looking. I was not able to get it to be smooth and elastic even after 15 mins in the stand mixer. I decided to move to step 3 and it has been 5 hours and my dough has not risen at all. I decided to try kneading it again and it has not changed after an hour of stretch and folds. Any advice on how I can save the dough I have left for something else? I am not sure how others have had success with this recipe.
Ashley Petrie, RDN, LDN says
Hi Katherine! I'm so sorry you're having trouble with the dough. Super frustrating! This is a high hydration dough (90%), so it will feel very wet and loose. If it’s not building strength and becoming elastic, it could be from a mismeasurement, a not-very-active starter, or if a lower protein flour was used (for example, if all-purpose is used in place of bread flour). At this point, you could try frying pieces of the dough in a little olive oil like flatbreads or pancakes — it won’t be focaccia, but it should still taste great!
Joanna Friederich says
Thank you for this recipe! I have made it 3 times now and it will easily become a staple in my home. I never discard my feedings, so this is a life saver/ life enchantment lol thanks
Ashley Petrie, RDN, LDN says
Aww I’m so glad to hear it’s become a staple for you, Joanna! This made my day! I love that it helps you use up your starter without any waste—that’s the best. Thanks so much for the kind words and 5-star rating! 💛
Kin says
I am just getting ready to bake this bread. We are going to have it for dinner, later today. Should I just leave it in the pan until we eat it? Or cut it and remove?
Thanks
Kim
Ashley Petrie, RDN, LDN says
Hi Kim! You can definitely leave it in the pan if that’s easier, especially if you’re serving it soon. Just keep in mind that the bottom may stay a bit softer that way. If you’d prefer a crispier bottom, you can transfer it to a wire rack to cool. Either way, hope you all enjoyed it—it makes such a great addition to dinner!
Ellen says
This tasted amazing. Used Italian herb and mozzarella cheese. My only issue.. The oil didn't absorb completely. My oven runs hot so I dropped the temp about 25 degrees. Should I keep the high heat, I read that could have been the issue.
Ashley Petrie, RDN, LDN says
Hi Ellen! I’m so glad you enjoyed the flavor—Italian herbs and mozzarella sound amazing! If the oil didn’t absorb completely, it could be from lowering the oven temp since a hotter oven helps the dough puff up and soak in the oil. Also, the fat from the mozzarella might’ve added to the overall oiliness, making it harder for the dough to absorb it all. If you try it with cheese again, you could use a little less oil and see if that helps. Would love to hear how your next round goes!
Kathryn says
I have this in the fridge for an overnight ferment and hoping to use it for pizza tonight. Any suggestions on how to bake it with pizza toppings (sauce, herbs, meats)? So far this has been an easy recipe to follow. It’s my first time making focaccia.
Ashley Petrie, RDN, LDN says
Hi Kathryn! Yes—let the dough come to room temp before adding toppings (about 1–2 hours out of the fridge). Once it's relaxed, dimple it all over with oiled fingers, then add your sauce, cheese, and toppings. Bake at 375°F for 25–30 minutes, and if the toppings start to brown too quickly, you can loosely cover it with foil for the last 5–10 minutes. Can’t wait to hear how it turns out!
Brandi says
I absolutely love this recipe. At first I was worried it wouldn't turn out as it was very wet. I put trust in the process and so glad I did.
I did the overnight version. It came out so delicious. Crunchy on the outside and pillowy soft on the inside. 10/10 would recommend.
Ashley Petrie, RDN, LDN says
Hi Brandi! I love hearing that you trusted the process and it paid off! That crunchy outside and soft inside combo is why I love this recipe too. Thanks so much for your kind review and recommendation! 🙂
Amanda says
Hello, could I ferment this in the fridge for longer than overnight? Like e days?
Ashley Petrie, RDN, LDN says
Hi Amanda! Yes, you can ferment this for 2-3 days in the refrigerator for a more pronounced flavor and better schedule flexibility. Hope this helps! 🙂
Kaitlin S. says
Just finished making this focaccia and it was delish and fluffy!! It was my first sourdough discard recipe. I made it with truffle salt and rosemary. Only issue I ran into was it did not brown very much and I had to cook it for 45 mins to get it to an internal temp of 190. I did use stoneware and had to sub avocado oil for the recipe, none the less… it was delish!
Ashley Petrie, RDN, LDN says
Thanks so much, Kaitlin! I’m so glad you loved it — truffle salt and rosemary sound amazing. The lighter browning and longer bake time could have been a mix of a few things. Stoneware heats more slowly than a metal pan, so it can take longer for the bottom and edges to crisp and color. Fermentation can also play a role — if the dough is a bit under-proofed, it hasn’t developed enough surface sugars to caramelize well, and if it’s over-proofed, some of those sugars get used up by the yeast, which can also lead to a paler crust. Even with those tweaks, it sounds like it turned out fluffy and delicious — I love that this was your first sourdough discard recipe! Thanks for sharing 🙂
Alexandra says
When using a stand mixer is that just at the first mix or you can use it at each stretch and fold?
Ashley Petrie, RDN, LDN says
Hi Alexandra! You can use your stand mixer in place of the stretch and folds — just gently knead the dough on low or medium-low speed until it’s smooth and elastic.
Kelly says
Hi, I made this exactly as described last week and it turned out great. I’m wondering about using the mixer with dough hook in the future. Do I just do the 10-15 mins once and cut out the two hours of folding and resting and go right into the four hour rise? Thanks!
Ashley Petrie, RDN, LDN says
Hi Kelly! I’m so glad it turned out well! Yes — if you use a stand mixer with a dough hook, you can knead it for 10–15 minutes just once until the dough is smooth and elastic, and you can skip the stretch-and-fold steps. After that, just move straight into the bulk rise. Hope that helps! 🙂
Lisa Uguccioni says
My Focaccia is so flat. I did use the dough hook for 15 minutes. Is that correct? I can’t figure out why I can’t make it rise more. Flavor is delicious!
Ashley Petrie, RDN, LDN says
Hi Lisa,
I’m so glad you loved the flavor! A few things could be affecting the rise. Since this is a high-hydration focaccia, the dough should be wet and stretchable but elastic—not overly sticky—when it’s properly kneaded. Using the dough hook for 15 minutes at medium-low speed is usually fine, but I’d be curious what speed you used. Overkneading can sometimes break down the gluten.
A few other things to check: how old was your discard, how long did you give the dough to rise, and what’s the temperature of your kitchen? If the discard is too old or your starter in general is pretty new, it can struggle to give the dough a good rise. On the other hand, if it overproofed, it could collapse a bit.
Let me know if any of this helps or if you have any more questions! 🙂
Melissa says
Its been 6.5 hours and no signs of rising....this has always been my issue. I don't know what I'm doing wrong. I feel like i have a healthy starter and i raised the heat in my house and placed my dough in my microwave for a warmer environment.....I cannot figure this out!!!
Ashley Petrie, RDN, LDN says
Hi Melissa! How old is your starter and what type of flour do you feed it? When I first made my starter, I couldn't get anything to rise either. It would bubble but my loaves kept turning out underproofed. I started feeding it whole wheat flour and that made it strong enough to actually get my first well-risen loaf. I have a blog post about it here if you want more info: https://enwnutrition.com/strengthen-sourdough-starter/
Liz says
Hi Ashley!! I need help 😭
I’m making this recipe now, and I’m using my stand mixer to knead. I used my kitchen scale for the ingredients, but after 15 minutes of kneading the dough it’s still cake batter consistency… I checked my bread flour and appt it expired last week… could this have been the cause? I hate to waste, can I still bake this?
Ashley Petrie, RDN, LDN says
Hi Liz! I don't think the flour being close to exp would cause it. My guess is either it still hasn't developed enough gluten structure or the opposite and excessive kneading could have caused the gluten network to break down. How fast was your stand mixer kneading? If you think it's underdeveloped, try doing some gentle stretch and folds or coil folds instead of the mixer. You can definitely still bake it, it just might not rise much or be super bubbly but will definitely still be edible.
Liz says
I mixed it at setting 4 which I think is medium low for 15 minutes, and then I tried setting 6 for like only 5 minutes bc I got scared of over kneading it… I’ll definitely try the stretch n folds the next attempt! I just baked this first one, it turned out kind of like naan hehe
Ashley Petrie, RDN, LDN says
Haha kind of like naan is still a win! 🙂