• Skip to main content
  • Skip to primary sidebar

Everyday Homemade

menu icon
go to homepage
  • About
  • All Sourdough Recipes
  • Sourdough Bread
  • Sourdough Discard
  • Recipe eBooks + Resources
    • Facebook
    • Instagram
    • Pinterest
  • subscribe
    search icon
    Homepage link
    • About
    • All Sourdough Recipes
    • Sourdough Bread
    • Sourdough Discard
    • Recipe eBooks + Resources
    • Facebook
    • Instagram
    • Pinterest
  • ร—
    Home ยป Recipes

    Blog

    Sourdough Avocado Toast

    May 12, 2025

    This Sourdough Avocado Toast is a healthy option for breakfast or brunch. Made with homemade sourdough bread, creamy avocado, and customized with your favorite toppings.

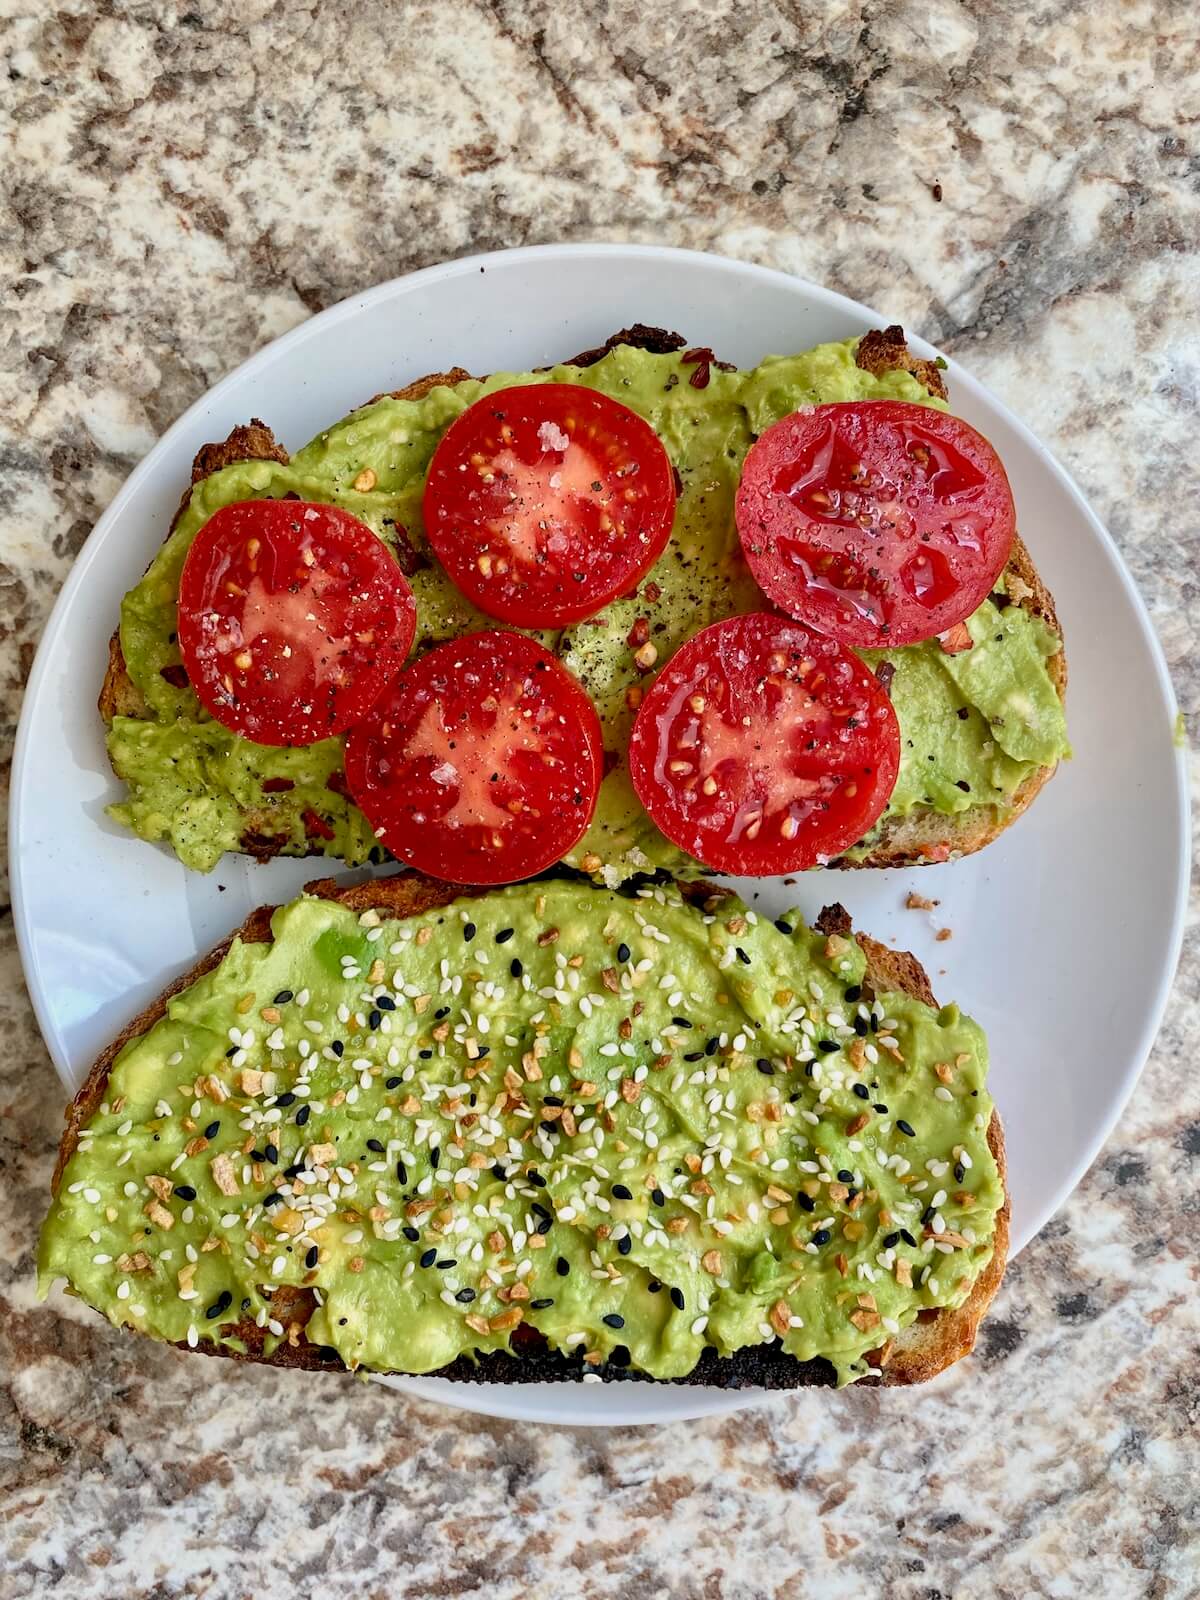
    Two pieces of sourdough avocado toast on a small plate. One is topped with everything bagel seasoning and the other is topped with fresh tomato slices and seasonings.

    Does it get any more classic brunch than avocado toast?

    If youโ€™re a sourdough baker like me, you have to try it on toasted homemade sourdough. Itโ€™s simple, satisfying, and so good.

    All you need is one ripe avocado mashed with a pinch of sea salt and a little lemon juice. Spread it over two slices of toasted sourdough bread, and thatโ€™s your base.

    From there, itโ€™s all about how you want to top it!

    Keep it simple with everything bagel seasoning or red pepper flakes. Or get a little fancy with smoked salmon and capers, or a fried egg and crispy bacon.

    Itโ€™s easy to scale up, too. If youโ€™ve got friends coming over for brunch, it makes a fun little DIY avocado toast bar.

    I hope you give it a try and love it as much as I do!

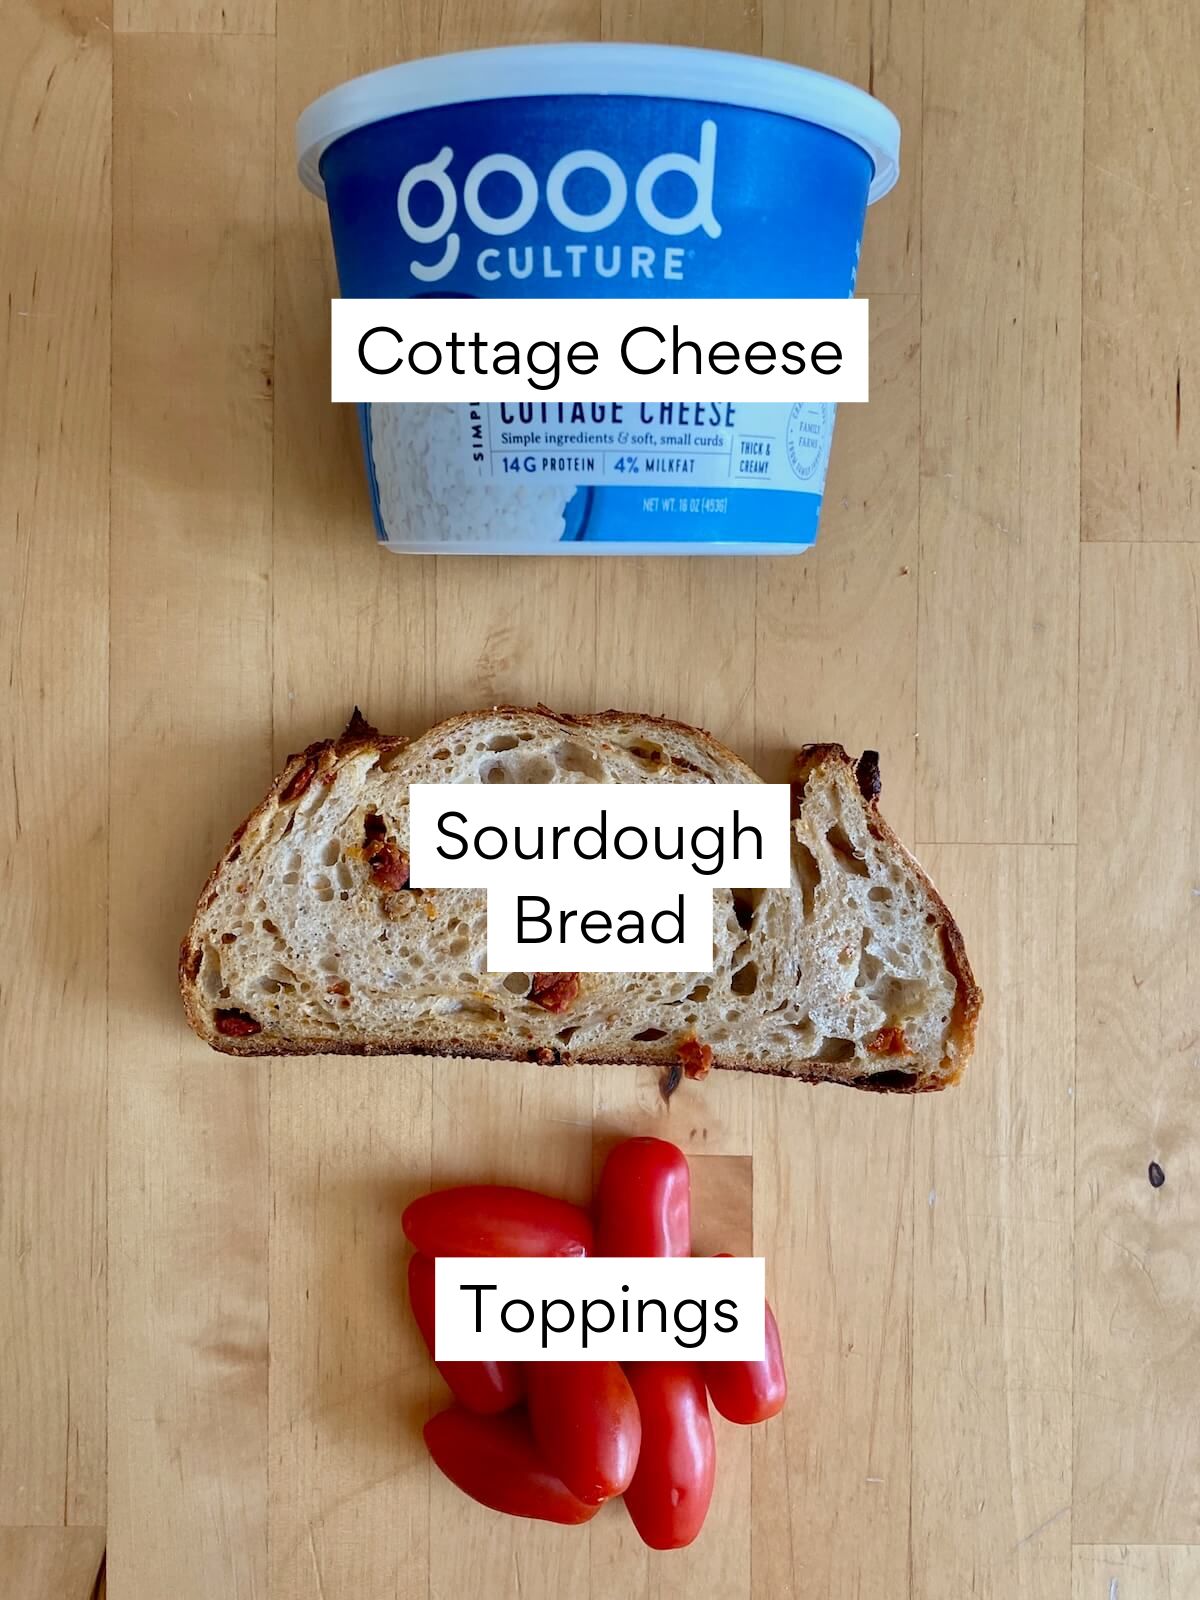
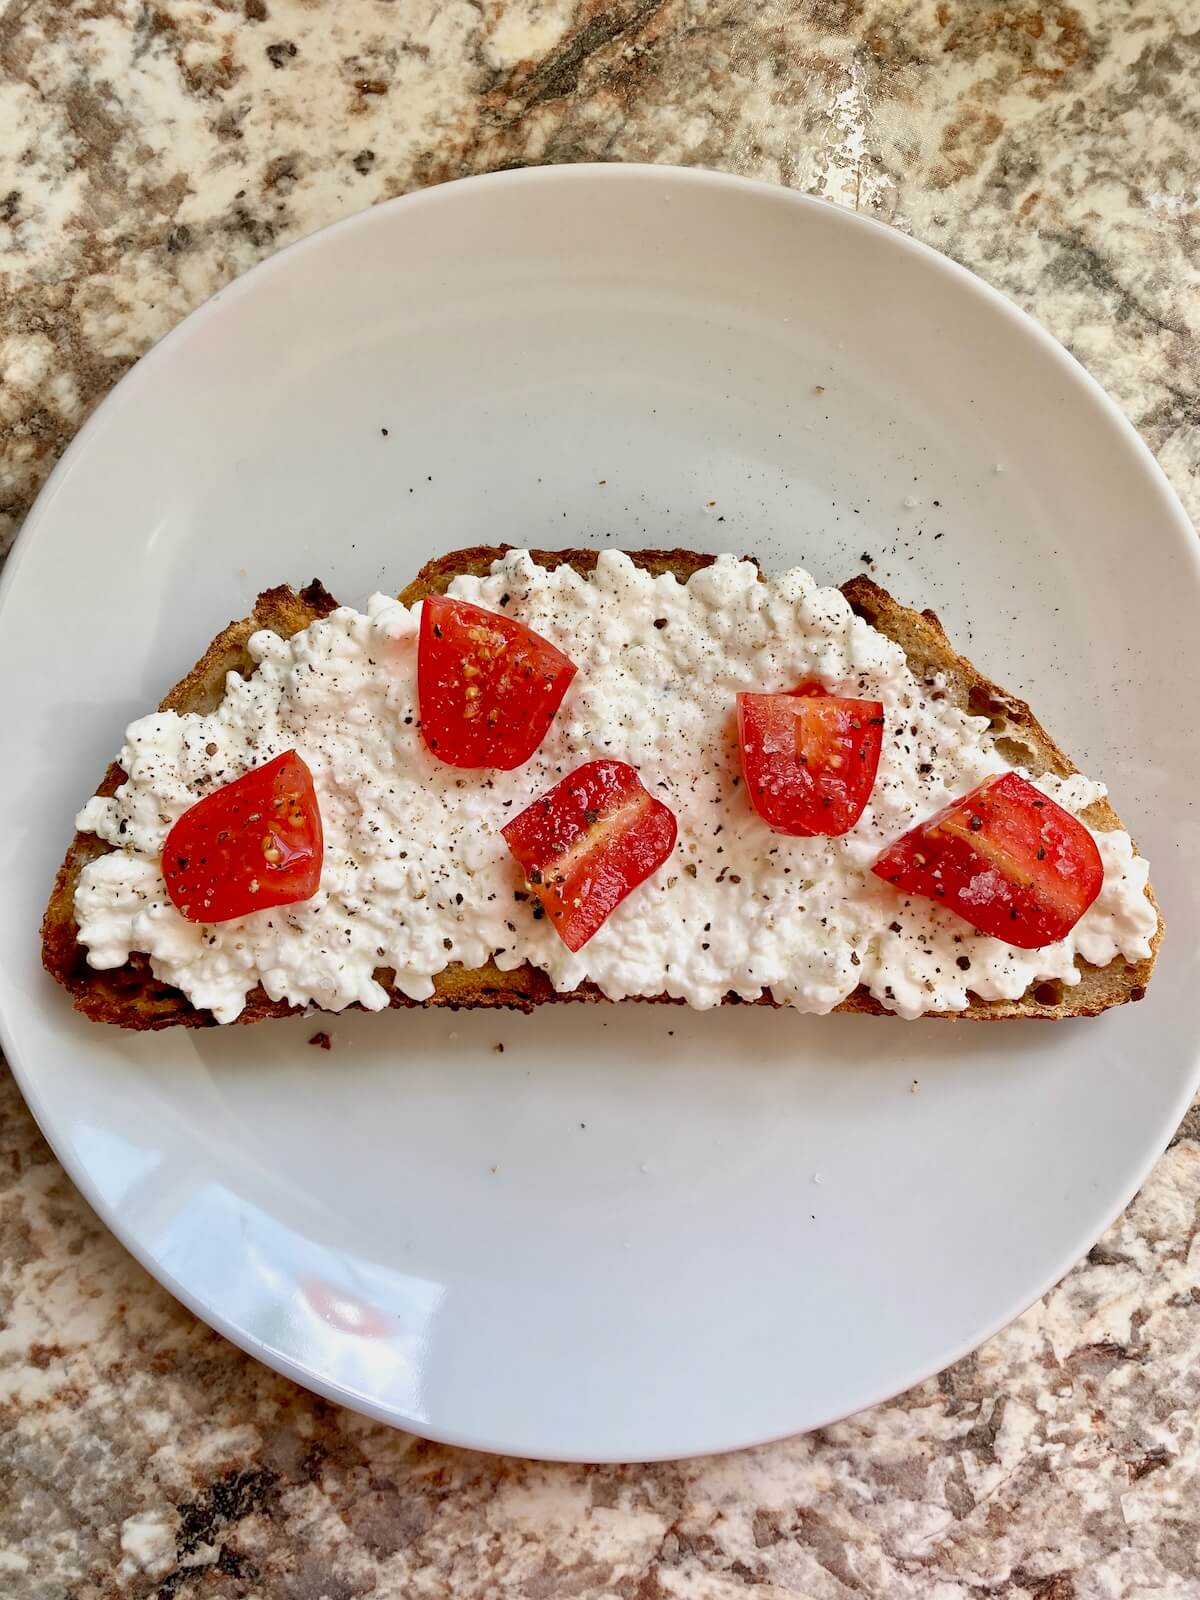
    Love cottage cheese? Give my sourdough cottage cheese toast recipe a try.

    Disclaimer: Some links throughout this post are affiliate links. As an Amazon Associate, I earn from qualifying purchases. You can learn more by visiting my Affiliate Disclosure Page.

    Ingredients & Substitutions

    Here are some notes on key ingredients. For a full list of ingredients, check out the recipe card below.

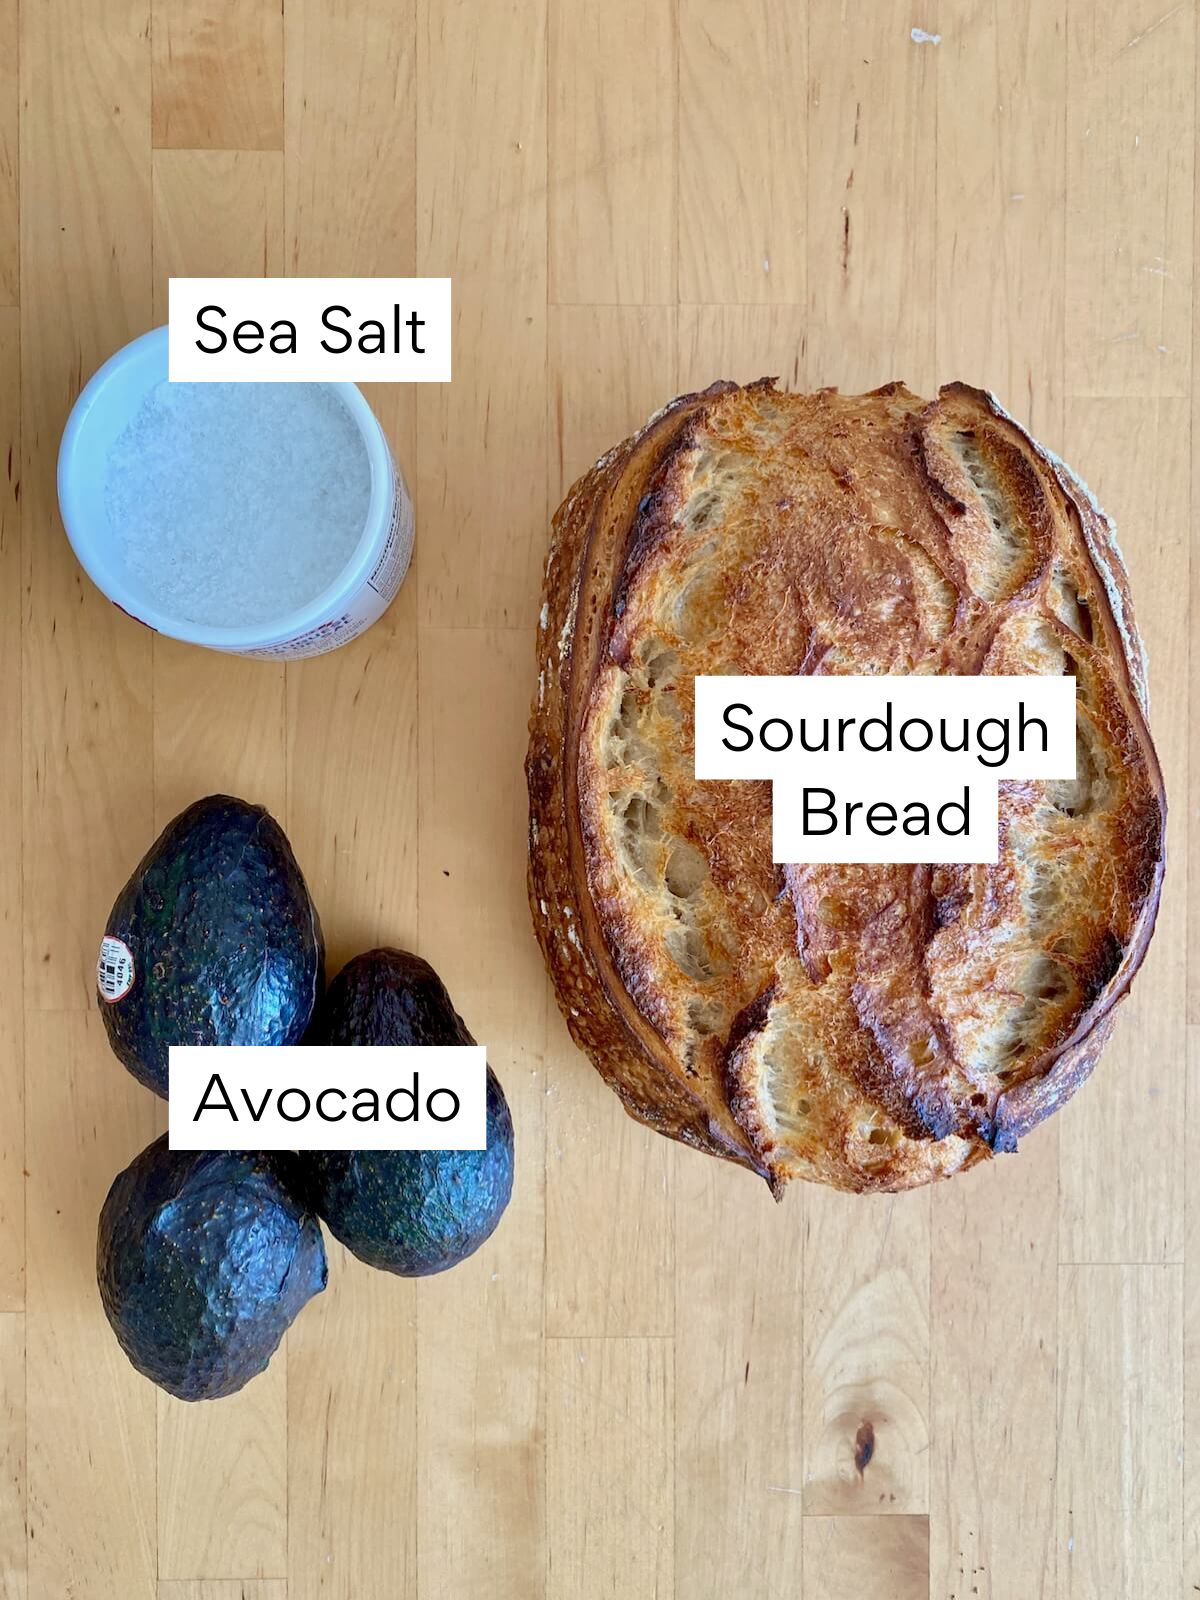
    • Sourdough Bread- I used my simple sourdough loaf, but feel free to use any sourdough variety you like - multigrain, whole wheat, everything bagel, olive, or even sourdough English muffins.
    • Avocado- Use ripe avocados that yield slightly to gentle pressure. If yours are underripe, let them sit on the counter for a day or two until ready.
    • Lemon Juice- Just a little helps brighten the flavor and slows down browning. You can swap it for lime juice or apple cider vinegar if thatโ€™s what you have on hand.
    • Sea Salt- I like using flaky sea salt or kosher salt to bring out the avocadoโ€™s natural flavor. Adjust to taste.
    • Toppings of Choice- Keep it simple with red pepper flakes, or dress it up with anything from sliced tomatoes and soft-boiled eggs to microgreens and smoked salmon. Check out the "Topping Ideas" section below for more inspiration!
    The ingredients to make sourdough avocado toast. Each ingredient is labeled with text. They include sourdough bread, avocado, and sea salt.

    Tips for Success

    • Choose ripe avocados. They should give slightly when gently pressed.
    • Use homemade sourdough. These toasts taste best on freshly baked sourdough.
    • Prepare just before serving. Mash the avocado right before assembling to keep it from browning.
    • Play with textures and flavors. Add crunchy, creamy, or spicy toppings to make each bite more interesting.

    How to Make Sourdough Avocado Toast

    Here is how to make avocado toast on sourdough bread (with pictures!).

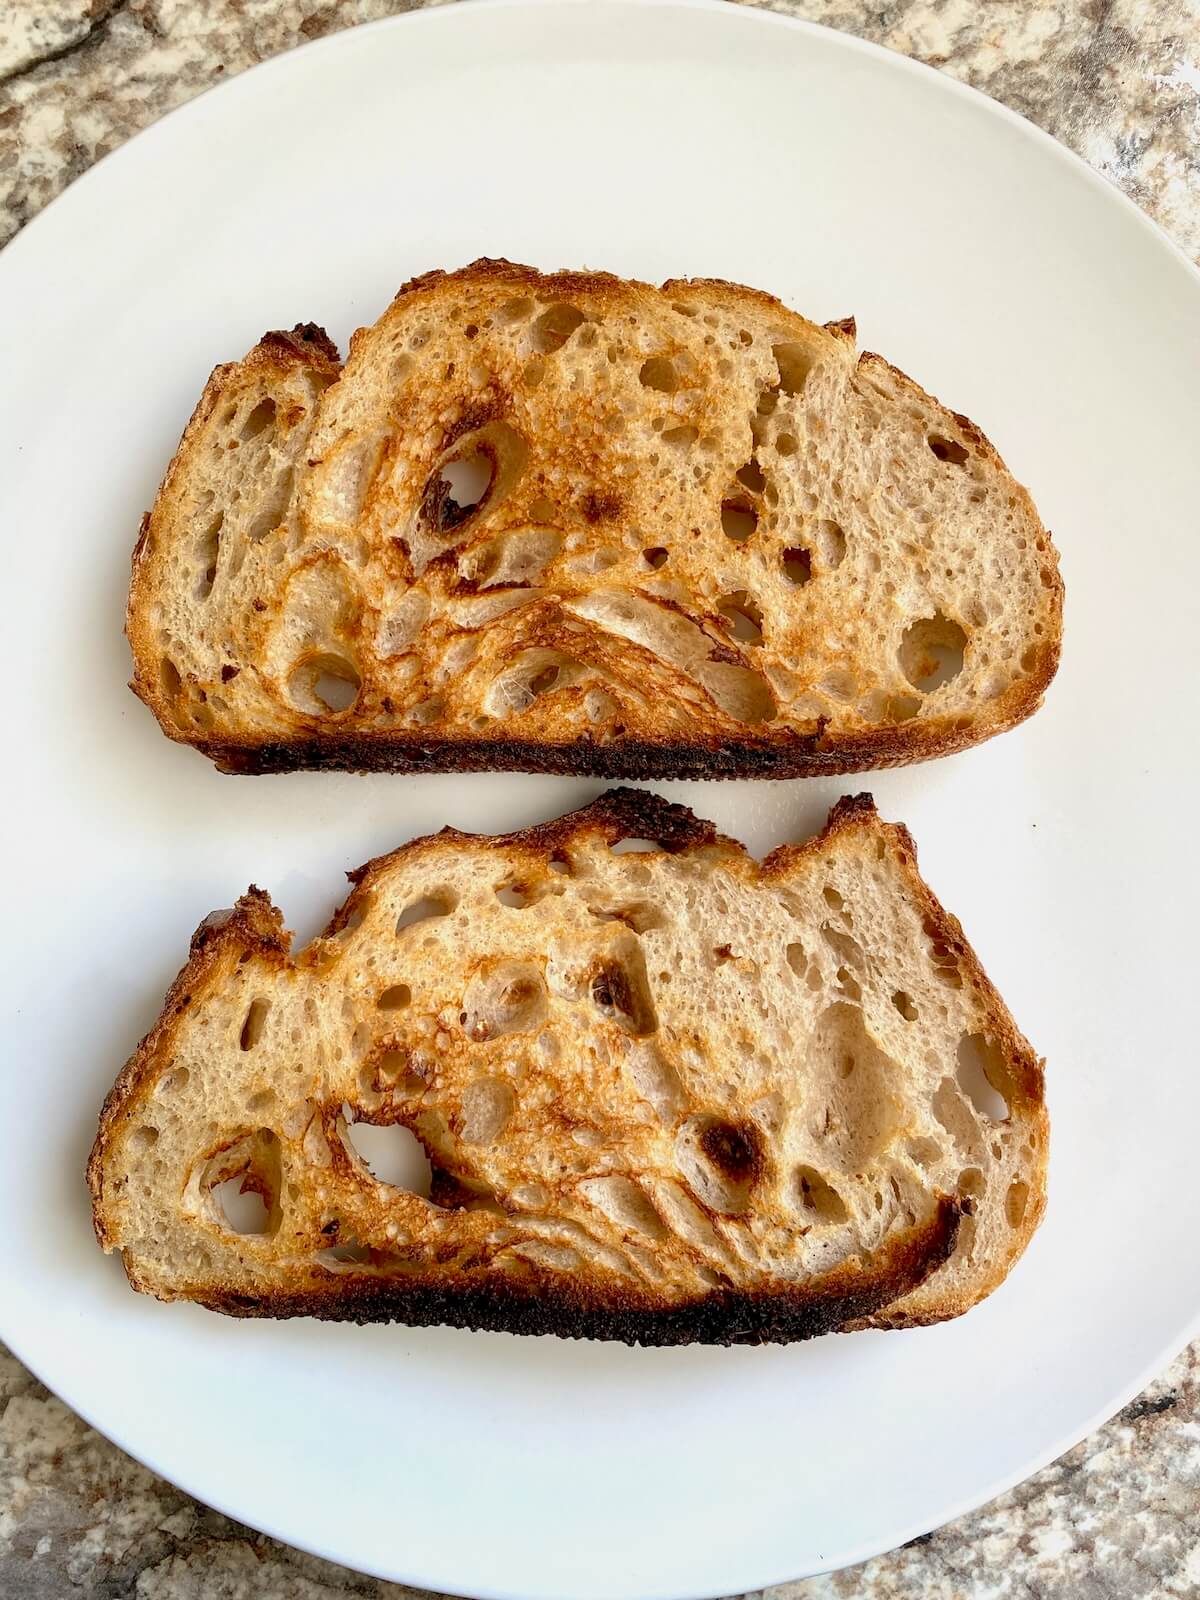
    Step 1: Toast the sourdough. Toast two slices of sourdough bread until golden and crisp.

    Two pieces of toasted sourdough bread.

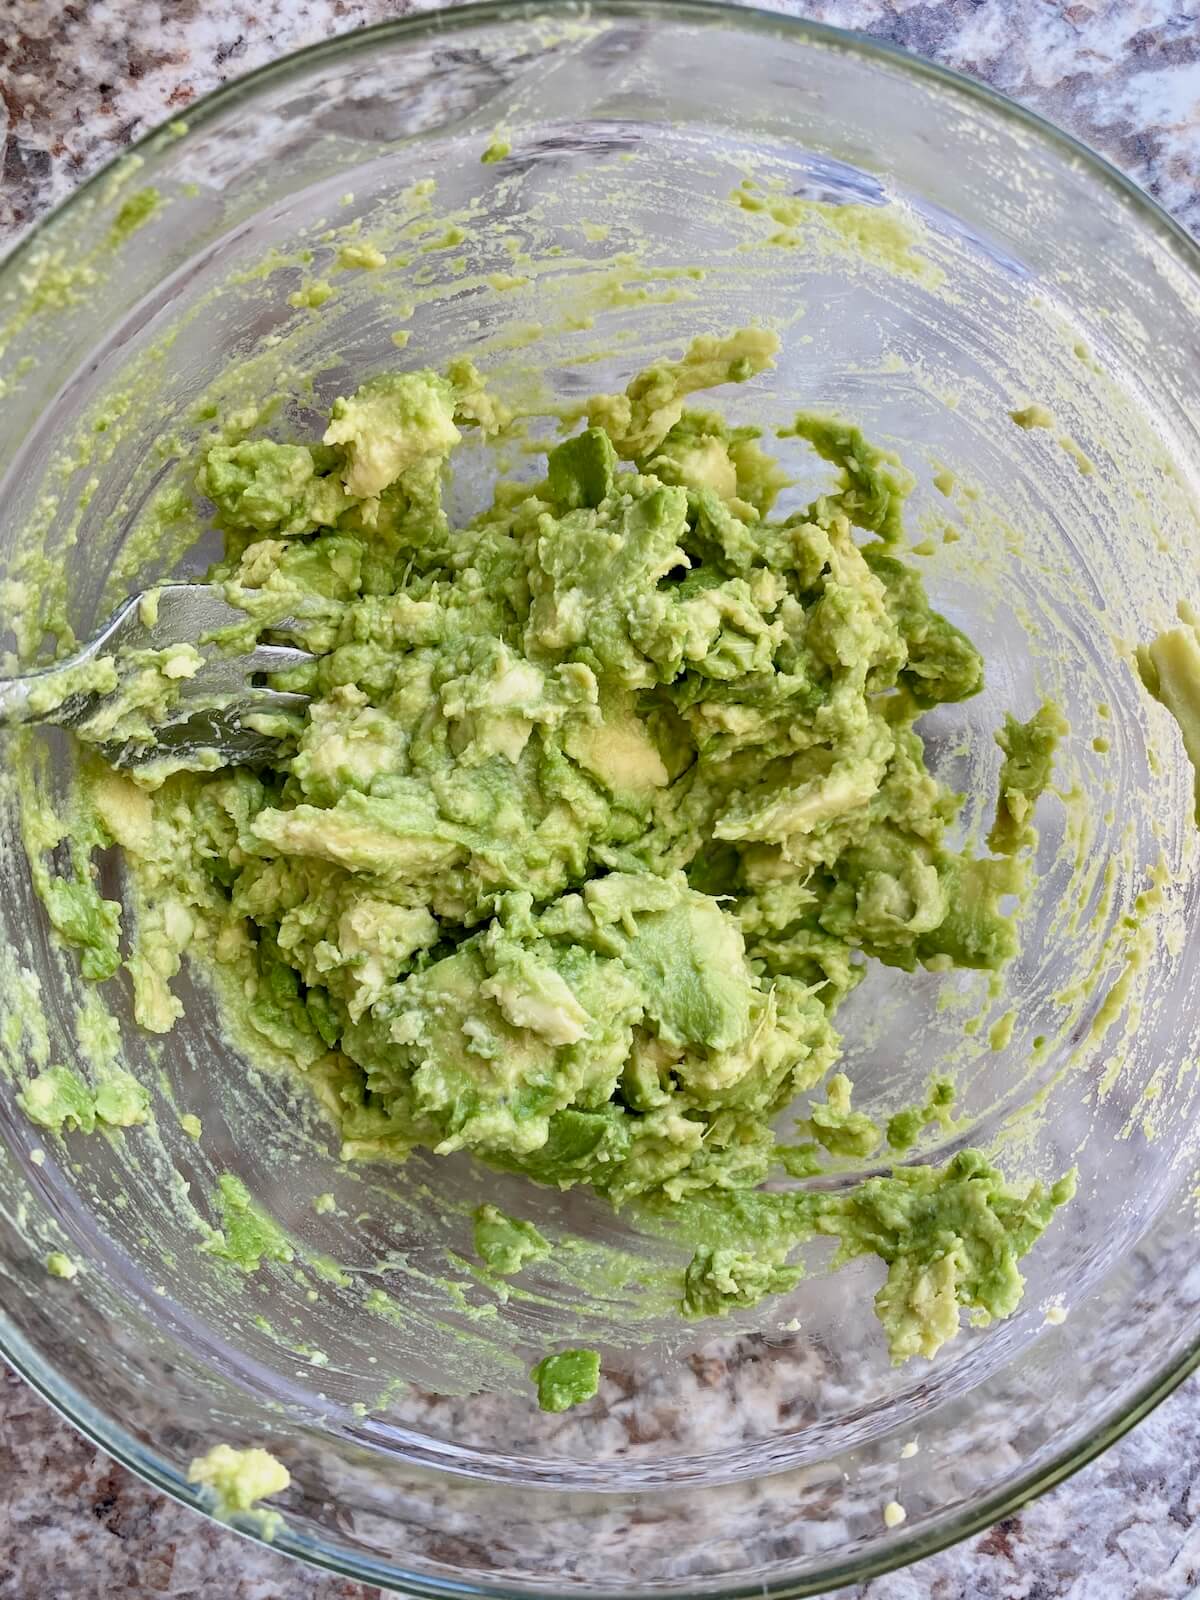
    Step 2: Mash the avocado. In a small bowl, mash the avocado with the salt.

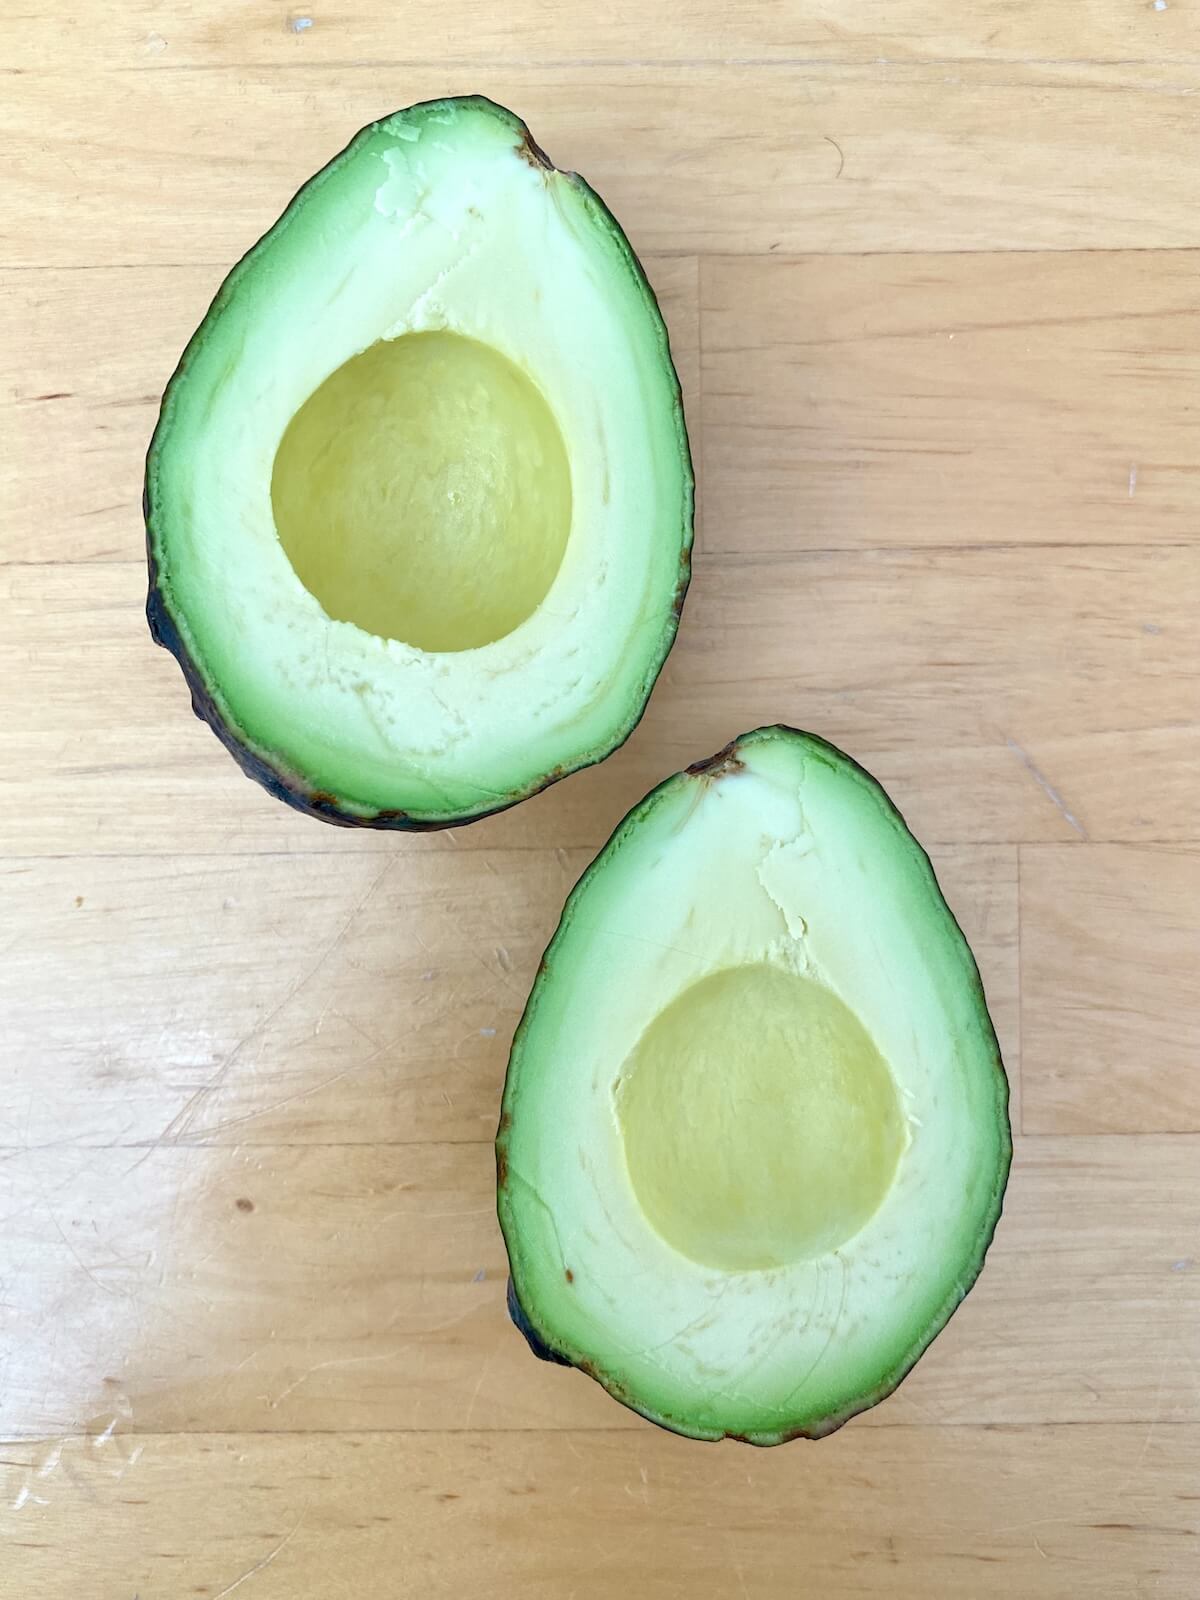
    A whole avocado cut in half with the pit removed.
    Avocado mashed with salt in a glass bowl.

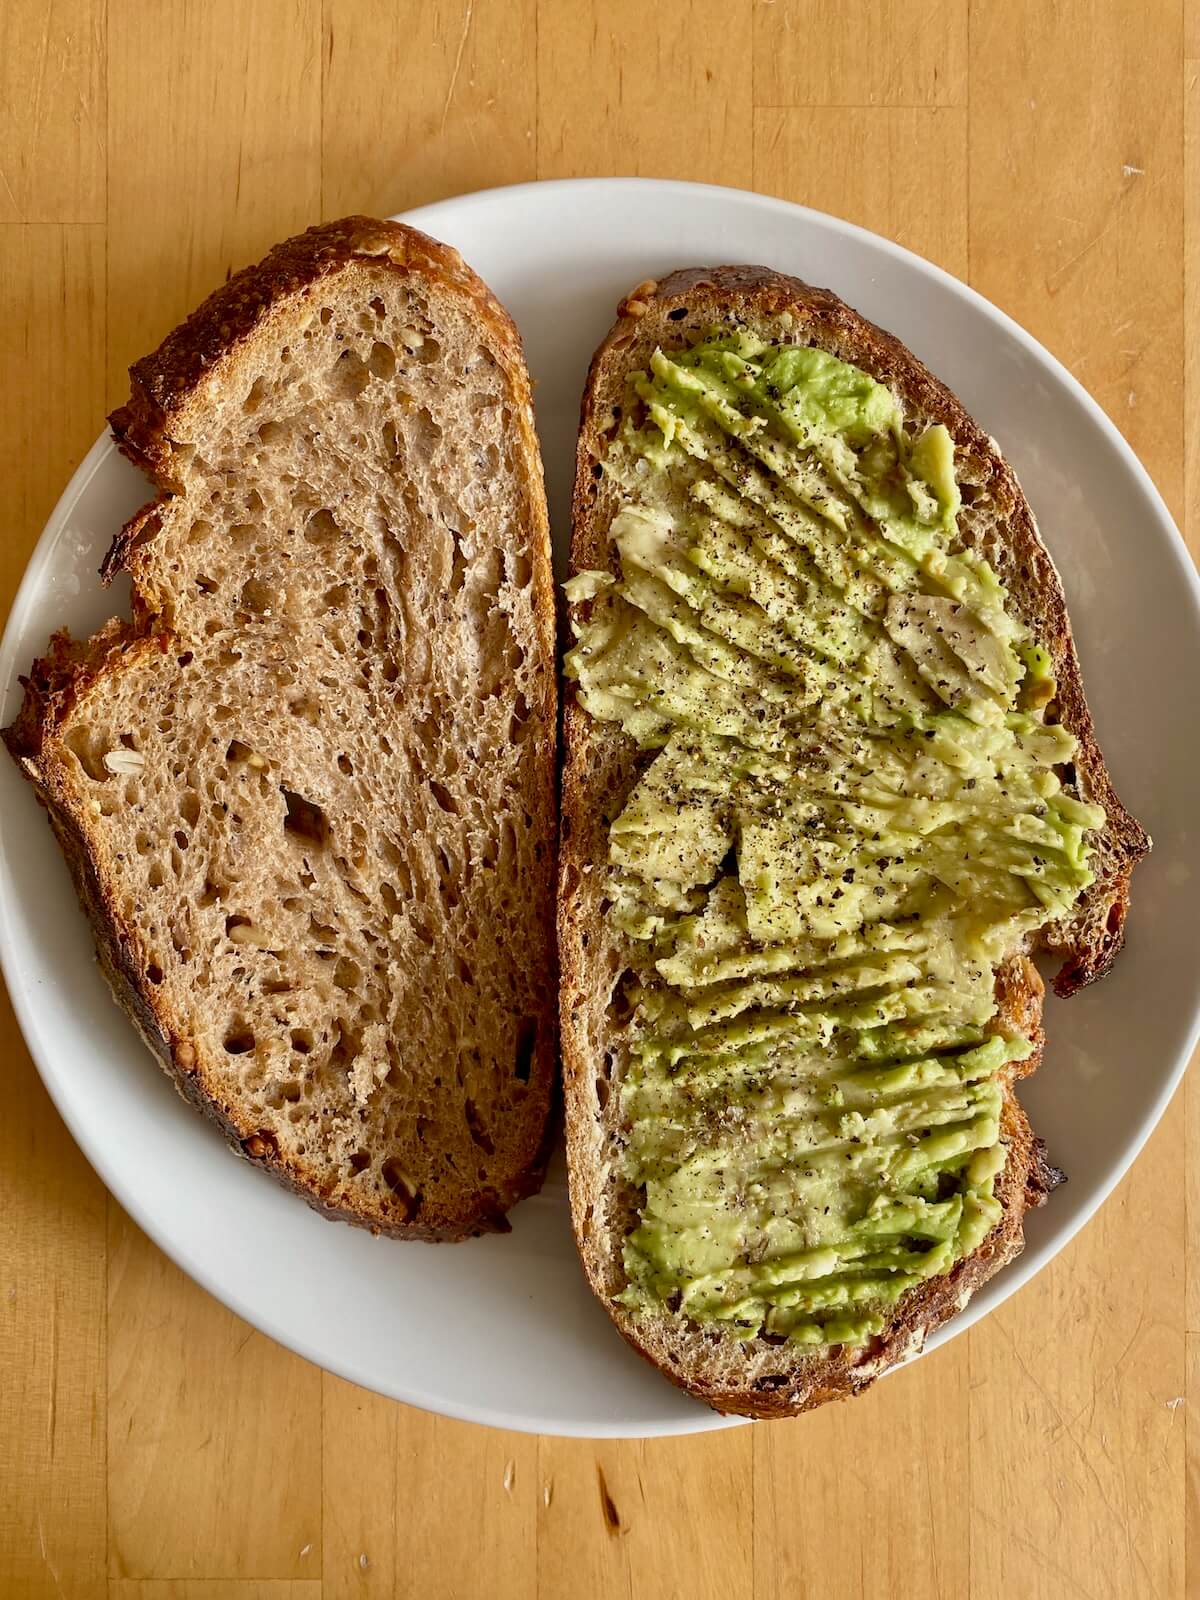
    Step 3: Assemble toasts. Divide the mashed avocado evenly between the two slices of toast. Add your favorite toppings and enjoy!

    A piece of toasted sourdough bread with mashed avocado on it.
    Two sourdough avocado toasts with toppings on a small plate.

    Topping Ideas

    Get creative with these toppings or mix and match to find your favorite!

    • Fried, scrambled, or poached egg
    • Bacon
    • Smoked salmon
    • Sliced tomatoes (especially delicious during summer!)
    • Fresh herbs (cilantro, parsley, basil)
    • Seasonings (everything bagel, chili lime, red pepper flakes, smoked paprika)
    • Crumbled feta or goat cheese
    • Pickled onions
    • Chili crisp, sriracha, or hot sauce
    • Lemon zest
    • Arugula or microgreens

    Make Ahead Tip

    This is one of those recipes thatโ€™s best enjoyed fresh, but you can prep the avocado about a day in advance.

    Mash it with salt and a splash of lemon juice, then press plastic wrap directly onto the surface to help prevent browning. Store in the fridge for up to one day.

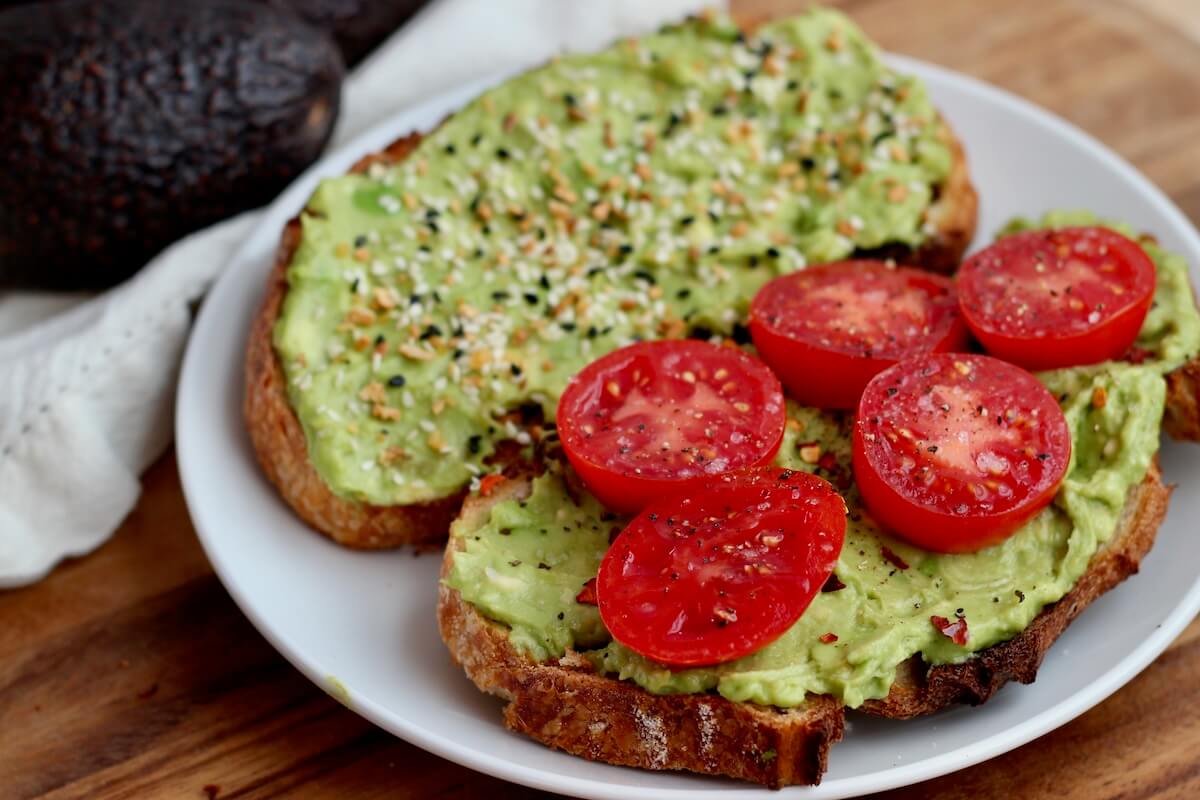
    A plate with two pieces of avocado sourdough toast with toppings.
    A cover of a recipe ebook with the title "Everyday Sourdough: 27 Sweet & Savory Sourdough Discard Recipes." There is an image of sourdough discard cinnamon rolls on the front. At the bottom, it reads "By Ashley Petrie of Everyday Homemade."
    Grab a copy today!

    Are you tired of watching your sourdough discard go to waste?

    Itโ€™s time to turn excess discard into something delicious with my new ebook - Everyday Sourdough!

    Inside, youโ€™ll find 27 tried-and-true sourdough discard recipes that will transform your leftover starter into mouthwatering creations your family and friends will love.

    No more guilt about wasting your discard - with Everyday Sourdough, you have endless options to quickly make something amazing anytime.

    Let's Connect!

    Be sure to leave a comment below if you have any questions. You can also connect with me on Instagram, Facebook, Pinterest, or via email at [email protected].

    More Sourdough Recipes

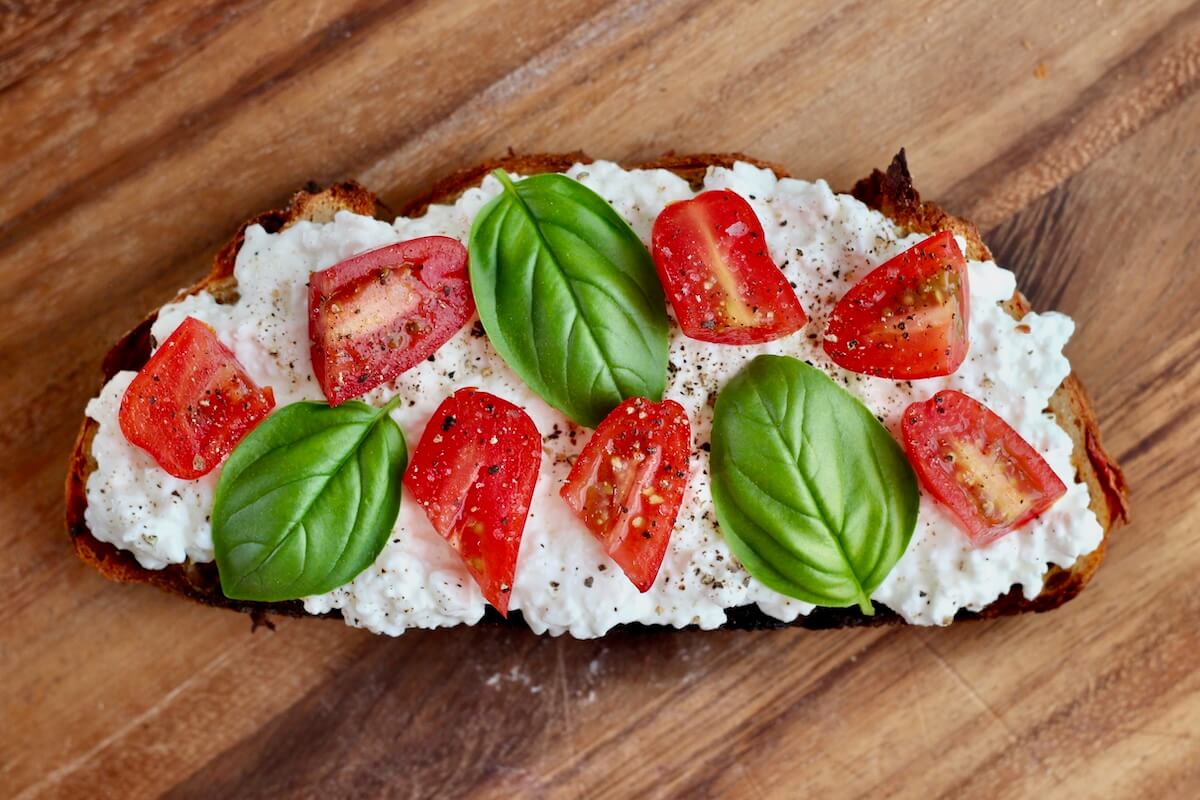
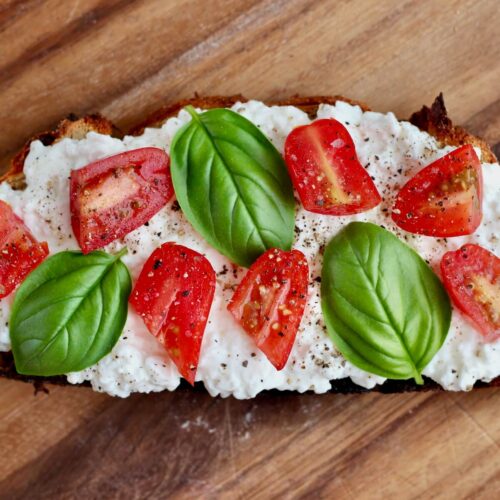
    • A piece of sourdough cottage cheese toast topped with tomatoes, basil, salt, and pepper.
      Sourdough Cottage Cheese Toast
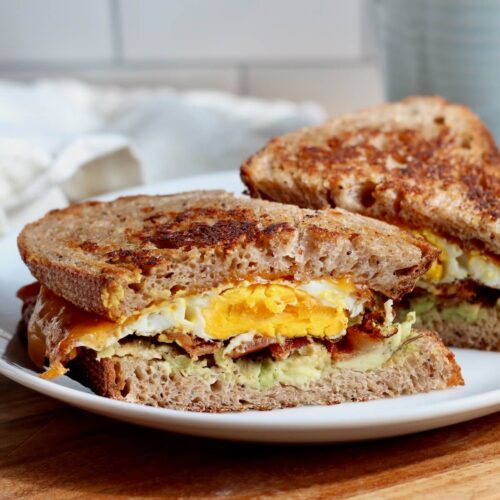
    • A bacon, egg, and cheese sourdough breakfast sandwich with avocado cut in half on a small white plate.
      Sourdough Breakfast Sandwich (Bacon, Egg & Cheese)
    • A small white plate with five pieces of sourdough bruschetta on it.
      Sourdough Bruschetta
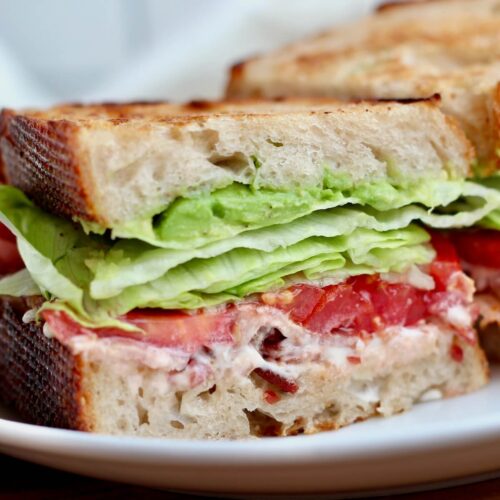
    • A BLT sandwich on sourdough bread cut in half on a plate.
      The Best BLT Sandwich on Sourdough Bread (with Avocado)

    ๐Ÿ“– Recipe

    Two pieces of sourdough avocado toast on a small plate. One is topped with everything bagel seasoning and the other is topped with fresh tomato slices and seasonings.
    Print Pin SaveSaved!

    Sourdough Avocado Toast

    This Sourdough Avocado Toast is a healthy option for breakfast or brunch. Made with homemade sourdough bread, creamy avocado, and customized with your favorite toppings.
    Course Breakfast
    Cuisine American
    Prep Time 10 minutes minutes
    Total Time 10 minutes minutes
    Servings 2 toasts
    Calories 350kcal
    Author Ashley Petrie, RDN, LDN

    Equipment

    • Toaster or toaster oven
    • Mixing bowls

    Ingredients

    • 2 slices sourdough bread
    • 1 medium ripe avocado
    • ยผ teaspoon sea salt
    • ยฝ-1 teaspoon lemon juice optional for added brightness and to prevent browning
    • Toppings of choice such as a fried egg, bacon, smoked salmon, tomato slices, everything bagel seasoning, or red pepper flakes

    Instructions

    • Toast two slices of sourdough bread until golden brown and crisp to your liking.
      2 slices sourdough bread
    • Cut the avocado in half, remove the pit, and scoop the flesh into a small bowl. Mash with a fork and mix in the salt. Add a squeeze of lemon juice or any other seasonings you like (optional).
      1 medium ripe avocado, ยผ teaspoon sea salt
    • Spread the mashed avocado evenly over the two slices of toasted sourdough.
    • Top with your favorite ingredients - like a fried egg, cherry tomatoes, everything bagel seasoning, or red pepper flakes - and enjoy immediately.
      Toppings of choice

    Notes

    • Make Ahead Tip: Prep the avocado up to 1 day ahead. Mash with salt and lemon juice, then cover tightly with plastic wrap and refrigerate.

    Nutrition

    Serving: 1toast (without toppings) | Calories: 350kcal | Carbohydrates: 45g | Protein: 10g | Fat: 16g | Saturated Fat: 3g | Polyunsaturated Fat: 3g | Monounsaturated Fat: 8.5g | Sodium: 480mg | Potassium: 592mg | Fiber: 9.5g | Sugar: 4g | Vitamin C: 26mg | Calcium: 25mg | Iron: 2.8mg
    Did you try this recipe?Let me know! Comment below, or take a picture and tag me on Instagram @everydayhomemadebyashley.

    Whole Wheat Sourdough Pita Bread

    May 5, 2025

    These Whole Wheat Sourdough Pita are made with 100% whole wheat flour and sourdough discard - no yeast needed! They come together the same day and are perfect for wraps, sandwiches, or serving with your favorite dips.

    A whole wheat sourdough pita stuffed with hummus and veggies.

    When I first made these whole wheat sourdough pita, I could not stop eating them. I devoured three in under 20 minutes (dipped in hummus, of course!).

    Iโ€™ve always loved whole grains, but these 100% whole wheat pita truly surprised me. The tangy sourdough and nutty wheat pair perfectly. And that hint of char from the cast iron skillet? So good.

    Made with just five simple ingredients, this easy sourdough discard recipe comes together the same day for fresh, homemade pita in no time. Use them for wraps, sandwiches, dips, or even turn them into crispy pita chips!

    As a sourdough food blogger and dietitian, one of my goals this year is to share more 100% whole wheat sourdough recipes with you. And this pita recipe, based off my classic sourdough discard pitas, is one of my new favorites.

    If you havenโ€™t already, check out my whole wheat sourdough bread, pizza dough, focaccia, and pancake recipes, too.

    I hope you give these a try and love them as much as I do!

    Disclaimer: Some links throughout this post are affiliate links. As an Amazon Associate, I earn from qualifying purchases. You can learn more by visiting my Affiliate Disclosure Page.

    Ingredients & Substitutions

    Here are some notes on key ingredients. For a full list of ingredients, check out the recipe card below.

    • Sourdough Discard- Use fresh discard (ideally less than a week old) for best fermentation. Older discard may be sluggish, so if thatโ€™s all you have, active starter may be a better choice.
    • Whole Wheat Flour- Made with 100% whole wheat flour for a hearty flavor and chewy texture. Letting the flour hydrate before mixing helps soften the bran and improve the dough structure.
    • Water- Use warm water (around 80โ€“90ยฐF) to encourage fermentation.
    • Olive Oil- Adds richness and makes the pita softer and more flexible once cooked.
    • Kosher Salt- Enhances the flavor of the dough. I use Diamond Crystal Kosher Salt (2.8 grams per teaspoon). If using table salt or Mortonโ€™s Kosher Salt, measure by weight or use about half the amount.
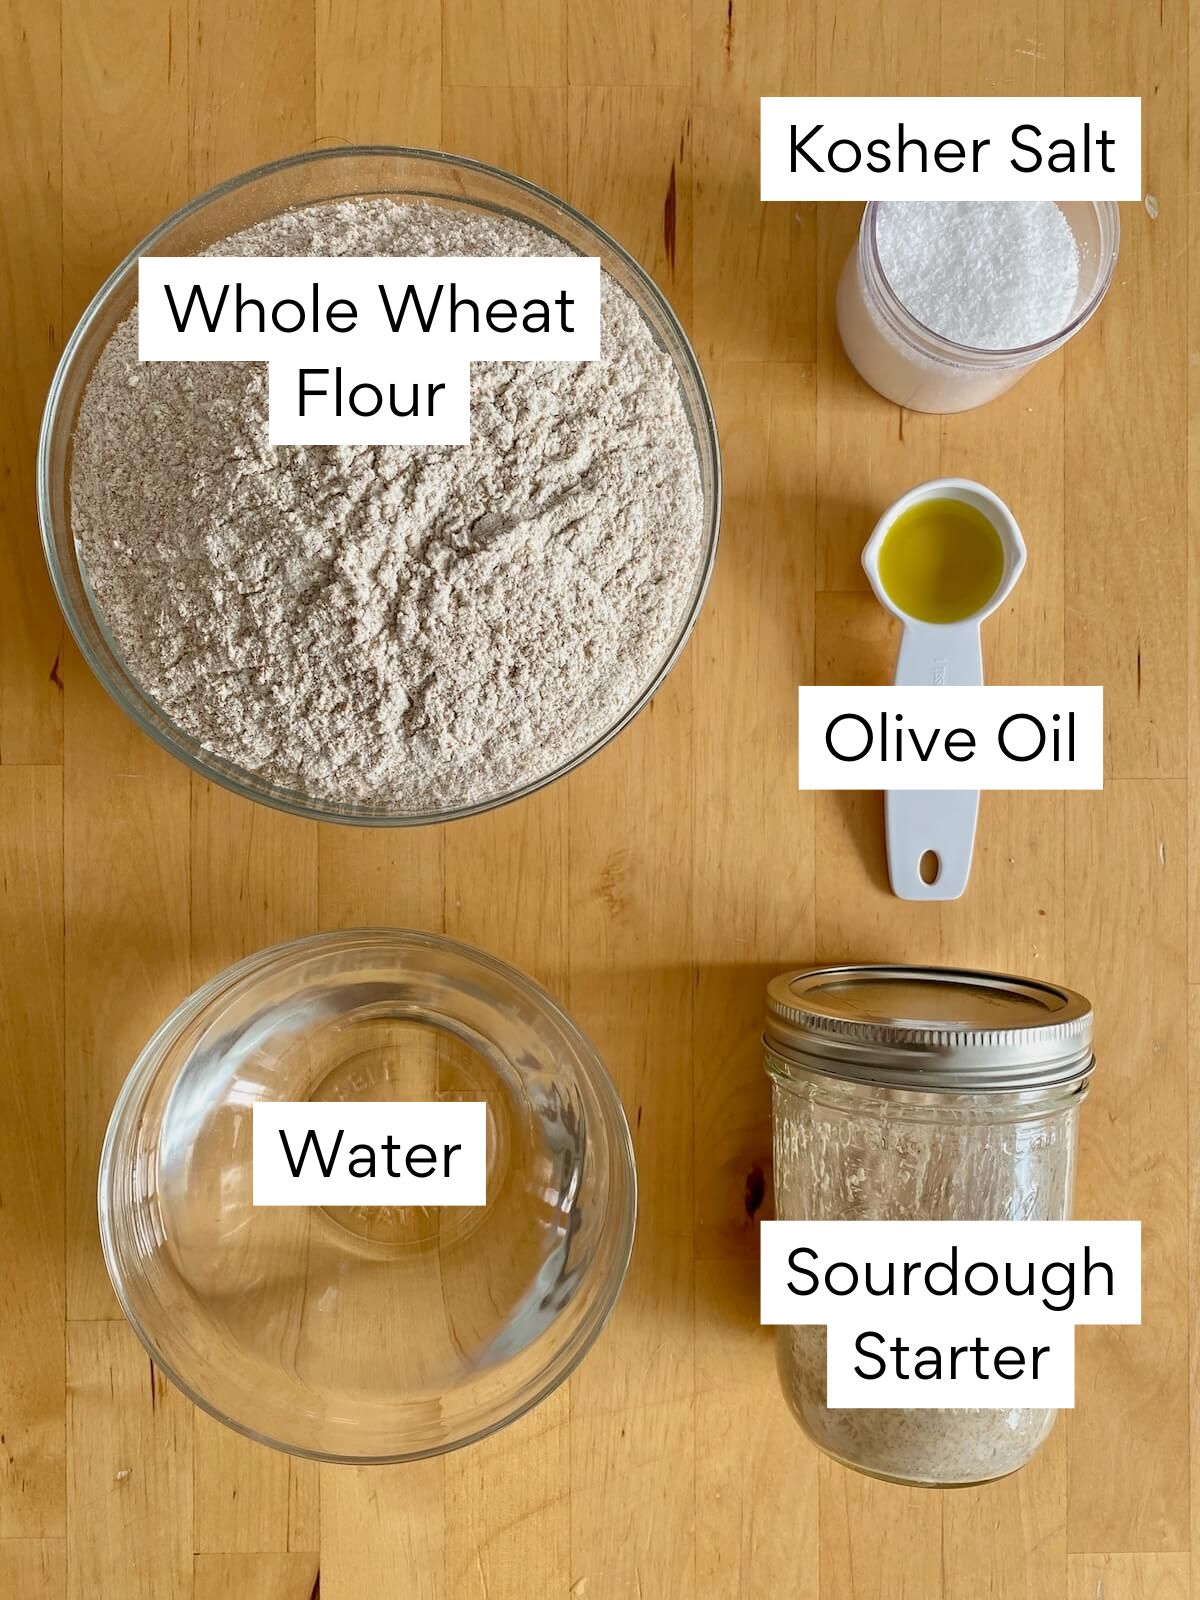
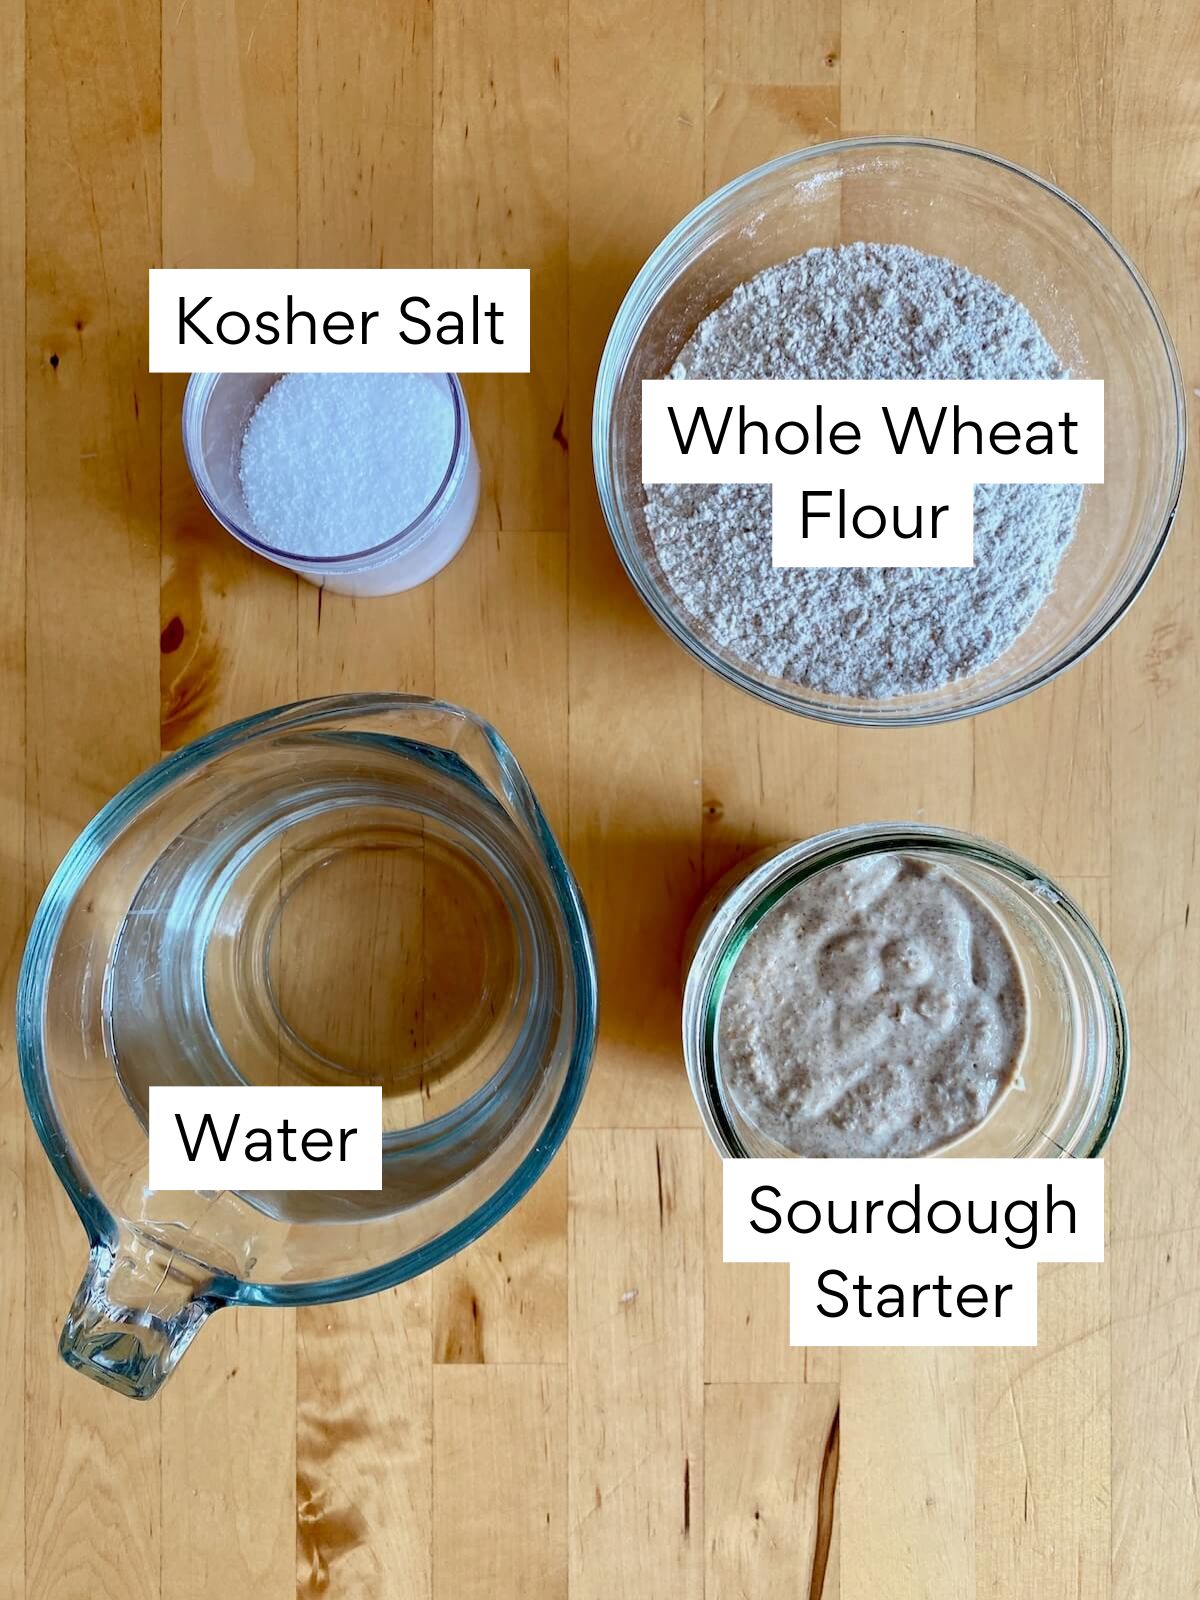
    The ingredients to make whole wheat sourdough pita bread. Each ingredient is labeled with text. They include water, sourdough discard, kosher salt, olive oil, and whole wheat flour.

    Tips for Success

    • Weigh ingredients. Using a kitchen scale gives you more accurate, consistent results than measuring by cups.
    • Donโ€™t skip autolyse. Resting the flour and water before mixing the dough helps the bran and germ in whole wheat flour to soften and hydrate, improving the final texture.
    • Rise in a warm spot. A warm environment (around 75ยฐF) helps your dough rise faster.
    • Roll the pita out thin. Rolling each round to about ยผ-inch thick helps them puff up beautifully and keeps the texture soft and chewy.
    • Preheat the skillet. Make sure your pan is fully hot before cooking to get that signature puff and some golden brown spots.

    How to Make Whole Wheat Sourdough Pita Bread

    Here is how to make sourdough pita bread with 100% whole wheat flour.

    Step 1: Autolyse. Combine whole wheat flour and warm water in a large bowl. Cover and let rest for 30-60 minutes.

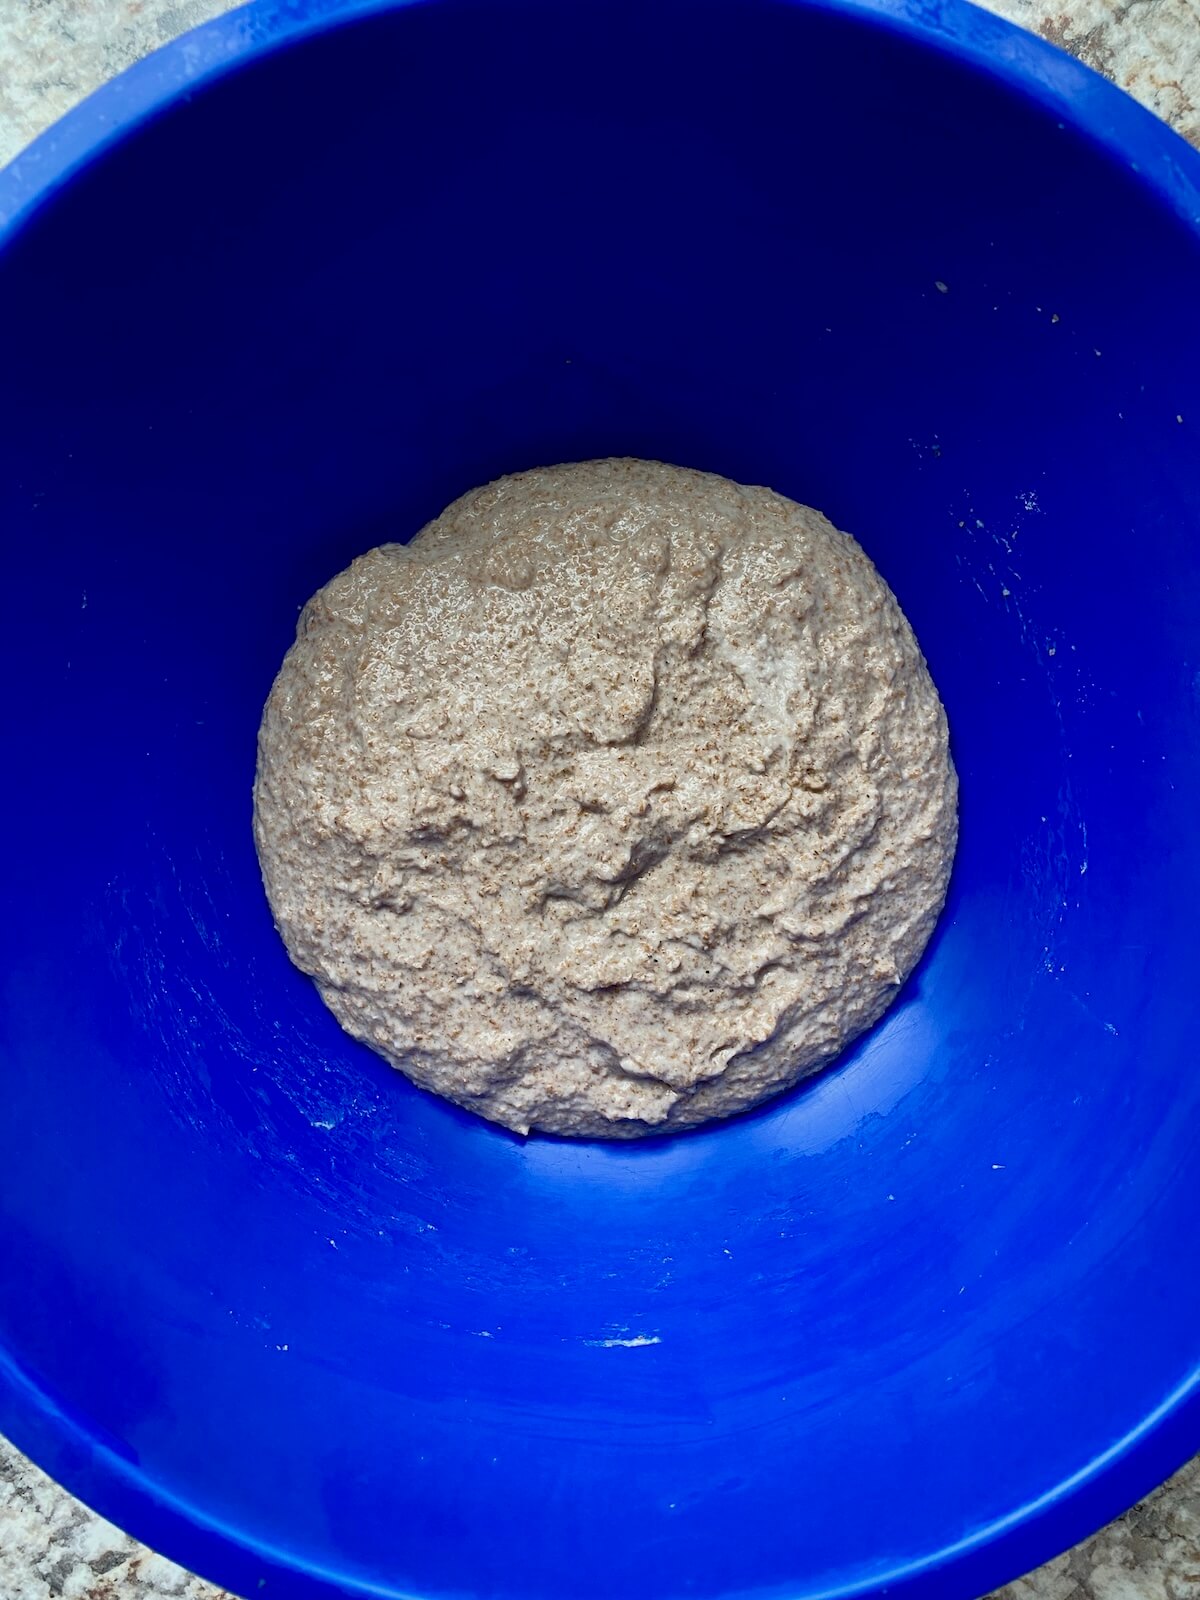
    Whole wheat flour and water mixed together in a clear glass bowl.

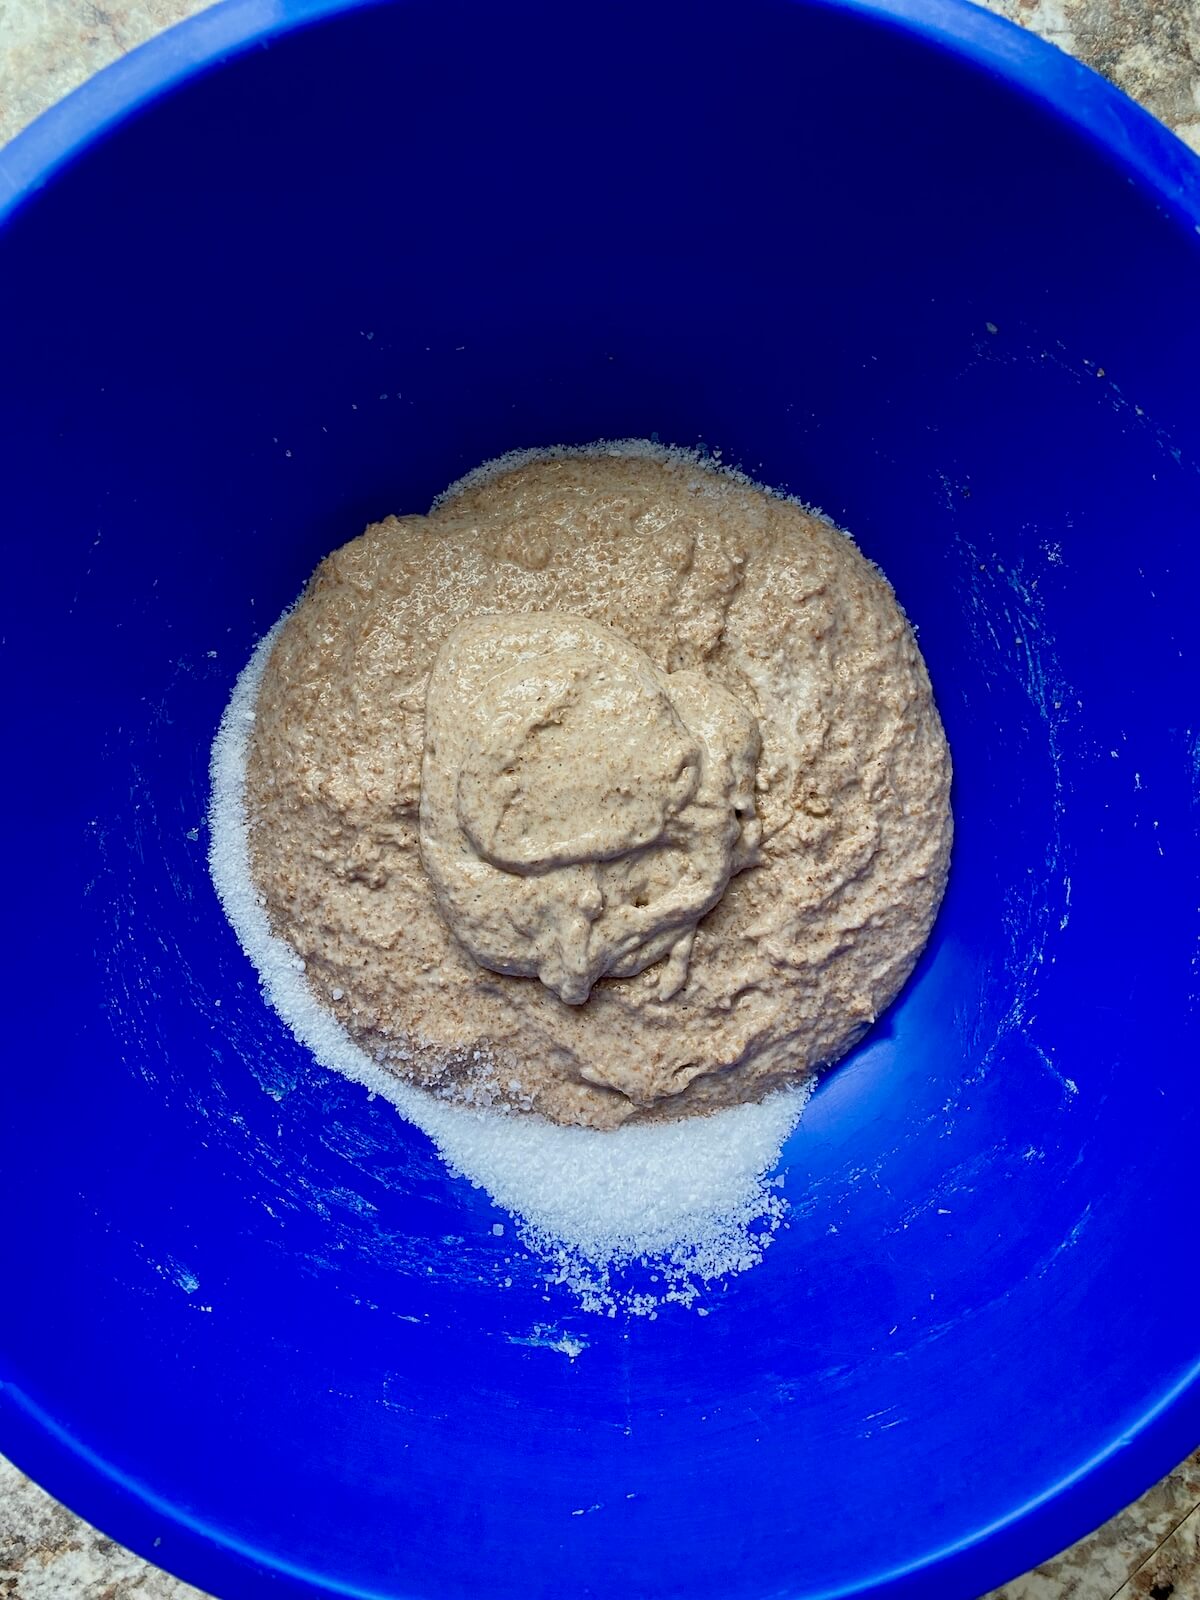
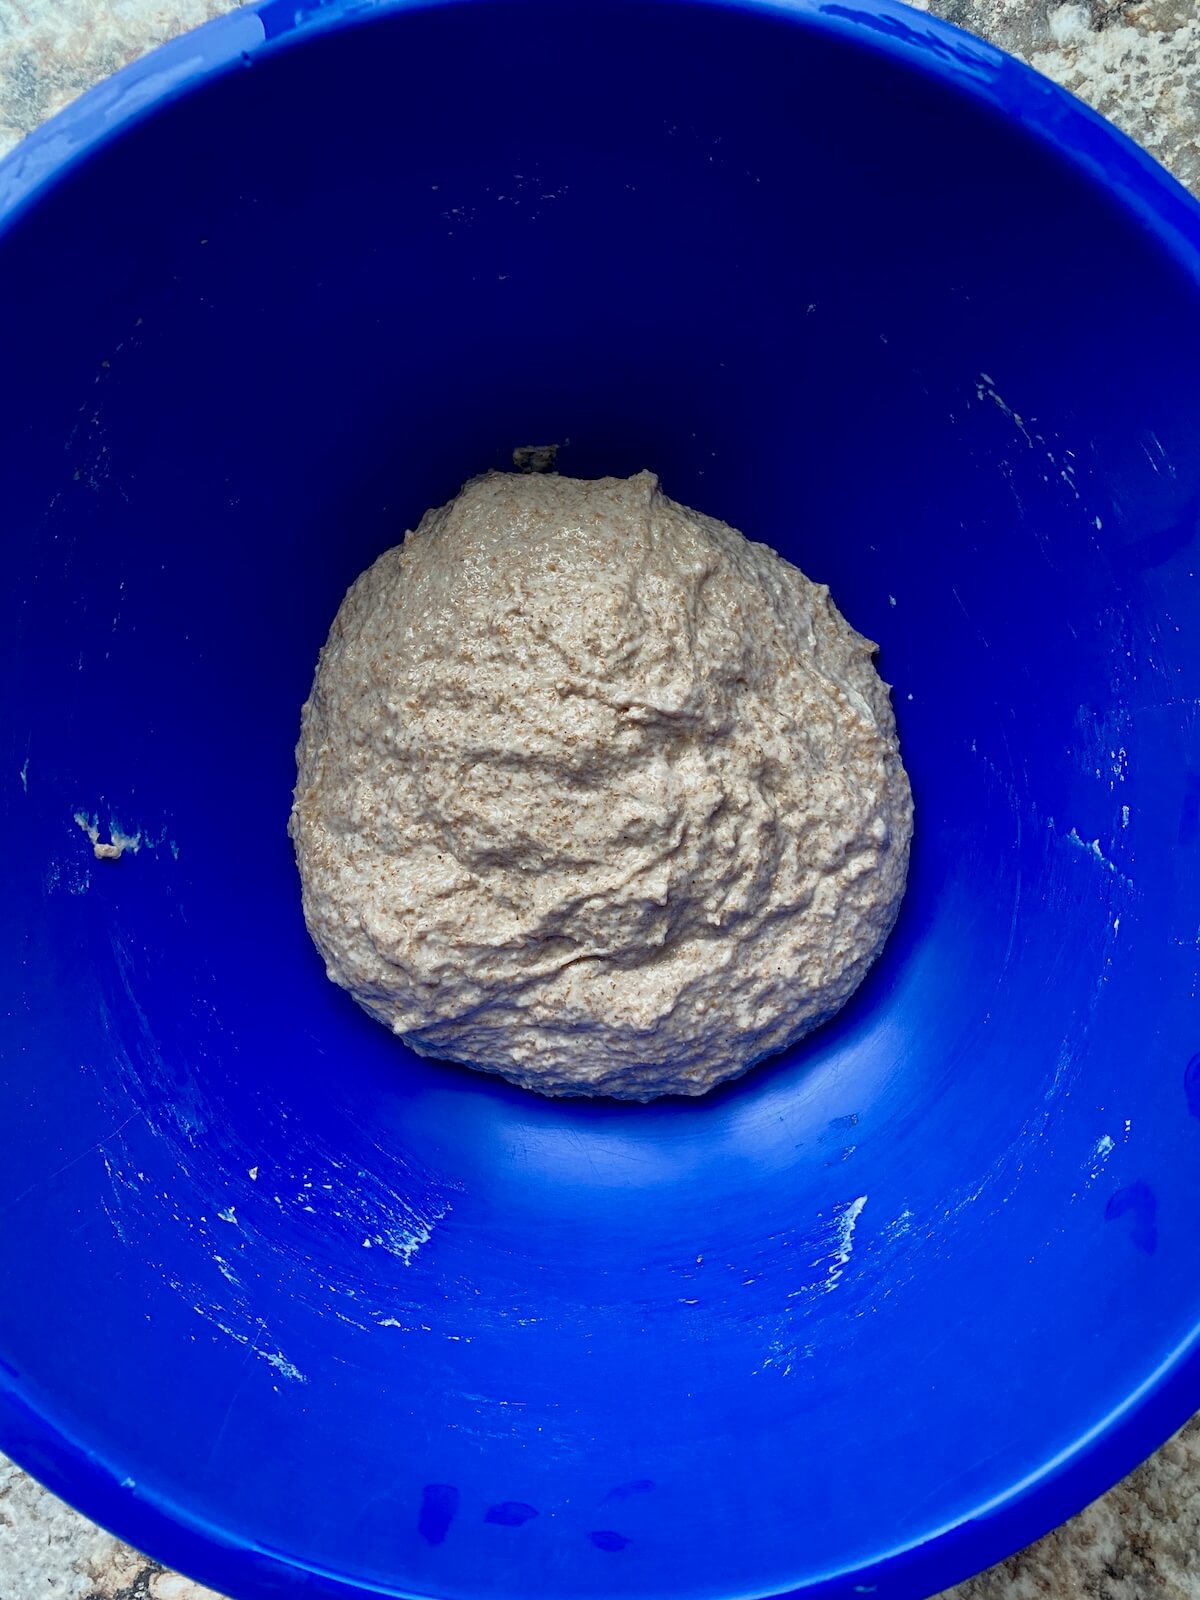
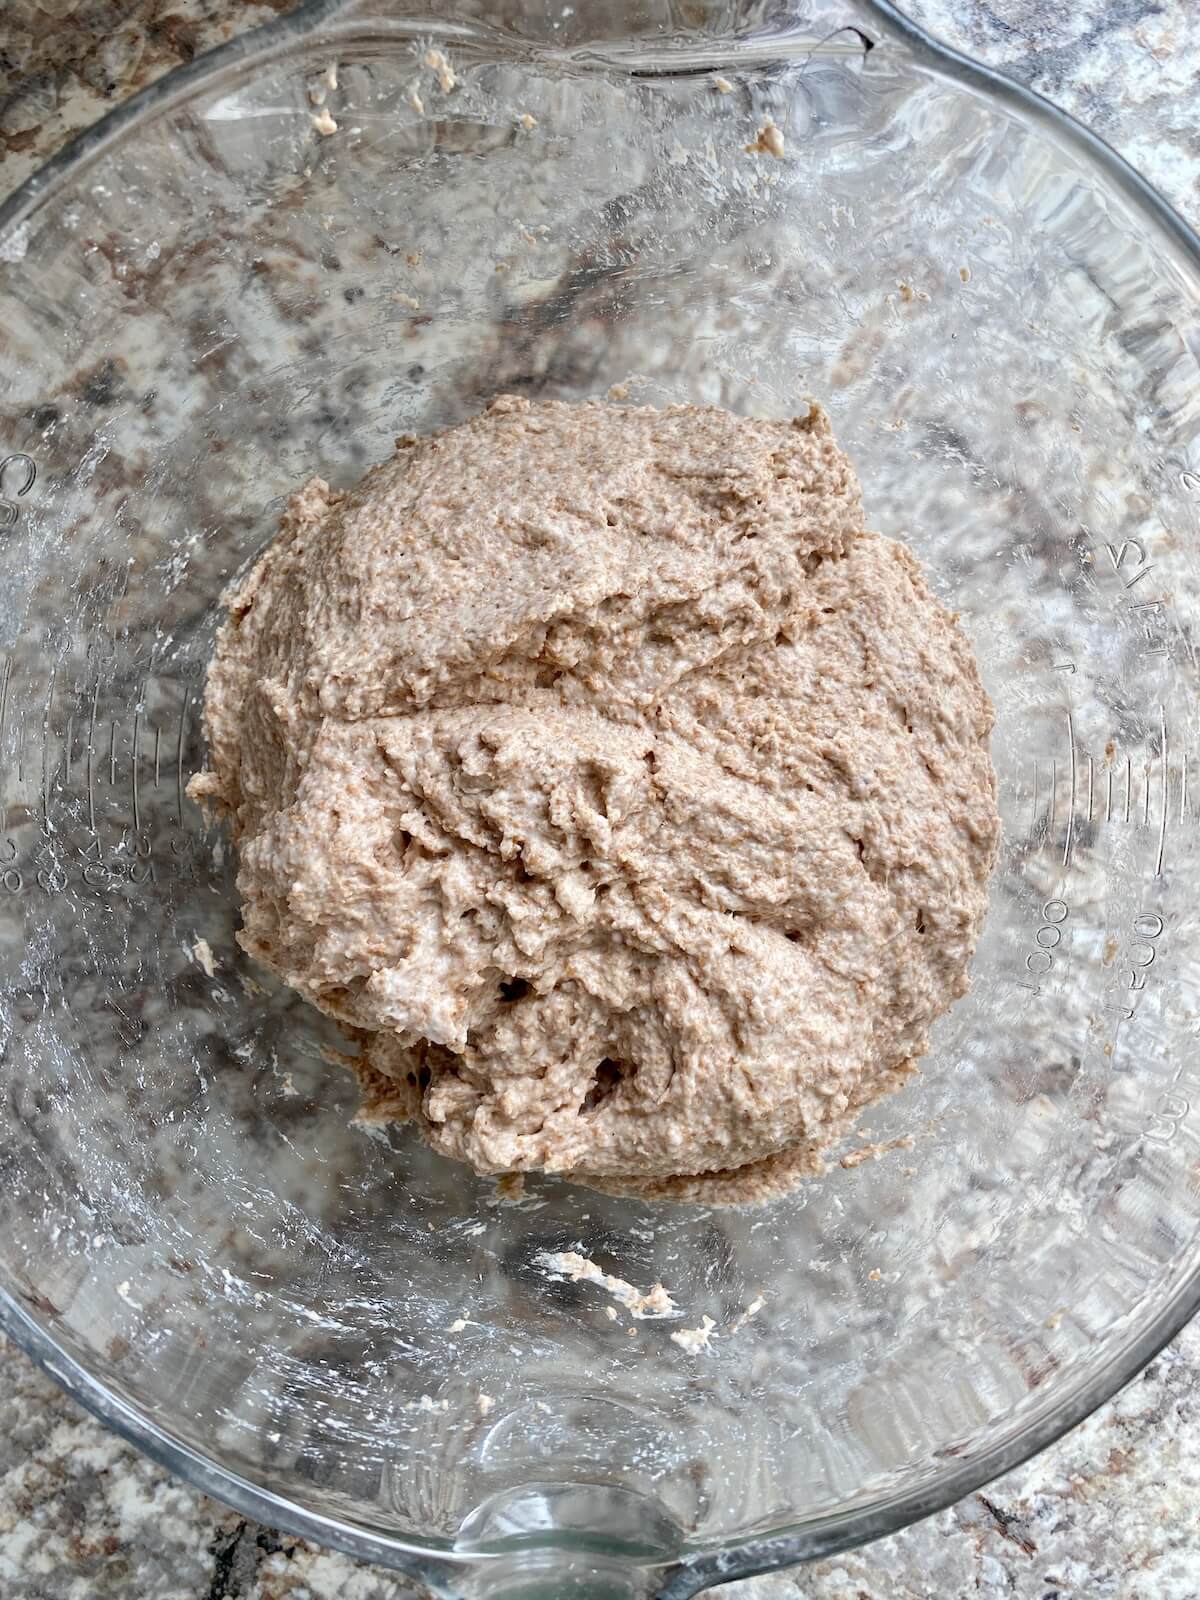
    Step 2: Mix dough. Add sourdough discard, olive oil, and salt, mixing until the dough comes together. Let it rest for 15 minutes.

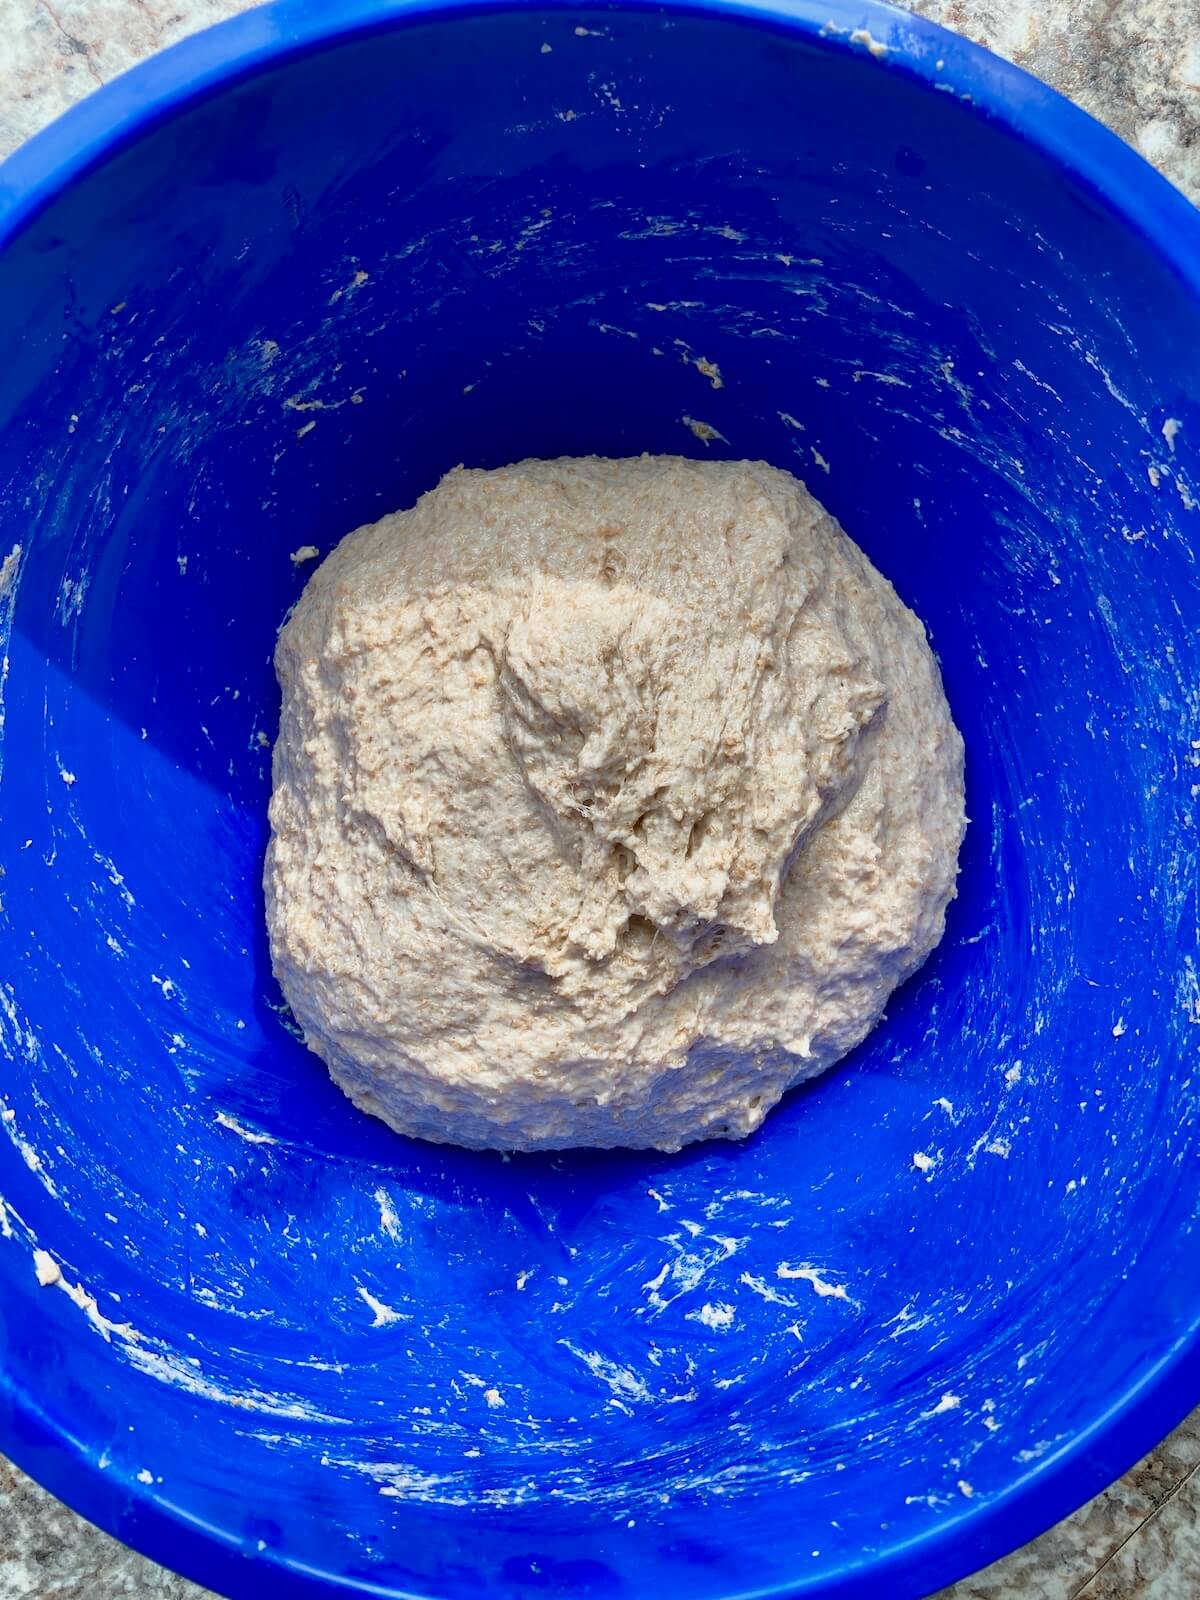
    Whole wheat sourdough pita dough in a glass bowl.

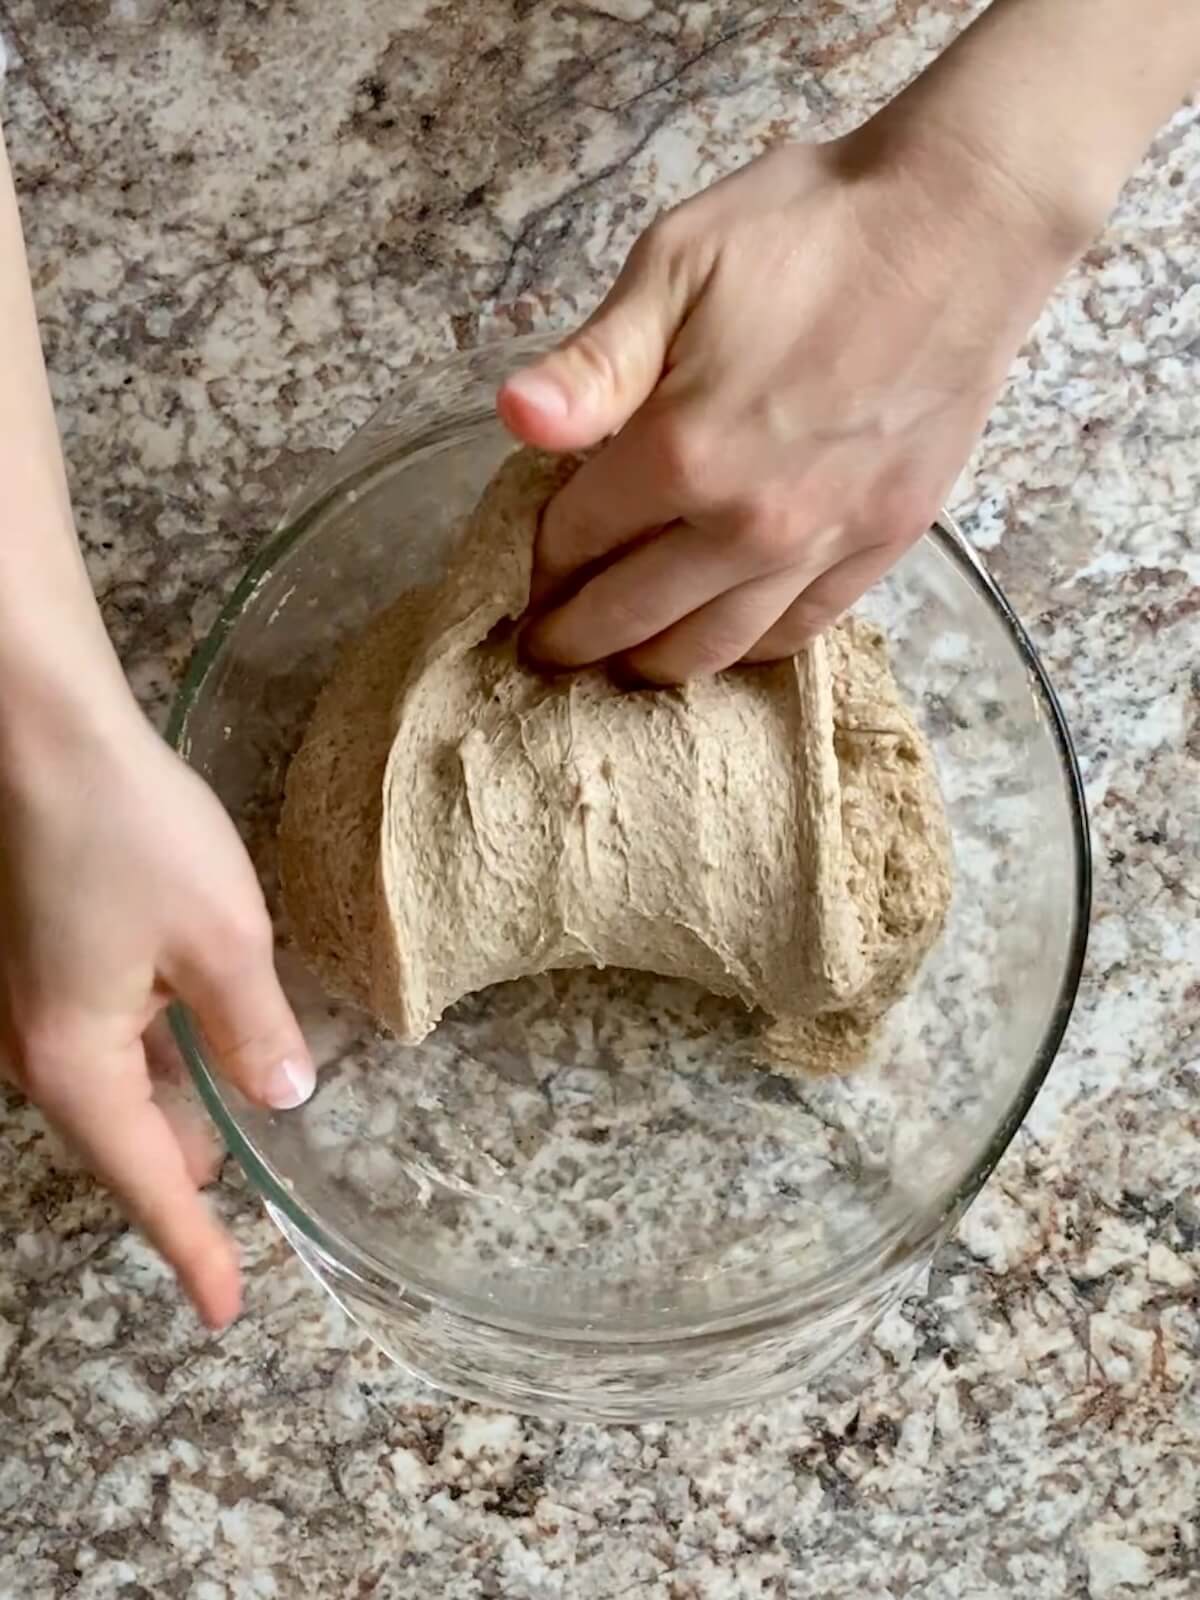
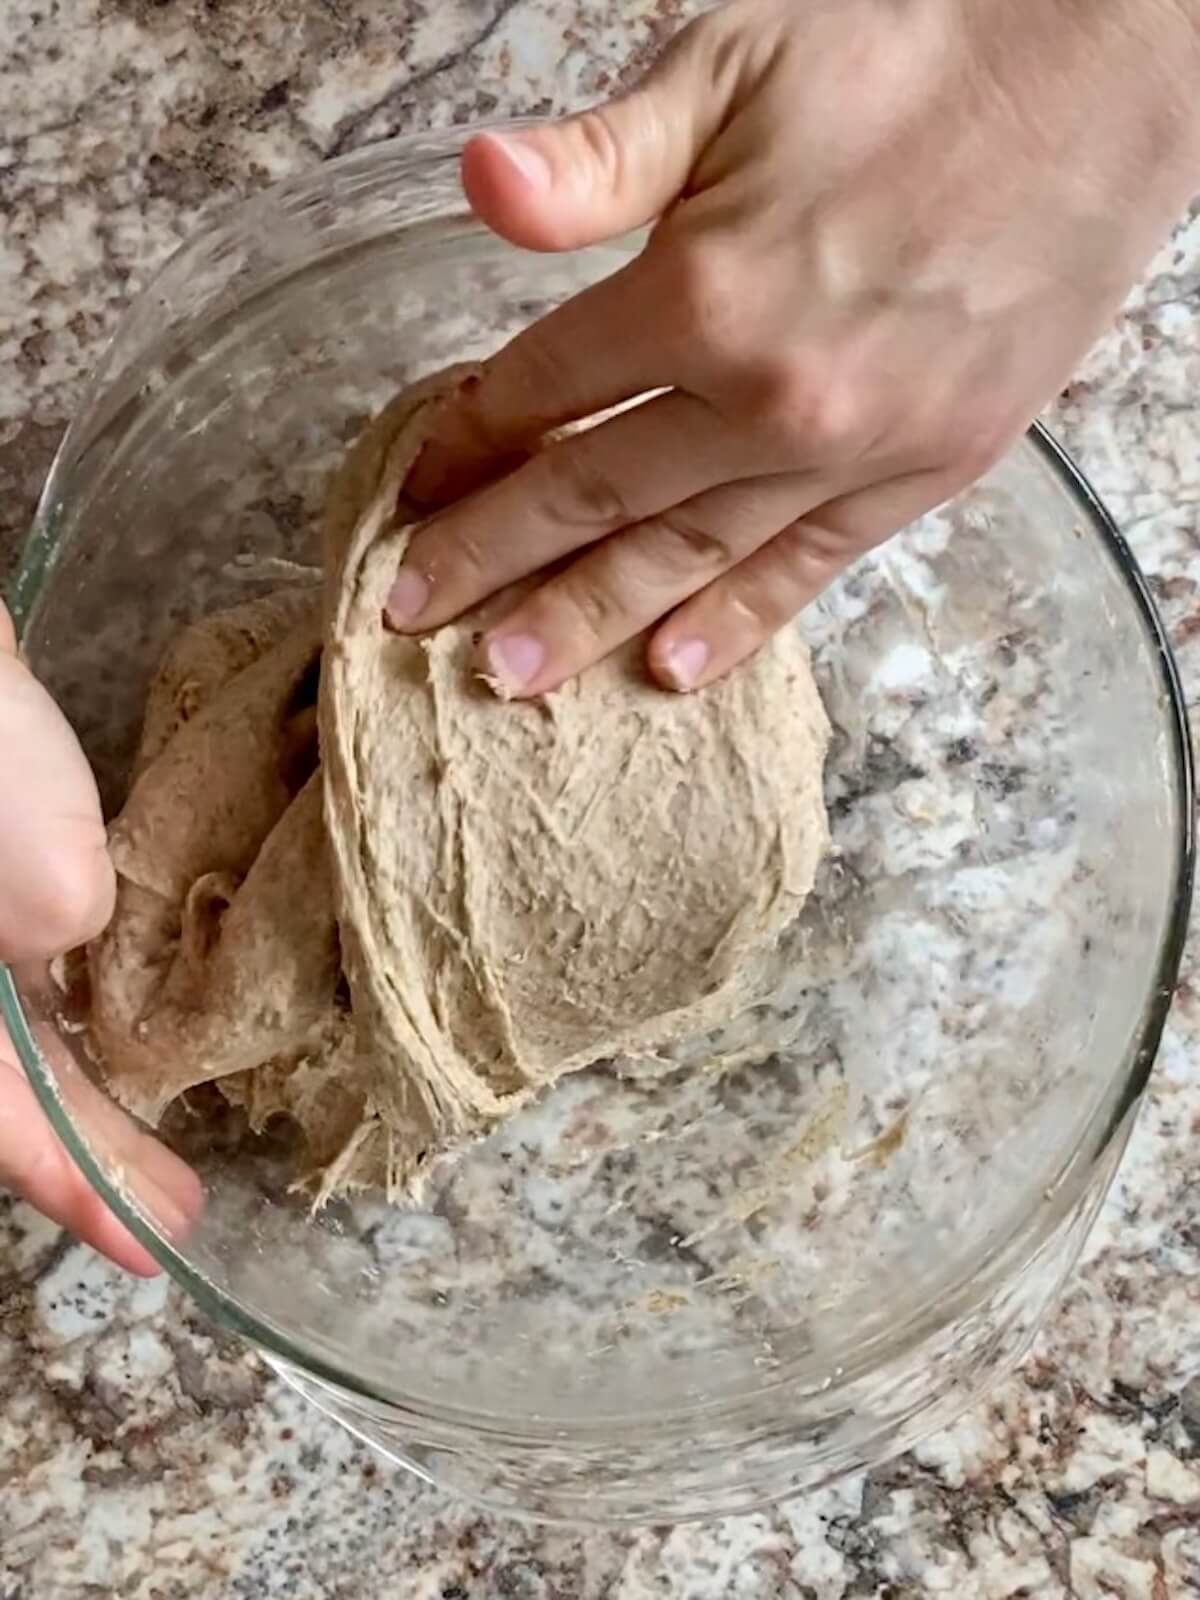
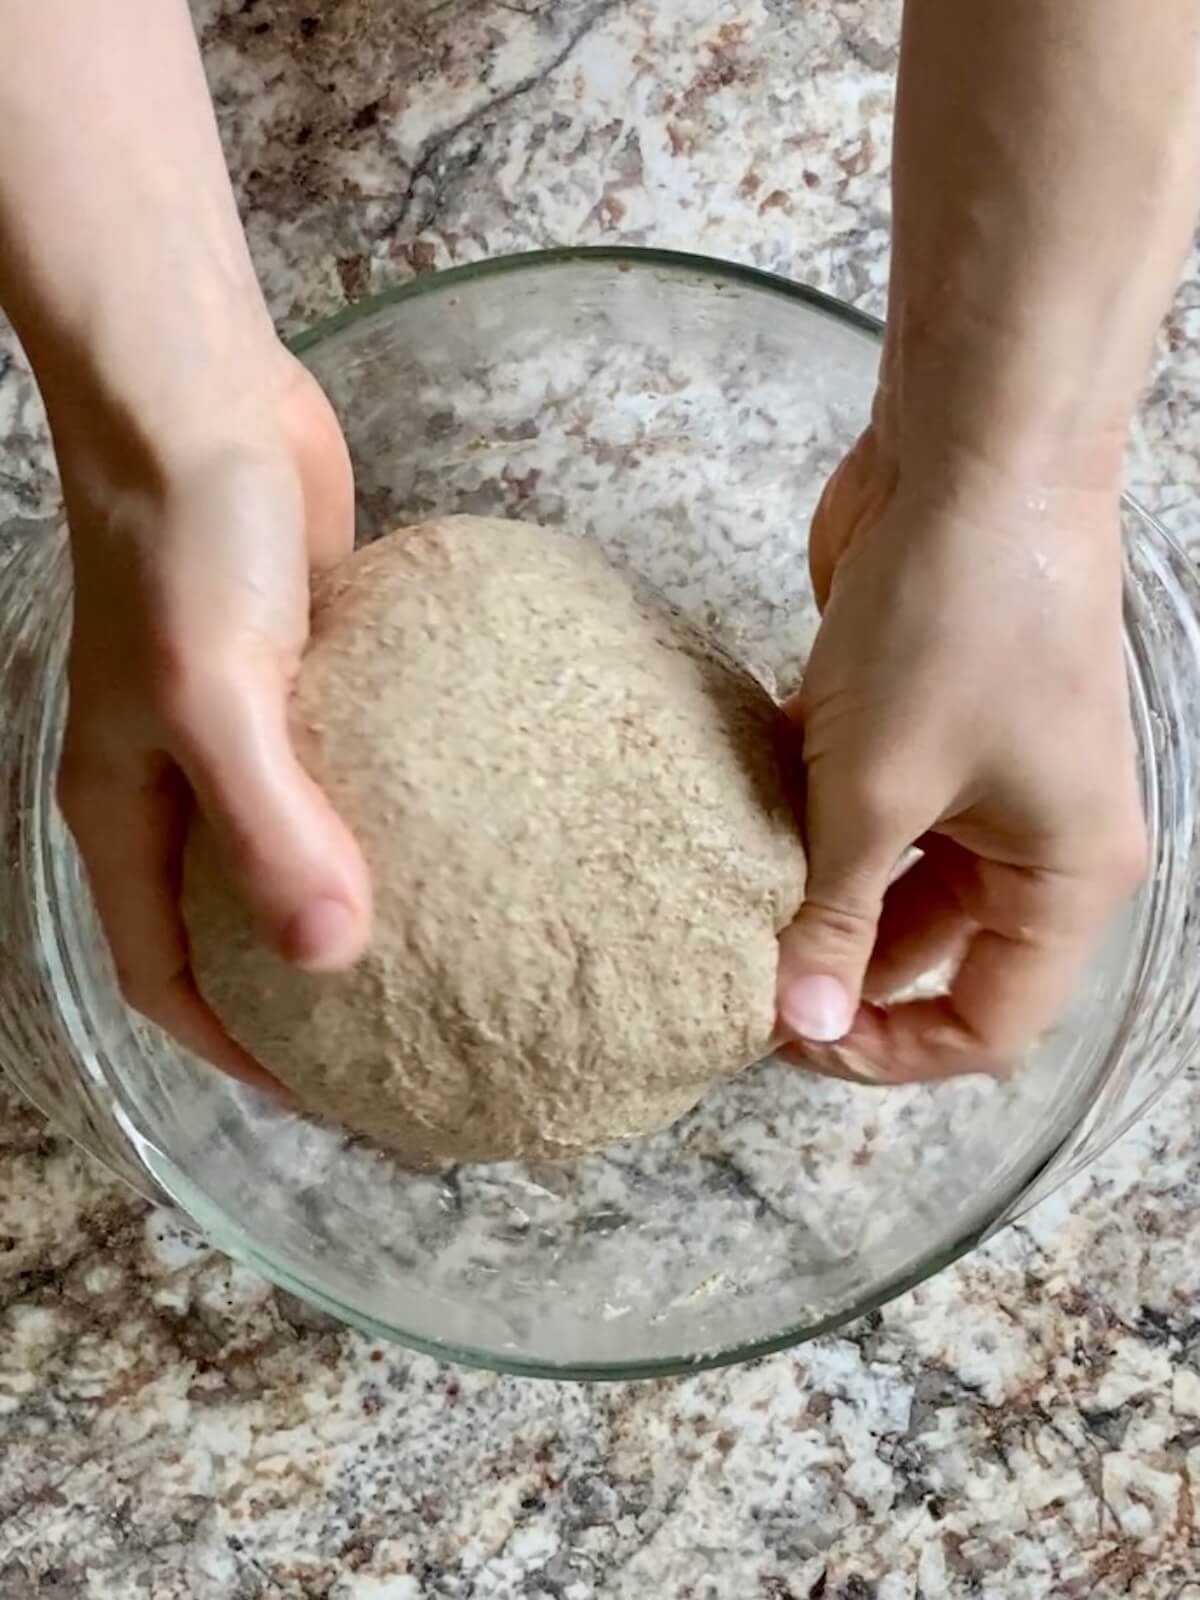
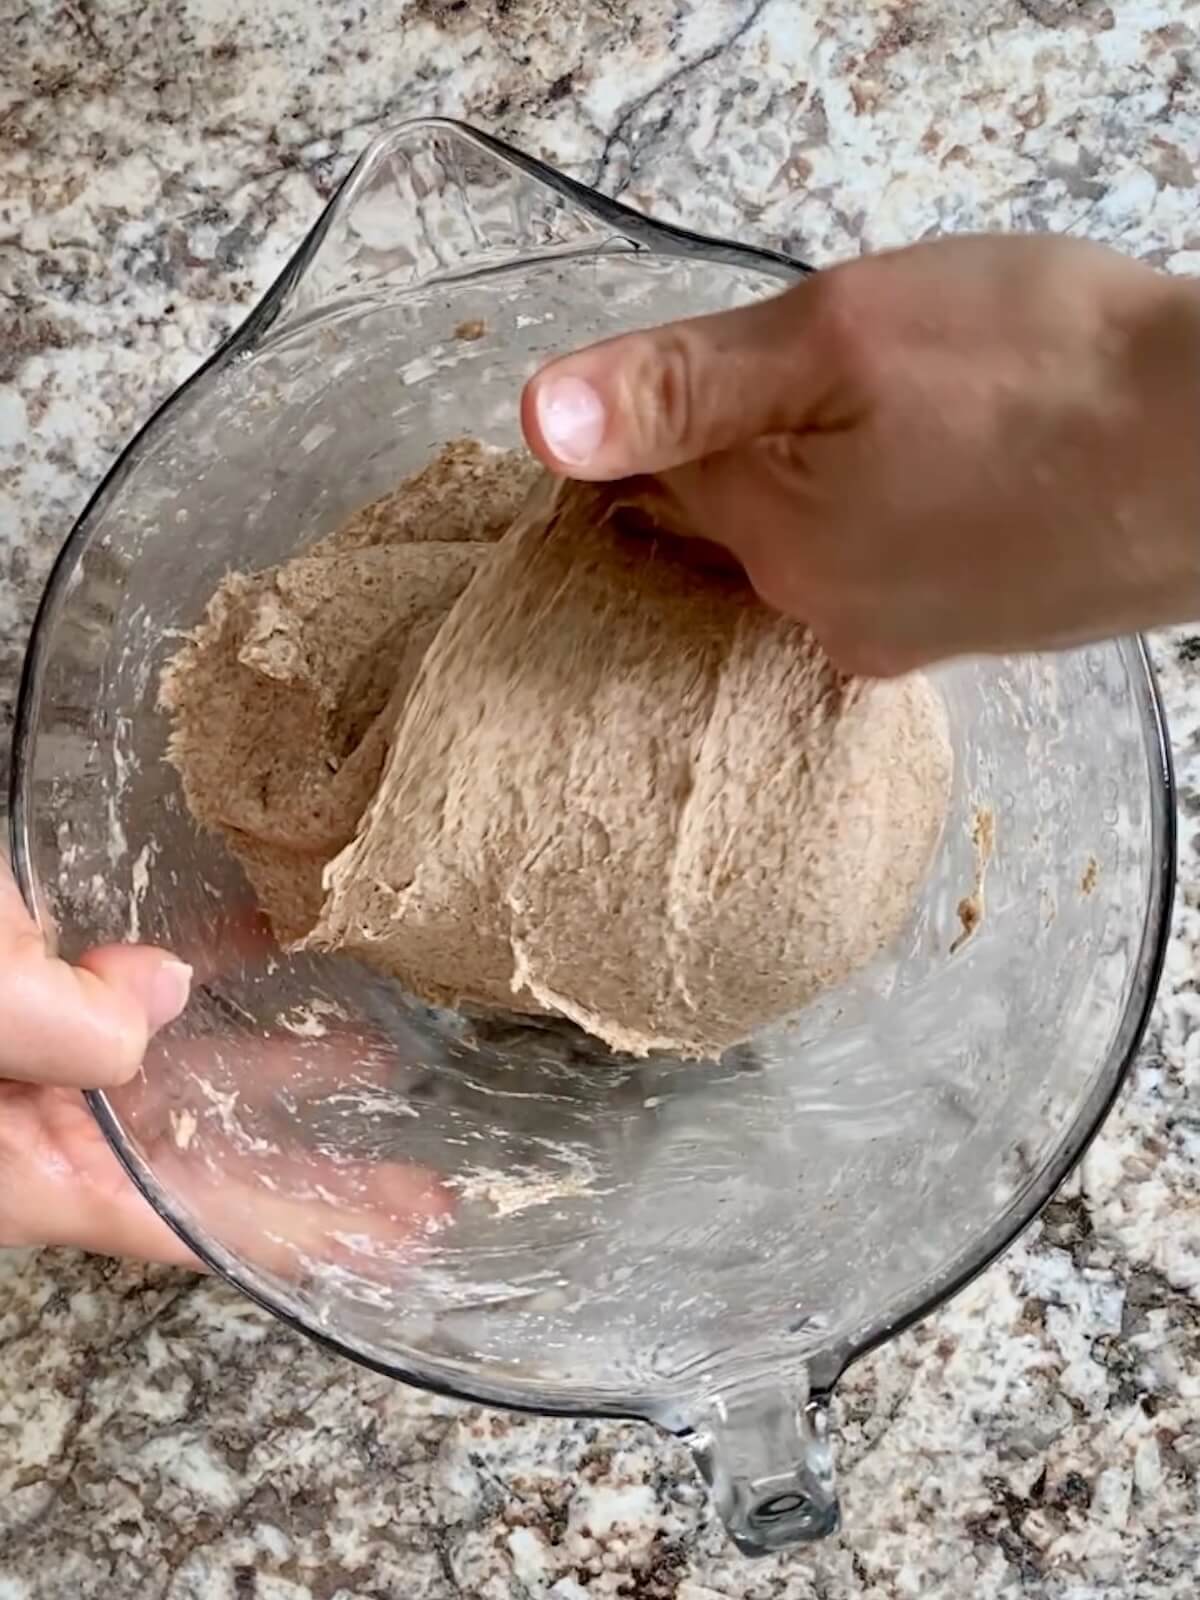
    Step 3: Stretch and fold. Perform 4 sets of stretch and folds, resting for 15 minutes between each set.

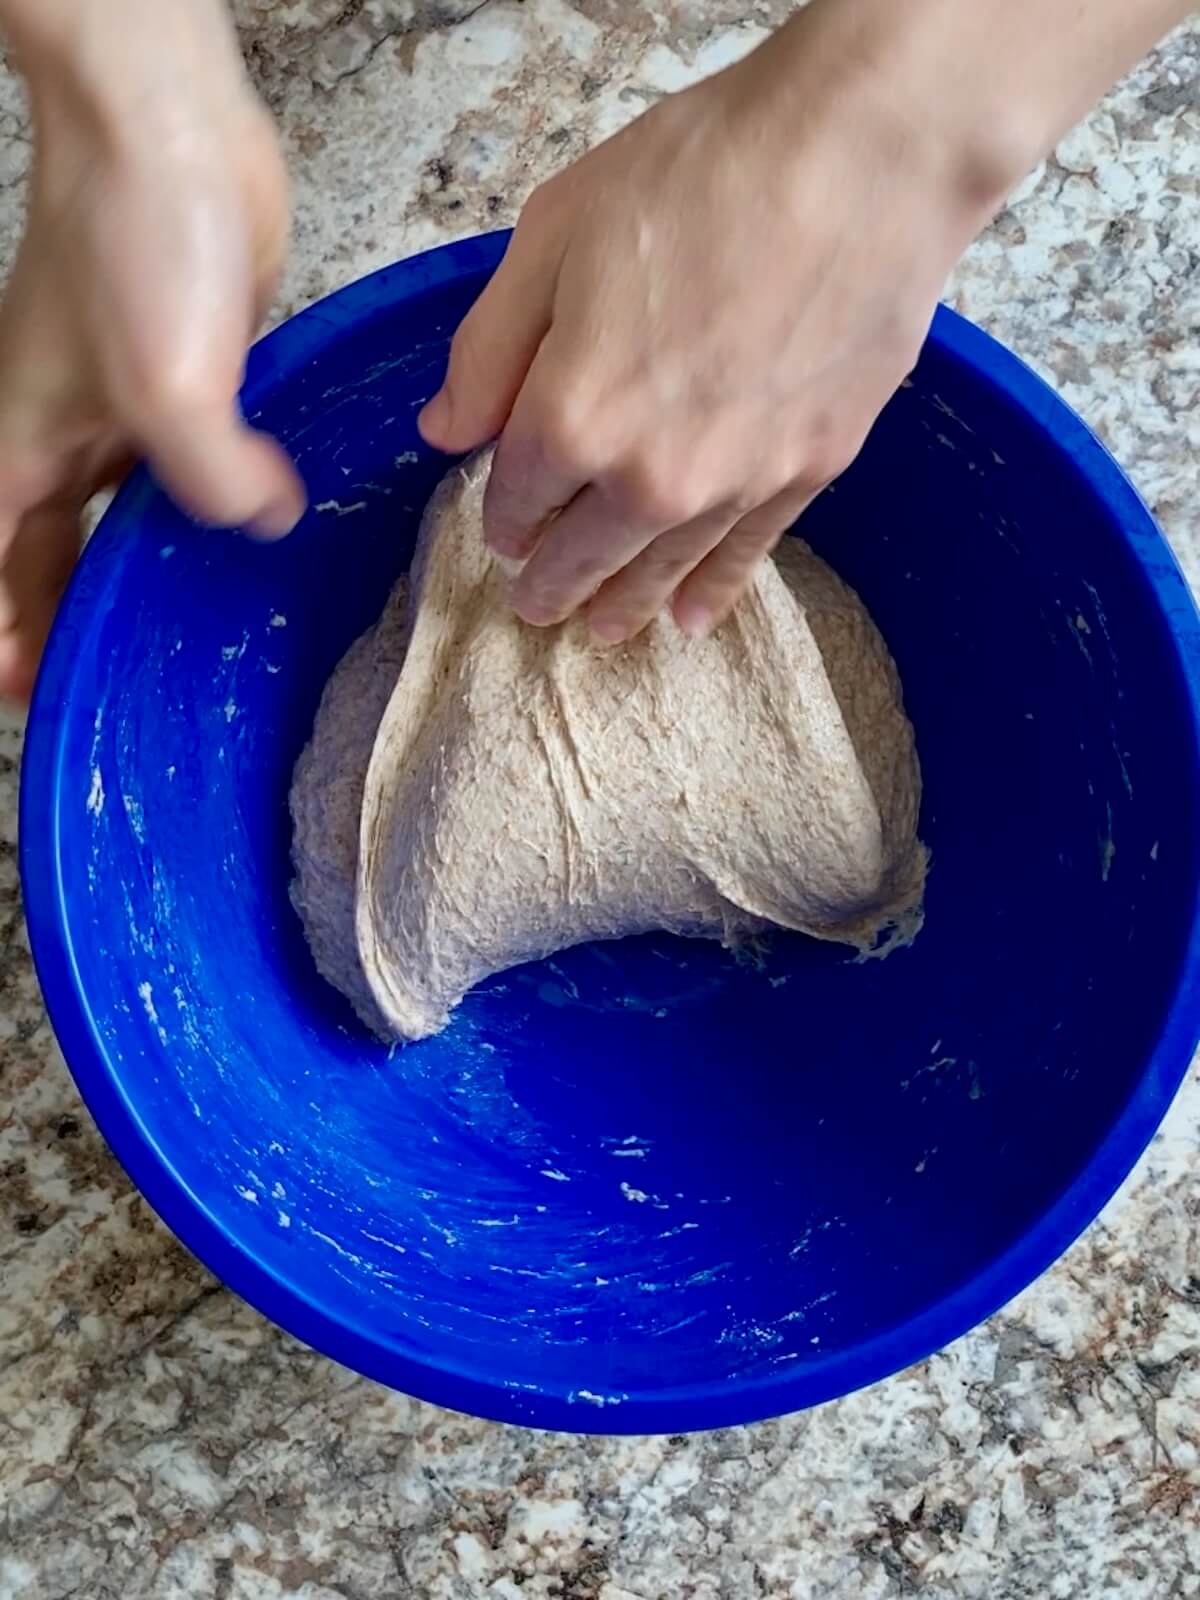
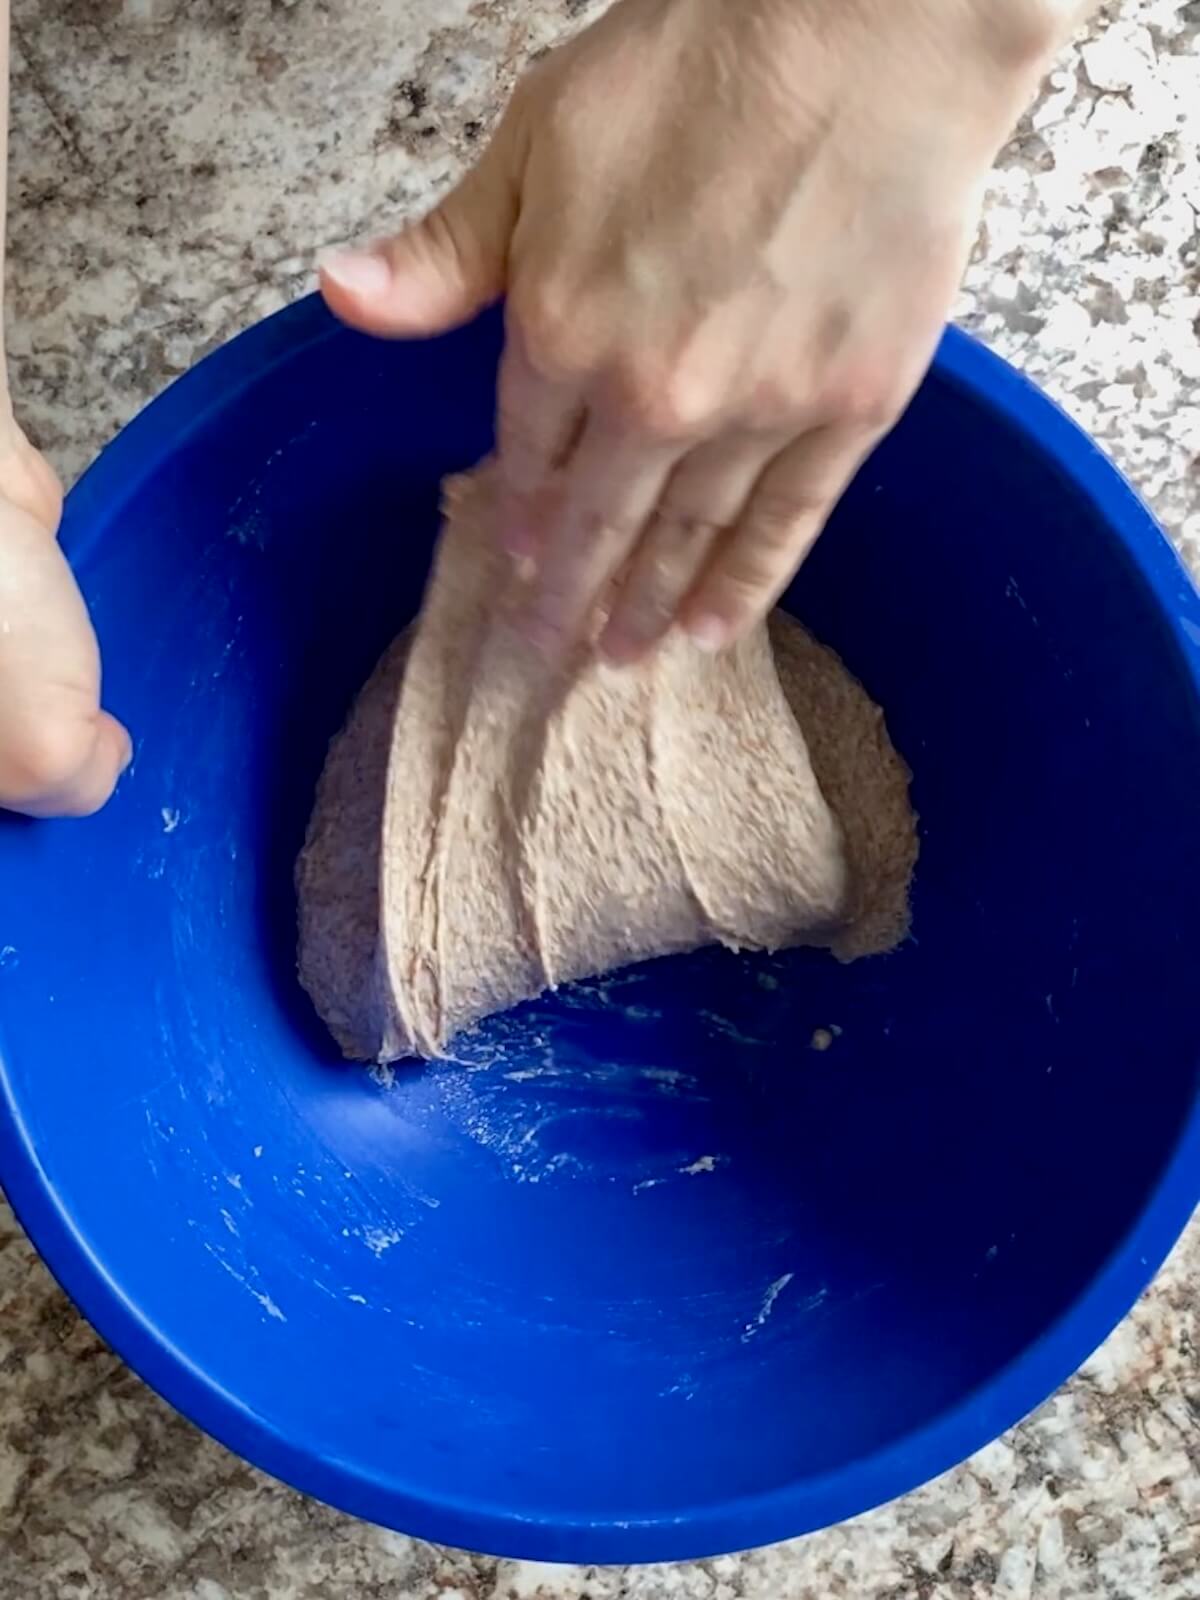
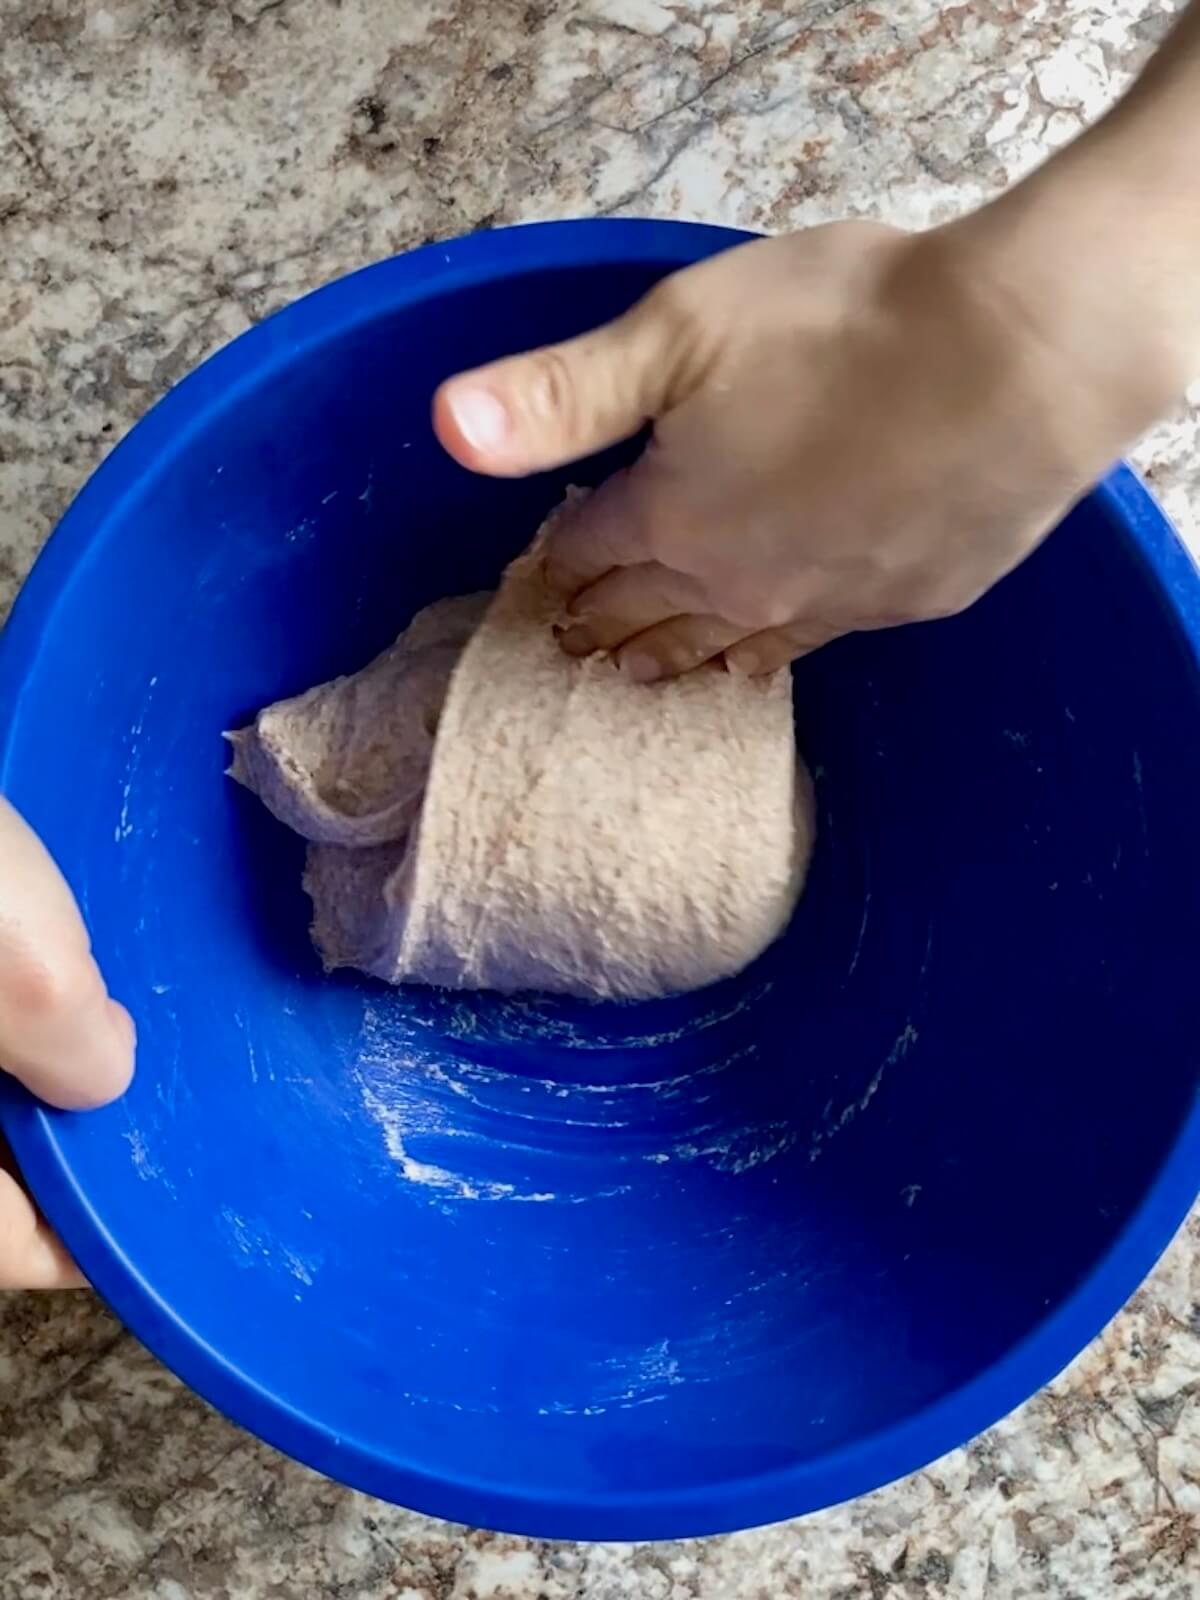
    Hands stretching and folding the whole wheat pita dough in a glass bowl.
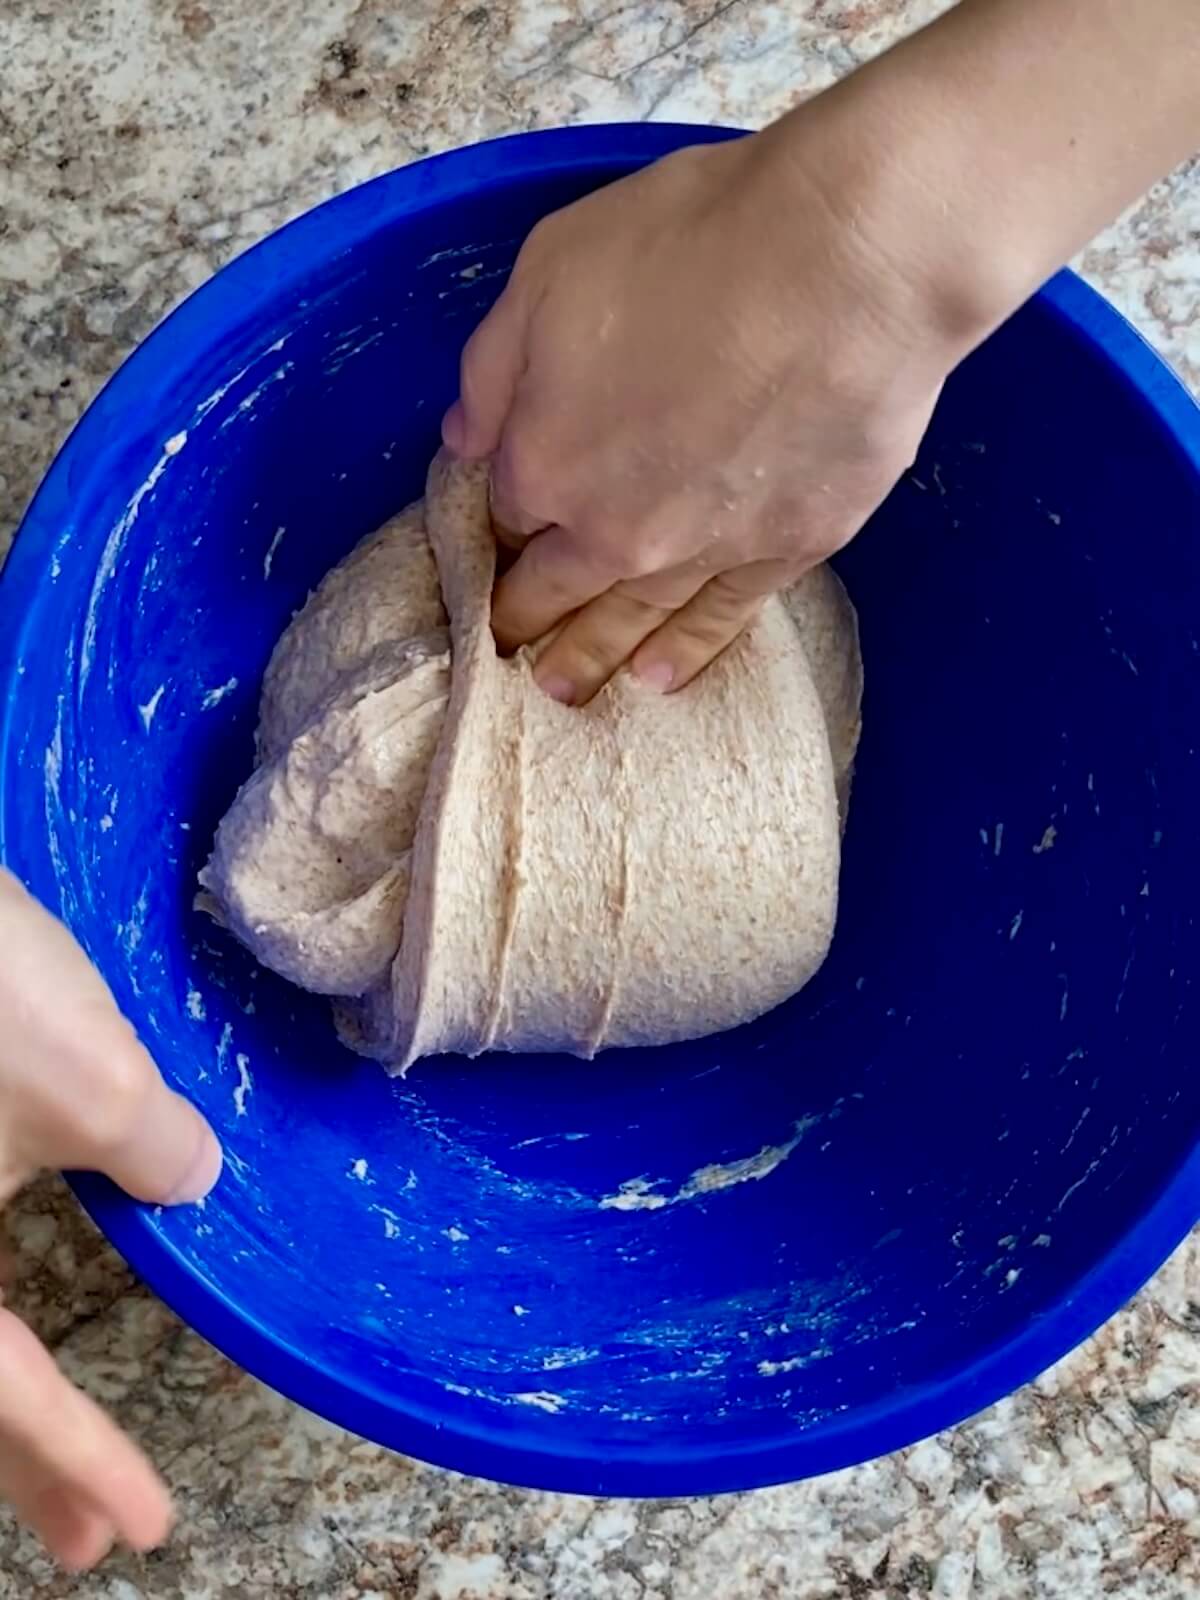
    Hands stretching and folding the whole wheat pita dough in a glass bowl.
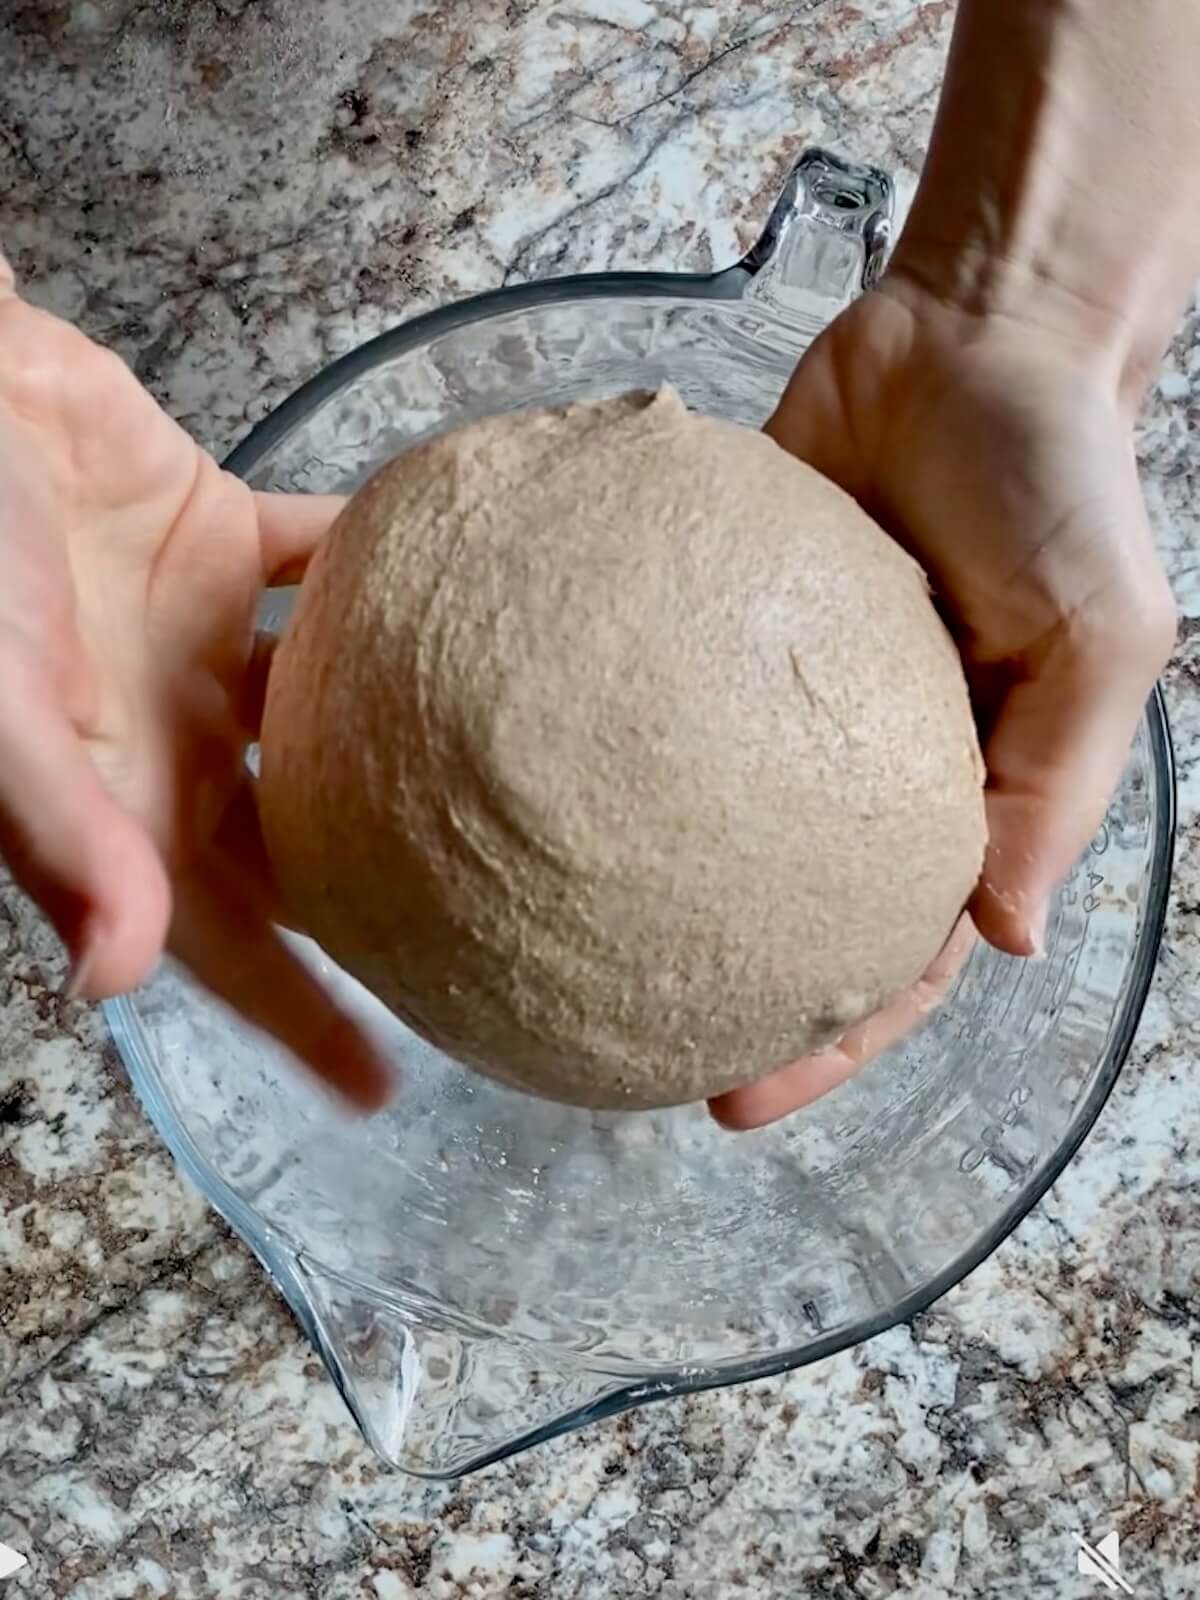
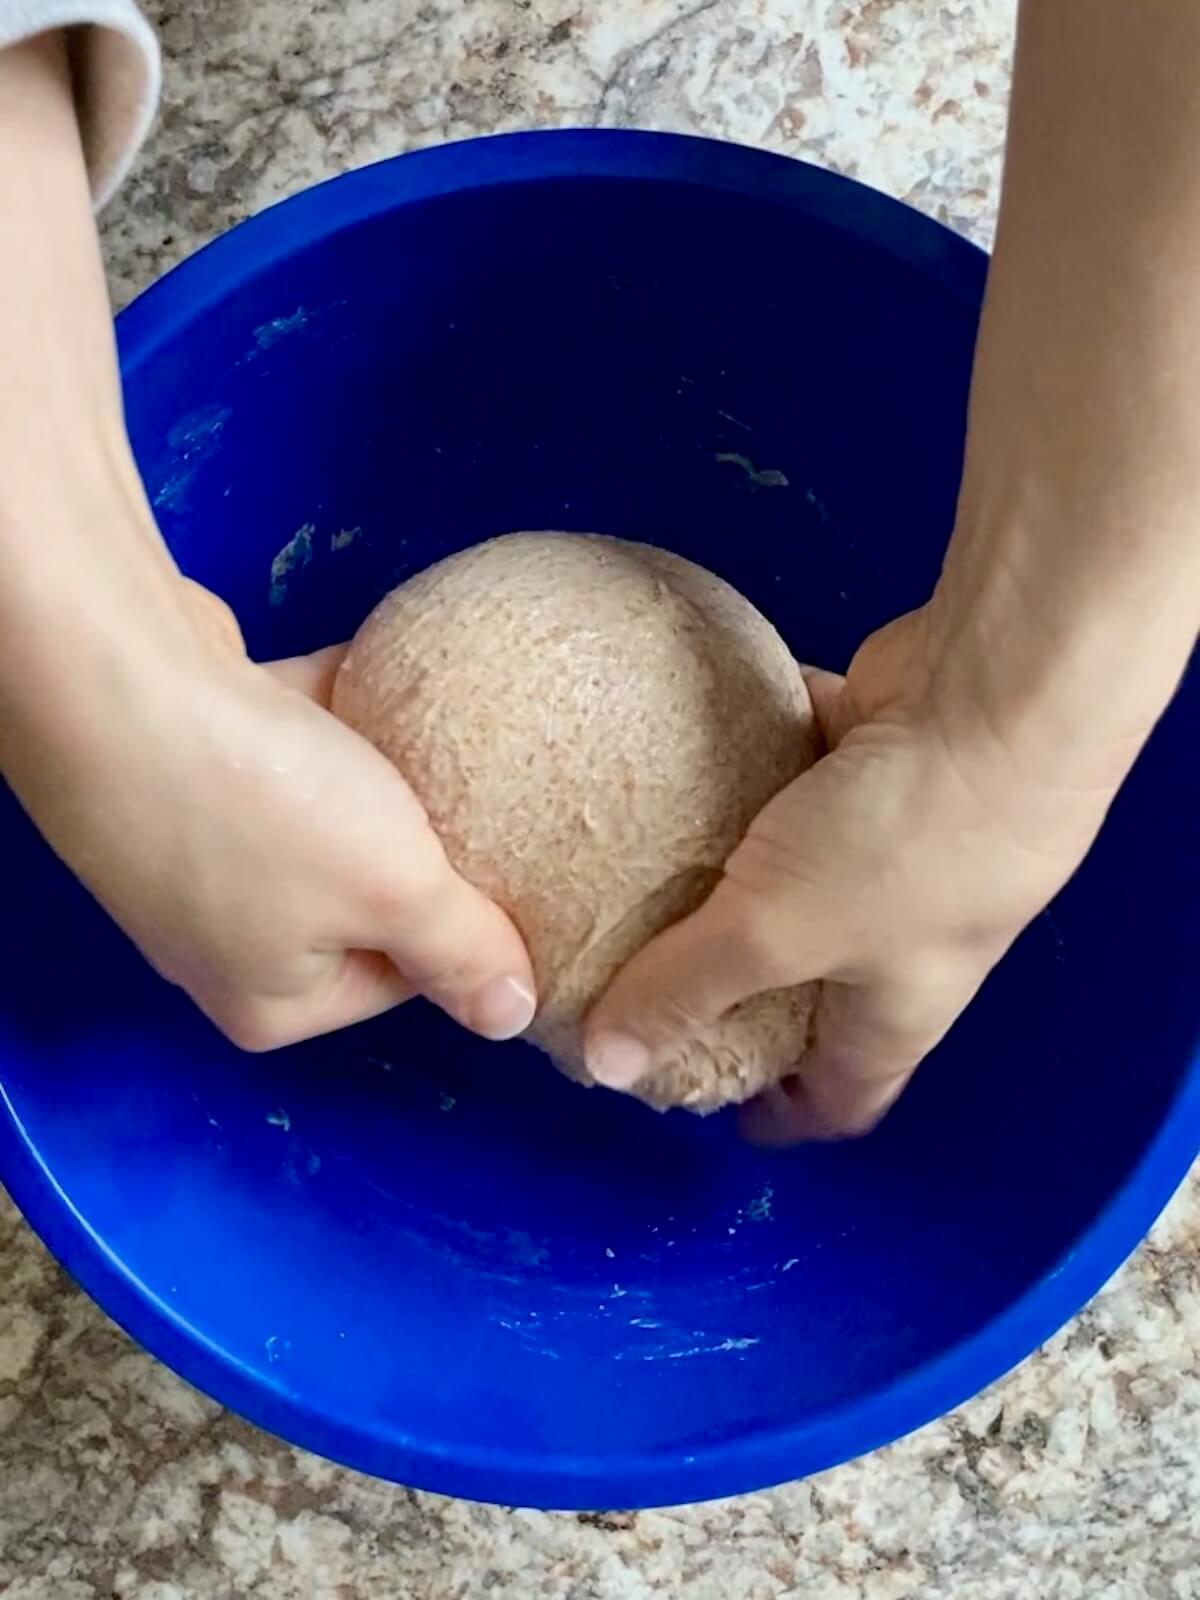
    The whole wheat sourdough pita bread dough being gathered into a ball to be place back in the glass bowl after stretching and folding.

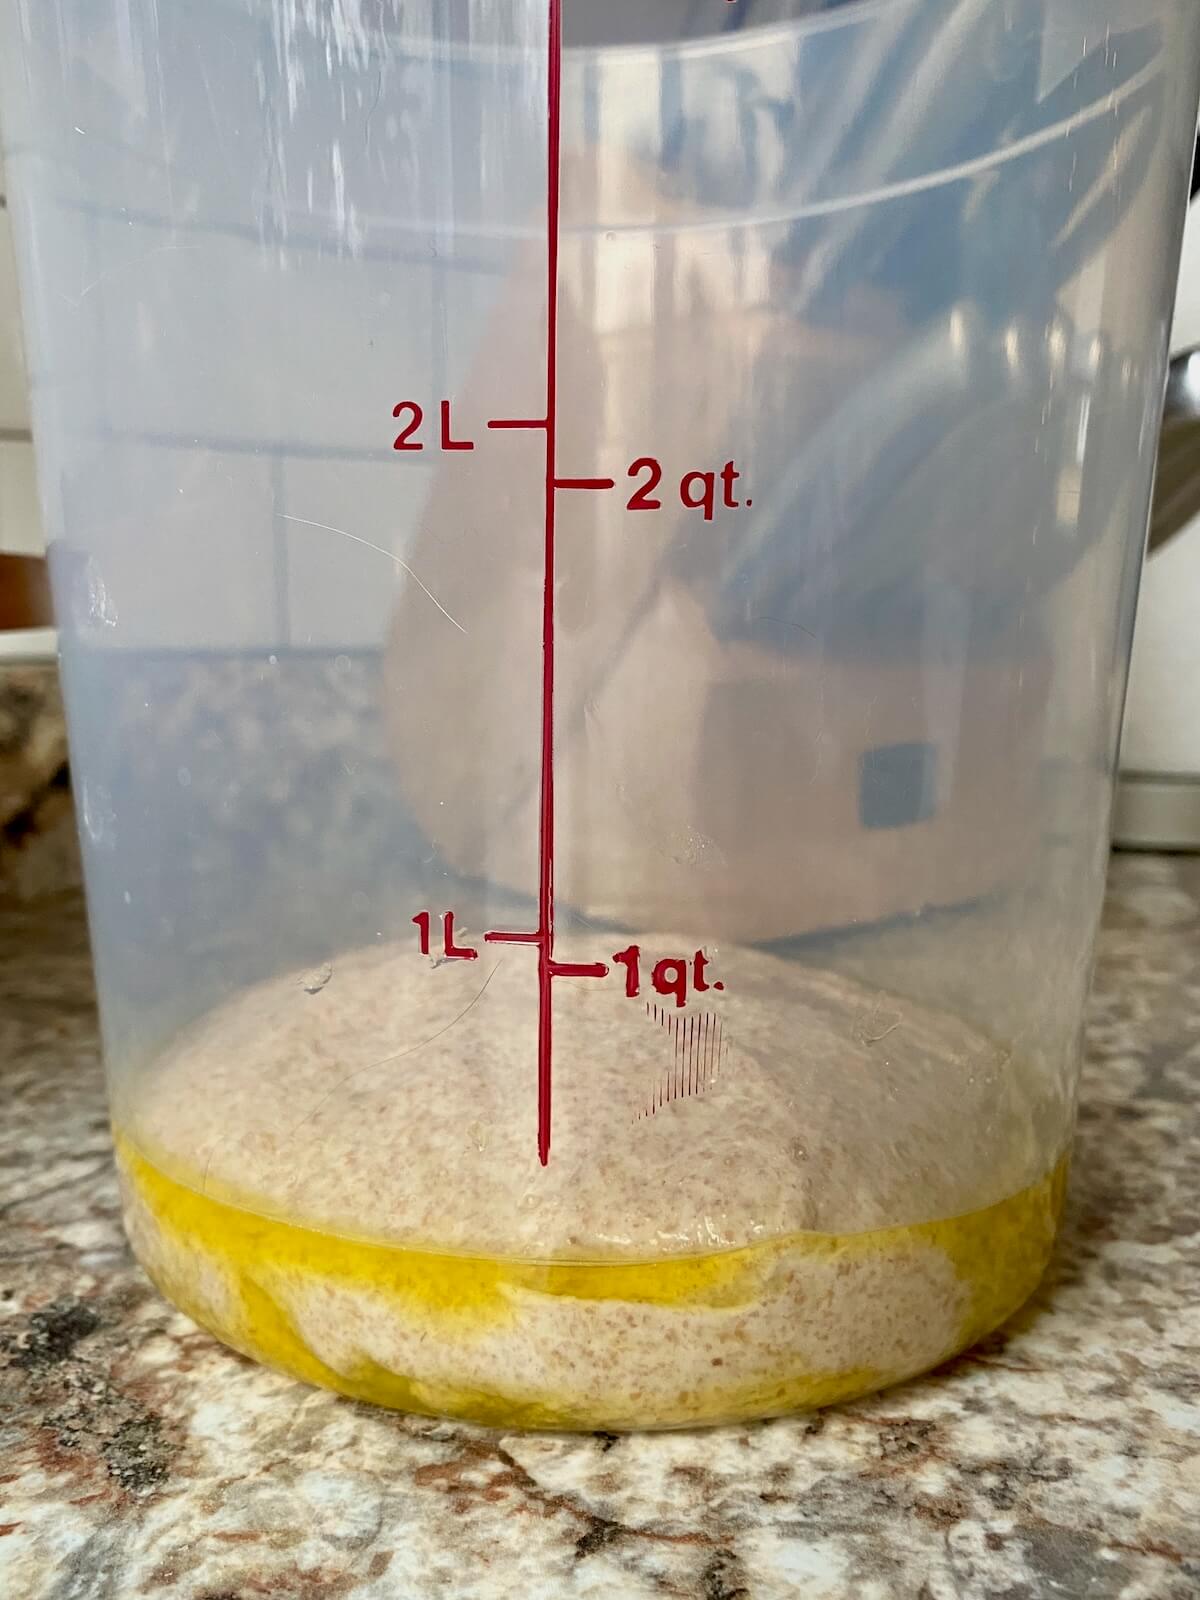
    Step 4: Bulk fermentation. Cover the dough and let it rise in a warm spot for 4-8 hours, or until doubled and bubbly.

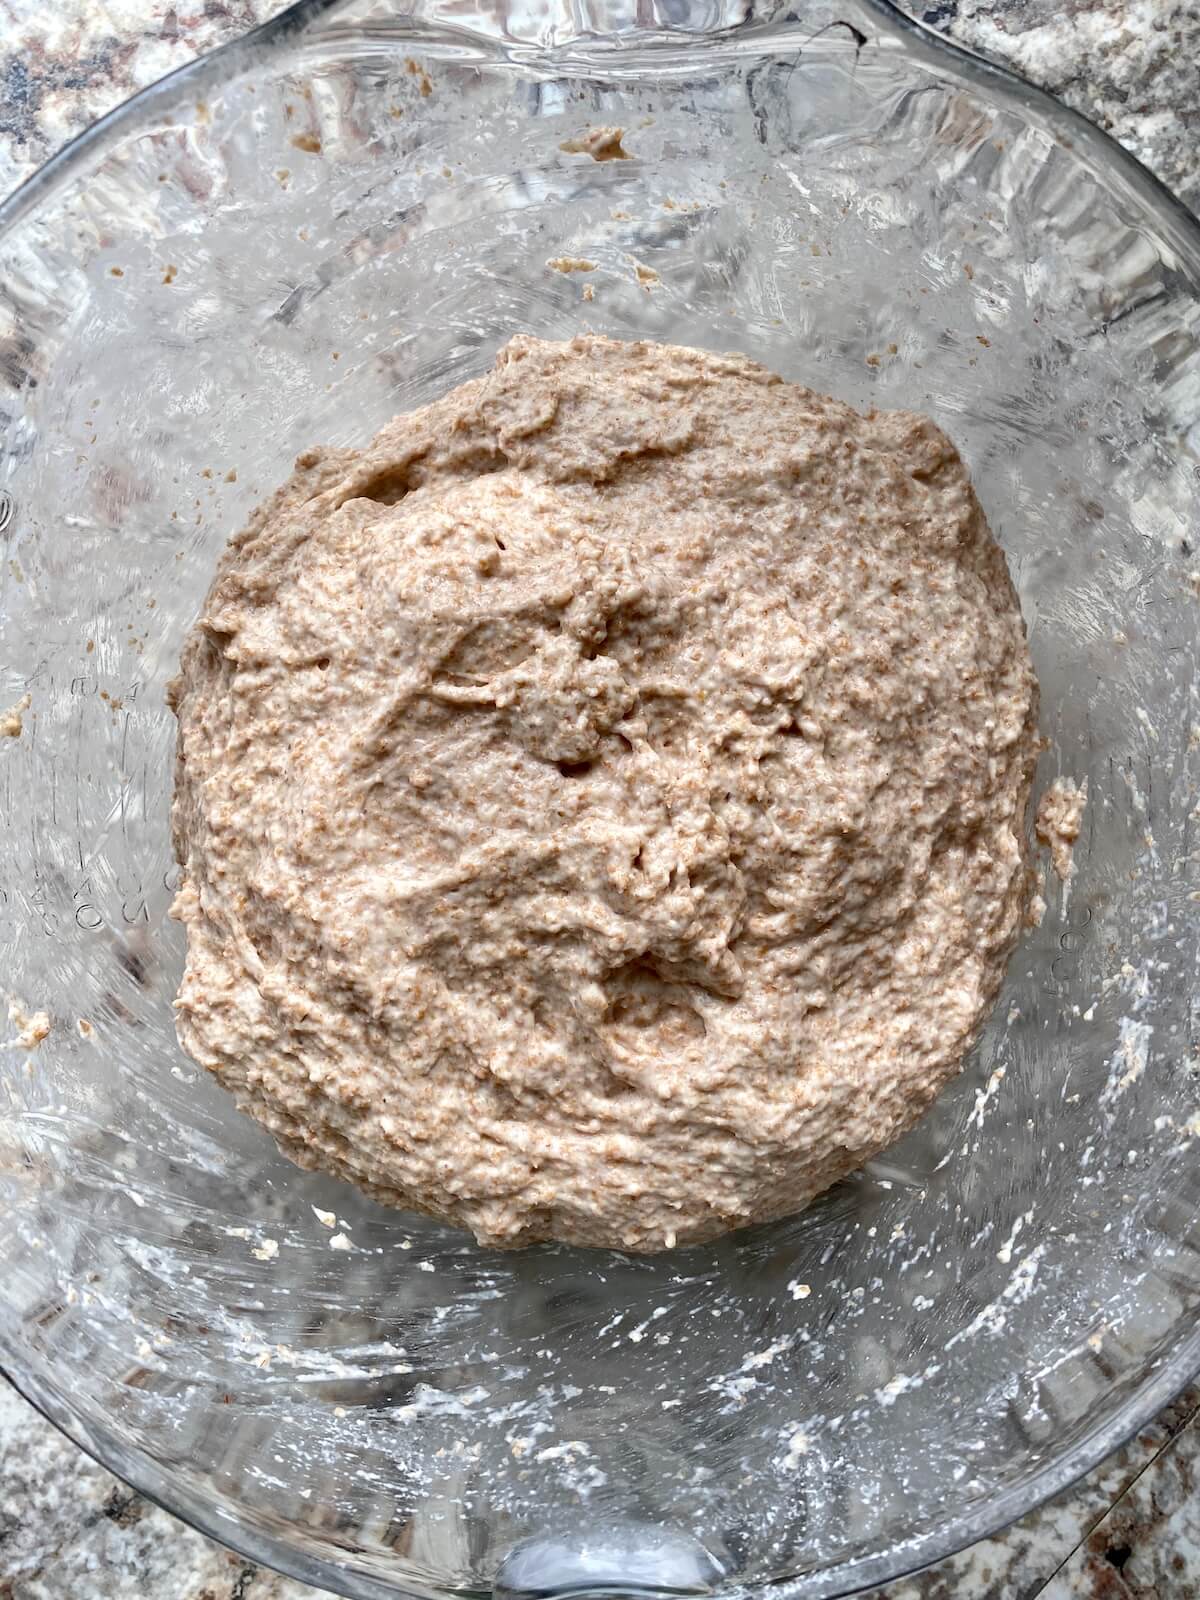
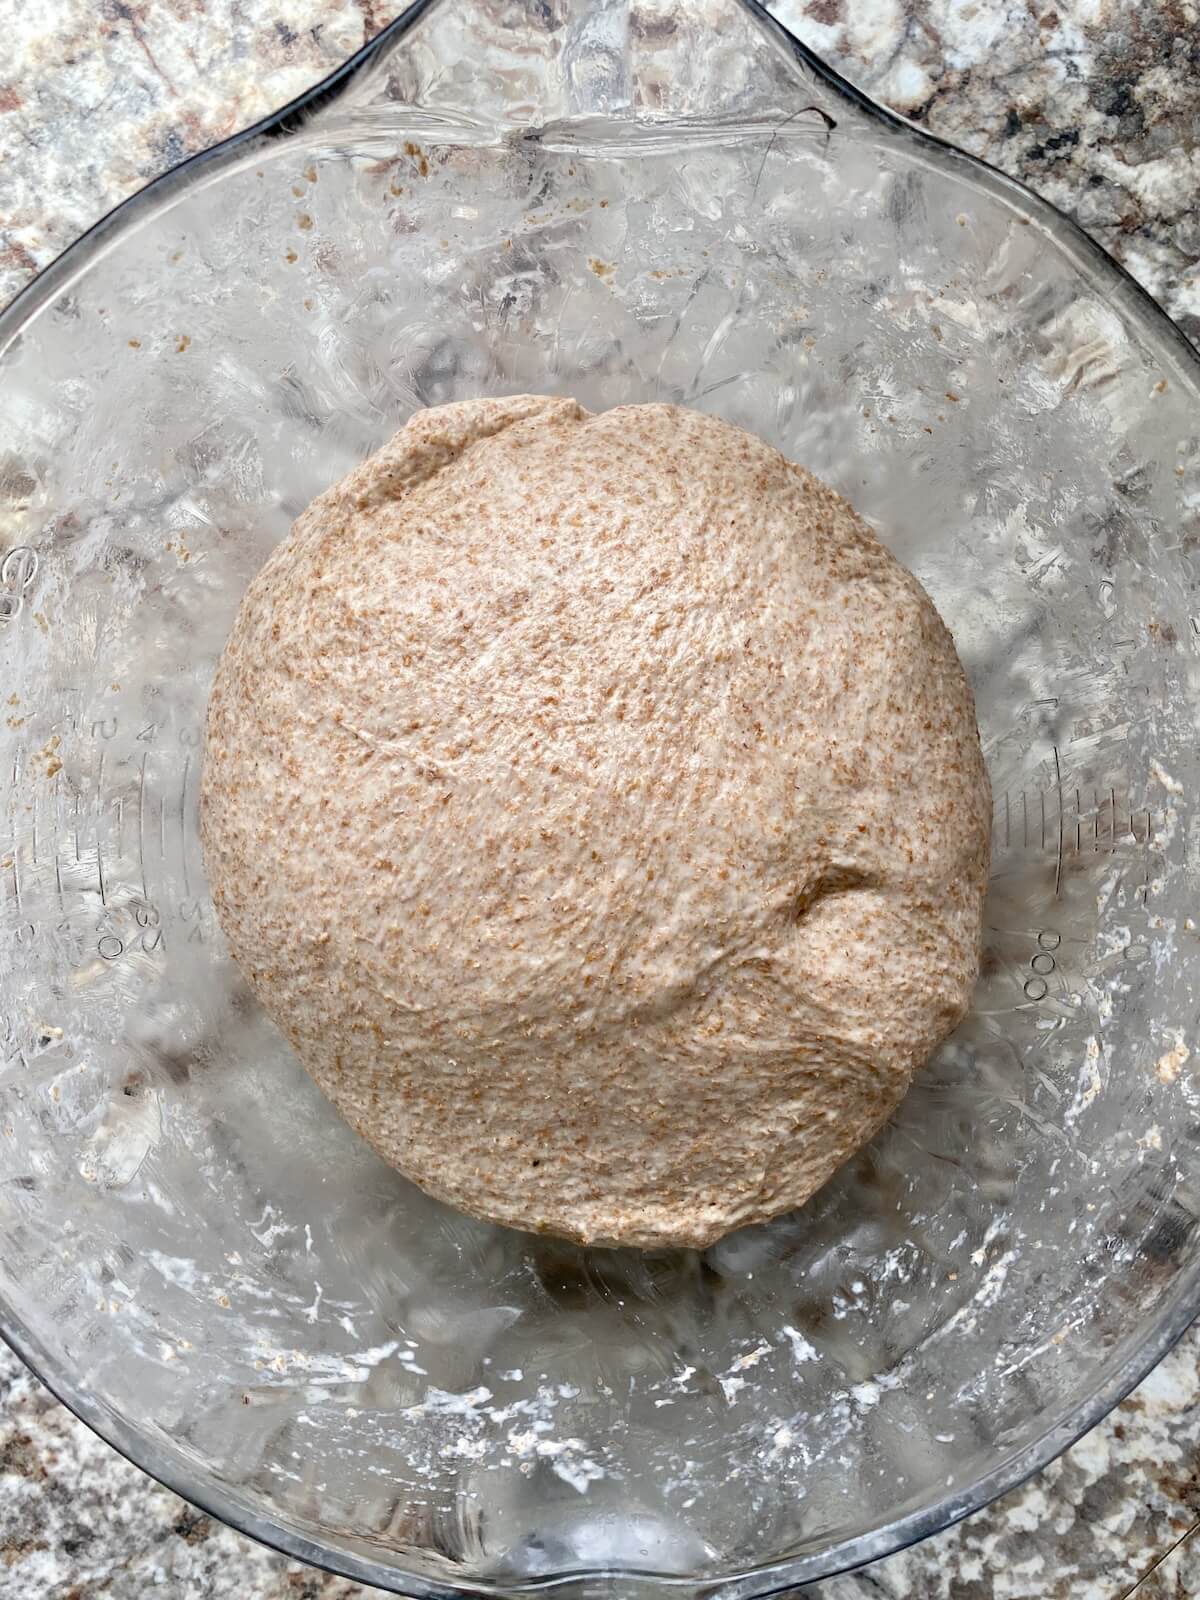
    The kneaded sourdough whole wheat pita bread dough ball in a glass bowl.
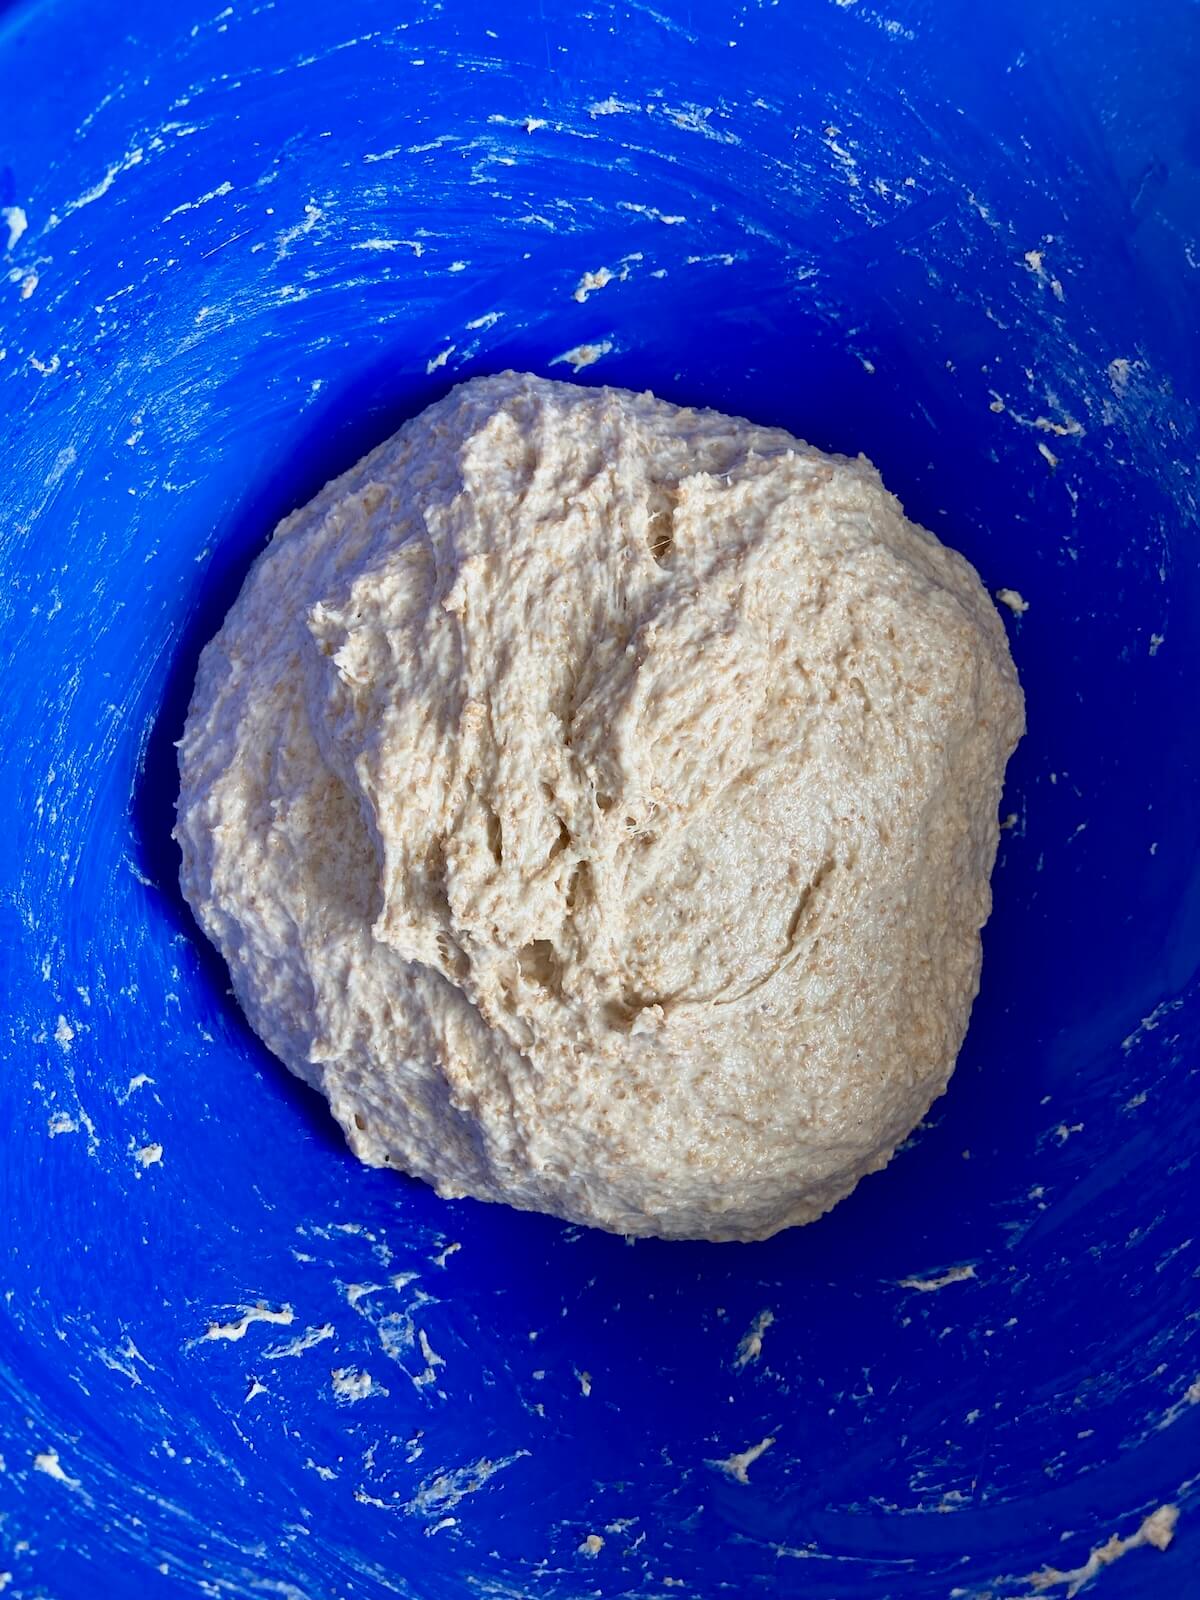
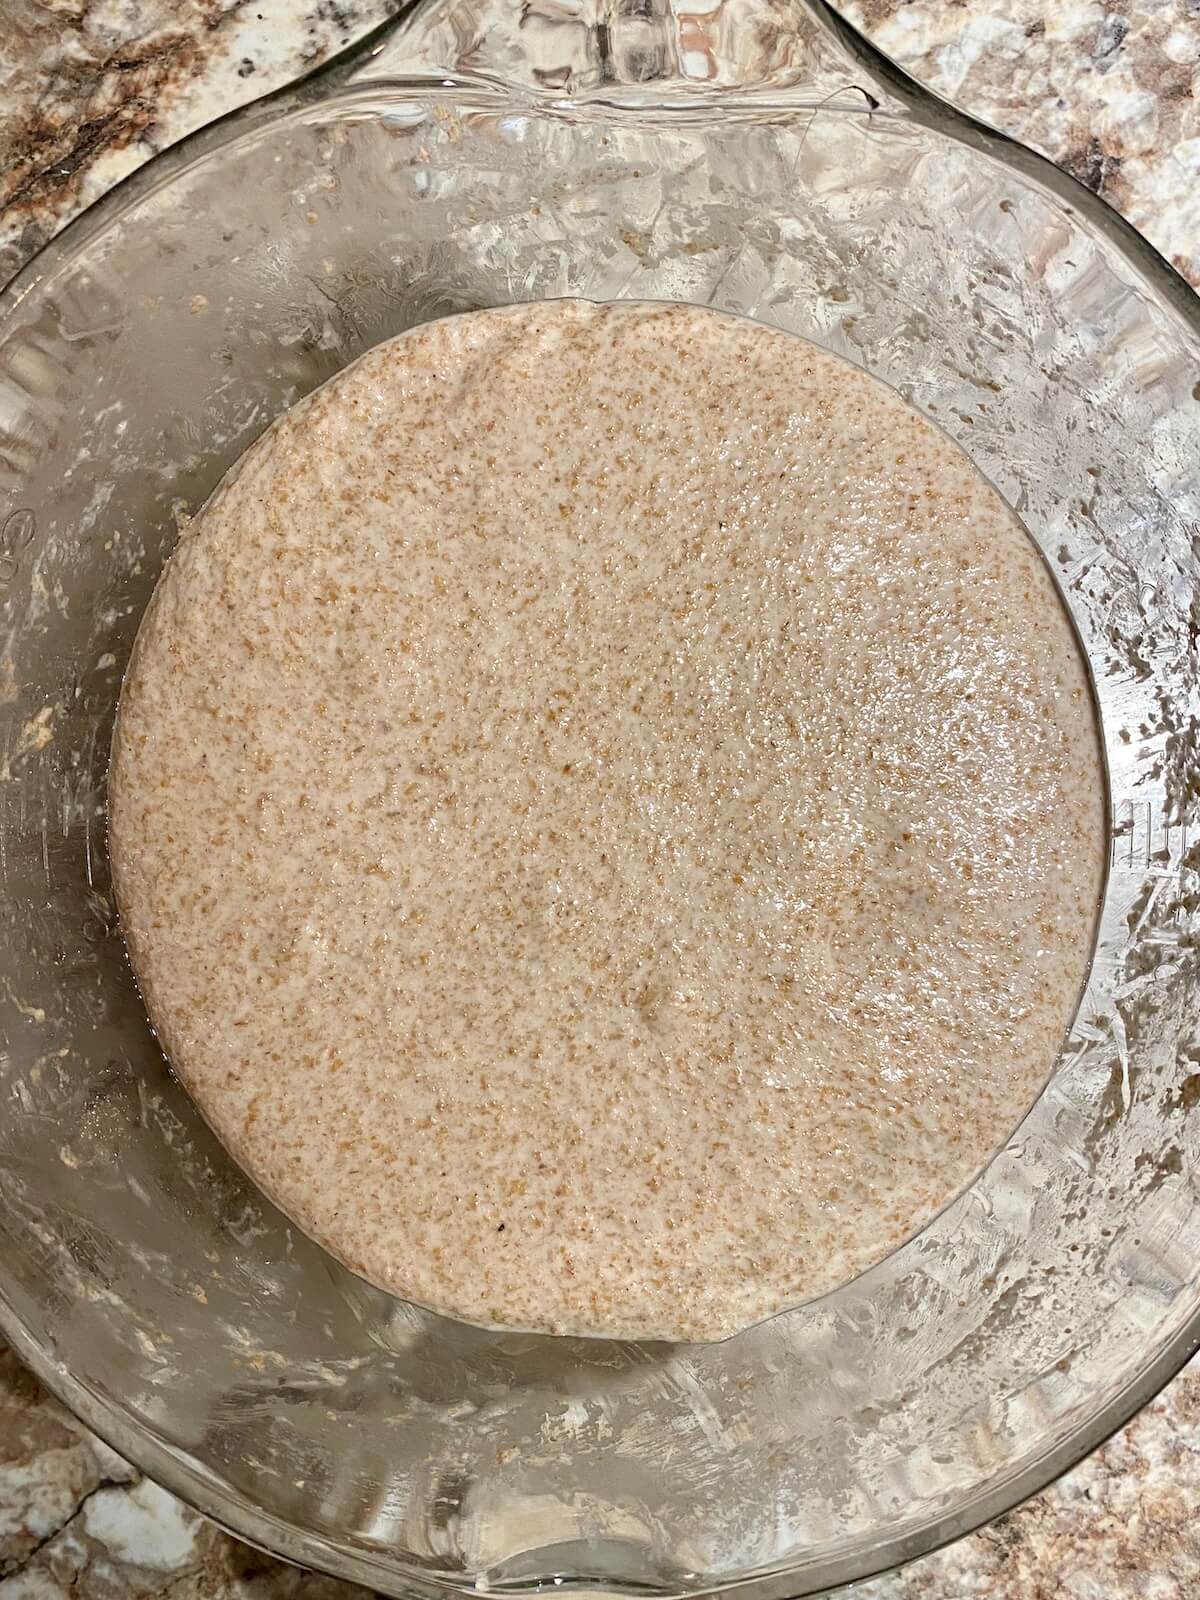
    Whole wheat sourdough pita bread dough in a glass mixing bowl after fermenting with visible gas bubbles on the surface.

    Step 5: Divide and shape. Divide the dough into 8 balls and shape them. Let rest for 20 minutes.

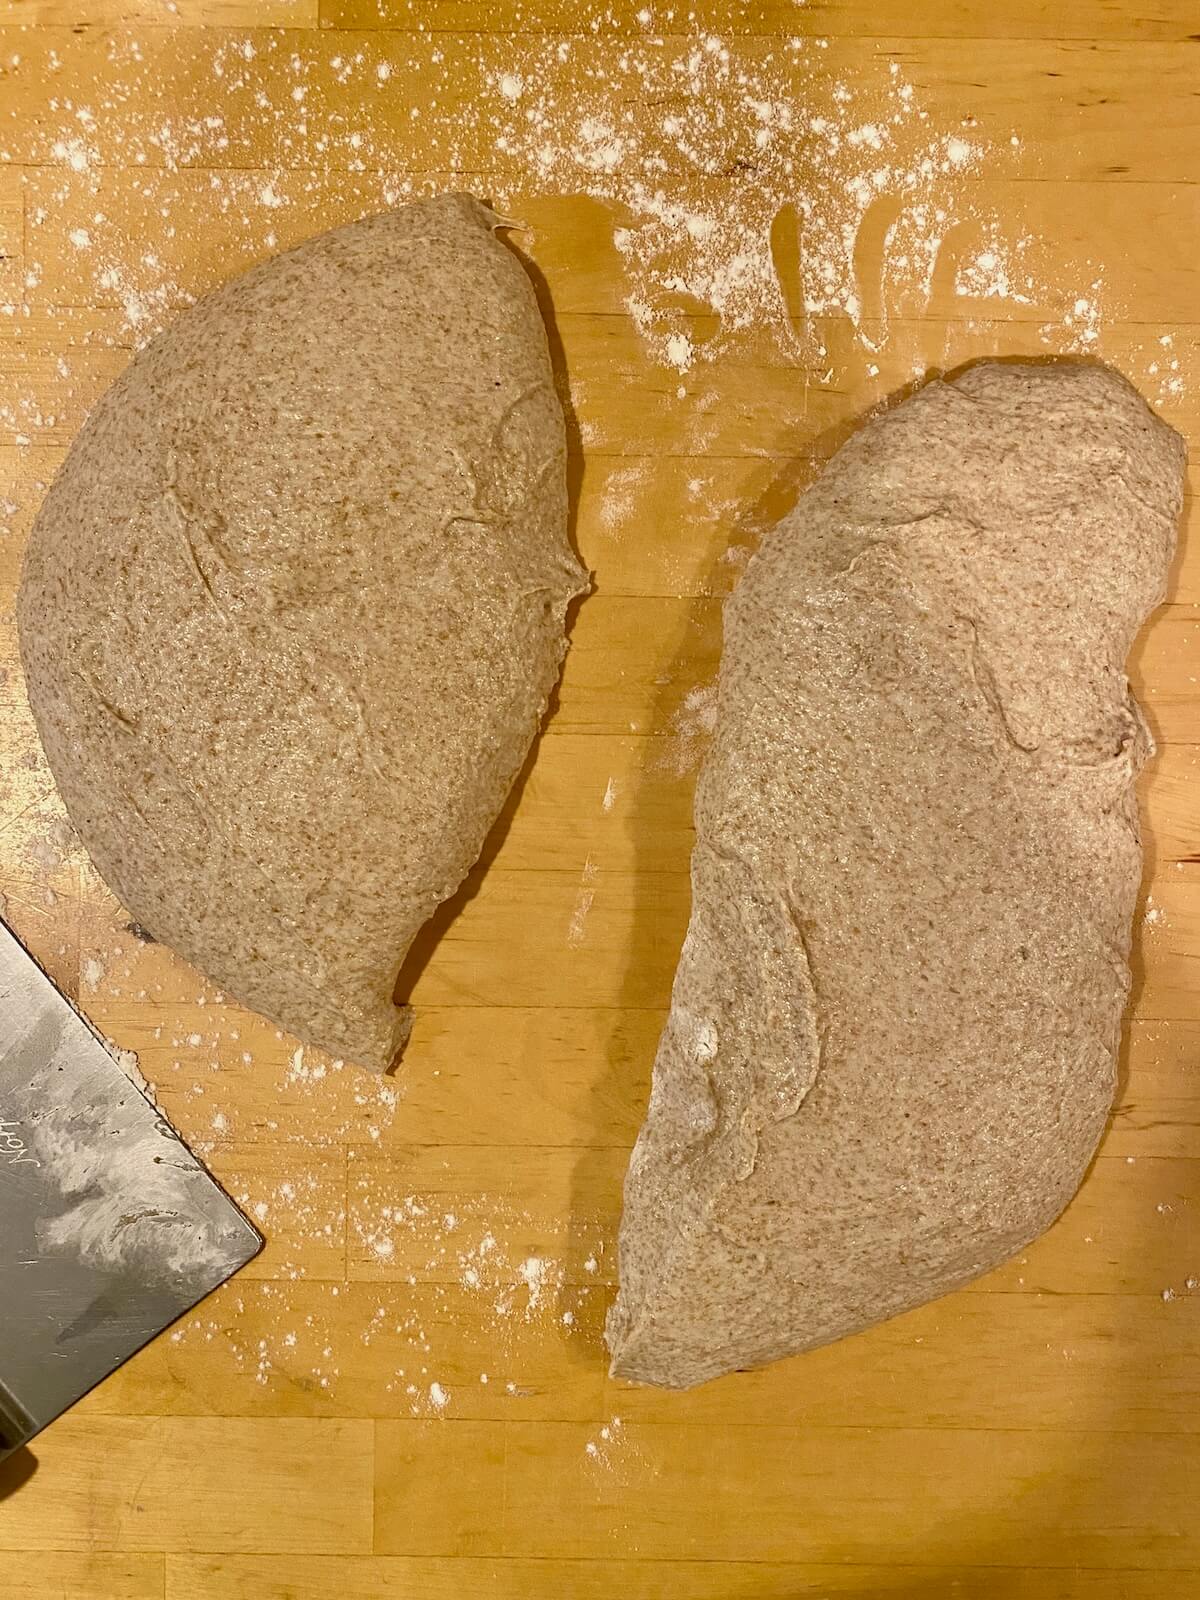
    The dough being divided with a bowl scraper on a lightly floured wooden counter top.
    Eight dough balls on a lightly floured wooden countertop.

    Step 6: Roll out pitas. Roll each dough ball into a 6-inch circle, about ยผ-inch thick.

    A whole wheat sourdough pita dough ball rolled out into a small circle on a counter.

    Step 7: Cook. Heat a dry cast-iron skillet on medium heat. Cook each pita for 30 seconds on both sides, until puffed. Cool completely before storing.

    A whole wheat sourdough pita bread cooking and puffing up in a cast iron skillet.
    A sourdough whole wheat pita bread cooking in a cast iron skillet.

    How to Store

    These sourdough whole wheat pitas will keep at room temperature in an airtight container for up to 2 days before they begin to dry out.

    For longer storage, freeze in a freezer-safe bag for up to 3 months. Thaw at room temperature and rewarm in the oven or toaster oven before serving.

    Serving Suggestions

    Fill these whole wheat sourdough pitas with grilled veggies, chicken, or steak for a quick lunch or dinner. Or serve them as an easy appetizer along with hummus and whipped feta dip.

    Theyโ€™re also great paired with fresh salads like spinach Caprese, strawberry spinach, arugula, or Caesar salad.

    A stack of sourdough whole wheat pitas on a wooden pizza peel.
    A cover of a recipe ebook with the title "Everyday Sourdough: 27 Sweet & Savory Sourdough Discard Recipes." There is an image of sourdough discard cinnamon rolls on the front. At the bottom, it reads "By Ashley Petrie of Everyday Homemade."
    Grab a copy today!

    Are you tired of watching your sourdough discard go to waste?

    Itโ€™s time to turn excess discard into something delicious with my new ebook - Everyday Sourdough!

    Inside, youโ€™ll find 27 tried-and-true sourdough discard recipes that will transform your leftover starter into mouthwatering creations your family and friends will love.

    No more guilt about wasting your discard - with Everyday Sourdough, you have endless options to quickly make something amazing anytime.

    Let's Connect!

    Be sure to leave a comment below if you have any questions. You can also connect with me on Instagram, Facebook, Pinterest, or via email at [email protected].

    More Whole Wheat Sourdough Recipes

    • Two pieces of 100% whole wheat sourdough bread on a piece of parchment paper.
      100% Whole Wheat Sourdough Bread
    • Three slicing of multigrain sourdough bread on a cutting board next to half of a loaf.
      Multigrain Sourdough Bread
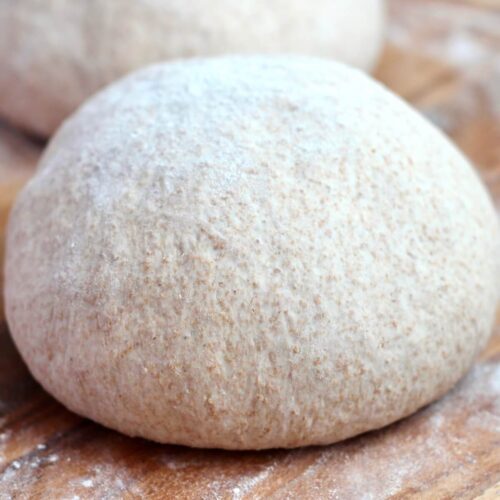
    • A sourdough whole wheat pizza dough ball on a floured pizza peel.
      Sourdough Whole Wheat Pizza Dough
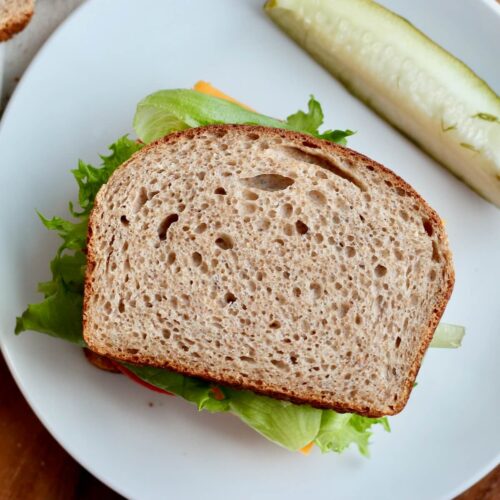
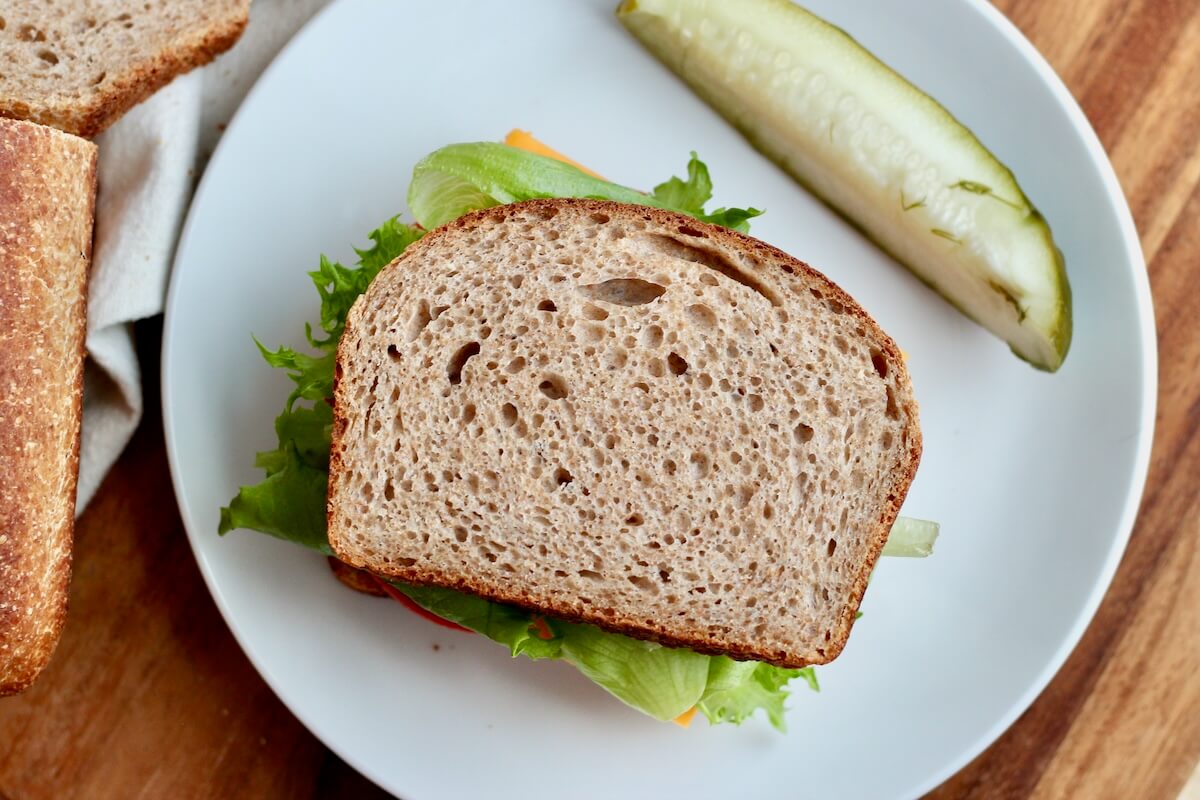
    • A sandwich made on whole wheat sourdough sandwich bread. The sandwich is on a white plate and their is a pickle spear next to it.
      Whole Wheat Sourdough Sandwich Bread

    ๐Ÿ“– Recipe

    A whole wheat sourdough pita stuffed with hummus and veggies.
    Print Pin SaveSaved!

    Whole Wheat Sourdough Pita

    These Whole Wheat Sourdough Pita are made with 100% whole wheat flour and sourdough discard - no yeast needed! They come together the same day and are perfect for wraps, sandwiches, or serving with your favorite dips.
    Course Bread, Side Dish
    Cuisine Mediterranean, Middle Eastern
    Prep Time 8 hours hours
    Cook Time 15 minutes minutes
    Total Time 8 hours hours 15 minutes minutes
    Servings 8 pita bread
    Calories 190kcal
    Author Ashley Petrie, RDN, LDN

    Equipment

    • Kitchen scale
    • 10-inch cast iron skillet or stainless steel skillet
    • Rolling Pin
    • Bench scraper (optional)

    Ingredients

    • 2 ยพ cups (330 grams) whole wheat flour
    • 1 cup + 2 tablespoons (270 grams) warm water 80-90โ„‰
    • ยฝ cup (100 grams) sourdough starter discard or active starter
    • 1 tablespoon (14 grams) extra virgin olive oil
    • 2 ยพ teaspoons (8 grams) Diamond Crystal Kosher Salt if using table salt or Morton's brand, use half volume or measure by weight

    Instructions

    • In a large bowl, combine the flour and water, mixing until no dry flour remains. Cover and let rest for 30-60 minutes to allow the flour to fully hydrate.
      2 ยพ cups (330 grams) whole wheat flour, 1 cup + 2 tablespoons (270 grams) warm water
    • Add the sourdough discard, olive oil, and salt to the bowl. Use your hands to mix until a smooth dough forms. Cover and let it rest for 15 minutes.
      ยฝ cup (100 grams) sourdough starter discard, 1 tablespoon (14 grams) extra virgin olive oil, 2 ยพ teaspoons (8 grams) Diamond Crystal Kosher Salt
    • Stretch and fold the dough by grabbing one edge, stretching it up, and folding it over itself. Rotate the bowl 90ยฐ and repeat the process for all four edges. After youโ€™ve stretched and folded all the edges, gather the dough into a ball and place it seam-side-down back into the bowl. Let the dough rest for 15 minutes, then repeat the stretch and fold process three more times with 15 minute rests between each set.
    • Cover the dough and let it rise in a warm spot until it doubles in size and shows visible fermentation bubbles on the surface. This usually takes about 4-8 hours, but the timing can vary.
    • Turn the dough out onto a lightly floured surface. Divide it into 8 equal pieces (about 88 grams each). Shape each piece into a ball by pinching the edges together, flipping it seam side down, and rolling it on the counter to tighten the dough. Cover and let them rest for 20 minutes.
    • Roll each dough ball into a 6-inch circle, about ยผ inch thick. Itโ€™s helpful to roll out most or all of the pitas before cooking.
    • Preheat a dry cast iron or stainless steel skillet over medium heat. Once hot, place the first pita in the skillet. Cook for about 30 seconds, or until bubbles start to form and the pita begins to puff up. Flip and cook for another 30 seconds on the other side. Repeat with the remaining pitas.
    • Note:ย The first one or two pita are usually paler and don't puff up quite as nicely. This happens when the skillet isn't quite up to the right temperature yet. Cook a few and adjust the temperature of your burner accordingly.
    • Transfer the cooked pitas to a wire rack to cool. Serve with hummus, sandwich fillings, or enjoy them on their own!

    Notes

    • Storage: Store in an airtight container for up to 2 days or freeze for up to 3 months.

    Nutrition

    Serving: 1pita bread | Calories: 190kcal | Carbohydrates: 35g | Protein: 6.5g | Fat: 3.5g | Saturated Fat: 0.5g | Polyunsaturated Fat: 1g | Monounsaturated Fat: 1.5g | Sodium: 403mg | Potassium: 174mg | Fiber: 5g | Calcium: 17mg | Iron: 1.8mg
    Did you try this recipe?Let me know! Comment below, or take a picture and tag me on Instagram @everydayhomemadebyashley.

    Sourdough Monster Cookies

    April 28, 2025

    These Sourdough Monster Cookies are thick, chewy, and packed with peanut butter, chocolate chips, and colorful M&Ms. Theyโ€™re the perfect way to use up sourdough discard and come together in just 30 minutes - no chill time needed!

    Sourdough monster cookies on a parchment-lined wooden cutting board.

    Iโ€™ve been baking with sourdough for years, and cookies are one of my favorite ways to use up discard. So itโ€™s probably no surprise that Iโ€™ve shared over 15 sourdough cookie recipes on the blog.

    And with so many favorites to choose from - chocolate chip, oatmeal, peanut butter - I figured, why not combine them all into one sourdough monster cookie recipe?

    These sourdough monster cookies are the best of all worlds.

    The dough is made with hearty rolled oats, natural peanut butter, and sourdough discard, then packed with chocolate chips and colorful M&M candies for a sweet, nutty, chewy cookie you wonโ€™t stop craving.

    Even better, they come together in just 30 minutes, and thereโ€™s no chilling required before baking.

    Trust me, once you try these, theyโ€™ll quickly become your new favorite sourdough cookie. I hope you give them a try and enjoy them as much as I do!

    Disclaimer: Some links throughout this post are affiliate links. As an Amazon Associate, I earn from qualifying purchases. You can learn more by visiting my Affiliate Disclosure Page.

    Ingredients & Substitutions

    Here are some notes on key ingredients. For a full list of ingredients, check out the recipe card below.

    • Sourdough Discard- Adds moisture, a subtle tang, and helps cut down on waste. Use room temperature, unfed discard for best results.
    • Natural Peanut Butter- Gives the cookies a soft texture without added oils, sugars, or stabilizers. Stir well before using.
    • Butter- Start with softened butter for an easier time mixing the dough.
    • Rolled Oats- Rolled or old-fashioned oats add chew and heartiness. Quick oats can work in a pinch, but the texture will be a bit softer and less chewy.
    • All-Purpose Flour- Provides structure while keeping the cookies tender. For best results, weigh your flour or use the spoon-and-level method.
    • Granulated & Brown Sugar- A mix of both sugars gives the cookies the perfect balance of sweetness and chew.
    • Kosher Salt- I use Diamond Crystal Kosher Salt. If using Mortonโ€™s or table salt, reduce the amount or weigh it to avoid over-salting.
    • Mix-Ins- I like semi-sweet chocolate chips and M&Ms for a pop of color and crunch, but feel free to swap in your favorite add-ins.
    The ingredients to make monster cookies with sourdough discard. Each ingredient is labeled with text. They include salt, mix-ins, brown sugar, sugar, butter, flour, oats, leavening agents, natural peanut butter, vanilla, eggs, and sourdough discard.

    Tips for Success

    • Measure ingredients by weight. Measuring by weight gives you consistent results every time and helps achieve the perfect texture.
    • Use natural peanut butter. It gives the cookies a softer texture and doesn't contain added oils, sugars, or stabilizers. Just give it a good stir first!
    • Let the dough rest (if you have time!). Even just 30 minutes of rest before baking helps hydrate the oats and flour.
    • Customize. Try using mini M&Ms, dark chocolate chunks, chopped peanuts, or even a sprinkle of flaky salt on top before baking.
    • Top with extra M&Ms. Pressing a few extra M&Ms onto each cookie before baking gives them a colorful, bakery-style look.

    How to Make Sourdough Monster Cookies

    Here is how to make monster cookies with sourdough discard.

    Step 1: Preheat oven. Preheat the oven to 350ยฐF. Line a rimmed baking sheet with parchment paper and set it aside.

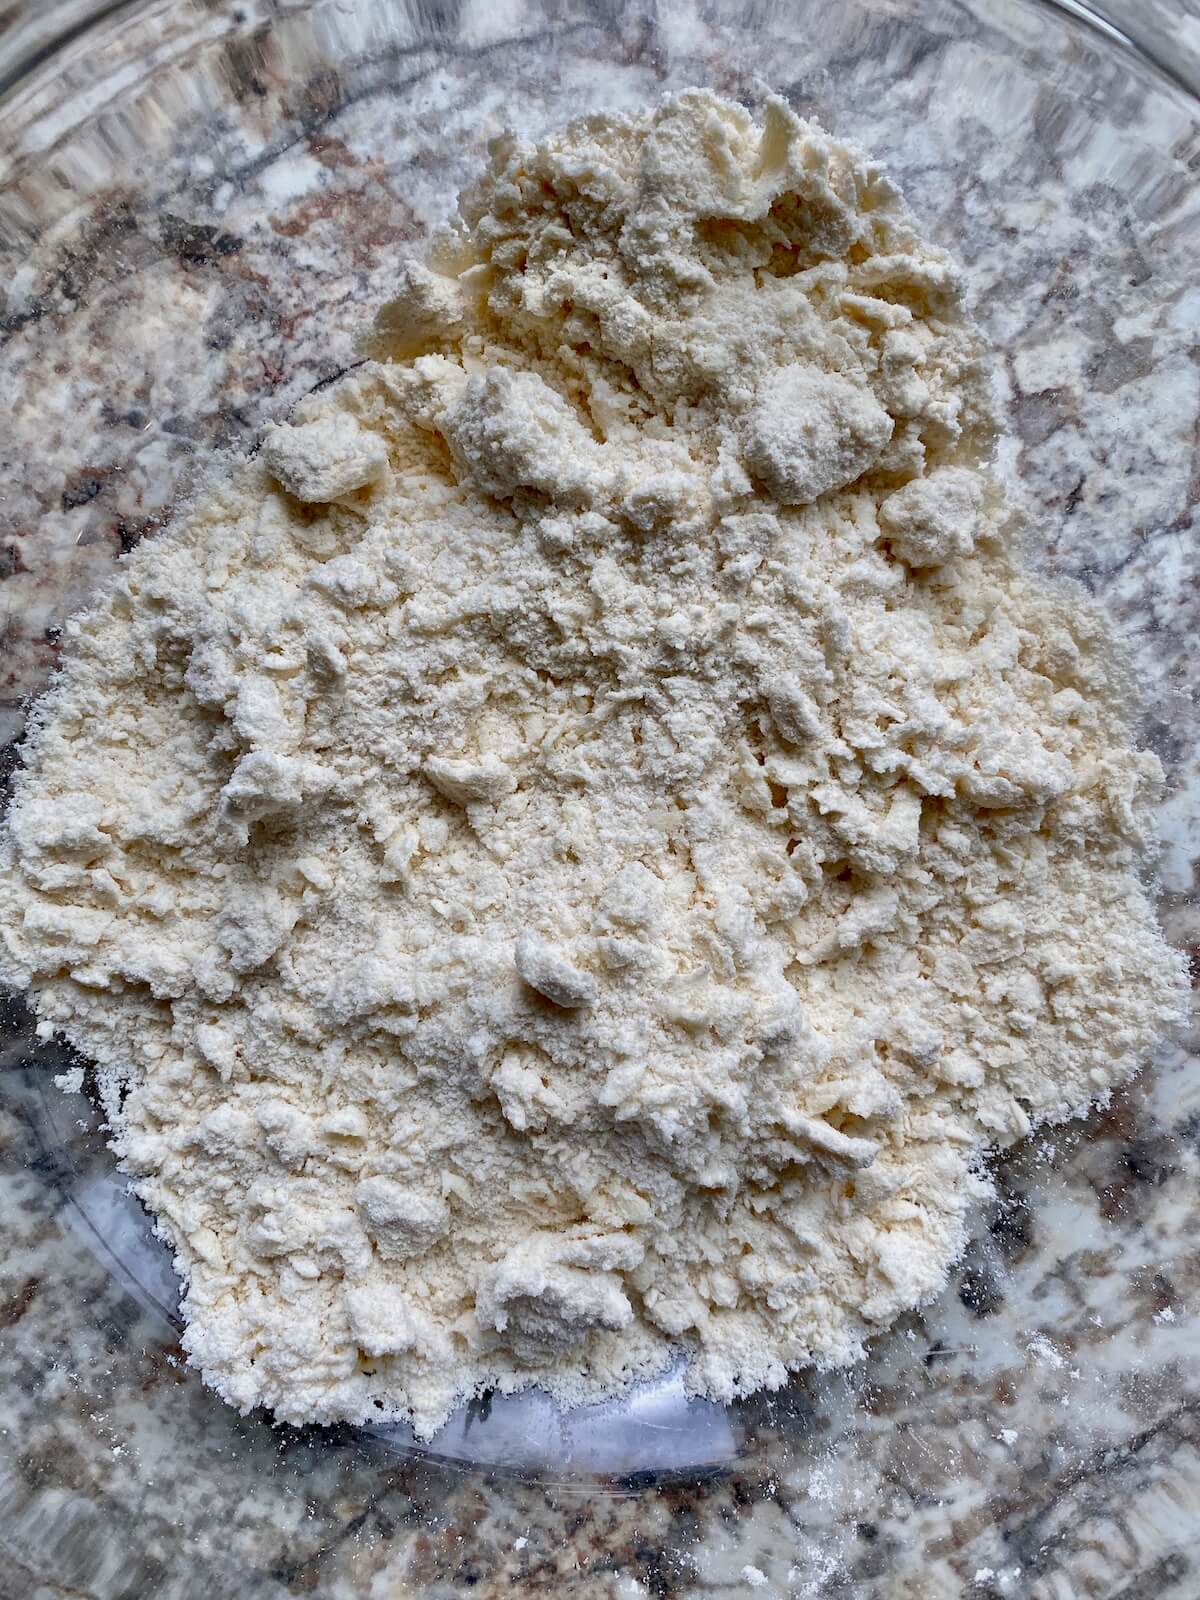
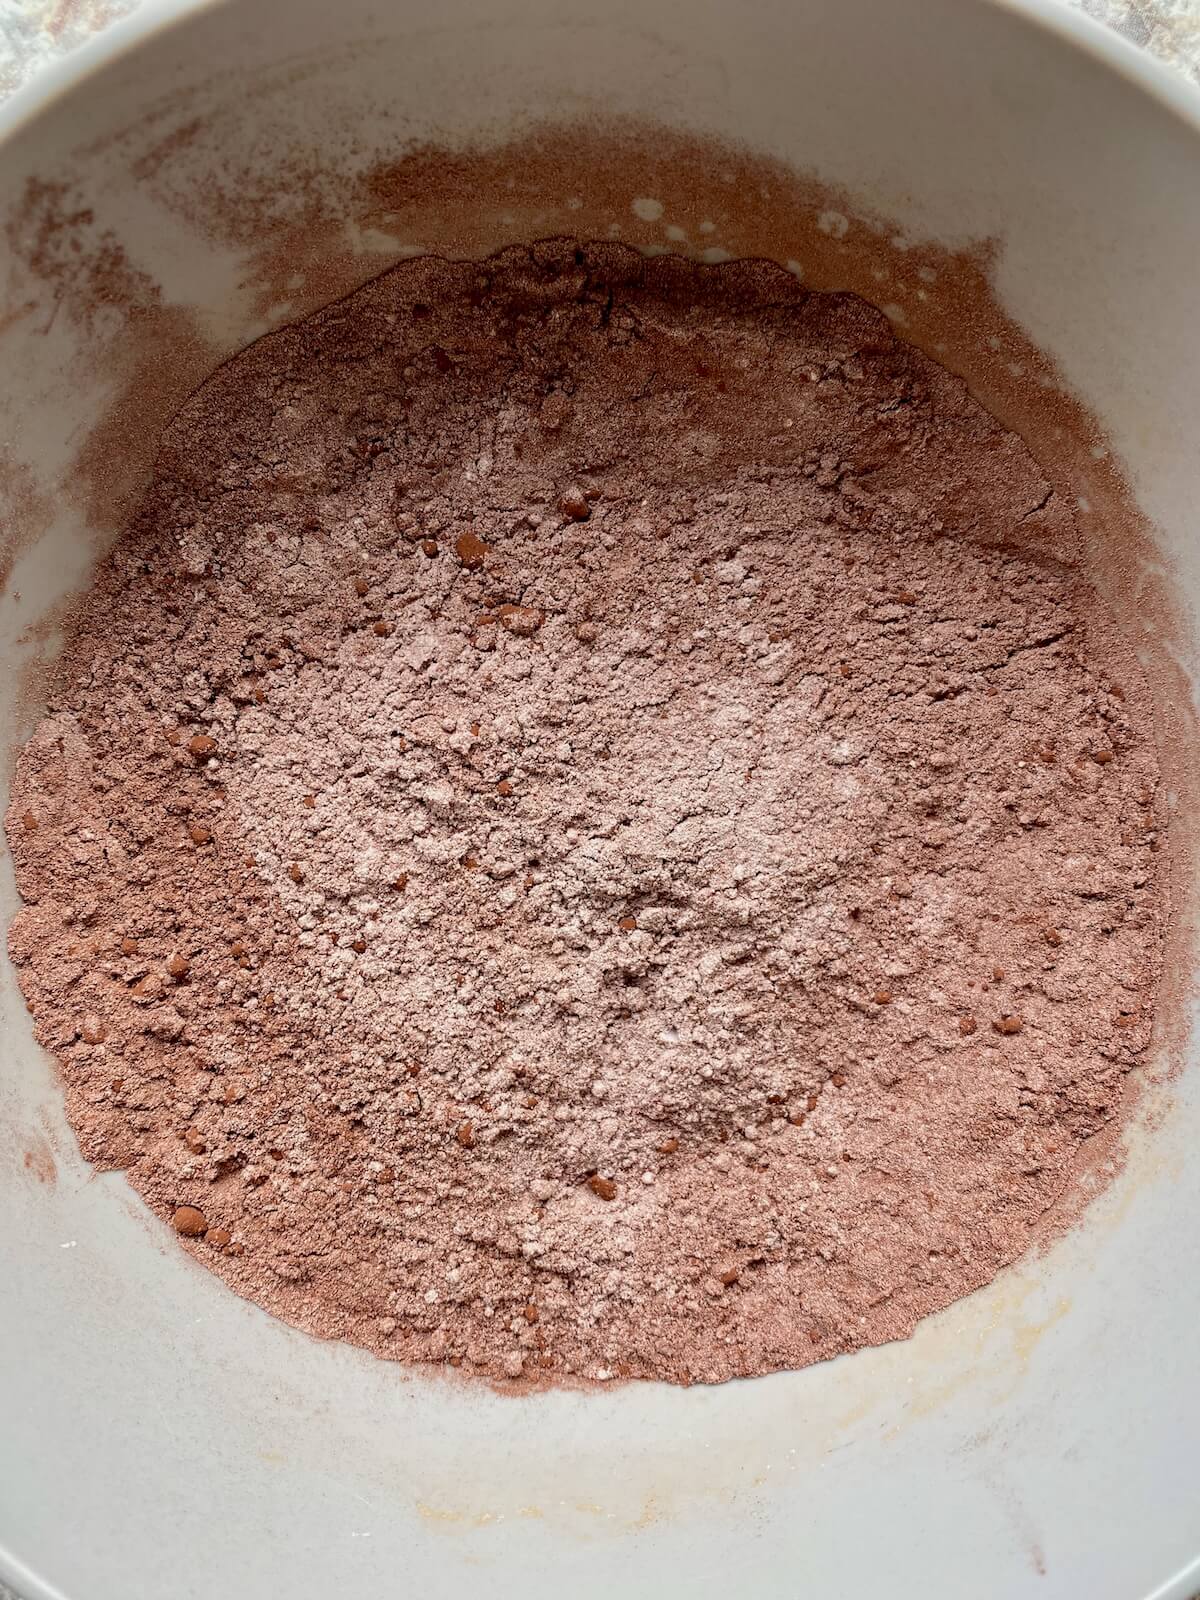
    Step 2: Mix dry ingredients. In a medium bowl, stir together the rolled oats, flour, kosher salt, baking powder, and baking soda. Set aside.

    The dry ingredients mixed together in a clear glass bowl.

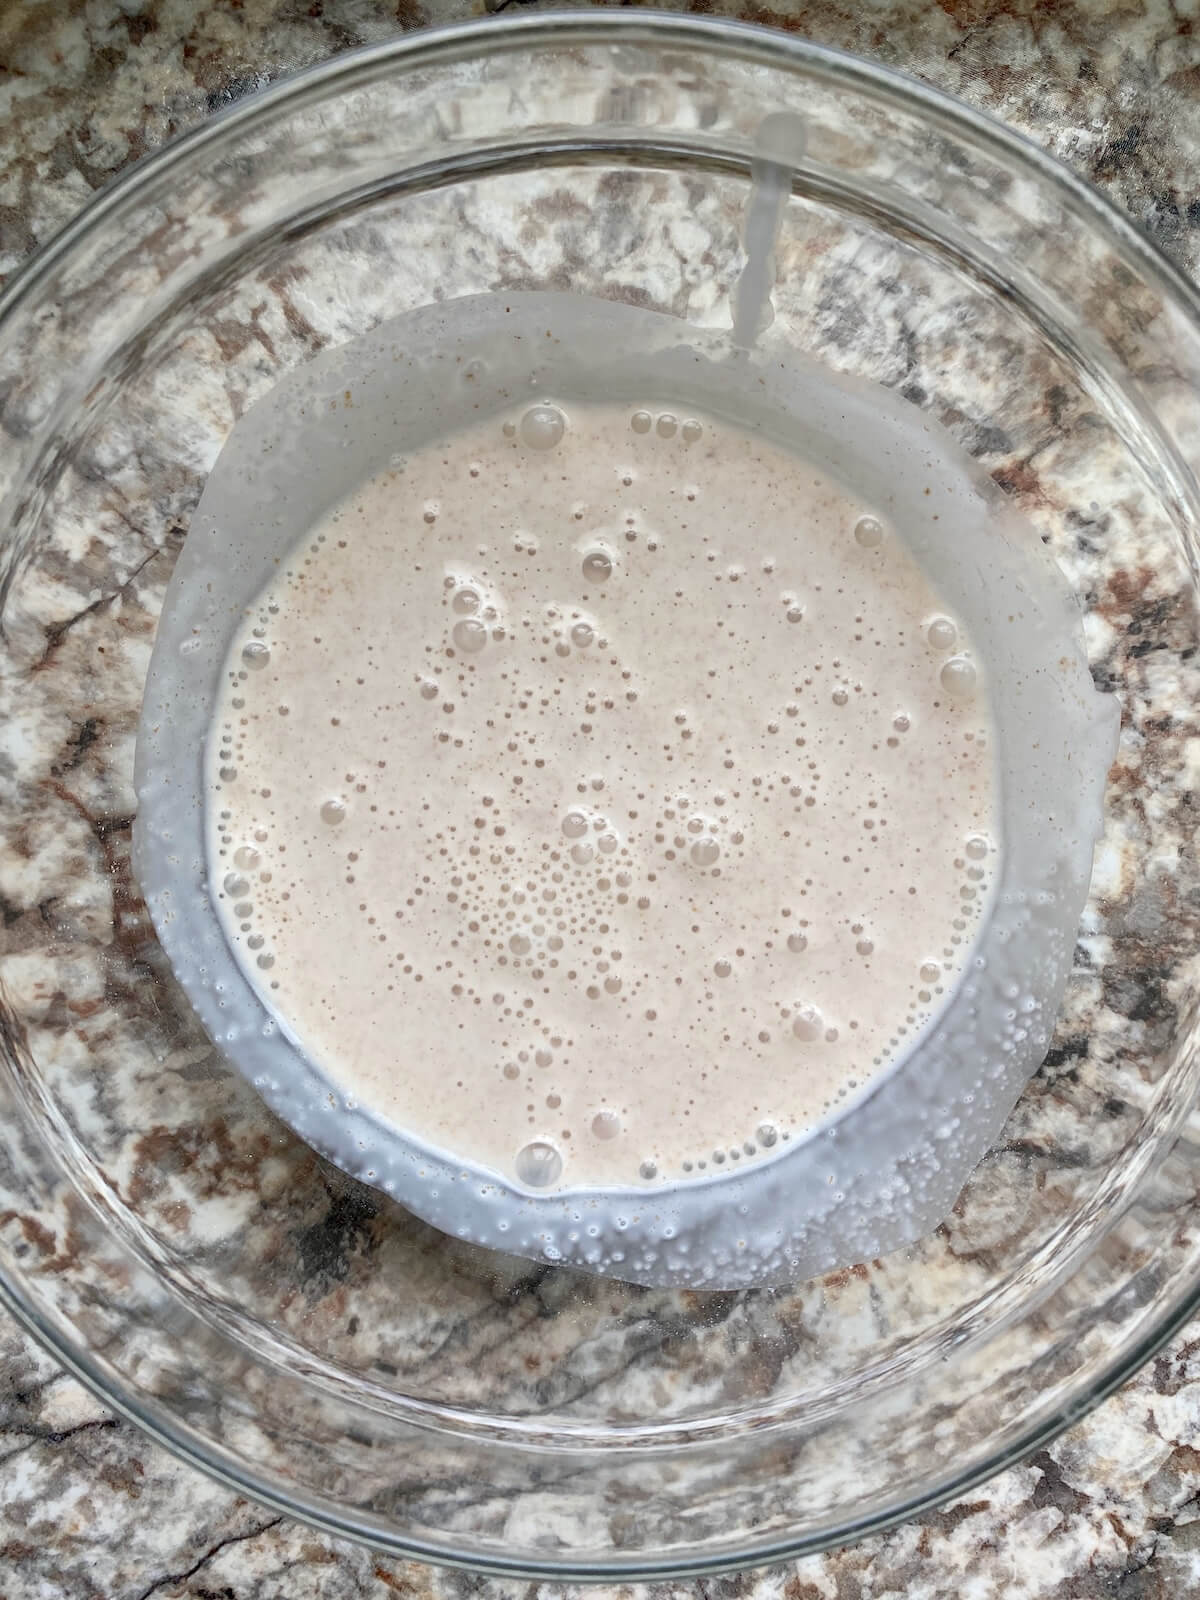
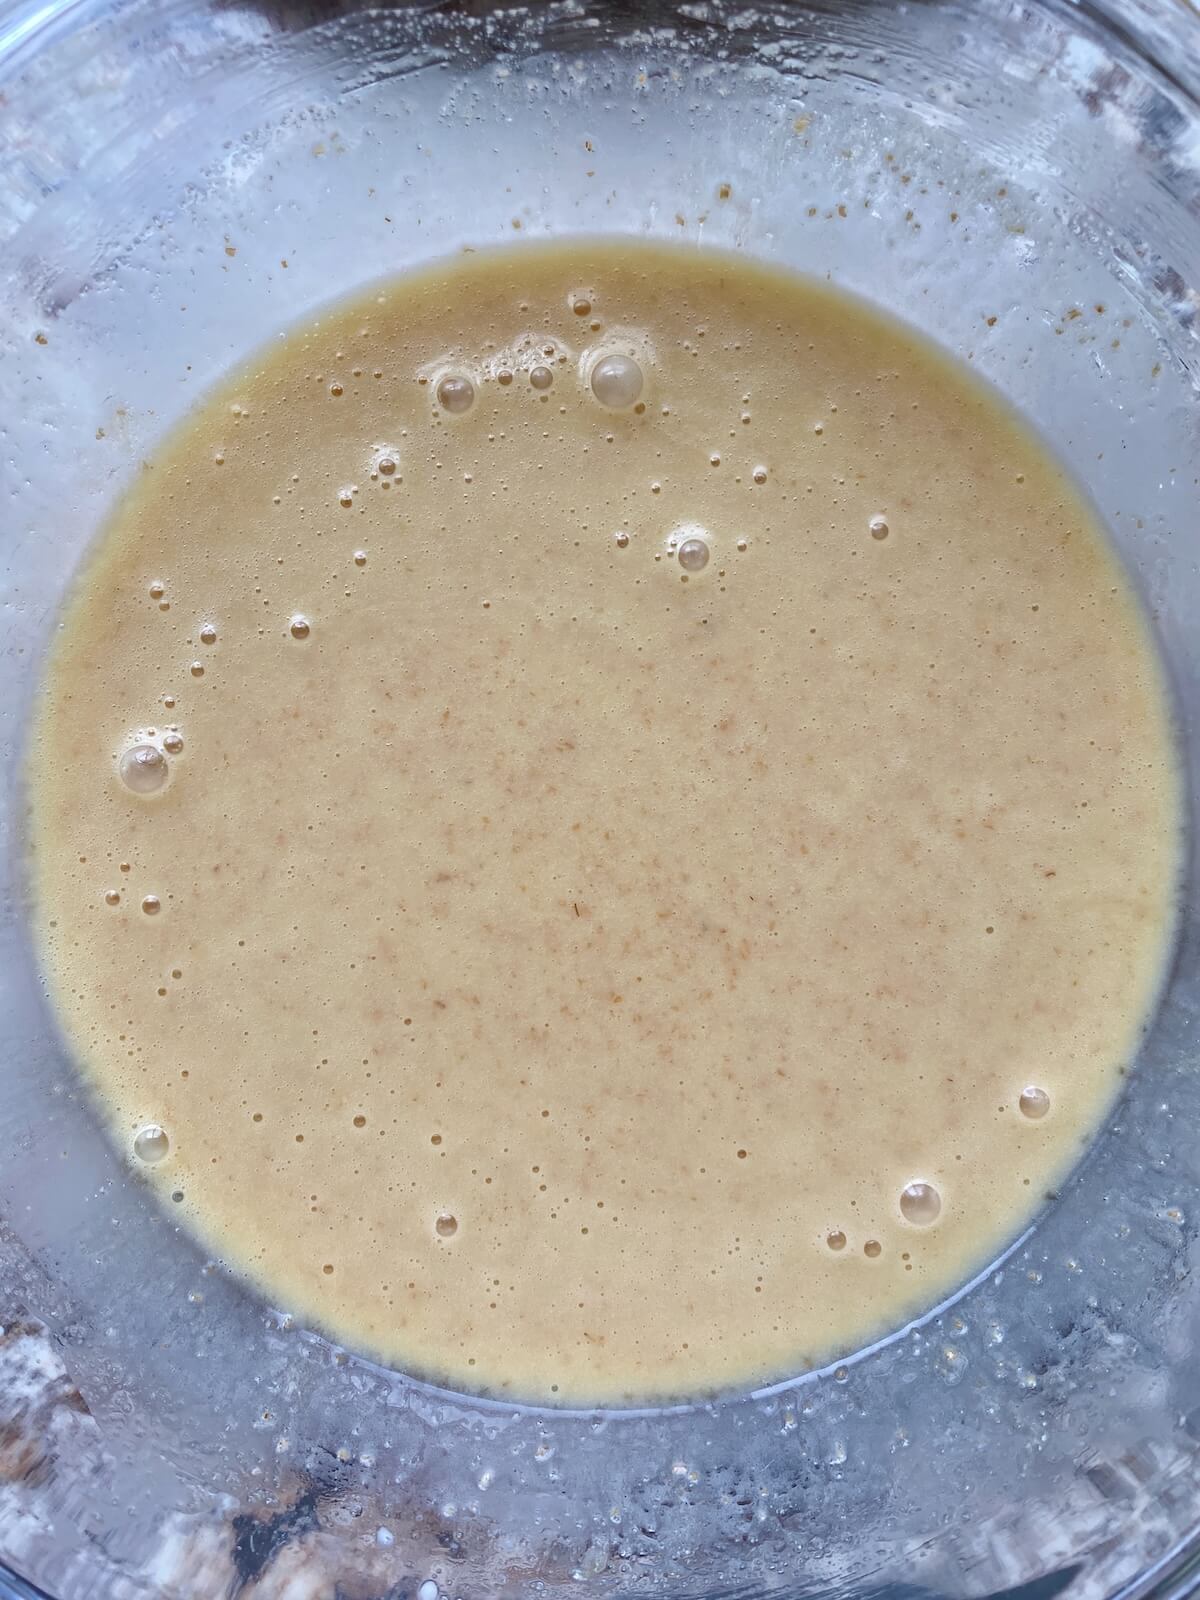
    Step 3: Combine wet ingredients. In a large bowl, use a hand mixer (or stand mixer fitted with the paddle attachment) to beat the softened butter, granulated sugar, and brown sugar until light and fluffy - about 2 minutes. Beat in the egg until well combined. Then mix in the peanut butter, sourdough discard, and vanilla extract. Continue mixing until the mixture is smooth and creamy.

    The wet ingredients blended together in a clear glass bowl.

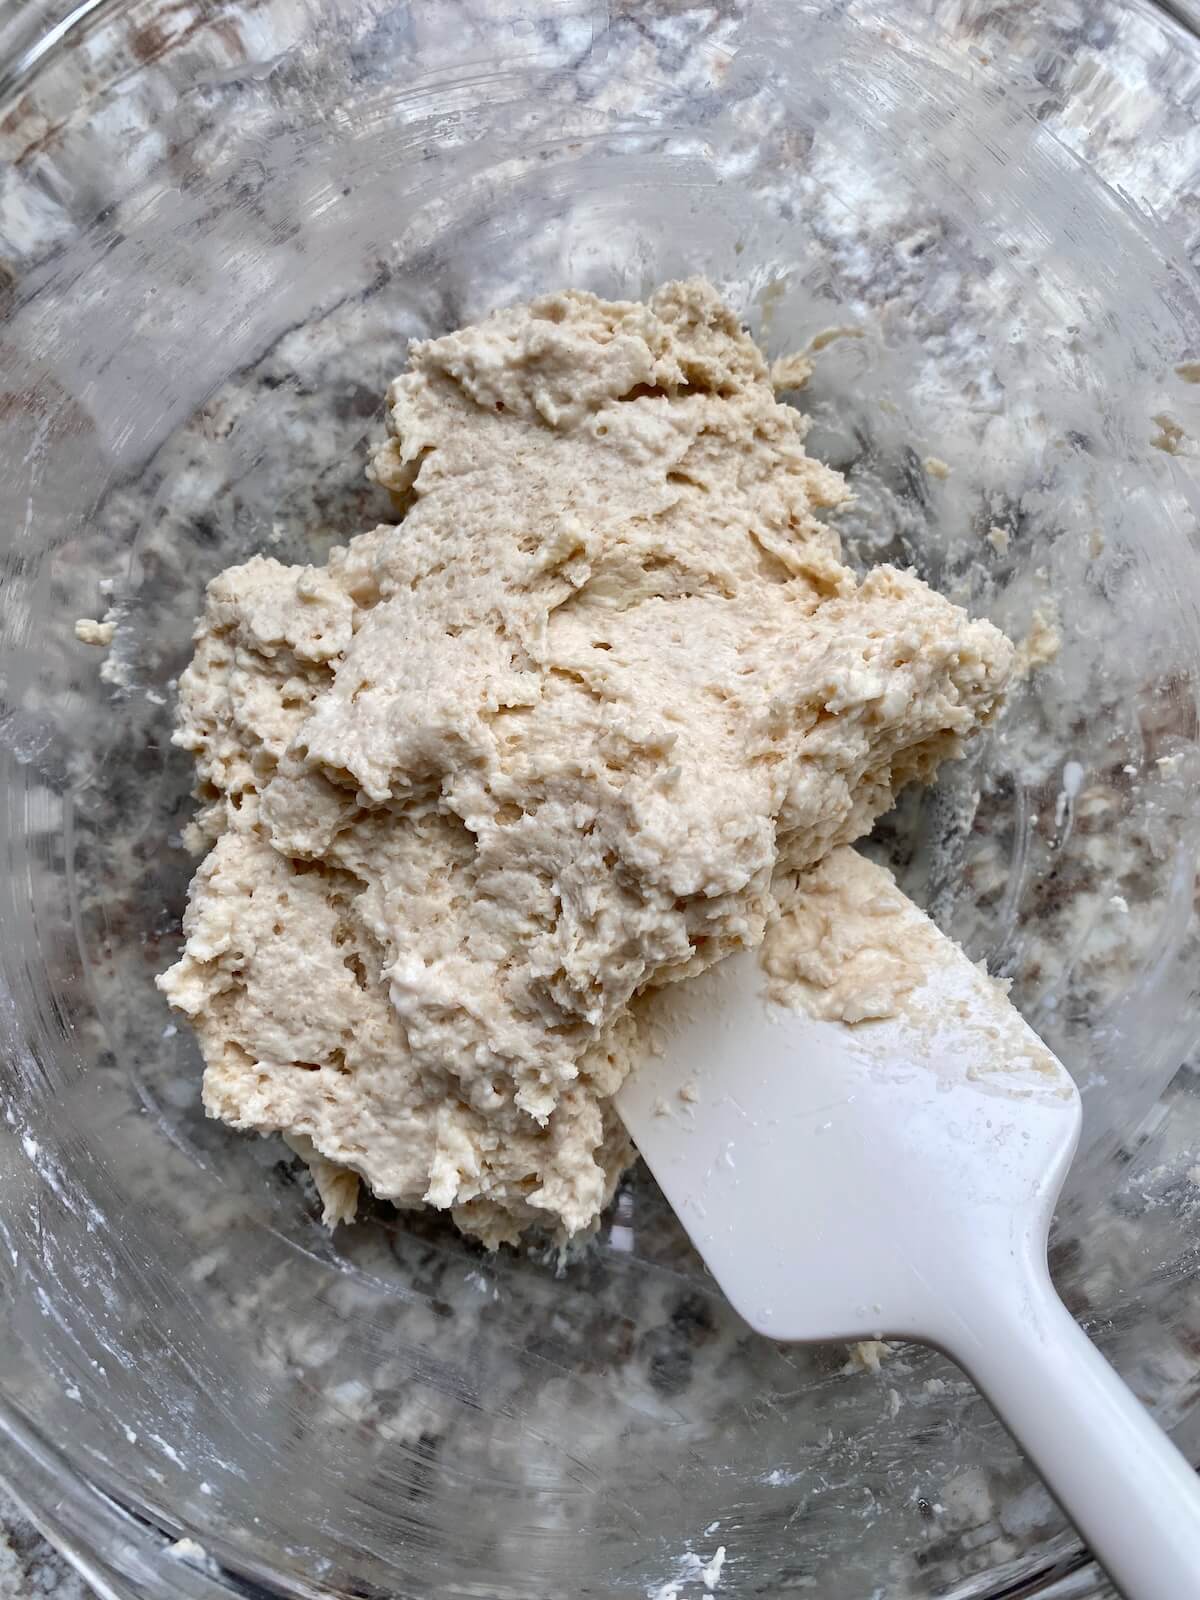
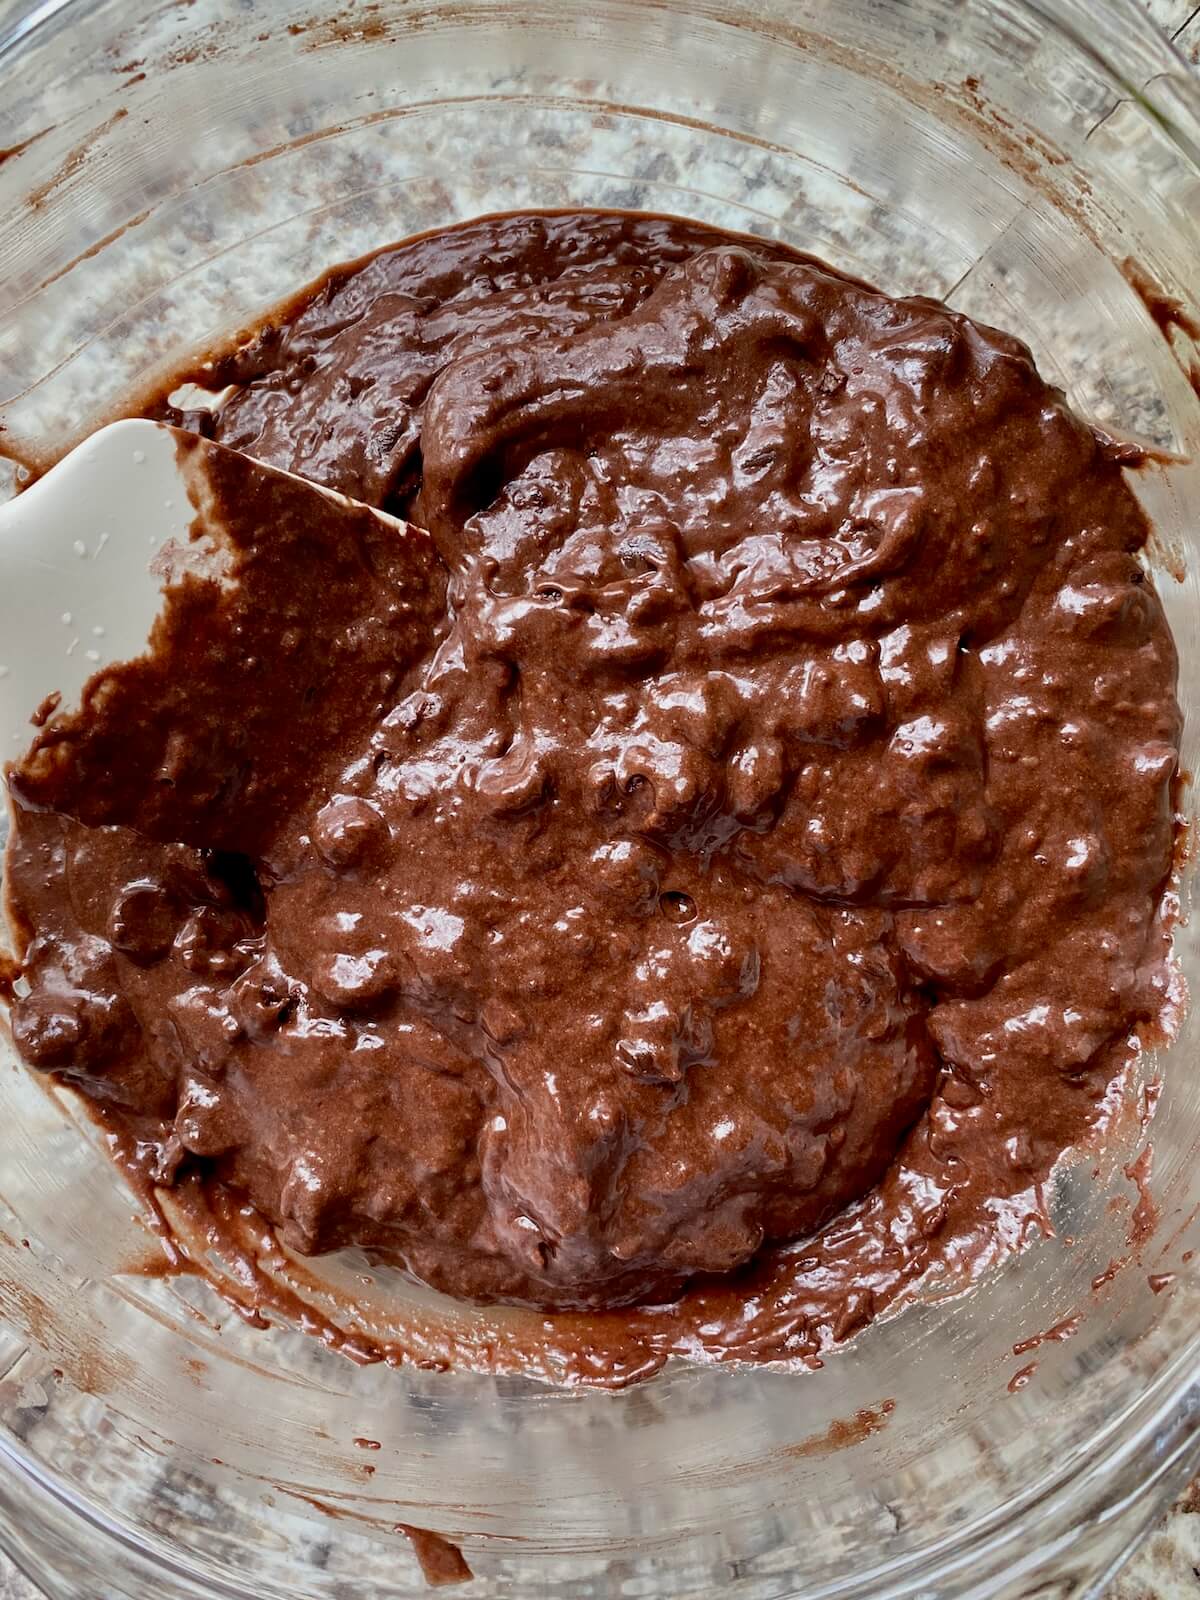
    Step 4: Prepare cookie dough. Add the dry ingredients to the wet ingredients and mix on low speed until just combined. Gently fold in the M&M candies and chocolate chips.

    The sourdough cookie dough in a glass bowl with a rubber spatula sticking out.
    Sourdough monster cookie dough in a glass bowl with a rubber spatula sticking out.

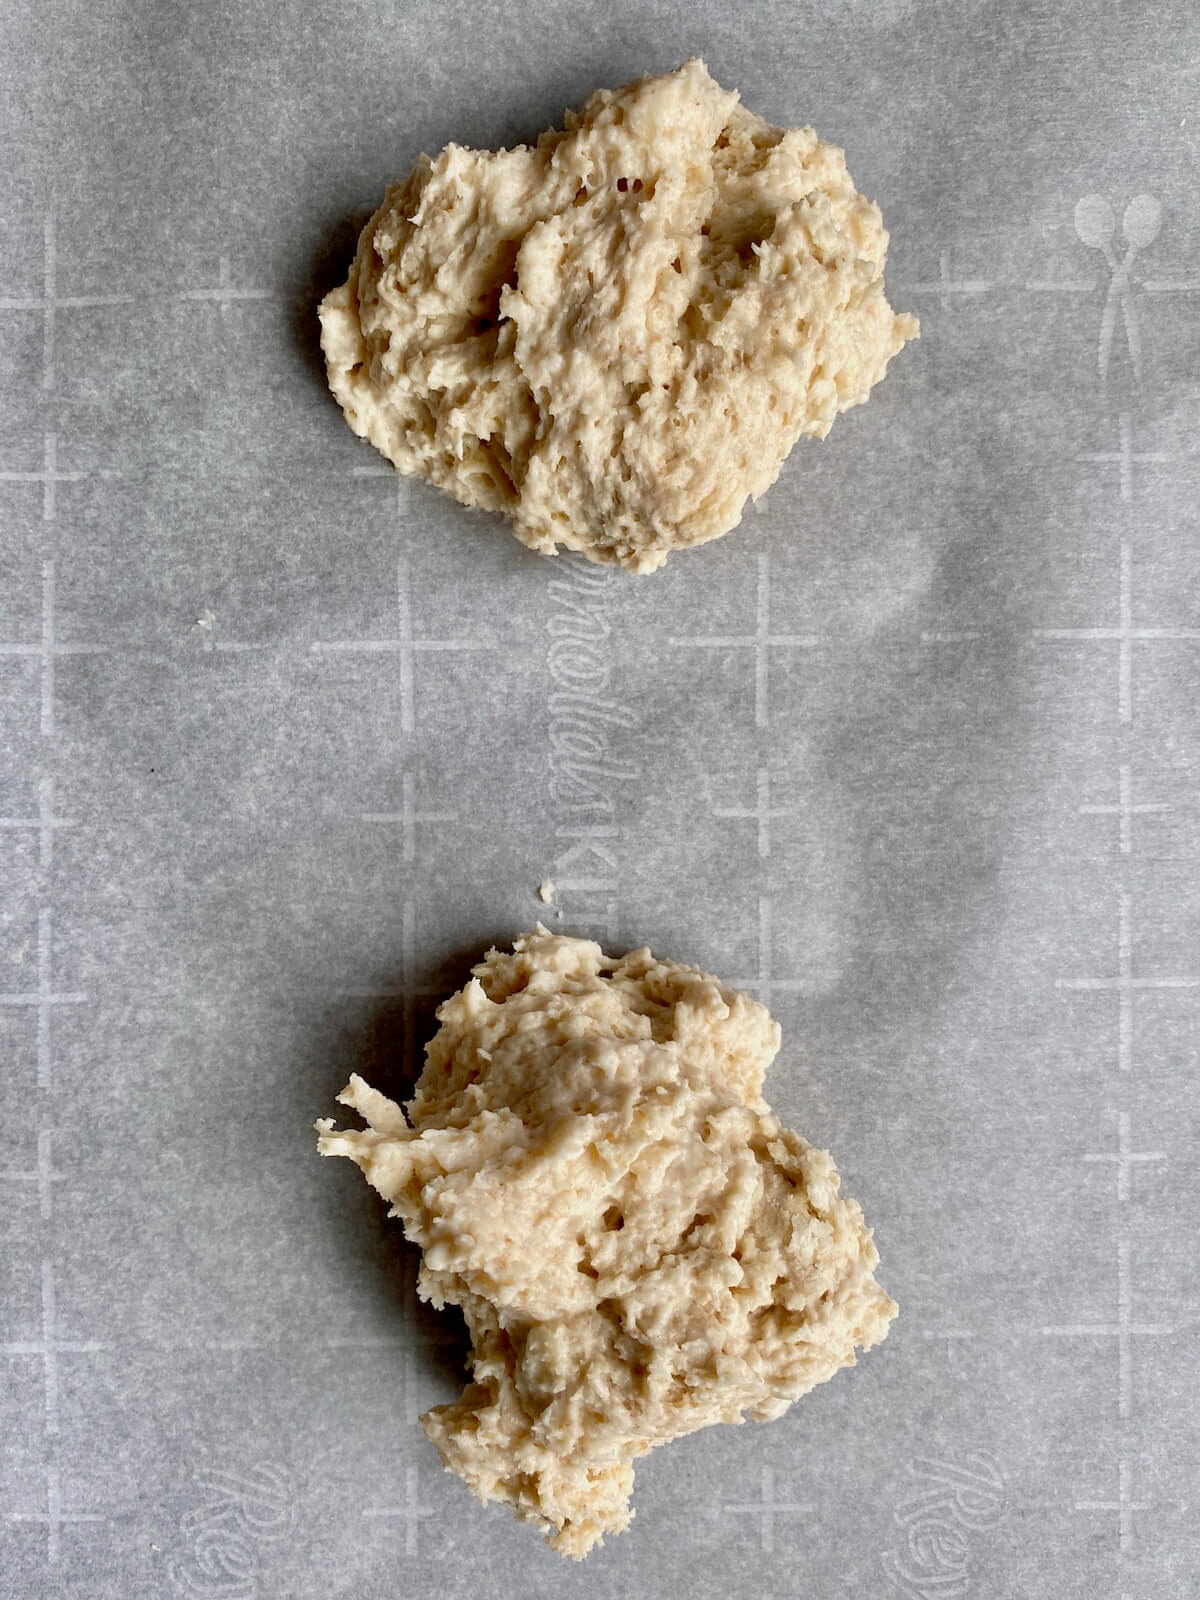
    Step 5: Portion cookie dough. Scoop heaping 2-tablespoon portions of dough onto the prepared baking sheet, leaving about 2 inches between each cookie to allow for spreading.

    Four cookie dough balls on a parchment-lined baking sheet.

    Step 6: Bake the cookies. Bake for 14โ€“16 minutes, or until the edges are just starting to turn golden brown and the centers look set but still soft.

    Step 7: Cool. Let the cookies cool on the baking sheet for 5 minutes, then transfer them to a wire rack to cool completely.

    Four baked sourdough monster cookies on a parchment-lined baking sheet.

    How to Store

    Store your sourdough monster cookies in an airtight container at room temperature for up to a week.

    For longer storage, you can freeze the baked cookies for up to 6 months. Just let them thaw at room temperature before enjoying.

    Want to prep the dough ahead of time? Refrigerate it for up to 2 days to long ferment it or freeze for up to 2 months. I recommend portioning the dough into scoops before freezing for easier baking later.

    A sourdough monster cookie split in half on a piece of parchment paper to show the texture. There are several whole cookies out of focus in the background.
    A cover of a recipe ebook with the title "Everyday Sourdough: 27 Sweet & Savory Sourdough Discard Recipes." There is an image of sourdough discard cinnamon rolls on the front. At the bottom, it reads "By Ashley Petrie of Everyday Homemade."
    Grab a copy today!

    Are you tired of watching your sourdough discard go to waste?

    Itโ€™s time to turn excess discard into something delicious with my new ebook - Everyday Sourdough!

    Inside, youโ€™ll find 27 tried-and-true sourdough discard recipes that will transform your leftover starter into mouthwatering creations your family and friends will love.

    No more guilt about wasting your discard - with Everyday Sourdough, you have endless options to quickly make something amazing anytime.

    Let's Connect!

    Be sure to leave a comment below if you have any questions. You can also connect with me on Instagram, Facebook, Pinterest, or via email at [email protected].

    More Sourdough Cookie Recipes

    • A stack of three sourdough oatmeal cookies on a piece of parchment paper. There are more cookies and a few chocolate chips out of focus in the background.
      Sourdough Oatmeal Cookies (With Chocolate Chips or Raisins)
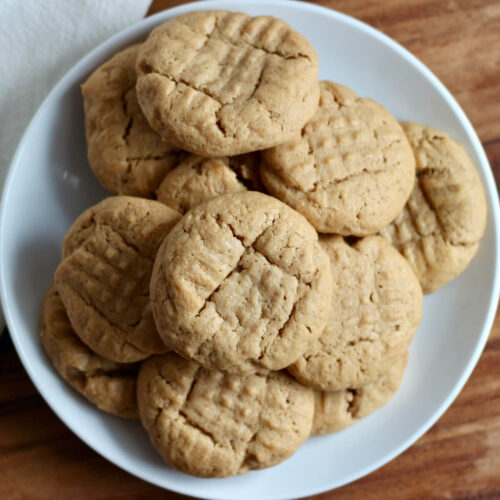
    • A small plate of sourdough peanut butter cookies.
      Sourdough Peanut Butter Cookies
    • Several sourdough chocolate chip cookies on a piece of wrinkled parchment paper on a wooden cutting board.
      Sourdough Chocolate Chip Cookies (No Chill)
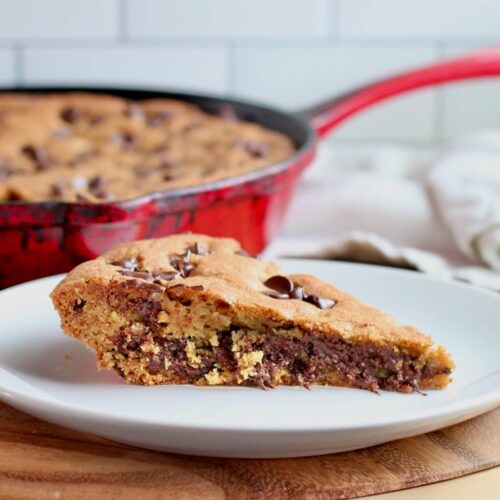
    • A piece of sourdough skillet cookie on a small plate. The rest of the skillet is out of focus in the background.
      Chocolate Chip Sourdough Skillet Cookie (Easy Discard Recipe)

    ๐Ÿ“– Recipe

    Sourdough monster cookies on a parchment-lined wooden cutting board.
    Print Pin SaveSaved!

    Sourdough Monster Cookies

    These Sourdough Monster Cookies are thick, chewy, and packed with peanut butter, chocolate chips, and colorful M&Ms. Theyโ€™re the perfect way to use up sourdough discard and come together in just 30 minutes - no chill time needed!
    Course Dessert
    Cuisine American
    Prep Time 15 minutes minutes
    Cook Time 15 minutes minutes
    Total Time 30 minutes minutes
    Servings 14 cookies
    Calories 325kcal
    Author Ashley Petrie, RDN, LDN

    Equipment

    • Hand mixer or stand mixer
    • Mixing bowls
    • Rimmed baking sheet
    • Parchment paper
    • Wire rack

    Ingredients

    • 1 ยฝ cups (120 grams) rolled oats
    • 1 ยผ cups (150 grams) all-purpose flour
    • ยฝ teaspoon Diamond Crystal Kosher Salt
    • ยฝ teaspoon baking powder
    • ยผ teaspoon baking soda
    • ยฝ cup (113 grams, 1 stick) unsalted butter softened
    • ยฝ cup (100 grams) granulated sugar
    • ยฝ cup (100 grams) brown sugar
    • 1 large (50 grams) egg room temperature
    • ยฝ cup (128 grams) natural peanut butter
    • ยฝ cup (100 grams) sourdough starter discard room temperature
    • 1 teaspoon vanilla extract
    • ยฝ cup (110 grams) M&M candies
    • ยฝ cup (85 grams) semi-sweet chocolate chips

    Instructions

    • Preheat the oven to 350ยฐF. Line a rimmed baking sheet with parchment paper and set it aside.
    • In a medium bowl, stir together the rolled oats, flour, kosher salt, baking powder, and baking soda. Set aside.
      1 ยฝ cups (120 grams) rolled oats, 1 ยผ cups (150 grams) all-purpose flour, ยฝ teaspoon Diamond Crystal Kosher Salt, ยฝ teaspoon baking powder, ยผ teaspoon baking soda
    • In a large bowl, use a hand mixer (or stand mixer fitted with the paddle attachment) to beat the softened butter, granulated sugar, and brown sugar until light and fluffy - about 2โ€“3 minutes. Beat in the egg until well combined. Then mix in the peanut butter, sourdough discard, and vanilla extract. Continue mixing until the mixture is smooth and creamy.
      ยฝ cup (113 grams, 1 stick) unsalted butter, ยฝ cup (100 grams) granulated sugar, ยฝ cup (100 grams) brown sugar, 1 large (50 grams) egg, ยฝ cup (128 grams) natural peanut butter, 1 teaspoon vanilla extract, ยฝ cup (100 grams) sourdough starter discard
    • Add the dry ingredients to the wet ingredients and mix on low speed until just combined. Gently fold in the M&M candies and chocolate chips.
      ยฝ cup (110 grams) M&M candies, ยฝ cup (85 grams) semi-sweet chocolate chips
    • Optionally, let the dough rest for 30 minutes at room temperature before baking to allow the oats to soften. You can also refrigerate it overnight if you want to bake the next day.
    • Scoop heaping 2-tablespoon portions of dough onto the prepared baking sheet, leaving about 2 inches between each cookie to allow for spreading.
    • Bake for 14โ€“16 minutes, or until the edges are just starting to turn golden brown and the centers look set but still soft.
    • Let the cookies cool on the baking sheet for 5 minutes, then transfer them to a wire rack to cool completely.

    Notes

    • Storage: Store completely cooled cookies in an airtight container at room temperature for up to 7 days or freeze for up to 6 months.

    Nutrition

    Serving: 1cookie | Calories: 325kcal | Carbohydrates: 42g | Protein: 6.5g | Fat: 15.5g | Saturated Fat: 7g | Polyunsaturated Fat: 0.5g | Monounsaturated Fat: 2.5g | Cholesterol: 33mg | Sodium: 128mg | Potassium: 165mg | Fiber: 2.5g | Sugar: 23g | Calcium: 38mg | Iron: 1.3mg
    Did you try this recipe?Let me know! Comment below, or take a picture and tag me on Instagram @everydayhomemadebyashley.

    Everything Bagel Sourdough Bread

    April 21, 2025

    This Everything Bagel Sourdough Bread is a beginner-friendly recipe that combines tangy, chewy sourdough with savory everything bagel seasoning. It's perfect for breakfast with cream cheese or as a hearty sandwich.

    A loaf of everything bagel sourdough bread cut into slices.

    When I started making sourdough bread, one of the first variations I tried was everything bagel seasoning. Initially, I just sprinkled it on top. But I quickly got frustrated when most of it would fall off as I sliced the bread.

    Then it hit me - why not mix the seasoning right into the dough? Genius, right? Now I get all that savory flavor in every slice, and I can still sprinkle more on top if I want to.

    This everything bagel sourdough bread is a beginner-friendly twist on classic sourdough. Since it's lower hydration, the dough is easy to handle. Plus, the seasoning blends in nicely without altering the texture of the dough.

    Itโ€™s perfect with cream cheese (it tastes just like an everything bagel!), but it also makes a great base for a breakfast sandwich or really any kind of sandwich.

    As a sourdough blogger whoโ€™s tried many different bread inclusions, Iโ€™ve learned that sometimes the simplest ones are the best. And this sourdough bread with everything bagel seasoning is a perfect example of that.

    I hope you give it a try and enjoy it as much as I do!

    Disclaimer: Some links throughout this post are affiliate links. As an Amazon Associate, I earn from qualifying purchases. You can learn more by visiting my Affiliate Disclosure Page.

    Ingredients & Substitutions

    Here are some notes on key ingredients. For a full list of ingredients, check out the recipe card below.

    • Active Sourdough Starter- Ensure your starter is bubbly and active. Use fresh discard (less than a week old) for a quicker rise.
    • Everything Bagel Seasoning- Use your favorite seasoning or make your own with sesame seeds, poppy seeds, garlic, onion, and salt. Add red pepper flakes for extra heat.
    • Bread Flour- Provides a chewy texture and helps with the rise. All-purpose flour will make the bread less chewy, and whole wheat flour will create a denser crumb and may require more water.
    • Water- This dough is 65% hydration, making it easy to handle. For a more open crumb, increase hydration slightly, but note that wetter dough is stickier and trickier to shape.
    • Kosher Salt- Enhances flavor. I use Diamond Crystal Kosher Salt (2.8 grams per teaspoon). If using table salt or Mortonโ€™s, measure by weight or use half as much.
    The ingredients to make everything bagel sourdough bread. Each ingredient is labeled with text. They include bread flour, water, active sourdough starter, everything bagel seasoning, and kosher salt.

    Tips for Success

    • Use active starter. Make sure your sourdough starter is bubbly and active before using it in the dough. A strong starter will help the bread rise properly and give it great flavor.
    • Weigh ingredients. Using a kitchen scale ensures consistent results every time.
    • Build tension when shaping. Shape the dough into a tight ball or loaf to help it rise tall and develop an open crumb structure in the oven.
    • Top with extra seasoning. Before placing the dough in the proofing basket, dip the top into everything bagel seasoning for added flavor and crunch.
    • Cool completely. Let the bread cool for at least 2 hours before serving to avoid a gummy texture.

    How to Make Everything Bagel Sourdough Bread

    Follow these simple step-by-step instructions to make a delicious loaf of sourdough bread with everything bagel seasoning:

    1. Feed Sourdough Starter

    • Feed your sourdough starter 6-12 hours before mixing the dough. It should be bubbly and active when you begin.
    • The rise time depends on your kitchen temperature, ranging from 6 hours in a warm environment (75โ„‰) to 12 hours in a cooler space (65-68โ„‰).
    An active sourdough starter in a glass mason jar.

    2. Mix the Dough

    • In a large bowl, whisk together the warm water and active sourdough starter until dissolved. Add the bread flour, everything bagel seasoning, and kosher salt.
    • Mix until a shaggy dough forms with no dry flour remaining.
    • Cover and let rest for 20 minutes.
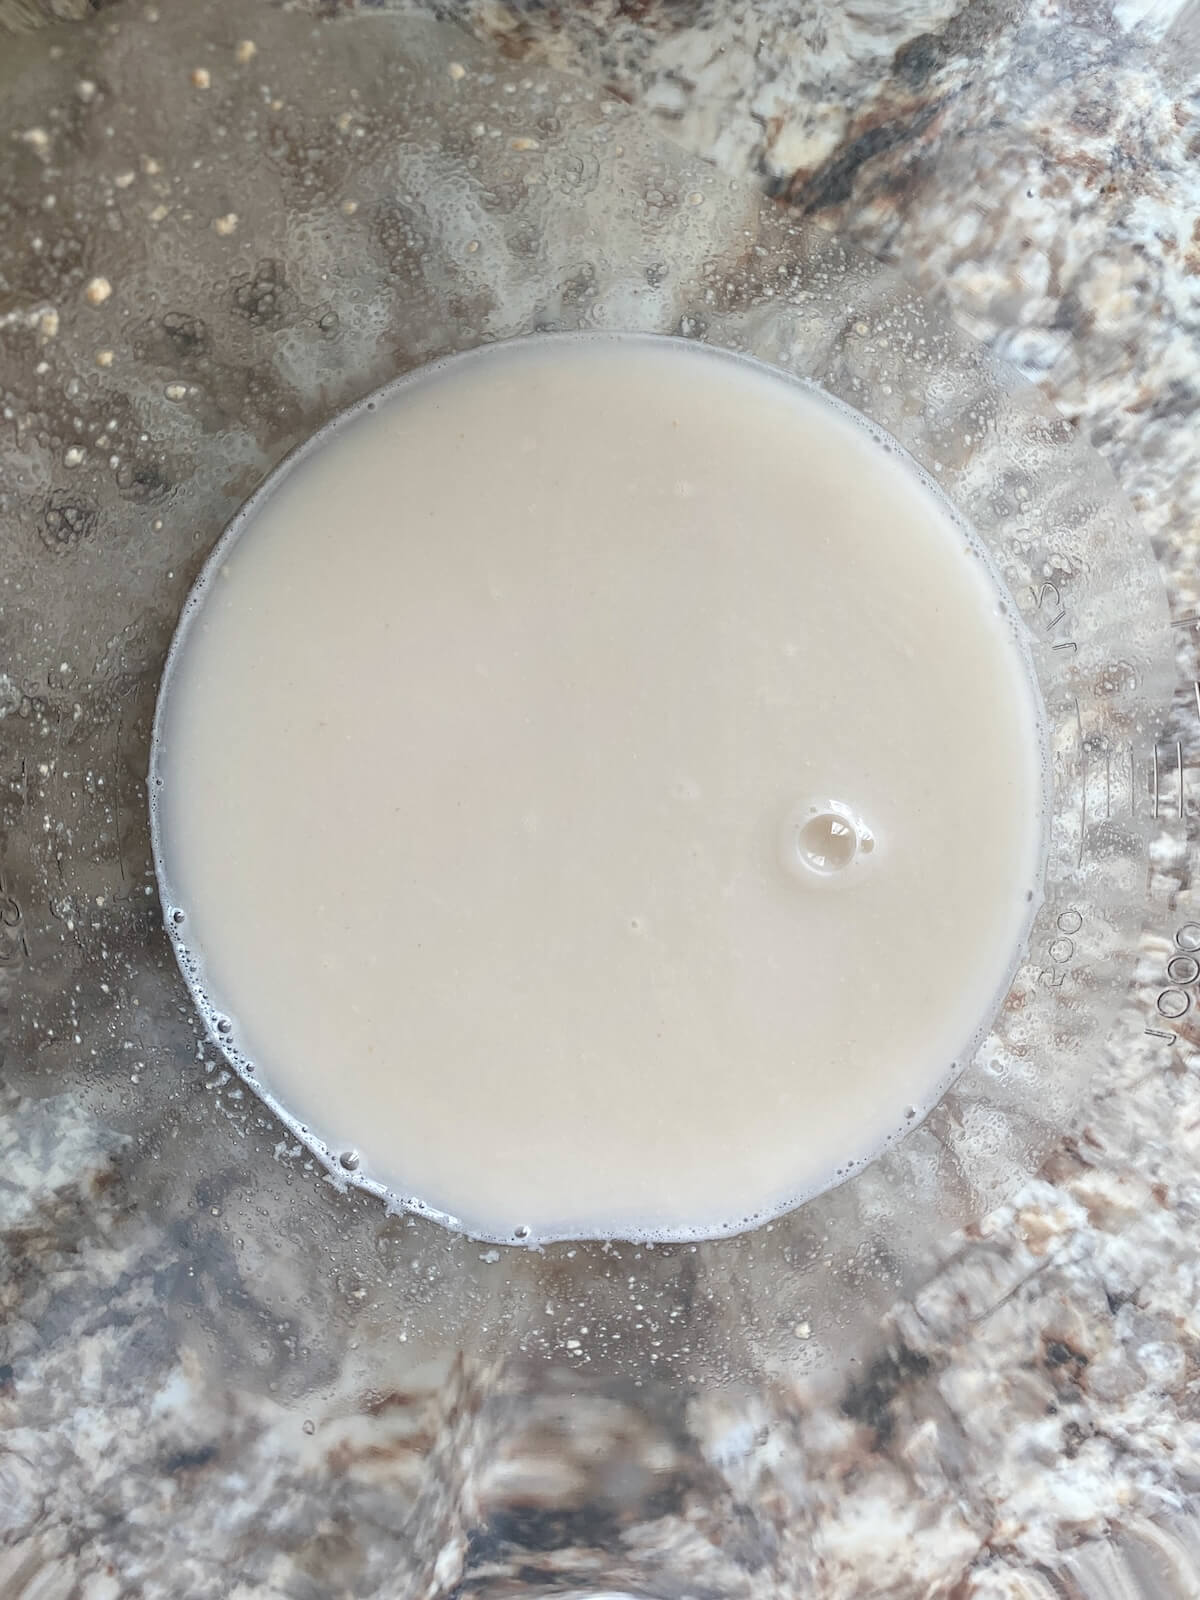
    Water and active sourdough starter mixed together in a glass mixing bowl.
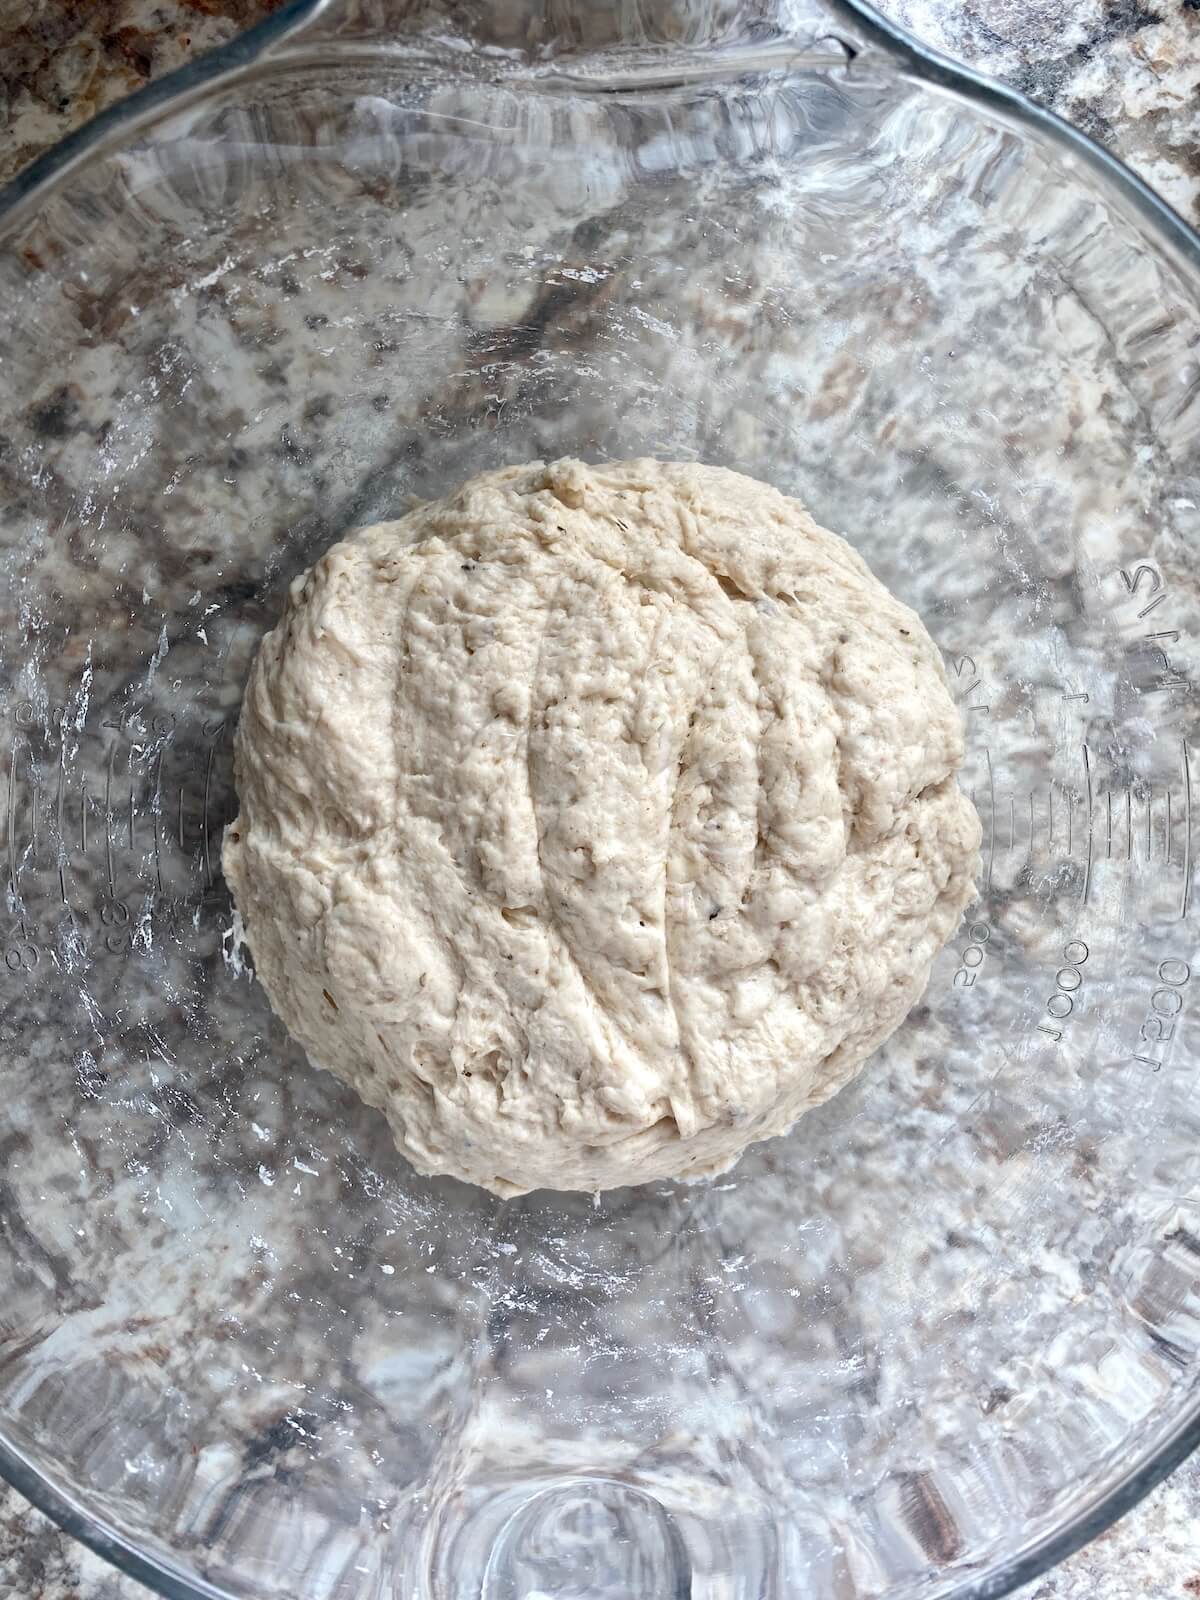
    A shaggy everything bagel sourdough bread dough in a glass mixing bowl.

    3. Stretch and Folds

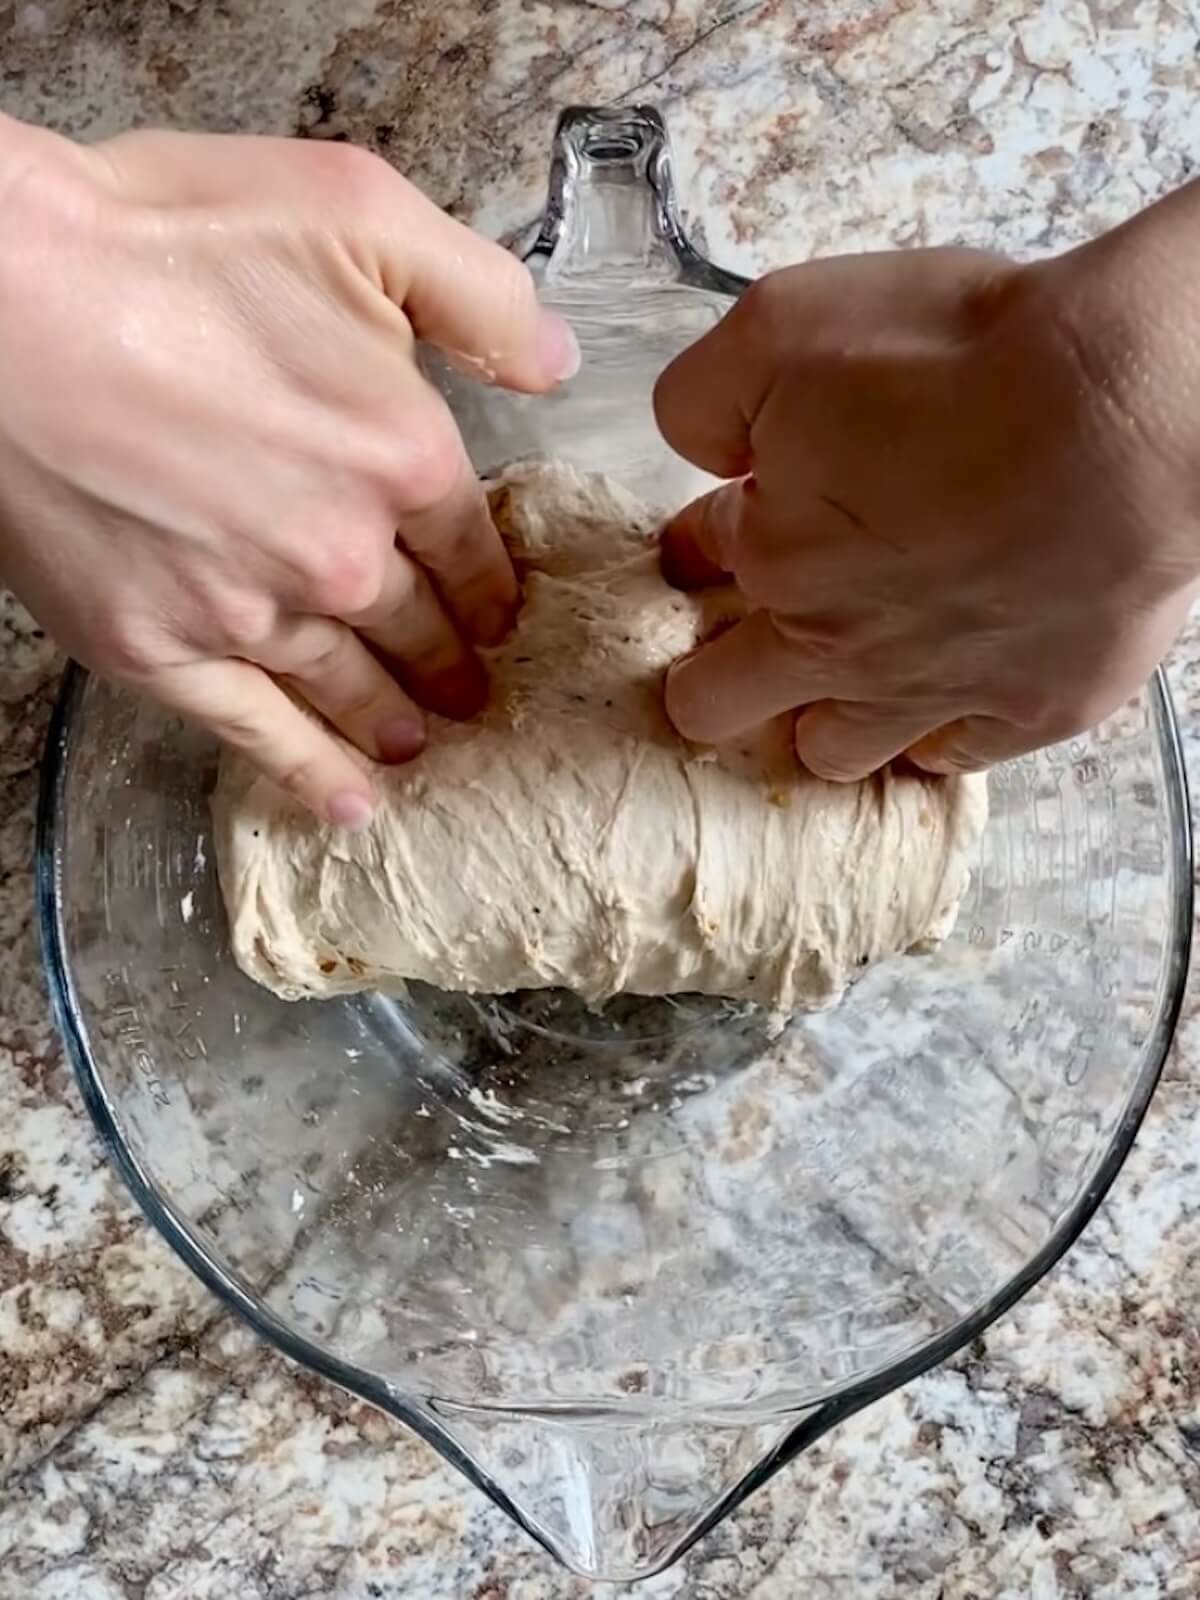
    • Wet your hands lightly and perform a set of stretch and folds.
    • Grab one edge of the dough, stretch it up as far as it will go without tearing, and fold it over itself.
    • Rotate the bowl 90ยฐ and repeat on the next side. Continue until all four sides have been stretched and folded.
    • Cover and rest for 15 minutes.
    • Repeat this stretch and fold process three more times, resting 15 minutes between each set.
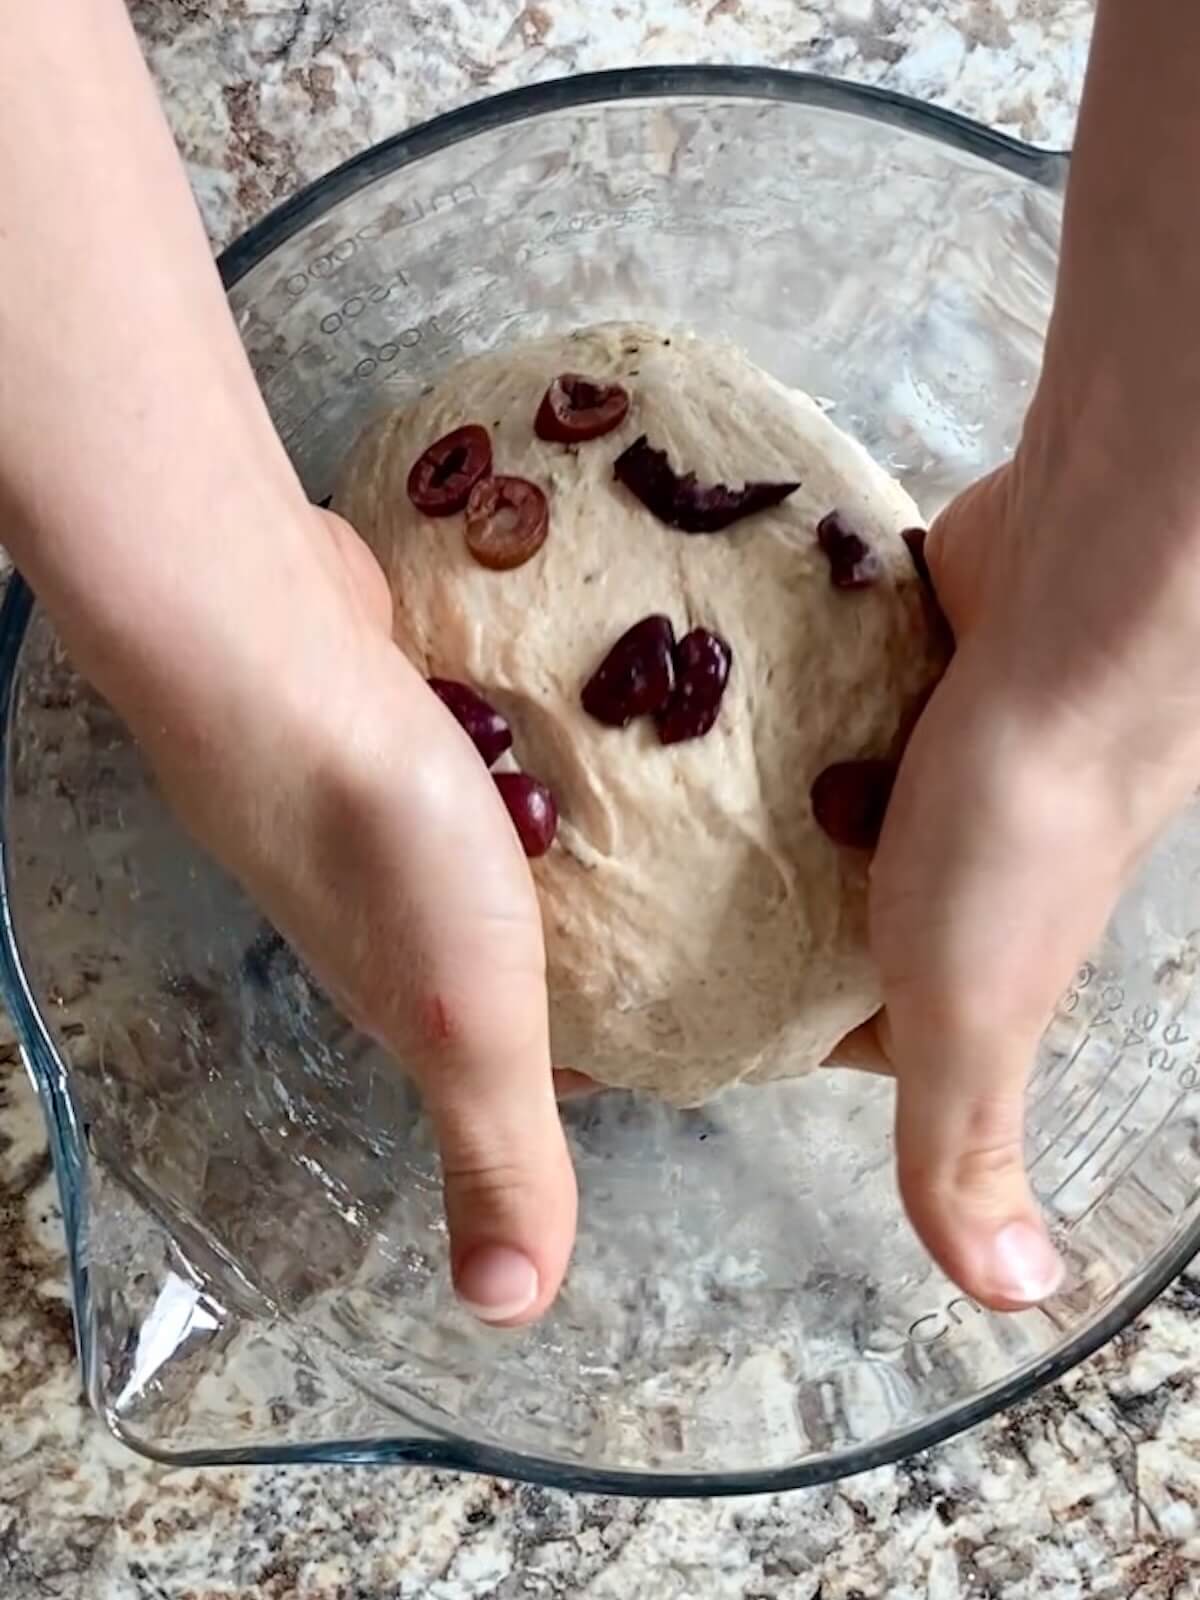
    Two hands stretching one side of the dough up out of the bowl.
    Two hands folding the stretched dough over on top of itself in a bowl.
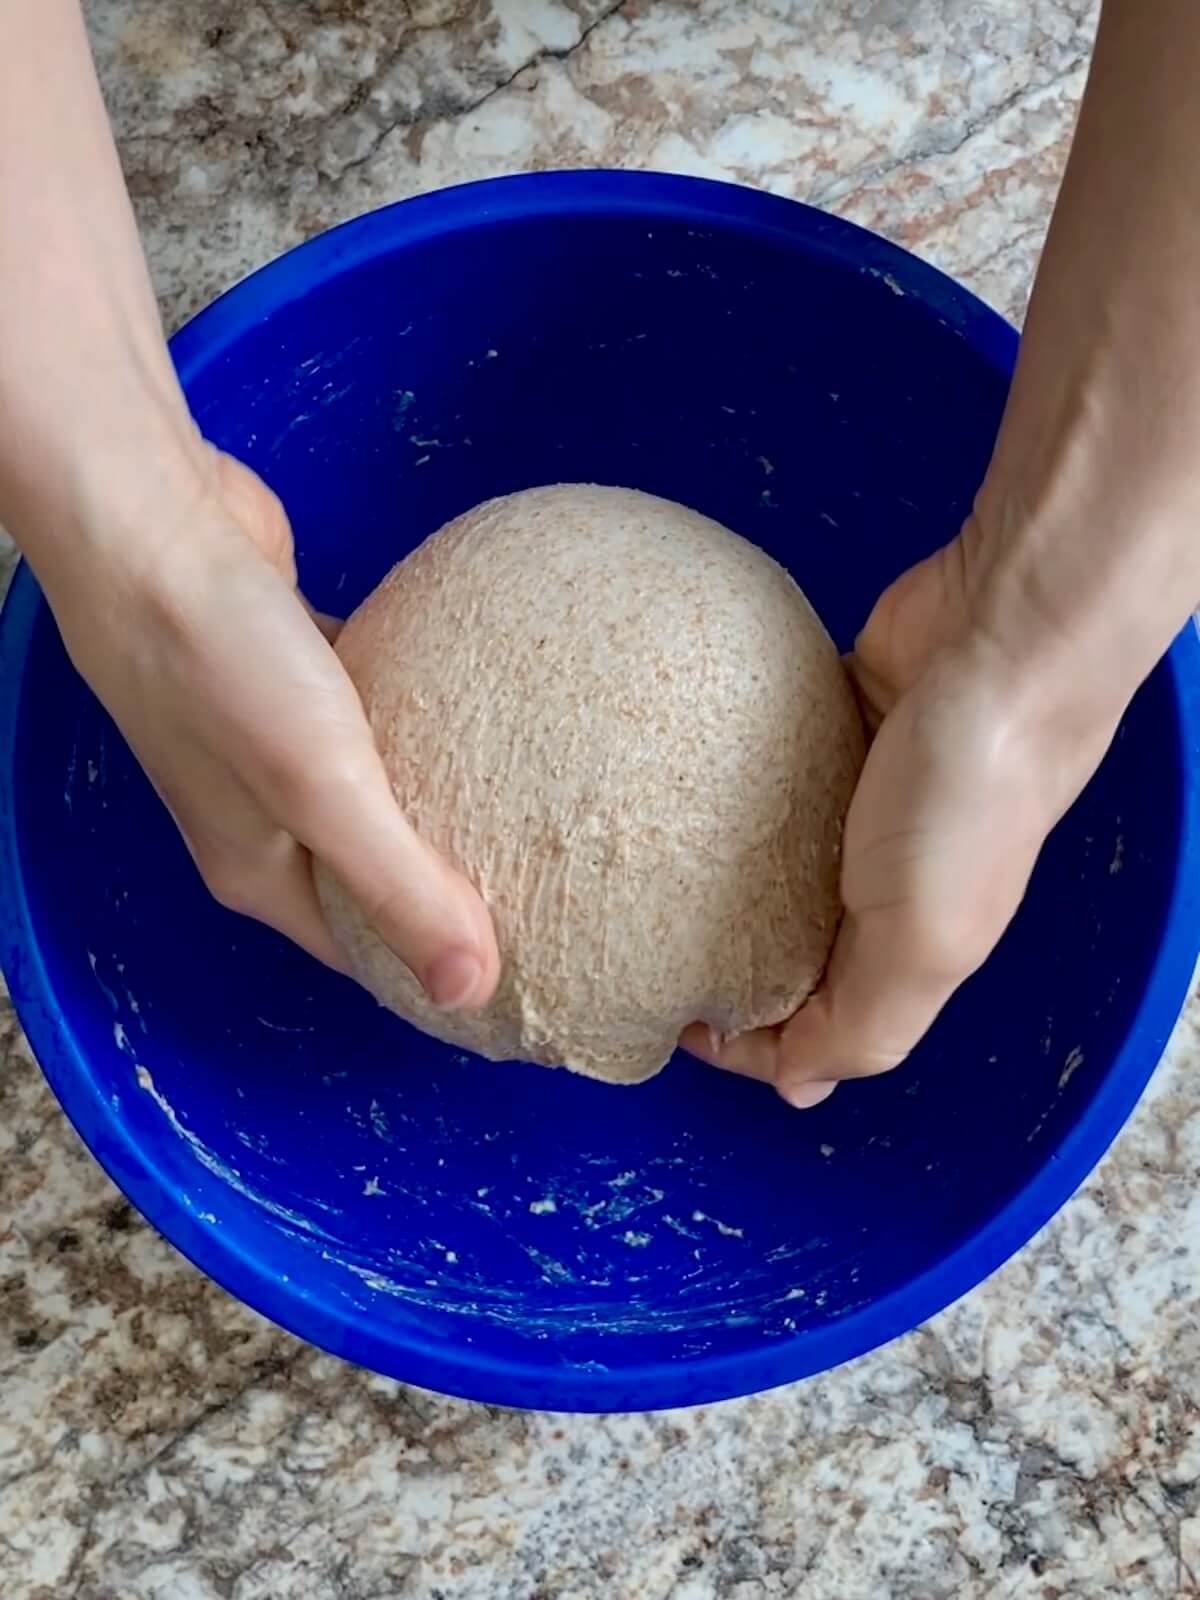
    Two hands shaping the dough into a ball and placing it back inside the mixing bowl after a set of stretch and folds.

    4. Bulk Fermentation

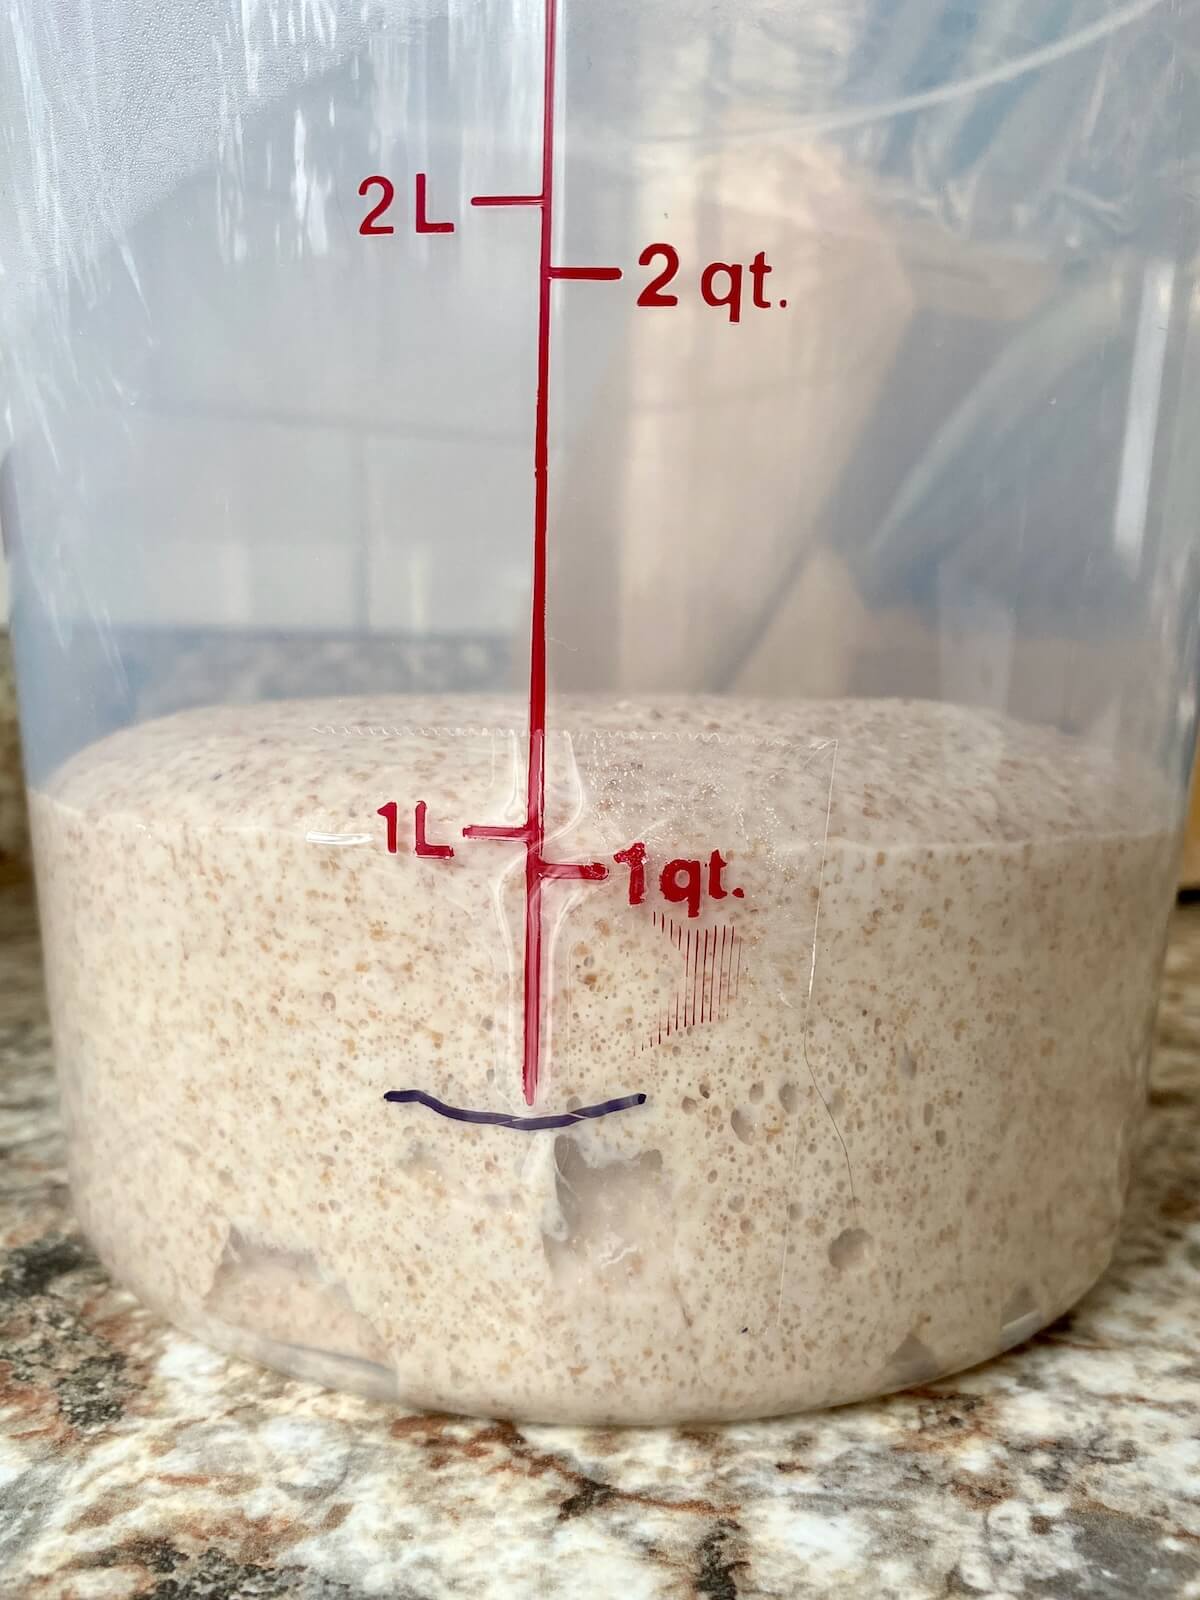
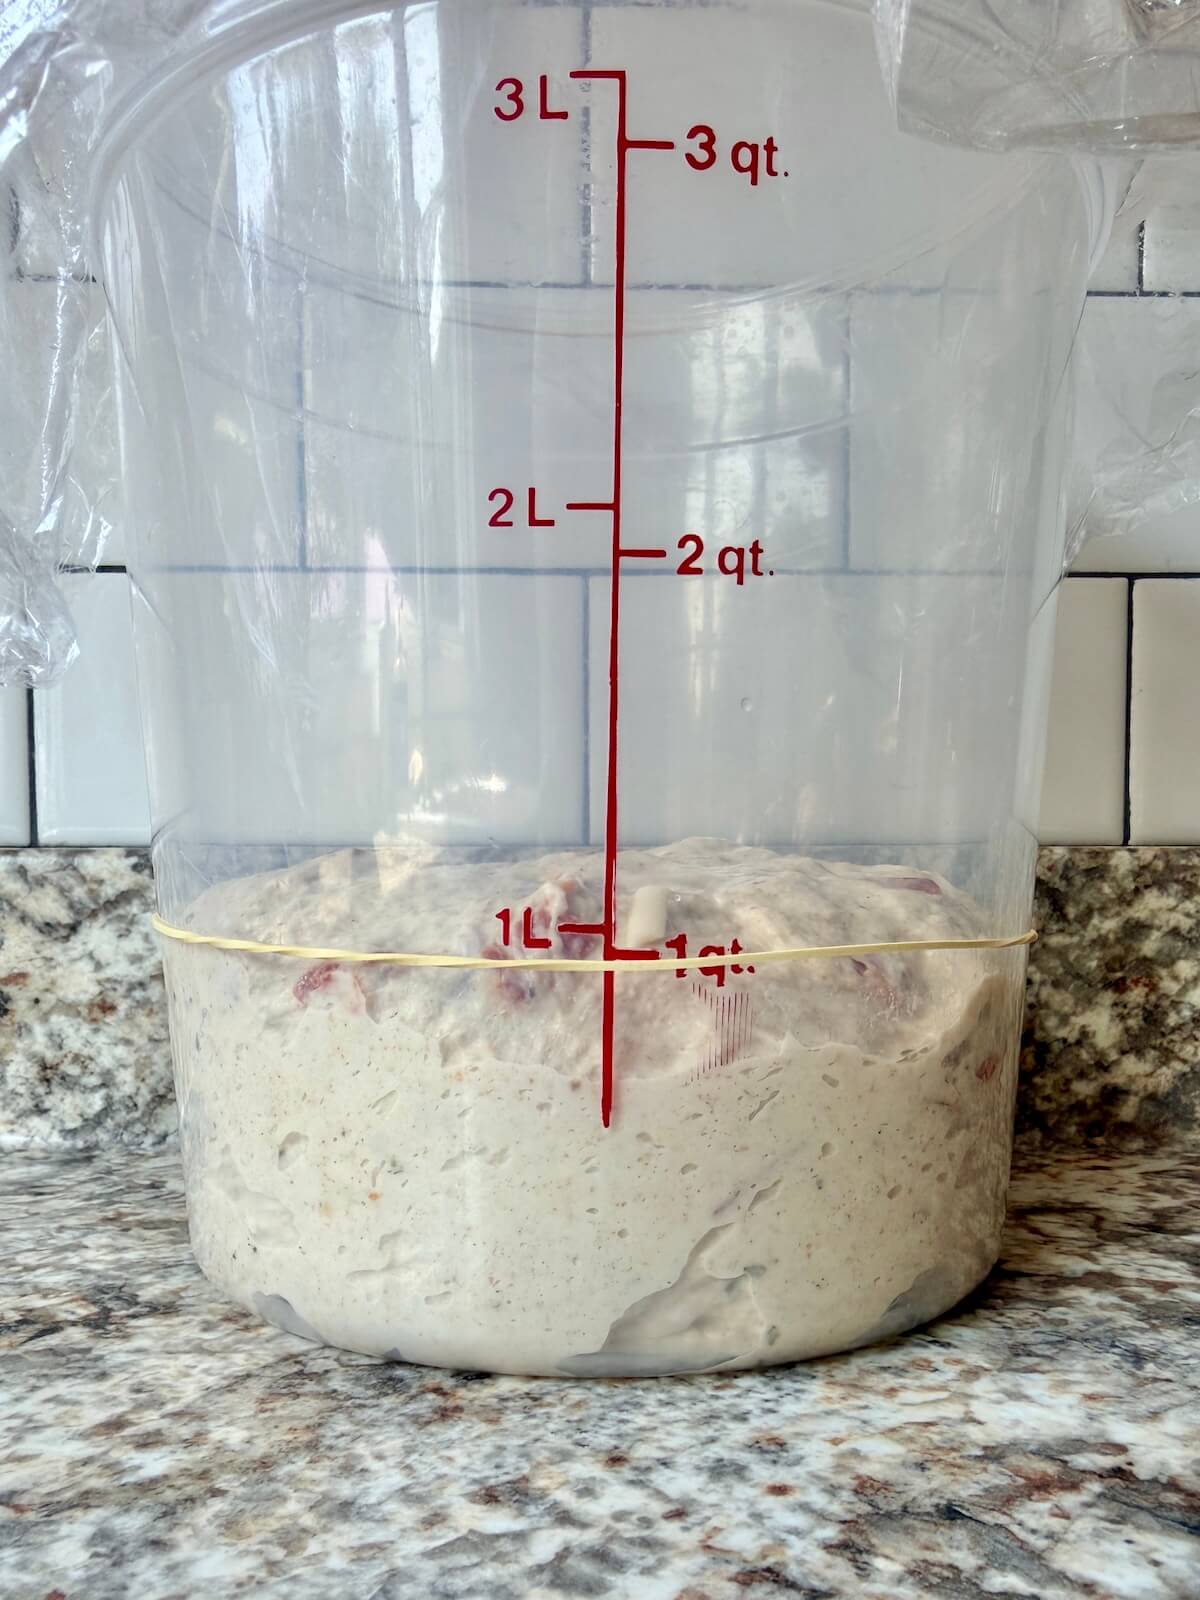
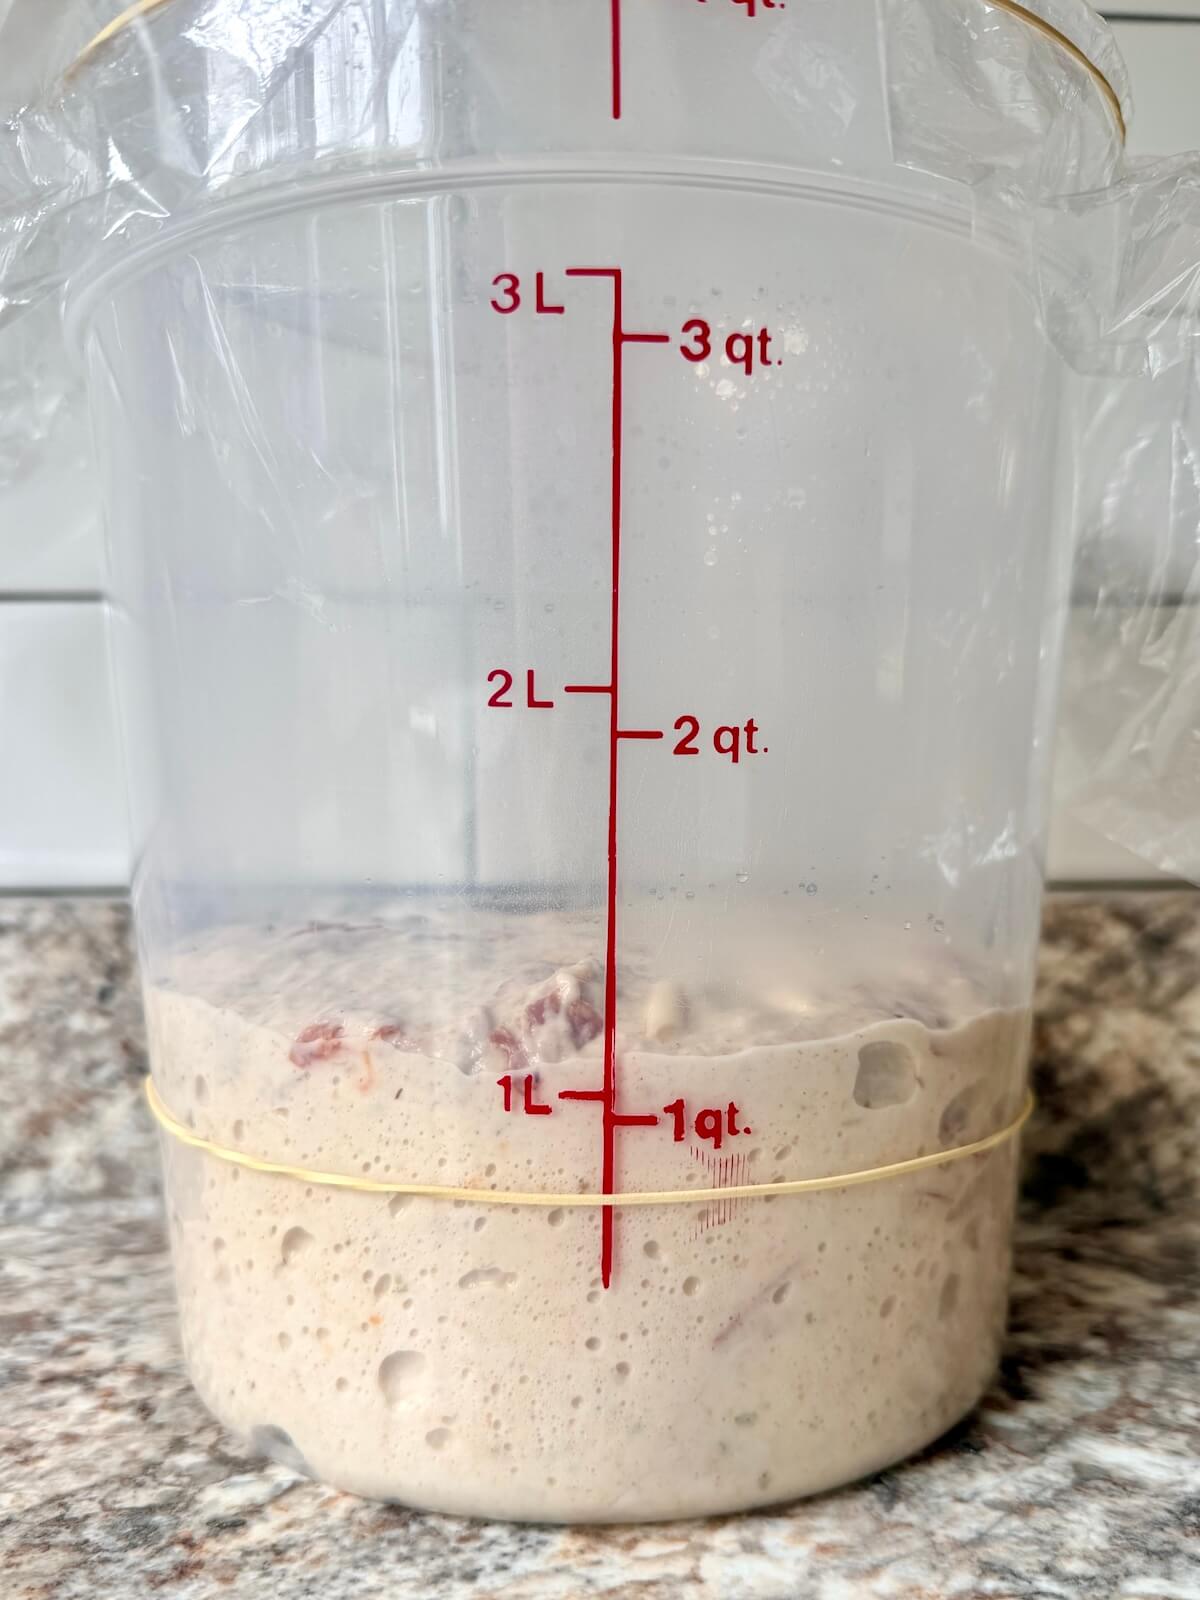
    • Cover the dough and let it rise in a warm spot until it doubles in size and has visible fermentation bubbles.
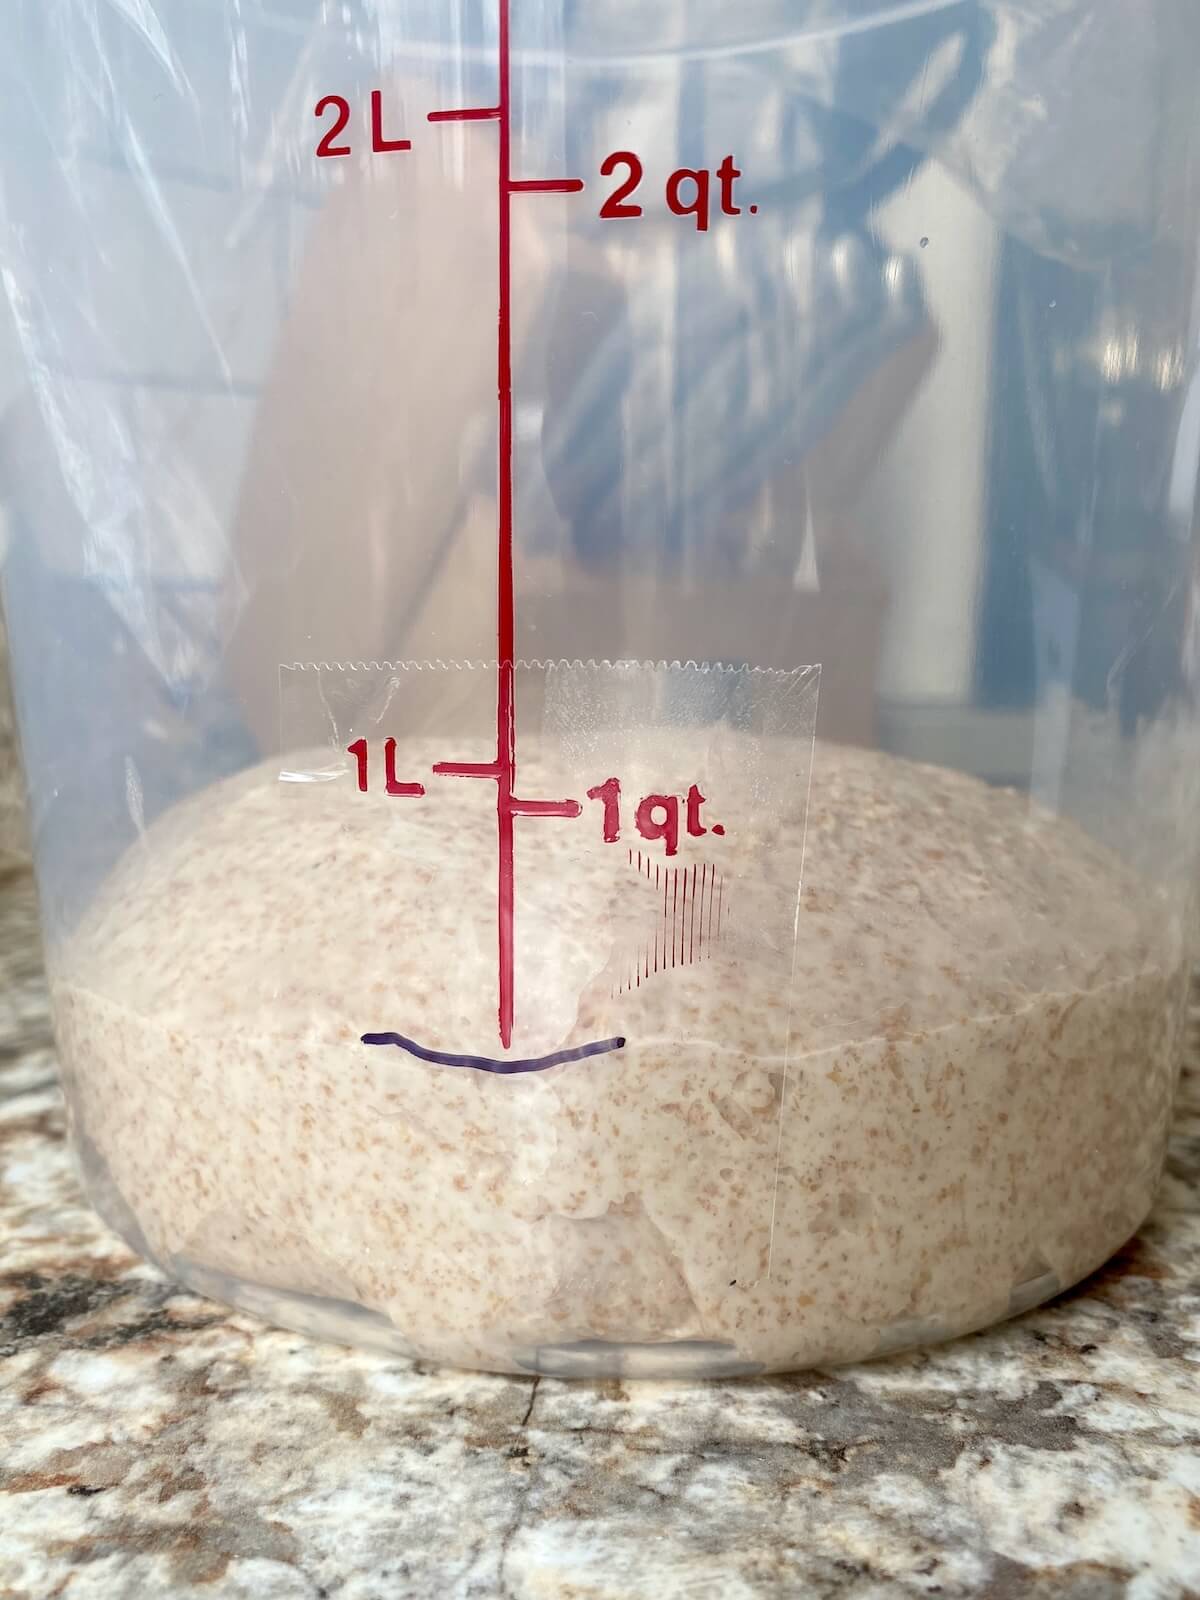
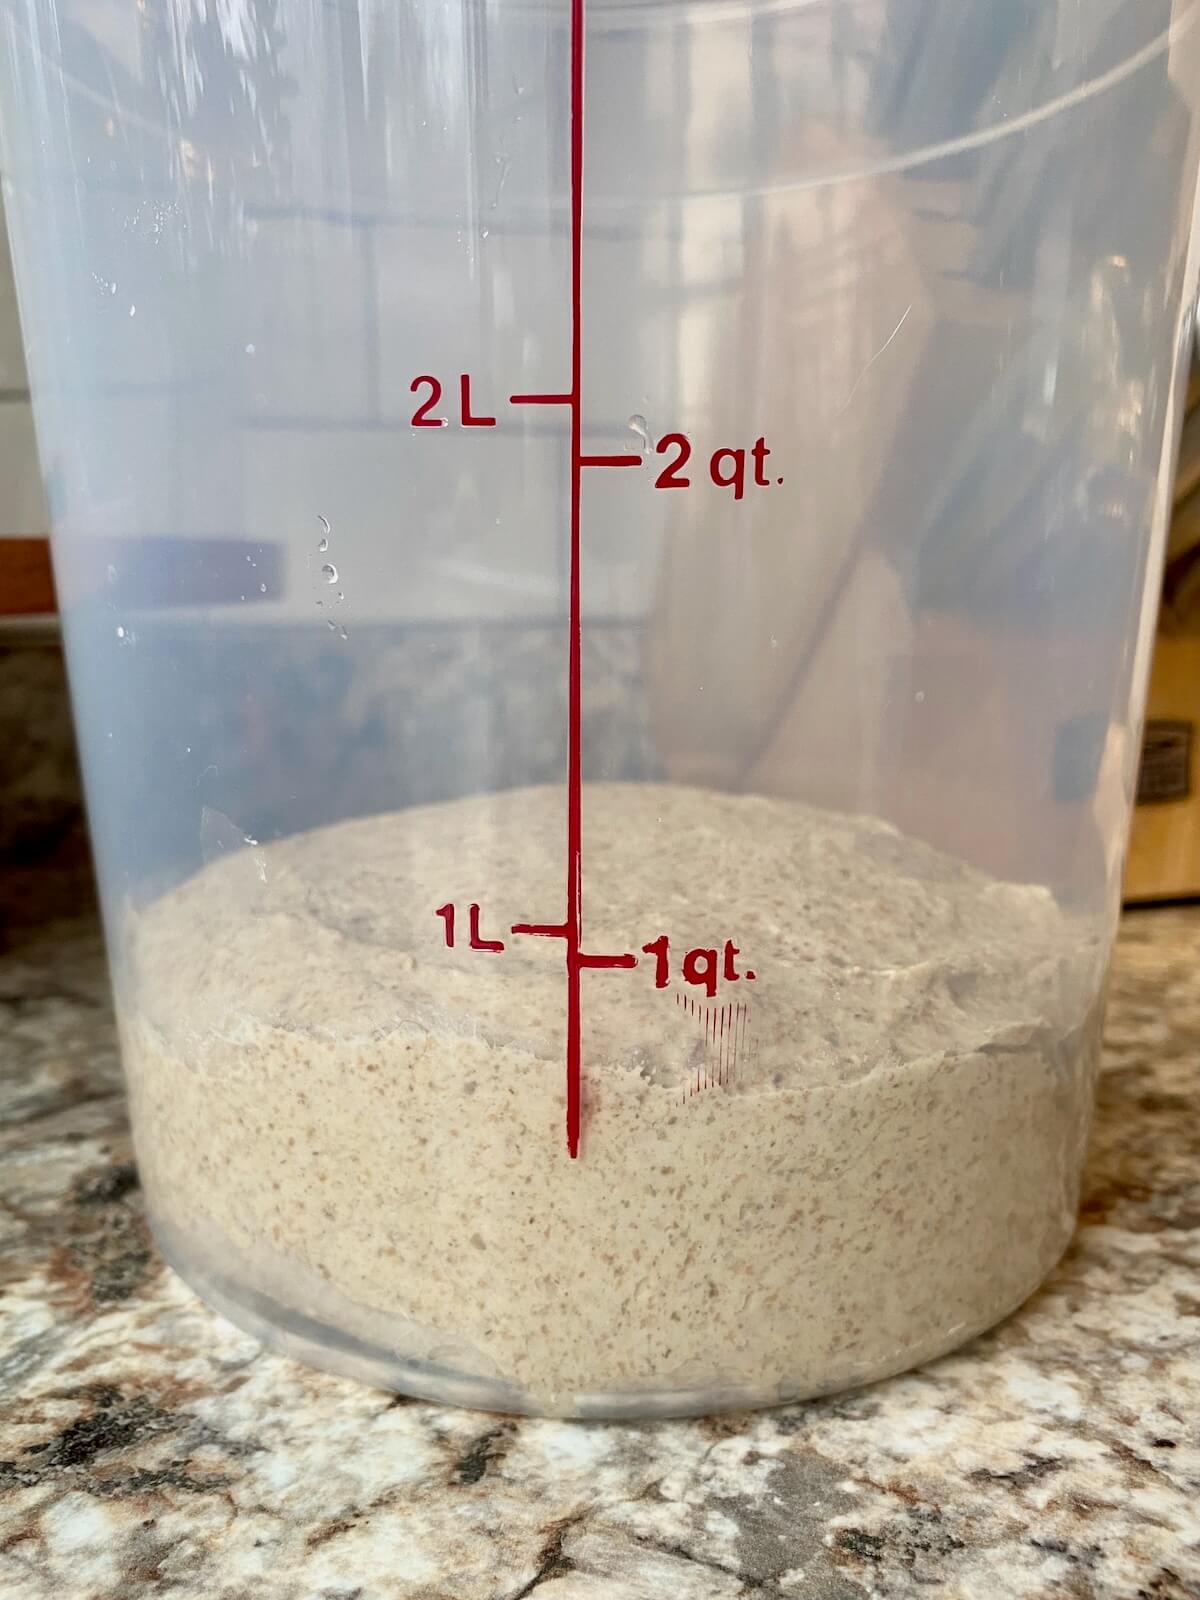
    • If using a straight-sided container, mark the starting level to track fermentation progress.
    • Bulk fermentation can take anywhere from 4-12 hours or longer depending on your kitchen and dough temperature and starter strength.
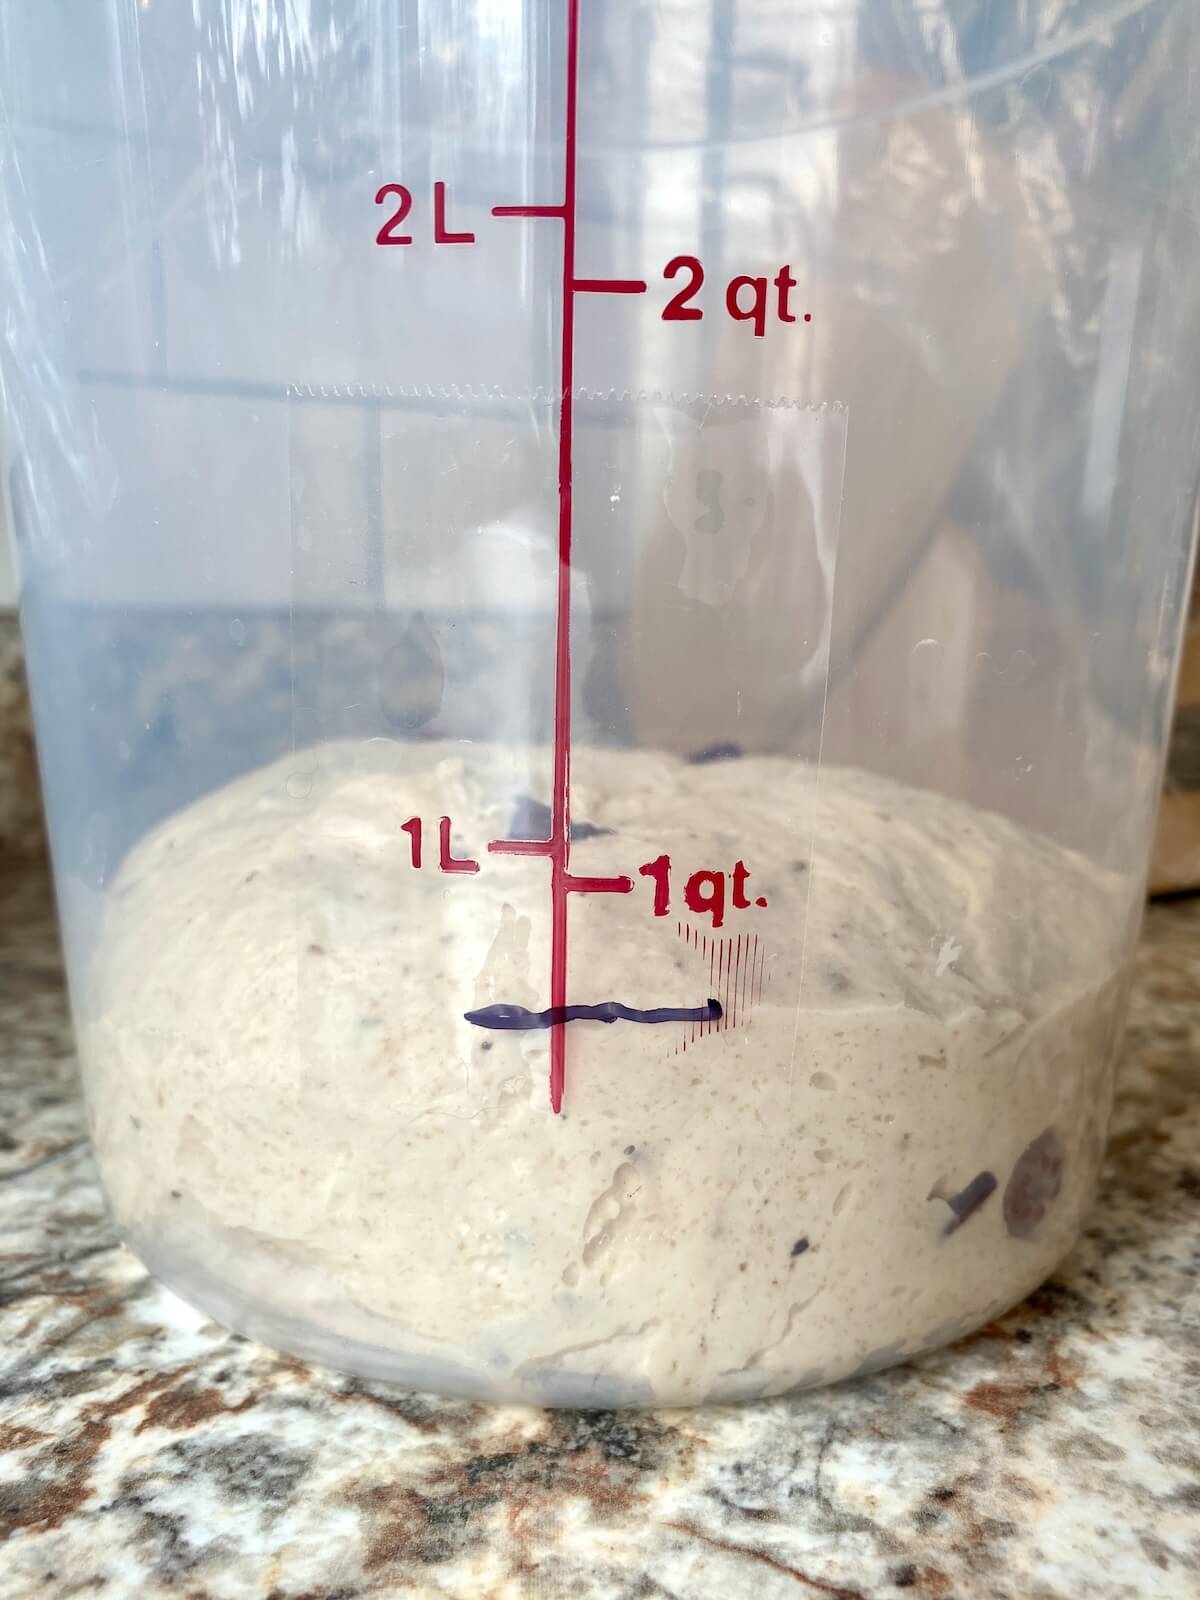
    Everything bagel sourdough bread dough in a glass mixing bowl after stretching and folding and before bulk fermentation.
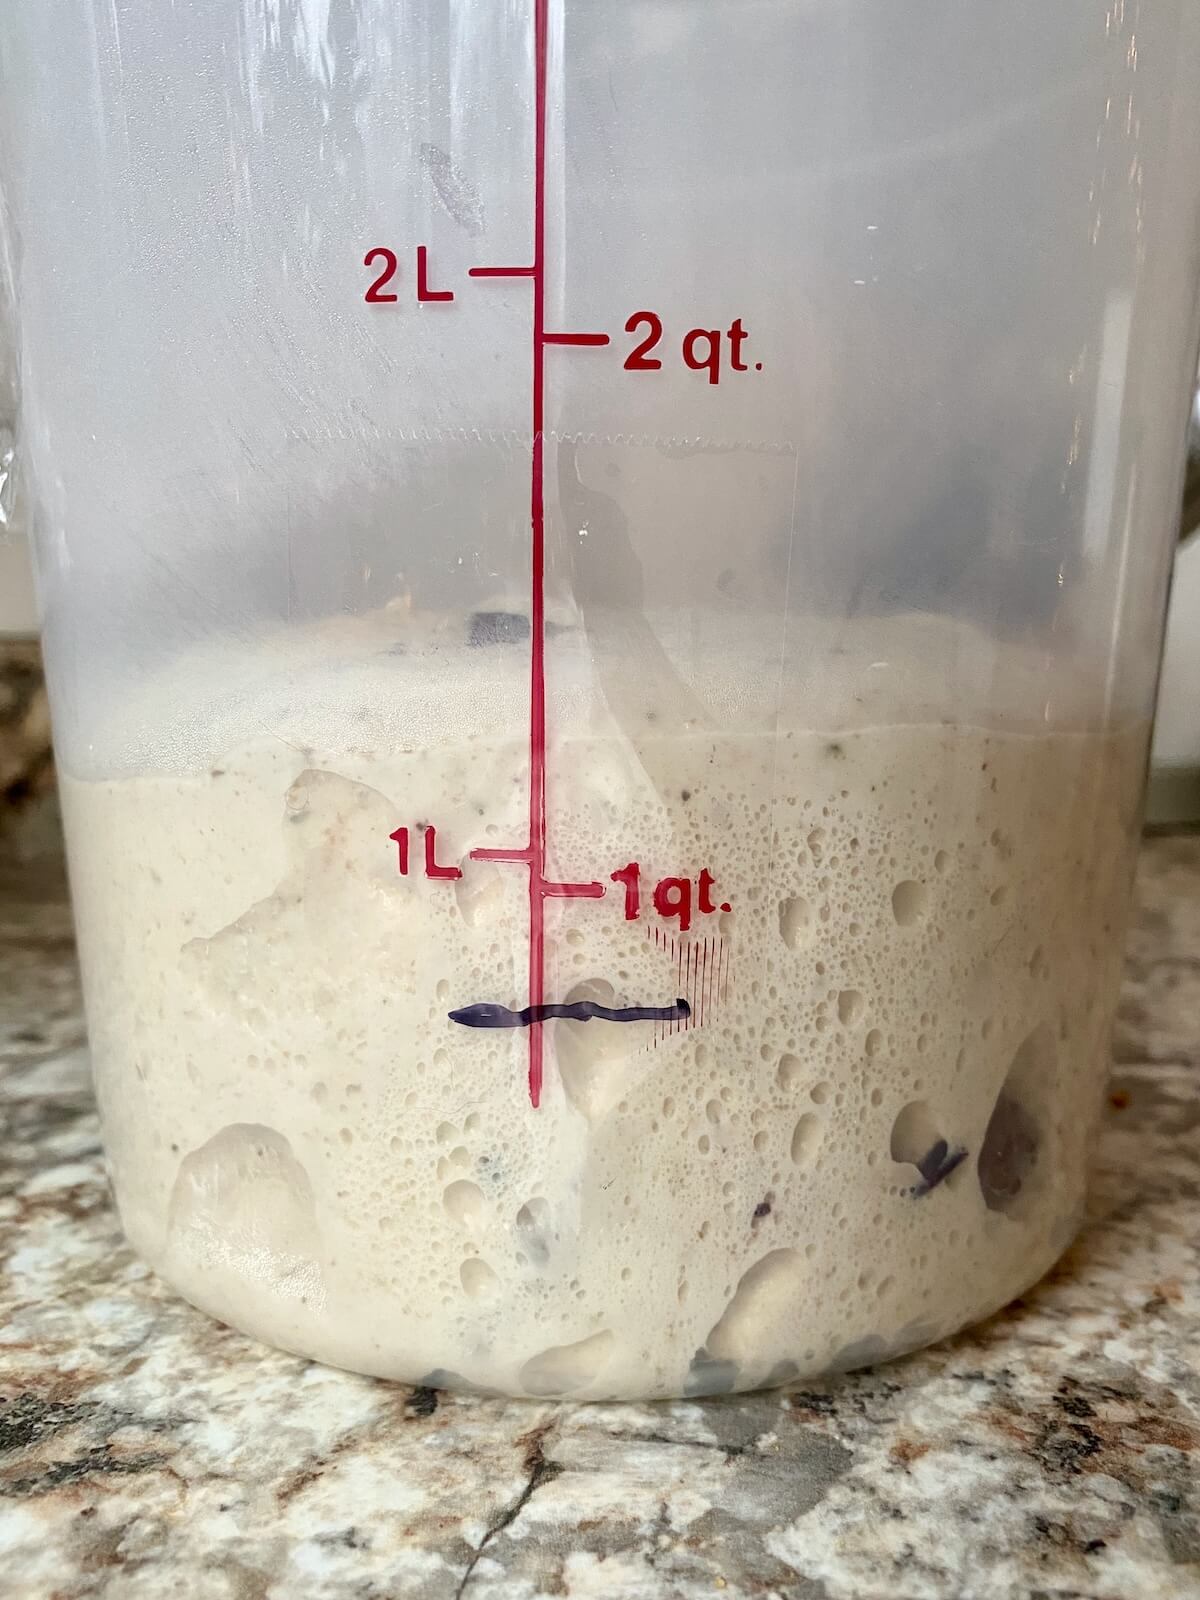
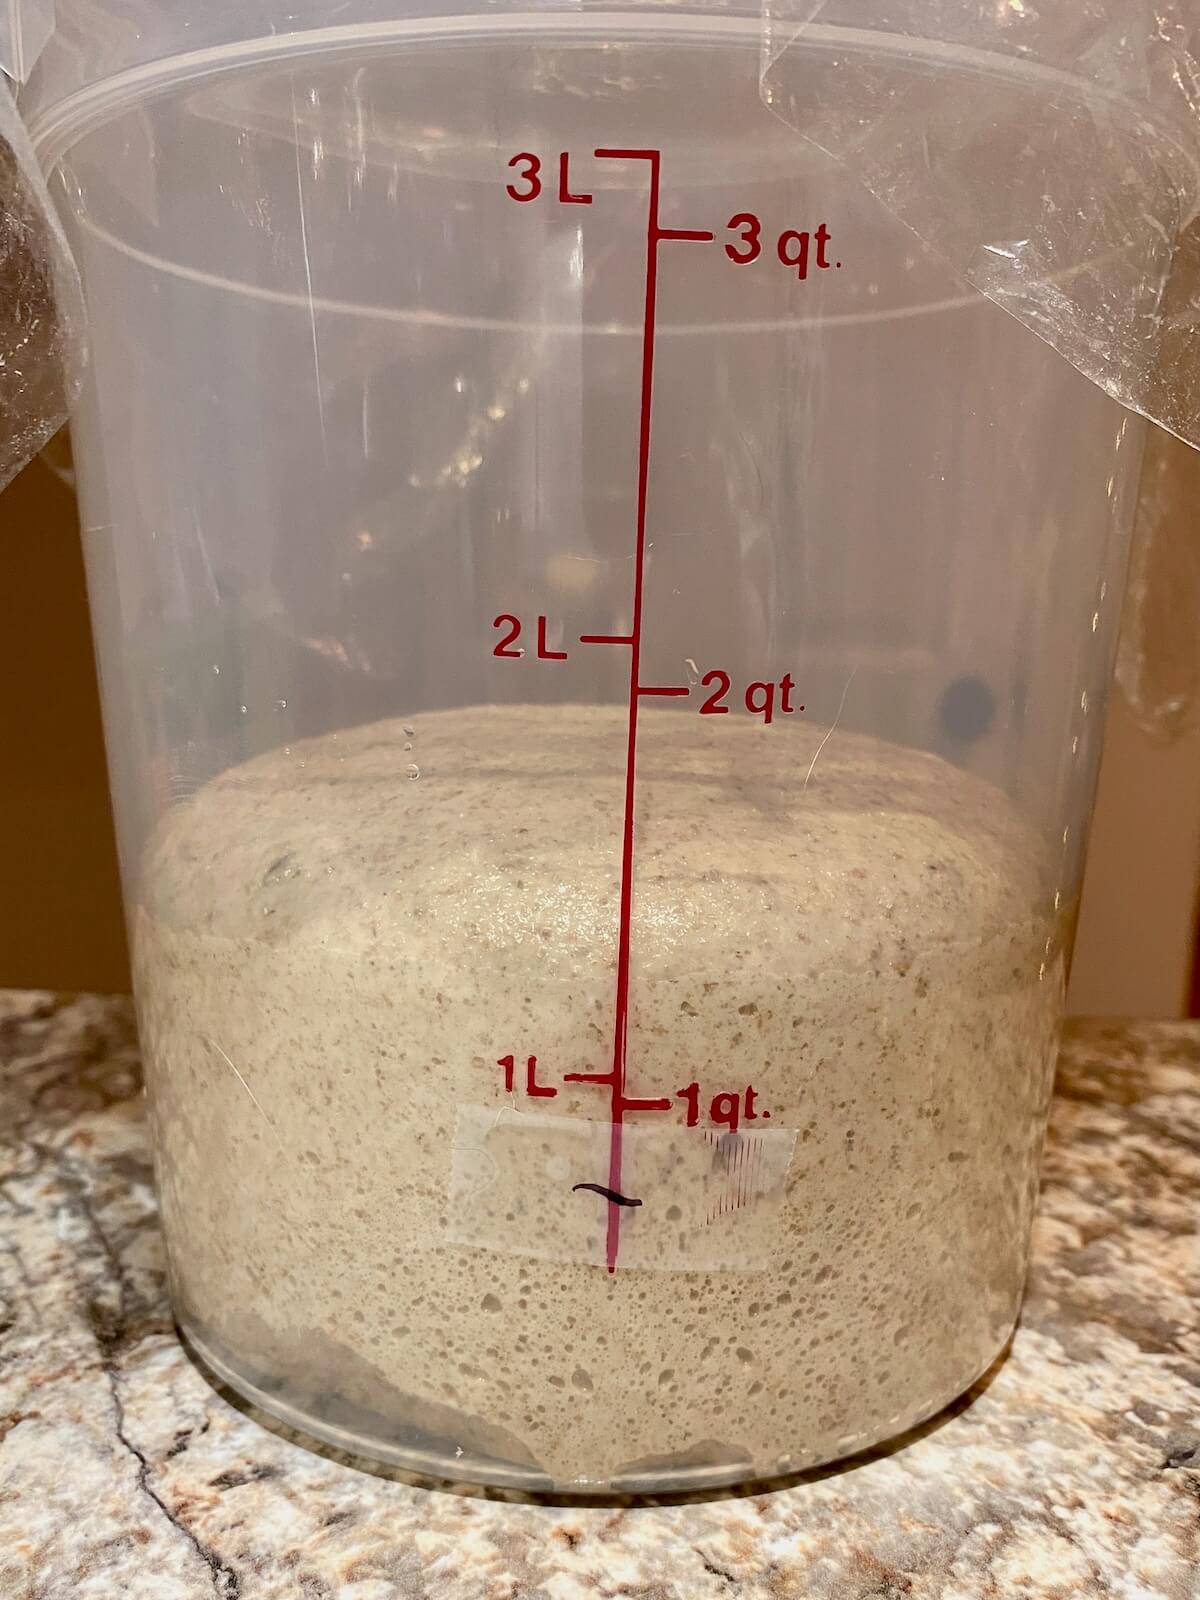
    The risen dough in a straight-sided container after bulk fermentation.

    5. Pre-Shape

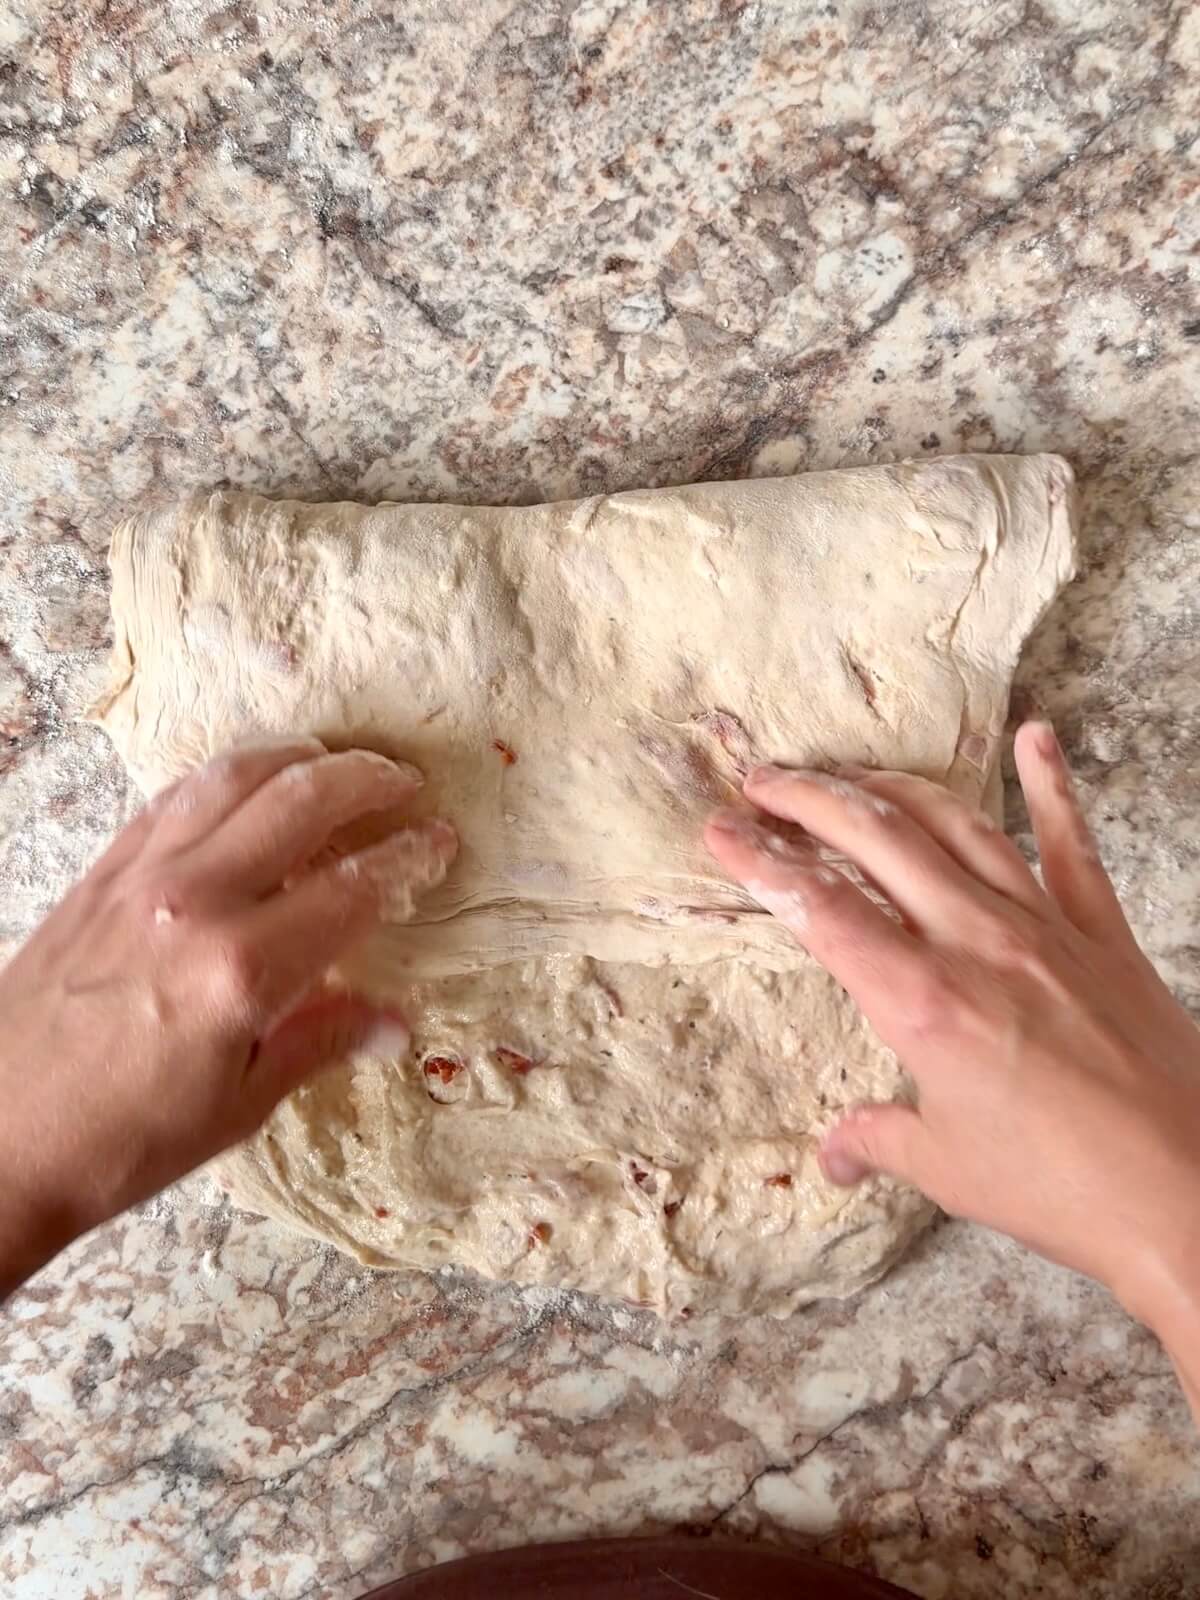
    • Lightly flour a work surface and transfer the fermented dough onto it.
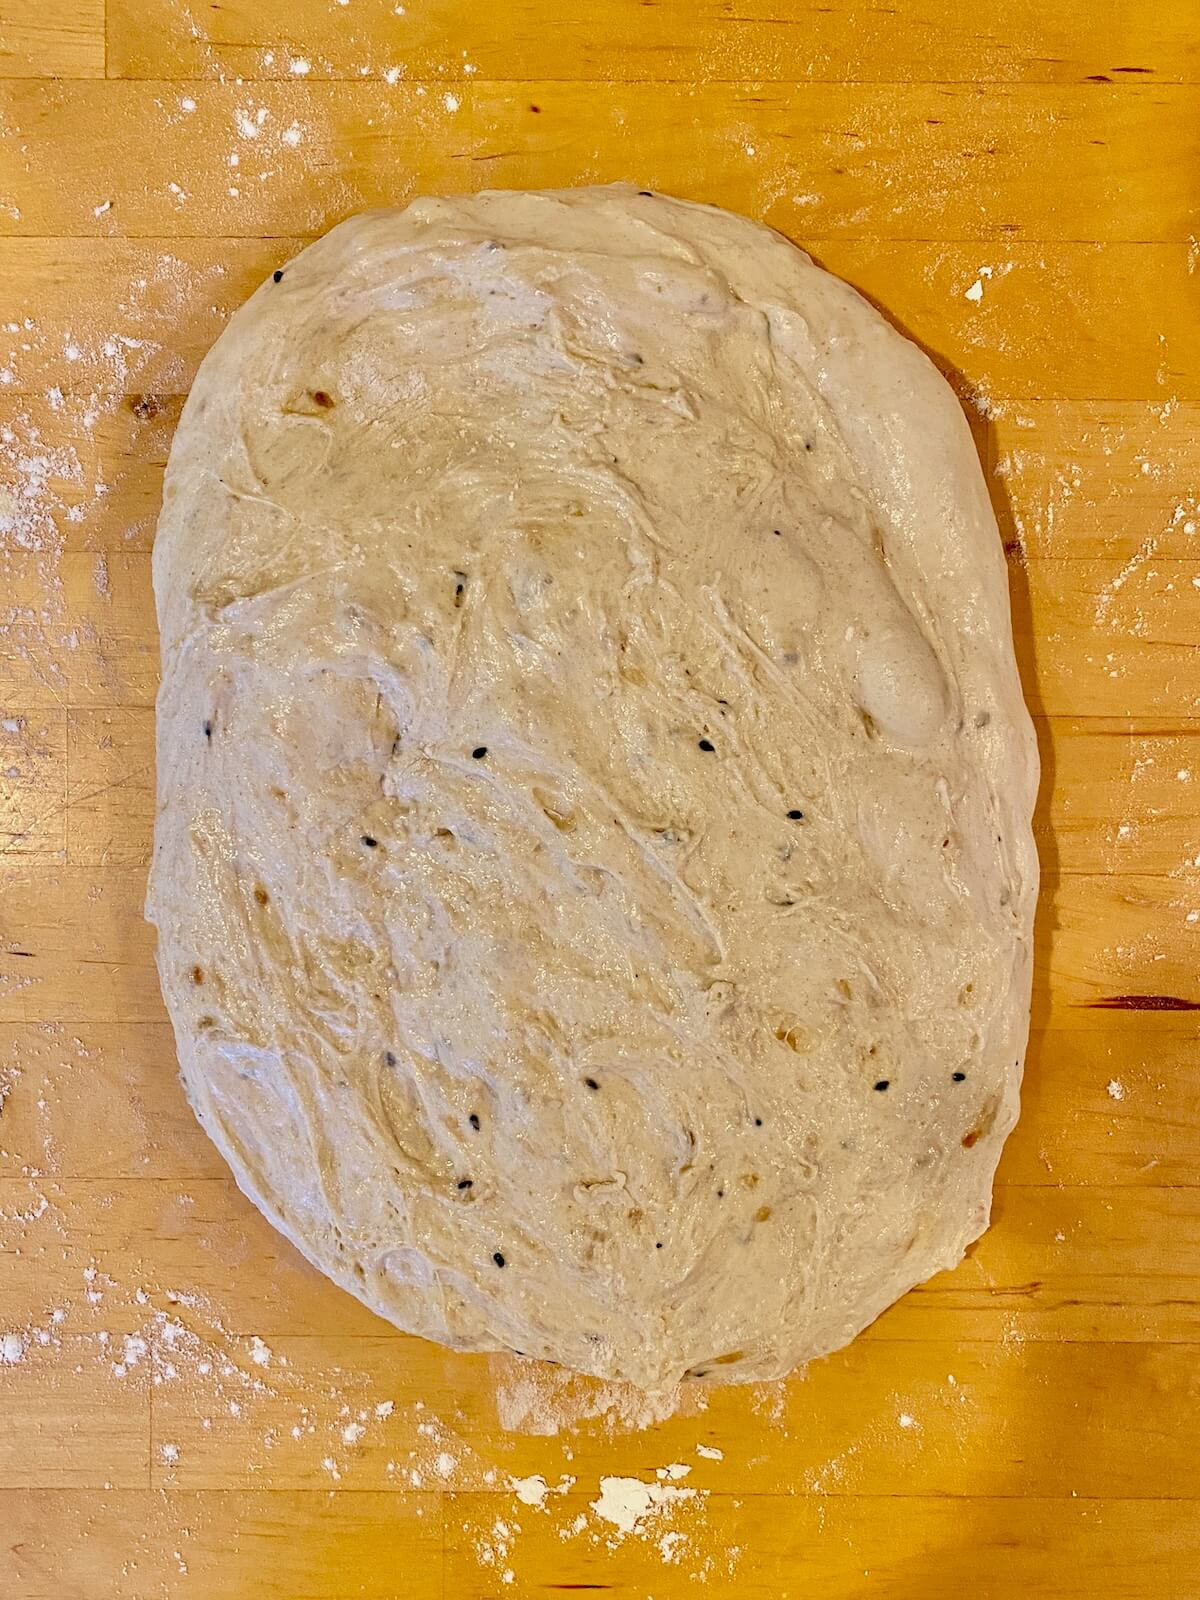
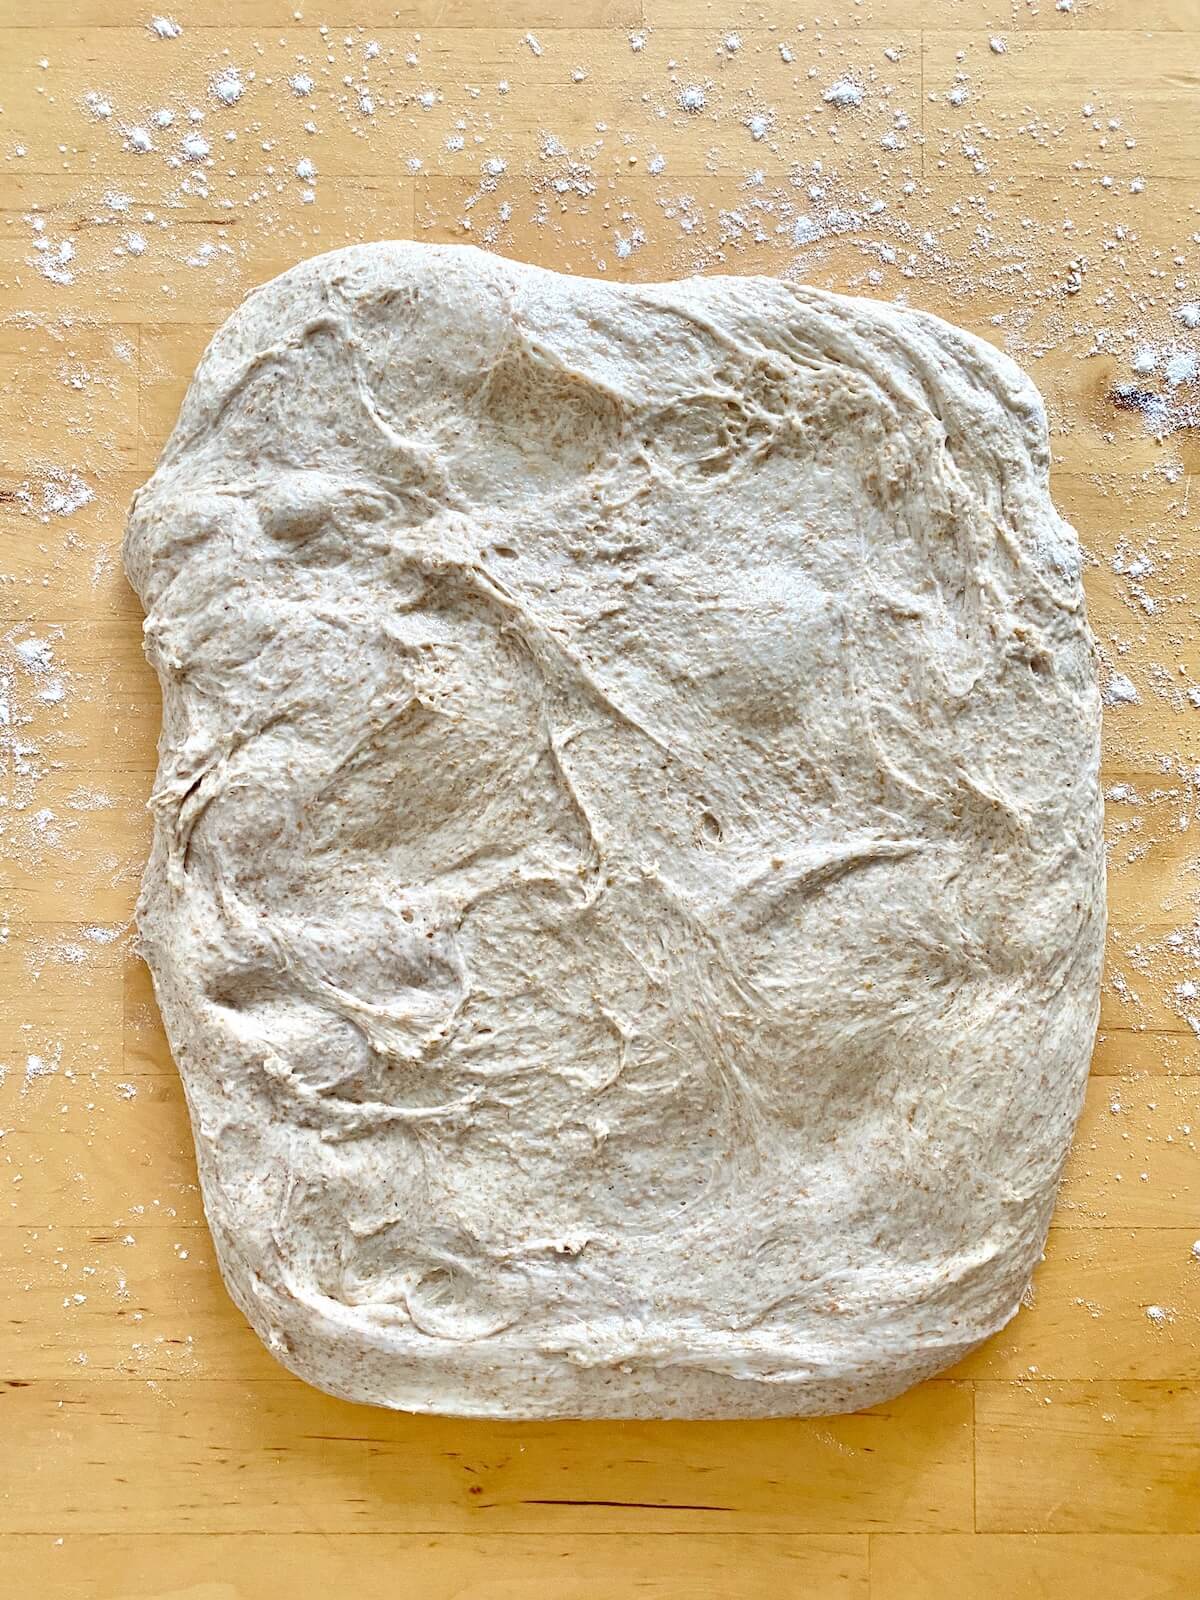
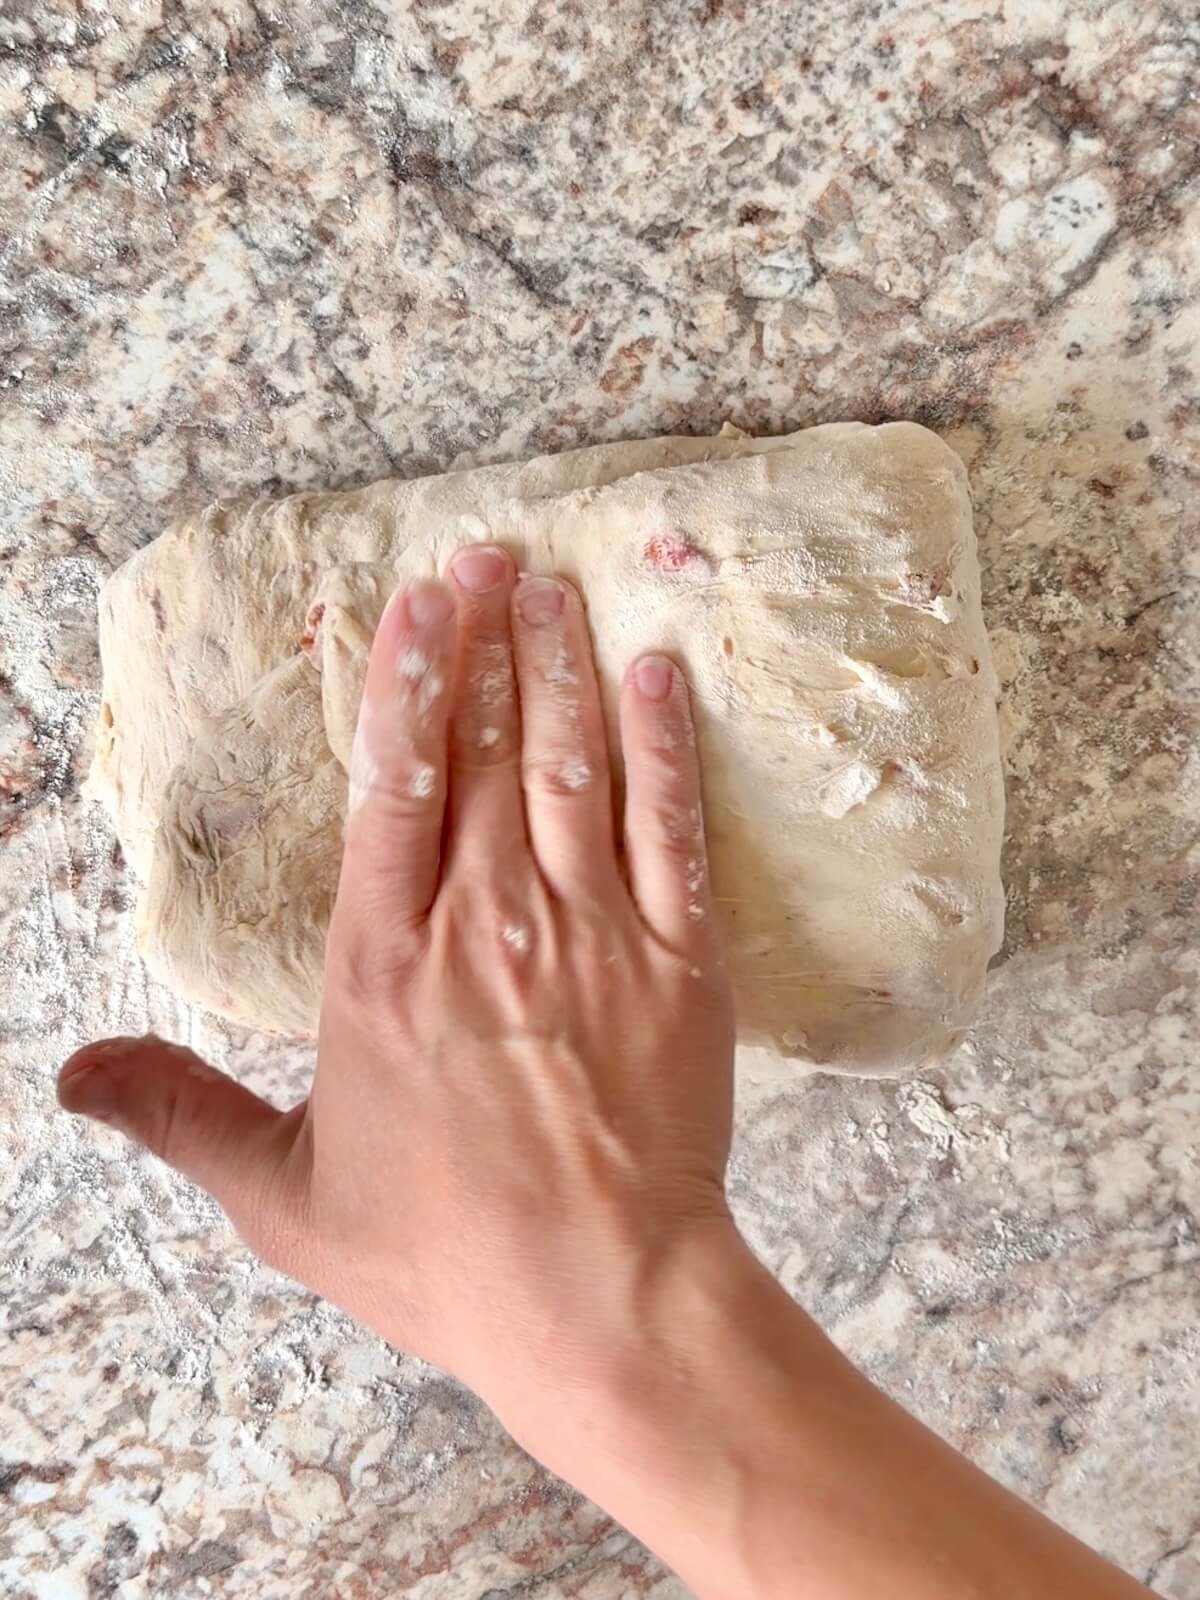
    • Gently pull it into a rough rectangle, then fold the long sides toward the center like a letter. Fold the short sides in the same way.
    • Flip the dough seam-side down and round it into a ball.
    • Cover and let rest for 15-20 minutes.

    6. Final Shaping

    • For a round loaf (boule): Flip the dough, shape it into a rectangle again, and repeat the same folding method as above.
    • For an oval loaf (batard): Fold the short edges toward the center, then tightly roll the dough from a long edge into a log, pinching the seam closed.
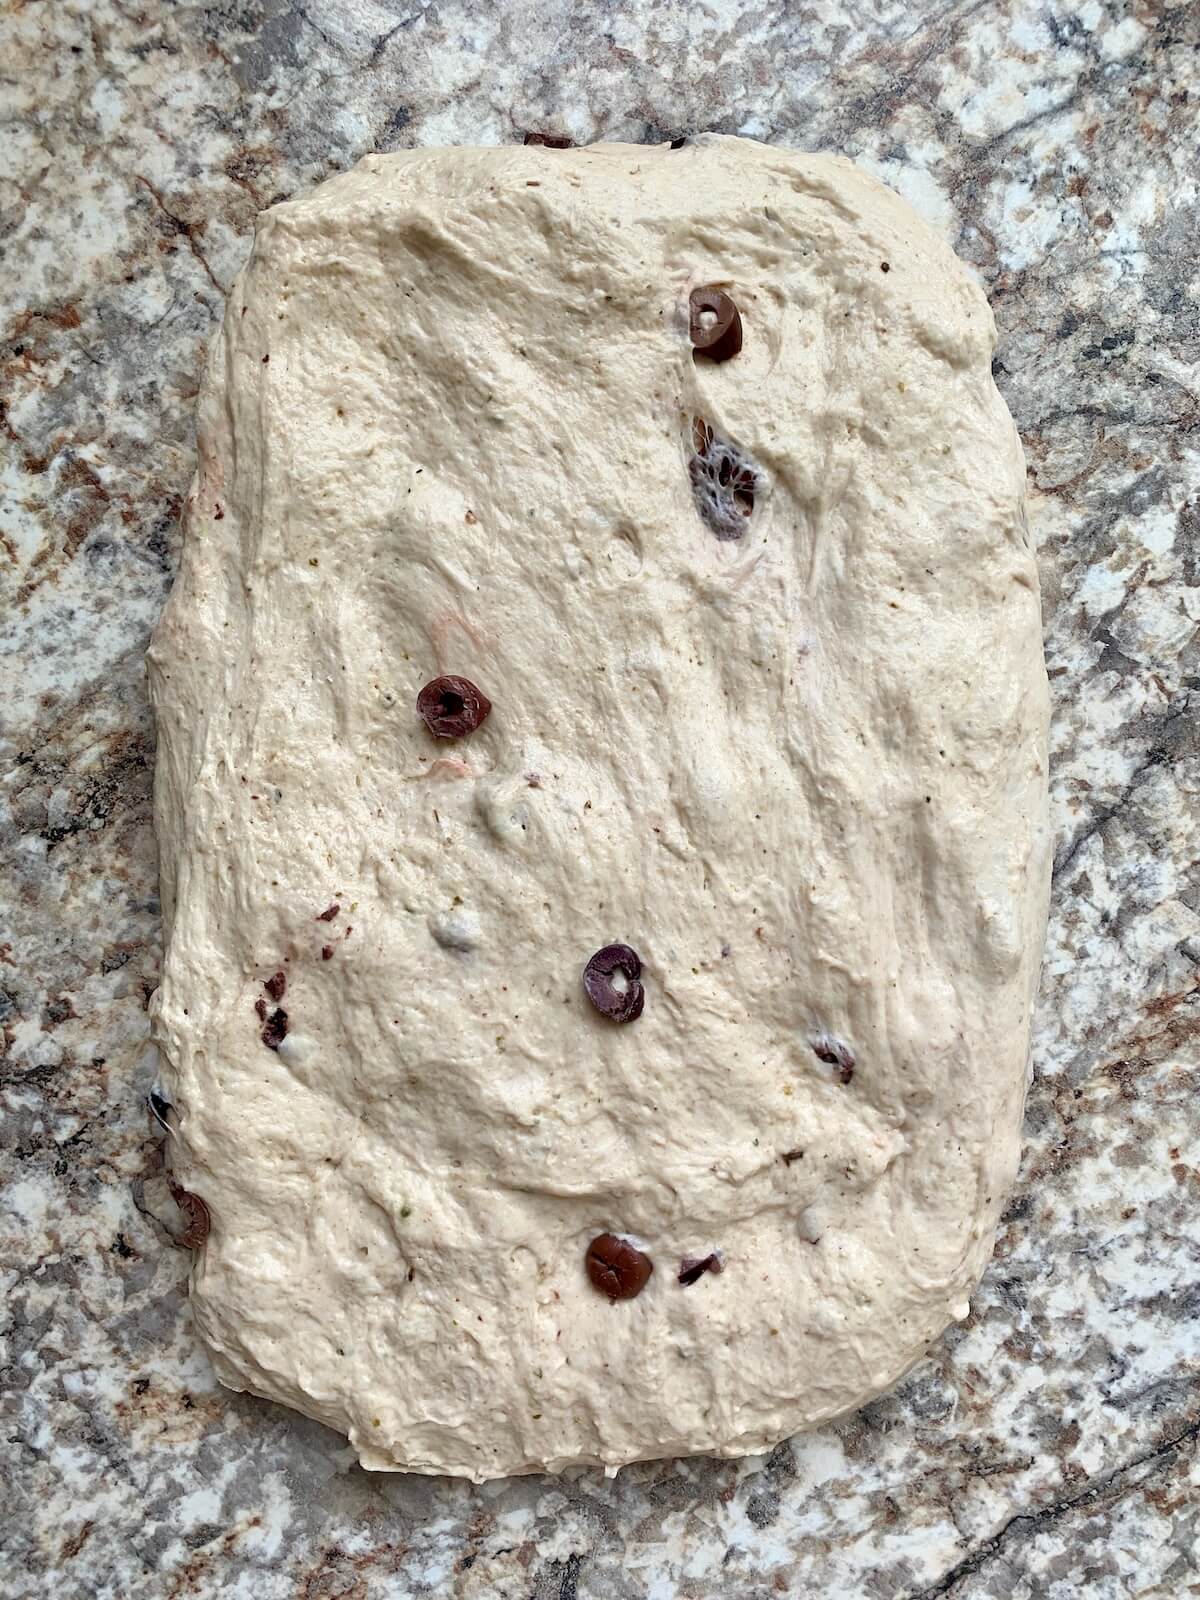
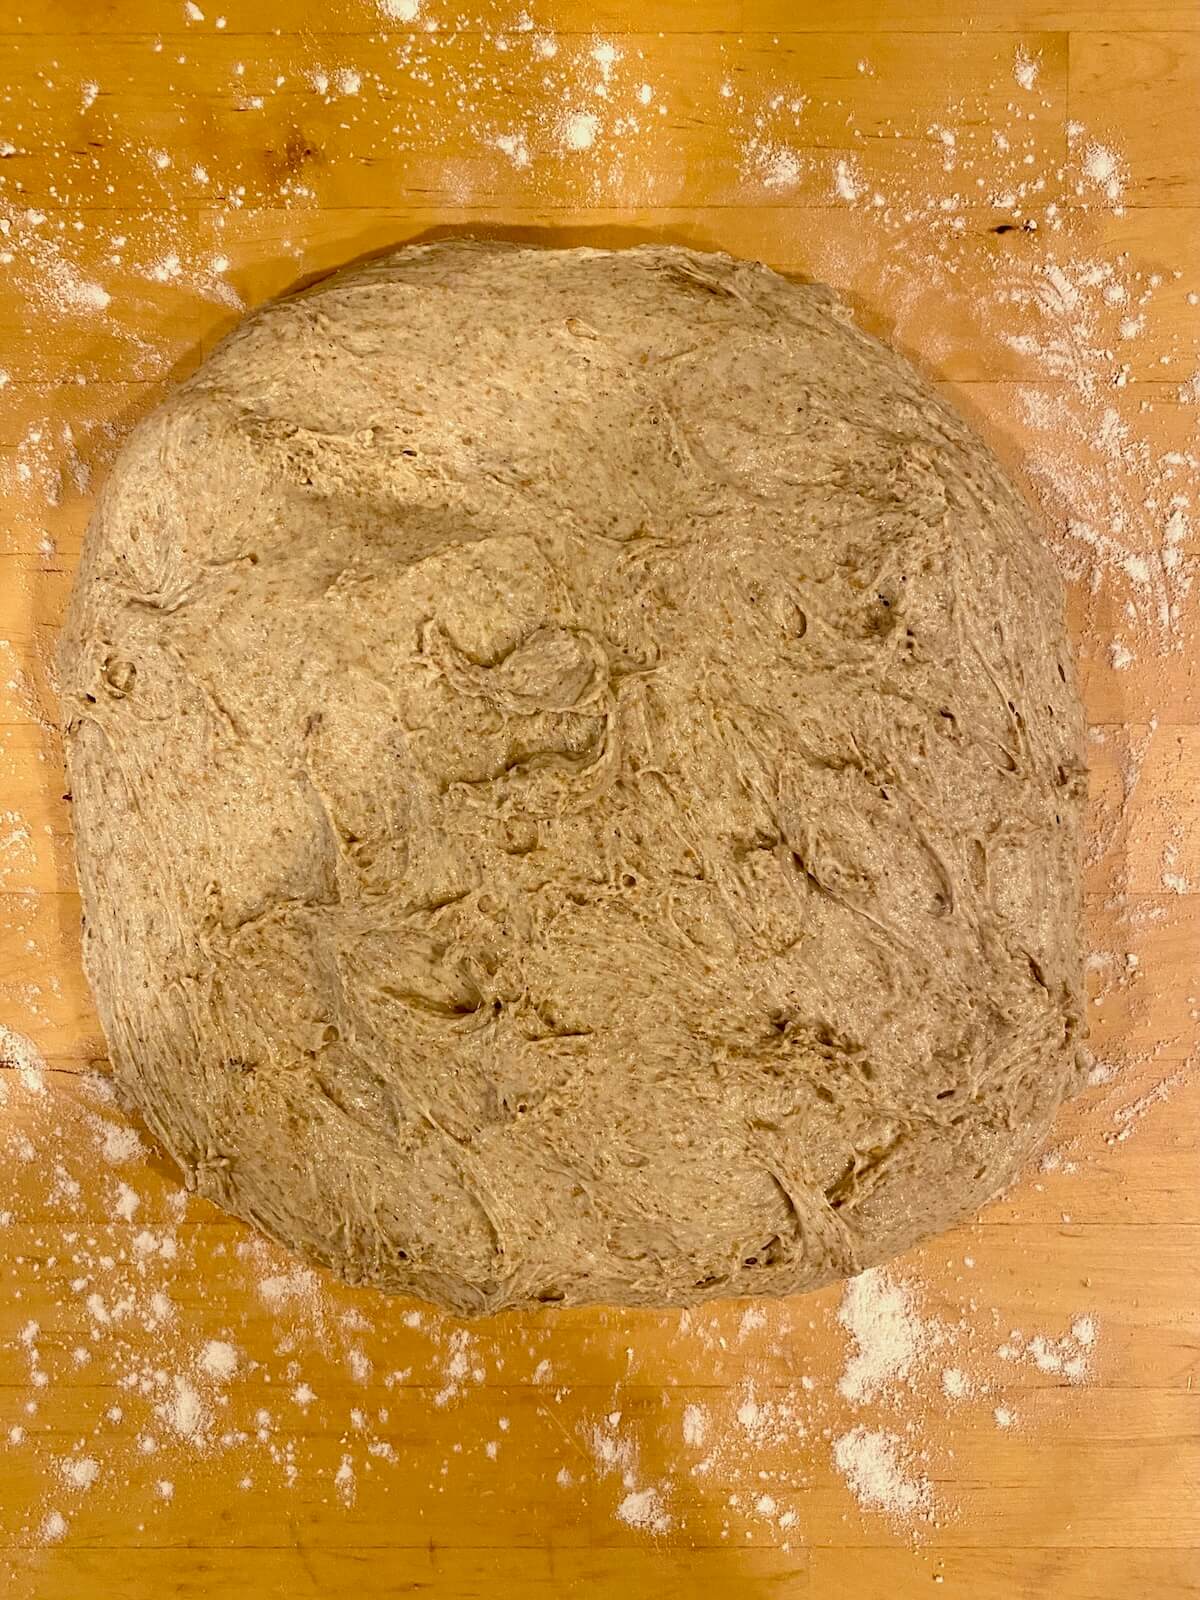
    Fermented everything bagel sourdough bread dough stretched into a rectangle on a wooden countertop.
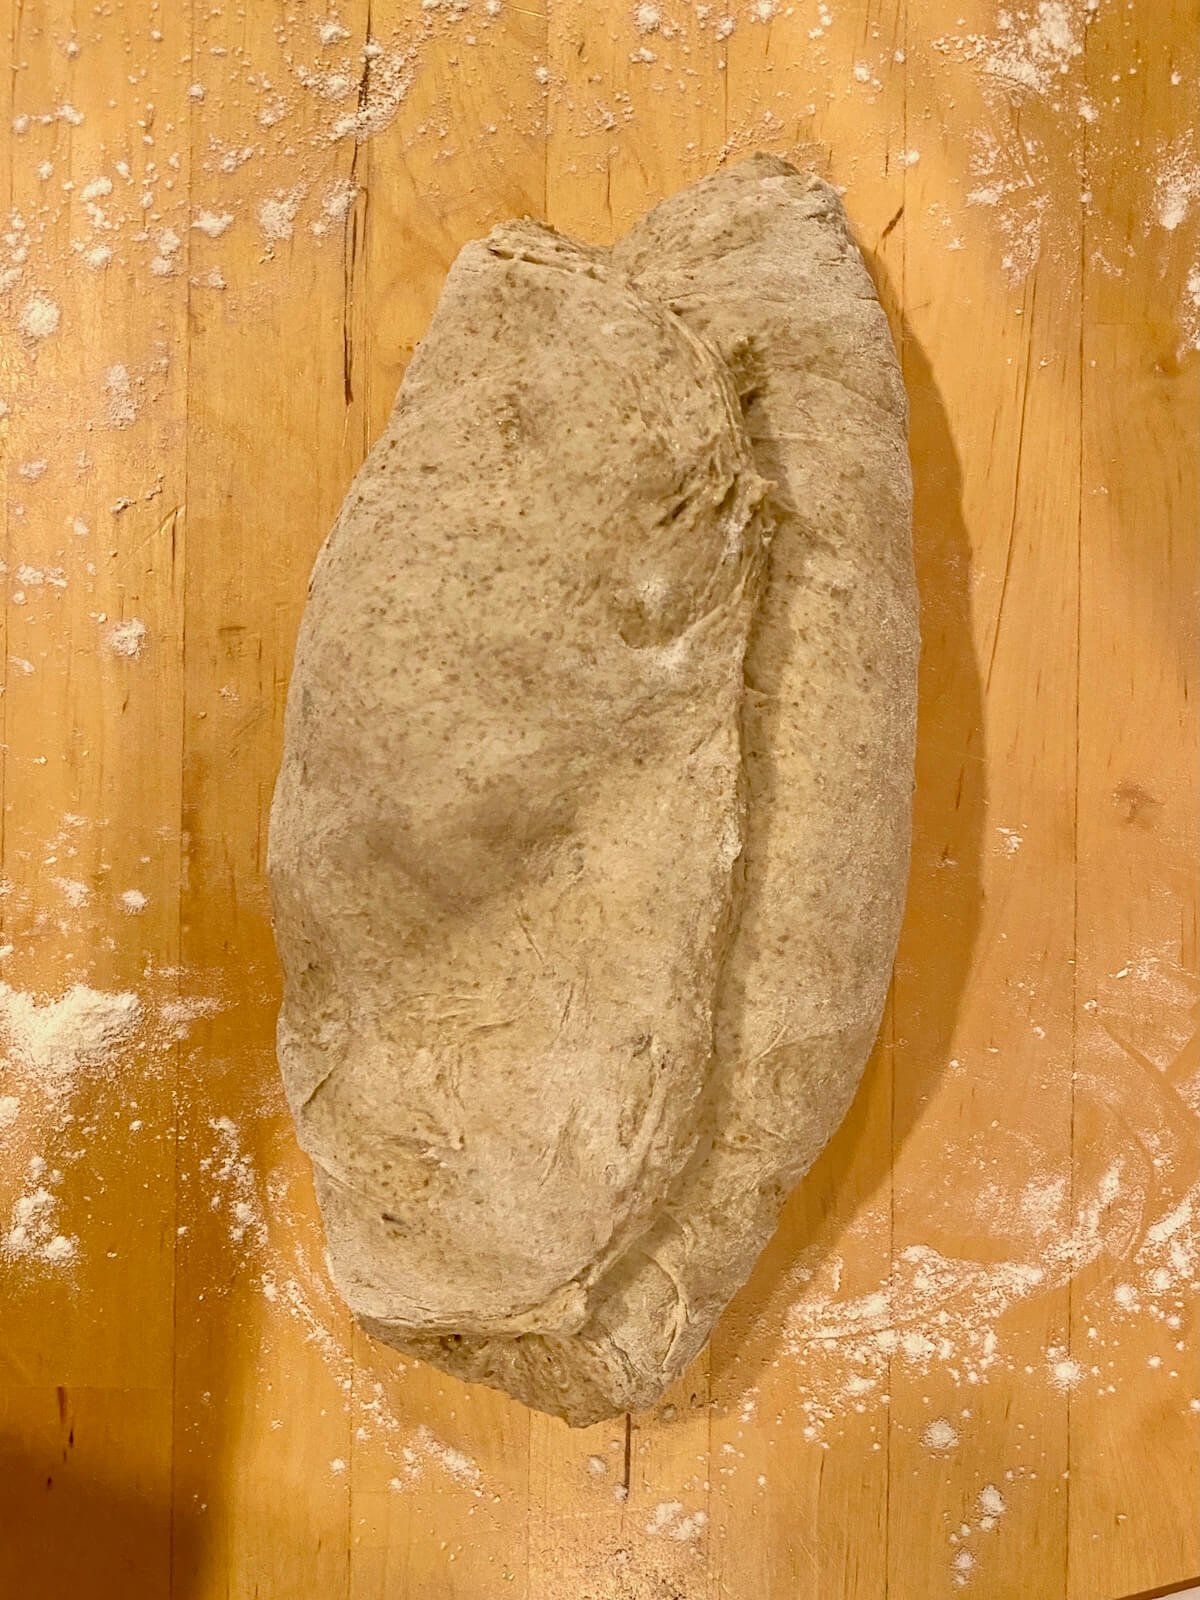
    The dough folded into thirds like a letter on a wooden countertop.
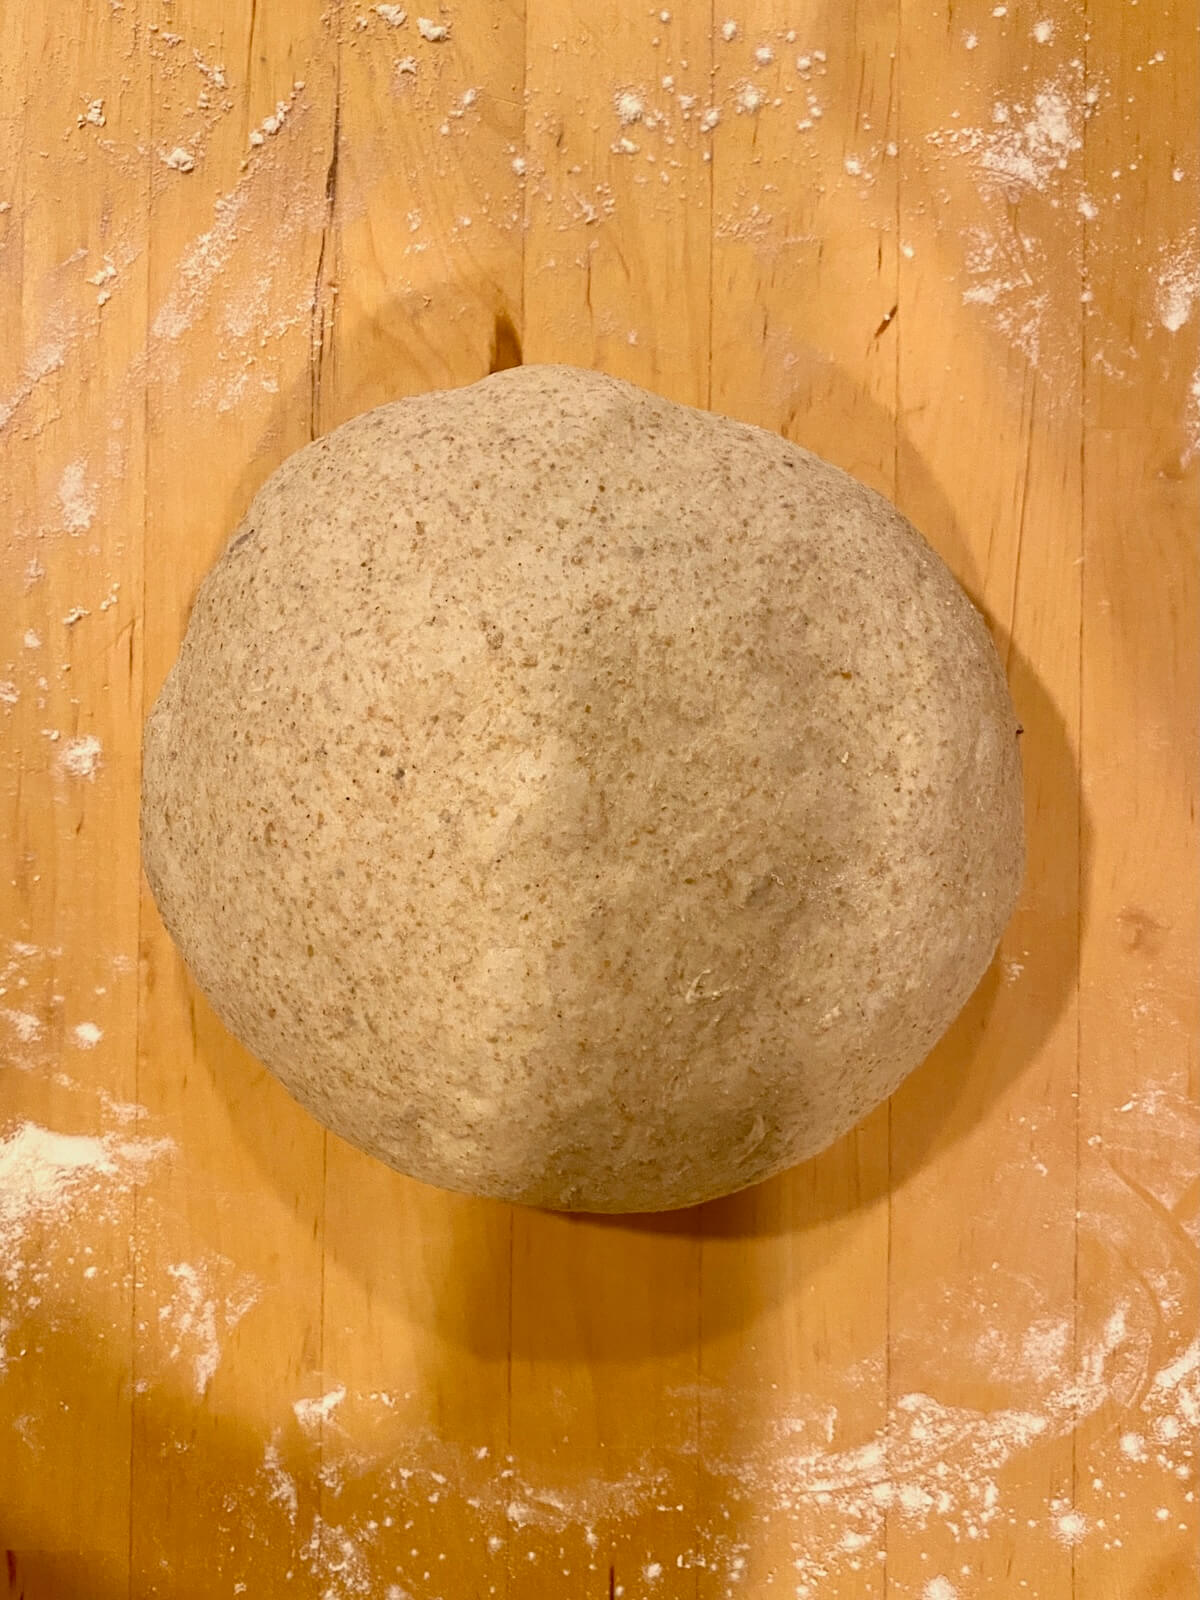
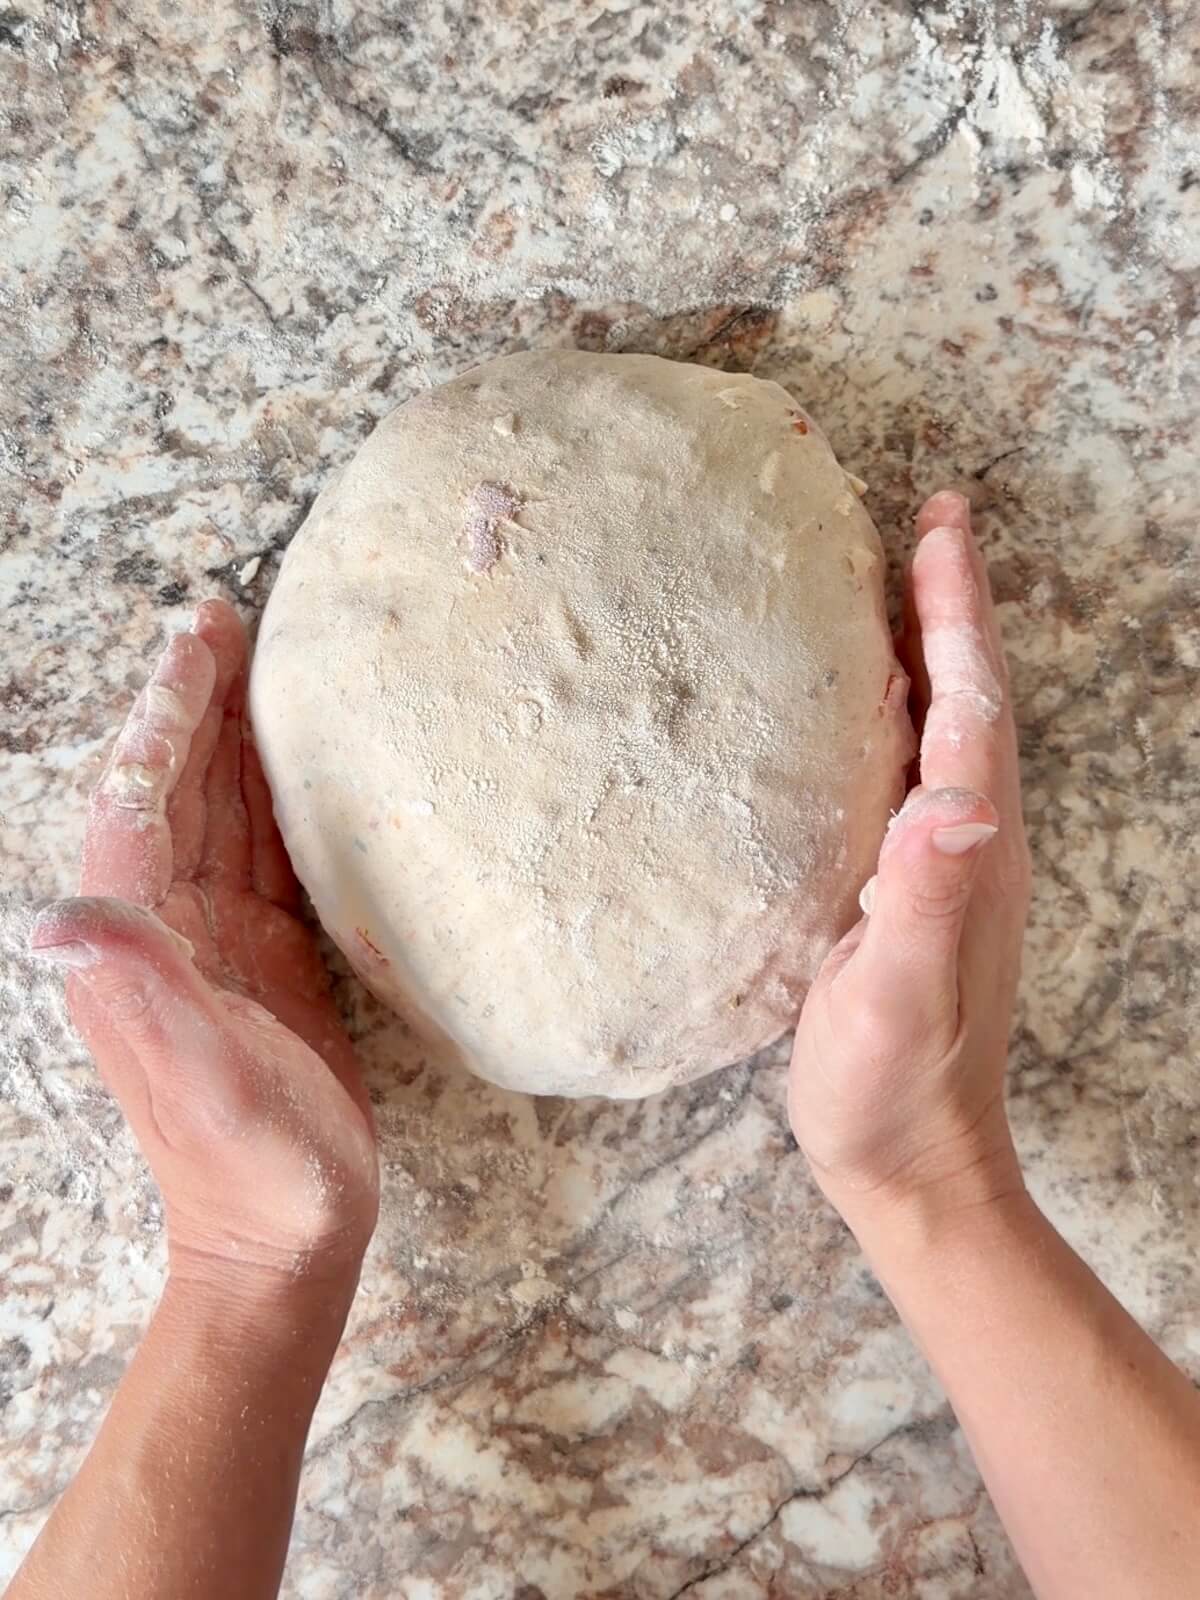
    The dough pre-shaped into a ball resting on a wooden countertop.

    7. Cold Proof

    • Generously dust your proofing basket with rice flour.
    • Before transferring the dough into the proofing basket, sprinkle some everything bagel seasoning onto a plate and gently dip the top of the dough if desired. Then, transfer the dough seam-side up into the basket.
    • If needed, pinch the seam to seal it. Cover the dough and refrigerate overnight (12-16 hours) to cold proof.
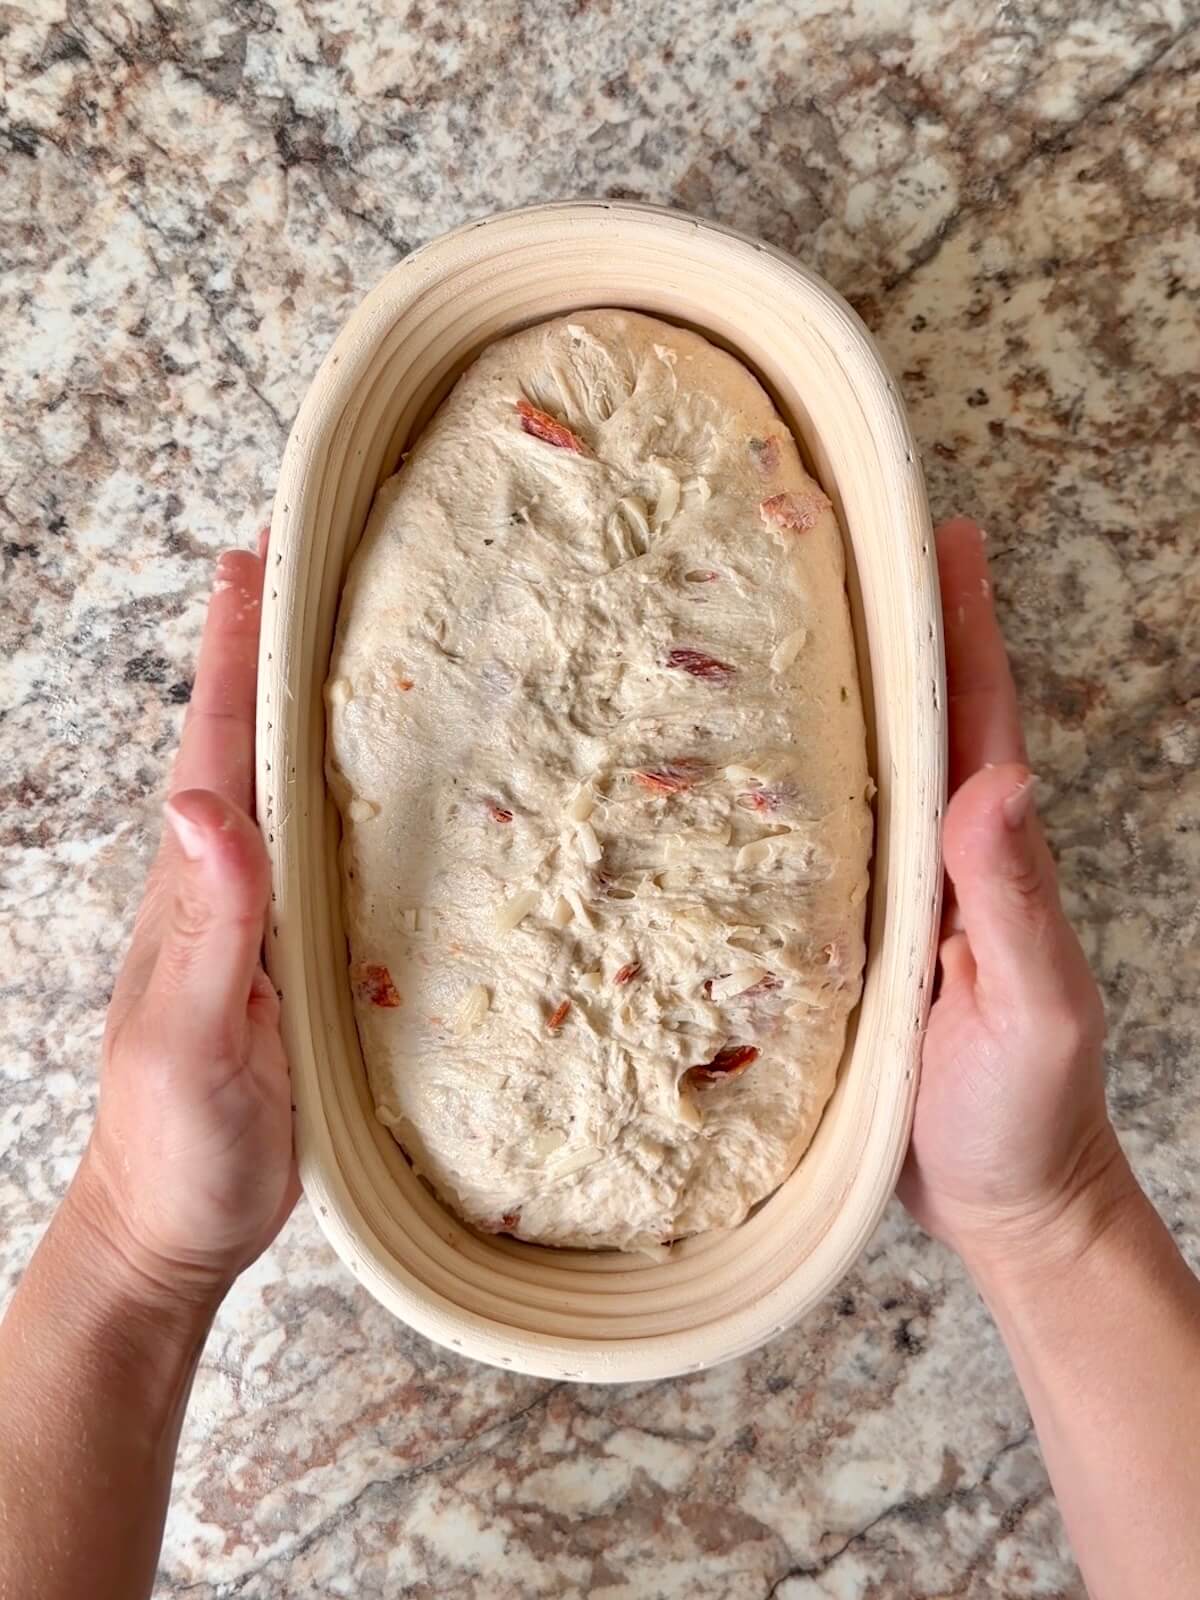
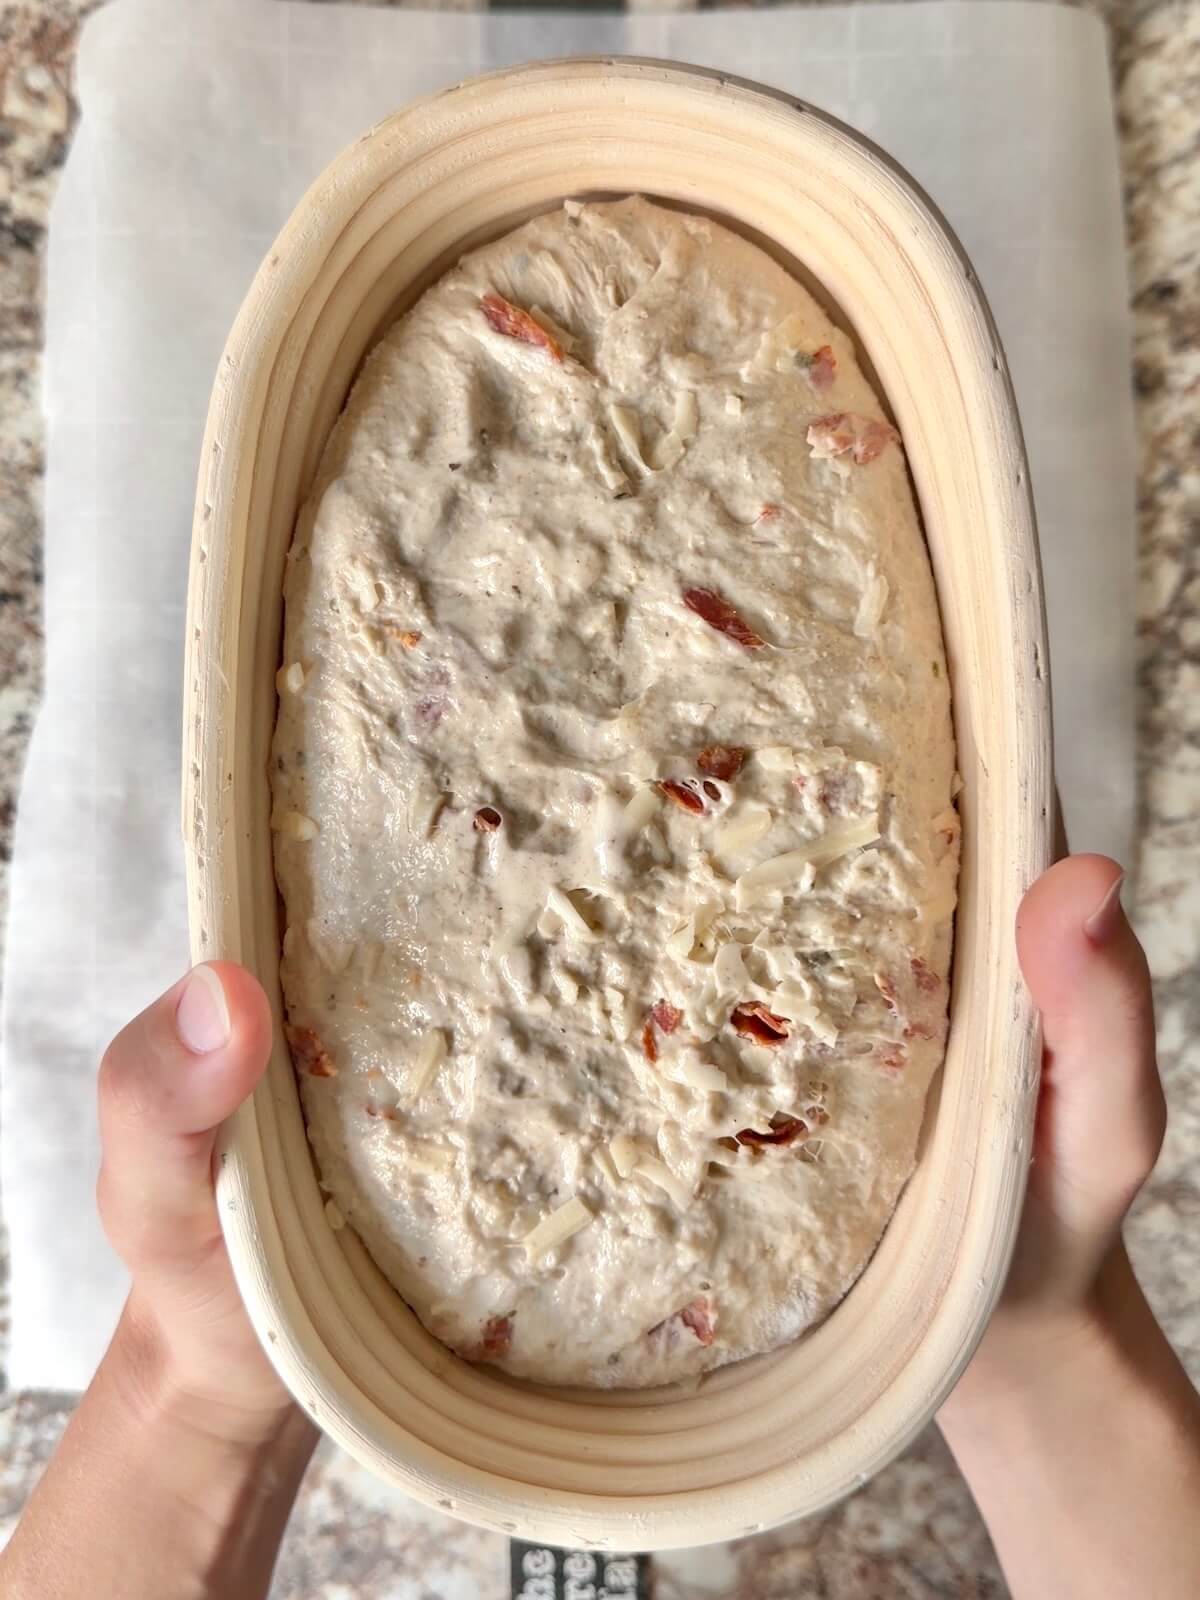
    The shaped loaf in a batard proofing basket.

    8. Bake the Bread

    • Preheat a lidded Dutch oven to 450ยฐF for 30-60 minutes.
    • Turn the dough onto bread sling or parchment and score as desired.
    • Add 2 ice cubes to the hot Dutch oven.
    • Transfer the dough, cover, and bake for 40 minutes. Remove the lid and bake for 5-10 more minutes for a golden crust.
    • Cool on a wire rack for 2-4 hours before slicing.
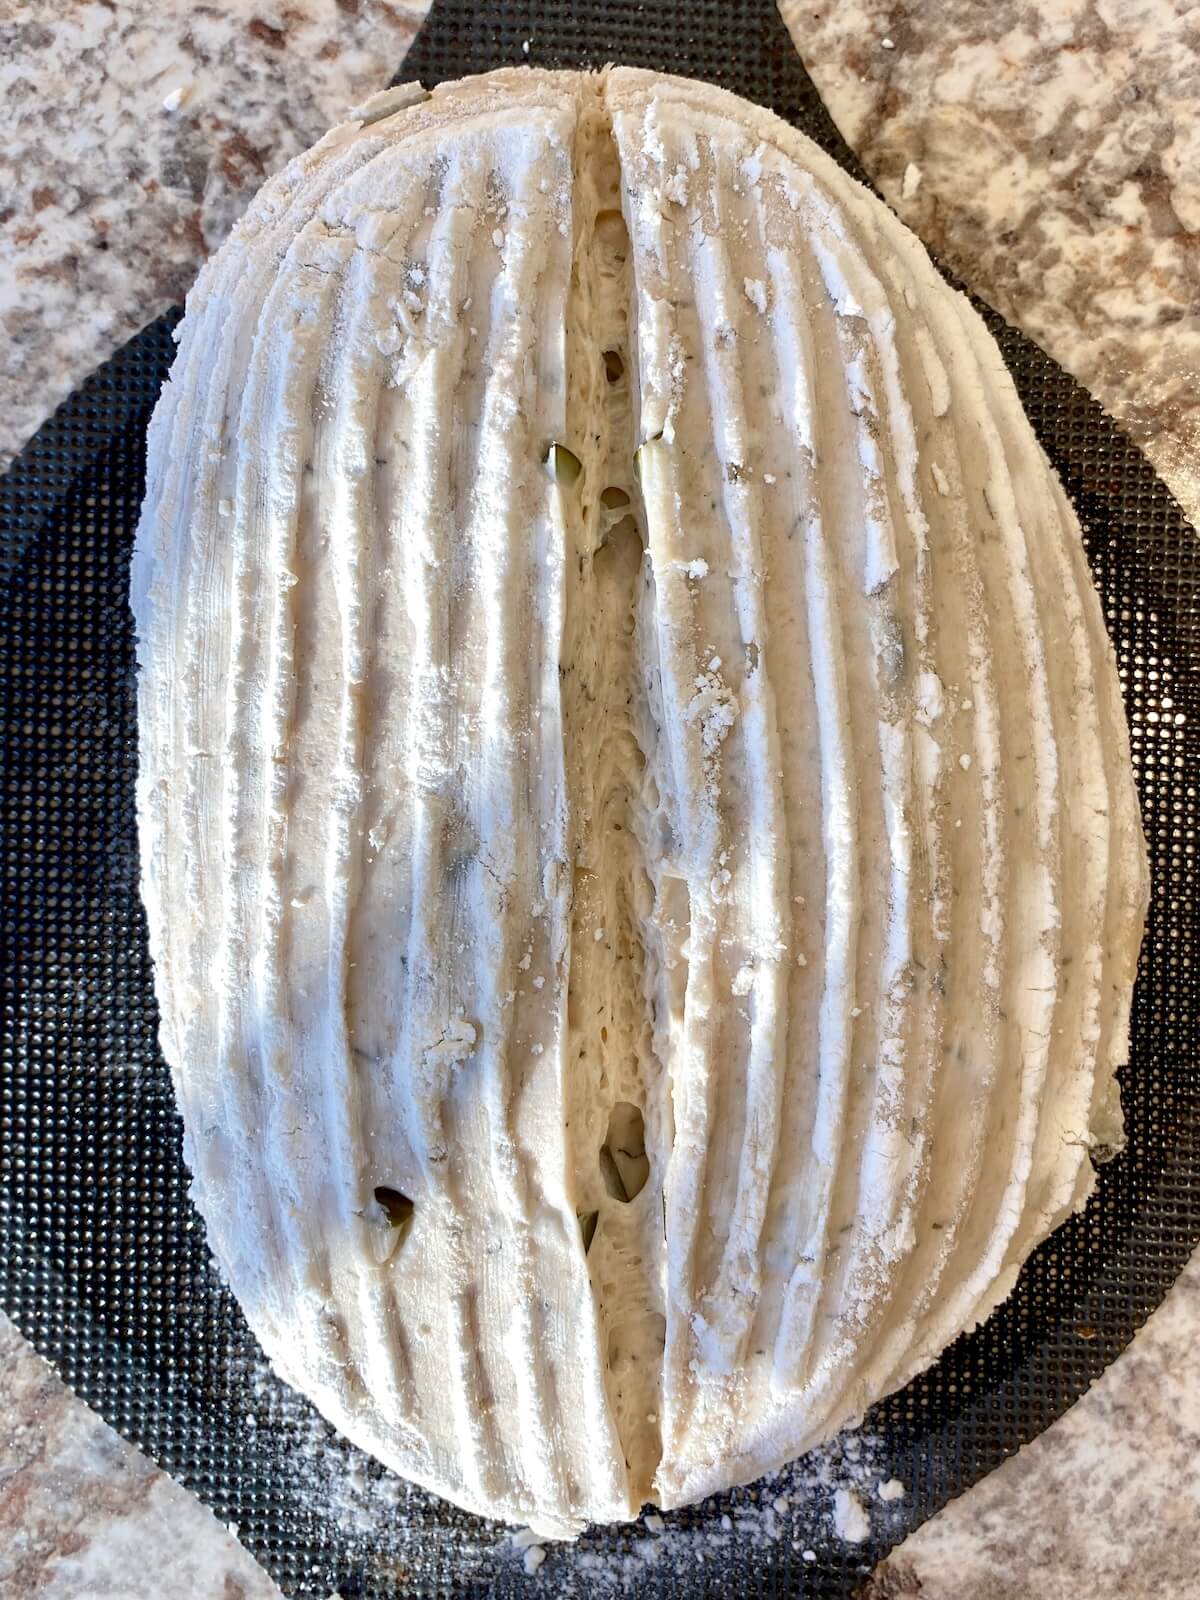
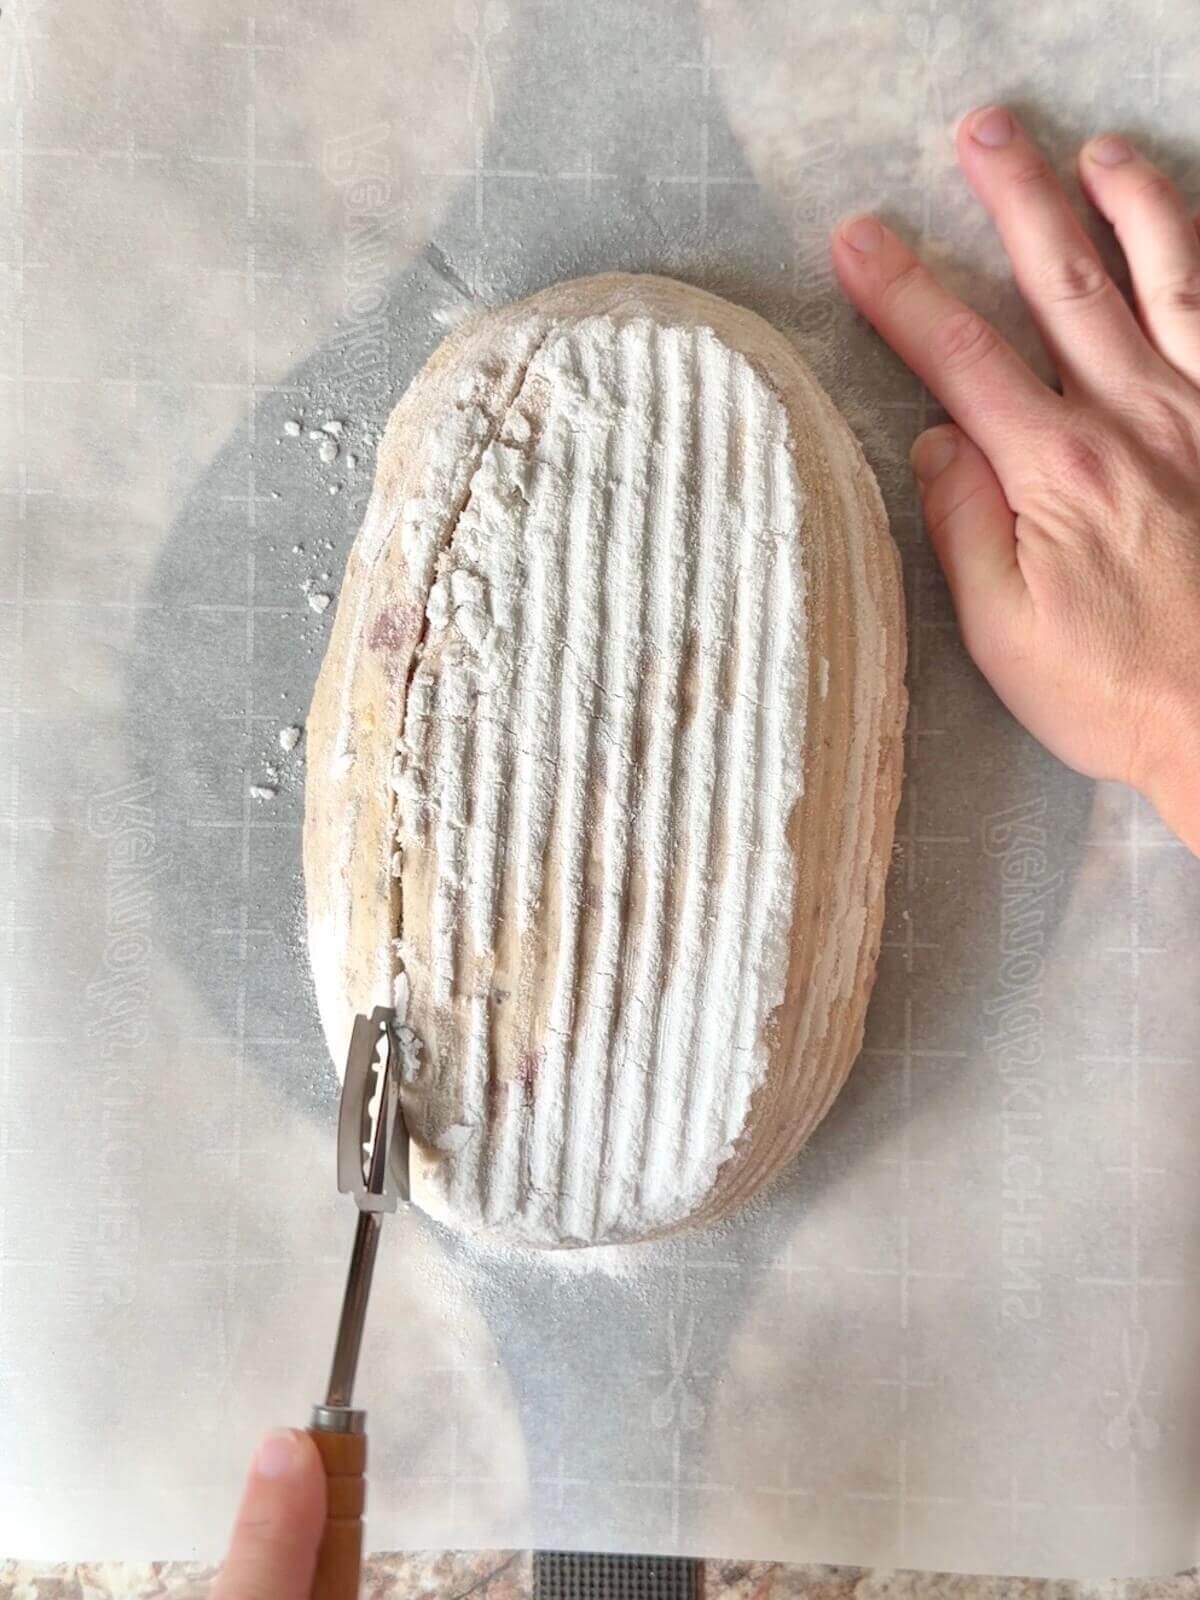
    The batard-shaped dough scored on a bread sling ready to be baked.
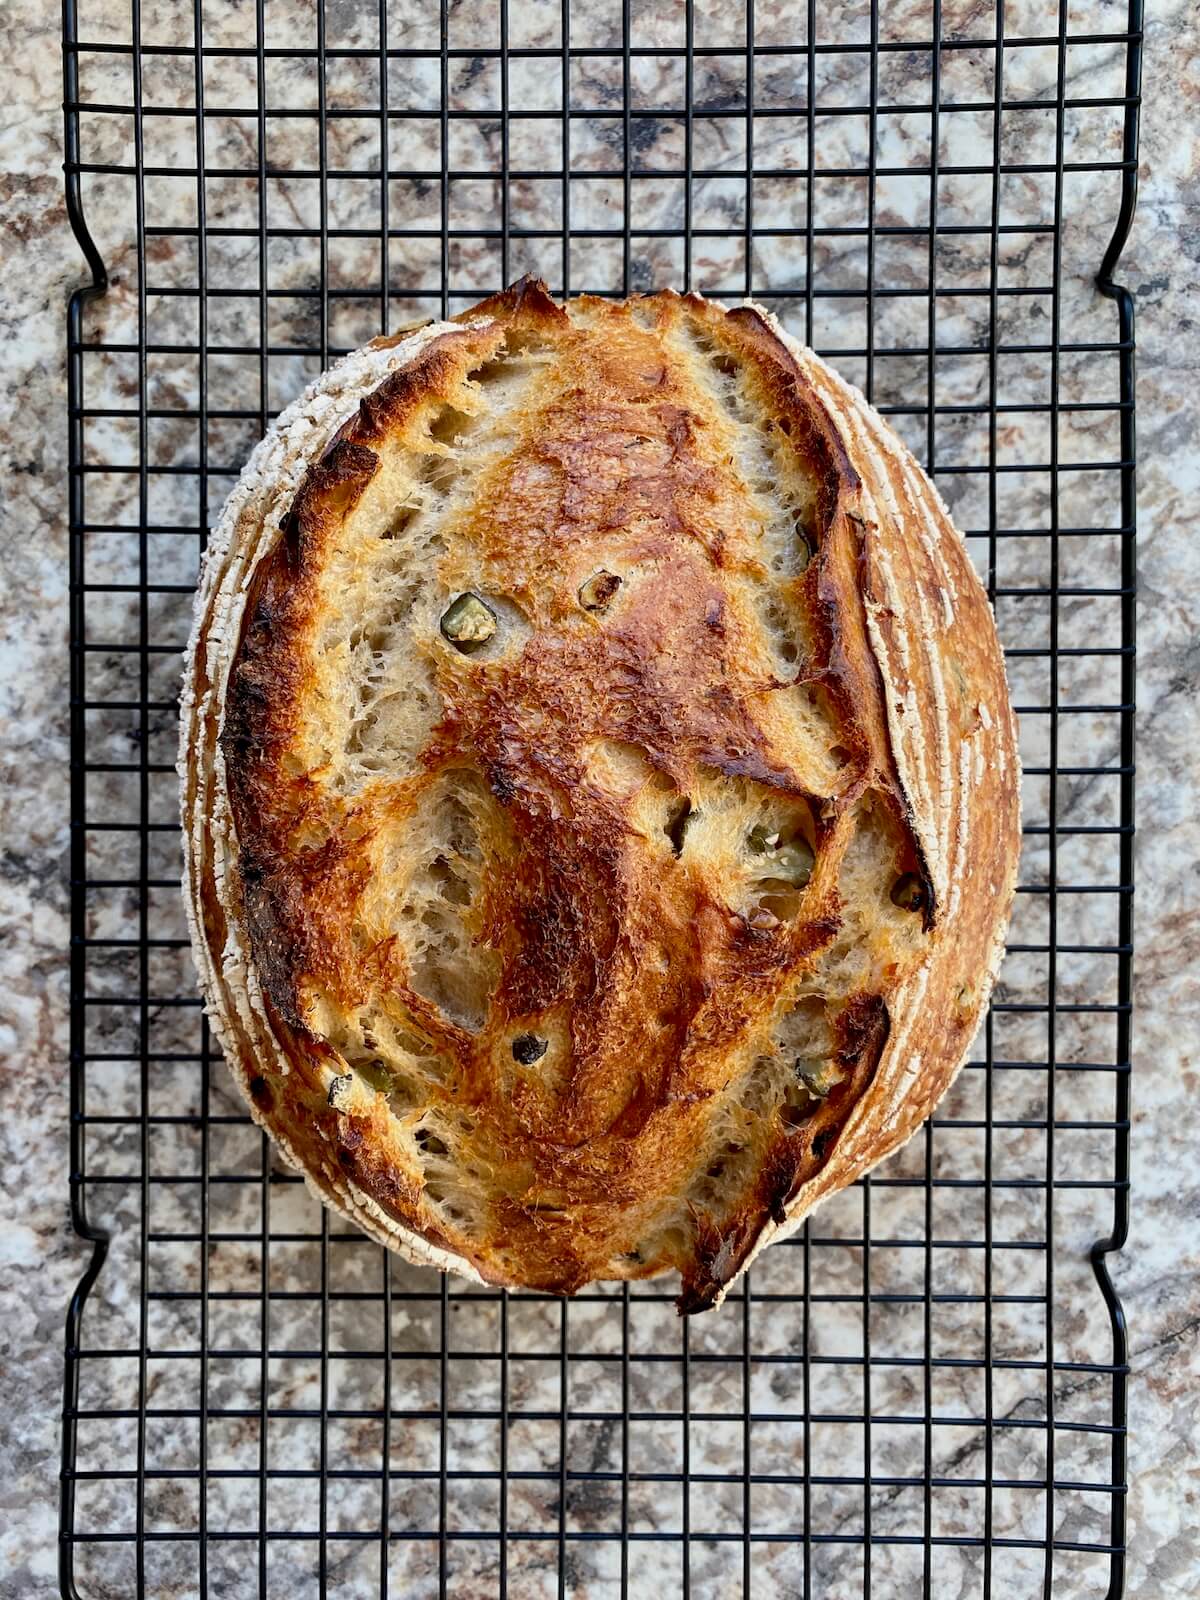
    The finished loaf of everything bagel sourdough bread on a wire cooling rack.

    Baker's Timeline

    Hereโ€™s a sample schedule you can follow to make this everything bagel sourdough bread:

    • 8:00 PM (Night Before): Feed your starter.
    • 8:00 AM: Mix the dough.
    • 8:30-9:30 AM: Stretch and fold.
    • 9:30 AM-3:30 PM (Varies): Bulk fermentation.
    • 3:30-4:00 PM: Pre-shape and final shape.
    • 4:00 PM-8:00 AM (Next Day): Cold proof.
    • 8:00-8:45 AM: Bake.
    • 8:45 AM-12:45 PM: Cool.

    Note: Rise times will vary depending on the strength of your starter and the temperature of your kitchen and dough. Itโ€™s best to rely on visual cues, like dough doubling in size, rather than strictly following times.

    How to Store

    Store your everything bagel sourdough bread in an airtight container or bread box at room temperature for up to 3 days.

    For longer storage, slice the bread and freeze it in a freezer-safe bag for up to 3 months. Thaw at room temperature or heat in the toaster or oven before enjoying.

    Serving Suggestions

    This bread is perfect with spreads like cream cheese, butter, avocado, or smoked salmon. It also makes a great base for sandwiches - try it as a breakfast sandwich, classic grilled cheese, or BLT.

    A whole loaf of everything bagel sourdough bread on a wooden cutting board.
    A cover of a recipe ebook with the title "Everyday Sourdough: 27 Sweet & Savory Sourdough Discard Recipes." There is an image of sourdough discard cinnamon rolls on the front. At the bottom, it reads "By Ashley Petrie of Everyday Homemade."
    Grab a copy today!

    Are you tired of watching your sourdough discard go to waste?

    Itโ€™s time to turn excess discard into something delicious with my new ebook - Everyday Sourdough!

    Inside, youโ€™ll find 27 tried-and-true sourdough discard recipes that will transform your leftover starter into mouthwatering creations your family and friends will love.

    No more guilt about wasting your discard - with Everyday Sourdough, you have endless options to quickly make something amazing anytime.

    Let's Connect!

    Be sure to leave a comment below if you have any questions. You can also connect with me on Instagram, Facebook, Pinterest, or via email at [email protected].

    More Sourdough Bread Recipes

    • Sliced sourdough pepperoni pizza bread on a wooden cutting board.
      Pepperoni Pizza Sourdough Bread with Mozzarella & Parmesan
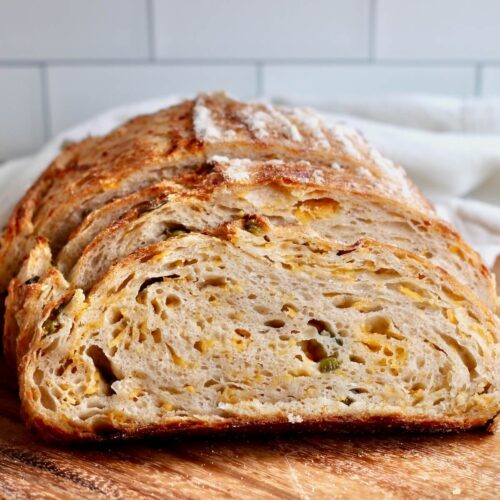
    • A sliced loaf of jalapeรฑo cheddar sourdough bread on a wooden cutting board.
      Easy Jalapeรฑo Cheddar Sourdough Bread with Fresh Jalapeรฑos
    • A slice of sourdough olive bread on a wooden cutting board.
      Kalamata Olive Sourdough Bread
    • A loaf of dill pickle sourdough bread cut into slices on a wooden cutting board.
      Dill Pickle Sourdough Bread

    ๐Ÿ“– Recipe

    A loaf of everything bagel sourdough bread cut into slices.
    Print Pin SaveSaved!
    5 from 2 votes

    Everything Bagel Sourdough Bread

    This Everything Bagel Sourdough Bread is a beginner-friendly recipe that combines tangy, chewy sourdough with savory everything bagel seasoning. It's perfect for breakfast with cream cheese or as a hearty sandwich.
    Course Bread, Breakfast
    Cuisine American
    Prep Time 1 day day 12 hours hours
    Cook Time 45 minutes minutes
    Cool Time 2 hours hours
    Total Time 1 day day 14 hours hours 45 minutes minutes
    Servings 12 slices
    Calories 175kcal
    Author Ashley Petrie, RDN, LDN

    Equipment

    • Kitchen scale
    • Mixing bowls
    • Straight-sided container optional
    • Bench scraper
    • Proofing basket or bowl lined with tea towel
    • Bread sling or parchment paper
    • Lame or sharp knife
    • 6-quart dutch oven

    Ingredients

    • 1 โ…“ cups (315 grams) warm water 80-90โ„‰
    • ยฝ cup (100 grams) active sourdough starter or "fresh" discard less than one week old - may take longer to ferment
    • 4 cups (480 grams) bread flour
    • 2 tablespoons (20 grams) everything bagel seasoning plus more for topping (optional)
    • 3 ยฝ teaspoons (10 grams) Diamond Crystal Kosher Salt
    • Rice flour for dusting proofing basket
    • 2 ice cubes for steam

    Instructions

    • Feed your sourdough starter 6-12 hours before mixing the dough. It should be bubbly and active when you begin.
    • In a large bowl, whisk together the warm water and active sourdough starter until dissolved. Add the bread flour, everything bagel seasoning, and kosher salt. Mix until a shaggy dough forms with no dry flour remaining. Cover and let rest for 20 minutes.
      1 โ…“ cups (315 grams) warm water, ยฝ cup (100 grams) active sourdough starter, 4 cups (480 grams) bread flour, 2 tablespoons (20 grams) everything bagel seasoning, 3 ยฝ teaspoons (10 grams) Diamond Crystal Kosher Salt
    • Wet your hands lightly and perform a set of stretch and folds. Grab one edge of the dough, stretch it up as far as it will go without tearing, and fold it over itself. Rotate the bowl 90ยฐ and repeat on the next side. Continue until all four sides have been stretched and folded. Cover and rest for 15 minutes. Repeat this stretch and fold process three more times, resting 15 minutes between each set.
    • Cover the dough and let it rise in a warm spot until it doubles in size and has visible fermentation bubbles. If using a straight-sided container, mark the starting level to track fermentation progress. Bulk fermentation can take anywhere from 4-12 hours or longer depending on your kitchen and dough temperature and starter strength.
    • Lightly flour a work surface and transfer the fermented dough onto it. Gently pull it into a rough rectangle, then fold the long sides toward the center like a letter. Fold the short sides in the same way. Flip the dough seam-side down and round it into a ball. Cover and let rest for 15-20 minutes.
    • For a round loaf (boule), flip the dough, shape it into a rectangle again, and repeat the same folding method as above. For an oval loaf (batard), fold the short edges toward the center, then tightly roll the dough from a long edge into a log, pinching the seam closed.
    • Generously dust your proofing basket with rice flour. Before transferring the dough into the proofing basket, sprinkle some everything bagel seasoning onto a plate and gently dip the top of the dough if desired. Then, transfer the dough seam-side up into the basket. If needed, pinch the seam to seal it. Cover the dough and refrigerate overnight (12-16 hours) to cold proof.
      Rice flour
    • Place a lidded Dutch oven inside your oven and preheat to 450โ„‰. Let the Dutch oven heat for an extra 30-60 minutes once the oven reaches temperature.
    • Turn the dough out onto a piece of parchment paper. Score the top as desired with a lame or sharp knife. Carefully place 2 ice cubes in the Dutch oven for steam. Use the parchment paper to transfer the dough into the hot Dutch oven. Cover immediately with the lid to trap the steam inside.
      2 ice cubes
    • Bake at 450โ„‰ for 40 minutes with the lid on. Then, remove the lid and bake for an additional 5-10 minutes, if needed, to achieve your desired crust color.
    • Allow the bread cool on a wire rack for at least 2-4 hours before slicing and serving.

    Notes

    • Storage: Store bread at room temperature for up to 3 days or slice and freeze for up to 3 months.

    Nutrition

    Serving: 1slice | Calories: 175kcal | Carbohydrates: 33g | Protein: 6g | Fat: 1g | Polyunsaturated Fat: 0.5g | Sodium: 471mg | Potassium: 56mg | Fiber: 1g | Calcium: 9mg | Iron: 2.5mg
    Did you try this recipe?Let me know! Comment below, or take a picture and tag me on Instagram @everydayhomemadebyashley.

    Turkey Sandwich on Sourdough Bread

    April 16, 2025

    This Turkey Sandwich on Sourdough is stacked with deli turkey, crisp lettuce, juicy tomato, and cheddar, all layered on tangy sourdough with mayo and mustard. It's quick, customizable, and perfect for an easy lunch.

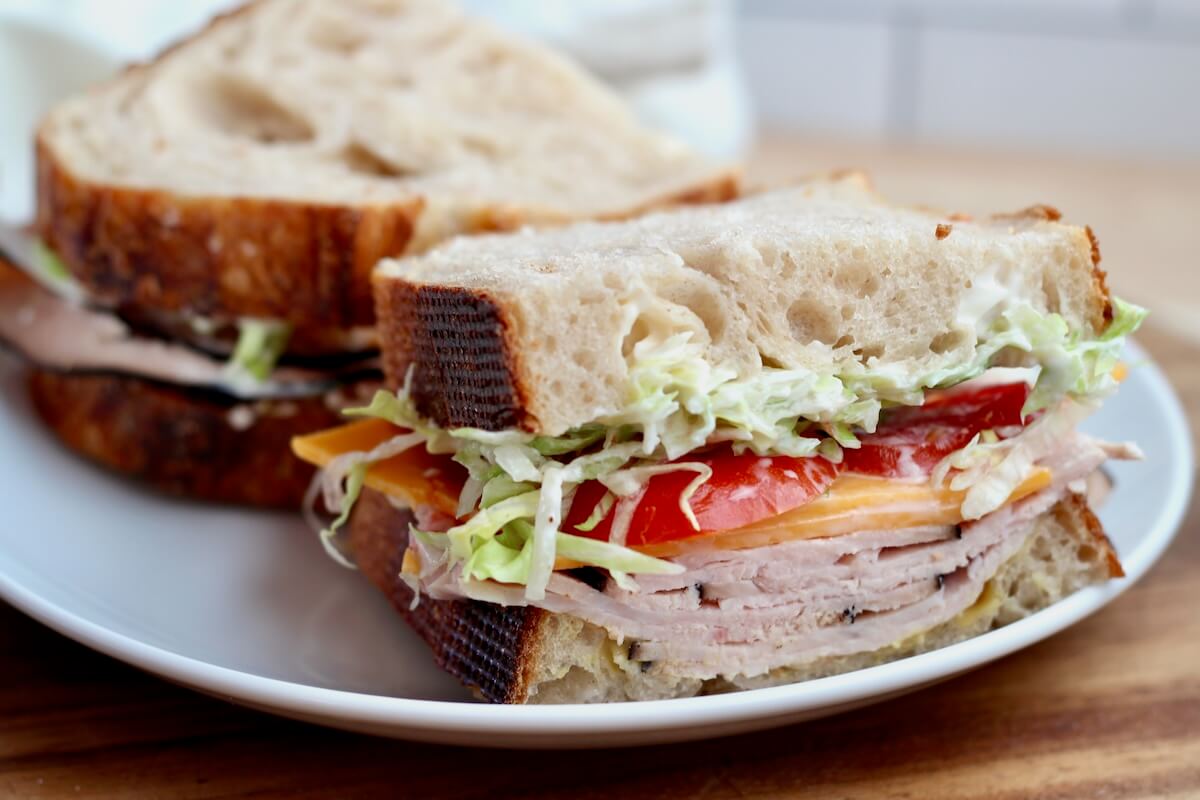
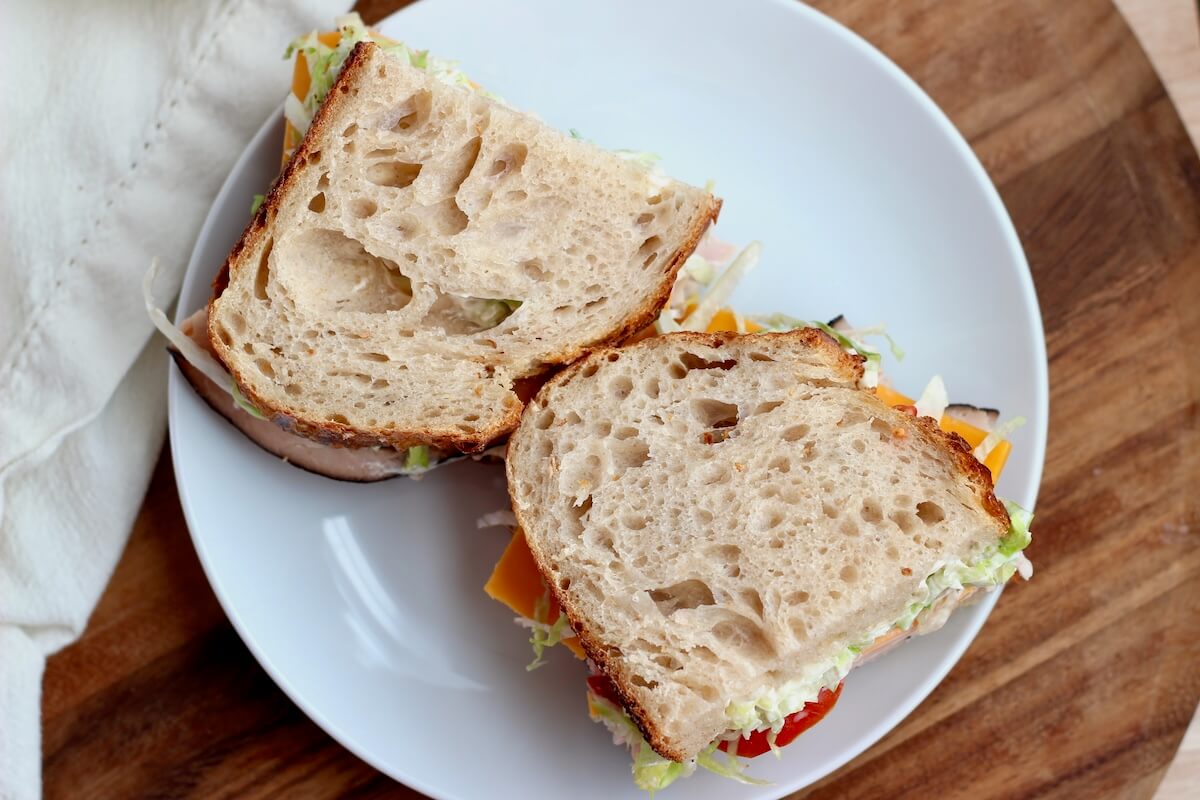
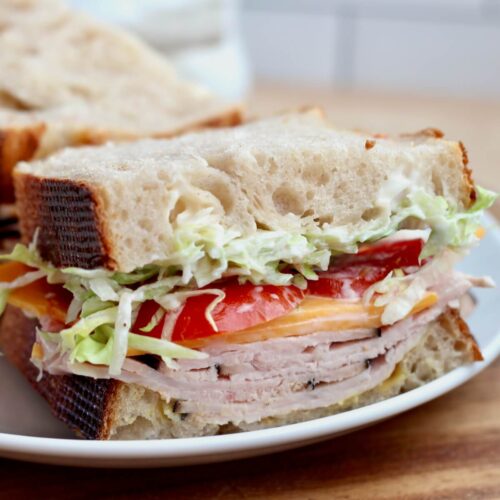
    A sourdough turkey sandwich cut in half on a plate.

    I'm not usually a big sandwich lover, but when I do crave one, it's usually on a sunny beach day in the summer. And itโ€™s always a turkey and cheese sandwich.

    And of course, now that Iโ€™ve been baking my own sourdough bread for three years, it has to be made on tangy sourdough.

    You can use any type of sourdough bread you like - whether itโ€™s my classic crusty loaf, a soft sandwich bread, multigrain, honey wheat, or even dill pickle sourdough (yum!).

    This sourdough turkey sandwich recipe is exactly how I love mine - mayo, honey mustard, sharp cheddar cheese, shredded iceberg lettuce, and juicy, ripe tomatoes, all piled high with turkey breast.

    Sometimes, Iโ€™ll add sliced red onion and avocado if I'm feeling a little fancy.

    No matter how you make it, I hope youโ€™ll give it a try and love it as much as I do. Maybe even take it on your next trip to the beach!

    Disclaimer: Some links throughout this post are affiliate links. As an Amazon Associate, I earn from qualifying purchases. You can learn more by visiting my Affiliate Disclosure Page.

    Ingredients & Substitutions

    Here are some notes on the key ingredients. For the full list of ingredients, check out the recipe card below.

    • Sourdough Bread- I used my classic crusty sourdough loaf, but store-bought works too. Sourdough sandwich bread, honey wheat sourdough, or pesto sourdough are great choices as well.
    • Turkey Breast- Use your favorite sliced deli turkey or leftover roasted turkey.
    • Cheddar Cheese- Adds a sharp, savory flavor. Swap with Swiss, provolone, pepper jack, or your favorite cheese.
    • Mayonnaise- For classic deli flavor and creaminess. Swap for a flavored mayo like spicy garlic or chipotle for a twist.
    • Mustard- Honey mustard for sweetness, or Dijon for a bit of kick.
    • Iceberg Lettuce- For that classic crunch and freshness.
    • Tomato- Use ripe beefsteak or heirloom tomatoes for the best flavor.
    • Optional Add-Ins- Customize with sliced avocado, red onion, bacon, pickles, spinach, or arugula.
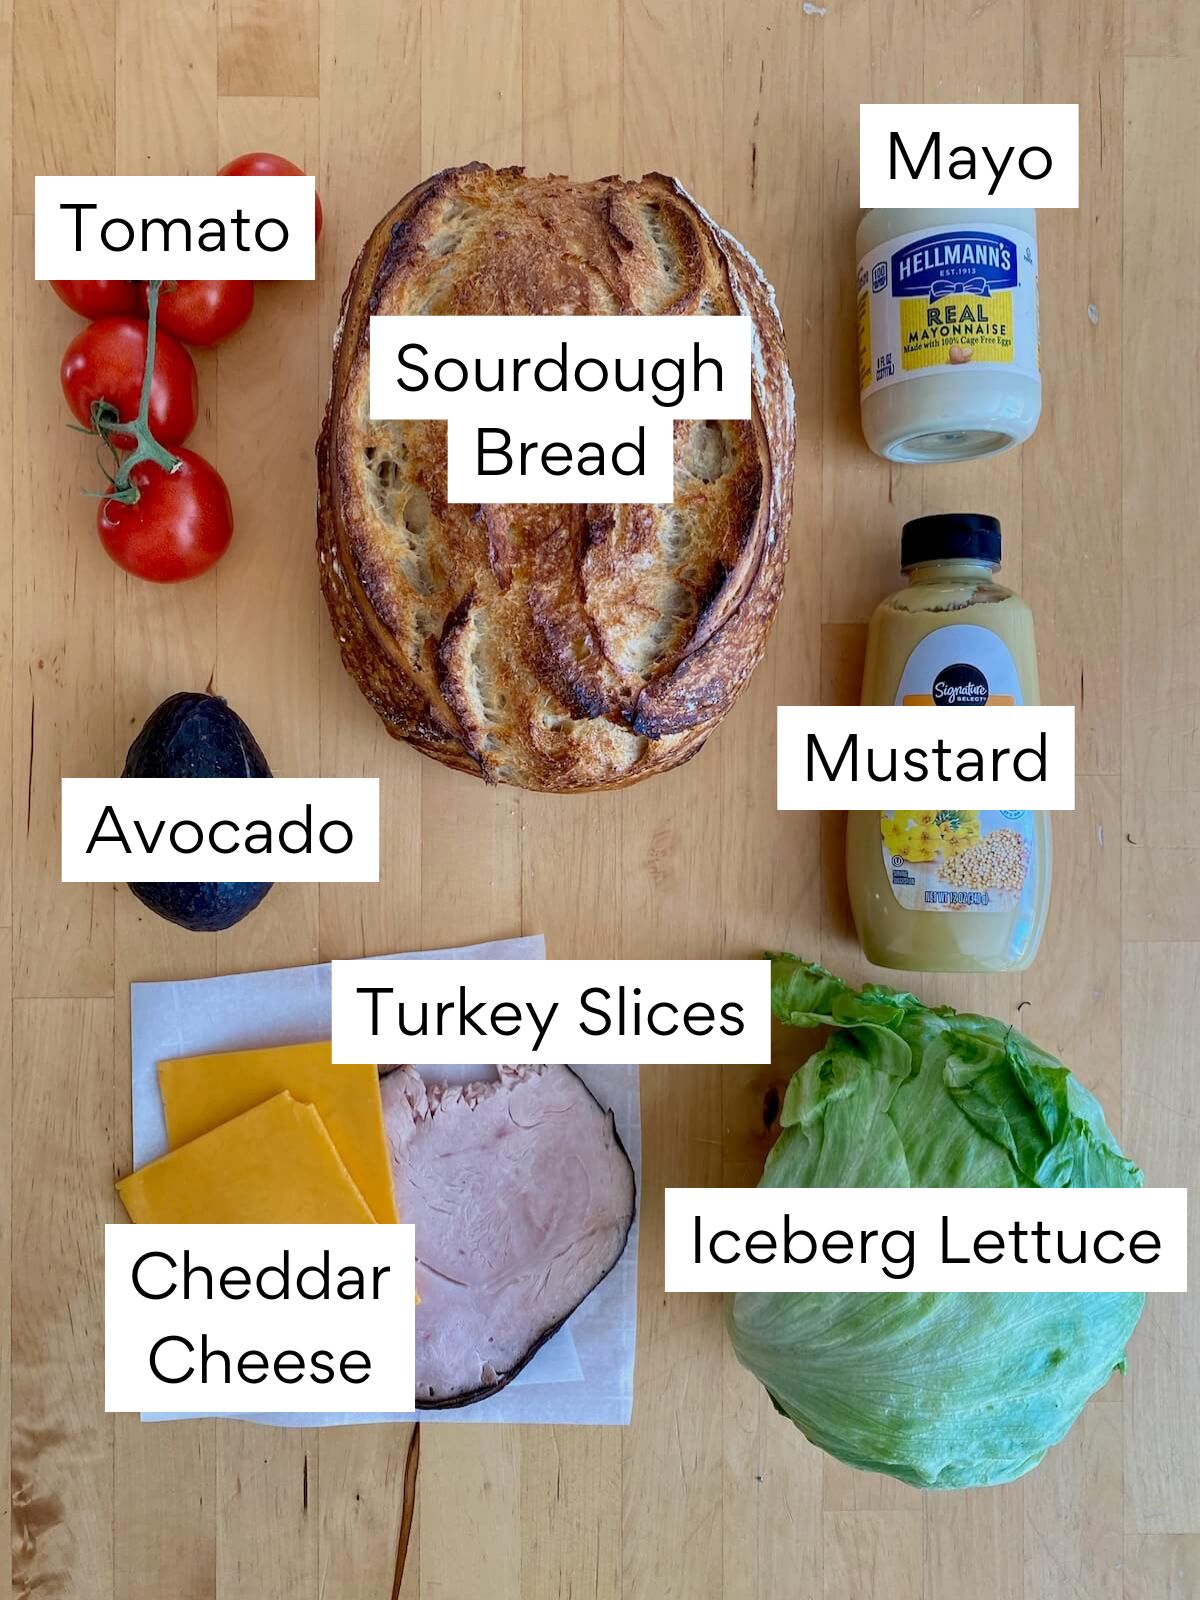
    The ingredients to make a sourdough turkey sandwich. Each ingredient is labeled with text. They include sourdough bread, turkey slices, cheddar cheese, iceberg lettuce, tomato, avocado, mayo, and mustard.

    How to Make a Turkey Sandwich on Sourdough Bread

    1. Toast the bread (optional) to add crunch.
    2. Spread mayo on one slice and mustard on the other.
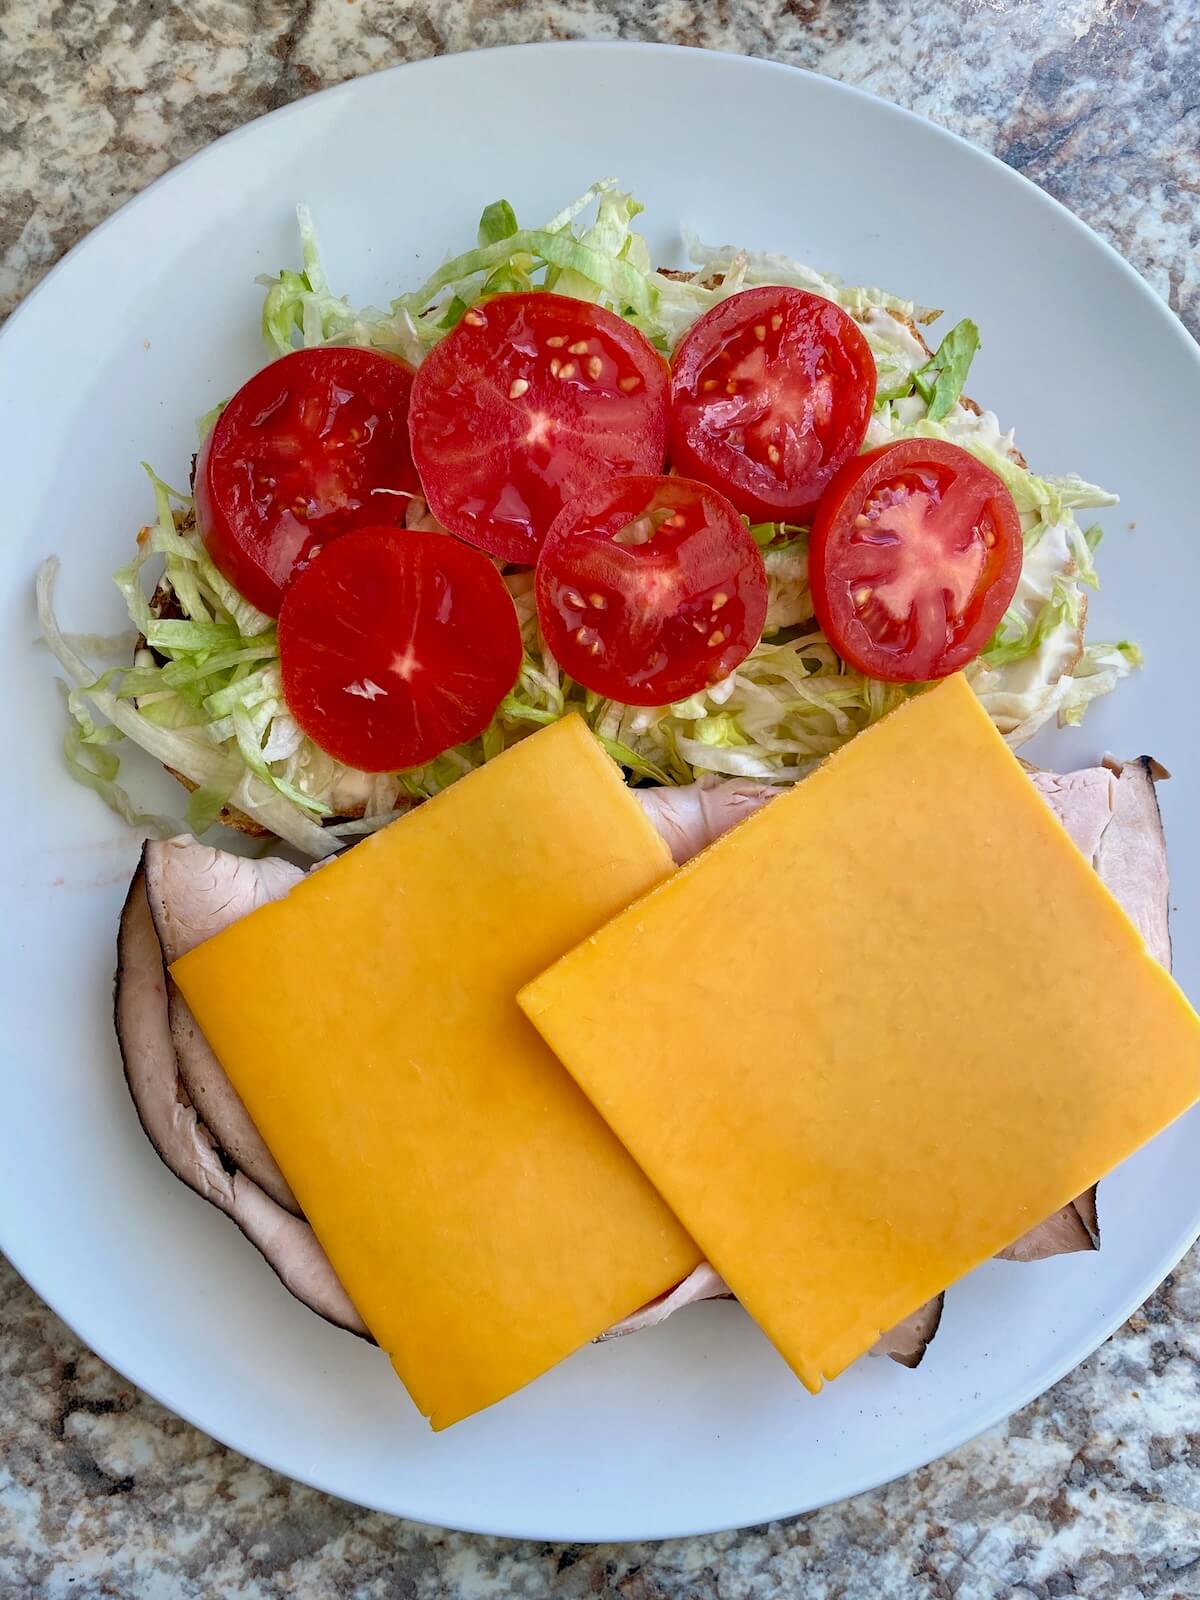
    3. Layer the sandwich: Add shredded lettuce on the mayo side, followed by tomato slices. On the mustard side, add turkey and cheddar cheese.
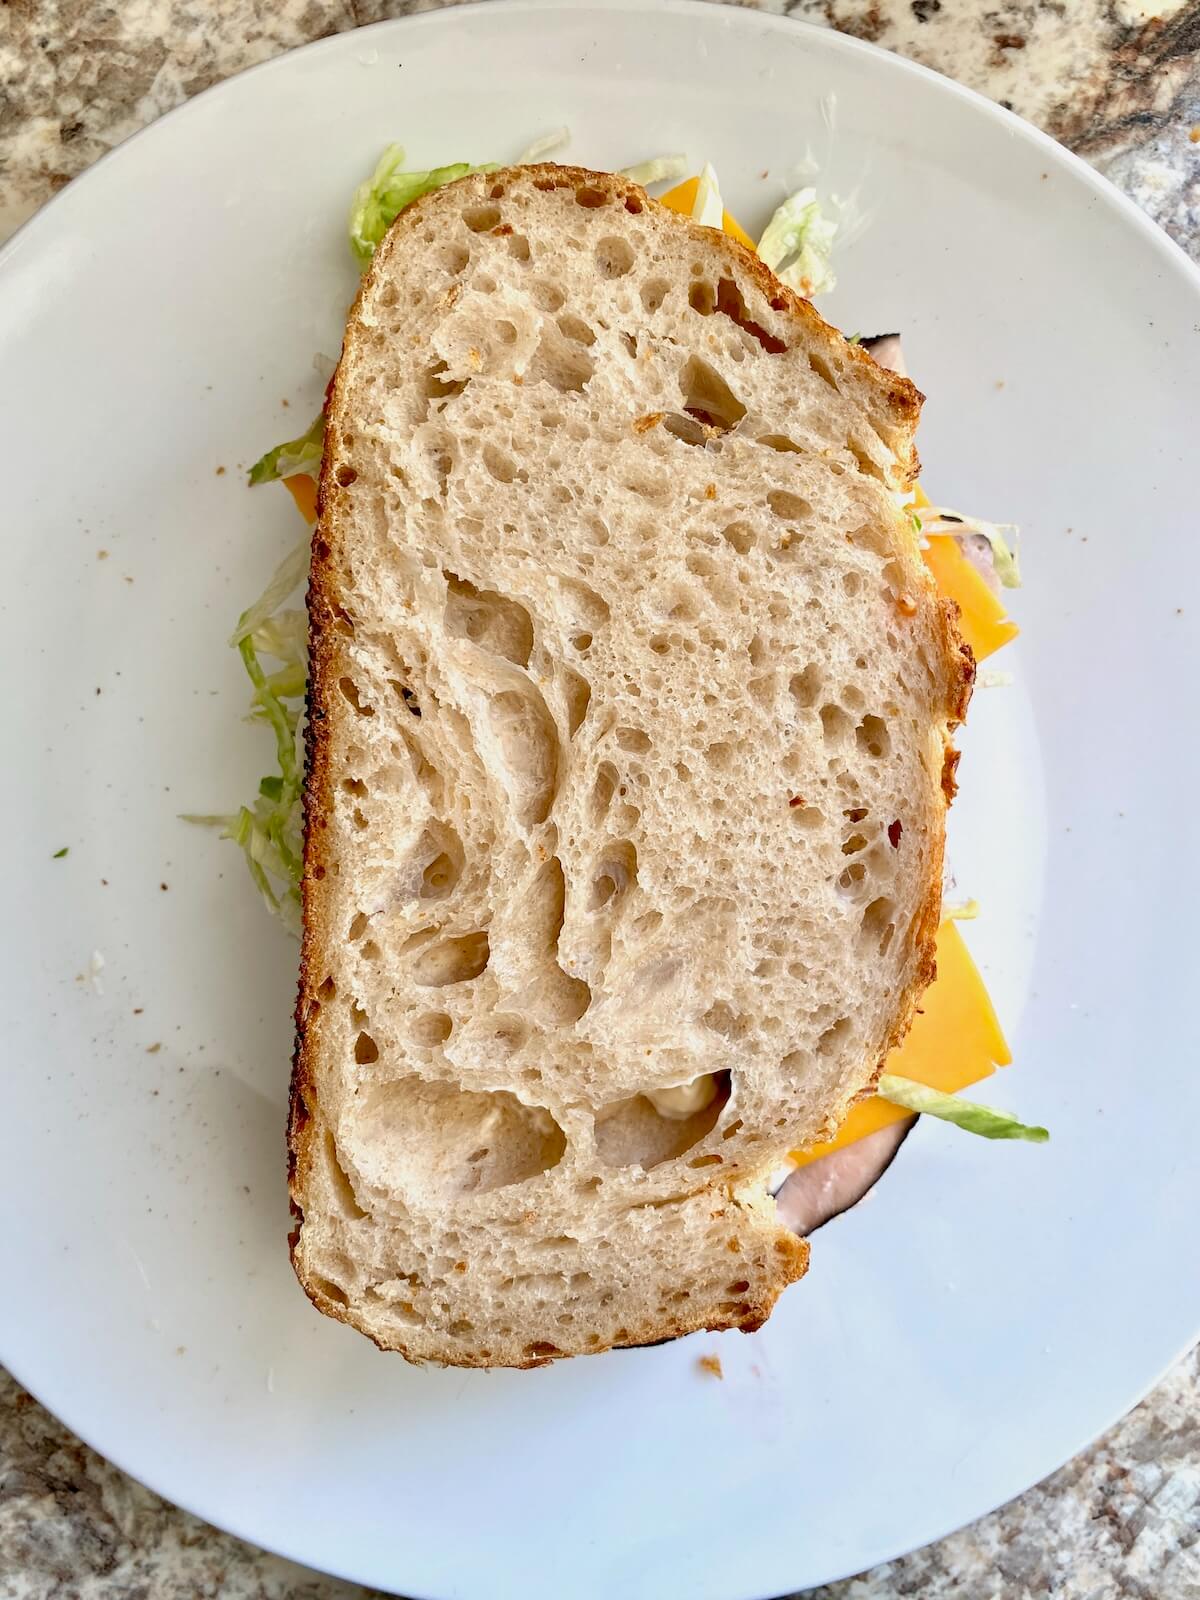
    4. Assemble: Press the sandwich together, cut in half, and serve immediately.
    An turkey sandwich being assembled on sourdough bread. One side has mustard, turkey, and cheese. The other side has mayo, shredded iceberg lettuce, and sliced tomato.
    An assembled sourdough turkey sandwich on a small white plate.

    Serving Suggestions

    Serve your sourdough turkey sandwich with sourdough discard cheese crackers and dill pickles for a complete meal. For a heartier option, pair it with a warm bowl of chicken noodle soup or a fresh side salad.

    A turkey sandwich on sourdough bread cut in half on a small white plate.
    A cover of a recipe ebook with the title "Everyday Sourdough: 27 Sweet & Savory Sourdough Discard Recipes." There is an image of sourdough discard cinnamon rolls on the front. At the bottom, it reads "By Ashley Petrie of Everyday Homemade."
    Grab a copy today!

    Are you tired of watching your sourdough discard go to waste?

    Itโ€™s time to turn excess discard into something delicious with my new ebook - Everyday Sourdough!

    Inside, youโ€™ll find 27 tried-and-true sourdough discard recipes that will transform your leftover starter into mouthwatering creations your family and friends will love.

    No more guilt about wasting your discard - with Everyday Sourdough, you have endless options to quickly make something amazing anytime.

    Let's Connect!

    Be sure to leave a comment below if you have any questions. You can also connect with me on Instagram, Facebook, Pinterest, or via email at [email protected].

    More Sourdough Sandwich Recipes

    • A sourdough grilled cheese sandwich cut in half diagonally on a small white plate.
      Sourdough Grilled Cheese Sandwich
    • A BLT sandwich on sourdough bread cut in half on a plate.
      The Best BLT Sandwich on Sourdough Bread (with Avocado)
    • A bacon, egg, and cheese sourdough breakfast sandwich with avocado cut in half on a small white plate.
      Sourdough Breakfast Sandwich (Bacon, Egg & Cheese)
    • Three slices of sourdough sandwich bread on a cutting board.
      Sourdough Sandwich Bread

    ๐Ÿ“– Recipe

    A sourdough turkey sandwich cut in half on a plate.
    Print Pin SaveSaved!

    Turkey Sandwich on Sourdough

    This Turkey Sandwich on Sourdough is stacked with deli turkey, crisp lettuce, juicy tomato, and cheddar, all layered on tangy sourdough with mayo and mustard. It's quick, customizable, and perfect for an easy lunch.
    Course Sandwich
    Cuisine American
    Prep Time 10 minutes minutes
    Cook Time 0 minutes minutes
    Total Time 10 minutes minutes
    Servings 1 sandwich
    Calories 883kcal
    Author Ashley Petrie, RDN, LDN

    Equipment

    • Bread knife
    • Toaster (optional)

    Ingredients

    • 2 slices sourdough bread or sourdough sandwich bread
    • 2 tablespoons honey or dijon mustard
    • 2 tablespoons mayonnaise
    • ยฝ cup shredded iceberg lettuce
    • 2-3 slices ripe tomato
    • 4 ounces sliced deli turkey breast or leftover roasted turkey
    • 2 slices cheddar cheese
    • Optional add-ins: Sliced red onion, avocado, pickles, bacon, or a handful of arugula, spinach, or microgreens

    Instructions

    • Lightly toast the sourdough slices if you prefer a warm, crisp base.
      2 slices sourdough bread
    • Spread mayonnaise on one slice of bread and mustard on the other.
      2 tablespoons honey or dijon mustard, 2 tablespoons mayonnaise
    • On the mayo side, layer the shredded iceberg lettuce directly on top so it mixes in a bit when the sandwich is cut. Add the sliced tomato on top of the lettuce. On the mustard side, place the sliced turkey and cheddar cheese.
      2-3 slices ripe tomato, 4 ounces sliced deli turkey breast, 2 slices cheddar cheese, ยฝ cup shredded iceberg lettuce
    • Gently press the two sides together, then cut in half.
    • Serve immediately and enjoy!

    Notes

    • Bread Options: You can use any type of sourdough bread you like! Try my multigrain, rye, honey wheat sourdough, or even dill pickle sourdough for a fun twist.

    Nutrition

    Serving: 1sandwich | Calories: 883kcal | Carbohydrates: 84g | Protein: 51.5g | Fat: 38g | Saturated Fat: 11.5g | Polyunsaturated Fat: 12.5g | Monounsaturated Fat: 5g | Cholesterol: 112mg | Sodium: 2343mg | Potassium: 430mg | Fiber: 4g | Sugar: 16.5g | Vitamin C: 12mg | Calcium: 345mg | Iron: 7mg
    Did you try this recipe?Let me know! Comment below, or take a picture and tag me on Instagram @everydayhomemadebyashley.

    The Best BLT Sandwich on Sourdough Bread (with Avocado)

    April 16, 2025

    This Sourdough BLT is the ultimate crispy, creamy, savory sandwich, with thick-cut bacon, juicy tomatoes, crisp lettuce, and creamy avocado piled high on sourdough bread toasted in bacon fat.

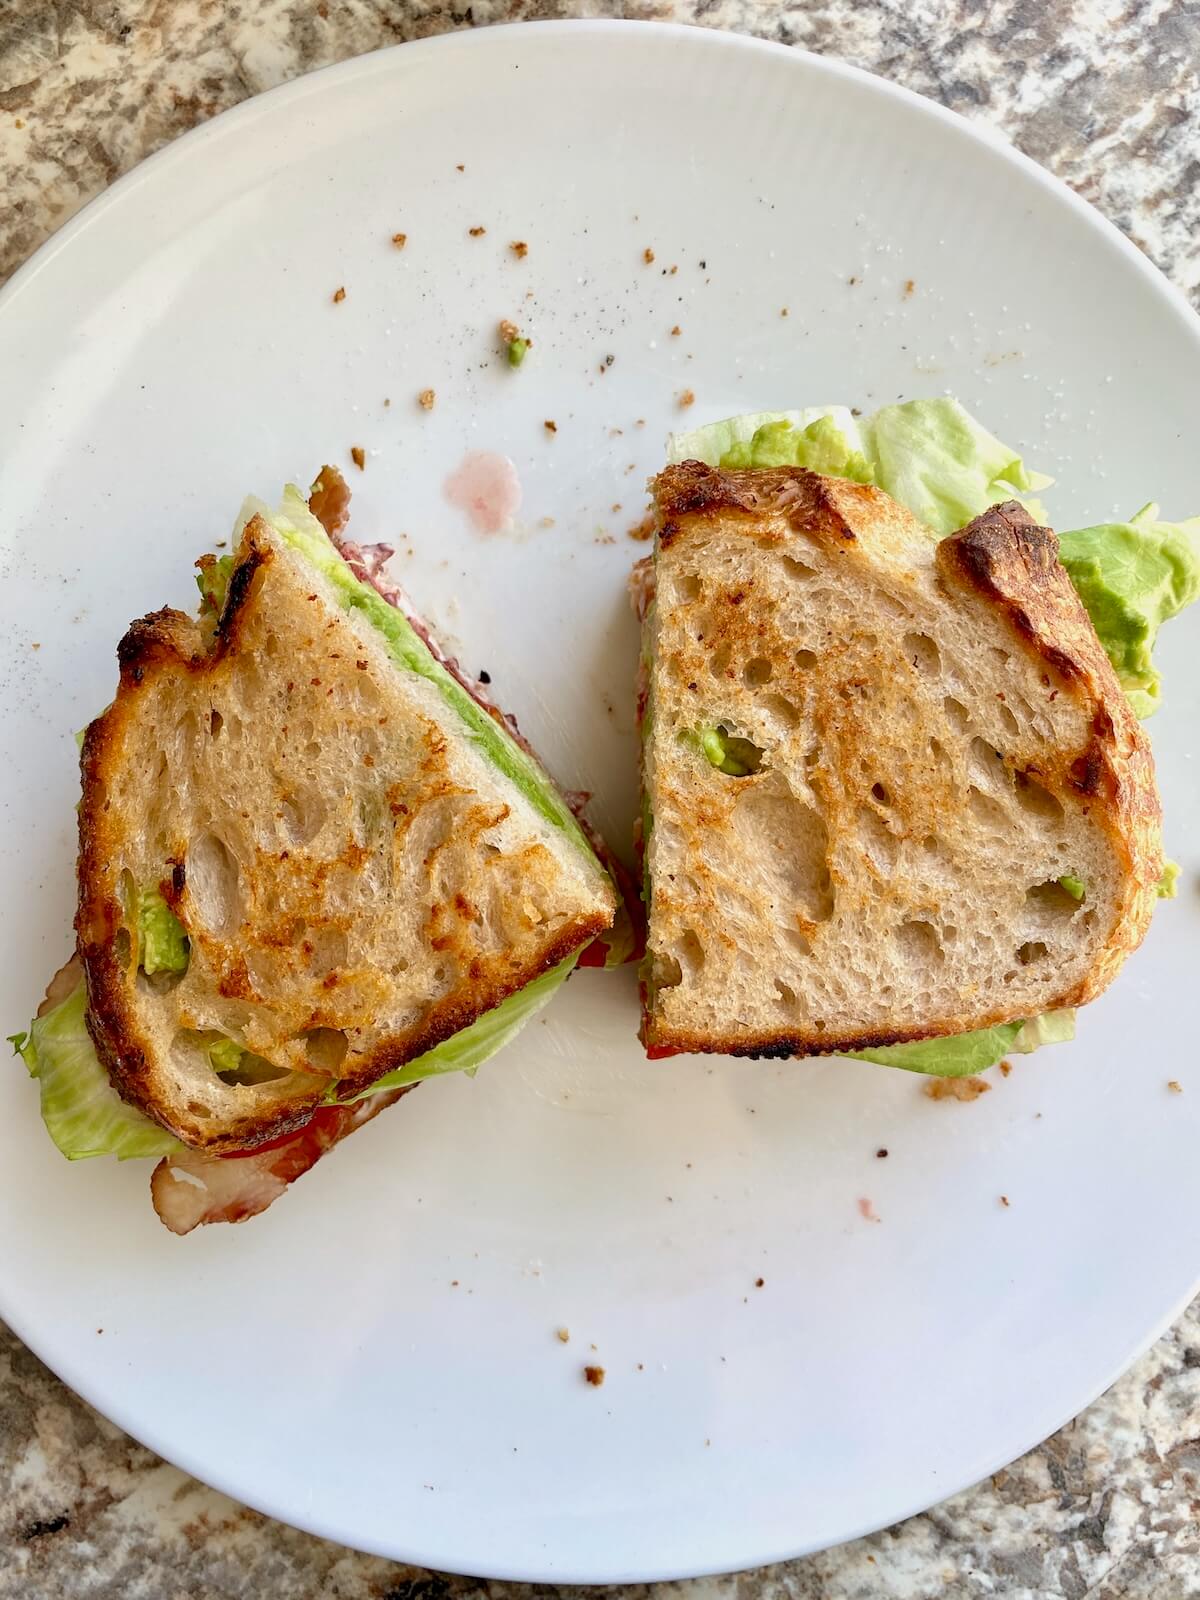
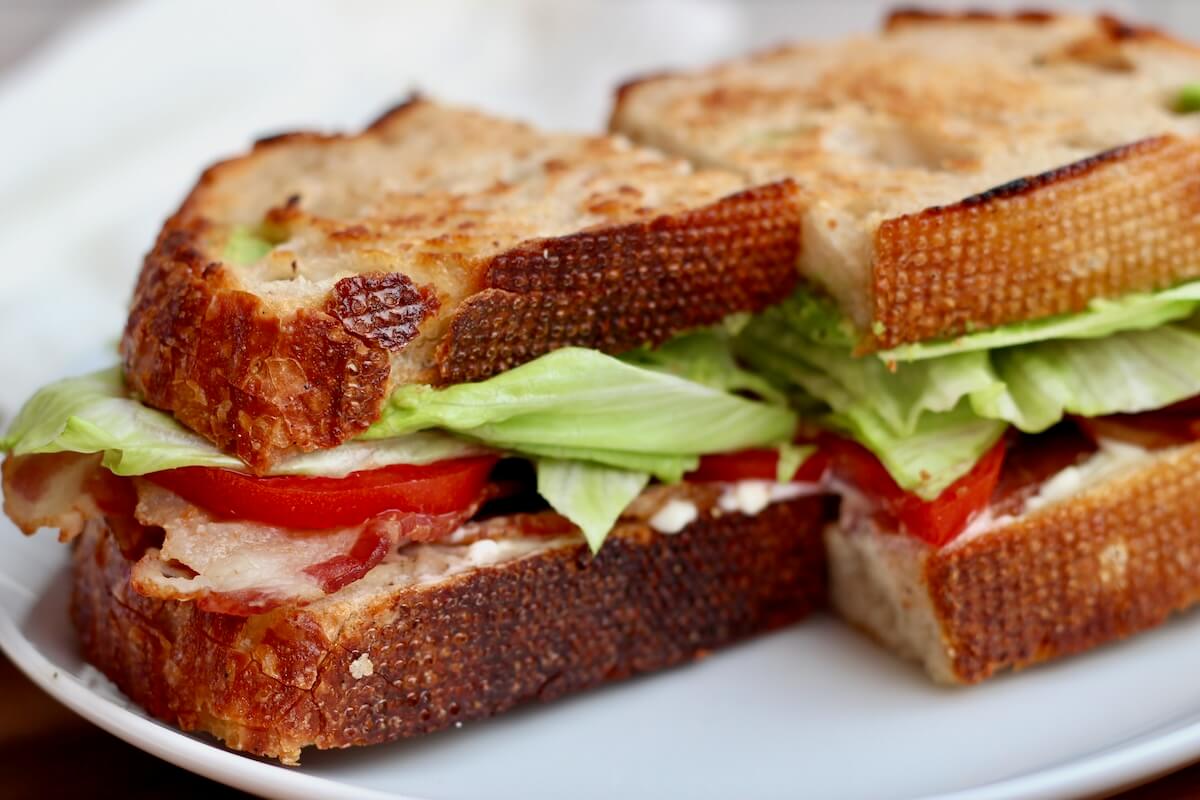
    A BLT sandwich on sourdough bread cut in half on a plate.

    Growing up, my favorite sandwich was a BLT. Did I actually like the lettuce and tomato? Not really. Back then, it was all about the bacon.

    Now? I actually enjoy the lettuce and tomato. And my love for a classic BLT is stronger than ever. Of course, as a sourdough blogger, you just know I had to give it a sourdough twist.

    This sourdough BLT starts with chewy, tangy sourdough bread toasted in rendered bacon fat. Then, it's piled high with crispy bacon, crunchy lettuce, and juicy tomatoes. Top it with creamy avocado and a swipe of mayo, and youโ€™ve taken this classic sandwich to the next level.

    Use any sourdough you like. My classic sourdough loaf is crusty and chewy, while multigrain, soft sandwich bread, or honey wheat give you different textures and flavors.

    If you love a good BLT, youโ€™ve got to try this one. Itโ€™s easy, quick, and perfect for a summer lunch or dinner. I just know youโ€™ll love it as much as I do!

    Disclaimer: Some links throughout this post are affiliate links. As an Amazon Associate, I earn from qualifying purchases. You can learn more by visiting my Affiliate Disclosure Page.

    Ingredients & Substitutions

    Here are some notes on the key ingredients. For the full list of ingredients, check out the recipe card below.

    • Sourdough Bread- I used my classic crusty sourdough loaf, but store-bought works too. For a softer bite, try sourdough sandwich bread or honey wheat sourdough.
    • Bacon- Opt for high-quality, thick-cut bacon for the best flavor and texture. You can use turkey bacon or a plant-based alternative if needed.
    • Iceberg Lettuce- Iceberg gives the sandwich that classic flavor and crunch. Romaine, green leaf, or butter lettuce are great swaps.
    • Tomato- Choose a ripe and juicy beefsteak or heirloom tomato for the best flavor.
    • Avocado- Adds creaminess. If youโ€™re not an avocado fan, you can skip it or swap in extra mayo or even hummus.
    • Mayonnaise- Adds that classic BLT flavor. Use your favorite brand or try a flavored mayo (like spicy garlic or chipotle) for a fun twist.
    • Salt & Pepper- Season to taste.
    The ingredients to make sourdough BLT sandwich. Each ingredient is labeled with text. They include bacon, sourdough bread, iceberg lettuce, avocado, mayo, tomato, salt, and pepper.

    Variations

    This sourdough BLT is easy to personalize. Here are some quick ways to switch it up:

    • Add a fried egg for a breakfast-style BLT.
    • Swap the bacon for turkey bacon, prosciutto, or a plant-based option.
    • Try different greens like romaine, arugula, or spinach.
    • Add cheese like sharp cheddar, provolone, or mozzarella.
    • Spice it up with a drizzle of hot sauce or sriracha aioli.

    Tips for Success

    • Use high-quality ingredients. Freshly-baked sourdough, thick-cut bacon, and ripe tomatoes make all the difference.
    • Cook bacon low and slow. Start bacon in a cold skillet over medium-low heat to render out fat and get it crispy.
    • Watch bacon closely. Bacon cooks fast and can go from crispy to burnt quickly. Keep an eye on it to reach your desired crispness.
    • Assemble right before serving. For the best texture, assemble the sandwich right before eating to keep the bread crispy and fresh.

    How to Make a BLT on Sourdough Bread

    Make my favorite BLT sandwich on homemade sourdough with this easy, step-by-step guide (photos included!).

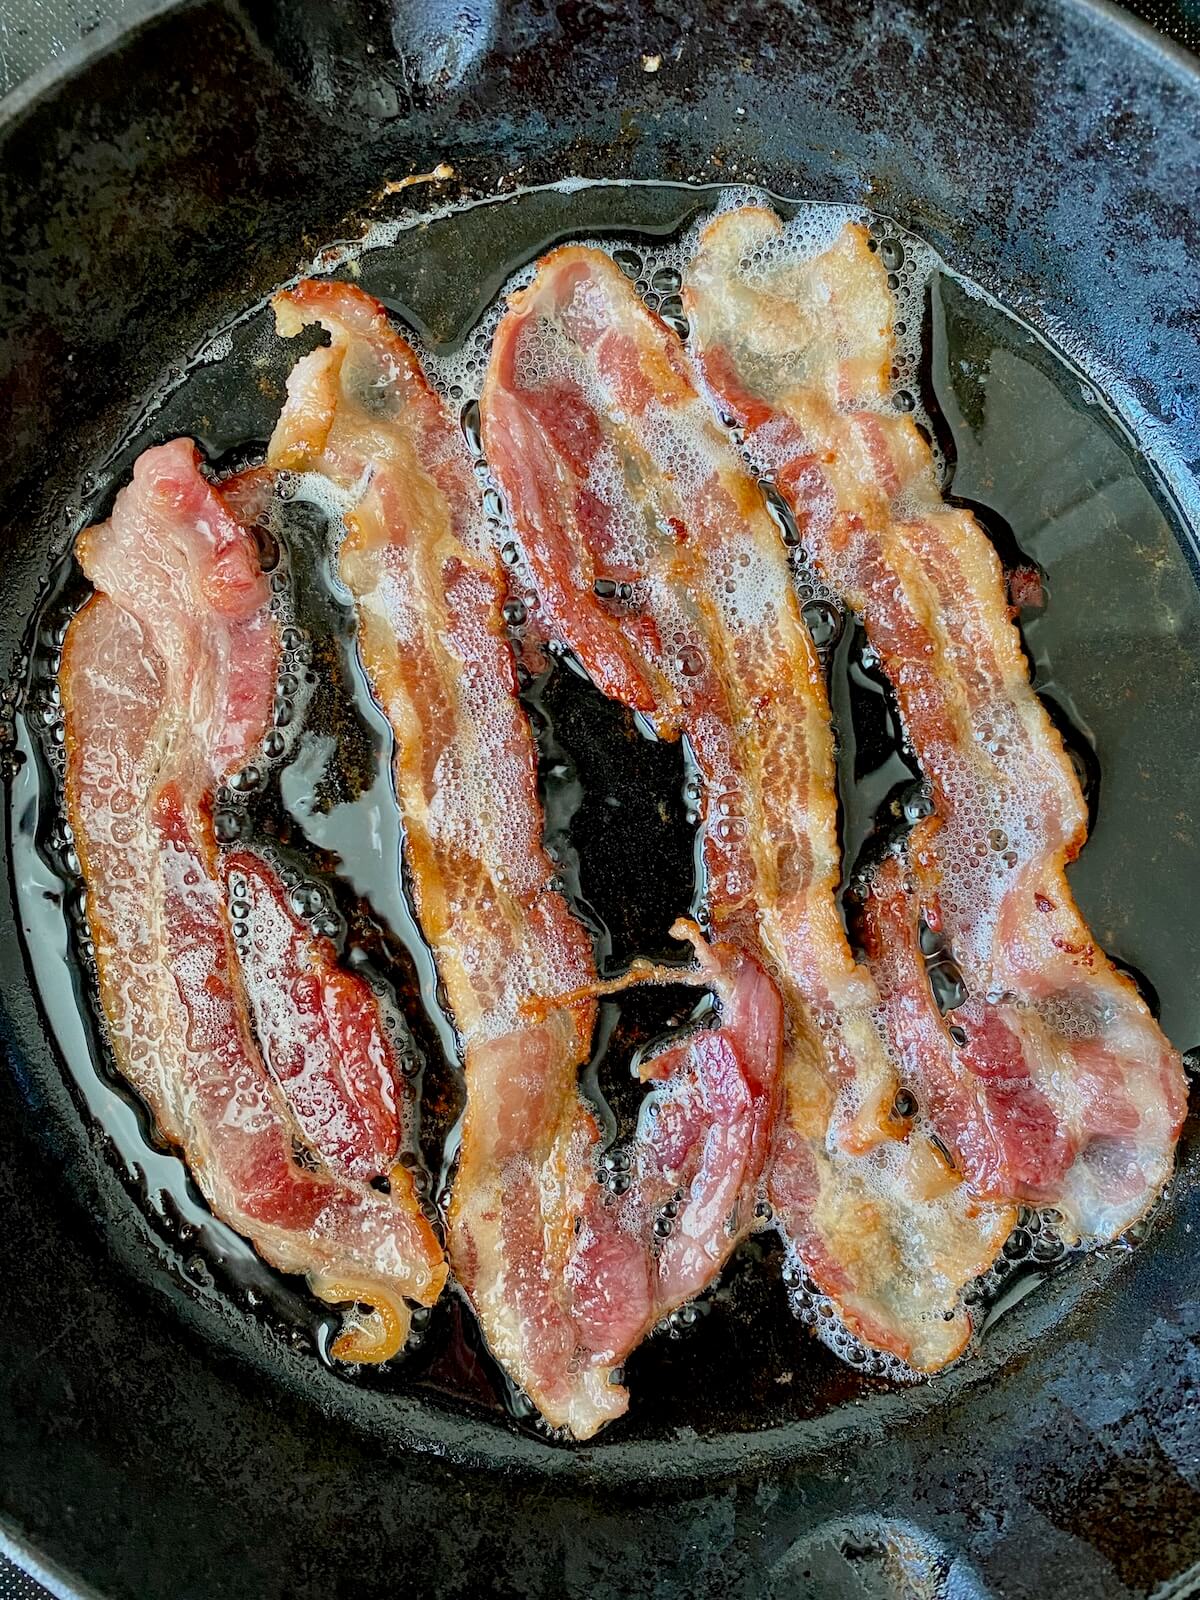
    Step 1: Cook the bacon. Lay bacon in a cold skillet and cook over medium-low heat, flipping occasionally, until crispy. Transfer to a paper towel-lined plate.

    Four slices of bacon cooking in a cast iron skillet.

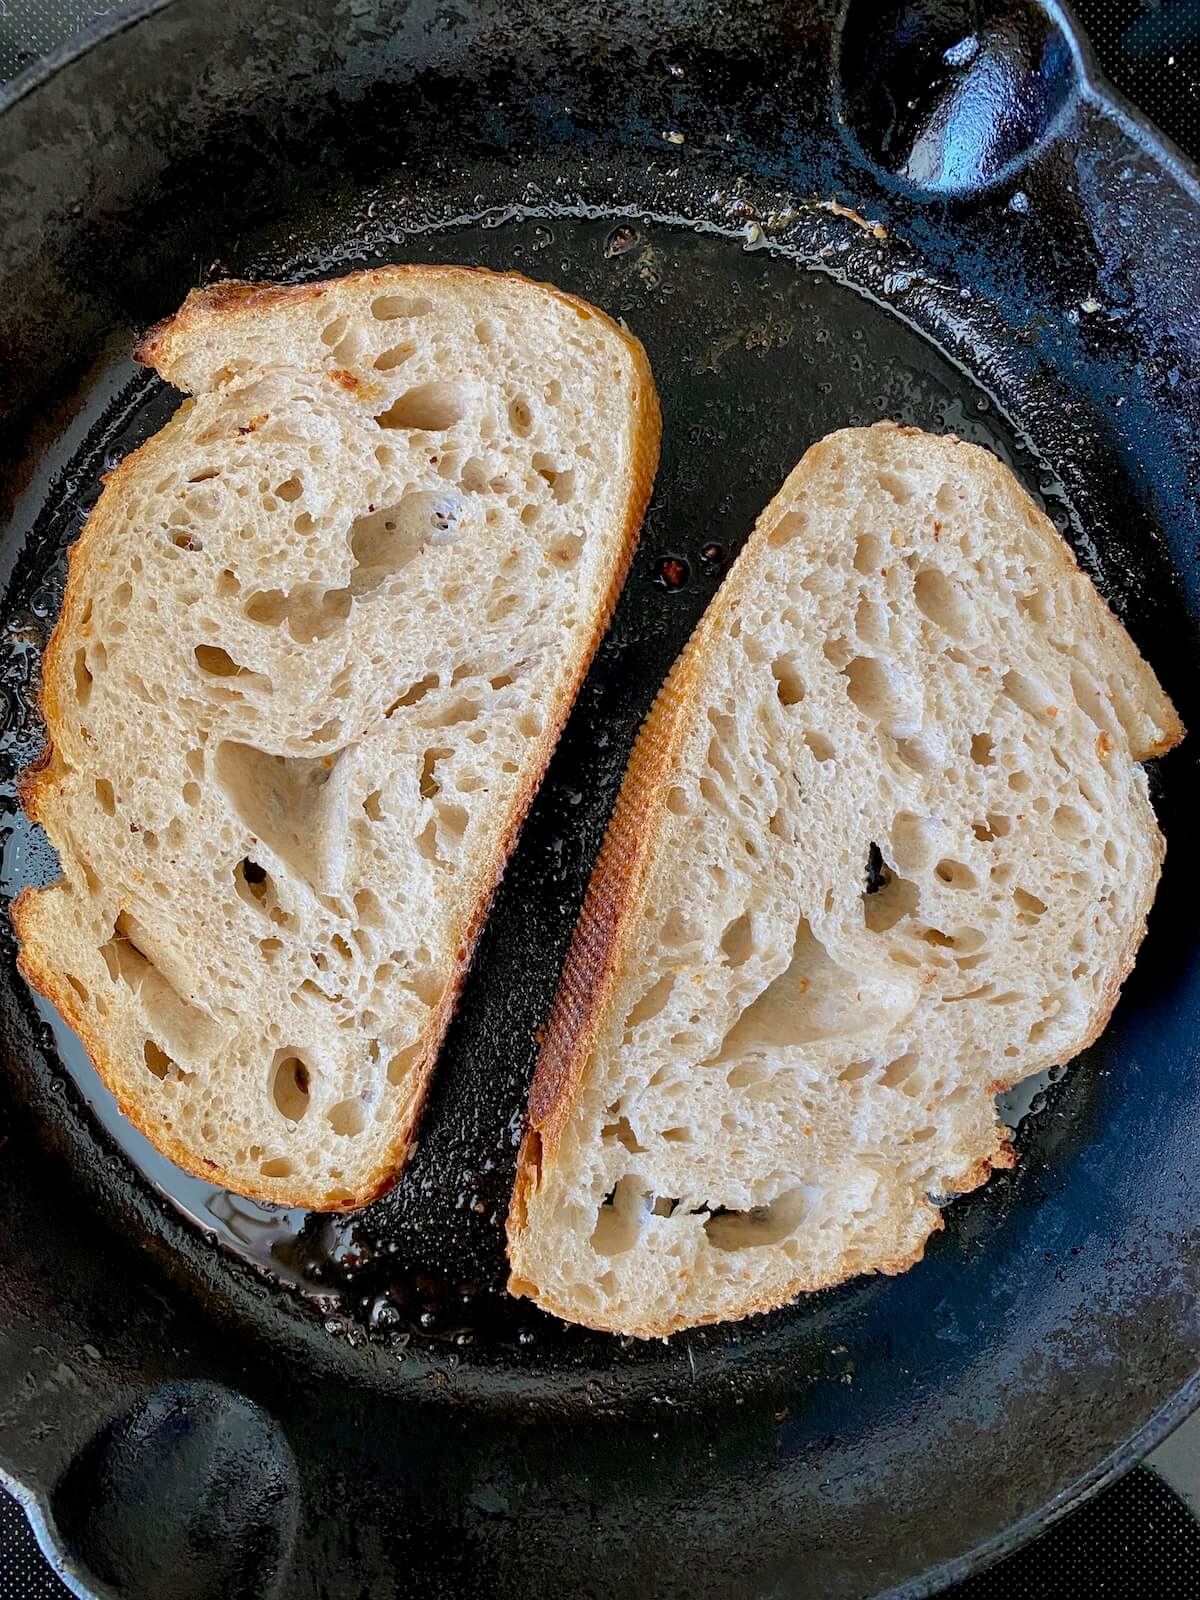
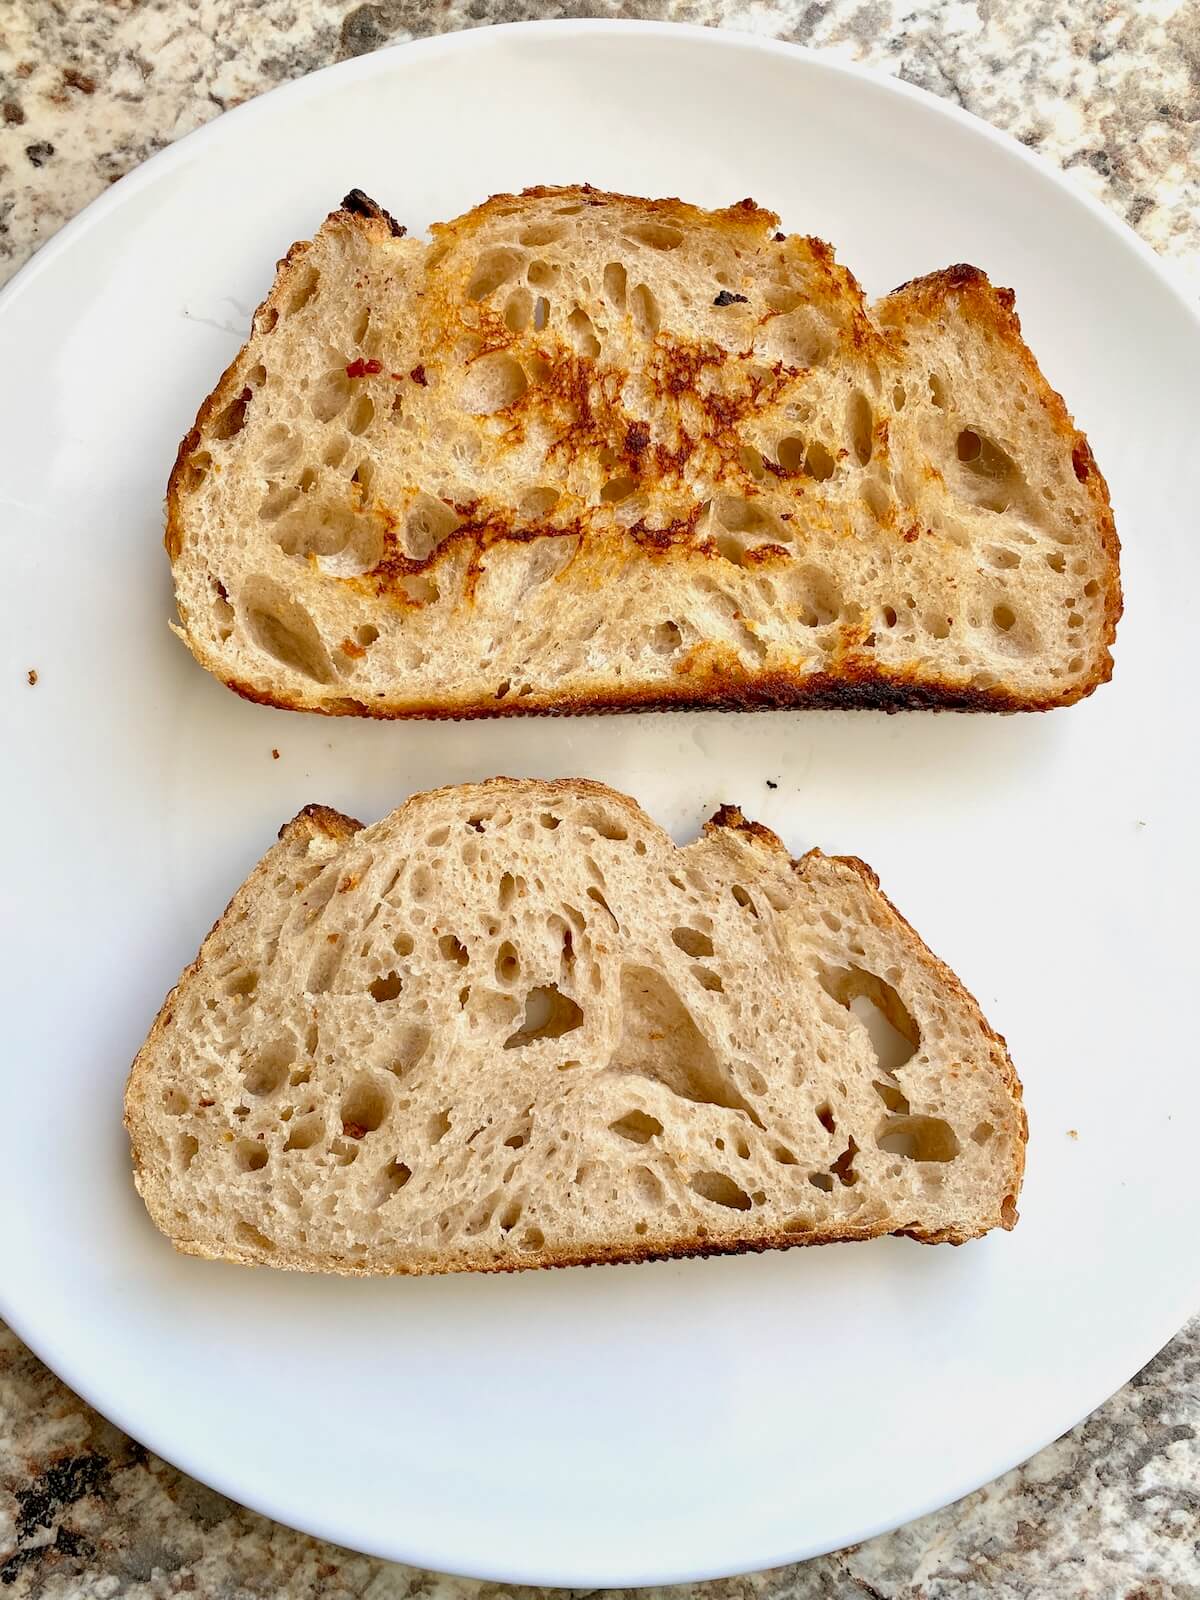
    Step 2: Toast the bread. Drain most of the bacon fat, leaving about 1 teaspoon. Toast the sourdough slices in the skillet on one side only.

    Two slices of sourdough bread toasting in bacon fat in a cast iron skillet.
    Two slices of toasted sourdough bread on a small white plate.

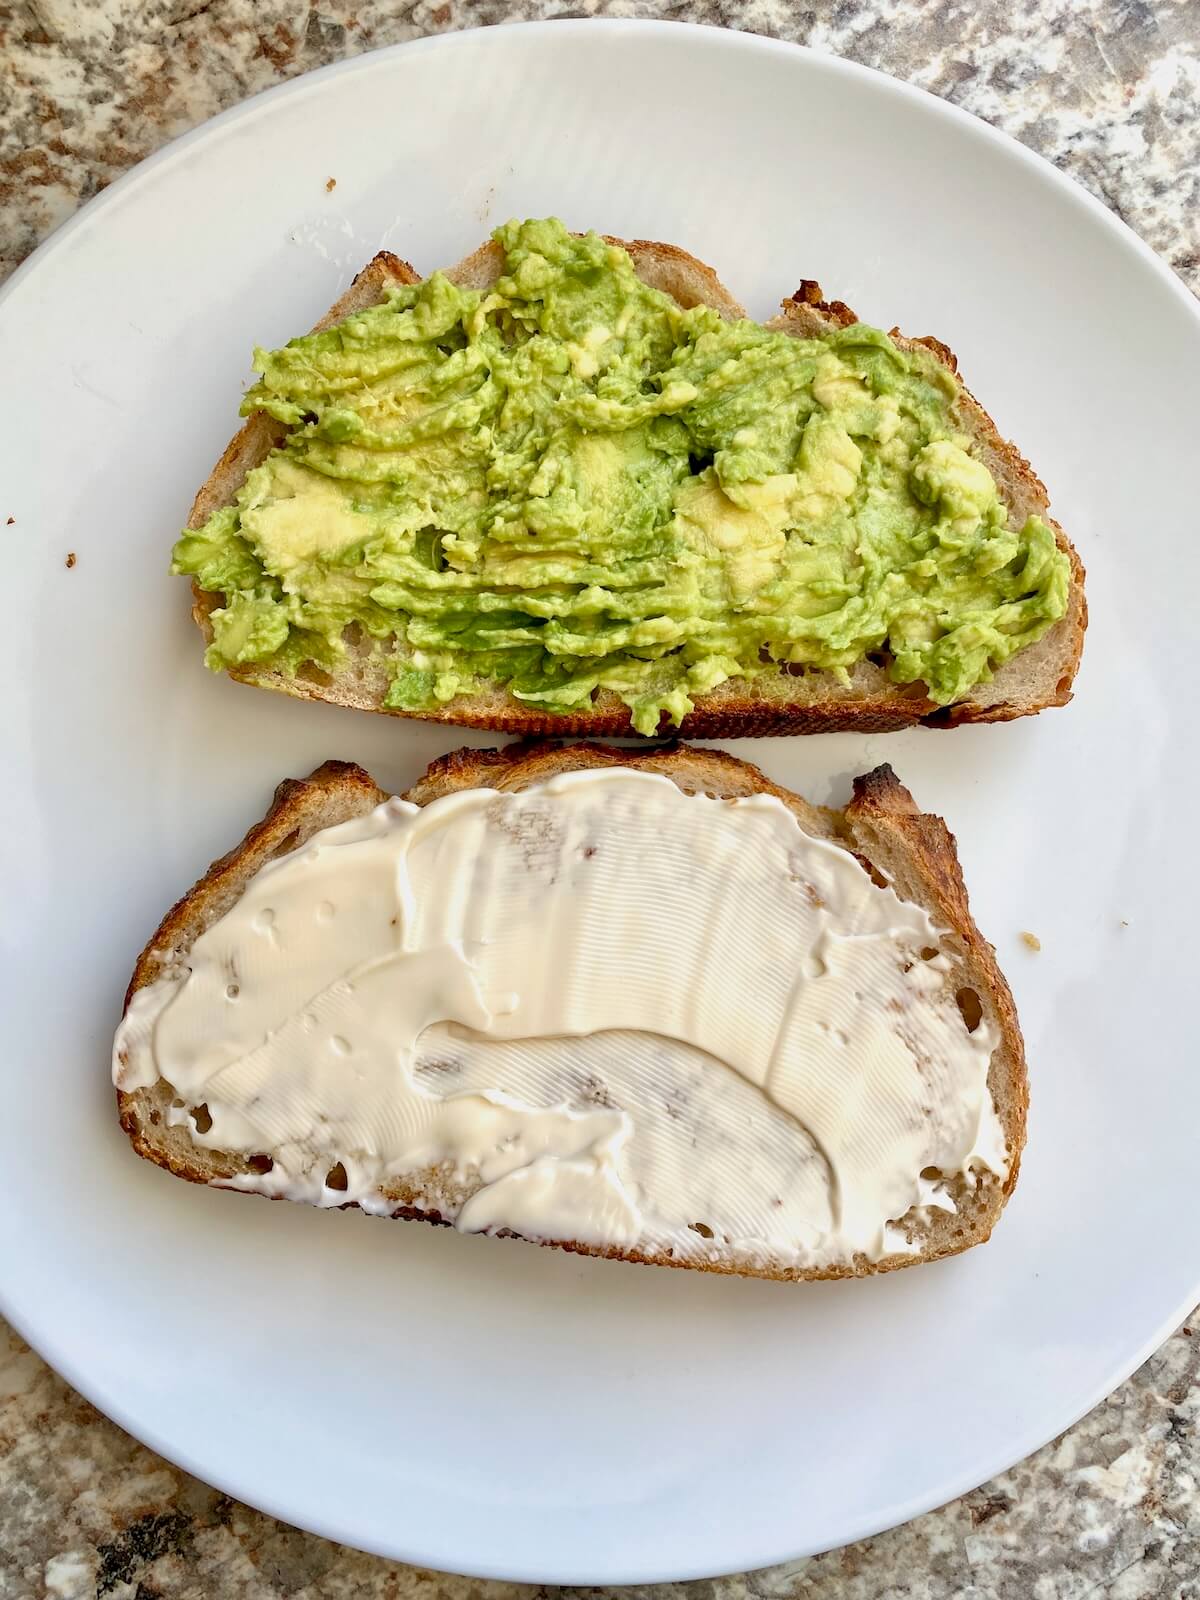
    Step 3: Add the spreads. Spread mashed avocado on one untoasted side and mayo on the other. Season both with salt and pepper.

    Two slices of sourdough bread on a small white plate. One piece has mashed avocado on it and the other piece has mayonnaise on it.

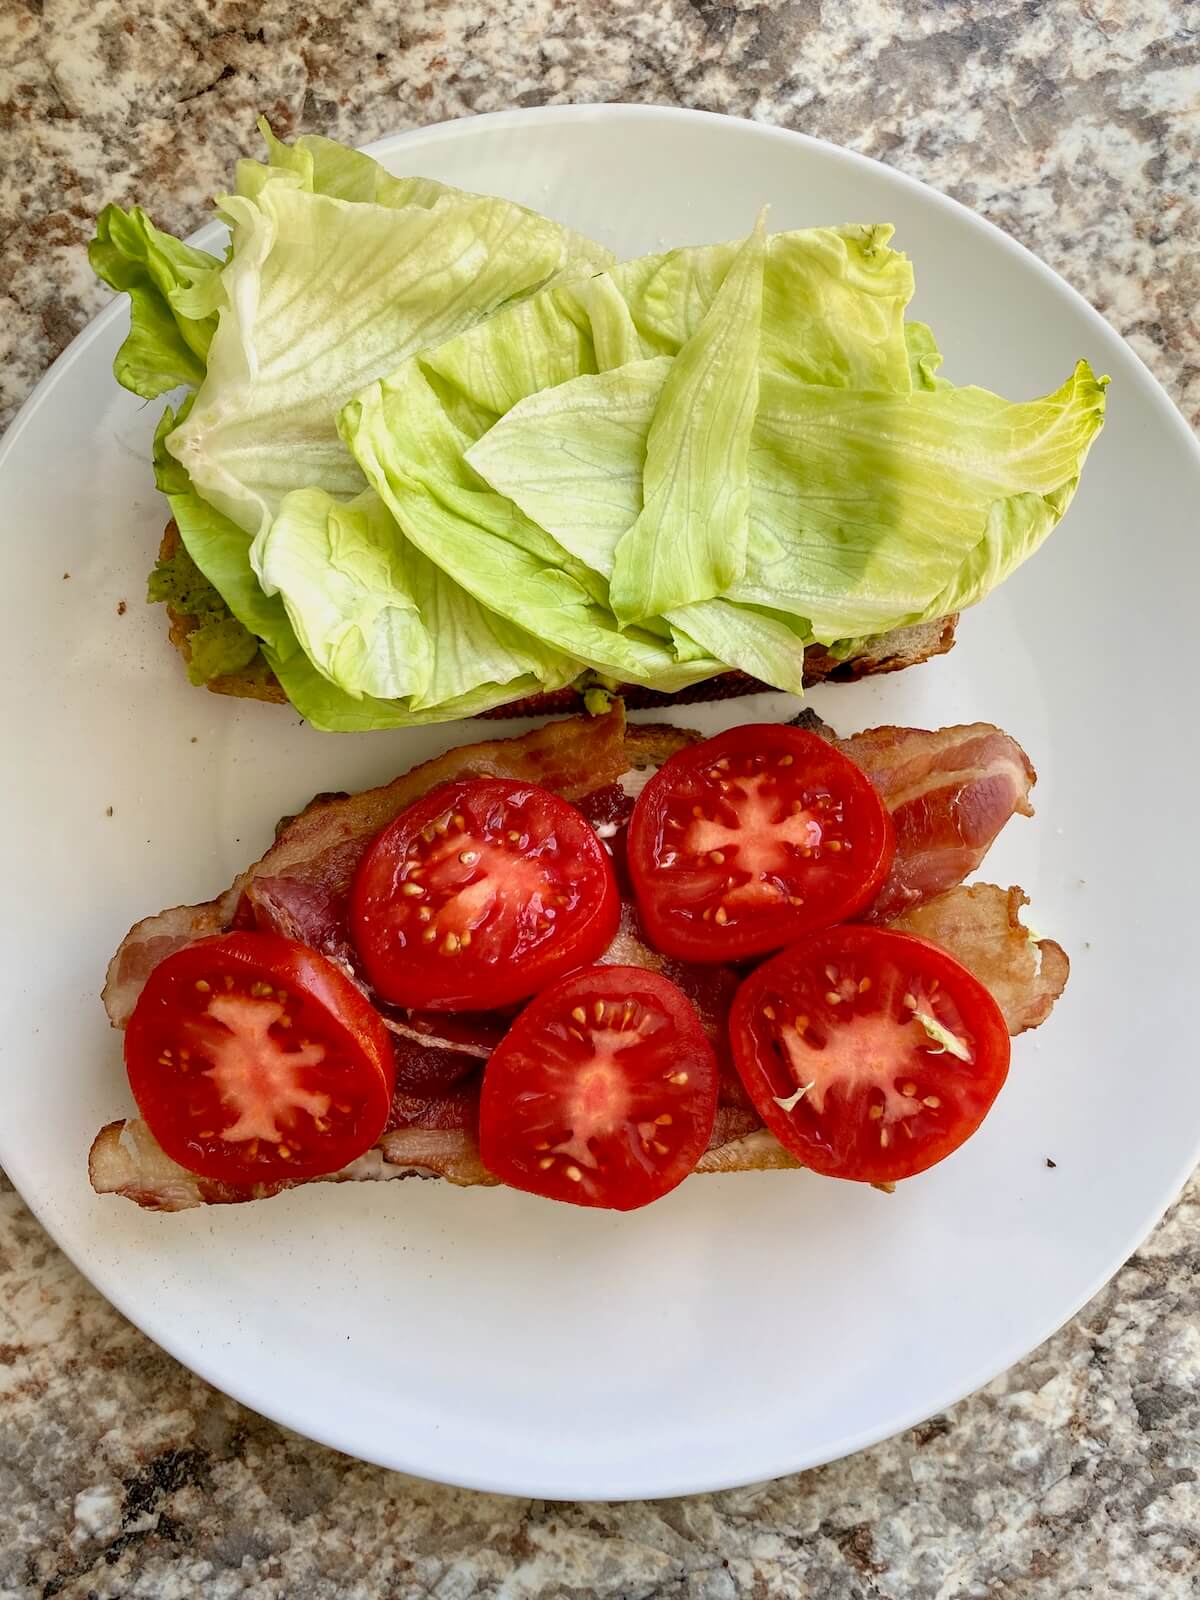
    Step 4: Assemble the sandwich. Layer bacon, tomato slices, and lettuce on the mayo slice. Top with the avocado slice, press together, and slice in half.

    Bacon, sliced tomato, and iceberg lettuce on top of slices of sourdough bread.
    The assembled BLT sourdough sandwich cut in half on a small white plate.

    Serving Suggestions

    Pair your sourdough BLT with cheesy sourdough or whole wheat crackers and a dill pickle for a fully homemade meal.

    A sourdough BLT sandwich cut in half on a plate.
    A cover of a recipe ebook with the title "Everyday Sourdough: 27 Sweet & Savory Sourdough Discard Recipes." There is an image of sourdough discard cinnamon rolls on the front. At the bottom, it reads "By Ashley Petrie of Everyday Homemade."
    Grab a copy today!

    Are you tired of watching your sourdough discard go to waste?

    Itโ€™s time to turn excess discard into something delicious with my new ebook - Everyday Sourdough!

    Inside, youโ€™ll find 27 tried-and-true sourdough discard recipes that will transform your leftover starter into mouthwatering creations your family and friends will love.

    No more guilt about wasting your discard - with Everyday Sourdough, you have endless options to quickly make something amazing anytime.

    Let's Connect!

    Be sure to leave a comment below if you have any questions. You can also connect with me on Instagram, Facebook, Pinterest, or via email at [email protected].

    More Sourdough Sandwich Recipes

    • A bacon, egg, and cheese sourdough breakfast sandwich with avocado cut in half on a small white plate.
      Sourdough Breakfast Sandwich (Bacon, Egg & Cheese)
    • A sourdough grilled cheese sandwich cut in half diagonally on a small white plate.
      Sourdough Grilled Cheese Sandwich
    • A sourdough turkey sandwich cut in half on a plate.
      Turkey Sandwich on Sourdough Bread
    • Three slices of sourdough sandwich bread on a cutting board.
      Sourdough Sandwich Bread

    ๐Ÿ“– Recipe

    A BLT sandwich on sourdough bread cut in half on a plate.
    Print Pin SaveSaved!
    5 from 1 vote

    Sourdough BLT Sandwich

    This Sourdough BLT is the ultimate crispy, creamy, savory sandwich, with thick-cut bacon, juicy tomatoes, crisp lettuce, and creamy avocado piled high on sourdough bread toasted in bacon fat.
    Course Sandwich
    Cuisine American
    Prep Time 10 minutes minutes
    Cook Time 20 minutes minutes
    Total Time 30 minutes minutes
    Servings 1 sandwich
    Calories 862kcal
    Author Ashley Petrie, RDN, LDN

    Equipment

    • 10-inch cast iron skillet or stainless steel skillet
    • Bread knife

    Ingredients

    • 4 slices thick-cut bacon
    • 2 slices sourdough bread
    • ยฝ ripe avocado mashed
    • 2 tablespoons mayonnaise
    • Kosher salt and freshly-cracked black pepper to taste
    • 3 slices tomato
    • A few leaves of iceberg lettuce

    Instructions

    • Place the bacon in a cold 10-inch cast iron or stainless steel skillet, laying the slices flat without overlapping. Turn the heat to medium-low and cook for about 10 minutes. Flip the bacon and continue cooking, flipping occasionally, until itโ€™s as crispy as you like. Transfer the cooked bacon to a paper towel-lined plate and set aside.
      4 slices thick-cut bacon
    • Carefully discard all but 1 teaspoon of the bacon fat from the skillet. Turn the heat to low and toast both slices of sourdough bread in the skillet on one side only, until golden and slightly crisp. Remove from the skillet and place the slices toasted-side down on a plate.
      2 slices sourdough bread
    • On the untoasted side of one slice, spread the mashed avocado. On the other slice, spread the mayonnaise. Sprinkle both sides with a little kosher salt and freshly cracked black pepper to taste.
      ยฝ ripe avocado, 2 tablespoons mayonnaise, Kosher salt and freshly-cracked black pepper
    • Layer the bacon on top of the mayo side, followed by the tomato slices and iceberg lettuce. Place the avocado slice on top, avocado-side down, and press gently to hold everything together.
      3 slices tomato, A few leaves of iceberg lettuce
    • Slice the sandwich in half and enjoy right away while itโ€™s still warm and crispy.

    Notes

    • Serving Suggestion: Serve your sourdough BLT with cheesy sourdough crackers and refrigerator dill pickles for a complete meal.

    Nutrition

    Serving: 1sandwich | Calories: 862kcal | Carbohydrates: 83.5g | Protein: 30g | Fat: 46.5g | Saturated Fat: 10.5g | Polyunsaturated Fat: 15g | Monounsaturated Fat: 13g | Cholesterol: 31mg | Sodium: 1624mg | Potassium: 980mg | Fiber: 10g | Sugar: 7g | Vitamin C: 39mg | Calcium: 56mg | Iron: 5.8mg
    Did you try this recipe?Let me know! Comment below, or take a picture and tag me on Instagram @everydayhomemadebyashley.

    Sourdough Bruschetta

    April 15, 2025

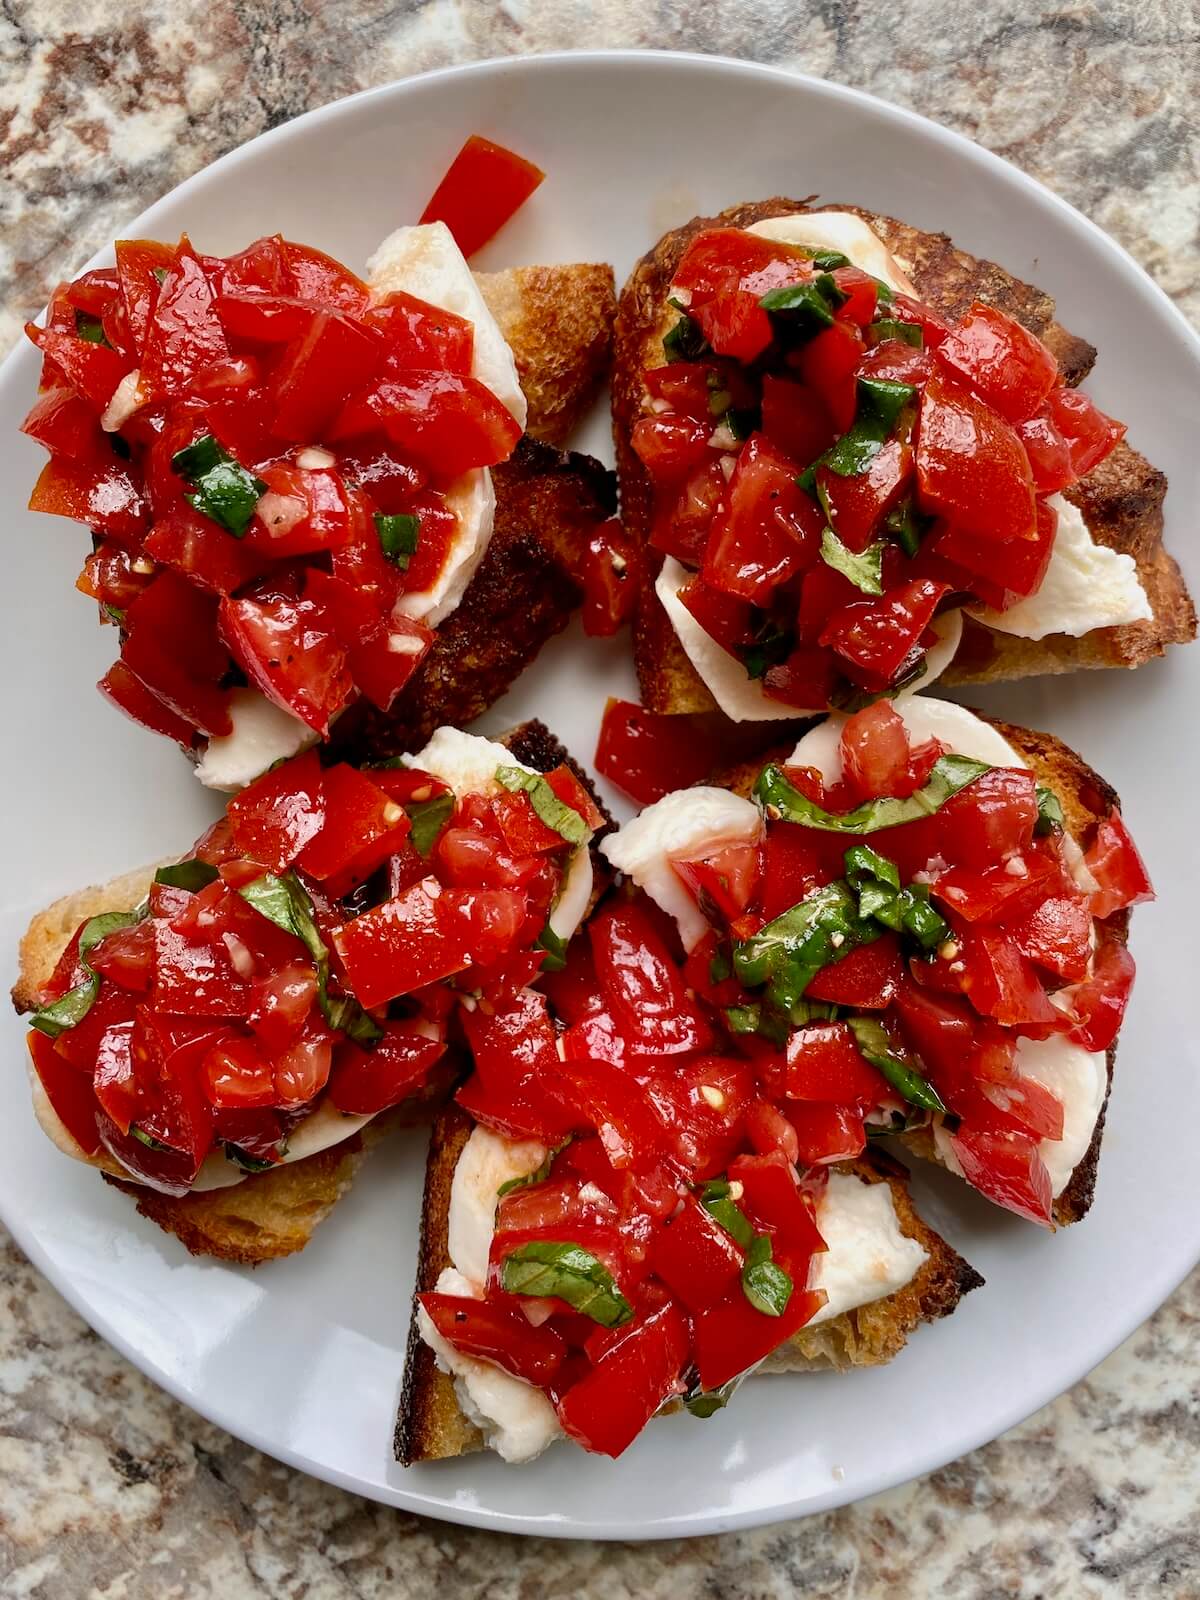
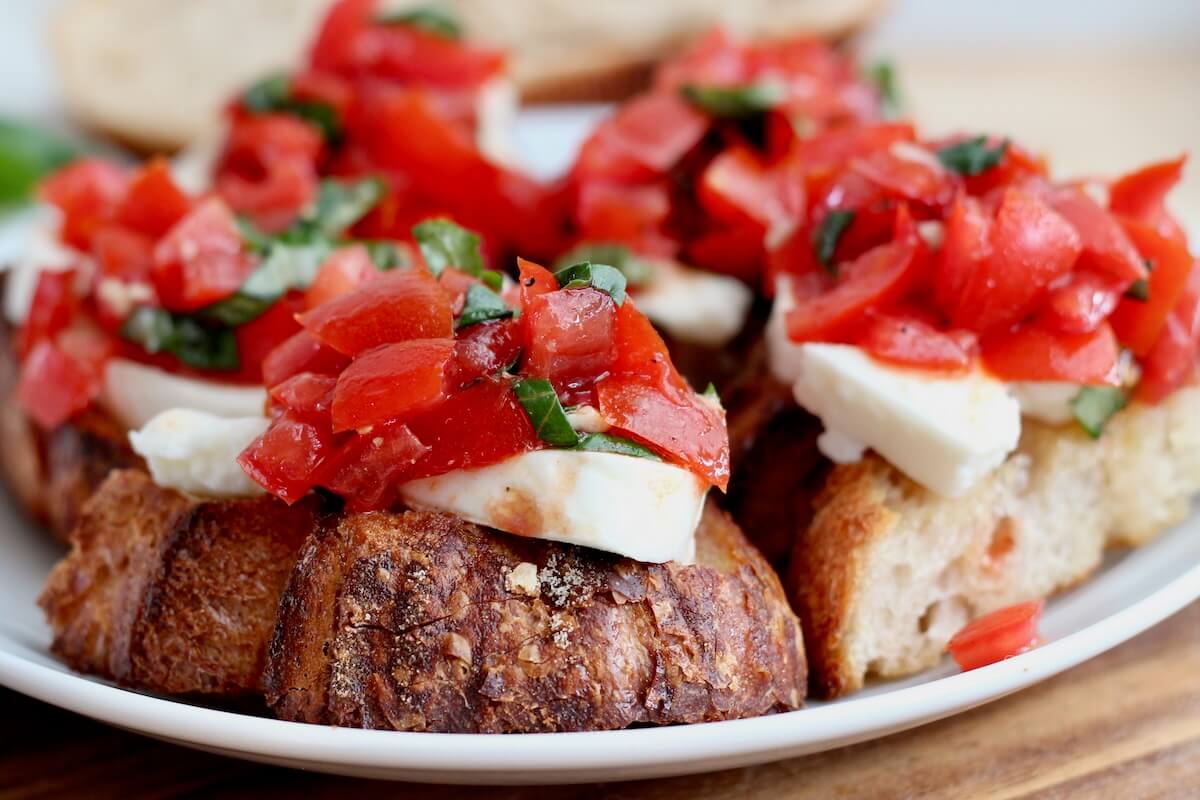
    This Sourdough Bruschetta is made with toasted sourdough bread topped with creamy mozzarella, marinated tomatoes, and fresh basil. It's an easy and delicious appetizer recipe perfect for any occasion!

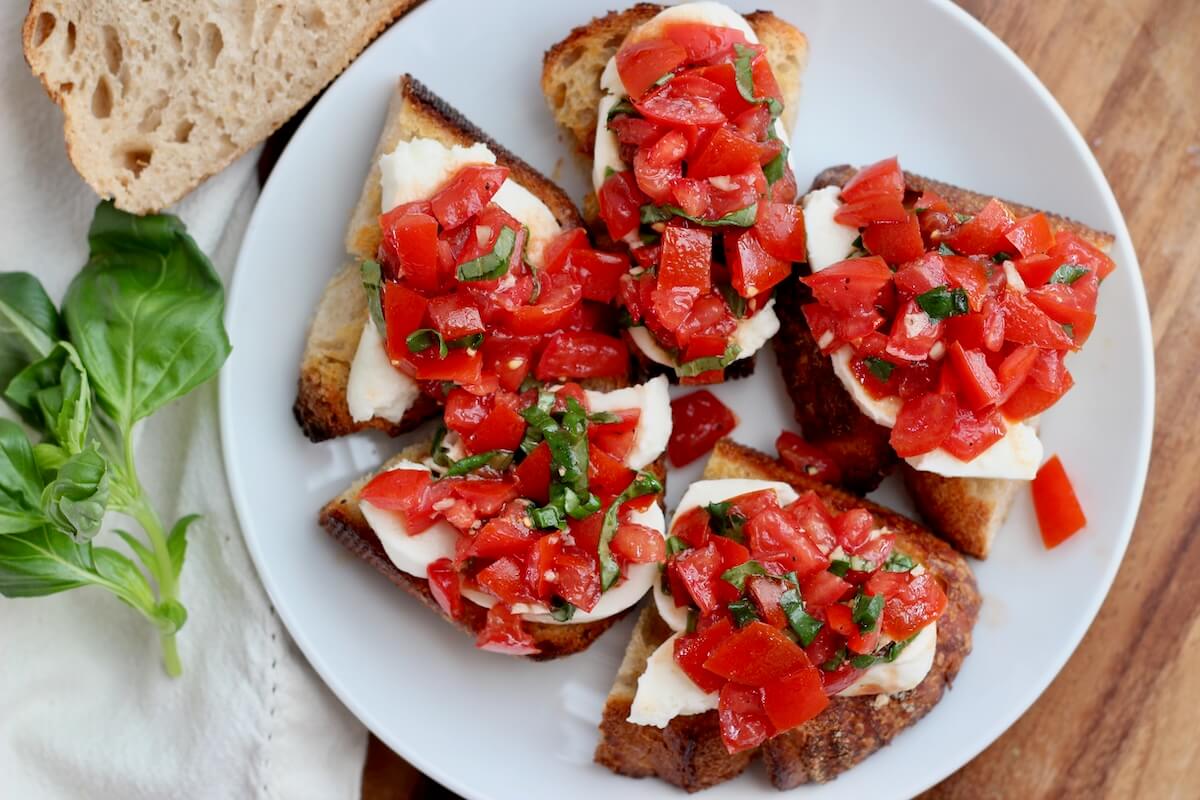
    A small white plate with five pieces of sourdough bruschetta on it.

    Bruschetta is one of my go-to appetizers for any gathering. Whether itโ€™s a casual summer dinner with friends or a holiday get-together with family, itโ€™s always a big hit.

    This sourdough bruschetta recipe is not only incredibly easy to make and ready in just 30 minutes, but it also looks beautiful and impressive.

    Even better? If youโ€™re a sourdough baker like I am, you can proudly say you made it with your own homemade sourdough bread!

    The sourdough really takes this bruschetta to the next level. It adds a tangy, complex flavor and chewy, crispy texture that perfectly complements the fresh mozzarella and marinated tomato-basil topping.

    I hope you give it a try and enjoy it as much as I do!

    Disclaimer: Some links throughout this post are affiliate links. As an Amazon Associate, I earn from qualifying purchases. You can learn more by visiting my Affiliate Disclosure Page.

    Ingredients & Substitutions

    Here are some notes on key ingredients. For a full list of ingredients, check out the recipe card below.

    • Sourdough Bread- I used my simple sourdough loaf, but feel free to use any sourdough variety you like - multigrain, olive, pesto, or even sourdough focaccia. Slice into 1-inch thick pieces.
    • Mozzarella Cheese- Fresh mozzarella works best, but burrata is a great substitute.
    • Tomatoes- Campari, heirloom, globe, or plum-style tomatoes are my go-to choices, but feel free to use any variety. Just make sure to dice them small and remove the seeds.
    • Garlic- Fresh garlic is key - finely mince or grate it for the best flavor. Rub the toasts with a halved garlic clove for an extra kick.
    • Basil- Thinly slice fresh basil using the chiffonade technique (stack, roll, and slice).
    • Extra Virgin Olive Oil- Opt for high-quality extra virgin olive oil to elevate the flavor of the bruschetta.
    • Balsamic Vinegar- Adds a nice balance of acidity to complement the creamy mozzarella.
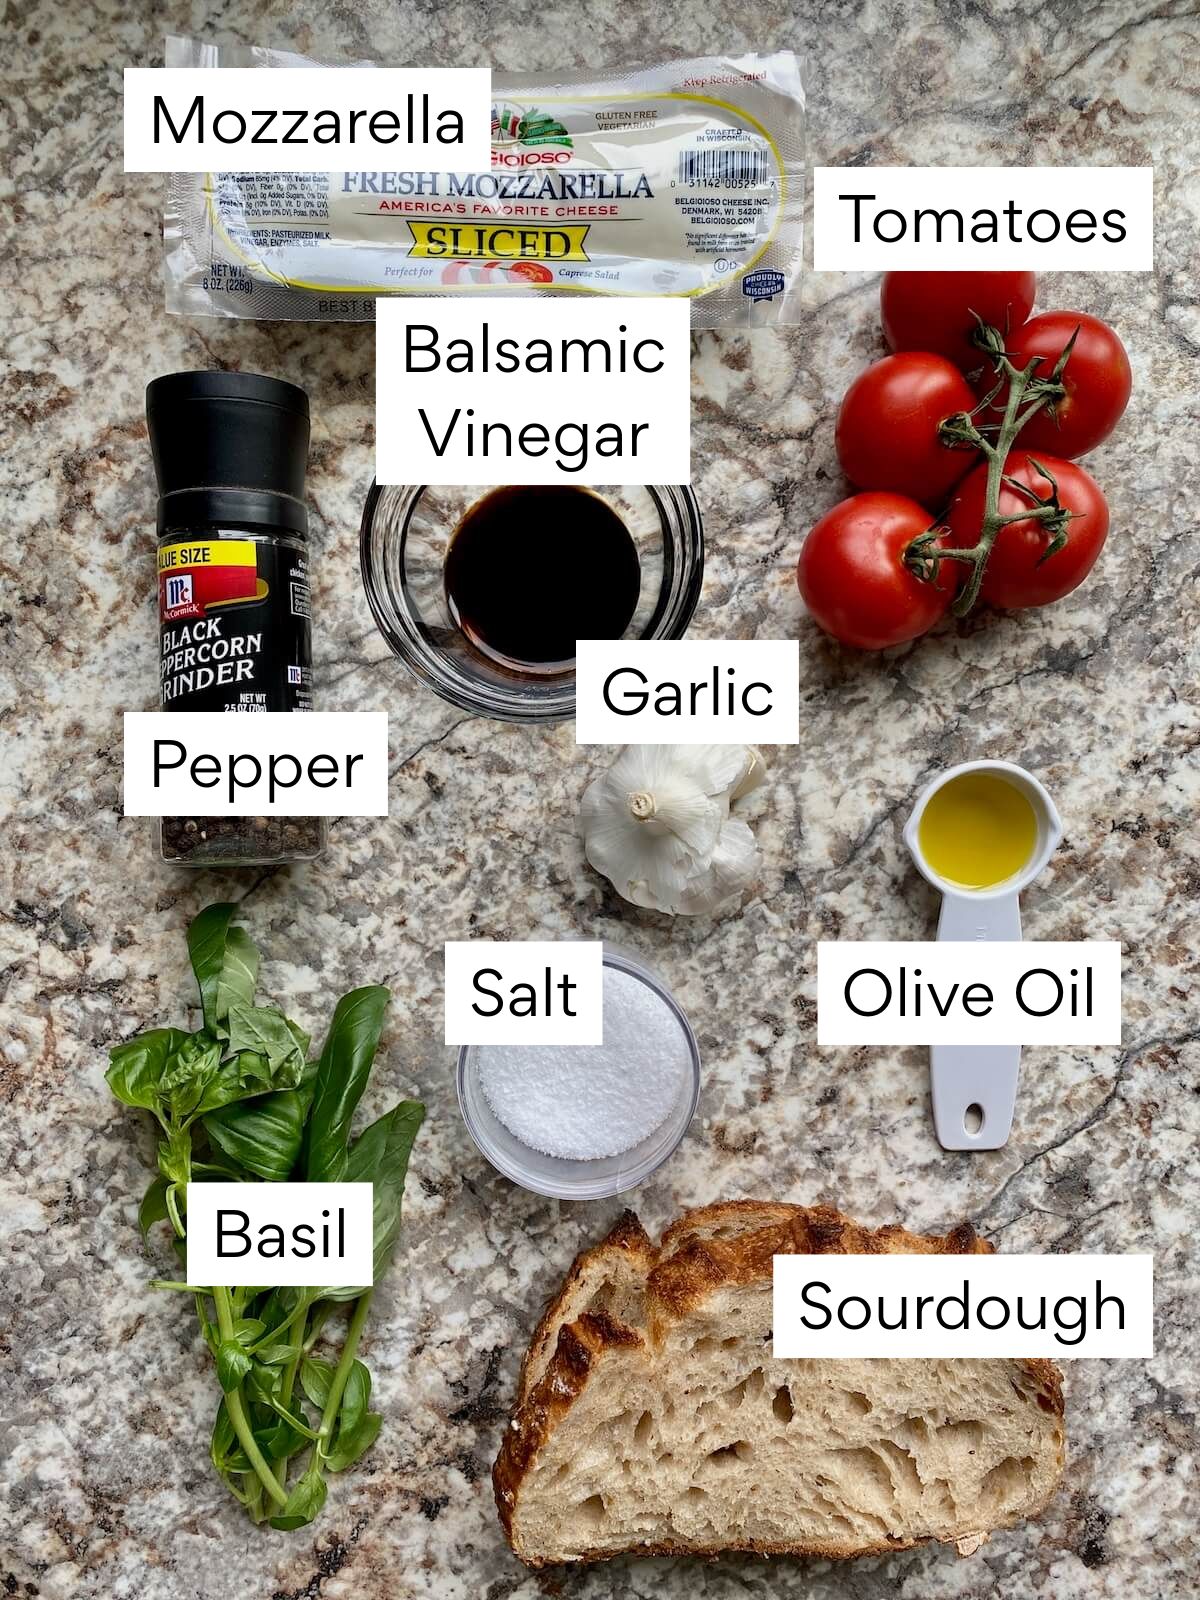
    The ingredients to make sourdough bruschetta. Each ingredient is labeled with text. They include mozzarella, tomatoes, balsamic vinegar, garlic, pepper, salt, olive oil, basil, and sourdough bread.

    Tips for Success

    • Choose ripe, in-season tomatoes. They'll give you the best flavor and texture for the bruschetta topping.
    • Use fresh, good-quality ingredients. Think homemade sourdough, creamy fresh mozzarella, and flavorful olive oil and balsamic vinegar - each one makes a big difference.
    • Let the tomatoes marinate. Give them at least 15โ€“20 minutes to soak up all that garlicky, herby goodness.
    • Assemble just before serving. Bruschetta is best when the bread is still crisp and the cheese is fresh.

    How to Make Sourdough Bruschetta

    Here is how to make bruschetta with sourdough bread (with pictures!).

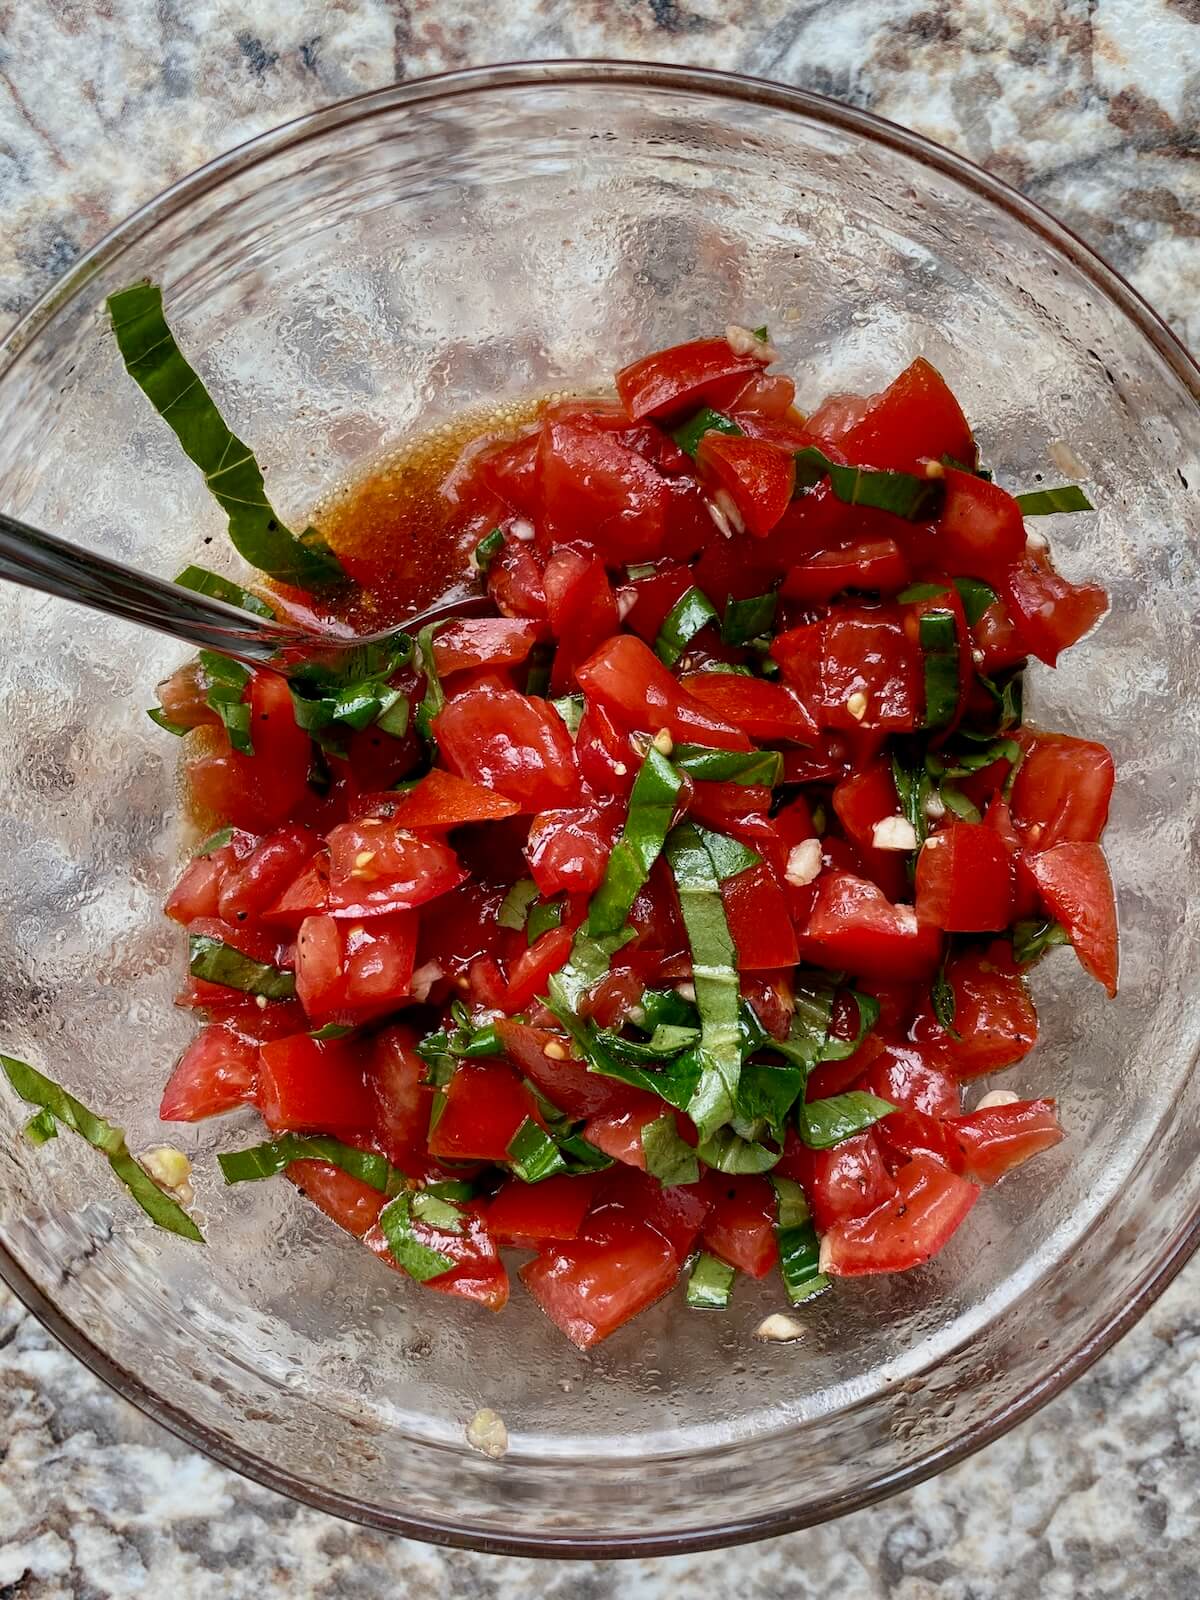
    Step 1: Marinate the tomatoes. Combine olive oil, balsamic vinegar, salt, pepper, diced tomatoes, garlic, and basil in a bowl. Let it sit while you prep the bread.

    Diced tomatoes, basil, and garlic marinating in a mixture of olive oil and balsamic vinegar in a glass bowl.

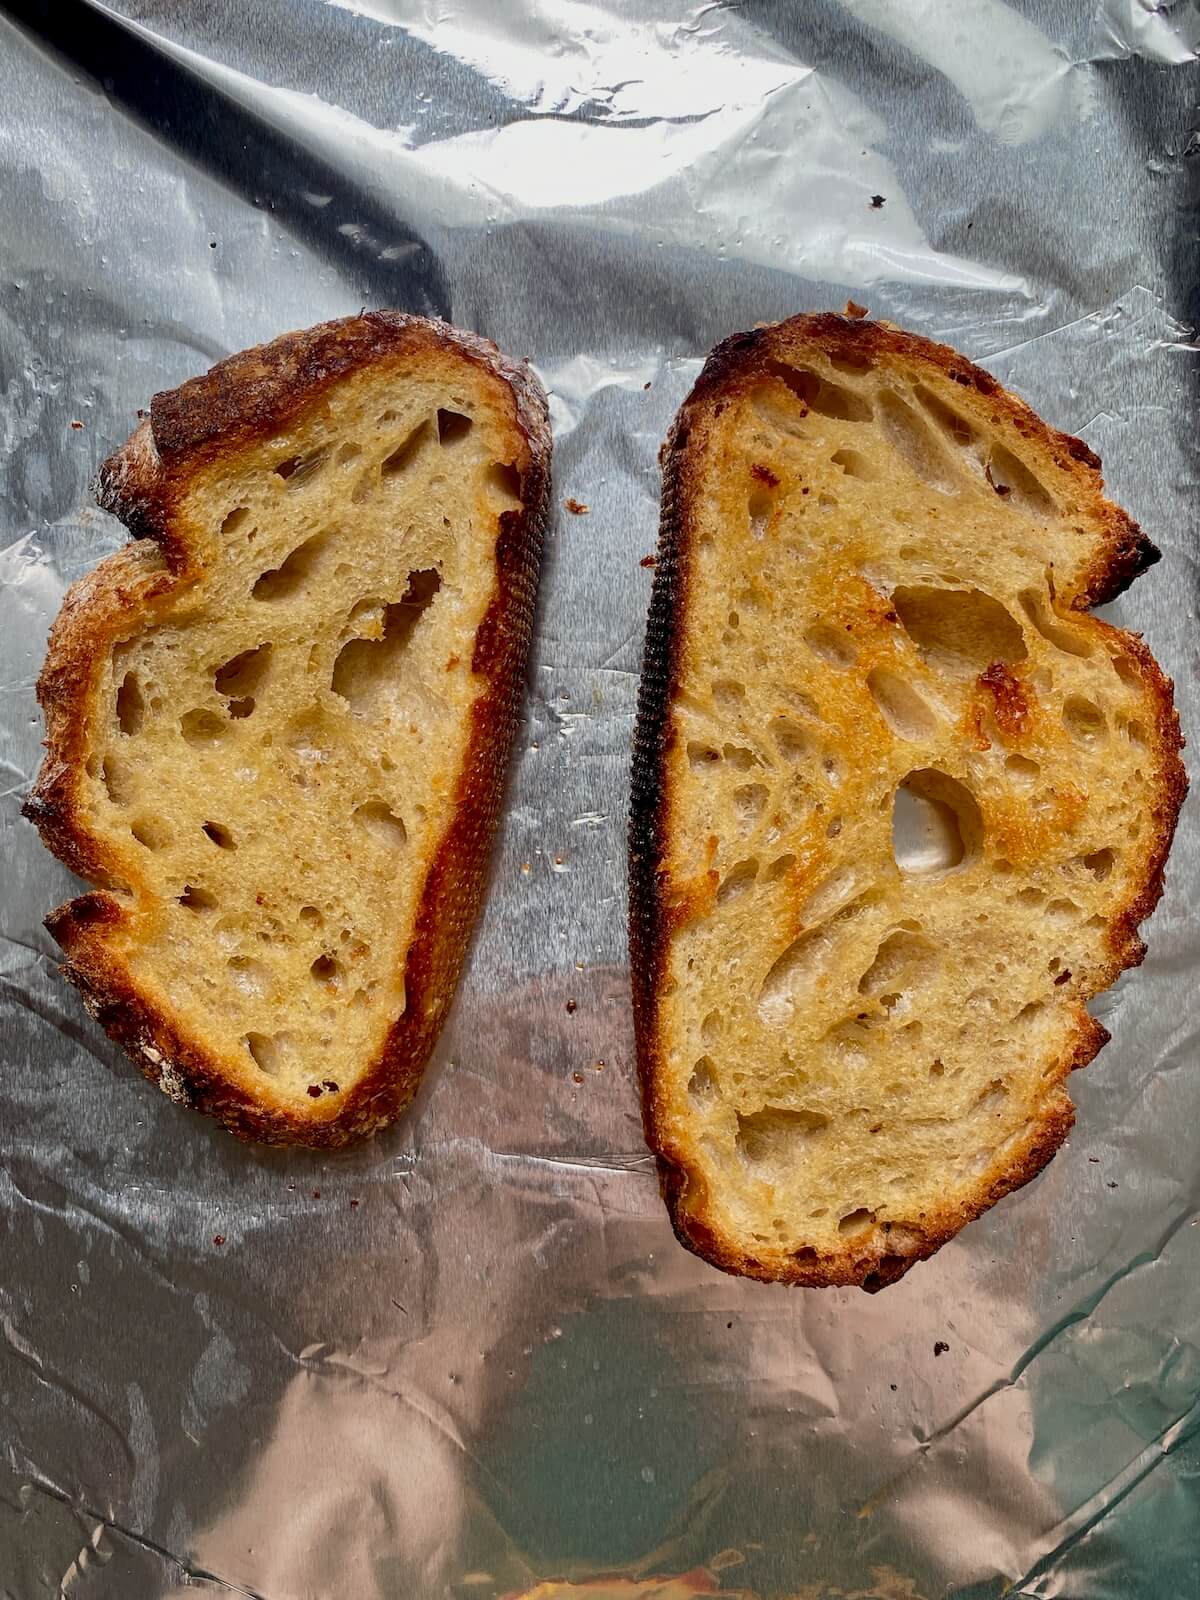
    Step 2: Toast the sourdough bread. Brush both sides of thick-cut sourdough slices with olive oil. Toast in the oven at 400ยฐF for 20 minutes, flipping halfway. Rub with garlic clove.

    Two pieces of toasted sourdough bread on a baking sheet.

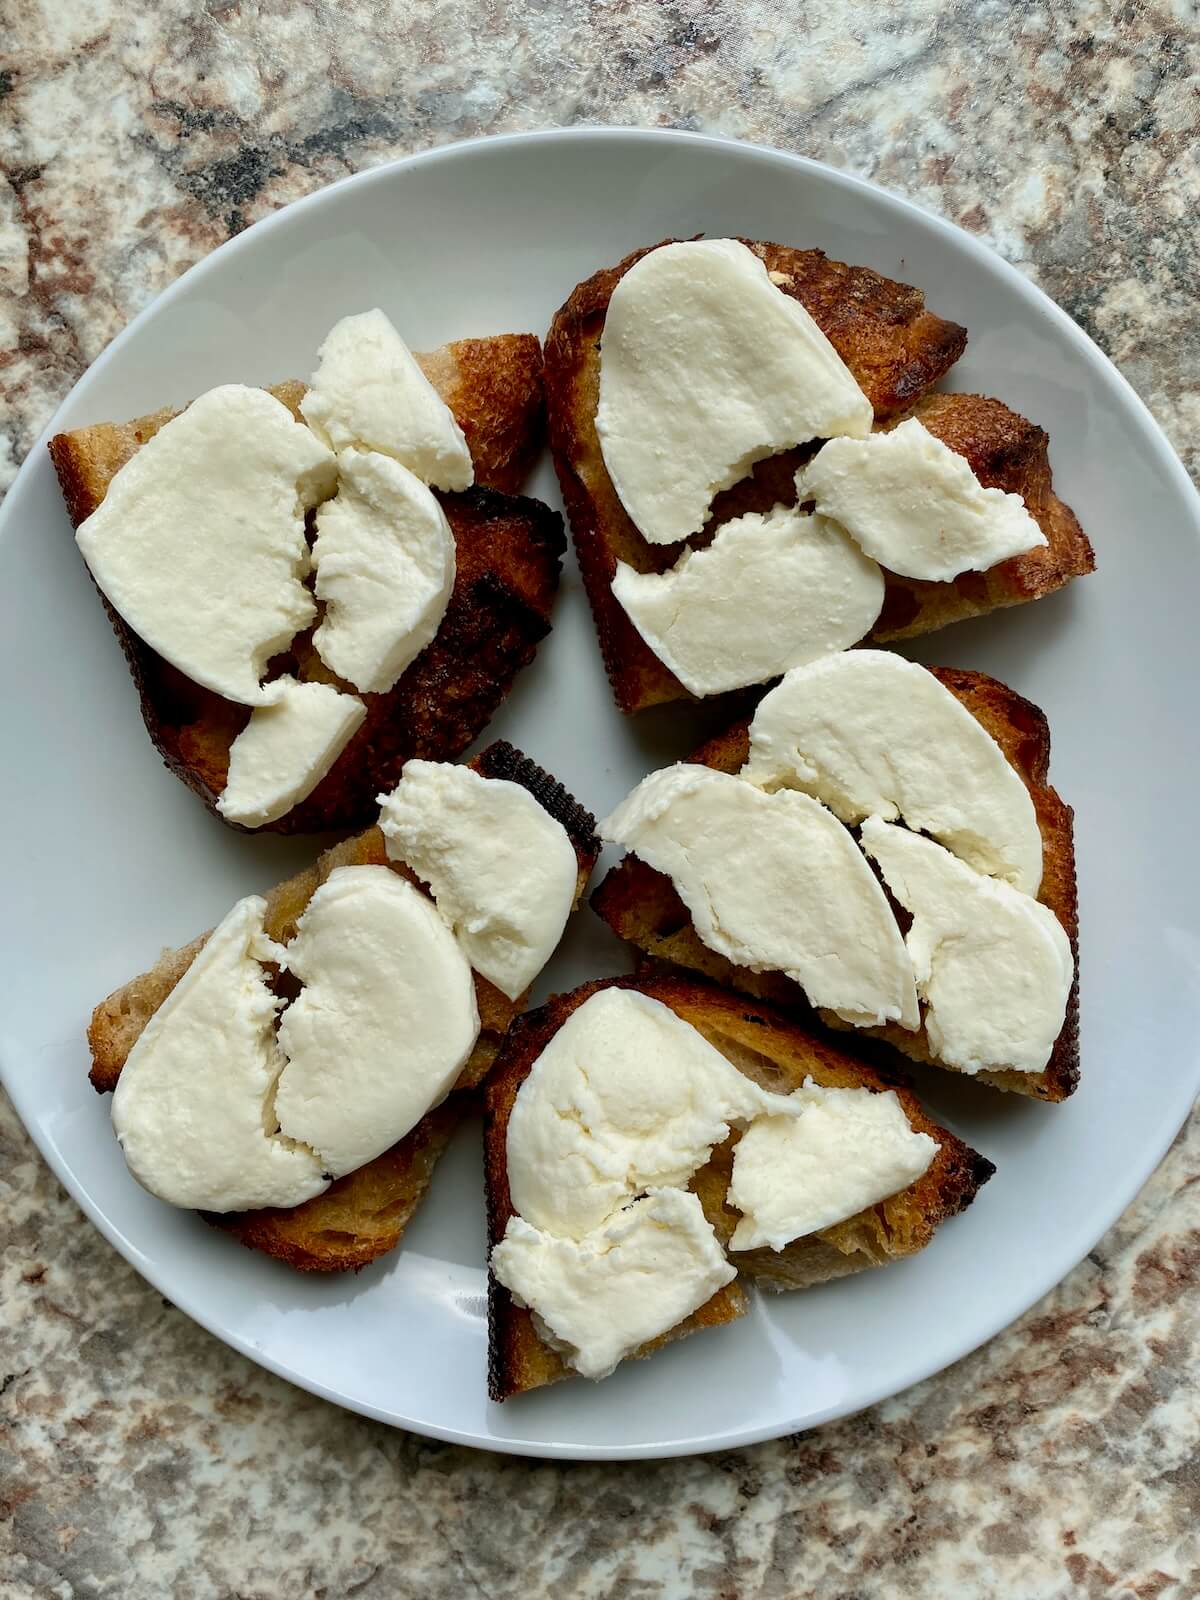
    Step 3: Assemble the bruschetta. Cut each slice of bread in half, layer with mozzarella, and top with the marinated tomatoes (drain any excess liquid first).

    Toasted sourdough bread with fresh mozzarella cheese on top of it on a small white plate.
    The assembled sourdough bruschetta on a small white plate.

    How to Store

    Bruschetta is best enjoyed fresh so the sourdough bread stays crisp.

    You can prep the marinated tomatoes 12โ€“24 hours in advance and store them in the fridge - just give them a quick stir and strain any liquid before serving.

    Use fresh mozzarella within 1โ€“2 days for best quality.

    Serving Suggestions

    This sourdough bread bruschetta makes a perfect appetizer for summer gatherings or holiday dinner parties. Pair it with my spinach caprese salad or serve it alongside a plate of homemade sourdough pasta with meatballs or pesto sauce.

    Pieces of sourdough bruschetta on a small white plate.
    A cover of a recipe ebook with the title "Everyday Sourdough: 27 Sweet & Savory Sourdough Discard Recipes." There is an image of sourdough discard cinnamon rolls on the front. At the bottom, it reads "By Ashley Petrie of Everyday Homemade."
    Grab a copy today!

    Are you tired of watching your sourdough discard go to waste?

    Itโ€™s time to turn excess discard into something delicious with my new ebook - Everyday Sourdough!

    Inside, youโ€™ll find 27 tried-and-true sourdough discard recipes that will transform your leftover starter into mouthwatering creations your family and friends will love.

    No more guilt about wasting your discard - with Everyday Sourdough, you have endless options to quickly make something amazing anytime.

    Let's Connect!

    Be sure to leave a comment below if you have any questions. You can also connect with me on Instagram, Facebook, Pinterest, or via email at [email protected].

    More Sourdough Recipes

    • A sourdough bread bowl filled with tomato soup on a small plate with chunks of sourdough bread on the plate to the right. The soup is garnished with fresh basil.
      Sourdough Bread Bowls (for Soups, Salads & Dips!)
    • Pieces of sourdough discard focaccia on a wooden cutting board.
      Sourdough Discard Focaccia with Herbs (Same Day or Overnight)
    • A sourdough grilled cheese sandwich cut in half diagonally on a small white plate.
      Sourdough Grilled Cheese Sandwich
    • Pieces of sourdough calzone on a sheet of parchment paper next to a small bowl of marinara dipping sauce.
      Sourdough Calzone (Pepperoni & Cheese)

    ๐Ÿ“– Recipe

    A small white plate with five pieces of sourdough bruschetta on it.
    Print Pin SaveSaved!
    5 from 2 votes

    Sourdough Bruschetta

    This Sourdough Bruschetta is made with toasted sourdough bread topped with creamy mozzarella, marinated tomatoes, and fresh basil. It's an easy and delicious appetizer recipe perfect for any occasion!
    Course Appetizer
    Cuisine Italian
    Prep Time 10 minutes minutes
    Cook Time 20 minutes minutes
    Total Time 30 minutes minutes
    Servings 8 pieces
    Calories 235kcal
    Author Ashley Petrie, RDN, LDN

    Equipment

    • Mixing bowls
    • Rimmed baking sheet
    • Aluminum foil

    Ingredients

    Marinated Tomatoes

    • 2 tablespoons extra-virgin olive oil
    • 1 tablespoon balsamic vinegar
    • ยฝ teaspoon kosher salt
    • ยผ teaspoon black pepper
    • 4 medium tomatoes diced small, seeds removed
    • ยผ cup fresh basil chiffonade (thinly sliced)
    • 2 cloves garlic grated or finely minced

    Bruschetta Toasts

    • 4 slices sourdough bread cut 1-inch thick
    • 2 tablespoons extra virgin olive oil
    • 1 clove garlic halved
    • 8 ounces fresh mozzarella cheese sliced

    Instructions

    • Preheat oven to 400ยฐF. Line a rimmed baking sheet with aluminum foil for easy cleanup.
    • In a medium bowl, whisk together the olive oil, balsamic vinegar, salt, and pepper. Add the diced tomatoes, basil, and garlic. Toss to coat and set aside to marinate while you toast the bread.
      2 tablespoons extra-virgin olive oil, 1 tablespoon balsamic vinegar, ยฝ teaspoon kosher salt, ยผ teaspoon black pepper, 4 medium tomatoes, ยผ cup fresh basil, 2 cloves garlic
    • Brush both sides of the sourdough slices with olive oil and place them on the prepared baking sheet in a single layer. Toast in the oven for about 20 minutes, flipping halfway through, until golden and crisp. While the toasts are still warm, gently rub the cut side of the halved garlic clove over the top of each slice for extra flavor.
      4 slices sourdough bread, 2 tablespoons extra virgin olive oil, 1 clove garlic
    • Cut each slice of toast in half. Top with slices of fresh mozzarella, then spoon the marinated tomato mixture over each one. Strain off any excess liquid to avoid soggy toast.
      8 ounces fresh mozzarella cheese
    • Serve immediately and enjoy while the toasts are crisp and the mozzarella is cool and creamy.

    Notes

    • Storage: The assembled bruschetta is best served immediately while the bread is crisp. However, the marinated tomato mixture can be made up to 12โ€“24 hours in advance and stored in an airtight container in the refrigerator. Use any leftover mozzarella within a day or two.

    Nutrition

    Serving: 1piece | Calories: 235kcal | Carbohydrates: 21.5g | Protein: 9g | Fat: 12.5g | Saturated Fat: 4.5g | Polyunsaturated Fat: 1g | Monounsaturated Fat: 5g | Cholesterol: 15mg | Sodium: 328mg | Potassium: 255mg | Fiber: 1.5g | Sugar: 3g | Vitamin C: 13mg | Calcium: 122.5mg | Iron: 1.6mg
    Did you try this recipe?Let me know! Comment below, or take a picture and tag me on Instagram @everydayhomemadebyashley.

    Cast Iron Sourdough Pan Pizza (Deep Dish-Style)

    April 14, 2025

    This Sourdough Pan Pizza is made deep dish-style with sourdough discard pizza dough. Baked in a cast iron skillet, the buttery, cornmeal crust makes it a fun and flavorful dinner the whole family will love.

    Sourdough pan pizza with pepperoni cut into four pieces in a cast iron skillet.

    Deep dish pizza, pan pizza, or cast iron skillet pizza - I honestly wasnโ€™t sure what to call this recipe at first.

    I originally wanted to make a sourdough deep dish pizza. But after some research, I realized deep dish has a unique crust often made with butter and cornmeal.

    Since I didnโ€™t want to add another pizza dough recipe to the blog (I already have sourdough discard and whole wheat versions), I decided to focus on bringing that classic deep dish flavor and texture in a new way.

    So, I put on my sourdough blogger thinking cap and created this delicious deep dish-style sourdough pan pizza.

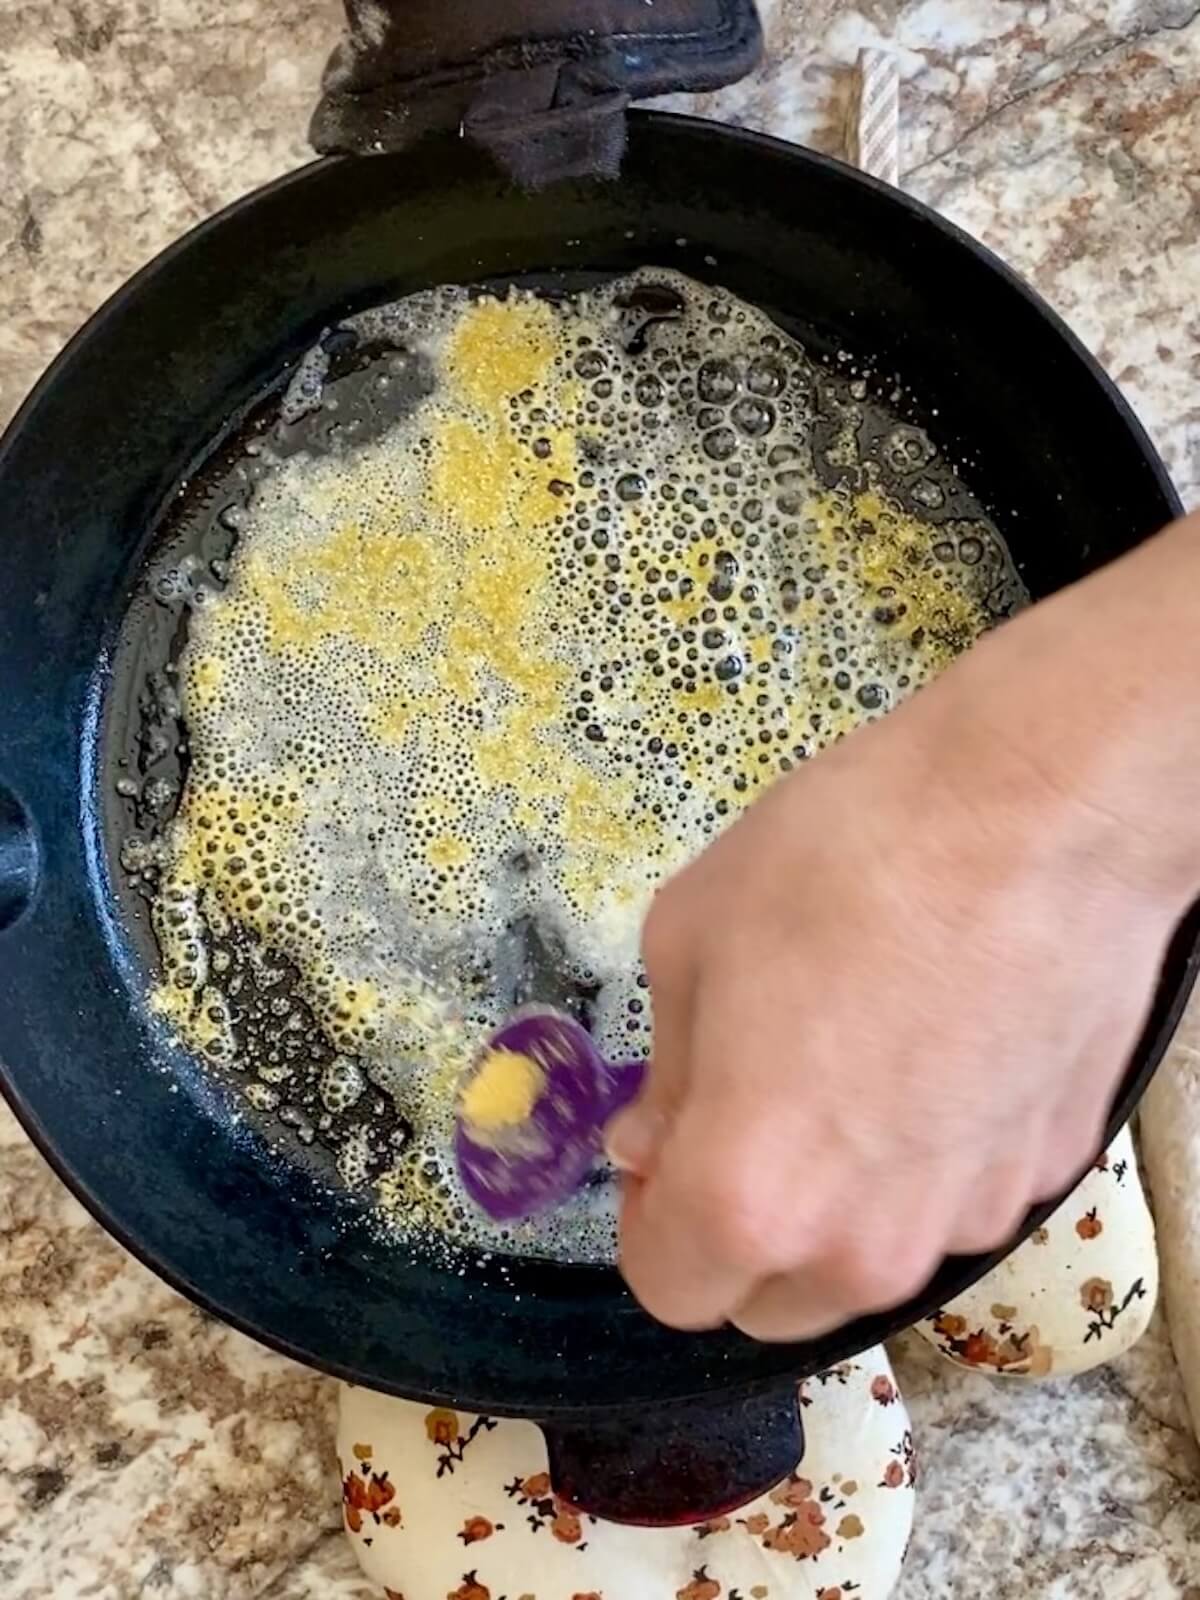
    To get that classic buttery, cornmeal crust, I heated a cast iron skillet, coated it with butter, and sprinkled in cornmeal before adding the dough. Then, I layered it like a true deep dish - cheese first, then toppings, then sauce.

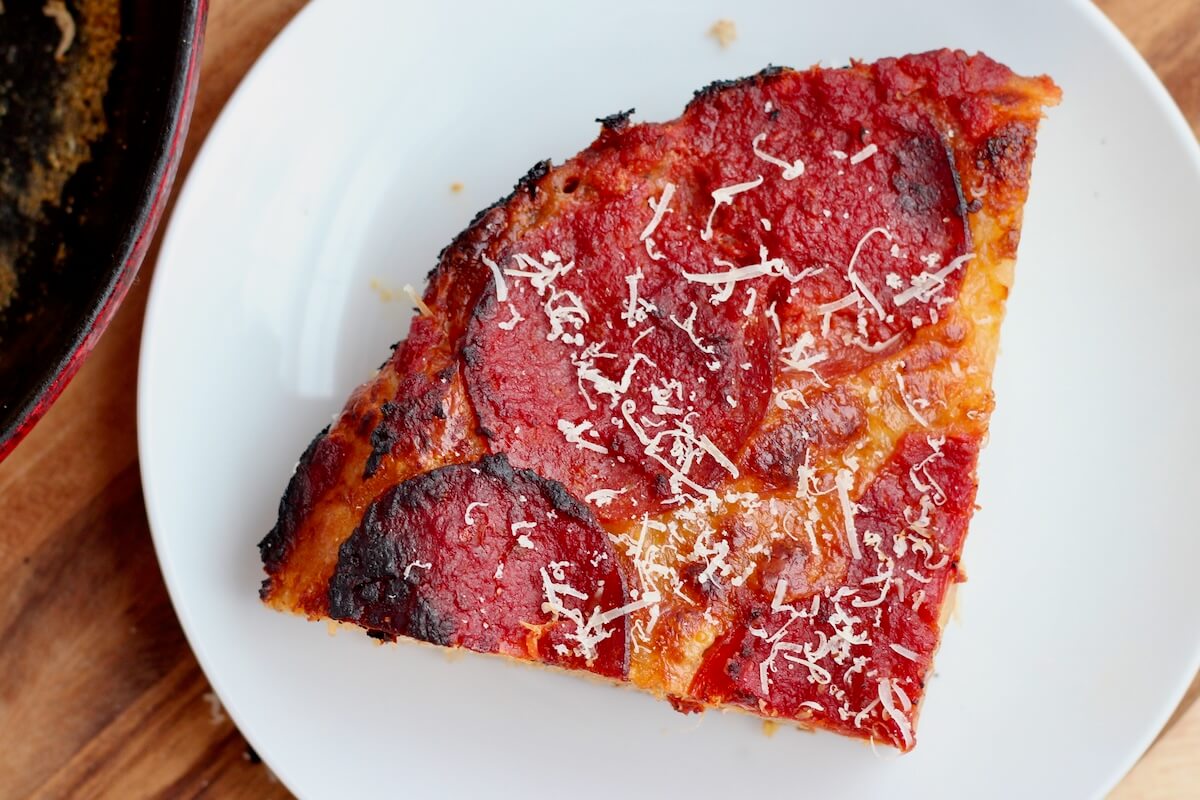
    The result? A crispy, golden crust with a rich, buttery flavor and a satisfying crunch from the cornmeal. My fiancรฉ couldnโ€™t stop raving about how good it was, and I have to admit, I was pretty impressed too.

    Trust me, this sourdough pizza recipe makes for a fun and satisfying dinner the whole family will love!

    Disclaimer: Some links throughout this post are affiliate links. As an Amazon Associate, I earn from qualifying purchases. You can learn more by visiting my Affiliate Disclosure Page.

    Ingredients & Substitutions

    Here are some notes on key ingredients. For a full list of ingredients, check out the recipe card below.

    • Sourdough Pizza Dough- Both my sourdough discard pizza dough and sourdough whole wheat pizza dough work wonderfully in this recipe.
    • Cornmeal- Adds a nice crunch to the bottom of the pizza, giving it that signature deep-dish texture. You can also use semolina flour or skip it altogether.
    • Butter- Deep dish pizza often includes butter in the dough for a unique flavor and texture. To mimic that, I use lots of butter to coat the cast iron skillet.
    • Marinara Sauce- In deep dish pizzas, the sauce goes on top of the cheese and toppings. I use my homemade marinara sauce for a classic flavor, but feel free to use your favorite pizza sauce.
    • Mozzarella Cheese- Use low-moisture mozzarella to prevent excess liquid from making your pizza soggy. Shredding it yourself also improves both texture and flavor compared to pre-shredded cheese.
    • Parmesan- Adds a nutty flavor. Use freshly grated parmesan cheese for the best flavor.
    • Pepperoni- About ยฝ cup of pepperoni should be enough for a single layer, or just enough to cover the cheese. Feel free to swap with sausage, mushrooms, grilled chicken, or your favorite pizza toppings.
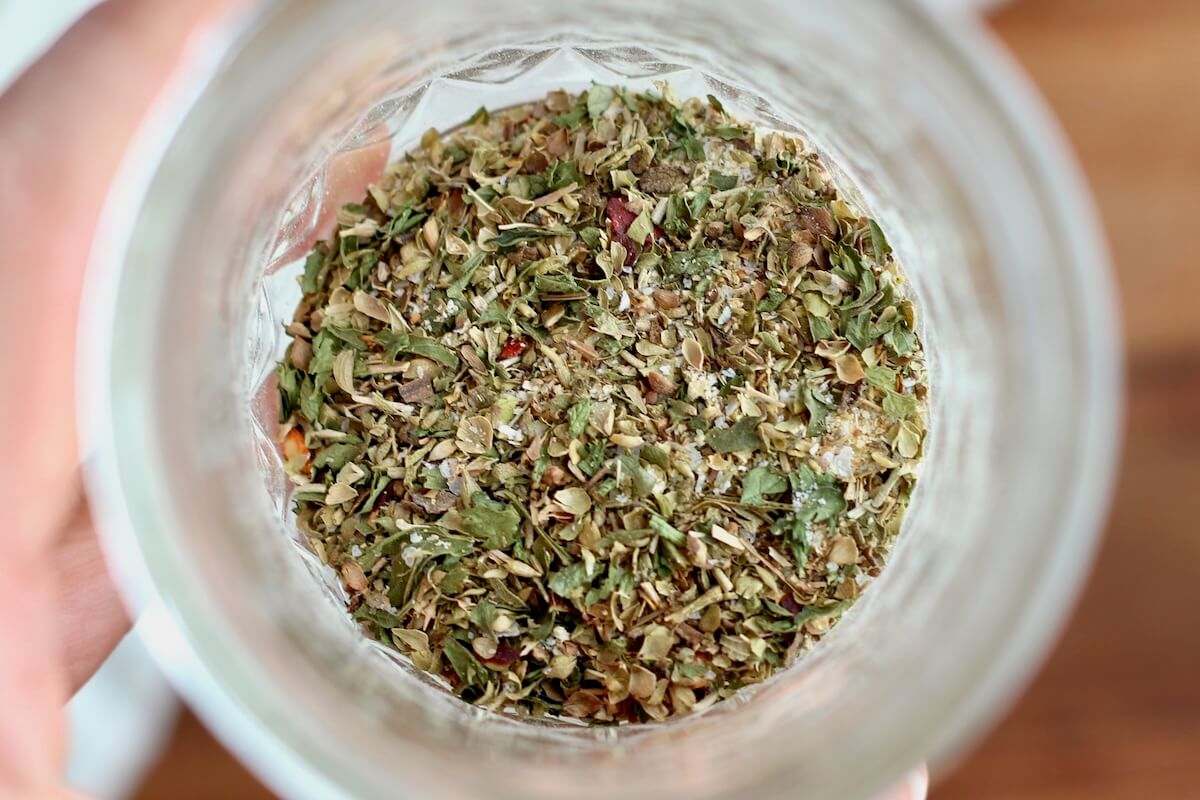
    • Seasonings- I love using my homemade pizza seasoning, but you can use any pizza seasoning blend you prefer. Alternatively, a simple combination of dried oregano and garlic powder will give you a classic pizza flavor.
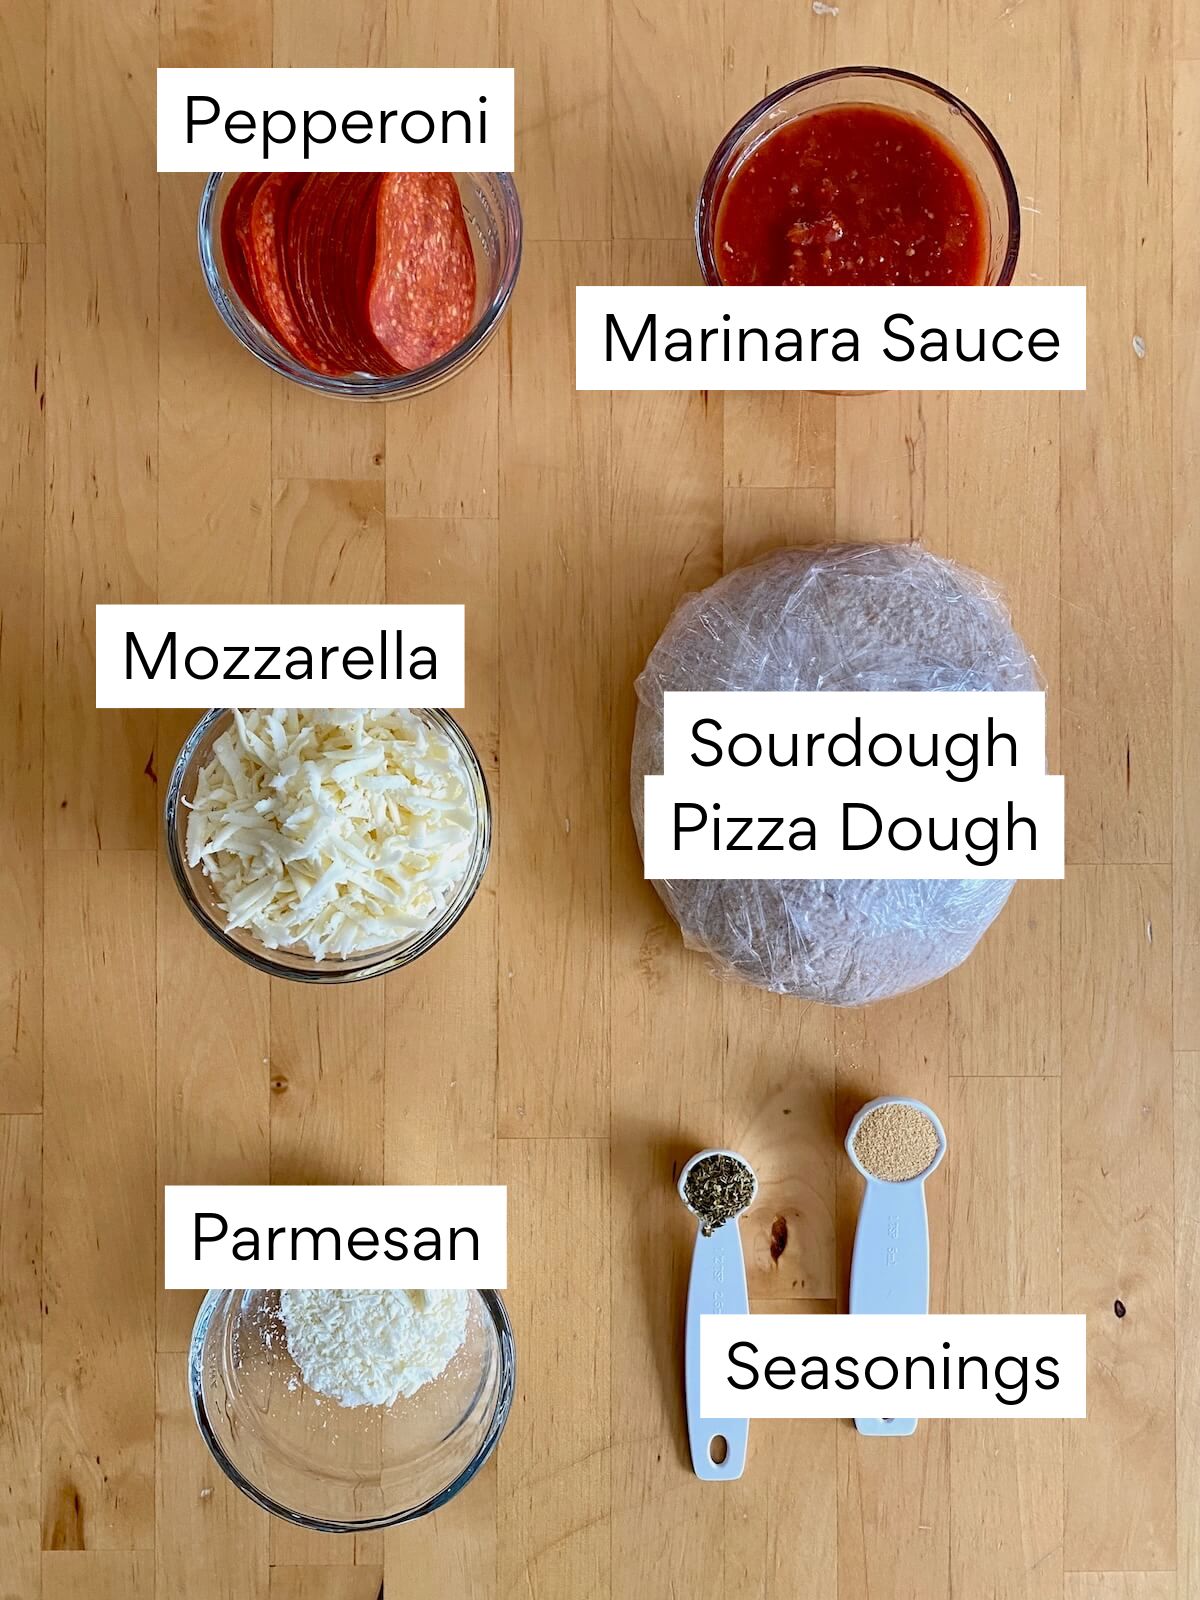
    The ingredients to make sourdough pan pizza. Each ingredient is labeled with text. They include sourdough pizza dough, cornmeal, mozzarella cheese, pepperoni, marinara sauce, parmesan, and butter.

    Tips for Success

    • Preheat the skillet. Donโ€™t skip this step! Preheating the skillet helps achieve a perfectly crispy crust on the bottom of the pizza.
    • Use the middle rack. Baking on the middle rack ensures a crispy bottom and evenly cooked top, while allowing the dough to cook through fully.
    • Don't overload with toppings. Too many toppings can weigh down the dough and prevent it from cooking properly.
    • Cover with foil if needed. If the top is browning too quickly before the center cooks through, loosely cover the pizza with foil to prevent burning.

    How to Make Sourdough Pan Pizza

    Here is how to make deep dish-style sourdough pan pizza in a cast iron skillet.

    Step 1: Preheat oven. Preheat your oven to 450โ„‰ with a 10-inch cast iron skillet inside on the middle rack.

    Step 2: Stretch the dough. On a lightly floured surface, stretch the pizza dough into a 12-inch circle (slightly larger than your skillet).

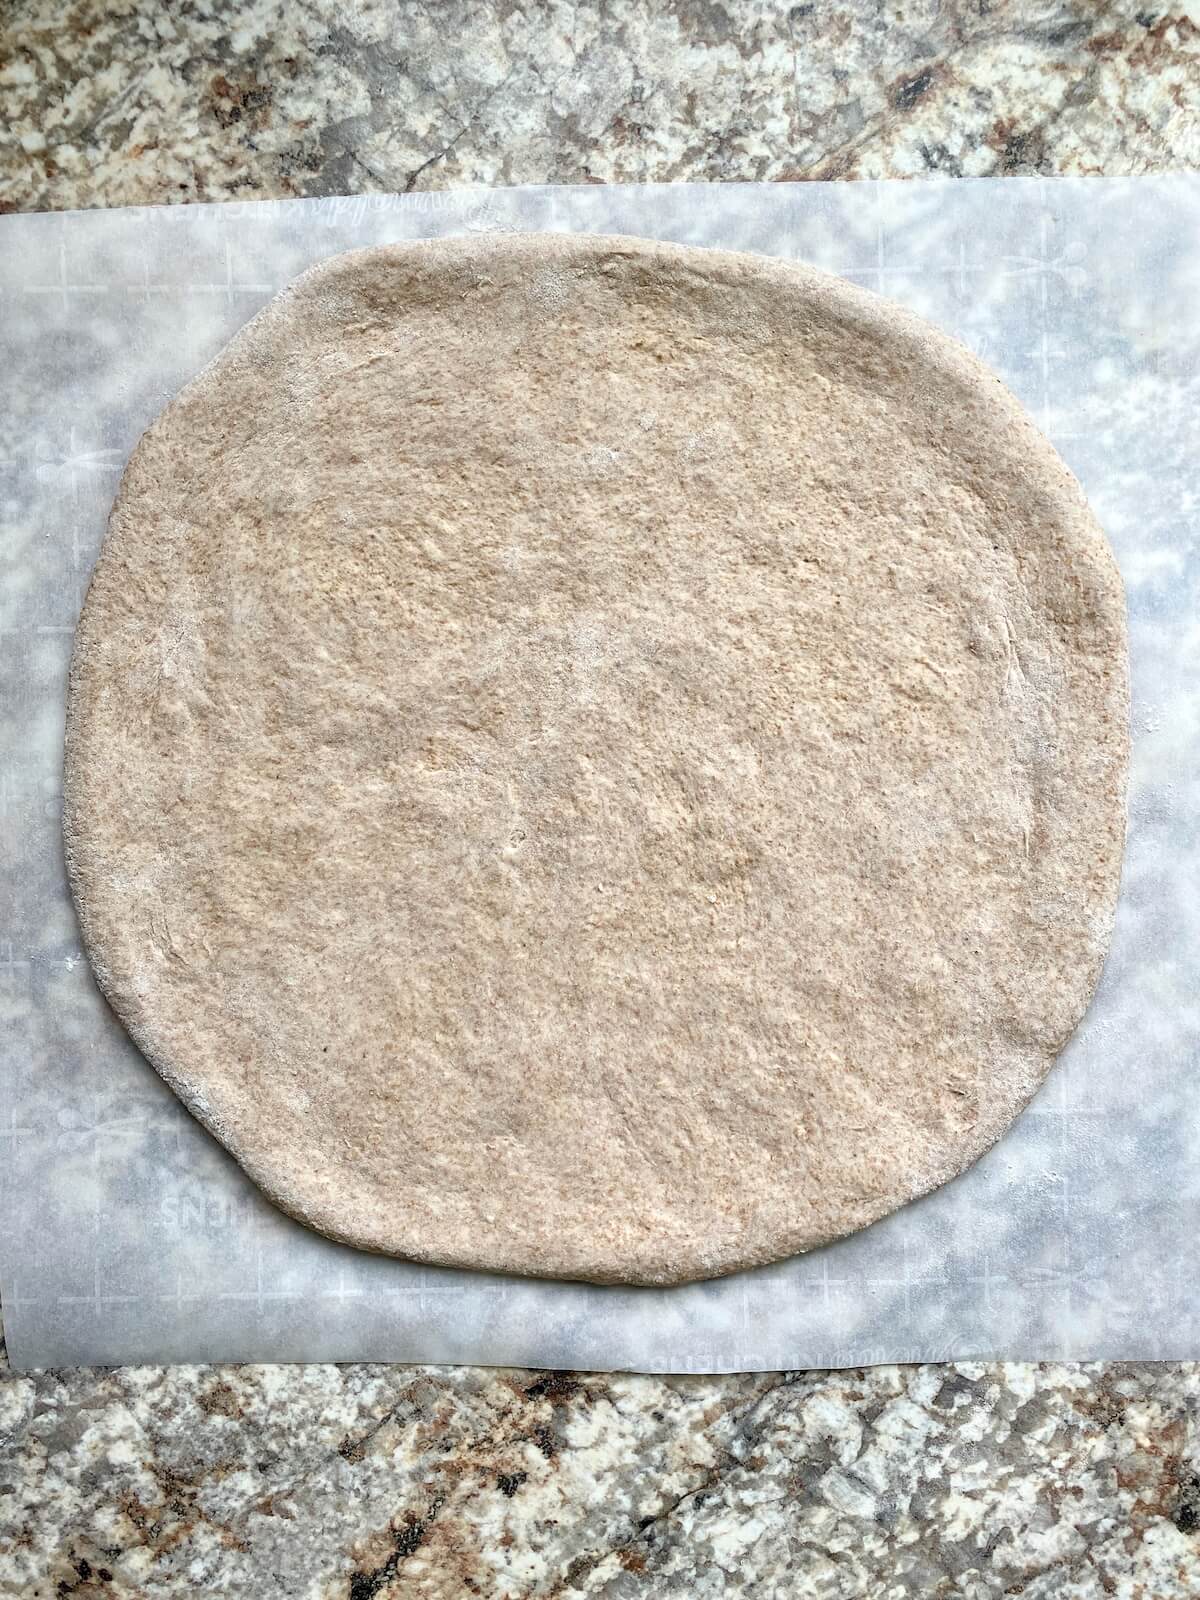
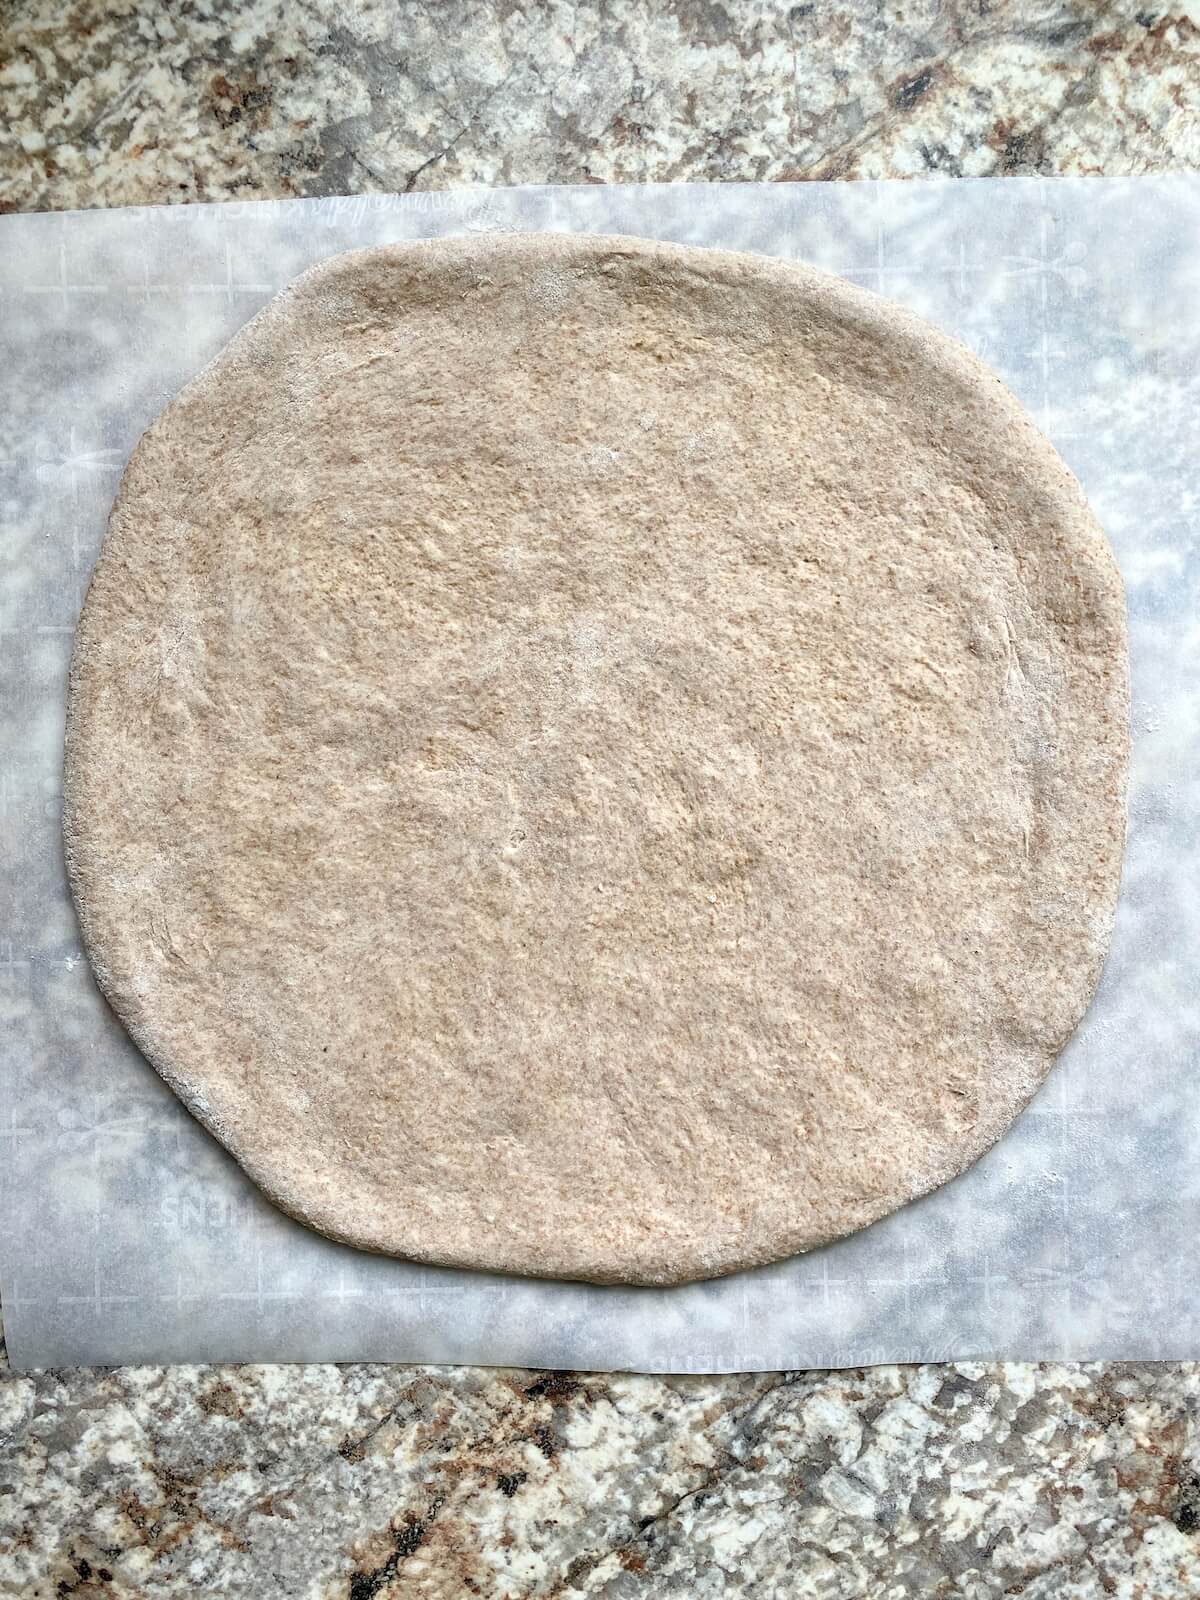
    A sourdough discard pizza dough stretched out into a circle on a countertop.

    Step 3: Butter the skillet. Carefully remove the hot skillet from the oven and add the butter, swirling it to coat the bottom. Sprinkle cornmeal evenly over the butter.

    A hot cast iron skillet coated with melted butter and cornmeal.

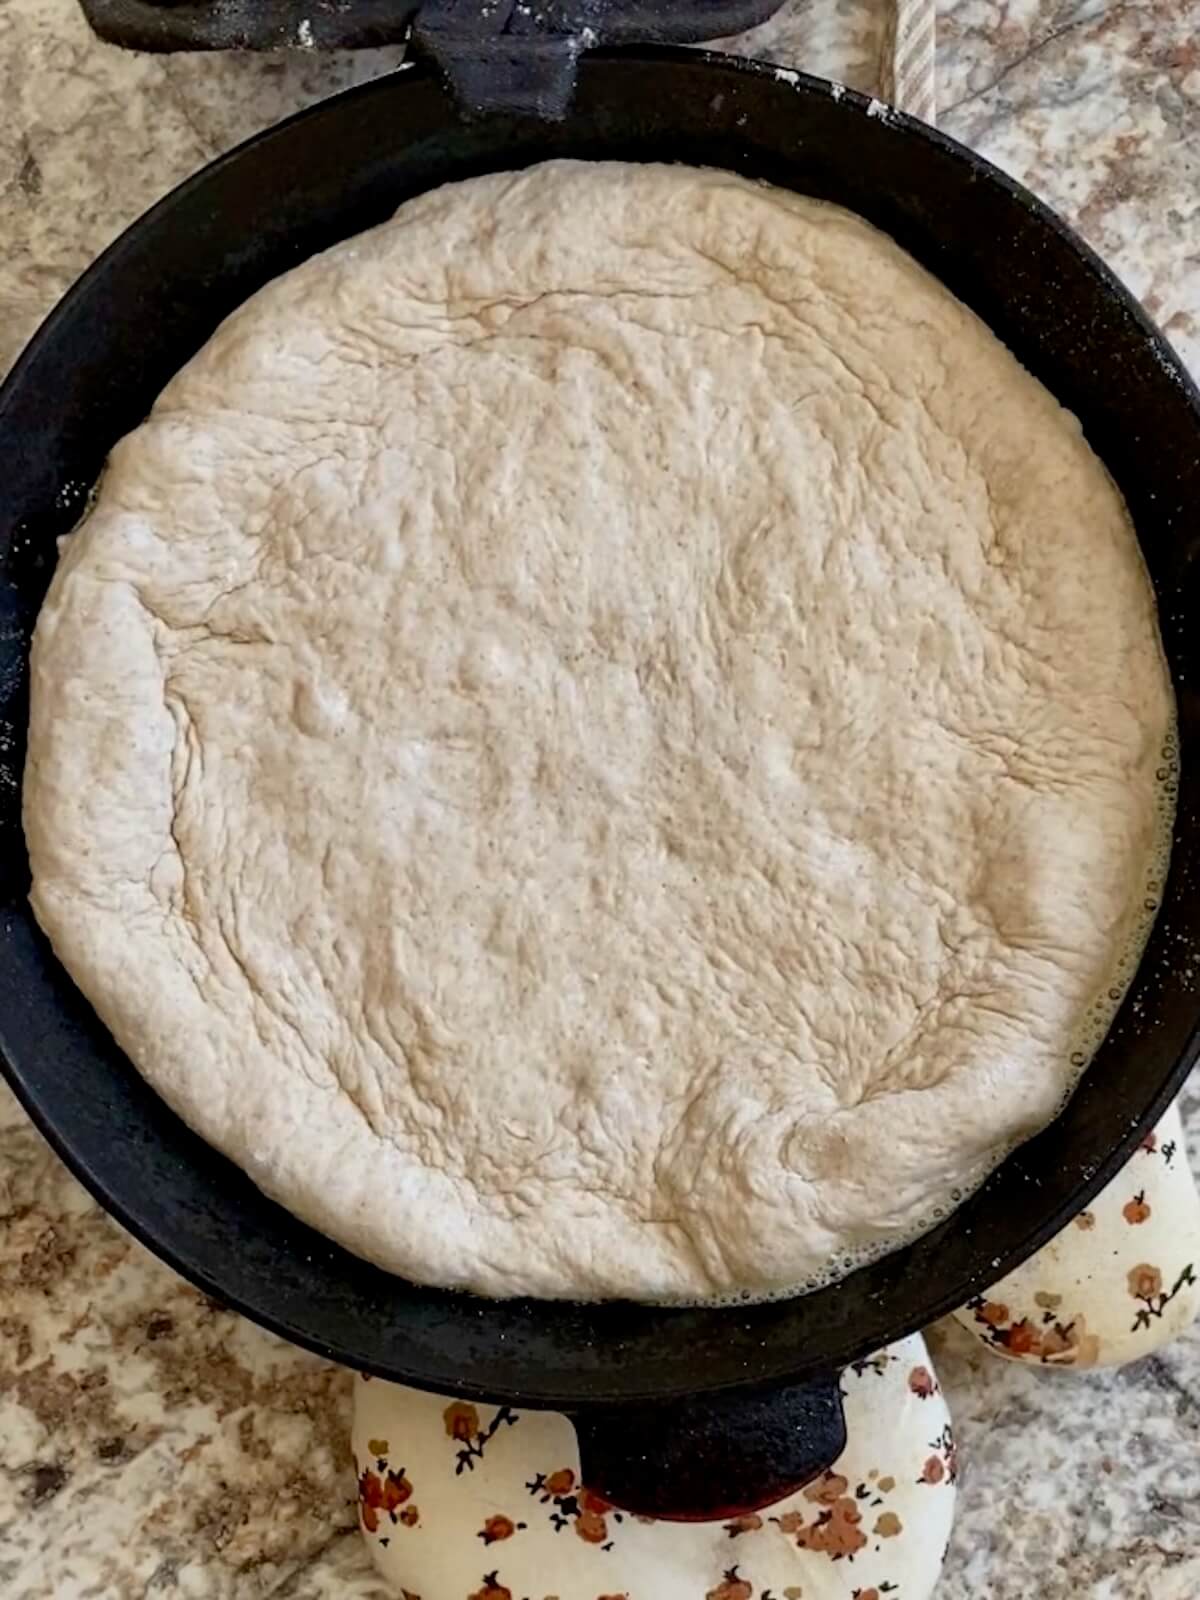
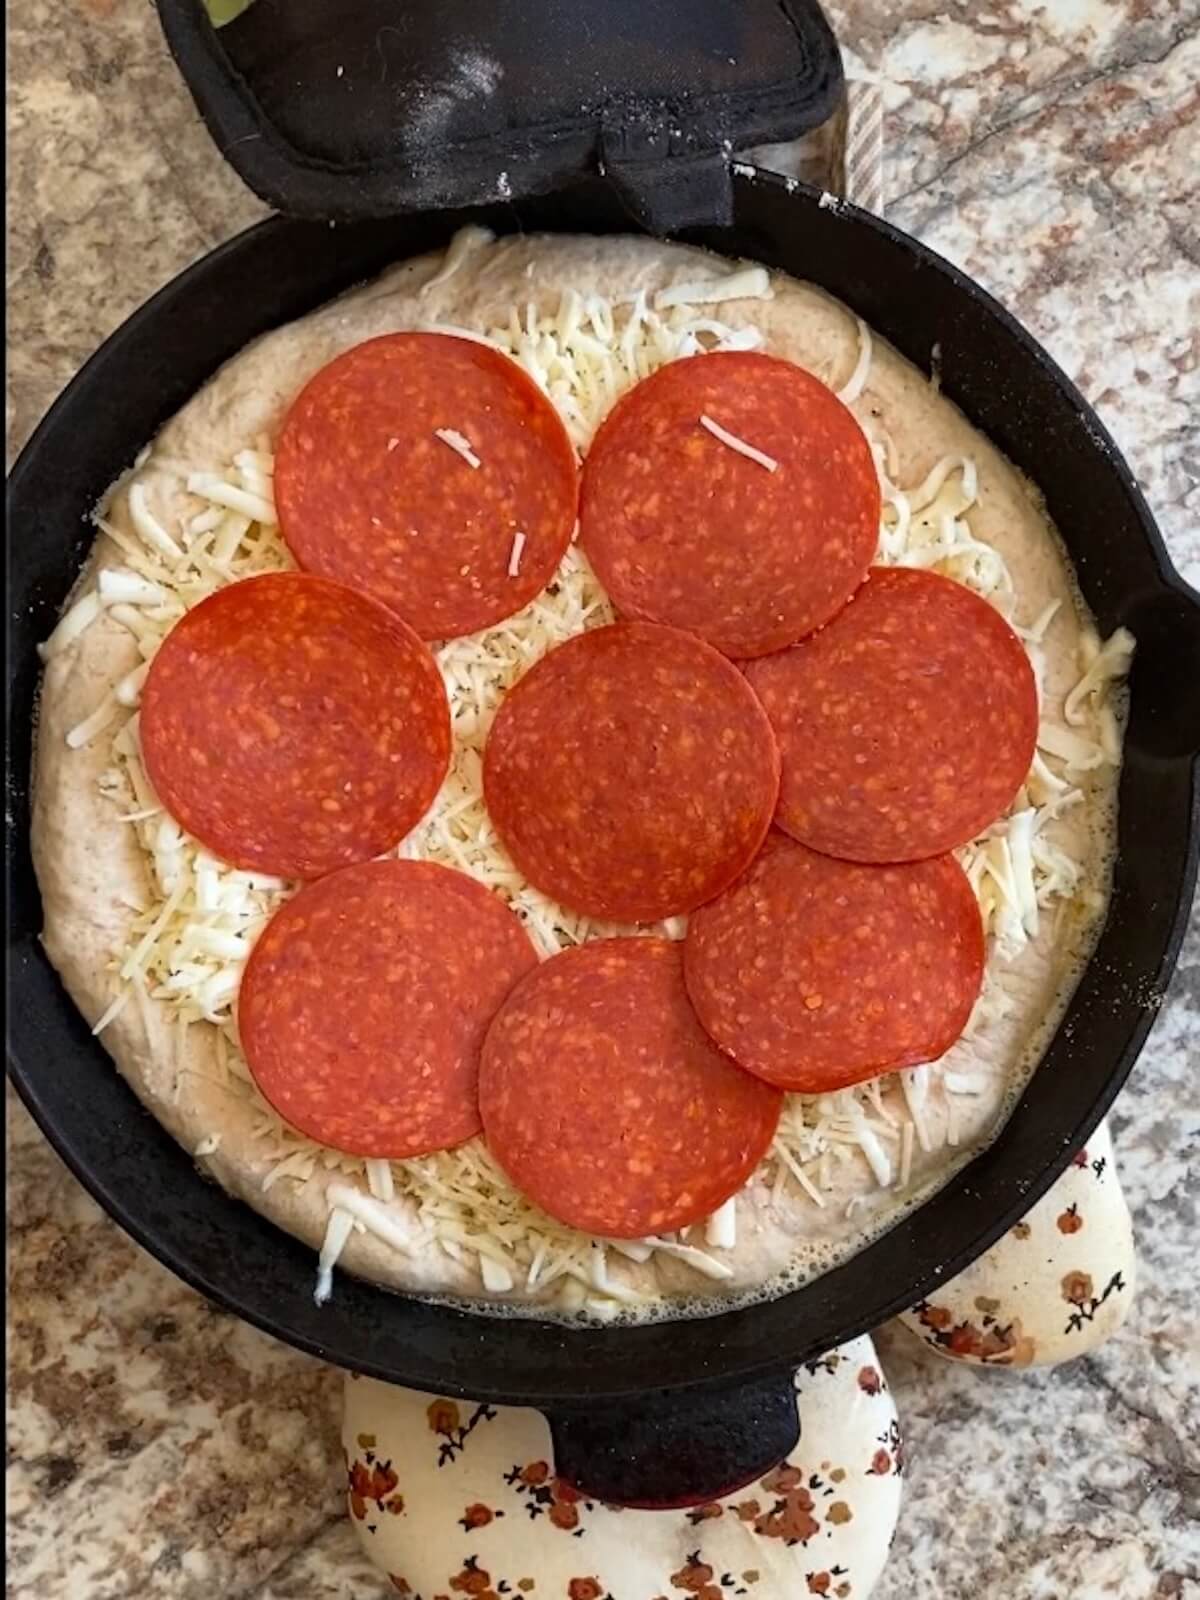
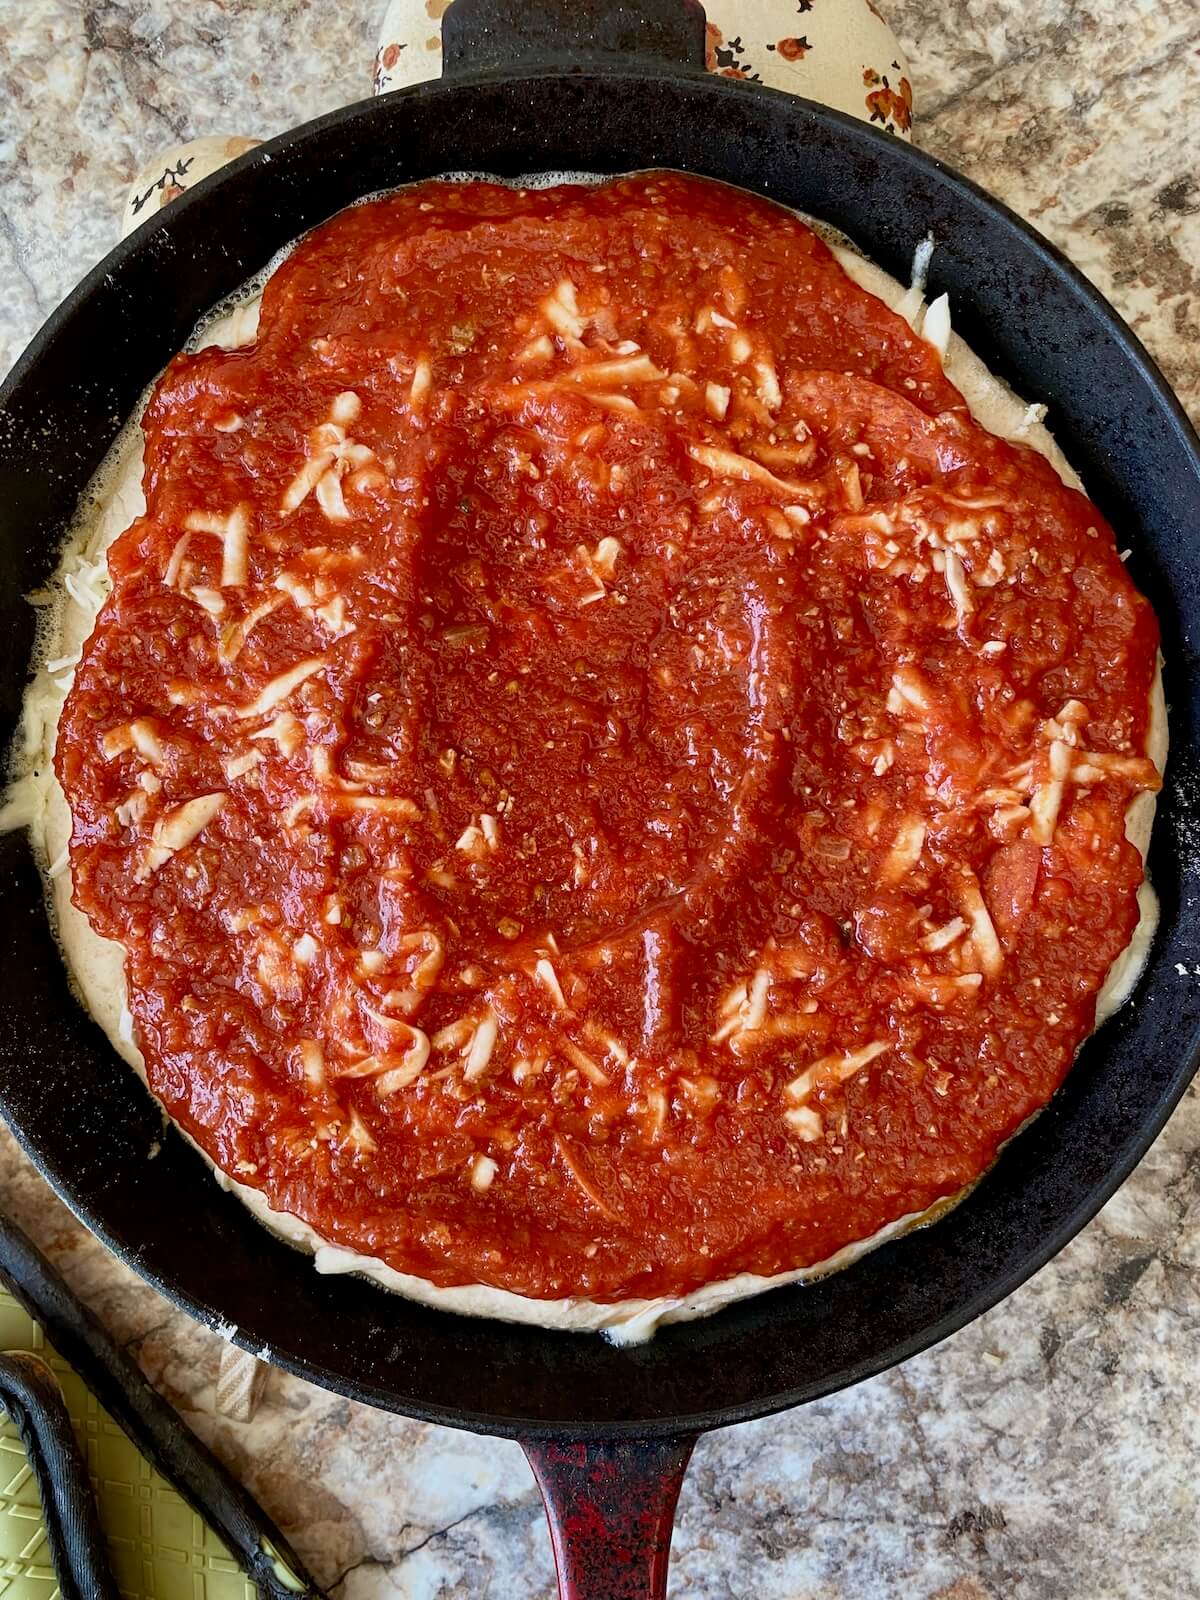
    Step 4: Assemble the pizza. Transfer the dough to the hot skillet, pressing it to the edges. Layer the pizza starting with mozzarella, followed by parmesan and pizza seasoning. Add pepperoni or your chosen toppings, and spread marinara sauce over everything.

    Sourdough pizza dough pressed into a hot, buttered cast iron skillet.
    Cheese and pepperoni layered on top of the sourdough pizza dough in a hot cast iron skillet.
    The pan pizza fully assembled in a hot cast iron skillet before baking.

    Step 5: Bake and serve. Bake for 45 minutes, or until the top is golden and bubbly, and the center is cooked through. If the top browns too quickly, loosely cover with aluminum foil. Let the pizza cool for 10 minutes before slicing and serving.

    The baked sourdough pan pizza with pepperoni in a cast iron skillet.

    Other Topping Ideas

    Switch up the marinara sauce with pesto, alfredo, buffalo, BBQ, or creamy pumpkin sauce. For toppings, try grilled chicken, homemade meatballs, buffalo chicken dip, or BBQ pulled chicken instead of pepperoni.

    Just be sure not to overload the pizza with toppings - too much can make it hard for the center to cook through.

    Serving Suggestions

    Pair this cast iron sourdough pizza with a light salad like spinach Caprese, Caesar, or arugula. Alternatively, enjoy it with roasted balsamic Brussels sprouts, sautรฉed asparagus, or green beans.

    For something heartier, try my sourdough garlic bread (my fave!) or garlic knots.

    How to Store

    Store leftover pizza in an airtight container in the refrigerator for up to 5 days.

    For longer storage, wrap tightly and freeze in a freezer-safe container for up to 3 months. Thaw overnight in the fridge. Reheat in the oven or microwave before serving.

    A piece of pepperoni sourdough pan pizza sprinkled with parmesan cheese on a small white plate.
    A cover of a recipe ebook with the title "Everyday Sourdough: 27 Sweet & Savory Sourdough Discard Recipes." There is an image of sourdough discard cinnamon rolls on the front. At the bottom, it reads "By Ashley Petrie of Everyday Homemade."
    Grab a copy today!

    Are you tired of watching your sourdough discard go to waste?

    Itโ€™s time to turn excess discard into something delicious with my new ebook - Everyday Sourdough!

    Inside, youโ€™ll find 27 tried-and-true sourdough discard recipes that will transform your leftover starter into mouthwatering creations your family and friends will love.

    No more guilt about wasting your discard - with Everyday Sourdough, you have endless options to quickly make something amazing anytime.

    Let's Connect!

    Be sure to leave a comment below if you have any questions. You can also connect with me on Instagram, Facebook, Pinterest, or via email at [email protected].

    More Sourdough Pizza Recipes

    • Four pieces of sourdough focaccia pizza on a piece of parchment paper.
      Sourdough Focaccia Pizza
    • Grilled sourdough pizza topped with tomato sauce, mozzarella cheese, and basil on a gas grill.
      Grilled Sourdough Pizza (Gas Grill)
    • Sliced sourdough pepperoni pizza bread on a wooden cutting board.
      Pepperoni Pizza Sourdough Bread with Mozzarella & Parmesan
    • A sourdough whole wheat pizza dough ball on a floured pizza peel.
      Sourdough Whole Wheat Pizza Dough

    ๐Ÿ“– Recipe

    Sourdough pan pizza with pepperoni cut into four pieces in a cast iron skillet.
    Print Pin SaveSaved!

    Sourdough Pan Pizza

    This Sourdough Pan Pizza is made deep dish-style with sourdough discard pizza dough. Baked in a cast iron skillet, the buttery, cornmeal crust makes it a fun and flavorful dinner the whole family will love.
    Course Main Course, Pizza
    Cuisine American
    Prep Time 30 minutes minutes
    Cook Time 45 minutes minutes
    Total Time 1 hour hour 15 minutes minutes
    Servings 4 slices
    Calories 585kcal
    Author Ashley Petrie, RDN, LDN

    Equipment

    • 10-inch cast iron skillet

    Ingredients

    • 1 1-1 ยฝ pound sourdough pizza dough (or whole wheat sourdough pizza dough)
    • 1 tablespoon unsalted butter
    • ยฝ tablespoon cornmeal
    • 2 cups low-moisture mozzarella cheese shredded
    • ยผ cup parmesan cheese grated
    • ยฝ teaspoon pizza seasoning (or ยผ teaspoon each dried oregano and garlic powder)
    • ยฝ cup sliced pepperoni (or toppings of choice)
    • 1 cup marinara sauce

    Instructions

    • Preheat your oven to 450โ„‰ with a 10-inch cast iron skillet inside on the middle rack.
    • On a lightly floured surface, stretch the pizza dough into a 12-inch circle (slightly larger than your skillet).
      1 1-1 ยฝ pound sourdough pizza dough
    • Carefully remove the hot skillet from the oven and add the butter, swirling it to coat the bottom. Sprinkle cornmeal evenly over the butter.
      1 tablespoon unsalted butter, ยฝ tablespoon cornmeal
    • Transfer the dough to the hot skillet, pressing it to the edges. Layer the pizza starting with mozzarella, followed by parmesan and pizza seasoning. Add pepperoni or your chosen toppings, and spread marinara sauce over everything.
      2 cups low-moisture mozzarella cheese, ยผ cup parmesan cheese, ยฝ teaspoon pizza seasoning, ยฝ cup sliced pepperoni, 1 cup marinara sauce
    • Bake for 45 minutes, or until the top is golden and bubbly, and the center is cooked through. If the top browns too quickly, loosely cover with aluminum foil.
    • Let the pizza cool for 10 minutes before slicing and serving.

    Notes

    • Quick Tip: Don't overload with toppings. Too many toppings can weigh down the dough and prevent it from cooking properly.
    • Storage: Store leftovers in an airtight container in the refrigerator for up to 5 days or freeze for up to 3 months. Thaw in the refrigerator and reheat in the oven or microwave.

    Nutrition

    Serving: 1slice | Calories: 585kcal | Carbohydrates: 70g | Protein: 28g | Fat: 24g | Saturated Fat: 10.5g | Polyunsaturated Fat: 2.5g | Monounsaturated Fat: 6.5g | Trans Fat: 0.5g | Cholesterol: 51mg | Sodium: 1561mg | Potassium: 566mg | Fiber: 2g | Sugar: 3g | Vitamin C: 4.5mg | Calcium: 407mg | Iron: 4.2mg
    Did you try this recipe?Let me know! Comment below, or take a picture and tag me on Instagram @everydayhomemadebyashley.

    Dill Pickle Sourdough Bread

    April 7, 2025

    This Dill Pickle Sourdough Bread is packed with savory inclusions like crunchy chopped pickles, garlic, and dill. Perfect for beginners, itโ€™s a unique twist on classic sourdough that makes a delicious bread for sandwiches.

    A loaf of dill pickle sourdough bread cut into slices on a wooden cutting board.

    Pickles โ€“ you either love them or hate them. Iโ€™m definitely in the "love them" camp. And since youโ€™re here, Iโ€™m guessing you are, too!

    I love pickles so much that every summer, I grow enough cucumbers, dill, and garlic in my garden to make a yearโ€™s worth of homemade garlic dill pickles.

    So, when I was brainstorming new recipes for the blog this year, it made perfect sense to combine my love for sourdough and pickles to create this dill pickle sourdough bread.

    Packed with crunchy pickles, garlic, and dill, it's perfect for sandwiches - from turkey and cheese at the beach to BBQ chicken at a backyard summer picnic.

    Itโ€™s also beginner-friendly. The lower hydration makes the dough easy to handle. Plus, the small amount of pickles and dried herbs don't overwhelm the dough, making it easier to shape.

    If you're looking for a new savory sourdough inclusion recipe, I hope you'll give this one a try! Itโ€™s quickly become one of my all-time favorites.

    Disclaimer: Some links throughout this post are affiliate links. As an Amazon Associate, I earn from qualifying purchases. You can learn more by visiting my Affiliate Disclosure Page.

    Ingredients & Substitutions

    Here are some notes on key ingredients. For a full list of ingredients, check out the recipe card below.

    • Active Sourdough Starter- Make sure your starter is bubbly and active. If youโ€™re using discard, opt for fresh discard thatโ€™s less than a week old for a quicker rise.
    • Dill Pickles- During the summer, I love using homemade pickles made with cucumbers from my garden. If it's not pickle season, I recommend choosing a high-quality brand without additives, like Grilloโ€™s Pickles (my favorite, and they're from Massachusetts, like me!).
    • Bread Flour- Gives the bread its chewy texture and helps with the rise. If you swap for all-purpose flour, the bread may not rise as tall or be as chewy. Whole wheat flour will create a denser crumb and may require a bit more water to keep the dough soft.
    • Water- This dough is about 65% hydration, so it's fairly easy to handle. If you want a more open crumb, you can increase the hydration slightly. You can also try using a small amount of pickle brine (1-2 teaspoons) in place of some of the water. Just be careful as too much acidity can negatively affect fermentation.
    • Seasonings- A simple combination of dried dill and garlic powder enhances the pickle flavor of the bread. You can substitute with fresh dill and minced garlic if desired.
    • Kosher Salt- Enhances the flavor of the bread. I use Diamond Crystal Kosher Salt, (about 2.8 grams per teaspoon). If youโ€™re using table salt or Mortonโ€™s kosher salt, measure by weight or use about half as much.
    The ingredients to make pickle sourdough bread. Each ingredient is labeled with text. They include water, sourdough starter, bread flour, kosher salt, dill, garlic powder, and dill pickles.

    Tips for Success

    • Use active starter. Make sure your sourdough starter is bubbly and active for the fastest rise. If using discard, choose fresh discard (a few days old max) since older discard can slow fermentation.
    • Weigh ingredients. A kitchen scale ensures consistent results every time.
    • Swapping pickle brine. You can replace 1-2 teaspoons of water with pickle brine, but keep in mind that its acidity may affect fermentation. I found that sticking with water works best for this recipe because some brine already gets into the dough from the chopped pickles.
    • Fold pickles in evenly. Some pickles may fall out as you fold them in - just press them back and spread them out as evenly as you can.
    • Build tension when shaping. Shape the dough into a tight ball or loaf to help it rise tall in the oven.
    • Cool completely. Let the bread cool for at least 2 hours before slicing to avoid a gummy texture.

    How to Make Dill Pickle Sourdough Bread

    Here is how to make sourdough bread with pickles.

    1. Feed Sourdough Starter

    • Feed your sourdough starter 6-12 hours before mixing the dough. It should be bubbly, active, and doubled in size.
    • The rise time depends on your kitchen temperature, ranging from 6 hours in a warm environment (75โ„‰) to 12 hours in a cooler space (65-68โ„‰).
    An active sourdough starter in a glass mason jar.

    2. Mix the Dough

    • In a large mixing bowl, whisk together the warm water and sourdough starter until dissolved.
    • Add the flour, salt, dill, and garlic powder, and stir until thereโ€™s no dry flour remaining.
    • Cover the bowl and let the dough rest for 20 minutes.
    Water and active sourdough starter mixed together in a glass mixing bowl with a wire whisk sticking out to the left.
    Sourdough pickle bread dough in a glass mixing bowl.

    3. Stretch and Folds

    • Lightly wet your hands to prevent the dough from sticking.
    • Gently flatten the dough in the mixing bowl. Sprinkle ยผ of the chopped pickles in the center, and perform a stretch-and-fold: grab one side of the dough, stretch it upwards, and fold it over.
    • Rotate the bowl 90ยฐ, add another ยผ of the pickles. Repeat until all the pickles are mixed in.
    • Gather the dough into a rough ball and place it seam-side down in the bowl.
    • Cover and let rest for 20 minutes.
    • Repeat the stretch-and-fold process three more times, letting the dough rest for 20 minutes between each set.
    Two hands stretching and folding the chopped pickles into the dough.
    The dough being stretched and folded in a glass mixing bowl.
    Two hands shaping the dough into a ball to place back in the mixing bowl after stretching and folding.

    4. Bulk Fermentation

    • Cover the dough and allow it to rise until it nearly doubles in size. It should be slightly jiggly with visible fermentation bubbles.
    • This can take anywhere from 4-12 hours depending on your kitchen and starter.

    ๐Ÿž Fermentation Tip: You can transfer the dough to a straight-sided container and mark the doughโ€™s starting level to track its progress more easily.

    The dill pickle sourdough bread dough in a straight-sided container before bulk fermentation.
    The dill pickle sourdough bread dough in a straight-sided container after bulk fermentation.

    5. Pre-Shape

    • Gently turn the dough out onto a floured surface and stretch it into a rectangle.
    • Fold both long sides toward the center like you're folding a letter, then fold the short sides inward.
    • Flip the dough seam-side down on the counter. Use your hands or a bench scraper to gently shape it into a round ball.
    • Cover and let it rest for 15 minutes.

    6. Final Shaping

    • Flip the dough seam-side up again and gently stretch it into a rectangle again.
    • If you're using a bowl or banneton, repeat the shaping process above.
    • For a batard-shaped loaf, fold the shorter edges of the rectangle toward the center. Then, starting at one of the longer edges, roll the dough tightly into a log, pinching the seam and ends to seal.
    The fermented dough stretched into a rectangle on a lightly floured wooden countertop.
    The fermented dough folded over itself into thirds.
    The fermented dough shaped into a ball on a lightly floured counter.

    7. Cold Proof

    • Dust your proofing basket generously with rice flour and transfer the dough seam-side up into the basket.
    • Cover and refrigerate overnight (12-16 hours) for the cold proof.
    The fermented dough in a batard proofing basket.

    8. Bake the Bread

    • Preheat a lidded Dutch oven to 450ยฐF for 30-60 minutes.
    • Turn the dough onto bread sling or parchment and score as desired.
    • Add 2 ice cubes to the hot Dutch oven.
    • Transfer the dough, cover, and bake for 40 minutes. Remove the lid and bake for 5-10 more minutes for a golden crust.
    • Cool on a wire rack for 2-4 hours before slicing.
    The dough scored on a bread sling before baking.
    The baked sourdough bread on a wire cooling rack.

    Baker's Timeline

    Hereโ€™s an example of a schedule you can follow to make this garlic dill pickle sourdough bread:

    • 8:00 PM (Night Before): Feed your starter.
    • 8:00 AM: Mix the dough.
    • 8:30-9:30 AM: Stretch and fold, add chopped pickles.
    • 9:30 AM-3:30 PM (Varies): Bulk fermentation.
    • 3:30-4:00 PM: Pre-shape and final shape.
    • 4:00 PM-8:00 AM (Next Day): Cold proof.
    • 8:00-8:45 AM: Bake.
    • 8:45 AM-12:45 PM: Cool.

    Note: Rise times will vary depending on the strength of your starter and the temperature of your kitchen and dough. It's best to rely on visual cues from your starter and dough rather than sticking strictly to the timeline.

    How to Store

    Store sourdough pickle bread in an airtight container or bread box at room temperature for up to 3 days.

    For longer storage, slice the bread and freeze it in a freezer-safe bag for up to 3 months. Then, thaw at room temperature or heat it in the toaster or oven before enjoying.

    Serving Suggestions

    This dill pickle sourdough bread is delicious with a smear of cream cheese, fresh butter, or homemade hummus. It also makes a fantastic base for any sandwich you'd typically add pickles to, like turkey, roast beef, BBQ pulled chicken, or grilled cheese.

    A whole loaf of dill pickle sourdough bread on a wooden cutting board.
    A cover of a recipe ebook with the title "Everyday Sourdough: 27 Sweet & Savory Sourdough Discard Recipes." There is an image of sourdough discard cinnamon rolls on the front. At the bottom, it reads "By Ashley Petrie of Everyday Homemade."
    Grab a copy today!

    Are you tired of watching your sourdough discard go to waste?

    Itโ€™s time to turn excess discard into something delicious with my new ebook - Everyday Sourdough!

    Inside, youโ€™ll find 27 tried-and-true sourdough discard recipes that will transform your leftover starter into mouthwatering creations your family and friends will love.

    No more guilt about wasting your discard - with Everyday Sourdough, you have endless options to quickly make something amazing anytime.

    Let's Connect!

    Be sure to leave a comment below if you have any questions. You can also connect with me on Instagram, Facebook, Pinterest, or via email at [email protected].

    More Sourdough Bread Recipes

    • Sliced sourdough pepperoni pizza bread on a wooden cutting board.
      Pepperoni Pizza Sourdough Bread with Mozzarella & Parmesan
    • A sliced loaf of jalapeรฑo cheddar sourdough bread on a wooden cutting board.
      Easy Jalapeรฑo Cheddar Sourdough Bread with Fresh Jalapeรฑos
    • A slice of sourdough olive bread on a wooden cutting board.
      Kalamata Olive Sourdough Bread
    • A loaf of everything bagel sourdough bread cut into slices.
      Everything Bagel Sourdough Bread

    ๐Ÿ“– Recipe

    A loaf of dill pickle sourdough bread cut into slices on a wooden cutting board.
    Print Pin SaveSaved!
    4.50 from 2 votes

    Pickle Sourdough Bread

    This Dill Pickle Sourdough Bread is packed with savory inclusions like crunchy chopped pickles, garlic, and dill. Perfect for beginners, itโ€™s a unique twist on classic sourdough that makes a delicious bread for sandwiches.
    Course Bread
    Cuisine American
    Prep Time 1 day day 12 hours hours
    Cook Time 45 minutes minutes
    Cool Time 2 hours hours
    Total Time 1 day day 14 hours hours 45 minutes minutes
    Servings 12 slices
    Calories 165kcal
    Author Ashley Petrie, RDN, LDN

    Equipment

    • Kitchen scale
    • Mixing bowls
    • Bowl scraper
    • Straight-sided container (optional, for bulk fermentation)
    • Proofing basket or bowl lined with tea towel
    • Lame or sharp knife
    • Bread sling or parchment paper
    • 6-quart dutch oven

    Ingredients

    • 1 โ…“ cups (315 grams) warm water 80-90โ„‰
    • ยฝ cup (100 grams) active sourdough starter
    • 4 cups (480 grams) bread flour
    • 3 ยฝ teaspoons (10 grams) Diamond Crystal Kosher Salt measure by weight or reduce to 1 ยพ teaspoons if using Morton's Kosher Salt or table salt
    • 1 teaspoon dried dill or 1 tablespoon fresh dill
    • 1 teaspoon garlic powder or 3-4 cloves raw garlic (minced)
    • ยฝ cup (70 grams) dill pickles chopped
    • Rice flour for dusting proofing basket
    • 2 ice cubes for steam

    Instructions

    • Feed your sourdough starter 6-12 hours before mixing the dough. It should be bubbly, active, and doubled in size. The rise time depends on your kitchen temperature, ranging from 6 hours in a warm environment (75โ„‰) to 12 hours in a cooler space (65-68โ„‰).
    • In a large mixing bowl, whisk together the warm water and sourdough starter until dissolved. Add the flour, salt, dill, and garlic powder, and stir until thereโ€™s no dry flour remaining. Cover the bowl and let the dough rest for 20 minutes.
      1 โ…“ cups (315 grams) warm water, ยฝ cup (100 grams) active sourdough starter, 4 cups (480 grams) bread flour, 3 ยฝ teaspoons (10 grams) Diamond Crystal Kosher Salt, 1 teaspoon dried dill, 1 teaspoon garlic powder
    • Lightly wet your hands to prevent the dough from sticking. Gently flatten the dough in the mixing bowl. Sprinkle ยผ of the chopped pickles in the center, and perform a stretch-and-fold: grab one side of the dough, stretch it upwards, and fold it over. Rotate the bowl 90ยฐ, add another ยผ of the pickles. Repeat until all the pickles are mixed in. Gather the dough into a rough ball and place it seam-side down in the bowl. Cover and let rest for 20 minutes. Repeat the stretch-and-fold process three more times, letting the dough rest for 20 minutes between each set.
      ยฝ cup (70 grams) dill pickles
    • Cover the dough and allow it to rise until it nearly doubles in size. It should be slightly jiggly with visible fermentation bubbles. This can take anywhere from 4-12 hours depending on your kitchen and starter. Optionally, use a straight-sided container to more easily track the doughโ€™s progress.
    • Gently turn the dough out onto a floured surface and stretch it into a rectangle. Fold both long sides toward the center like you're folding a letter, then fold the short sides inward. Flip the dough seam-side down on the counter. Use your hands or a bench scraper to gently shape it into a round ball. Cover and let it rest for 15 minutes.
    • Flip the dough seam-side up again and gently stretch it into a rectangle again. If you're using a bowl or banneton, repeat the shaping process above. For a batard-shaped loaf, fold the shorter edges of the rectangle toward the center. Then, starting at one of the longer edges, roll the dough tightly into a log, pinching the seam and ends to seal.
    • Dust your proofing basket generously with rice flour and transfer the dough seam-side up into the basket. Cover and refrigerate overnight (12-16 hours) for the cold proof.
      Rice flour
    • The next day, place a lidded Dutch oven inside the oven and preheat to 450ยฐF. Let the Dutch oven heat for 30-60 minutes once the oven reaches temperature.
    • Turn the dough out onto a bread sling or parchment paper. Score the top of the dough as desired with a lame or sharp knife. Carefully place 2 ice cubes in the Dutch oven for steam. Then, quickly transfer the dough into the hot Dutch oven using the sling or parchment paper. Cover with the lid to trap the steam inside.
      2 ice cubes
    • Bake at 450ยฐF for 40 minutes with the lid on. Then, remove the lid and bake for an additional 5-10 minutes to achieve your desired crust color.
    • Remove the bread from the Dutch oven and let it cool on a wire rack for at least 2-4 hours before slicing and serving.

    Notes

    • Adding pickle brine. You can replace 1-2 teaspoons of water with pickle brine, but keep in mind that its acidity may affect fermentation. I found that sticking with water works best for this recipe because some brine already gets into the dough from the chopped pickles.
    • Storage: Storeย in a bread box or an airtight container at room temperature for up to 3 days. For longer storage, slice the bread and freeze it in a freezer-safe container for up to 3 months.

    Nutrition

    Serving: 1slice | Calories: 165kcal | Carbohydrates: 32.5g | Protein: 6.5g | Fat: 0.5g | Polyunsaturated Fat: 0.5g | Sodium: 368mg | Potassium: 62mg | Fiber: 1g | Calcium: 11mg | Iron: 2.5mg
    Did you try this recipe?Let me know! Comment below, or take a picture and tag me on Instagram @everydayhomemadebyashley.

    Kalamata Olive Sourdough Bread

    March 31, 2025

    This Olive Sourdough Bread is a savory loaf packed with Kalamata olives, garlic, and oregano. The lower hydration makes the dough easy to handle, making it perfect for beginners wanting to experiment with adding inclusions to their sourdough.

    A slice of sourdough olive bread on a wooden cutting board.

    This Kalamata olive sourdough bread has become one of my new favorites - I even prefer it over my pepperoni mozzarella and jalapeรฑo cheddar sourdough bread!

    When testing this recipe, I baked so many loaves that I had to start stashing them in the freezer.

    A few weeks later, when I ran out of bagels for breakfast (I love them with smoked salmon), I grabbed a slice of this instead. I loved it so much that bagels are officially out, and this bread is my new go-to.

    Even if smoked salmon isnโ€™t your thing, this sourdough olive bread is fantastic dipped in hummus or olive oil. It also makes an incredible sandwich.

    And since itโ€™s only 65% hydration, the dough is super easy to work with - perfect if youโ€™re new to adding inclusions to sourdough.

    I hope you give it a try and love it as much as I do!

    Disclaimer: Some links throughout this post are affiliate links. As an Amazon Associate, I earn from qualifying purchases. You can learn more by visiting my Affiliate Disclosure Page.

    Ingredients & Substitutions

    Here are some notes on key ingredients. For a full list of ingredients, check out the recipe card below.

    • Active Sourdough Starter- Make sure your starter is bubbly and active. If youโ€™re using discard, go with fresh discard thatโ€™s less than a week old for a quicker rise.
    • Kalamata Olives- Slice the olives and pat them dry to prevent excess moisture from interfering with the dough. If you donโ€™t have Kalamata olives, green olives, or any other mild variety will work as a substitute.
    • Bread Flour- Gives the bread its chewy texture and helps with the rise. You can swap it for all-purpose flour or whole wheat. If you go with whole wheat, you might need to add a little extra water to keep the dough soft and workable.
    • Water- This dough is about 65% hydration, which makes it easy to handle and perfect for beginners. If you prefer a softer or more open crumb, feel free to increase the hydration slightly - just be mindful that wetter dough can be a bit trickier to shape.
    • Seasonings- A simple combination of dried oregano and garlic powder enhances the savory flavor of the bread. If you want to experiment, you could substitute with other herbs or try using fresh oregano and minced garlic.
    • Kosher Salt- Enhances the flavor of the bread. I use Diamond Crystal Kosher Salt, (about 2.8 grams per teaspoon). If youโ€™re using table salt or Mortonโ€™s kosher salt, measure by weight or use about half as much.
    The ingredients to make sourdough olive bread. Each ingredient is labeled with text. They include kalamata olives, bread flour, water, sourdough starter, kosher salt, oregano, and garlic powder.

    Tips for Success

    • Use active starter. Make sure your sourdough starter is bubbly and active for the best rise. If using discard, choose some no older than a few days, as older discard can slow fermentation.
    • Weigh ingredients. Using a kitchen scale to weigh your ingredients ensures consistent results every time.
    • Pat olives dry. Be sure to drain and pat the olives dry before adding them to the dough. This prevents extra moisture from affecting the doughโ€™s texture.
    • Fold in olives evenly. A few olives may fall out as you fold them in. Simply press them back into the dough and try to spread them out as evenly as possible.
    • Use a straight-sided container. Itโ€™s easier to track how much your dough has risen in a marked straight-sided container.
    • Build tension when shaping. Shape the dough into a tight ball or loaf without tearing so the bread rises tall in the oven instead of spreading out.
    • Cool completely. Let the bread cool for at least two hours before slicing to avoid a gummy crumb and to get the best texture.

    How to Make Olive Sourdough Bread

    Here is how to make sourdough bread with Kalamata olives.

    1. Feed Sourdough Starter

    • Feed your sourdough starter 6-12 hours before mixing the dough, ensuring it becomes bubbly, active, and doubles in size.
    • In a warm kitchen (around 75โ„‰), this may take about 6 hours, while in a cooler kitchen (65-68โ„‰), it could take up to 12 hours.
    An active sourdough starter in a glass mason jar.

    2. Mix Dough

    • In a large mixing bowl, whisk together the warm water and the sourdough starter until dissolved.
    • Add the flour, kosher salt, oregano, and garlic powder, mixing until fully incorporated with no dry flour remaining.
    • Cover and let rest for 20 minutes.
    Sourdough starter and water mixed together in a glass bowl.
    The dough mixed together in a glass bowl before adding olives.

    3. Stretch and Fold

    • Lightly wet your hands to prevent the dough from sticking.
    • Flatten the dough slightly and sprinkle ยผ of the sliced olives in the center. Perform a stretch-and-fold by grabbing one side of the dough, stretching it upwards, and folding it over. Rotate the bowl 90ยฐ, add another ยผ of the olives, and repeat until all the olives are incorporated.
    • Gather the dough into a rough ball and place it seam-side down.
    • Cover and rest for 20 minutes.
    • Repeat the stretch-and-fold process 3 more times, allowing the dough to rest 20 minutes between each set.
    The sliced kalamata olives being stretched and folded into the dough.
    Sliced kalamata olives being stretched and folded into the dough.
    The dough gathered into a ball being placed seam side down into the mixing bowl.

    4. Bulk Fermentation

    • Cover the dough and let it rise until it nearly doubles in size, with visible fermentation bubbles.
    • The rise time can vary anywhere from 4-12 hours depending on your kitchen and dough temperature and starter strength.

    ๐Ÿž Fermentation Tip: You can transfer the dough to a straight-sided container and mark the doughโ€™s starting level to track its progress more easily.

    The kalamata olive sourdough bread dough in a straight-sided container before bulk fermentation.
    The kalamata olive sourdough bread dough in a straight-sided container after bulk fermentation.

    5. Pre-Shape

    • Gently turn the dough out onto a floured surface and stretch it into a rectangle.
    • Fold both long sides toward the center like you're folding a letter, then fold the short sides inward, and flip the dough seam-side down.
    • Use your hands or a bench scraper to gently shape it into a round ball.
    • Cover and let it rest for 15 minutes.

    6. Final Shaping

    • Flip the dough seam-side up again and gently stretch it into a smaller rectangle.
    • If you're using a bowl or banneton, repeat the shaping process above.
    • For a batard, fold the shorter edges of the rectangle toward the center. Then, starting at one of the longer edges, roll the dough tightly into a log, pinching the seam and ends to seal.
    The fermented dough stretched into a rectangle on a floured countertop.
    The dough folded in thirds like a letter on a floured countertop.
    The dough shaped into a boule on a floured countertop.

    7. Cold Proof

    • Generously dust your proofing basket with rice flour, then transfer the dough seam-side up into the basket.
    • If needed, pinch the seam to seal it.
    • Cover the dough and refrigerate overnight (12-16 hours) to cold proof.
    Sourdough olive bread dough proofing in a batard-shaped basket.

    8. Bake the Bread

    • Preheat a lidded Dutch oven to 450ยฐF for 30-60 minutes.
    • Turn the dough onto bread sling or parchment and score as desired.
    • Add 2 ice cubes to the hot Dutch oven.
    • Transfer the dough, cover, and bake for 40 minutes. Remove the lid and bake for 5-10 more minutes for a golden crust.
    • Cool on a wire rack for 2-4 hours before slicing.
    A batard-shaped sourdough olive bread dough scored down the middle.
    A baked loaf of olive sourdough bread on a wire cooling rack.

    Baker's Timeline

    Hereโ€™s an example of a schedule you can follow to make this Kalamata olive sourdough bread:

    • 8:00 PM (Night Before): Feed your starter.
    • 8:00 AM: Mix the dough.
    • 8:30-9:30 AM: Stretch and fold, add sliced kalamata olives.
    • 9:30 AM-3:30 PM (Varies): Bulk fermentation.
    • 3:30-4:00 PM: Pre-shape and final shape.
    • 4:00 PM-8:00 AM (Next Day): Cold proof.
    • 8:00-8:45 AM: Bake.
    • 8:45 AM-12:45 PM: Cool.

    Note: Rise times will vary depending on the strength of your starter and the temperature of your kitchen and dough. It's best to rely on visual cues from your starter and dough rather than sticking strictly to the timeline.

    How to Store

    Store in an airtight container or bread box at room temperature for up to 3 days.

    For longer storage, slice and freeze in a freezer-safe bag for up to 3 months. When ready to enjoy, simply thaw at room temperature or warm it in the toaster or oven.

    Serving Suggestions

    This olive sourdough bread pairs beautifully with a variety of toppings and dips, such as olive oil, homemade butter, hummus, or cream cheese with smoked salmon (my fiancรฉ's favorite!).

    You can also use it as the base for burrata bruschetta or turn it into a delicious grilled cheese sandwich.

    A loaf of olive sourdough bread on a wooden cutting board next to a white cloth napkin.
    A cover of a recipe ebook with the title "Everyday Sourdough: 27 Sweet & Savory Sourdough Discard Recipes." There is an image of sourdough discard cinnamon rolls on the front. At the bottom, it reads "By Ashley Petrie of Everyday Homemade."
    Grab a copy today!

    Are you tired of watching your sourdough discard go to waste?

    Itโ€™s time to turn excess discard into something delicious with my new ebook - Everyday Sourdough!

    Inside, youโ€™ll find 27 tried-and-true sourdough discard recipes that will transform your leftover starter into mouthwatering creations your family and friends will love.

    No more guilt about wasting your discard - with Everyday Sourdough, you have endless options to quickly make something amazing anytime.

    Let's Connect!

    Be sure to leave a comment below if you have any questions. You can also connect with me on Instagram, Facebook, Pinterest, or via email at [email protected].

    More Sourdough Bread Recipes

    • Slices of sun-dried tomato sourdough bread on a cutting board.
      Sun-Dried Tomato Sourdough Bread (with Roasted Garlic & Parmesan)
    • A loaf of dill pickle sourdough bread cut into slices on a wooden cutting board.
      Dill Pickle Sourdough Bread
    • Sliced sourdough pepperoni pizza bread on a wooden cutting board.
      Pepperoni Pizza Sourdough Bread with Mozzarella & Parmesan
    • Three slicing of multigrain sourdough bread on a cutting board next to half of a loaf.
      Multigrain Sourdough Bread

    ๐Ÿ“– Recipe

    A slice of sourdough olive bread on a wooden cutting board.
    Print Pin SaveSaved!
    5 from 2 votes

    Olive Sourdough Bread

    This Olive Sourdough Bread is a savory loaf packed with Kalamata olives, garlic, and oregano. The lower hydration makes the dough easy to handle, making it perfect for beginners wanting to experiment with adding inclusions to their sourdough.
    Course Bread
    Cuisine American, Greek
    Prep Time 1 day day 12 hours hours
    Cook Time 45 minutes minutes
    Cool Time 2 hours hours
    Total Time 1 day day 14 hours hours 45 minutes minutes
    Servings 12 slices
    Calories 180kcal
    Author Ashley Petrie, RDN, LDN

    Equipment

    • Kitchen scale
    • Mixing bowls
    • Bench scraper
    • Straight-sided container (optional)
    • Banneton or bowl lined with tea towel
    • Bread sling or parchment paper
    • Lame or sharp knife
    • 6-quart dutch oven

    Ingredients

    • 1 โ…“ cups (315 grams) warm water 80-90โ„‰
    • ยฝ cup (100 grams) active sourdough starter or "fresh" discard less than one week old (dough may take longer to rise)
    • 4 cups (480 grams) bread flour
    • 3 ยฝ teaspoons (10 grams) Diamond Crystal Kosher Salt if using table salt or Mortonโ€™s, use half the volume or weigh in grams
    • 1 teaspoon dried oregano
    • 1 teaspoon garlic powder
    • ยฝ cup (70 grams) Kalamata olives drained, sliced, and patted dry
    • Rice flour for dusting proofing basket
    • 2 ice cubes for steam

    Instructions

    • Feed your sourdough starter 6-12 hours before mixing the dough, ensuring it becomes bubbly, active, and doubles in size. In a warm kitchen (around 75โ„‰), this may take about 6 hours, while in a cooler kitchen (65-68โ„‰), it could take up to 12 hours.
    • In a large mixing bowl, whisk together the warm water and the sourdough starter until dissolved. Add the flour, kosher salt, oregano, and garlic powder, mixing until fully incorporated with no dry flour remaining. Cover and let rest for 20 minutes to allow the flour to fully hydrate and the gluten to relax.
      1 โ…“ cups (315 grams) warm water, ยฝ cup (100 grams) active sourdough starter, 4 cups (480 grams) bread flour, 3 ยฝ teaspoons (10 grams) Diamond Crystal Kosher Salt, 1 teaspoon dried oregano, 1 teaspoon garlic powder
    • Lightly wet your hands to prevent the dough from sticking. Flatten the dough slightly and sprinkle ยผ of the sliced olives in the center. Perform a stretch-and-fold by grabbing one side of the dough, stretching it upwards, and folding it over. Rotate the bowl 90ยฐ, add another ยผ of the olives, and repeat until all the olives are incorporated. Gather the dough into a rough ball and place it seam-side down. Cover and rest for 20 minutes. Repeat the stretch-and-fold process 3 more times, allowing the dough to rest 20 minutes between each set.
      ยฝ cup (70 grams) Kalamata olives
    • Cover the dough and let it rise until it nearly doubles in size, with visible fermentation bubbles. The rise time can vary anywhere from 4-12 hours depending on your kitchen and dough temperature and starter strength. You can transfer the dough to a straight-sided container and mark the doughโ€™s starting level to track its progress more easily.
    • Gently turn the dough out onto a floured surface and stretch it into a rectangle. Fold both long sides toward the center like you're folding a letter, then fold the short sides inward, and flip the dough seam-side down. Use your hands or a bench scraper to gently shape it into a round ball. Cover and let it rest for 15 minutes.
    • Flip the dough seam-side up again and gently stretch it into a smaller rectangle. If you're using a bowl or banneton, repeat the shaping process above. For a batard, fold the shorter edges of the rectangle toward the center. Then, starting at one of the longer edges, roll the dough tightly into a log, pinching the seam and ends to seal.
    • Generously dust your proofing basket with rice flour, then transfer the dough seam-side up into the basket. If needed, pinch the seam to seal it. Cover the dough and refrigerate overnight (12-16 hours) to cold proof.
      Rice flour
    • Place a lidded Dutch oven inside your oven and preheat to 450โ„‰. Let the Dutch oven heat for an extra 30-60 minutes once the oven reaches temperature.
    • Turn the dough out onto a bread sling or piece of parchment paper. Score the top as desired with a lame or sharp knife. Carefully place 2 ice cubes in the Dutch oven for steam. Use the parchment paper to transfer the dough into the hot Dutch oven. Cover immediately with the lid to trap the steam inside.
      2 ice cubes
    • Bake at 450โ„‰ for 40 minutes with the lid on. Then, remove the lid and bake for an additional 5-10 minutes to achieve your desired crust color.
    • Allow the bread cool for at least 2-4 hours before slicing and serving. Letting the bread cool fully helps the crumb set and avoids a gummy texture.

    Notes

    • Tip: Use a scale to weigh your ingredients for the most accurate results.
    • Storage: Store bread in an airtight container or breadbox for up to 3 days at room temperature or freeze for up to 3 months.

    Nutrition

    Serving: 1slice | Calories: 180kcal | Carbohydrates: 33g | Protein: 6.5g | Fat: 2g | Saturated Fat: 0.5g | Polyunsaturated Fat: 0.5g | Sodium: 437mg | Potassium: 71mg | Fiber: 1g | Calcium: 11.5mg | Iron: 2.4mg
    Did you try this recipe?Let me know! Comment below, or take a picture and tag me on Instagram @everydayhomemadebyashley.

    Whole Wheat Sourdough Sandwich Bread

    March 24, 2025

    This Whole Wheat Sourdough Sandwich Bread is soft, fluffy, and full of hearty whole grains. A hint of honey and butter makes it perfect for sandwiches, toast, or simply warmed with butter.

    A sandwich made on whole wheat sourdough sandwich bread. The sandwich is on a white plate and their is a pickle spear next to it.

    Iโ€™ve talked before about how much I love whole grains. As a dietitian, Iโ€™m always looking for ways to add more fiber to my diet. And whole grain breads are an easy way to do just that.

    Some of my go-to recipes with 100% whole wheat flour are my whole wheat sourdough bread, focaccia, English muffins, and even sourdough pizza dough. But when I set out to make a soft, sandwich-style loaf, I quickly realized that 100% whole wheat made it denser than I liked.

    So, I switched gears a bit and came up with this honey wheat sourdough sandwich bread. It's made with 65% whole wheat flour and 35% bread flour. It keeps the nutty, whole grain goodness while still giving you a taller, more tender loaf.

    The best part? You can bake it the same day or let it ferment overnight for more flavor.

    This whole wheat sourdough sandwich bread is the perfect balance between a hearty whole wheat loaf and classic white bread. Itโ€™s great for breakfast sandwiches, grilled cheese, toast, and more.

    I hope you give it a try and enjoy it as much as I do!

    Disclaimer: Some links throughout this post are affiliate links. As an Amazon Associate, I earn from qualifying purchases. You can learn more by visiting my Affiliate Disclosure Page.

    Ingredients & Substitutions

    Here are some notes on key ingredients. For a full list of ingredients, check out the recipe card below.

    • Active Sourdough Starter- Use a bubbly, active starter for the best rise. If using sourdough discard, make sure itโ€™s fresh (less than a week old) to avoid sluggish fermentation.
    • Whole Wheat Flour- Provides a hearty texture and nutty flavor. Since whole wheat flour is naturally denser than white flour, using a 65/35 blend of whole wheat and bread flour helps create a softer, fluffier loaf. For a milder taste, you can substitute white whole wheat flour.
    • Bread Flour- Helps lighten the texture and improve rise, preventing the bread from becoming too dense. You can substitute all-purpose flour, but the loaf may not be as airy.
    • Water- This recipe makes a 71% hydration dough, which helps give the loaf a more open crumb structure. Using warm water (80-90ยฐF) helps speed up fermentation.
    • Butter- Adds moisture, richness, and tenderness. Substitute with an equal amount of olive oil if preferred.
    • Honey- Provides subtle sweetness that complements the nutty whole wheat flavor.
    • Kosher Salt- Enhances flavor. I use Diamond Crystal Kosher Salt (2.8 grams per teaspoon). If using table salt or Mortonโ€™s Kosher Salt, measure by weight or use about half the amount.
    The ingredients to make whole wheat sourdough sandwich bread. Each ingredient is labeled with text. They include butter, bread flour, sourdough starter, whole wheat flour, water, honey, and salt.

    Tips for Success

    • Use active starter. Ensure your sourdough starter is bubbly and active for the best rise. If using discard, make sure itโ€™s no more than a few days old, as older discard may slow the rise.
    • Weigh ingredients. Weighing your ingredients ensures accurate measurements, leading to a more reliable dough consistency.
    • Donโ€™t skip autolysing. Letting the dough rest after mixing the flour and water softens the bran and germ in the whole wheat flour, which helps with gluten development and improves texture.
    • Find a warm spot. Dough rises best in a warm environment. If your kitchen is cool, try placing it near a warm oven or on top of the fridge.
    • Track rise with a straight-sided container. A straight-sided container makes it easy to measure the doughโ€™s growth during bulk fermentation.
    • Cool completely. Let the bread cool for at least one hour to avoid a gummy texture and get that perfect crumb.

    How to Make Whole Wheat Sourdough Sandwich Bread

    Here is how to make sourdough sandwich bread with whole wheat flour.

    1. Feed Sourdough Starter

    • About 6-12 hours before starting, feed your sourdough starter to ensure itโ€™s bubbly and active.
    • The timing will depend on your kitchen temperature. If your kitchen is around 75ยฐF, it will take about 6 hours. In cooler kitchens (65-68ยฐF), it may take closer to 12 hours.
    An active sourdough starter in a glass mason jar.

    2. Autolyse

    • In a large bowl, combine the whole wheat flour, bread flour, and warm water until no dry flour remains.
    • Cover the bowl and let the mixture rest for 1 hour.
    The flour and water autolysing in a blue bowl.

    3. Mix the Dough

    • After the rest, add the active sourdough starter, melted butter, honey, and salt to the dough.
    • Use your hands to mix everything together until a sticky, cohesive dough forms.
    • Cover the bowl and let the dough rest for 15 minutes.
    The dough mixed together in a blue bowl.

    4. Stretch and Folds

    • Lightly wet your hands to prevent sticking.
    • Grab one edge of the dough, stretch it upwards as far as it will go without tearing, and fold it over onto itself. Rotate the bowl 90ยฐ and repeat the process. Do this for all four sides of the dough, for a total of 4 folds.
    • Gather the dough into a ball and place it seam side down in the bowl.
    • Cover and let it rest for another 15 minutes.
    • Repeat the stretching and folding process every 15 minutes, for a total of 6 times.
    The dough being stretched and folded in a blue mixing bowl.
    A pair of hands stretching and folding the dough in a mixing bowl.
    A pair of hands gathering the dough into a ball and placing in back into the mixing bowl.

    5. Bulk Fermentation

    • After the final fold, cover the dough and let it rise in a warm spot until it doubles in size, with visible fermentation bubbles. This can take anywhere from 4 to 12 hours depending on the temperature of your kitchen and the dough.
    • For an easier way to track fermentation, transfer the dough to a straight-sided container and mark its starting point.
    The dough in a straight-sided container with a mark to show where bulk fermentation has started.
    The fully fermented dough in a straight-sided container.

    6. Shape the Dough

    • Once the dough has doubled in size, butter the bottom and sides of a 9"x5" loaf pan.
    • Turn the dough out onto a lightly floured surface and gently pull it into a rectangle shape.
    • Starting from one short end, roll the dough tightly towards the other short end, like a jelly roll.
    • Let it rest on the seam for 1-2 minutes, then pinch the ends to seal.
    The fermented dough stretched out into a rectangle on a floured countertop.

    7. Proof the Dough

    • Transfer the shaped dough seam side down into the prepared loaf pan.
    • Cover it and let it proof at room temperature for 2-4 hours, or until itโ€™s noticeably puffy and risen nearly to the top of the pan.
    • For a more pronounced sourdough flavor, you can refrigerate the dough overnight before allowing it to proof at room temperature the next morning.
    The dough rolled into a loaf shape in an aluminum loaf pan.
    The proofed dough in an aluminum loaf pan.

    8. Bake the Bread

    • About 20 minutes before the dough is done proofing, preheat your oven to 400ยฐF.
    • Place the loaf in the preheated oven and bake for 30-40 minutes, or until the top is golden brown and the internal temperature reaches 190ยฐF.
    • Remove the bread from the oven and allow it to cool in the pan for 10 minutes. Then, transfer it to a wire rack to cool completely.
    The baked whole wheat sourdough sandwich bread in a loaf pan on a wire cooling rack.

    Baker's Timeline

    Hereโ€™s an example of a schedule you can follow to make this sourdough whole wheat sandwich bread:

    • 9:00 PM (Night Before): Feed your starter.
    • 8:00-9:00 AM: Autolyse.
    • 9:00-9:15 AM: Mix the dough.
    • 9:30-10:45 AM: Stretch and fold.
    • 10:45 AM-4:45 PM (Varies): Bulk fermentation.
    • 4:45-5:00 PM: Shape.
    • 5:00 PM-7:00 PM (Varies): Proof.
    • 7:00-7:45 PM: Bake.
    • 7:45 PM-8:40 PM: Cool.

    Note: Rise times will vary depending on the strength of your starter and the temperature of your kitchen and dough. It's best to rely on visual cues from your starter and dough rather than sticking strictly to the timeline.

    How to Store

    This honey wheat sourdough sandwich bread will keep at room temperature in an airtight container or bread box for up to 3 days.

    For longer storage, slice and freeze in a freezer-safe bag for up to 3 months. Thaw at room temperature or warm it in the toaster or oven before serving.

    Serving Suggestions

    This whole wheat sourdough sandwich bread is perfect for a hearty breakfast or lunch.

    Enjoy it toasted with eggs, avocado, or butter and strawberry jam. It also makes a great, healthier base for a sourdough breakfast sandwich or grilled cheese (especially when paired with a side of dill pickles).

    A loaf of whole wheat sourdough sandwich bread cut into slices on a wooden cutting board.
    A cover of a recipe ebook with the title "Everyday Sourdough: 27 Sweet & Savory Sourdough Discard Recipes." There is an image of sourdough discard cinnamon rolls on the front. At the bottom, it reads "By Ashley Petrie of Everyday Homemade."
    Grab a copy today!

    Are you tired of watching your sourdough discard go to waste?

    Itโ€™s time to turn excess discard into something delicious with my new ebook - Everyday Sourdough!

    Inside, youโ€™ll find 27 tried-and-true sourdough discard recipes that will transform your leftover starter into mouthwatering creations your family and friends will love.

    No more guilt about wasting your discard - with Everyday Sourdough, you have endless options to quickly make something amazing anytime.

    Let's Connect!

    Be sure to leave a comment below if you have any questions. You can also connect with me on Instagram, Facebook, Pinterest, or via email at [email protected].

    More Sourdough Bread Recipes

    • A loaf of sourdough potato bread cut into slices on a cutting board.
      Sourdough Potato Bread
    • Slices of oatmeal sourdough bread stacked on top of a piece of parchment paper.
      Sourdough Oatmeal Bread
    • Three slices of sourdough sandwich bread on a cutting board.
      Sourdough Sandwich Bread
    • A slice of toasted sourdough cinnamon raisin bread with a pat of butter on top.
      Soft Sourdough Cinnamon Raisin Bread

    ๐Ÿ“– Recipe

    A sandwich made on whole wheat sourdough sandwich bread. The sandwich is on a white plate and their is a pickle spear next to it.
    Print Pin SaveSaved!

    Whole Wheat Sourdough Sandwich Bread

    This Whole Wheat Sourdough Sandwich Bread is soft, fluffy, and full of hearty whole grains. A hint of honey and butter makes it perfect for sandwiches, toast, or simply warmed with butter.
    Course Bread
    Cuisine American
    Prep Time 23 hours hours
    Cook Time 40 minutes minutes
    Cool Time 1 hour hour
    Total Time 1 day day 40 minutes minutes
    Servings 16 slices
    Calories 125kcal
    Author Ashley Petrie, RDN, LDN

    Equipment

    • Kitchen scale
    • Standard 9"x5" aluminum loaf pan
    • Mixing bowls
    • Bowl scraper
    • Straight-sided container (optional)

    Ingredients

    • 2 ยผ cups (270 grams) whole wheat flour
    • 1 ยผ cups (150 grams) bread flour
    • 1 ยผ cups (300 grams) warm water 80-90โ„‰
    • โ…“ cup (80 grams) active sourdough starter or "fresh" discard less than one week old
    • 3 tablespoons (42 grams) unsalted butter melted and cooled
    • 1 tablespoon (21 grams) honey
    • 3 ยผ teaspoons (9 grams) Diamond Crystal Kosher Salt If using table salt or Mortonโ€™s Kosher Salt, measure by weight or use about half the amount.

    Instructions

    • About 6-12 hours before starting, feed your sourdough starter to ensure itโ€™s bubbly and active. The timing will depend on your kitchen temperature. If your kitchen is around 75ยฐF, it will take about 6 hours. In cooler kitchens (65-68ยฐF), it may take closer to 12 hours.
    • In a large bowl, combine the whole wheat flour, bread flour, and warm water until no dry flour remains. Cover the bowl and let the mixture rest for 1 hour.
      2 ยผ cups (270 grams) whole wheat flour, 1 ยผ cups (150 grams) bread flour, 1 ยผ cups (300 grams) warm water
    • After the rest, add the active sourdough starter, melted butter, honey, and salt to the dough. Use your hands to mix everything together until a sticky, cohesive dough forms. Cover the bowl and let the dough rest for 15 minutes.
      โ…“ cup (80 grams) active sourdough starter, 3 tablespoons (42 grams) unsalted butter, 1 tablespoon (21 grams) honey, 3 ยผ teaspoons (9 grams) Diamond Crystal Kosher Salt
    • Lightly wet your hands to prevent sticking. Grab one edge of the dough, stretch it upwards as far as it will go without tearing, and fold it over onto itself. Rotate the bowl 90ยฐ and repeat the process. Do this for all four sides of the dough, for a total of 4 folds. Gather the dough into a ball and place it seam side down in the bowl. Cover and let it rest for another 15 minutes. Repeat the stretching and folding process every 15 minutes, for a total of 6 times.
    • After the final fold, cover the dough and let it rise in a warm spot until it doubles in size, with visible fermentation bubbles. This can take anywhere from 4 to 12 hours depending on the temperature of your kitchen and the dough. For an easier way to track fermentation, transfer the dough to a straight-sided container and mark its starting point.
    • Once the dough has doubled in size, butter the bottom and sides of a 9"x5" loaf pan. Turn the dough out onto a lightly floured surface and gently pull it into a rectangle shape. Starting from one short end, roll the dough tightly towards the other short end, like a jelly roll. Let it rest on the seam for 1-2 minutes, then pinch the ends to seal.
    • Transfer the shaped dough seam side down into the prepared loaf pan. Cover it and let it proof at room temperature for 2-4 hours, or until itโ€™s noticeably puffy and risen nearly to the top of the pan. For a more pronounced sourdough flavor, you can refrigerate the dough overnight before allowing it to proof at room temperature the next morning.
    • About 20 minutes before the dough is done proofing, preheat your oven to 400ยฐF.
    • Place the loaf in the preheated oven and bake for 30-40 minutes, or until the top is golden brown and the internal temperature reaches 190ยฐF.
    • Remove the bread from the oven and allow it to cool in the pan for 10 minutes. Then, transfer it to a wire rack to cool completely. Let it cool for at least 1 hour before slicing to prevent a gummy texture.

    Notes

    • Tip: For best results, use a scale to measure all ingredients by weight (grams). If using volume measurements (cups), spoon the flour into the cups instead of scooping.
    • Storage: Store bread in an airtight container at room temperature for up to 3 days or freeze for up to 3 months.

    Nutrition

    Serving: 1slice | Calories: 125kcal | Carbohydrates: 22g | Protein: 4g | Fat: 3g | Saturated Fat: 1.5g | Polyunsaturated Fat: 0.5g | Monounsaturated Fat: 1g | Cholesterol: 6mg | Sodium: 227mg | Potassium: 86mg | Fiber: 2.5g | Sugar: 1g | Calcium: 10mg | Iron: 1.3mg
    Did you try this recipe?Let me know! Comment below, or take a picture and tag me on Instagram @everydayhomemadebyashley.

    Whole Wheat Sourdough Focaccia

    March 17, 2025

    This Whole Wheat Sourdough Focaccia is made with 100% whole wheat flour but still comes out soft and bubbly thanks to its high hydration. Whether you make it the same day or ferment overnight, itโ€™s wonderfully tangy with a hearty texture and nutty flavor.

    Several pieces of whole wheat sourdough focaccia on a piece of wrinkled parchment paper.

    Whole wheat flour can be tricky to work with, but I love the challenge of creating 100% whole wheat sourdough recipes. After sharing my classic sourdough focaccia, I knew I had to try a whole wheat version.

    While I was testing this recipe, we had some friends over for a board game night. So I decided to serve the focaccia with homemade marinara sauce for dipping. They absolutely loved it, and it was the perfect snack for the evening!

    This whole wheat sourdough focaccia is soft, bubbly, and tangy - especially if fermented overnight. The whole wheat flour adds a hearty texture and nutty flavor, while the olive oil creates a beautifully crispy crust.

    Don't be intimidated by whole wheat flour or the 100% hydration dough. With a few simple techniques - like autolysing, using a strong starter, and building gluten through stretch and folds - this focaccia is actually quite easy to make.

    I really hope you give it a try and enjoy it as much as I did!

    Disclaimer: Some links throughout this post are affiliate links. As an Amazon Associate, I earn from qualifying purchases. You can learn more by visiting my Affiliate Disclosure Page.

    Ingredients & Substitutions

    Here are some notes on key ingredients. For a full list of ingredients, check out the recipe card below.

    • Sourdough Starter- You can use either an active sourdough starter or discard for this focaccia. If using discard, choose some thatโ€™s less than a week old to help the dough rise well.
    • Whole Wheat Flour- This focaccia is made with 100% whole wheat flour, giving it a hearty flavor and chewy texture. If you prefer a softer crumb, you can swap some of the whole wheat for bread or all-purpose flour.
    • Water- This dough is high hydration (100% water), which helps create a light and airy focaccia with those signature large bubbles. At first, it might feel more like a thick batter, but after a few sets of stretch-and-folds, youโ€™ll notice it gains structure.
    • Olive Oil- Adds flavor and keeps the focaccia from sticking to the pan. Use the best extra virgin olive oil you have on hand, and donโ€™t skip drizzling some on top before baking!
    • Kosher Salt- Salt brings out the flavor in the dough and the toppings. I like to sprinkle extra on top for that perfect salty bite. I use Diamond Crystal Kosher Salt (about 2.8 grams per teaspoon). If youโ€™re using table salt or Mortonโ€™s, measure by weight or use half the amount.
    • Herbs & Toppings- Rosemary is a classic choice, but feel free to get creative. Try thyme, oregano, or a mix of fresh herbs. Add thinly sliced garlic, cherry tomatoes, or even caramelized onions for extra flavor.
    The ingredients to make whole wheat sourdough focaccia. Each ingredient is labeled with text. They include whole wheat flour, kosher salt, olive oil, water, and sourdough starter.

    Choosing the Size of Your Baking Pan

    Choosing the size of your baking pan will depend on your preference for the thickness and texture of your focaccia. Here are a few options to help you decide:

    • 9"x13" Baking Pan: Ideal for a thicker focaccia with crispy edges and a soft, fluffy interior.
    • Half Sheet Pan (18"x13"): Produces a thinner focaccia with more crispy edges - perfect for making sandwiches!
    • Two 8"x8" Square Pans: Great for making thicker focaccia and experimenting with different toppings on each.

    Tips for Success

    • Use active starter. Whole wheat flour doesnโ€™t rise as high as bread flour due to the bran and germ, so itโ€™s important to use a strong, active starter or fresh discard for the best rise and structure.
    • Don't skip the autolyse. Autolysing is key when using whole wheat flour. Letting the dough rest after mixing the flour and water helps soften the bran and germ, giving the gluten a head start and resulting in a lighter, fluffier focaccia.
    • Wet your hands. This dough is high hydration and sticky, so keeping your hands wet will prevent sticking and make stretching and folding much easier.
    • Line the pan with parchment paper. This adds an extra layer of insurance against sticking and makes cleanup a breeze.
    • Proof overnight for more flavor. If youโ€™re a fan of that bold sourdough tang, pop the dough in the fridge overnight after spreading it into the pan.
    • Get creative with toppings. Focaccia can be topped with just about anything you'd like! Try it with garlic and garden-fresh vegetables, or turn it into a focaccia pizza with tomato sauce and cheese.

    How to Make Whole Wheat Sourdough Focaccia

    Here's how to make a delicious sourdough focaccia using 100% whole wheat flour.

    1. Feed Starter

    • Feed your sourdough starter 6-12 hours before starting the dough to make sure itโ€™s bubbly and active.
    • It will take around 6 hours if your kitchen is warm (75ยฐF) or closer to 12 hours if itโ€™s cooler (65-68ยฐF).
    An active sourdough starter in a glass mason jar.

    2. Autolyse

    • In a large bowl, combine the whole wheat flour and warm water. Stir until no dry flour remains.
    • Cover and let it rest for 1 hour.
    Whole wheat flour and water autolysing in a bowl.

    3. Mix Dough

    • After the 1-hour autolyse, add your sourdough starter and salt to the bowl. Mix everything together by hand until a sticky, wet dough forms.
    • Cover and let it rest for 15 minutes.
    Sourdough starter and kosher salt added to the flour and water in a bowl.
    Whole wheat sourdough focaccia dough in a mixing bowl.

    4. Stretch and Folds

    • Wet your hand to prevent sticking. Grab one edge of the dough, stretch it up, and fold it over onto itself. Rotate the bowl 90ยฐ and repeat this up to 16 times, until the dough begins to tighten.
    • Gather the dough into a ball and flip it seam side down in the bowl.
    • Cover and let it rest for 15 minutes.
    • Repeat this process 5 more times (for a total of 6 sets), resting for 15 minutes between each set.
    The dough being stretched and folded in a bowl.
    The focaccia dough being stretched and folded in a bowl.
    The stretched and folded dough being gathered into a ball and placed seam side down in a bowl.

    5. Bulk Fermentation

    • Drizzle 2 tablespoons of olive oil into a clean bowl or straight-sided container.
    • Transfer the dough into the oiled container, making sure itโ€™s lightly coated in oil to prevent sticking.
    • Cover and let the dough rise at room temperature until it doubles in size. This usually takes about 4 hours at 75ยฐF or up to 12 hours at 65ยฐF.
    The dough in a straight-sided container with some olive oil before bulk fermentation.
    The dough in a straight-sided container with some olive oil after bulk fermentation.

    6. Transfer Dough to Pan

    • Line a 9"x13" baking pan with parchment paper and drizzle 2 tablespoons of olive oil on top.
    • Gently transfer the dough to the prepared pan.
    • Use your fingers to press and stretch the dough toward the edges. If it springs back, let it rest for 10 minutes and try again.
    The dough stretched into a square aluminum pan lined with parchment paper and coated in olive oil.

    7. Proof

    • Cover the pan and let the dough proof at room temperature for about 2 hours or until it doubles and looks noticeably puffy.
    • For a tangier flavor, refrigerate the dough overnight after spreading it in the pan. Then, let it come to room temperature and proof before baking.
    The dough in a square pan after proofing.

    8. Dimple the Dough + Add Toppings

    • About 20 minutes before baking, preheat your oven to 375ยฐF and position a rack in the center.
    • Lightly oil your hands and use your fingertips to poke deep dimples all over the surface of the dough.
    • Drizzle the top with the remaining 2 tablespoons of olive oil and sprinkle with kosher salt and your favorite herbs.
    The proofed dough after being indented and coated with oil, salt, and herbs.

    9. Bake and Serve

    • Bake for 25-30 minutes, until the focaccia is golden brown on top.
    • Let the focaccia cool in the pan for 10 minutes before removing it. Slice and serve warm.
    The baked whole wheat sourdough focaccia in an aluminum baking pan.
    Sliced whole wheat sourdough focaccia on a cutting board. One piece of flipped over to show the crumb.

    How to Store

    Store cooled whole wheat sourdough focaccia in an airtight container at room temperature for up to 2 days.

    For longer storage, transfer to a freezer-safe container and freeze for up to 3 months. Thaw at room temperature and reheat in the oven before serving.

    Serving Suggestions

    This whole wheat sourdough focaccia is perfect served warm with a drizzle of olive oil or dipped into my marinara sauce or pesto sauce. It also makes a hearty side for sourdough pasta and meatballs or spinach caprese salad.

    Three pieces of whole wheat sourdough focaccia stacked on top of each other.
    A cover of a recipe ebook with the title "Everyday Sourdough: 27 Sweet & Savory Sourdough Discard Recipes." There is an image of sourdough discard cinnamon rolls on the front. At the bottom, it reads "By Ashley Petrie of Everyday Homemade."
    Grab a copy today!

    Are you tired of watching your sourdough discard go to waste?

    Itโ€™s time to turn excess discard into something delicious with my new ebook - Everyday Sourdough!

    Inside, youโ€™ll find 27 tried-and-true sourdough discard recipes that will transform your leftover starter into mouthwatering creations your family and friends will love.

    No more guilt about wasting your discard - with Everyday Sourdough, you have endless options to quickly make something amazing anytime.

    Let's Connect!

    Be sure to leave a comment below if you have any questions. You can also connect with me on Instagram, Facebook, Pinterest, or via email at [email protected].

    More Sourdough Focaccia Recipes

    • Pieces of sourdough discard focaccia on a wooden cutting board.
      Sourdough Discard Focaccia with Herbs (Same Day or Overnight)
    • Four pieces of sourdough focaccia pizza on a piece of parchment paper.
      Sourdough Focaccia Pizza
    • Five pieces of sourdough discard cinnamon roll focaccia with icing on a small white plate.
      Sourdough Discard Cinnamon Roll Focaccia
    • Three pieces of sourdough blueberry focaccia stacked on top of each other on a small, white plate.
      Sourdough Blueberry Focaccia

    ๐Ÿ“– Recipe

    Several pieces of whole wheat sourdough focaccia on a piece of wrinkled parchment paper.
    Print Pin SaveSaved!

    Whole Wheat Sourdough Focaccia

    This Whole Wheat Sourdough Focaccia is made with 100% whole wheat flour but still comes out soft and bubbly thanks to its high hydration. Whether you make it the same day or ferment overnight, itโ€™s wonderfully tangy with a hearty texture and nutty flavor.
    Course Bread
    Cuisine Italian
    Prep Time 1 day day
    Cook Time 30 minutes minutes
    Total Time 1 day day 30 minutes minutes
    Servings 16 pieces
    Calories 160kcal
    Author Ashley Petrie, RDN, LDN

    Equipment

    • 9"x13" aluminum baking pan (or an 18"x13" half sheet pan for thinner focaccia; or two 8"x8" aluminum baking pans), glass or ceramic may also be used
    • Kitchen scale
    • Mixing bowls
    • Bowl scraper
    • Straight-sided container (optional)

    Ingredients

    • 4 cups (480 grams) whole wheat flour
    • 2 cups (480 grams) warm water 80-90โ„‰
    • ยฝ cup (100 grams) active sourdough starter or "fresh" discard less than one week old
    • 4 ยผ teaspoons (12 grams) Diamond Crystal Kosher Salt measure by weight or use about half volume if using table salt or Morton's brand
    • 6 tablespoons extra virgin olive oil divided
    • Additional kosher salt for sprinkling on top
    • Fresh or dried herbs for sprinkling on top

    Instructions

    • Feed your sourdough starter 6-12 hours before starting the dough to make sure itโ€™s bubbly and active. It will take around 6 hours if your kitchen is warm (75ยฐF) or closer to 12 hours if itโ€™s cooler (65-68ยฐF).
    • In a large bowl, combine the whole wheat flour and warm water. Stir until no dry flour remains. Cover and let it rest for 1 hour (this step is called autolyse - it helps the dough hydrate and start building gluten).
      4 cups (480 grams) whole wheat flour, 2 cups (480 grams) warm water
    • After the 1-hour autolyse, add your sourdough starter and salt to the bowl. Mix everything together by hand until a sticky, wet dough forms. Cover and let it rest for 15 minutes.
      ยฝ cup (100 grams) active sourdough starter, 4 ยผ teaspoons (12 grams) Diamond Crystal Kosher Salt
    • Wet your hand to prevent sticking. Grab one edge of the dough, stretch it up, and fold it over onto itself. Rotate the bowl 90ยฐ and repeat this up to 16 times, until the dough begins to tighten. Gather the dough into a ball and flip it seam side down in the bowl. Cover and let it rest for 15 minutes. Repeat this process 5 more times (for a total of 6 sets), resting for 15 minutes between each set.
    • Drizzle 2 tablespoons of olive oil into a clean bowl or straight-sided container. Transfer the dough into the oiled container, making sure itโ€™s lightly coated in oil to prevent sticking. Cover and let the dough rise at room temperature until it doubles in size. This usually takes about 4 hours at 75ยฐF or up to 12 hours at 65ยฐF.
    • Line a 9"x13" baking pan with parchment paper and drizzle 2 tablespoons of olive oil on top. Gently transfer the dough to the prepared pan. Use your fingers to press and stretch the dough toward the edges. If it springs back, let it rest for 10 minutes and try again.
    • Cover the pan and let the dough proof at room temperature for about 2 hours or until it doubles and looks noticeably puffy. For a tangier flavor, refrigerate the dough overnight after spreading it in the pan. Then, let it come to room temperature and proof before baking.
    • About 20 minutes before baking, preheat your oven to 375ยฐF and position a rack in the center.
    • Lightly oil your hands and use your fingertips to poke deep dimples all over the surface of the dough. This helps redistribute air bubbles and gives focaccia its signature look. Drizzle the top with the remaining 2 tablespoons of olive oil and sprinkle with kosher salt and your favorite herbs.
    • Bake for 25-30 minutes, until the focaccia is golden brown on top.
    • Let the focaccia cool in the pan for 10 minutes before removing it. Slice and serve warm. Enjoy!

    Notes

    • Quick Tip: For best results, use a scale to measure ingredients by weight (grams).
    • Storage: Store cooled focaccia in an airtight container at room temperature for up to 2 days or freeze for up to 3 months.

    Nutrition

    Serving: 1piece | Calories: 160kcal | Carbohydrates: 23.5g | Protein: 5g | Fat: 6g | Saturated Fat: 1g | Polyunsaturated Fat: 1g | Monounsaturated Fat: 4g | Sodium: 305mg | Potassium: 125mg | Fiber: 3.5g | Calcium: 13.5mg | Iron: 1.3mg
    Did you try this recipe?Let me know! Comment below, or take a picture and tag me on Instagram @everydayhomemadebyashley.

    Chocolate Chip Sourdough Bread

    March 10, 2025

    This Chocolate Chip Sourdough Bread is crusty on the outside, soft and tangy on the inside, with just a hint of decadent sweetness from the chocolate chips. Itโ€™s an easy, beginner-friendly sourdough bread recipe thatโ€™s sure to become a favorite.

    Three slices of chocolate chip sourdough bread on a wooden cutting board.

    When it comes to sourdough inclusions, I usually lean toward savory combos - like pepperoni and mozzarella or jalapeรฑo and cheddar - because they feel so versatile.

    But lately, my sweet tooth has taken over, and Iโ€™ve been experimenting with sweet sourdough breads like the double chocolate and chocolate cherry sourdough recipes I posted a few weeks ago.

    Naturally, I had to add a simple chocolate chip sourdough bread to the mix, too!

    This recipe is perfect for beginners, thanks to its lower hydration dough thatโ€™s easy to handle. I added a little sugar to complement the sweetness of the chocolate chips, but otherwise, itโ€™s a classic sourdough loaf with a decadent twist.

    Just fold in the chocolate chips, let it ferment overnight, and bake it in the morning for a soft, sweet loaf thatโ€™s perfect for breakfast, dessert, or a snack.

    I hope you give it a try and love it as much as I do!

    Disclaimer: Some links throughout this post are affiliate links. As an Amazon Associate, I earn from qualifying purchases. You can learn more by visiting my Affiliate Disclosure Page.

    Ingredients & Substitutions

    Here are some notes on key ingredients. For a full list of ingredients, check out the recipe card below.

    • Active Sourdough Starter- Make sure your starter is bubbly and active. If youโ€™re using discard, go with fresh discard thatโ€™s less than a week old for better flavor, texture, and rise.
    • Semi-Sweet Chocolate Chips- I love semi-sweet chips for their perfect balance of sweet and bitter. Use whatever chocolate you like - milk, dark, or even chopped chocolate bars work great.
    • Bread Flour- Gives the bread its chewy texture and helps with the rise. You can swap it for all-purpose flour or whole wheat. If you go with whole wheat, you might need to add a little extra water to keep the dough soft and workable.
    • Water- This dough is about 65% hydration, which makes it easier to handle - perfect for beginners. You can adjust the hydration higher if you prefer a softer or more open crumb.
    • Granulated Sugar- Adds a subtle touch of sweetness without overpowering the tangy sourdough flavor. You can swap it for brown sugar or leave it out if you prefer a less sweet bread.
    • Kosher Salt- Enhances the flavor of the bread. I use Diamond Crystal Kosher Salt, (about 2.8 grams per teaspoon). If youโ€™re using table salt or Mortonโ€™s kosher salt, measure by weight or use about half as much.
    The ingredients to make sourdough bread with chocolate chips. Each ingredient is labeled with text. They include water, chocolate chips, sourdough starter, bread flour, granulated sugar, and salt.

    Tips for Success

    • Use active starter. Make sure your starter is bubbly and active for the best rise. If youโ€™re using discard, stick with fresh discard thatโ€™s only a few days old - older discard can slow down fermentation.
    • Weigh ingredients. A kitchen scale is your best friend when it comes to sourdough baking. Measuring by weight gives you consistent results every time.
    • Fold in chocolate chips evenly. When adding the chocolate chips, some might fall out - donโ€™t sweat it! Just press them back in and try to distribute them as evenly as possible for chocolate in every bite.
    • Find a warm spot to rise. If your kitchen is cool, try placing the dough near a warm oven, on top of the fridge, or inside a turned-off oven with the light on.
    • Use a straight-sided container. Itโ€™s easier to track how much your dough has risen with a straight-sided container - just mark the starting level and watch it grow.
    • Build tension when shaping. Create a tight surface when shaping the dough without tearing it so that the loaf rises tall in the oven instead of spreading out.
    • Cool completely. As tempting as it is to dig in immediately, let the bread cool for at least two hours. This keeps the crumb from turning gummy and gives you a better texture.

    How to Make Chocolate Chip Sourdough Bread

    Making sourdough bread with chocolate chips is easy! Hereโ€™s my step-by-step process with pictures to help you along the way:

    1. Feed Sourdough Starter

    • Start by feeding your sourdough starter 6-12 hours before baking to ensure itโ€™s bubbly and active.
    • Depending on your kitchen temperature, it might take 6 hours in warmer kitchens (around 75โ„‰), or up to 12 hours in cooler kitchens (65-68โ„‰).
    An active sourdough starter in a glass mason jar.

    2. Mix Dough

    • In a large mixing bowl, whisk together the warm water and the sourdough starter until dissolved.
    • Add the flour, sugar, and salt, mixing until fully incorporated with no dry flour remaining.
    • Cover and let rest for 20 minutes to allow the flour to fully hydrate and the gluten to relax.
    Sourdough starter and water whisked together in a glass mixing bowl.
    The dough mixed together in a glass mixing bowl.

    3. Stretch and Fold

    • Lightly wet your hands to prevent the dough from sticking. Flatten the dough slightly and sprinkle ยผ of the chocolate chips in the center.
    • Perform a stretch-and-fold by grabbing one side of the dough, stretching it upwards, and folding it over. Rotate the bowl 90ยฐ, add another ยผ of the chocolate chips, and repeat until all the chips are incorporated. Gather the dough into a rough ball and place it seam-side down.
    • Cover and rest for 20 minutes. Repeat the stretch-and-fold process 3 more times, allowing the dough to rest 20 minutes between each fold.
    Chocolate chips sprinkled on top of the dough in a mixing bowl.
    The dough being stretched and folded in a bowl to incorporate the chocolate chips and build gluten.
    The dough after the chocolate chips have been incorporated.

    4. Bulk Fermentation

    • Cover the dough and let it rise until it nearly doubles in size, with visible fermentation bubbles.
    • The rise time can vary anywhere from 4-12 hours depending on your kitchen temperature and starter strength.

    ๐Ÿž Fermentation Tip: You can transfer the dough to a straight-sided container and mark the doughโ€™s starting level to track its progress.

    The dough in a straight-sided container before bulk fermenting.

    5. Pre-Shape

    • Gently turn the dough out onto a floured surface and stretch it into a rectangle.
    • Fold both long sides toward the center like you're folding a letter, then fold the short sides inward, and flip the dough seam-side down.
    • Use your hands or a bench scraper to gently shape it into a round ball.
    • Cover and let it rest for 15 minutes.

    6. Final Shaping

    • Flip the dough seam-side up again and gently stretch it into a smaller rectangle.
    • If you're using a bowl or banneton, repeat the shaping process above.
    • For a batard, fold the shorter edges of the rectangle toward the center. Then, starting at one of the longer edges, roll the dough tightly into a log, pinching the seam and ends to seal.
    The dough stretched into a large rectangle on a wooden countertop after bulk fermentation.
    The dough folded over onto itself during shaping.
    A round shaped chocolate chip sourdough bread dough on a wooden counter.

    7. Cold Proof

    • Generously dust your proofing basket with rice flour, then transfer the dough seam-side up into the basket.
    • If needed, pinch the seam to seal it.
    • Cover the dough and refrigerate overnight (12-16 hours) to cold proof.
    The dough in a banneton basket before proofing overnight.
    The dough in a banneton basket after proofing overnight.

    8. Bake the Bread

    • Preheat a lidded Dutch oven to 450ยฐF for 30-60 minutes.
    • Turn the dough onto bread sling or parchment and score as desired.
    • Add 2 ice cubes to the hot Dutch oven.
    • Transfer the dough, cover, and bake for 45 minutes. Remove the lid and bake for 5 more minutes for a golden crust.
    • Cool on a wire rack for 2-4 hours before slicing.
    The scored dough on a piece of parchment paper, ready to be baked.
    A baked loaf of sourdough chocolate chip bread on a wire cooling rack.

    Baker's Timeline

    Hereโ€™s an example of a schedule you can follow to make this chocolate chip sourdough bread:

    • 8:00 PM (Night Before): Feed your starter.
    • 8:00 AM: Mix the dough.
    • 8:30-9:30 AM: Stretch and fold, add chocolate chips.
    • 9:30 AM-3:30 PM (Varies): Bulk fermentation.
    • 3:30-4:00 PM: Pre-shape and final shape.
    • 4:00 PM-8:00 AM (Next Day): Cold proof.
    • 8:00-8:45 AM: Bake.
    • 8:45 AM-12:45 PM: Cool.

    Note: Rise times will vary depending on the strength of your starter and the temperature of your kitchen and dough. It's best to rely on visual cues from your starter and dough rather than sticking strictly to the timeline.

    How to Store

    Store bread at room temperature in an airtight container or bread box for up to 4 days.

    For longer storage, slice and freeze in a freezer-safe bag for up to 3 months. When you're ready to enjoy, just thaw at room temperature or warm it in the toaster or oven.

    Serving Suggestions

    This chocolate chip sourdough bread is delicious served warm with a slather of homemade butter or your favorite spread - peanut butter, hazelnut spread, and strawberry apple jam are some of my favorites.

    Or turn it into sourdough French toast for a sweet, chocolatey breakfast thatโ€™s perfect for Sunday morning.

    A loaf of chocolate chip sourdough bread on a wooden cutting board.
    A cover of a recipe ebook with the title "Everyday Sourdough: 27 Sweet & Savory Sourdough Discard Recipes." There is an image of sourdough discard cinnamon rolls on the front. At the bottom, it reads "By Ashley Petrie of Everyday Homemade."
    Grab a copy today!

    Are you tired of watching your sourdough discard go to waste?

    Itโ€™s time to turn excess discard into something delicious with my new ebook - Everyday Sourdough!

    Inside, youโ€™ll find 27 tried-and-true sourdough discard recipes that will transform your leftover starter into mouthwatering creations your family and friends will love.

    No more guilt about wasting your discard - with Everyday Sourdough, you have endless options to quickly make something amazing anytime.

    Let's Connect!

    Be sure to leave a comment below if you have any questions. You can also connect with me on Instagram, Facebook, Pinterest, or via email at [email protected].

    More Sourdough Bread Recipes

    • Three slices of double chocolate sourdough bread on a white linen napkin.
      Double Chocolate Sourdough Bread
    • Slices of s'more sourdough bread on a piece of parchment paper.
      S'mores Sourdough Bread
    • Slices of cinnamon sugar sourdough bread on a wooden cutting board.
      Cinnamon Sugar Sourdough Bread
    • Slices of funfetti sourdough bread on a wooden cutting board.
      Funfetti Sourdough Bread with Cream Cheese Frosting Swirl

    ๐Ÿ“– Recipe

    Three slices of chocolate chip sourdough bread on a wooden cutting board.
    Print Pin SaveSaved!

    Chocolate Chip Sourdough Bread

    This Chocolate Chip Sourdough Bread is crusty on the outside, soft and tangy on the inside, with just a hint of decadent sweetness from the chocolate chips. Itโ€™s an easy, beginner-friendly sourdough bread recipe thatโ€™s sure to become a favorite.
    Course Bread
    Cuisine American
    Prep Time 1 day day
    Cook Time 45 minutes minutes
    Cool Time 2 hours hours
    Total Time 1 day day 2 hours hours 45 minutes minutes
    Servings 12 slices
    Calories 255kcal
    Author Ashley Petrie, RDN, LDN

    Equipment

    • Kitchen scale
    • Mixing bowls
    • Bench scraper
    • Straight-sided container (optional, for bulk fermenation)
    • Banneton or bowl lined with tea towel
    • Parchment paper
    • Lame or sharp knife
    • 6-quart dutch oven

    Ingredients

    • 1 ยผ cups + 2 tablespoons (330 grams) warm water 80-90โ„‰
    • ยฝ cup (100 grams) active sourdough starter
    • 4 ยผ cups (510 grams) bread flour
    • ยผ cup (50 grams) granulated sugar
    • 3 ยฝ teaspoons (10 grams) Diamond Crystal Kosher Salt measure by weight or reduce volume by about half if using table salt or Morton's brand
    • 1 cup (170 grams) semi-sweet chocolate chips
    • Rice flour for dusting banneton
    • 2 ice cubes for steam

    Instructions

    • Start by feeding your sourdough starter 6-12 hours before baking to ensure itโ€™s bubbly and active. Depending on your kitchen temperature, it might take 6 hours in warmer kitchens (around 75โ„‰), or up to 12 hours in cooler kitchens (65-68โ„‰).
    • In a large mixing bowl, whisk together the warm water and the sourdough starter until dissolved. Add the flour, sugar, and salt, mixing until fully incorporated with no dry flour remaining. Cover and let rest for 20 minutes to allow the flour to fully hydrate and the gluten to relax.
      1 ยผ cups + 2 tablespoons (330 grams) warm water, ยฝ cup (100 grams) active sourdough starter, 4 ยผ cups (510 grams) bread flour, ยผ cup (50 grams) granulated sugar, 3 ยฝ teaspoons (10 grams) Diamond Crystal Kosher Salt
    • Lightly wet your hands to prevent the dough from sticking. Flatten the dough slightly and sprinkle ยผ of the chocolate chips in the center. Perform a stretch-and-fold by grabbing one side of the dough, stretching it upwards, and folding it over. Rotate the bowl 90ยฐ, add another ยผ of the chocolate chips, and repeat until all the chips are incorporated. Gather the dough into a rough ball and place it seam-side down. Cover and rest for 20 minutes. Repeat the stretch-and-fold process 3 more times, allowing the dough to rest 20 minutes between each fold.
      1 cup (170 grams) semi-sweet chocolate chips
    • Cover the dough and let it rise until it nearly doubles in size, with visible fermentation bubbles. The rise time can vary anywhere from 4-12 hours depending on your kitchen temperature and starter strength. (Tip:ย You can transfer the dough to a straight-sided container and mark the doughโ€™s starting level to track its progress.)
    • Gently turn the dough out onto a floured surface and stretch it into a rectangle. Fold both long sides toward the center like you're folding a letter, then fold the short sides inward, and flip the dough seam-side down. Use your hands or a bench scraper to gently shape it into a round ball. Cover and let it rest for 15 minutes.
    • Flip the dough seam-side up again and gently stretch it into a smaller rectangle. If you're using a bowl or banneton, repeat the shaping process above. For a batard, fold the shorter edges of the rectangle toward the center. Then, starting at one of the longer edges, roll the dough tightly into a log, pinching the seam and ends to seal.
    • Generously dust your proofing basket with rice flour, then transfer the dough seam-side up into the basket. If needed, pinch the seam to seal it. Cover the dough and refrigerate overnight (12-16 hours) to cold proof.
      Rice flour
    • Place a lidded Dutch oven inside your oven and preheat to 450โ„‰. Let the Dutch oven heat for an extra 30-60 minutes once the oven reaches temperature.
    • Turn the dough out onto a piece of parchment paper. Score the top as desired with a lame or sharp knife. Carefully place 2 ice cubes in the Dutch oven for steam. Use the parchment paper to transfer the dough into the hot Dutch oven. Cover immediately with the lid to trap the steam inside.
      2 ice cubes
    • Bake at 450โ„‰ for 45 minutes with the lid on. Then, remove the lid and bake for an additional 5 minutes, if needed, to achieve your desired crust color.
    • Allow the bread cool on a wire rack for at least 2-4 hours before slicing and serving.

    Notes

    • Quick Tip: Use a kitchen scale to weigh ingredients in grams for best results.
    • Storage:ย Store bread at room temperature in an airtight container or bread box for up to 4 days. For longer storage, slice and freeze in a freezer-safe container for up to 3 months.

    Nutrition

    Serving: 1slice | Calories: 255kcal | Carbohydrates: 46.5g | Protein: 7g | Fat: 5g | Saturated Fat: 2.5g | Polyunsaturated Fat: 0.5g | Sodium: 336mg | Potassium: 70mg | Fiber: 2g | Sugar: 11g | Calcium: 11mg | Iron: 4.6mg
    Did you try this recipe?Let me know! Comment below, or take a picture and tag me on Instagram @everydayhomemadebyashley.

    Salted Brown Butter Sourdough Ice Cream

    March 7, 2025

    This Sourdough Ice Cream combines the rich, nutty flavor of brown butter with a hint of tangy sourdough discard. It has a velvety smooth texture thatโ€™s perfect for sundaes, ice cream sandwiches, or as a topping for your favorite desserts.

    A small glass bowl of sourdough ice cream.

    My friends, I think Iโ€™ve made something magical.

    Several months ago, my sister gave me her ice cream maker that she never used. At the time, I had started buying milk from a local dairy farm and mentioned wanting to make my own ice cream with it.

    Well, let's just say, I quickly became absolutely hooked on homemade ice cream.

    Naturally, as a sourdough food blogger, it didn't take long before I thought, โ€œWhat if I could make ice cream with sourdough discard?โ€ It sounded so unique and intriguing, that I just had to give it a try. And Iโ€™m so glad I did!

    I wanted this sourdough ice cream recipe to be a little more creative than plain vanilla (though I do offer that option in the recipe card below).

    So, after some experimenting, I landed on this salted brown butter flavor. It's super rich, nutty, and complex with just a hint of sourdough tang. The texture is velvety smooth with small bits of creamy brown butter pieces throughout.

    Itโ€™s also incredibly easy to make and perfect for brownie sundaes, ice cream cookie sandwiches, or as a topping for apple pie or crisp. I promise it will be the talk of your next birthday party or summer gathering.

    I hope you give it a try and enjoy it as much as we do!

    Disclaimer: Some links throughout this post are affiliate links. As an Amazon Associate, I earn from qualifying purchases. You can learn more by visiting my Affiliate Disclosure Page.

    Ingredients & Substitutions

    Here are some notes on key ingredients. For a full list of ingredients, check out the recipe card below.

    • Sourdough Discard- A fun and unique way to use up excess sourdough discard. It adds a subtle bread or yeast-like flavor to the ice cream's finish.
    • Butter- Browning the butter gives the ice cream a rich, nutty flavor. Omit the butter entirely for a vanilla-flavored ice cream instead.
    • Heavy Cream- Its high fat content prevents ice crystals, giving the ice cream a smooth, creamy texture.
    • Whole Milk- Whole milk balances the richness of the cream while still providing some fat for a creamy consistency.
    • Granulated Sugar- Sweetens the ice cream and lowers the freezing point, creating a softer, creamier texture thatโ€™s easier to scoop. It also helps prevent large ice crystals from forming.
    • Vanilla Extract- Gives the ice cream a warm vanilla flavor that pairs beautifully with the nutty brown butter.
    • Kosher Salt- Enhances the overall flavor of the ice cream while balancing the sweetness. I use one teaspoon of Diamond Crystal Kosher Salt (about 2.8 grams per teaspoon). If youโ€™re using Mortonโ€™s Kosher Salt or table salt, start with ยฝ teaspoon.
    The ingredients to make sourdough ice cream. Each ingredient is labeled with text. They include sourdough discard, heavy cream, whole milk, vanilla extract, granulated sugar, kosher salt, and butter.

    Tips for Success

    • Use high-quality ingredients. Using high-quality cream, milk, and butter can really make a big difference in the flavor and texture of your ice cream.
    • Heat the ice cream base. Heating it to 160ยฐF ensures that any harmful bacteria in the raw flour are killed.
    • Chill the base before churning. Especially if you're using a canister-style machine. It helps prevent the bowl from heating up and ensures the ice cream churns to a smoother, creamier consistency.
    • Don't overdo the discard. Stick with ยผ cup of sourdough discard โ€“ adding too much can cause ice crystals to form, making the ice cream less smooth and creamy.

    Types of Ice Cream Machines

    There are two main types of ice cream machines, both with a slightly different process and results:

    • Canister-style (freeze-bowl) machines- These require you to freeze the bowl for at least 24 hours before churning. Theyโ€™re affordable and easy to use but require advance planning.
    • Compressor (self-freezing) machines- These have built-in cooling systems, so you donโ€™t need to pre-freeze anything. They allow for back-to-back batches but are more expensive and take up more counter space.

    How to Make Sourdough Ice Cream

    Here is how to make salted brown butter sourdough ice cream.

    Step 1: Prepare Your Ice Cream Machine

    If youโ€™re using a canister-style ice cream machine, make sure you freeze the bowl at least 24 hours ahead of time for best results. Follow your specific machineโ€™s instructions.

    Step 2: Brown the Butter

    In a small saucepan, melt the butter over medium-low heat. Continue cooking and whisking until it stops sizzling and the milk solids turn a deep golden brown with a nutty aroma. Immediately transfer to a separate bowl to prevent burning.

    ๐Ÿฆ Vanilla Sourdough Ice Cream: If you prefer a simple vanilla-flavored ice cream, simply omit the butter entirely and follow the rest of the recipe as written.

    Brown butter in a small glass bowl.

    Step 3: Make the Ice Cream Base

    Rinse and cool the saucepan before adding the browned butter, heavy cream, whole milk, sugar, sourdough discard, vanilla extract, and salt. Whisk to combine, then heat over medium heat until the mixture reaches 160-165ยฐF. This ensures any potential bacteria in the discard is killed.

    The sourdough ice cream base being heated in a stainless steel pot on the stovetop.

    Step 4: Chill the Mixture

    Transfer the ice cream base to a bowl and refrigerate until it cools to 40ยฐF. To speed this up, place the bowl over an ice bath and stir occasionally. The butter may solidify in the mixture, which is normal.

    The sourdough ice cream base chilled to 40 degrees Fahrenheit.

    Step 5: Churn the Ice Cream

    Once chilled, pour the ice cream base into your machine and churn for 15-20 minutes or until it reaches a soft serve consistency.

    The brown butter sourdough ice cream base in an ice cream machine.
    Sourdough ice cream in an ice cream machine.

    Step 6: Freeze or Serve

    For soft-serve style, enjoy immediately. For a firmer, scoopable ice cream, transfer to a freezer-safe container and freeze for 12-24 hours.

    The finished sourdough ice cream in the ice cream machine.

    How to Store

    Store sourdough ice cream in a freezer-safe container for up to 3 months. For the best flavor and texture, enjoy within 3-4 weeks.

    To prevent ice crystals from forming, press a piece of parchment paper or plastic wrap directly onto the surface before sealing with a lid.

    Serving Suggestions

    Serve this brown butter sourdough ice cream on top of warm sourdough brownies or a sourdough skillet cookie, or make ice cream sandwiches with sourdough chocolate chip cookies.

    It also pairs beautifully with desserts like sourdough apple pie, apple crisp, strawberry shortcake, or lemon pound cake, and more.

    A sourdough ice cream sundae in a small bowl sitting on top of a plate. The sundae has ice cream, hot fudge, whipped cream, and colorful sprinkles.
    A cover of a recipe ebook with the title "Everyday Sourdough: 27 Sweet & Savory Sourdough Discard Recipes." There is an image of sourdough discard cinnamon rolls on the front. At the bottom, it reads "By Ashley Petrie of Everyday Homemade."
    Grab a copy today!

    Are you tired of watching your sourdough discard go to waste?

    Itโ€™s time to turn excess discard into something delicious with my new ebook - Everyday Sourdough!

    Inside, youโ€™ll find 27 tried-and-true sourdough discard recipes that will transform your leftover starter into mouthwatering creations your family and friends will love.

    No more guilt about wasting your discard - with Everyday Sourdough, you have endless options to quickly make something amazing anytime.

    Let's Connect!

    Be sure to leave a comment below if you have any questions. You can also connect with me on Instagram, Facebook, Pinterest, or via email at [email protected].

    More Sourdough Dessert Recipes

    • Sourdough discard brownies in an aluminum baking pan.
      Sourdough Discard Brownies
    • Several sourdough chocolate chip cookies on a piece of wrinkled parchment paper on a wooden cutting board.
      Sourdough Chocolate Chip Cookies (No Chill)
    • A piece of sourdough apple pie on a small white plate in front of the rest of the apple pie.
      Sourdough Apple Pie with Oat Streusel Topping
    • A small white plate of sourdough apple crisp topped with ice cream.
      Sourdough Apple Crisp

    ๐Ÿ“– Recipe

    A small glass bowl of sourdough ice cream.
    Print Pin SaveSaved!

    Sourdough Ice Cream

    This Sourdough Ice Cream combines the rich, nutty flavor of brown butter with a hint of tangy sourdough discard. It has a velvety smooth texture thatโ€™s perfect for sundaes, ice cream sandwiches, or as a topping for your favorite desserts.
    Course Dessert
    Cuisine American
    Prep Time 2 hours hours
    Cook Time 0 minutes minutes
    Total Time 2 hours hours
    Servings 5 cups
    Calories 640kcal
    Author Ashley Petrie, RDN, LDN

    Equipment

    • Ice cream machine
    • Ice cream scooper
    • Small saucepan
    • Thermometer

    Ingredients

    • ยฝ cup (1 stick) unsalted butter
    • 2 cups heavy cream
    • 1 cup whole milk
    • โ…” cup granulated sugar
    • ยผ cup sourdough starter discard
    • 2 teaspoons vanilla extract
    • 1 teaspoon Diamond Crystal Kosher Salt reduce to ยฝ teaspoon if using Morton's brand or table salt

    Instructions

    • If youโ€™re using a canister-style ice cream machine, make sure you freeze the bowl at least 24 hours ahead of time for best results. Follow your specific machineโ€™s instructions.
    • In a small saucepan, melt the butter over medium-low heat. Continue cooking and whisking until it stops sizzling and the milk solids turn a deep golden brown with a nutty aroma. Immediately transfer to a separate bowl to prevent burning.
      ยฝ cup (1 stick) unsalted butter
    • Rinse and cool the saucepan before adding the browned butter, heavy cream, whole milk, sugar, sourdough discard, vanilla extract, and salt. Whisk to combine, then heat over medium heat until the mixture reaches 160-165ยฐF. This ensures any potential bacteria in the discard is killed.
      2 cups heavy cream, 1 cup whole milk, โ…” cup granulated sugar, ยผ cup sourdough starter discard, 2 teaspoons vanilla extract, 1 teaspoon Diamond Crystal Kosher Salt
    • Transfer the ice cream base to a bowl and refrigerate until it cools to 40ยฐF. To speed this up, place the bowl over an ice bath and stir occasionally. The butter may solidify in the mixture, which is normal.
    • Once chilled, pour the ice cream base into your machine and churn for 15-20 minutes until it's thick, creamy, and reaches a soft serve consistency.
    • For soft-serve style, enjoy immediately. For a firmer, scoopable ice cream, transfer to a freezer-safe container and freeze for 12-24 hours.

    Notes

    • Vanilla Sourdough Ice Cream: If you prefer a simple vanilla-flavored ice cream, simply omit the butter entirely and follow the recipe as written.
    • Storage: Store ice cream in a freezer-safe container for up to 3 months. For the best flavor and texture, enjoy within 3-4 weeks.

    Nutrition

    Serving: 1cup | Calories: 640kcal | Carbohydrates: 36.5g | Protein: 4.5g | Fat: 54g | Saturated Fat: 32g | Polyunsaturated Fat: 2.5g | Monounsaturated Fat: 12.5g | Trans Fat: 2g | Cholesterol: 157mg | Sodium: 266mg | Potassium: 179mg | Sugar: 32g | Calcium: 123mg | Iron: 0.3mg
    Did you try this recipe?Let me know! Comment below, or take a picture and tag me on Instagram @everydayhomemadebyashley.

    Sourdough Apple Crisp

    March 7, 2025

    This Sourdough Apple Crisp is an easy fall dessert made with warmly spiced apples and topped with a buttery oat crumble infused with sourdough discard.

    A small white plate of sourdough apple crisp topped with ice cream.

    As a lifelong Massachusetts resident, apple picking is one of my favorite fall traditions. I go every year with my fiancรฉ. And of course, I always make at least one apple crisp with all the apples I pick.

    Last fall, I shared a recipe for apple pie with a sourdough crust and oat streusel topping. As a sourdough baker and blogger, I'm always looking for new, creative ways to use up my never-ending jar of sourdough discard.

    For this sourdough apple crisp, I used the same warmly spiced apple filling and sourdough oat streusel from my apple pie recipe. I simply skipped the pie crust for a quicker, easier dessert.

    The filling is lightly sweetened and balanced with lemon juice and tart apples, while the topping is buttery, sweet, and perfectly crisp.

    I love it because it comes together in under two hours and is always a hit with my friends and family. Itโ€™s perfect for after a day of apple picking, Thanksgiving dessert, or whenever youโ€™re craving a cozy fall treat.

    I hope you give it a try and enjoy it as much as we do!

    Disclaimer: Some links throughout this post are affiliate links. As an Amazon Associate, I earn from qualifying purchases. You can learn more by visiting my Affiliate Disclosure Page.

    Ingredients & Substitutions

    Here are some notes on key ingredients. For a full list of ingredients, check out the recipe card below.

    • Sourdough Discard- Adds tang to the apple crisp topping. You can also use active sourdough starter.
    • Apples- About 3 pounds (8-10 small) of tart apples like Granny Smith. Braeburn or Cortland also work well.
    • Rolled Oats- Use rolled or old-fashioned oats for a hearty, chewy texture.
    • Butter- Cold butter is necessary to create a flaky, crispy streusel.
    • Lemon Juice- Adds a little acidity to balance the sweetness of the apple filling. You can also use apple cider vinegar.
    • Cornstarch- Thickens the apple filling so it holds its shape when served. You can substitute cornstarch with arrowroot powder or tapioca starch (1:1 ratio), or use double the amount of all-purpose flour.
    • Kosher Salt- Enhances flavor and balances sweetness. I use Diamond Crystal Kosher Salt. If you use Morton's Kosher Salt or table salt, reduce the volume by about half.
    The ingredients to make sourdough apple crisp. Each ingredient is labeled with text. They include brown sugar, butter, all-purpose flour, lemon juice, sourdough discard, oats, cornstarch, salt, spices, apples.

    Tips for Success

    • Choose tart apples. Tart varieties like Granny Smith create a nice balance with the sweetness of the apple crisp topping.
    • Use a baking sheet. Place your baking dish on a large sheet to catch any potential spills while baking.
    • Cover with foil if needed. If the topping starts to brown too quickly, tent it with foil and continue baking until the filling is fully cooked.
    • Make ahead. Prep the oat crumble topping up to two days in advance to save time on baking day.

    How to Make Sourdough Apple Crisp

    Here is how to make apple crisp with sourdough discard.

    Step 1: Preheat the Oven

    Preheat the oven to 350โ„‰. Butter an 8-inch square baking dish (or a 9-inch pie dish) and set it aside.

    Step 2: Prepare the Topping

    In a medium bowl, combine the flour, oats, brown sugar, cinnamon, and salt. Cut in the cold butter and sourdough discard using your fingertips, a fork, or a pastry blender until the mixture holds together loosely when squeezed, and no dry flour remains. Set aside in the refrigerator.

    Oats, flour, and spices mixed together in a small bowl.
    Sourdough oat crumble topping for the apple crisp in a small glass bowl.

    Step 3: Make the Apple Filling

    In a large mixing bowl, toss the diced apples together with the lemon juice. Sprinkle the brown sugar, cornstarch, spices, and salt over the apples and stir until all of the apples are well-coated.

    Diced apples mixed with cinnamon, sugar, and lemon juice in a blue mixing bowl.

    Step 4: Assemble the Apple Crisp

    Transfer the apple filling and any juices into your prepared baking dish. Sprinkle the topping evenly over the apple filling, pressing down slightly to help it stick together.

    Diced apple filling in an 8-inch square aluminum baking pan.
    Sourdough apple crisp in a square baking pan before baking.

    Step 5: Bake

    Bake for 45-50 minutes, or until the topping is golden brown and the apple filling is bubbling around the edges. If the topping begins to darken too quickly, tent the dish with foil and continue baking until the filling is fully cooked.

    The baked sourdough apple crisp in a square aluminum pan.

    Step 6: Cool and Serve

    Let the apple crisp cool for 30 minutes so the filling can set. Serve and enjoy!

    A serving of sourdough apple crisp with ice cream on a small plate.

    How to Store

    Store leftover sourdough apple crisp covered at room temperature for up to 2 days or keep it in the refrigerator for up to one week.

    For longer storage, freeze for up to 3 months. To serve, simply thaw it in the fridge overnight, then warm briefly in the oven or microwave.

    Serving Suggestions

    I love serving this sourdough apple crisp with a big scoop of homemade sourdough ice cream. The creamy, rich vanilla flavor pairs perfectly with the warm, spiced apples and buttery oat crumble.

    You can also pair it with a dollop of whipped cream, a drizzle of caramel sauce, or even a slice of cheddar cheese (if you're from New England, you know it's a must!).

    Sourdough apple crisp topped with ice cream on a small white plate.
    A cover of a recipe ebook with the title "Everyday Sourdough: 27 Sweet & Savory Sourdough Discard Recipes." There is an image of sourdough discard cinnamon rolls on the front. At the bottom, it reads "By Ashley Petrie of Everyday Homemade."
    Grab a copy today!

    Are you tired of watching your sourdough discard go to waste?

    Itโ€™s time to turn excess discard into something delicious with my new ebook - Everyday Sourdough!

    Inside, youโ€™ll find 27 tried-and-true sourdough discard recipes that will transform your leftover starter into mouthwatering creations your family and friends will love.

    No more guilt about wasting your discard - with Everyday Sourdough, you have endless options to quickly make something amazing anytime.

    Let's Connect!

    Be sure to leave a comment below if you have any questions. You can also connect with me on Instagram, Facebook, Pinterest, or via email at [email protected].

    More Sourdough Apple Recipes

    • A piece of sourdough apple pie on a small white plate in front of the rest of the apple pie.
      Sourdough Apple Pie with Oat Streusel Topping
    • Three sourdough apple cinnamon rolls on a small white plate. The cinnamon roll in front is cut in half to show the texture of the inside.
      Sourdough Apple Cinnamon Rolls
    • Sourdough apple muffins with cinnamon streusel topping on a wooden cutting board with one green apple amongst them.
      Sourdough Discard Apple Muffins with Cinnamon Streusel
    • Sourdough apple cider donuts on a wooden cutting board with a whole green apple.
      Baked Sourdough Apple Cider Donuts

    ๐Ÿ“– Recipe

    A small white plate of sourdough apple crisp topped with ice cream.
    Print Pin SaveSaved!

    Sourdough Apple Crisp

    This Sourdough Apple Crisp is an easy fall dessert made with warmly spiced apples and topped with a buttery oat crumble infused with sourdough discard.
    Course Dessert
    Cuisine American
    Prep Time 45 minutes minutes
    Cook Time 45 minutes minutes
    Cool Time 30 minutes minutes
    Total Time 2 hours hours
    Servings 9 servings
    Calories 338kcal
    Author Ashley Petrie, RDN, LDN

    Equipment

    • 8-inch square pan or 9-inch pie dish

    Ingredients

    Sourdough Oat Topping

    • 1 cup (120 grams) all-purpose flour
    • 1 cup (80 grams) rolled oats
    • ยผ cup (50 grams) brown sugar packed
    • 1 teaspoon ground cinnamon
    • ยฝ teaspoon Diamond Crystal Kosher Salt use ยผ teaspoon if using Morton's Kosher Salt or table salt
    • ยฝ cup (113 grams, 1 stick) unsalted butter cold, cut into ยฝ-inch cubes
    • ยผ cup (50 grams) sourdough starter discard

    Apple Crisp Filling

    • 3 pounds (about 8-10 small) tart apples peeled, cored, cut into ยฝ to 1-inch cubes
    • 1 tablespoon lemon juice
    • ยฝ cup (100 grams) brown sugar packed
    • 3 tablespoons cornstarch
    • 2 teaspoons ground cinnamon
    • ยผ teaspoon ground ginger
    • โ…› teaspoon ground nutmeg
    • ยฝ teaspoon Diamond Crystal Kosher Salt use ยผ teaspoon if using Morton's Kosher Salt or table salt

    Instructions

    • Preheat the oven to 350โ„‰. Butter an 8-inch square baking dish (or a 9-inch pie dish) and set it aside. For easier cleanup, place the baking dish on a large baking sheet to catch any potential spills while baking.
    • In a medium bowl, combine the flour, oats, brown sugar, cinnamon, and salt. Cut in the cold butter and sourdough discard using your fingertips, a fork, or a pastry blender until the mixture holds together loosely when squeezed, and no dry flour remains. Set aside in the refrigerator.
      1 cup (120 grams) all-purpose flour, 1 cup (80 grams) rolled oats, ยผ cup (50 grams) brown sugar, 1 teaspoon ground cinnamon, ยฝ teaspoon Diamond Crystal Kosher Salt, ยฝ cup (113 grams, 1 stick) unsalted butter, ยผ cup (50 grams) sourdough starter discard
    • In a large mixing bowl, toss the diced apples together with the lemon juice. Sprinkle the brown sugar, cornstarch, spices, and salt over the apples and stir until all of the apples are well-coated.
      3 pounds (about 8-10 small) tart apples, 1 tablespoon lemon juice, ยฝ cup (100 grams) brown sugar, 3 tablespoons cornstarch, 2 teaspoons ground cinnamon, ยผ teaspoon ground ginger, โ…› teaspoon ground nutmeg, ยฝ teaspoon Diamond Crystal Kosher Salt
    • Transfer the apple filling and any juices into your prepared baking dish. Sprinkle the topping evenly over the apple filling, pressing down slightly to help it stick together.
    • Bake for 45-50 minutes, or until the topping is golden brown and the apple filling is bubbling around the edges. If the topping begins to darken too quickly, tent the dish with foil and continue baking until the filling is fully cooked.
    • Let the apple crisp cool for 30 minutes so the filling can set. Serve with a scoop of sourdough ice cream and enjoy!

    Notes

    • Storage: Store covered at room temperature for up to two days, in the fridge for up to one week, or freeze for up to three months.

    Nutrition

    Serving: 1serving | Calories: 338kcal | Carbohydrates: 59g | Protein: 4g | Fat: 11.5g | Saturated Fat: 6.5g | Polyunsaturated Fat: 1g | Monounsaturated Fat: 3.5g | Trans Fat: 0.5g | Cholesterol: 29.5mg | Sodium: 133mg | Potassium: 242mg | Fiber: 5g | Sugar: 32g | Vitamin C: 7.5mg | Calcium: 40mg | Iron: 1.1mg
    Did you try this recipe?Let me know! Comment below, or take a picture and tag me on Instagram @everydayhomemadebyashley.

    Sourdough Rye Bread (Easy, Beginner-Friendly Recipe)

    March 3, 2025

    This Sourdough Rye Bread combines rye flour, molasses, and caraway seeds for a hearty, tangy, and flavorful loaf that's easy to make and perfect for beginners.

    A loaf of sourdough rye bread cut into slices on a wooden cutting board.

    When I first picked up rye flour from a local mill in Massachusetts, I had no idea how different it was from whole wheat.

    I jumped right in and made a sourdough rye bread with 50% rye flour. It turned outโ€ฆ okay. The bread was a bit dense, and the dough was tough to work with. Turns out, rye flour mixed with water is more like wet cement and doesnโ€™t build gluten like wheat does. After some research, I found that most rye breads use around 30% rye flour.

    For this recipe, I kept it beginner-friendly with 25% rye flour and added whole wheat for extra heartiness. A touch of molasses brings sweetness and depth, while caraway seeds add that classic deli rye flavor.

    With simple steps like using a rye starter, autolyse, and stretch-and-folds, this rye sourdough bread is easy to make - even if youโ€™re new to rye.

    The result? A hearty loaf with a chewy crust and soft interior. Itโ€™s tangy, nutty, and slightly sweet, with just the right hint of caraway.

    I hope you give this easy sourdough rye bread recipe a try and enjoy it as much as I do!

    Disclaimer: Some links throughout this post are affiliate links. As an Amazon Associate, I earn from qualifying purchases. You can learn more by visiting my Affiliate Disclosure Page.

    Ingredients & Substitutions

    Here are some notes on key ingredients. For a full list of ingredients, check out the recipe card below.

    • Active Sourdough Starter- Make sure your starter is bubbly and active for a quicker rise. For best results, feed your starter with rye flour or make a separate rye starter from your usual starter. Rye starters may ferment faster than wheat starters.
    • Rye Flour- You can use either dark or light rye flour. This recipe uses about 25% rye flour, making it more beginner-friendly.
    • Whole Wheat Flour- Adds a heartier texture to the bread. If you'd like, you can substitute it with more bread flour or rye flour if you're comfortable working with rye.
    • Bread Flour- Provides a chewy texture and helps the bread rise. You can substitute it with all-purpose flour or more whole wheat flour. If you use whole wheat, you may need to add a bit more water to maintain the dough's consistency.
    • Water- This dough is 75% hydration because rye and whole wheat flour absorb more water. Autolyse the water and flour before mixing the dough for stronger gluten development and to fully hydrate the flour.
    • Molasses- Adds a subtle sweetness and depth of flavor.
    • Caraway Seeds- Optional, but they provide the classic rye bread flavor.
    • Kosher Salt- Enhances the flavor of the bread. I use Diamond Crystal Kosher Salt, which is about 8.4 grams per tablespoon. If you're using table salt or Morton's brand, be sure to measure by weight or use about half the amount.
    The ingredients to make sourdough rye bread. Each ingredient is labeled with text. They include rye flour, whole wheat flour, rye starter, bread flour, caraway seeds, water, kosher salt, and molasses.

    Tips for Success

    • Start with a small amount of rye flour. Rye can be harder to work with than wheat, so start with a smaller percentage (like the 25% in this recipe) and gradually increase as you get more comfortable.
    • Use active rye starter. Make sure your starter is bubbly and active for the best rise. If using discard, make sure it's only a few days old, as older discard may cause the dough to rise more slowly. Rye ferments more quickly than wheat, so keep a close eye on the dough during fermentation to prevent overproofing.
    • Find a warm spot to rise. Dough rises best in a warm environment. If your kitchen is cool, try placing the dough near a warm oven or on top of the fridge.
    • Use a straight-sided container. A straight-sided container helps track the doughโ€™s rise during bulk fermentation, allowing you to easily measure how much itโ€™s grown.
    • Build tension when shaping. When shaping, aim to create a tight surface without tearing. This helps the dough rise tall in the oven instead of spreading out.
    • Cool completely. Let the bread cool for at least two hours before slicing to avoid a gummy texture and get that perfect crumb.

    How to Make Sourdough Rye Bread

    Making sourdough bread with rye flour is easier than it sounds! Hereโ€™s my step-by-step process with pictures to help you along the way:

    1. Feed Sourdough Starter

    • About 6-12 hours before baking, feed your sourdough starter with rye flour to ensure it's bubbly and active.
    • The timing will depend on your kitchen temperature - around 75ยฐF takes 6 hours, cooler kitchens (65-68ยฐF) might take 12 hours.
    An active rye sourdough starter in a glass mason jar.

    2. Autolyse

    • In a large mixing bowl, combine the bread flour, whole wheat flour, and rye flour with 1 ยผ cups plus 2 tablespoons (330g) of warm water.
    • Mix until combined, cover, and let rest for 30 minutes.
    Bread flour, rye flour, and whole wheat flour mixed together with water in a glass bowl.

    3. Dissolve Molasses and Salt

    • In a small bowl, whisk together the remaining 2 tablespoons (30g) of warm water with the molasses and salt to dissolve. Set aside.
    A bowl of molasses mixed with a small amount of water.

    4. Mix Dough

    • After the 30-minute autolyse, add your active sourdough starter and the molasses-salt mixture to the flour-water mixture. If using, add the caraway seeds.
    • Mix everything together thoroughly with your hands until a sticky, cohesive dough forms.
    • Cover and let rest for 15 minutes.
    The starter, molasses, and caraway seeds added to the flour water mixture in a glass bowl.
    Sourdough rye bread dough in a glass bowl.

    5. Stretch and Fold

    • Wet your hands lightly and perform the first stretch and fold.
    • Grab one edge of the dough, stretch it up, and fold it over itself. Rotate the bowl 90ยฐ and repeat this process until youโ€™ve done it on all four sides of the dough. Gather the dough into a ball and flip it folded-side down.
    • Cover and rest for 15 minutes.
    • Repeat this stretch and fold process 3 more times (for a total of 4 sets), resting the dough for about 15 minutes between each round.
    Two hands stretching and folding the sourdough rye bread dough in a glass bowl.
    Two hands stretching and folding the sourdough rye bread dough in a glass bowl.
    The rye sourdough bread dough being shaped into a ball by two hands above a glass bowl.

    6. Bulk Fermentation

    • Cover the dough and let it rise until it nearly doubles in size, with visible fermentation bubbles.
    • This can take anywhere from 4-12 hours, depending on your kitchen temperature and starter strength. Rye starters may ferment more quickly, so keep an eye on the dough if you're using one. 

    ๐Ÿž Fermentation Tip: Transfer the dough to a straight-sided container and mark the starting level to track its progress.

    The sourdough rye bread dough in a straight sided container before bulk fermentation.
    The sourdough rye bread dough in a straight sided container after bulk fermentation.

    7. Pre-Shape

    • Once the dough has risen, gently turn it out onto a floured surface.
    • Stretch it into a rectangle. Fold both long sides in toward the center, then fold the short sides in. Flip the dough seam-side down.
    • Use your hands or a bench scraper to shape it into a round ball.
    • Cover and rest for 15 minutes.

    8. Final Shaping

    • Flip the dough seam-side up again and gently stretch it into a smaller rectangle.
    • If you're using a bowl or banneton, repeat the shaping process above.
    • For a batard, fold the shorter edges of the rectangle toward the center. Then, starting at one of the longer edges, roll the dough tightly into a log, pinching the seam and ends to seal.
    The dough stretched out into a rectangle on a lightly floured wooden countertop.
    The dough folded over itself like a letter on a lightly floured wooden counter top.
    The shaped sourdough rye bread dough on a lightly floured wooden countertop.

    9. Cold Proof

    • Generously dust your proofing basket with rice flour.
    • Transfer the dough, seam-side up, into the basket. Pinch the seam if needed to seal.
    • Cover and refrigerate for 12-16 hours for cold proofing.
    The shaped dough in a banneton basket before proofing.
    The shaped dough in a banneton basket after proofing.

    10. Bake the Bread

    • Preheat a lidded Dutch oven to 450ยฐF for 30-60 minutes.
    • Turn the dough onto bread sling or parchment and score as desired.
    • Add 2 ice cubes to the hot Dutch oven.
    • Transfer the dough, cover, and bake for 45 minutes. Remove the lid and bake for 5 more minutes for a golden crust.
    • Cool on a wire rack for 2-4 hours before slicing.
    The scored dough on a bread sling ready to be baked.
    A baked loaf of sourdough rye bread on a wire cooling rack.

    Baker's Timeline

    Hereโ€™s an example of a schedule you can follow to make this rye sourdough bread:

    • 8:00 PM (Night Before): Feed your starter.
    • 8:00-8:30 AM: Autolyse.
    • 8:30-8:45 AM: Mix the dough.
    • 9:00-9:45 AM: Stretch and fold.
    • 10:00 AM-3:00 PM (Varies): Bulk fermentation.
    • 3:00-3:30 PM: Pre-shape and final shape.
    • 3:30 PM-7:30 AM (Next Day): Cold proof.
    • 7:30-8:15 AM: Bake.
    • 8:15 AM-12:15 PM: Cool.

    Note: Rise times will vary depending on the strength of your starter and the temperature of your kitchen and dough. It's best to rely on visual cues from your starter and dough rather than sticking strictly to the timeline.

    How to Store

    Sourdough rye bread will keep at room temperature in an airtight container or bread box for up to 4 days.

    For longer storage, slice and freeze in a freezer-safe bag for up to 3 months. When you're ready to enjoy it, just thaw at room temperature or warm it in the toaster or oven.

    Serving Suggestions

    This easy sourdough rye bread is delicious served warm with homemade butter and strawberry apple jam, or with hummus and dill pickles for something more savory.

    It also pairs perfectly with corned beef and cabbage or makes a great base for a comforting sourdough grilled cheese.

    A whole loaf of sourdough rye bread on a wooden cutting board.
    A cover of a recipe ebook with the title "Everyday Sourdough: 27 Sweet & Savory Sourdough Discard Recipes." There is an image of sourdough discard cinnamon rolls on the front. At the bottom, it reads "By Ashley Petrie of Everyday Homemade."
    Grab a copy today!

    Are you tired of watching your sourdough discard go to waste?

    Itโ€™s time to turn excess discard into something delicious with my new ebook - Everyday Sourdough!

    Inside, youโ€™ll find 27 tried-and-true sourdough discard recipes that will transform your leftover starter into mouthwatering creations your family and friends will love.

    No more guilt about wasting your discard - with Everyday Sourdough, you have endless options to quickly make something amazing anytime.

    Let's Connect!

    Be sure to leave a comment below if you have any questions. You can also connect with me on Instagram, Facebook, Pinterest, or via email at [email protected].

    More Sourdough Bread Recipes

    • Two pieces of 100% whole wheat sourdough bread on a piece of parchment paper.
      100% Whole Wheat Sourdough Bread
    • A round loaf of Dutch oven sourdough bread.
      Beginner-Friendly Sourdough Bread Recipe (Dutch Oven Method)
    • Slices of honey oat sourdough bread on a cutting board.
      Honey Oat Sourdough Bread
    • A sliced loaf of beer sourdough bread on a wooden cutting board.
      Beer Sourdough Bread (Made with Beer Instead of Water!)

    ๐Ÿ“– Recipe

    A loaf of sourdough rye bread cut into slices on a wooden cutting board.
    Print Pin SaveSaved!
    4 from 4 votes

    Sourdough Rye Bread

    This Sourdough Rye Bread combines rye flour, molasses, and caraway seeds for a hearty, tangy, and flavorful loaf that's easy to make and perfect for beginners.
    Course Bread
    Cuisine American, Jewish
    Prep Time 1 day day
    Cook Time 45 minutes minutes
    Cool Time 2 hours hours
    Total Time 1 day day 2 hours hours 45 minutes minutes
    Servings 12 slices
    Calories 160kcal
    Author Ashley Petrie, RDN, LDN

    Equipment

    • Kitchen scale
    • Mixing bowls
    • Bench scraper
    • Banneton or bowl lined with tea towel
    • Lame or sharp knife
    • 6-quart dutch oven
    • Bread sling or parchment paper
    • Straight-sided container (optional)

    Ingredients

    • 2 cups (240 grams) bread flour
    • 1 cup (120 grams) whole wheat flour
    • 1 cup (120 grams) rye flour light or dark
    • 1 ยฝ cups (360 grams) warm water 80-90โ„‰ (divided)
    • 1 tablespoon (20 grams) molasses
    • 3 ยฝ teaspoons (10 grams) Diamond Crystal Kosher Salt measure by weight or reduce volume by about half if using table salt or Morton's brand
    • ยฝ cup (100 grams) active sourdough starter preferably fed with rye flour
    • 2-3 teaspoons caraway seeds optional
    • Rice flour for dusting bannetone
    • 2 ice cubes for steam

    Instructions

    • About 6-12 hours before baking, feed your sourdough starter with rye flour to ensure it's bubbly and active. The timing will depend on your kitchen temperature - around 75ยฐF takes 6 hours, cooler kitchens (65-68ยฐF) might take 12 hours.
    • In a large mixing bowl, combine the bread flour, whole wheat flour, and rye flour with 1 ยผ cups plus 2 tablespoons (330g) of warm water. Mix until combined, cover, and let rest for 30 minutes.
      2 cups (240 grams) bread flour, 1 cup (120 grams) whole wheat flour, 1 cup (120 grams) rye flour
    • In a small bowl, whisk together the remaining 2 tablespoons (30g) of warm water with the molasses and salt to dissolve. Set aside.
      1 tablespoon (20 grams) molasses, 3 ยฝ teaspoons (10 grams) Diamond Crystal Kosher Salt
    • After the 30-minute autolyse, add your active sourdough starter and the molasses-salt mixture to the flour-water mixture. If using, add the caraway seeds. Mix everything together thoroughly with your hands until a sticky, cohesive dough forms. Cover and let rest for 15 minutes.
      ยฝ cup (100 grams) active sourdough starter, 2-3 teaspoons caraway seeds
    • Wet your hands lightly and perform the first stretch and fold. Grab one edge of the dough, stretch it up, and fold it over itself. Rotate the bowl 90ยฐ and repeat this process until youโ€™ve done it on all four sides of the dough. Gather the dough into a ball, flip it folded-side down, cover, and rest for 15 minutes. Repeat this stretch and fold process 3 more times (for a total of 4 sets), resting the dough for about 15 minutes between each round.
    • Cover the dough and let it rise until it nearly doubles in size, with visible fermentation bubbles. This can take anywhere from 4-12 hours, depending on your kitchen temperature and starter strength. Rye starters may ferment more quickly, so keep an eye on the dough if you're using one. (Tip: Transfer the dough to a straight-sided container and mark the starting level to track its progress.)
    • Once the dough has risen, gently turn it out onto a floured surface. Stretch it into a rectangle. Fold both long sides in toward the center, then fold the short sides in. Flip the dough seam-side down. Use your hands or a bench scraper to shape it into a round ball. Cover and rest for 15 minutes.
    • Flip the dough seam-side up again and gently stretch it into a smaller rectangle. If you're using a bowl or banneton, repeat the shaping process above. For a batard, fold the shorter edges of the rectangle toward the center. Then, starting at one of the longer edges, roll the dough tightly into a log, pinching the seam and ends to seal.
    • Generously dust your proofing basket with rice flour. Transfer the dough, seam-side up, into the basket. Pinch the seam if needed to seal. Cover and refrigerate for 12-16 hours for cold proofing.
      Rice flour
    • The next day, place a lidded Dutch oven inside the oven and preheat to 450ยฐF. Let the Dutch oven heat for 30-60 minutes once the oven reaches temperature.
    • Turn the dough out onto a bread sling or parchment paper. Score the top of the dough with a lame or sharp knife. Carefully place 2 ice cubes in the Dutch oven for steam, then transfer the dough into the hot Dutch oven using the sling or parchment paper. Cover with the lid to trap the steam inside.
      2 ice cubes
    • Bake at 450ยฐF for 45 minutes with the lid on. Then, remove the lid and bake for an additional 5 minutes to achieve your desired crust color.
    • Remove the bread from the Dutch oven and let it cool on a wire rack for at least 2-4 hours before slicing and serving.

    Notes

    • Quick Tip: For best results, use a food scale to measure all of your ingredients by weight.
    • Storage: Store bread in an airtight container at room temperature for up to 4 days or slice and freeze for up to 3 months.

    Nutrition

    Serving: 1slice | Calories: 160kcal | Carbohydrates: 33g | Protein: 6.5g | Fat: 1g | Polyunsaturated Fat: 0.5g | Sodium: 337mg | Potassium: 195mg | Fiber: 5g | Sugar: 2g | Calcium: 20.5mg | Iron: 2.4mg
    Did you try this recipe?Let me know! Comment below, or take a picture and tag me on Instagram @everydayhomemadebyashley.

    Sourdough Breakfast Sandwich (Bacon, Egg & Cheese)

    February 25, 2025

    This Sourdough Breakfast Sandwich is the ultimate combination of crispy bacon, perfectly cooked eggs, melty cheddar cheese, and creamy avocado, all on toasted homemade sourdough bread.

    A bacon, egg, and cheese sourdough breakfast sandwich with avocado cut in half on a small white plate.

    We eat a lot of sourdough breakfast sandwiches in my house. Not just because I bake a lot of sourdough, but also because I have a flock of 16 chickens!

    Chickens are so much fun. They're always squawking at each other and keeping us entertained. And of course, they provide plenty of fresh eggs.

    Funny thing is, I didnโ€™t like eggs at all growing up. But my family kept encouraging me to try them. Eventually, I did. While they're still not my favorite food, Iโ€™ll happily eat them in a sourdough egg sandwich like this one.

    My go-to is a classic bacon, egg, and cheese on toasted sourdough with a little avocado for its creamy texture. Itโ€™s simple, satisfying, and even better when you use high-quality ingredients like homemade sourdough, fresh eggs, and thick-cut bacon.

    I love using my multigrain sourdough or everything bagel sourdough, but any sourdough bread or English muffin works. The trick is cooking the bacon first, then frying the eggs and toasting the sourdough in the bacon fat.

    The result? A hearty, flavorful sourdough breakfast sandwich youโ€™ll want to make every morning.

    I hope you give it a try and enjoy it as much as I do!

    Disclaimer: Some links throughout this post are affiliate links. As an Amazon Associate, I earn from qualifying purchases. You can learn more by visiting my Affiliate Disclosure Page.

    Ingredients & Substitutions

    Here are some notes on key ingredients. For a full list of ingredients, check out the recipe card below.

    • Sourdough Bread- Homemade sourdough makes this sandwich extra special, but a fresh loaf from a local bakery works too. I used my multigrain sourdough bread, but my rustic sourdough, honey wheat sandwich bread, whole wheat sourdough, or sourdough English muffins would also be great options.
    • Eggs- Use two large fresh eggs per sandwich. You can cook them over-easy, over-medium, or over-hard depending on how runny or firm you like your yolk.
    • Bacon- Thick-cut bacon adds the best crunch and flavor. I also use the leftover bacon fat to cook the eggs and toast the bread. If you want to switch it up, try sausage, turkey bacon, or a plant-based alternative (just use butter or oil instead of bacon fat for cooking).
    • Cheddar Cheese- Cheddar melts beautifully and adds a sharp bite. Feel free to swap in your favorite cheese - pepper jack, Swiss, gouda, or provolone would all be delicious.
    • Avocado- Optional, but highly recommended! It adds a creamy texture that balances the crispy bacon and toasted sourdough bread.
    • Seasonings- I kept it simple with salt and pepper, but you can customize it with garlic powder, red pepper flakes, or even everything bagel seasoning to change it up.
    The ingredients to make a sourdough breakfast sandwich. They include sourdough bread, bacon, cheddar cheese, avocado, eggs, salt, and pepper.

    Tips for Success

    • Start with the best ingredients. Fresh sourdough bread, high-quality eggs, and thick-cut bacon make all a difference in flavor. If you can, go for the good stuff!
    • Watch the heat. Every stovetop is a little different, so keep an eye on your skillet to avoid burning the bacon, eggs, or bread. Adjust the heat as needed to keep things cooking evenly.
    • Start the bacon in a cold skillet. This helps the fat render slowly, giving you crispier, more evenly cooked bacon.
    • Use the bacon fat. Donโ€™t let it go to waste! Cooking the eggs and toasting the bread in leftover bacon fat adds incredible flavor (and saves you from using extra butter or oil).
    • Enjoy it fresh. This sourdough breakfast sandwich is at its best when the bread is warm, the cheese is melty, and everything is fresh off the skillet.

    How to Make a Sourdough Breakfast Sandwich

    Here is how to make a bacon, egg, and cheese sandwich on sourdough bread.

    Step 1: Cook the bacon. Place the bacon in a cold cast iron or stainless steel skillet. Turn the heat to medium-low and cook for about 5 minutes. Flip and continue cooking until it reaches your desired crispiness. Transfer to a paper towel-lined plate to drain.

    Two slices of raw bacon in a cast iron skillet.
    Two cooked slices of bacon in a cast iron skillet.

    Step 2: Fry the eggs. Keep the skillet on medium-low and crack the eggs into the pan, using the bacon fat for cooking. Season with salt and pepper. Cook for 2-3 minutes or until the whites are mostly set. Flip the eggs, then place ยฝ slice of cheddar on each. Cover the pan with a lid and cook for another 1-2 minutes or until the cheese is melted. Transfer the eggs to a plate.

    Two eggs seasoned with salt and pepper frying in bacon fat in a cast iron skillet.
    Two fried eggs in a cast iron skillet. The egg on the left is covered in a slice of melted cheddar cheese.

    Step 3: Toast the sourdough bread. Reduce the heat to low. Carefully remove most of the bacon fat from the pan, leaving just a light coating. Place both slices of sourdough in the pan, toasting only one side for 1-2 minutes or until golden brown. Transfer to a clean plate.

    Two slices of multigrain sourdough bread toasting in bacon fat in a cast iron skillet.

    Step 4: Assemble sandwich. Mash ยฝ avocado onto the untoasted side of one slice of sourdough. Season with salt and pepper to taste. Layer the bacon on top, followed by the cheesy eggs. Place the second slice of sourdough on top, untoasted side down so the toasted sides are on the outside. Cut in half and enjoy immediately!

    Two slices of toasted sourdough bread on a small white plate. The slice of the left is covered with mashed avocado that's been seasoned with salt and pepper.
    Two slices of cooked bacon on top of the mashed avocado on a slice of toasted sourdough bread.
    An assembled sourdough breakfast sandwich on a small white plate before topping with the top piece of sourdough bread.

    How to Store

    This sourdough breakfast sandwich is best enjoyed fresh. But if you're serving a crowd, you can prep a few things ahead:

    • Slice the sourdough the night before and store it in an airtight container or bag.
    • Cook the bacon up to 3 days in advance and reheat it in a skillet to crisp it up.

    Since eggs, melted cheese, and mashed avocado are best fresh, I donโ€™t recommend making the whole sandwich ahead. But with a little prep, you can get them on plates in no time!

    A sourdough breakfast sandwich cut in half on a small white plate.
    A cover of a recipe ebook with the title "Everyday Sourdough: 27 Sweet & Savory Sourdough Discard Recipes." There is an image of sourdough discard cinnamon rolls on the front. At the bottom, it reads "By Ashley Petrie of Everyday Homemade."
    Grab a copy today!

    Are you tired of watching your sourdough discard go to waste?

    Itโ€™s time to turn excess discard into something delicious with my new ebook - Everyday Sourdough!

    Inside, youโ€™ll find 27 tried-and-true sourdough discard recipes that will transform your leftover starter into mouthwatering creations your family and friends will love.

    No more guilt about wasting your discard - with Everyday Sourdough, you have endless options to quickly make something amazing anytime.

    Let's Connect!

    Be sure to leave a comment below if you have any questions. You can also connect with me on Instagram, Facebook, Pinterest, or via email at [email protected].

    More Sourdough Breakfast Recipes

    • A piece of sourdough cottage cheese toast topped with tomatoes, basil, salt, and pepper.
      Sourdough Cottage Cheese Toast
    • Two pieces of sourdough avocado toast on a small plate. One is topped with everything bagel seasoning and the other is topped with fresh tomato slices and seasonings.
      Sourdough Avocado Toast
    • Several sourdough English muffins on a white cloth napkin. Two of the English muffins are cut in half.
      Sourdough English Muffins
    • Several whole wheat sourdough English muffins on a white linen cloth. One of the muffins is split open to show the nooks and crannies.
      Whole Wheat Sourdough English Muffins

    ๐Ÿ“– Recipe

    A bacon, egg, and cheese sourdough breakfast sandwich with avocado cut in half on a small white plate.
    Print Pin SaveSaved!

    Sourdough Breakfast Sandwich

    This Sourdough Breakfast Sandwich is the ultimate combination of crispy bacon, perfectly cooked eggs, melty cheddar cheese, and creamy avocado, all on toasted homemade sourdough bread.
    Course Breakfast
    Cuisine American
    Prep Time 5 minutes minutes
    Cook Time 20 minutes minutes
    Total Time 25 minutes minutes
    Servings 1 sandwich
    Calories 766kcal
    Author Ashley Petrie, RDN, LDN

    Equipment

    • 10-inch cast iron skillet or stainless steel skillet
    • Tongs
    • Metal spatula

    Ingredients

    • 2 slices thick-cut bacon
    • 2 large eggs
    • 1 slice sharp cheddar cheese
    • 2 slices sourdough bread
    • ยฝ avocado
    • Salt and pepper to taste

    Instructions

    • Place the bacon in a cold cast iron or stainless steel skillet. Turn the heat to medium-low and cook for about 5 minutes. Flip and continue cooking until it reaches your desired crispiness. Transfer to a paper towel-lined plate to drain.
      2 slices thick-cut bacon
    • Keep the skillet on medium-low and crack the eggs into the pan, using the bacon fat for cooking. Season with salt and pepper. Cook for 2-3 minutes or until the whites are mostly set. Flip the eggs, then place ยฝ slice of cheddar on each. Cover the pan with a lid and cook for another 1-2 minutes or until the cheese is melted. Transfer the eggs to a plate.
      2 large eggs, Salt and pepper, 1 slice sharp cheddar cheese
    • Reduce the heat to low. Carefully remove most of the bacon fat from the pan, leaving just a light coating. Place both slices of sourdough in the pan, toasting only one side for 1-2 minutes or until golden brown. Transfer to a clean plate.
      2 slices sourdough bread
    • Mash ยฝ avocado onto the untoasted side of one slice of sourdough. Season with salt and pepper to taste. Layer the bacon on top, followed by the cheesy eggs. Place the second slice of sourdough on top, untoasted side down so the toasted sides are on the outside.
      ยฝ avocado, Salt and pepper
    • Cut in half and enjoy immediately!

    Notes

    • Quick Tip: Every stovetop is a little different, so keep an eye on your skillet to avoid burning the bacon, eggs, or bread. Adjust the heat as needed to keep things cooking evenly.
    • Storage: This sandwich is best served fresh. For easier assembly, slice the sourdough and cook the bacon in advance, but wait to cook the eggs and assemble the sandwich until you're ready to serve.

    Nutrition

    Serving: 1sandwich | Calories: 766kcal | Carbohydrates: 70g | Protein: 36.5g | Fat: 38g | Saturated Fat: 12.5g | Polyunsaturated Fat: 3g | Monounsaturated Fat: 11g | Cholesterol: 412mg | Sodium: 1600mg | Potassium: 603mg | Fiber: 6g | Sugar: 1.5g | Vitamin C: 4.5mg | Calcium: 224mg | Iron: 3.6mg
    Did you try this recipe?Let me know! Comment below, or take a picture and tag me on Instagram @everydayhomemadebyashley.

    18 Easy Sourdough Muffin Recipes to Use Up Your Discard

    February 24, 2025

    Looking for a simple way to use your sourdough discard? This collection of sourdough muffin recipes has you covered! From banana and blueberry to decadent chocolate chip, here you'll find a sourdough muffin for every craving.

    Four images of various sourdough muffins in a grid with a white text box in the center with text that reads "Sourdough Muffin Recipes."

    If you bake with sourdough regularly, you likely have a jar of sourdough discard tucked away in the back of your fridge, just waiting to be used. I love turning my discard into sourdough quick breads and muffins โ€” theyโ€™re easy, quick, and full of flavor possibilities.

    Not only are sourdough discard muffins delicious, but they also make the perfect grab-and-go breakfast or snack. You can bake a batch to enjoy the same day or even freeze them for later.

    In this post, youโ€™ll find everything from sweet banana and blueberry muffins to indulgent chocolate chip and seasonal favorites like pumpkin and apple.

    So, whether you're a seasoned baker or just getting started, these sourdough muffin recipes are a great way to put your discard to good use. Pick your favorite, grab your ingredients, and let's get baking!

    1. Sourdough Banana Muffins

    Several sourdough banana muffins stacked together. One of the muffins has been split in half to show the texture of the crumb.
    Sourdough Discard Banana Muffins
    These Sourdough Discard Banana Muffins are a quick and easy way to use up sourdough discard and overripe bananas. Ready in just 30 minutes, theyโ€™re moist, flavorful, and perfect for customizing with your favorite mix-ins.
    Get the recipe
    Five sourdough banana muffins on a piece of wrinkled parchment paper on top of a wooden cutting board.

    2. Sourdough Blueberry Muffins with Oat Streusel Topping

    Four sourdough discard blueberry muffins on a piece of crinkled parchment paper. The muffin in focus is split in half to show the texture.
    Sourdough Blueberry Muffins
    These Sourdough Blueberry Muffins are moist, buttery, and topped with a crispy oat streusel. Made with sourdough discard, they're quick, easy to make, and perfect for breakfast or snacking!
    Get the recipe
    A sourdough blueberry muffin split in half on a muffin liner. There are several more whole muffins out of focus in the background.

    3. Sourdough Zucchini Muffins

    Several sourdough discard zucchini muffins on a piece of wrinkled parchment paper on a wooden cutting board.
    Sourdough Zucchini Muffins with Cinnamon Streusel
    These Sourdough Zucchini Muffins are an easy sourdough discard recipe made with fresh zucchini, warm cinnamon, and a sweet streusel topping. They bake up soft and tender with a bakery-style texture, making them the perfect breakfast or snack.
    Get the recipe
    Several sourdough zucchini muffins with cinnamon streusel topping on a wooden counter.

    4. Lemon Poppyseed Sourdough Muffins

    Several sourdough lemon poppyseed muffins on a piece of wrinkled parchment paper.
    Sourdough Lemon Poppyseed Muffins
    These Sourdough Lemon Poppyseed Muffins are light, tender, and bursting with fresh lemon flavor, all while using up your sourdough discard. Theyโ€™re ready in just 30 minutes and so easy to make - perfect for a quick breakfast or snack.
    Get the recipe
    Sourdough lemon poppyseed muffins on a piece of wrinkled parchment paper. One of the muffins is split in half, laying on the paper liner.

    5. Cranberry Orange Sourdough Muffins

    Several sourdough cranberry orange muffins on a wrinkled piece of parchment paper. One of the muffins is split open to show the texture of the inside.
    Sourdough Cranberry Orange Muffins
    These Sourdough Cranberry Orange Muffins are bursting with bright citrus flavor and chewy dried cranberries. They're made with sourdough discard and are perfect for breakfast, brunch, and snacking.
    Get the recipe
    Three sourdough cranberry orange muffins on a piece of crinkled parchment paper.

    6. Raspberry White Chocolate Sourdough Muffins

    Several white chocolate raspberry muffins on a table on top of a crinkled piece of parchment paper. There is a small bowl of frozen raspberries and extra white chocolate chips scattered about.
    Raspberry White Chocolate Sourdough Muffins
    These Raspberry White Chocolate Sourdough Muffins come together in just 30 minutes using sourdough discard. Bursting with fresh or frozen raspberries and melty white chocolate chips, theyโ€™re an easy breakfast or snack made from scratch.
    Get the recipe
    A raspberry white chocolate sourdough muffin split in half on a paper liner with several other muffins out of focus in the background.

    7. Sourdough Apple Muffins

    A sourdough apple muffin split in half to show the texture.
    Sourdough Apple Muffins with Cinnamon Streusel
    These Sourdough Apple Muffins are soft, moist, and packed with grated apple, cinnamon, and sourdough discard, then finished with a generous layer of buttery cinnamon streusel.
    Get the recipe
    Sourdough apple muffins with cinnamon streusel topping on a wooden cutting board with one green apple amongst them.

    8. Sourdough Carrot Cake Muffins

    Five sourdough discard carrot muffins on a counter.
    Sourdough Carrot Muffins
    These Sourdough Carrot Muffins are packed with freshly grated carrots and warm spices for a homemade muffin that tastes just like carrot cake. Made with sourdough discard, these moist and tender muffins are beginner-friendly and ready in just 30 minutes. Enjoy them for breakfast, a snack, or even dessert!
    Get the recipe
    A stack of three sourdough carrot muffins with three other muffins in the background.

    9. Sourdough Oatmeal Muffins

    Five sourdough oatmeal muffins on a piece of wrinkled parchment paper on a countertop.
    Sourdough Oatmeal Muffins
    These Sourdough Oatmeal Muffins are made with rolled oats and all butter for a hearty, make-ahead breakfast or snack. With just a bowl and whisk, this easy sourdough discard recipe is ready the same day and sure to become a new favorite.
    Get the recipe
    A sourdough oatmeal muffin split in half still sitting in the muffin wrapper.
    A cover of a recipe ebook with the title "Everyday Sourdough: 27 Sweet & Savory Sourdough Discard Recipes." There is an image of sourdough discard cinnamon rolls on the front. At the bottom, it reads "By Ashley Petrie of Everyday Homemade."
    Grab a copy today!

    Are you tired of watching your sourdough discard go to waste?

    Itโ€™s time to turn excess discard into something delicious with my new ebook - Everyday Sourdough!

    Inside, youโ€™ll find 27 tried-and-true sourdough discard recipes that will transform your leftover starter into mouthwatering creations your family and friends will love.

    No more guilt about wasting your discard - with Everyday Sourdough, you have endless options to quickly make something amazing anytime.

    10. Sourdough Morning Glory Muffins

    Three sourdough morning glory muffins stacked on top of each other with a few other muffins scattered around.
    Sourdough Morning Glory Muffins
    These Sourdough Morning Glory Muffins turn extra sourdough discard into wholesome, from-scratch muffins your family will love for breakfast or snacks. Theyโ€™re make-ahead friendly, freeze beautifully, and are super easy to grab on busy mornings.
    Get the recipe
    Sourdough morning glory muffins on a piece of parchment paper on a wooden cutting board.

    11. Sourdough Pumpkin Muffins

    Three sourdough pumpkin muffins stacked in a pyramid shape on a wrinkled piece of parchment paper. There is a small bowl of pumpkin puree in the background.
    Sourdough Pumpkin Muffins with Streusel
    These Sourdough Pumpkin Muffins are an easy way to use up sourdough discard this fall, with pumpkin puree, warm spices, and crunchy streusel on top. They're soft, moist, and have those tall, bakery-style tops you usually only get from a bakery!
    Get the recipe
    A sourdough pumpkin muffin split in half on a piece of parchment paper.

    12. Sourdough Chocolate Chip Muffins

    Three sourdough chocolate chip muffins on a wooden cutting board. Two of the muffins are stacked on top of each other while the other muffin is laying next to them with the top visible.
    Sourdough Chocolate Chip Muffins
    These Sourdough Chocolate Chip Muffins are quick and easy to make with sourdough discard. Enjoy them fresh out of the oven or make them ahead for a sweet breakfast or snack anytime.
    Get the recipe
    A sourdough chocolate chip muffin split in half on the wrapper with a few more whole muffins out of focus in the background.

    13. Double Chocolate Sourdough Muffins

    A sourdough double chocolate muffins split in half in a paper wrapper surrounded by more muffins.
    Sourdough Chocolate Muffins
    These Sourdough Chocolate Muffins are moist, decadent, and packed with chocolate chips. Ready in just 30 minutes, theyโ€™re an easy, delicious way to use up sourdough discard.
    Get the recipe
    Five sourdough chocolate muffins on a wooden cutting board.

    14. Sourdough Cinnamon Muffins

    A sourdough cinnamon muffin split in half on the paper wrapper to show the crumb.
    Sourdough Cinnamon Muffins
    These Sourdough Cinnamon Muffins are soft, buttery, and packed with warm cinnamon flavor - just like a churro. Topped with a crunchy cinnamon-sugar sprinkle, theyโ€™re a delicious and easy way to use up sourdough discard in just 30 minutes!
    Get the recipe
    A sourdough cinnamon muffin on a wooden cutting board.

    15. Sourdough Discard Corn Muffins

    Five sourdough discard corn muffins on a counter. One of the muffins is split in half with butter on each half.
    Sourdough Corn Muffins
    These Sourdough Corn Muffins are soft, buttery, and packed with cornmeal flavor. Theyโ€™re perfect as a quick breakfast, snack, or an easy side for soups, chili, and stews. Plus, theyโ€™re a great way to use up your sourdough discard.
    Get the recipe
    A sourdough corn muffin split in half on the wrapper with a piece of butter on each half.

    16. Strawberry Sourdough Muffins

    Sourdough strawberry muffins on a counter top. There are fresh strawberries to the left of one of the muffins.
    Sourdough Strawberry Muffins
    These Sourdough Strawberry Muffins use tangy sourdough discard and fresh summer strawberries for a quick, easy breakfast or snack you can make and enjoy the same day.
    Get the recipe
    A sourdough strawberry muffin split in half on a paper liner. There are more muffins out of focus in the background.

    17. Sourdough Peach Muffins

    Several sourdough peach muffins, one of which is split in half on a paper wrapper, on a countertop. There are two whole peaches also on the counter along with a wrinkled sheet of parchment paper.
    Sourdough Peach Muffins
    These Sourdough Peach Muffins are packed with fresh peaches and finished with a buttery oat streusel. Made with sourdough discard, theyโ€™re quick, easy, and perfect for a summer breakfast or snack.
    Get the recipe
    A sourdough peach muffins split in half on a paper wrapper. There are more muffins and a whole peach out of focus in the background.

    18. Sourdough Mini Muffins

    Five mini sourdough muffins stacked on top of each other with several more scattered around the stack.
    Sourdough Discard Mini Muffins
    These Sourdough Discard Mini Muffins are quick, easy, and so fun to make. Customize them with your favorite mix-ins for a sweet breakfast or snack that everyone will love.
    Get the recipe
    A mini muffin tin filled with sourdough discard mini muffins.

    Pin It!
    An image of a sourdough chocolate chip muffin and a sourdough discard blueberry muffin with the text "15 Easy Sourdough Muffin Recipes" in between them.

    18 Sourdough Discard Muffin Recipes

    1. Banana Muffins
    2. Blueberry Muffins
    3. Zucchini Muffins
    4. Lemon Poppyseed Muffins
    5. Cranberry Orange Muffins
    6. Raspberry White Chocolate Muffins
    7. Apple Muffins
    8. Carrot Cake Muffins
    9. Oatmeal Muffins
    10. Morning Glory Muffins
    11. Pumpkin Muffins
    12. Chocolate Chip Muffins
    13. Double Chocolate Muffins
    14. Cinnamon Sugar Muffins
    15. Corn Muffins
    16. Strawberry Muffins
    17. Peach Muffins
    18. Mini Muffins

    Let's Connect!

    Be sure to leave a comment below if you have any questions. You can also connect with me on Instagram, Facebook, Pinterest, or via email at [email protected].

    Sourdough Calzone (Pepperoni & Cheese)

    February 17, 2025

    This Sourdough Calzone is made with homemade sourdough pizza dough and filled with pepperoni and cheese for an easy meal or appetizer. Ready in just an hour, it can also be customized with your favorite fillings.

    Pieces of sourdough calzone on a sheet of parchment paper next to a small bowl of marinara dipping sauce.

    Growing up, my uncle always made the most amazing calzones during the holidays.

    Iโ€™ve always loved calzones, but I donโ€™t make or order them all that often. That is, until I tried making them with sourdough - and now, Iโ€™m hooked!
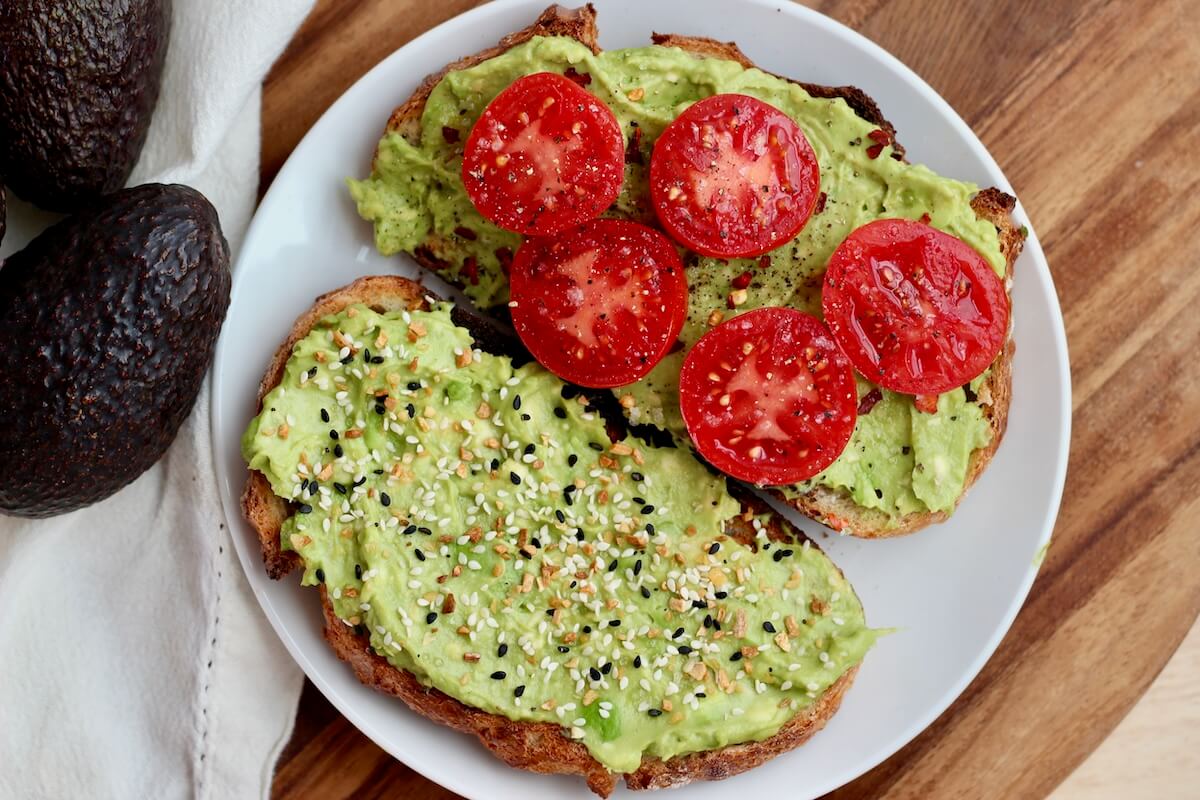
    You can make this sourdough calzone with my sourdough discard pizza dough or my whole wheat sourdough pizza dough recipe. Both give the calzone a bubbly, chewy, and crispy crust.

    I went with a classic pepperoni and cheese filling because thatโ€™s what my fiancรฉ loves, but you can totally switch it up with whatever fillings youโ€™re craving (Iโ€™ve got some ideas below!).

    Itโ€™s super quick - ready in about an hour - making it perfect for an easy dinner, appetizer for parties, or even the holidays.

    I really hope you give it a try and love it as much as we do!

    Disclaimer: Some links throughout this post are affiliate links. As an Amazon Associate, I earn from qualifying purchases. You can learn more by visiting my Affiliate Disclosure Page.

    Ingredients & Substitutions

    Here are some notes on key ingredients. For a full list of ingredients, check out the recipe card below.

    • Sourdough Pizza Dough- You can use my sourdough discard pizza dough or sourdough whole wheat pizza dough for this recipe.
    • Pepperoni- About ยฝ cup of pepperoni works well, or just enough to create a single layer over the cheese. Feel free to adjust based on your preference.
    • Mozzarella Cheese- Low-moisture mozzarella is best to prevent a soggy calzone. For the best flavor and texture, shred it yourself from a block rather than using pre-shredded cheese.
    • Parmesan- Adds a rich, nutty, slightly sharp flavor. Freshly grating it at home will give you the best taste.
    • Seasonings- A simple blend of dried oregano and garlic powder adds classic pizza flavor. You can also use my homemade pizza seasoning or your favorite pizza seasoning.
    • Dipping Sauce- Serve sourdough calzone with marinara, pesto, alfredo, ranch, or any sauce you love for dipping.
    The ingredients to make a pepperoni and cheese sourdough calzone. Each ingredient is labeled with text. They include pepperoni, mozzarella, sourdough pizza dough, parmesan, seasonings, and marinara sauce.

    Tips for Success

    • Use parchment paper. Using parchment paper (and some flour) prevents the dough from sticking when stretching and shaping.
    • Don't overfill. Too much filling can make it hard to seal and may cause leaks while baking.
    • Seal the edge well. When rolling the edge over itself, gently pull the dough outward slightly as you roll to create a tight seal. Pinch firmly to prevent leaks.
    • Cut vent holes on top. Venting the calzone helps release steam and prevents the calzone from bursting open in the oven.
    • Cool before cutting. Waiting about 10 minutes helps the cheese set, making it easier to slice and preventing burns from hot fillings.

    How to Make Sourdough Calzone

    Here is how to make a sourdough calzone with pepperoni and cheese filling.

    Step 1: Preheat oven. Preheat the oven to 500โ„‰ and place a pizza stone or baking sheet inside to heat up.

    Step 2: Stretch the dough. Lightly flour a piece of parchment paper and stretch your pizza dough into a 12-inch round.

    A sourdough pizza dough stretched out on a piece of parchment paper.

    Step 3: Add filling ingredients. Fill the calzone by spreading 1 ยฝ cups of shredded mozzarella over one half of the dough, leaving a 1-inch border around the edge. Sprinkle the parmesan cheese, oregano, and garlic powder over the mozzarella, then layer the pepperoni slices on top. Finish with the remaining 1 ยฝ cups of shredded mozzarella.

    Mozzarella cheese, parmesan cheese, and seasonings on half of a stretched out sourdough pizza dough.
    Pepperoni layered on top of cheese on half of a stretched out sourdough pizza dough.
    Sourdough pizza dough stretched out with half of it covered by layers of pepperoni and cheese.

    Step 4: Fold and seal. Carefully fold the empty side of the dough over the filling to create a half-moon shape. Press the edges together, then start at one corner and roll the edge of the dough over itself, pulling it out slightly as you go. Continue rolling and pinching along the entire edge to create a secure seal.

    Sourdough pizza dough folded in half to cover the calzone fillings.

    Step 5: Prepare for baking. Cut 2-3 small slits in the top to let steam escape. Trim the excess parchment paper, leaving enough around the calzone in case any cheese or oil drips.

    An uncooked sourdough calzone on a pizza peel.

    Step 6: Bake calzone. Use a pizza peel (or another baking sheet) to slide the calzone onto the preheated pizza stone or baking sheet. Bake for 15-18 minutes, or until the crust is golden brown and the cheese is bubbly.

    Step 7: Cool and serve. Let the calzone cool for 10 minutes before slicing. Serve with marinara or your favorite dipping sauce.

    A cooked pepperoni sourdough calzone on a baking sheet.

    Other Filling Ideas

    Try swapping the pepperoni for grilled chicken or homemade meatballs. Add sautรฉed veggies like mushrooms, spinach, or bell peppers. Or fill it with buffalo chicken dip, pesto, or even BBQ pulled chicken.

    No matter what you choose, just be sure not to overfill to make sealing the dough easier.

    How to Store

    Keep leftover calzone in an airtight container in the refrigerator for up to 5 days.

    For longer storage, freeze for up to 3 months. When ready to enjoy, thaw overnight in the fridge and reheat in the oven or microwave.

    Serving Suggestions

    Serve sourdough calzone with a side of marinara sauce, pesto, or alfredo sauce for dipping. For a balanced meal, pair it with a salad like my spinach caprese salad, asparagus spring salad, or strawberry goat cheese salad.

    A pepperoni sourdough calzone split in two on a sheet of parchment paper next to a small bowl of marinara sauce.
    A cover of a recipe ebook with the title "Everyday Sourdough: 27 Sweet & Savory Sourdough Discard Recipes." There is an image of sourdough discard cinnamon rolls on the front. At the bottom, it reads "By Ashley Petrie of Everyday Homemade."
    Grab a copy today!

    Are you tired of watching your sourdough discard go to waste?

    Itโ€™s time to turn excess discard into something delicious with my new ebook - Everyday Sourdough!

    Inside, youโ€™ll find 27 tried-and-true sourdough discard recipes that will transform your leftover starter into mouthwatering creations your family and friends will love.

    No more guilt about wasting your discard - with Everyday Sourdough, you have endless options to quickly make something amazing anytime.

    Let's Connect!

    Be sure to leave a comment below if you have any questions. You can also connect with me on Instagram, Facebook, Pinterest, or via email at [email protected].

    More Sourdough Pizza Recipes

    • Four pieces of sourdough focaccia pizza on a piece of parchment paper.
      Sourdough Focaccia Pizza
    • Grilled sourdough pizza topped with tomato sauce, mozzarella cheese, and basil on a gas grill.
      Grilled Sourdough Pizza (Gas Grill)
    • Sliced sourdough pepperoni pizza bread on a wooden cutting board.
      Pepperoni Pizza Sourdough Bread with Mozzarella & Parmesan
    • Sourdough discard pizza dough stretched out on a pizza peel.
      Sourdough Discard Pizza Dough (No Yeast)

    ๐Ÿ“– Recipe

    Pieces of sourdough calzone on a sheet of parchment paper next to a small bowl of marinara dipping sauce.
    Print Pin SaveSaved!

    Sourdough Calzone

    This Sourdough Calzone is made with homemade sourdough pizza dough and filled with pepperoni and cheese for an easy meal or appetizer. Ready in just an hour, it can also be customized with your favorite fillings.
    Course Appetizer, Main Course
    Cuisine American, Italian
    Prep Time 30 minutes minutes
    Cook Time 20 minutes minutes
    Cool Time 10 minutes minutes
    Total Time 1 hour hour
    Servings 8 pieces
    Calories 312kcal
    Author Ashley Petrie, RDN, LDN

    Equipment

    • Pizza stone or aluminum baking sheet
    • Cheese grater
    • Pizza Peel
    • Parchment paper

    Ingredients

    • 1 large (1-1 ยฝ pounds) sourdough pizza dough or sourdough whole wheat pizza dough
    • 3 cups low-moisture mozzarella cheese shredded (divided)
    • 2 tablespoons parmesan cheese grated
    • ยผ teaspoon dried oregano
    • ยผ teaspoon garlic powder
    • ยฝ cup pepperoni slices or enough for a single, slightly overlapping layer of pepperoni

    Instructions

    • Preheat the oven to 500โ„‰ and place a pizza stone or baking sheet inside to heat up.
    • Lightly flour a piece of parchment paper and stretch your pizza dough into a 12-inch round.
      1 large (1-1 ยฝ pounds) sourdough pizza dough
    • Fill the calzone by spreading 1 ยฝ cups of shredded mozzarella over one half of the dough, leaving a 1-inch border around the edge. Sprinkle the parmesan cheese, oregano, and garlic powder over the mozzarella, then layer the pepperoni slices on top. Finish with the remaining 1 ยฝ cups of shredded mozzarella.
      3 cups low-moisture mozzarella cheese, 2 tablespoons parmesan cheese, ยผ teaspoon dried oregano, ยผ teaspoon garlic powder, ยฝ cup pepperoni slices
    • Carefully fold the empty side of the dough over the filling to create a half-moon shape. Press the edges together, then start at one corner and roll the edge of the dough over itself, pulling it out slightly as you go. Continue rolling and pinching along the entire edge to create a secure seal.
    • Cut 2-3 small slits in the top to let steam escape. Trim the excess parchment paper, leaving enough around the calzone in case any cheese or oil drips.
    • Use a pizza peel (or another baking sheet) to slide the calzone onto the preheated pizza stone or baking sheet. Bake for 15-18 minutes, or until the crust is golden brown and the cheese is bubbly.
    • Let the calzone cool for 10 minutes before slicing. Serve with marinara or your favorite dipping sauce.

    Notes

    • Storage: Store leftovers in an airtight container in the refrigerator for up to 5 days or freeze for up to 3 months.
    • Other Filling Ideas: Try swapping the pepperoni for grilled chicken or homemade meatballs. Add sautรฉed veggies like mushrooms, spinach, or bell peppers. Or fill it with buffalo chicken dip, pesto, or even BBQ pulled chicken.

    Nutrition

    Serving: 1piece | Calories: 312kcal | Carbohydrates: 35g | Protein: 16g | Fat: 11.5g | Saturated Fat: 5.5g | Polyunsaturated Fat: 1g | Monounsaturated Fat: 3.5g | Trans Fat: 0.5g | Cholesterol: 31mg | Sodium: 639mg | Potassium: 126mg | Fiber: 1g | Sugar: 1g | Calcium: 256mg | Iron: 2.6mg
    Did you try this recipe?Let me know! Comment below, or take a picture and tag me on Instagram @everydayhomemadebyashley.

    Sourdough Whole Wheat Pizza Dough

    February 17, 2025

    This Sourdough Whole Wheat Pizza Dough is made with 100% whole wheat flour and sourdough discard for a hearty, healthy base for your next pizza night. Use it the same day or ferment overnight for more flavor.

    A sourdough whole wheat pizza dough ball on a floured pizza peel.

    Iโ€™m a big fan of whole wheat flour in sourdough recipes. If youโ€™ve tried my whole wheat sourdough bread, sandwich bread, or focaccia, you know how much I love its hearty flavor and texture.

    The thing is, my partner isnโ€™t usually the biggest fan of whole wheat. He absolutely loves my sourdough discard pizza dough (one of the most popular recipes on my blog).

    So, when I made this sourdough whole wheat pizza dough, I wasnโ€™t sure how heโ€™d react. But to my surprise, he really liked it! He even said he almost didnโ€™t notice it was whole wheat at all.

    This recipe is hearty, healthy, and the perfect way to use up excess sourdough discard. Plus, it pairs beautifully with any pizza toppings you love.

    I went with 90% hydration because whole wheat flour absorbs so much water. The extra moisture helps create a light, airy pizza crust. Donโ€™t worry though - this dough is still easy to work with! Just be sure to dust with plenty of flour when stretching it out to prevent sticking.

    This dough is also super flexible. You can use it the same day or ferment it overnight in the fridge for a more developed flavor.

    I canโ€™t wait for you to give this whole wheat sourdough pizza dough recipe a try! I hope you enjoy it as much as we do.

    Disclaimer: Some links throughout this post are affiliate links. As an Amazon Associate, I earn from qualifying purchases. You can learn more by visiting my Affiliate Disclosure Page.

    Ingredients & Substitutions

    Here are some notes on key ingredients. For a full list of ingredients, check out the recipe card below.

    • Sourdough Starter- You can use either an active sourdough starter or discard for this dough. If youโ€™re using discard, try to use some thatโ€™s less than a week old to get the best rise.
    • Whole Wheat Flour- This pizza dough is made with 100% whole wheat flour, which gives it a tangy, nutty flavor and chewy texture. If you want a milder whole wheat taste, feel free to swap some of the whole wheat for bread or all-purpose flour.
    • Water- With 90% hydration, this recipe creates a light, airy pizza crust with a crispy finish. Whole wheat flour absorbs much of the water, but the dough can still get sticky when stretching. Donโ€™t be shy with the flour to prevent sticking!
    • Kosher Salt- Salt enhances the flavor of the dough. I use Diamond Crystal Kosher Salt (about 2.8 grams per teaspoon). If youโ€™re using table salt or Mortonโ€™s, measure by weight or use half the amount.
    • Toppings of Choice- Top your pizza with whatever you're craving! For a delicious pizza sauce, try my marinara, alfredo, or pesto.
    The ingredients to make sourdough whole wheat pizza dough. Each ingredient is labeled with text. They include whole wheat flour, kosher salt, water, and sourdough starter.

    Tips for Success

    • Weigh your ingredients. For the best results, use a food scale to measure your ingredients. If youโ€™re using cups for flour, spoon it into the cup instead of scooping.
    • Don't skip the autolyse. Let the dough rest after mixing the flour and water. This helps with gluten development and softens the bran and germ, making for a lighter, fluffier crust.
    • Proof overnight for more flavor. Want more tang? Let the dough rest in the fridge for up to 3 days after shaping into dough balls.
    • Use enough flour. When stretching your dough, make sure to use enough flour to keep it from sticking to your hands and the counter.
    • Stretch gently. If the dough resists, donโ€™t force it. Let it rest for a few minutes to relax, then continue stretching it out gently.

    How to Make Sourdough Whole Wheat Pizza Dough

    Here's how to make a delicious 100% whole wheat sourdough pizza dough.

    1. Autolyse

    • In a large bowl, mix the whole wheat flour and warm water together until no dry flour remains.
    • Cover and let the dough rest for 1 hour.
    Whole wheat flour and water mixed together in a glass bowl.

    2. Mix Dough

    • After an hour, add your sourdough starter (discard or active) and salt to the dough. Use your hands to mix everything together until itโ€™s fully incorporated.
    • Cover and let rest for 15 minutes.
    The dough just after being mixed in a glass bowl.

    3. Stretch and Folds

    • Wet your hands lightly to prevent the dough from sticking.
    • Grab one edge of the dough, pull it up, and fold it over onto itself. Rotate the bowl 90ยฐ and repeat. Do this 4-8 times around the bowl or until the dough starts to feel tighter.
    • Gather the dough into a ball and place it seam-side down in the bowl.
    • Cover and rest for 15 minutes.
    • Repeat this stretch and fold process 5 more times with 15-minute rests in between.
    The dough being stretched and folded in a glass bowl.
    The dough being stretched and folded in a glass bowl.
    The dough being gathered into a ball and placed seam side down in a glass bowl.

    4. Bulk Fermentation

    • Cover the dough and let it rise in a warm spot (around 70-75ยฐF) for about 4-6 hours.
    • The time it takes can vary depending on your kitchen temperature and the strength of your sourdough starter or discard. The dough is ready when it doubles in size and has visible bubbles on the surface.
    The dough in a glass bowl before bulk fermentation.
    The dough in a glass bowl after bulk fermentation.

    5. Shape

    • Turn the dough out onto a lightly floured surface. Use a bench scraper to divide it into two equal pieces (about 670 grams each).
    • Shape each piece by pulling the dough into a rough rectangle. Fold the top and bottom edges of the rectangle towards the center, pressing lightly to seal. Fold the left and right edges toward the center, overlapping slightly. Press to seal, then flip the dough over so the seam side is down.
    • Gently use your hands or a bench scraper to shape each piece into a smooth round ball.
    The dough split in two in a floured countertop.
    The dough shaped into two dough balls on a floured countertop.

    6. Proof

    • Place the dough balls on a lightly floured surface or parchment paper and cover with plastic wrap.
    • Let them rest for 20-30 minutes before using them for pizza.
    • After proofing, you can use the dough for your pizza recipe right away or you can long ferment it in the refrigerator for up to 3 days for a more tangy flavor.
    One of the dough balls stretched out into a pizza on a piece of parchment paper.
    A hand holding up a slice of cheese pizza made on sourdough whole wheat pizza dough.

    Suggested Cooking Methods

    Once your dough is shaped and ready, it's pizza time! Here are a few methods for baking your pizza:

    • Pizza Stone in the Oven: Preheat the oven with a pizza stone inside to 550ยฐF. Once the stone is hot, build your pizza on a pizza peel, then carefully transfer it directly onto the stone. Bake for about 8-10 minutes, or until the crust is golden and crispy.
    • Sheet Pan in the Oven: Preheat your oven to 500ยฐF. Build your pizza on a sheet pan, then transfer it to the preheated oven. Bake for about 15 minutes, until the crust is golden and the toppings are cooked through.
    • Grill Pan on the Grill: Preheat the grill to 500ยฐF. Assemble your pizza on a grill pan, then transfer it to the grill. To avoid burning the bottom, turn the middle burner to medium-low. Close the grill lid and cook for 8-10 minutes, or until the crust is crispy and the toppings are bubbling.
    • Directly on the Grill: For a crispy, charred crust, you can grill your pizza directly on the grates. Just be sure to keep a close eye on it to prevent it from burning! The direct heat will give the pizza a wonderfully smoky flavor and a crisp, golden bottom.

    How to Store

    To store your sourdough whole wheat pizza dough, wrap it tightly in plastic wrap and refrigerate for up to 3 days.

    For longer storage, wrap individual dough balls in plastic wrap, then place them inside a freezer-safe plastic bag. You can freeze the pizza dough for up to 3 months. When you're ready to use it, simply thaw it overnight in the refrigerator.

    Serving Suggestions

    This sourdough whole wheat pizza crust is perfect for my sourdough grilled pizza or pan pizza.

    You can also use it to make mushroom pizza, garlic parmesan white pizza, or bolognese pizza recipe. Or switch things up with a delicious pepperoni and cheese sourdough calzone.

    A cheese pizza made with whole wheat sourdough pizza dough cut into 8 slices on a wire cooling rack. One slice is missing from the pizza.
    A cover of a recipe ebook with the title "Everyday Sourdough: 27 Sweet & Savory Sourdough Discard Recipes." There is an image of sourdough discard cinnamon rolls on the front. At the bottom, it reads "By Ashley Petrie of Everyday Homemade."
    Grab a copy today!

    Are you tired of watching your sourdough discard go to waste?

    Itโ€™s time to turn excess discard into something delicious with my new ebook - Everyday Sourdough!

    Inside, youโ€™ll find 27 tried-and-true sourdough discard recipes that will transform your leftover starter into mouthwatering creations your family and friends will love.

    No more guilt about wasting your discard - with Everyday Sourdough, you have endless options to quickly make something amazing anytime.

    Let's Connect!

    Be sure to leave a comment below if you have any questions. You can also connect with me on Instagram, Facebook, Pinterest, or via email at [email protected].

    More Sourdough Pizza Recipes

    • Sourdough discard pizza dough stretched out on a pizza peel.
      Sourdough Discard Pizza Dough (No Yeast)
    • Beer sourdough pizza dough stretched out into a circle on a floured pizza peel.
      Beer Sourdough Pizza Dough (Same Day or Overnight)
    • A cheese pizza on a pizza peel made with high-protein sourdough pizza dough.
      High-Protein Sourdough Pizza Dough (With Whey Protein)
    • Four pieces of sourdough focaccia pizza on a piece of parchment paper.
      Sourdough Focaccia Pizza

    ๐Ÿ“– Recipe

    A sourdough whole wheat pizza dough ball on a floured pizza peel.
    Print Pin SaveSaved!

    Sourdough Whole Wheat Pizza Dough

    This Sourdough Whole Wheat Pizza Dough is made with 100% whole wheat flour and sourdough discard for a hearty, healthy base for your next pizza night. Use it the same day or ferment overnight for more flavor.
    Course Pizza
    Cuisine American, Italian
    Prep Time 10 hours hours
    Cook Time 0 minutes minutes
    Total Time 10 hours hours
    Servings 2 large dough balls (670 grams each)
    Calories 1211kcal
    Author Ashley Petrie, RDN, LDN

    Equipment

    • Kitchen scale
    • Mixing bowls
    • Bench scraper

    Ingredients

    • 5 cups (600 grams) whole wheat flour
    • 2 ยผ cup (540 grams) warm water 80-90โ„‰
    • ยพ cup (200 grams) sourdough starter discard or active starter
    • 2 tablespoons (16 grams) Diamond Crystal Kosher Salt measure by weight or reduce volume by about half if using table salt or Morton's brand

    Instructions

    • In a large bowl, mix the whole wheat flour and warm water together until no dry flour remains. Cover and let the dough rest for 1 hour. This resting period helps soften the bran and germ in the whole wheat flour and allows gluten to start developing.
      5 cups (600 grams) whole wheat flour, 2 ยผ cup (540 grams) warm water
    • After an hour, add your sourdough starter (discard or active) and salt to the dough. Use your hands to mix everything together until itโ€™s fully incorporated. Cover and let rest for 15 minutes.
      ยพ cup (200 grams) sourdough starter discard, 2 tablespoons (16 grams) Diamond Crystal Kosher Salt
    • Wet your hands lightly to prevent the dough from sticking. Grab one edge of the dough, pull it up, and fold it over onto itself. Rotate the bowl 90ยฐ and repeat. Do this 4-8 times around the bowl or until the dough starts to feel tighter. Gather the dough into a ball and place it seam-side down in the bowl. Cover and rest for 15 minutes. Repeat this stretch and fold process 5 more times with 15-minute rests in between.
    • Cover the dough and let it rise in a warm spot (around 70-75ยฐF) for 4-6 hours. The time it takes can vary depending on your kitchen temperature and the strength of your sourdough starter or discard. The dough is ready when it doubles in size and has visible bubbles on the surface. If your kitchen is on the cooler side, place the dough in an off oven with just the light on to provide gentle warmth.
    • Turn the dough out onto a lightly floured surface. Use a bench scraper to divide it into two equal pieces (about 670 grams each). Shape each piece by pulling the dough into a rough rectangle. Fold the top and bottom edges of the rectangle towards the center, pressing lightly to seal. Fold the left and right edges toward the center, overlapping slightly. Press to seal, then flip the dough over so the seam side is down. Gently use your hands or a bench scraper to shape each piece into a smooth round ball.
    • Place the dough balls on a lightly floured surface or parchment paper and cover with plastic wrap. Let them rest for 20-30 minutes before using them for pizza. After proofing, you can use the dough right away or you can long ferment it in the refrigerator for up to 3 days for a more tangy flavor.
    • To Shape for Pizza: Place one of the proofed dough balls on a floured surface or sheet of parchment paper. Be generous with the flour to prevent sticking as you work. Gently press down about an inch from the edge of the dough with your fingertips to create a crust, working your way around the dough to start stretching it into a round shape. Then, gently press and pull the dough outward, rotating it as needed, until itโ€™s the size and thickness you want. If the dough resists or springs back, let it rest for a few minutes before continuing to stretch.
    • Use the dough for your favorite pizza or calzone recipe. See the notes below for suggested cooking methods.

    Notes

    • Yield: This recipe makes 2 large dough balls, each making about a 12-14-inch round pizza.
    • Measure ingredients by weight.ย For the most accurate and consistent results, measure your ingredients by weight using a food scale. If using measuring cups for flour, spoon it into the cup rather than scooping it from the container.
    • Use enough flour while stretching.ย To prevent the dough from sticking to your hands or the work surface while stretching, dust lightly with flour as needed. This will make it easier to handle and shape the dough without tearing or sticking.
    • Storage: Store dough in an airtight container for up to 3 days in the refrigerator or 3 months in the freezer.ย 
    • Make Ahead: The dough develops more flavor the longer it sits in the refrigerator and can be made up to 3 days ahead.
    • Suggested Cooking Methods:
      • Pizza Stone in the Oven: Preheat the oven with a pizza stone inside to 550ยฐF. Build the pizza on a pizza peel, then transfer the pizza directly to the hot pizza stone. Bake for about 8-10 minutes.
      • Sheet Pan in the Oven: Preheat the oven to 500ยฐF. Build the pizza on a sheet pan, then transfer to the preheated oven. Bake for 15 minutes.
      • Grill Pan on the Grill: Preheat the grill to 500ยฐF. Build the pizza on a grill pan, then transfer the pan to the grill. Turn the middle burner to medium-low to prevent burning the bottom of the pizza. Close the grill lid and cook for 8-10 minutes.
      • Directly on the Grill: For a crispy, charred crust, you can also grill your pizza directly on the grill grates. Just be sure to keep a close eye on it!

    Nutrition

    Serving: 1dough ball | Calories: 1211kcal | Carbohydrates: 249g | Protein: 53g | Fat: 9.5g | Saturated Fat: 1.5g | Polyunsaturated Fat: 4.5g | Monounsaturated Fat: 1g | Sodium: 3223mg | Potassium: 1316mg | Fiber: 37g | Sugar: 1.5g | Calcium: 142.5mg | Iron: 13.5mg
    Did you try this recipe?Let me know! Comment below, or take a picture and tag me on Instagram @everydayhomemadebyashley.

    Sourdough Lemon Poppyseed Muffins

    February 17, 2025

    These Sourdough Lemon Poppyseed Muffins are light, tender, and bursting with fresh lemon flavor, all while using up your sourdough discard. Theyโ€™re ready in just 30 minutes and so easy to make - perfect for a quick breakfast or snack.

    Sourdough lemon poppyseed muffins on a piece of wrinkled parchment paper. One of the muffins is split in half, laying on the paper liner.

    As a sourdough food blogger, I love grouping similar recipes together when Iโ€™m testing new ideas. So, this January, I decided it was time to give some of my older muffin and quick bread recipes a little makeover, along with adding a few new ones to the mix.

    I dove into testing seven new sourdough muffin recipes and one quick bread recipe. Among them were sourdough banana muffins, sourdough chocolate chip muffins, and of course, these sourdough lemon poppyseed muffins.

    After getting some help from friends and family with taste testing, these lemon poppyseed muffins quickly became the standout favorite.

    Theyโ€™re light and tender with a burst of fresh lemon flavor, and the poppyseeds add just the right amount of crunch. The sourdough discard gives them a subtle tang, while the butter adds richness that perfectly complements the bright lemon notes.

    And the best part? These muffins are super quick and easy to make - ready in just 30 minutes!

    Theyโ€™re a great way to use up any sourdough discard you might have hiding in the back of your fridge. Plus, with their light, refreshing flavor, theyโ€™re perfect for springtime brunch celebrations like Motherโ€™s Day and Easter.

    I canโ€™t wait for you to try them, and I hope you love them as much as I do!

    Disclaimer: Some links throughout this post are affiliate links. As an Amazon Associate, I earn from qualifying purchases. You can learn more by visiting my Affiliate Disclosure Page.

    Ingredients & Substitutions

    Here are some notes on key ingredients. For a full list of ingredients, check out the recipe card below.

    • Sourdough Discard- Adds moisture and a subtle tangy flavor to the muffins. The older your discard, the more pronounced the tang, so feel free to adjust according to your taste preferences.
    • Lemon Juice + Zest- Fresh lemon juice and zest give the muffins their bright, citrusy flavor. The zest is particularly important for a more intense lemon taste, so don't skip it!
    • Lemon Extract- Enhances the lemon flavor. If you donโ€™t have lemon extract, you can substitute with a little extra lemon zest or juice.
    • Poppy Seeds- These add a delightful crunch and texture. If you donโ€™t have poppy seeds on hand, chia seeds are a great substitute.
    • All-Purpose Flour- Provides the structure for the muffins. If you want a slightly heartier texture, you can replace up to โ…“ of the all-purpose flour with whole wheat flour. Just note that this may result in a denser muffin.
    • Granulated Sugar- The sugar provides sweetness and moisture. If you're looking for a slightly less sweet lemon muffin, you can reduce the sugar to ยพ cup (150 grams) without affecting the texture too much.
    • Whole Milk- Adds richness and moisture. You can substitute with any milk or milk alternative, such as almond or oat milk, if needed.
    • Butter- Adds a rich, buttery taste. Since butter firms up as it cools, these muffins are best served warm. If you prefer, you can swap butter for a neutral oil like vegetable or canola oil for a slightly different flavor and softer texture at room temperature.
    • Kosher Salt- I use Diamond Crystal Kosher Salt (2.8 grams per teaspoon). If youโ€™re using table salt or Mortonโ€™s Kosher Salt, measure by weight or reduce to half the amount to avoid oversalting.
    The ingredients to make sourdough lemon poppyseed muffins. Each ingredient is labeled with text. They include lemon juice, lemon zest, butter, sugar, salt, lemon extract, milk, sourdough discard, baking powder, baking soda, poppy seeds, eggs, and all-purpose flour.

    Tips for Success

    • Measure ingredients accurately. For the most accurate results, weigh your flour. If you donโ€™t have a scale, spoon the flour into the measuring cup and level it off. Using too much flour can result in dense, dry muffins.
    • Opt for fresh lemon juice. Use fresh lemon juice instead of bottled juice for the best flavor.
    • Use room temperature ingredients. Let your eggs, sourdough discard, and milk come to room temperature before mixing for a smoother batter that bakes more evenly.
    • Fold gently. Mix just until the dry and wet ingredients are combined as overmixing can lead to dense or tough muffins.
    • Serve warm. Muffins made with all butter firm up as they cool. To bring back their soft texture, reheat in the microwave for 10โ€“15 seconds or in the oven for a few minutes.

    How to Make Sourdough Lemon Poppyseed Muffins

    Here is how to make lemon poppyseed muffins with sourdough discard.

    Step 1: Preheat oven and prepare muffin tin. Preheat your oven to 425ยฐF. Line a 12-cup muffin tin with paper liners, or grease each cup with butter, oil, or cooking spray to prevent sticking.

    Step 2: Mix dry ingredients. In a medium bowl, whisk together the flour, poppy seeds, baking powder, baking soda, and salt. Set aside.

    The dry ingredients mixed together in a bowl.

    Step 3: Prepare wet ingredients. In a large mixing bowl, whisk the melted butter and sugar together until smooth and slightly lighter in color. Add the eggs, one at a time, whisking well after each addition. Stir in the milk, sourdough discard, lemon juice, lemon zest, and lemon extract until fully combined.

    The wet ingredients mixed together in a bowl.

    Step 4: Combine wet and dry ingredients. Add the dry ingredients to the wet mixture. Gently fold the batter together, mixing just until the flour is fully incorporated. Be careful not to overmix to keep the muffins light and tender.

    Sourdough lemon poppyseed muffin batter in a mixing bowl with a rubber spatula sticking out to the left.

    Step 5: Fill muffin cups. Divide the batter evenly between the 12 muffin cups.

    Six paper lined muffin wells filled with sourdough lemon poppyseed muffin batter.

    Step 6: Bake muffins. Bake for 12โ€“14 minutes, or until the tops are golden brown and a toothpick inserted into the center comes out clean.

    Step 7: Cool and serve. Let the muffins cool in the pan for 5 minutes before transferring them to a wire rack to cool completely. Enjoy your muffins warm with butter, jam, or as is!

    Six baked sourdough discard lemon poppyseed muffins in a muffin tin.

    How to Store

    Store your completely cooled sourdough discard lemon poppyseed muffins in an airtight container at room temperature for 3โ€“4 days. Reheat in the oven or microwave for 10โ€“15 seconds before serving for the softest texture.

    For longer storage, freeze the muffins in a freezer-safe container for up to 3 months. When you're ready to enjoy them, thaw at room temperature and warm them up before serving.

    Several sourdough lemon poppyseed muffins on a piece of wrinkled parchment paper.
    A cover of a recipe ebook with the title "Everyday Sourdough: 27 Sweet & Savory Sourdough Discard Recipes." There is an image of sourdough discard cinnamon rolls on the front. At the bottom, it reads "By Ashley Petrie of Everyday Homemade."
    Grab a copy today!

    Are you tired of watching your sourdough discard go to waste?

    Itโ€™s time to turn excess discard into something delicious with my new ebook - Everyday Sourdough!

    Inside, youโ€™ll find 27 tried-and-true sourdough discard recipes that will transform your leftover starter into mouthwatering creations your family and friends will love.

    No more guilt about wasting your discard - with Everyday Sourdough, you have endless options to quickly make something amazing anytime.

    Let's Connect!

    Be sure to leave a comment below if you have any questions. You can also connect with me on Instagram, Facebook, Pinterest, or via email at [email protected].

    More Sourdough Muffin Recipes

    • Three sourdough cranberry orange muffins on a piece of crinkled parchment paper.
      Sourdough Cranberry Orange Muffins
    • A sourdough blueberry muffin split in half on a muffin liner. There are several more whole muffins out of focus in the background.
      Sourdough Blueberry Muffins with Streusel Topping
    • A sourdough peach muffins split in half on a paper wrapper. There are more muffins and a whole peach out of focus in the background.
      Sourdough Peach Muffins with Streusel Topping
    • Sourdough morning glory muffins on a piece of parchment paper on a wooden cutting board.
      Sourdough Morning Glory Muffins (Healthy & Freezer-Friendly)

    ๐Ÿ“– Recipe

    Sourdough lemon poppyseed muffins on a piece of wrinkled parchment paper. One of the muffins is split in half, laying on the paper liner.
    Print Pin SaveSaved!

    Sourdough Lemon Poppyseed Muffins

    These Sourdough Lemon Poppyseed Muffins are light, tender, and bursting with fresh lemon flavor, all while using up your sourdough discard. Theyโ€™re ready in just 30 minutes and so easy to make - perfect for a quick breakfast or snack.
    Course Breakfast, Snack
    Cuisine American
    Prep Time 15 minutes minutes
    Cook Time 15 minutes minutes
    Total Time 30 minutes minutes
    Servings 12 muffins
    Calories 261kcal
    Author Ashley Petrie, RDN, LDN

    Equipment

    • Standard 12-cup muffin tin
    • Mixing bowls
    • Whisk
    • Paper liners
    • Kitchen scale

    Ingredients

    • 2 ยผ cups (270 grams) all-purpose flour
    • 2 tablespoons (20 grams) poppy seeds can substitute with chia seeds
    • 2 teaspoons baking powder
    • ยฝ teaspoon baking soda
    • 1 teaspoon Diamond Crystal Kosher Salt
    • ยฝ cup (113 grams, 1 stick) unsalted butter melted
    • 1 cup (200 grams) granulated sugar
    • 2 large (100 grams) eggs room temperature
    • ยฝ cup (120 grams) whole milk room temperature
    • ยฝ cup (100 grams) sourdough starter discard
    • ยผ cup (about 1 large lemon) lemon juice
    • 1 tablespoon (about 1 lemon) lemon zest
    • 2 teaspoons lemon extract

    Instructions

    • Preheat your oven to 425ยฐF. Line a 12-cup muffin tin with paper liners, or grease each cup with butter, oil, or cooking spray to prevent sticking.
    • In a medium bowl, whisk together the flour, poppy seeds, baking powder, baking soda, and salt. Set aside.
      2 ยผ cups (270 grams) all-purpose flour, 2 tablespoons (20 grams) poppy seeds, 2 teaspoons baking powder, ยฝ teaspoon baking soda, 1 teaspoon Diamond Crystal Kosher Salt
    • In a large mixing bowl, whisk the melted butter and sugar together until smooth and slightly lighter in color. Add the eggs, one at a time, whisking well after each addition. Stir in the milk, sourdough discard, lemon juice, lemon zest, and lemon extract until fully combined.
      ยฝ cup (113 grams, 1 stick) unsalted butter, 1 cup (200 grams) granulated sugar, 2 large (100 grams) eggs, ยฝ cup (120 grams) whole milk, ยฝ cup (100 grams) sourdough starter discard, ยผ cup (about 1 large lemon) lemon juice, 1 tablespoon (about 1 lemon) lemon zest, 2 teaspoons lemon extract
    • Add the dry ingredients to the wet mixture. Gently fold the batter together, mixing just until the flour is fully incorporated. Be careful not to overmix to keep the muffins light and tender.
    • Divide the batter evenly between the 12 muffin cups.
    • Bake for 12โ€“14 minutes, or until the tops are golden brown and a toothpick inserted into the center comes out clean.
    • Let the muffins cool in the pan for 5 minutes before transferring them to a wire rack to cool completely. Enjoy your muffins warm with butter, jam, or as is!

    Notes

    • Optional Lemon Glaze: For a sweet finishing touch, drizzle a glaze made from 1 cup powdered sugar and 1-2 tablespoons lemon juice (adjust for desired consistency) over cooled muffins.
    • Quick Tip:ย Muffins made with all butter tend to firm up at room temperature since butter solidifies as it cools. A quick warm-up in the microwave for 10-15 seconds restores their soft texture.
    • Storage:ย Keep muffins in an airtight container at room temperature for 3-4 days or freeze them for up to 3 months.

    Nutrition

    Serving: 1muffin | Calories: 261kcal | Carbohydrates: 39g | Protein: 5.5g | Fat: 9.5g | Saturated Fat: 5g | Polyunsaturated Fat: 1g | Monounsaturated Fat: 2.5g | Trans Fat: 0.5g | Cholesterol: 54mg | Sodium: 244mg | Potassium: 61mg | Fiber: 1g | Sugar: 17.5g | Vitamin C: 2.6mg | Calcium: 89mg | Iron: 0.5mg
    Did you try this recipe?Let me know! Comment below, or take a picture and tag me on Instagram @everydayhomemadebyashley.

    Sourdough Discard Banana Muffins (30 Minutes!)

    February 10, 2025

    These Sourdough Discard Banana Muffins are a quick and easy way to use up sourdough discard and overripe bananas. Ready in just 30 minutes, theyโ€™re moist, flavorful, and perfect for customizing with your favorite mix-ins.

    Five sourdough banana muffins on a piece of wrinkled parchment paper on top of a wooden cutting board.

    I buy bananas every week for my mid-morning snack. But, almost without fail, I end up with a few that get too ripe by the end of the week. Sound familiar?

    And, of course, as a sourdough blogger, I always have a big jar of sourdough discard hanging out in my fridge.

    While I love banana bread, sometimes itโ€™s nice to have muffins that are already portioned out. So, I took my favorite sourdough banana bread recipe and made a few tweaks to turn it into these moist, tender muffins.

    Theyโ€™re lightly sweetened with brown sugar and ripe bananas, and sourdough discard gives them a slight tang. Made with all butter, theyโ€™re rich in flavor with a comforting hint of cinnamon that pairs perfectly with banana.

    These muffins are a great way to use up both your overripe bananas and sourdough discard. Plus, theyโ€™re ready in just 30 minutes. They also freeze beautifully, making them an easy, grab-and-go breakfast or snack.

    I canโ€™t wait for you to try them - I hope you love these banana sourdough muffins as much as I do!

    Still have a few ripe bananas hanging around? Check out my sourdough banana pancake recipe!

    Disclaimer: Some links throughout this post are affiliate links. As an Amazon Associate, I earn from qualifying purchases. You can learn more by visiting my Affiliate Disclosure Page.

    Ingredients & Substitutions

    Here are some notes on key ingredients. For a full list of ingredients, check out the recipe card below.

    • Sourdough Discard- Adds moisture and a subtle tangy flavor. The older your discard, the more pronounced the tang, so adjust according to your taste.
    • Bananas- Overripe bananas with lots of brown spots work best. They add natural sweetness, moisture, and flavor to the muffins.
    • All-Purpose Flour- Provides the structure for the muffins. You can replace up to โ…“ with whole wheat flour for a slightly heartier texture, but the muffins may be a bit denser.
    • Brown Sugar- Adds a rich, caramel-like sweetness that pairs perfectly with the bananas and cinnamon. If needed, you can substitute it with coconut sugar or granulated sugar.
    • Butter- Adds a rich, buttery flavor. Since butter firms up when cooled, these sourdough banana muffins are best served warm. If preferred, you can substitute it with a neutral oil like vegetable or canola oil.
    • Cinnamon- Adds warm, cozy flavor to the muffins. For a fun twist, try swapping it with a teaspoon of my pumpkin spice blend.
    • Kosher Salt- I use Diamond Crystal Kosher Salt (2.8 grams per teaspoon). If youโ€™re using table salt or Mortonโ€™s Kosher Salt, measure by weight or reduce to half the amount to avoid oversalting.
    The ingredients to make sourdough banana muffins. Each ingredient is labeled with text. They include sourdough discard, butter, baking powder, baking soda, vanilla, cinnamon, eggs, brown sugar, salt, all-purpose flour, and ripe bananas.

    Tips for Success

    • Measure ingredients accurately. Weigh your flour for the most accurate results, or spoon it into the measuring cup and level it off. Using too much flour can lead to dense, dry muffins.
    • Choose ripe bananas. The riper, the better - spotty, overripe bananas add natural sweetness and moisture to your muffins.
    • Use room temperature ingredients. Bring your eggs, sourdough discard, and bananas to room temperature before mixing for a smoother batter that bakes more evenly.
    • Fold gently. Stir just until the dry and wet ingredients are combined as overmixing can make the muffins dense or tough.
    • Customize with mix-ins. Fold in your favorite add-ins like chocolate chips, chopped nuts, or dried fruit to make these sourdough banana muffins your own.
    • Serve warm. Muffins made with butter tend to firm up as they cool. Reheat in the microwave for 10โ€“15 seconds or in the oven for a few minutes to restore their soft texture.

    How to Make Sourdough Banana Muffins

    Here is how to make banana muffins with sourdough discard.

    Step 1: Prepare muffin tin. Preheat your oven to 425ยฐF. Line a 12-cup muffin tin with paper liners, or lightly grease each cup with butter, oil, or cooking spray to prevent sticking.

    Step 2: Mix dry ingredients. In a medium bowl, whisk together the flour, cinnamon, salt, baking powder, and baking soda. Set aside.

    The dry ingredients mixed together in a bowl.

    Step 3: Whisk wet ingredients. In a large mixing bowl, whisk the melted butter and brown sugar until smooth and slightly lighter in color. Add the eggs one at a time, whisking well after each addition. Stir in the mashed bananas, sourdough discard, and vanilla extract, mixing until fully combined.

    The wet ingredients mixed together in a bowl.

    Step 4: Combine wet and dry ingredients. Gently fold the dry ingredient mixture into the wet ingredients, being careful not to overmix. If desired, fold in 1 cup of mix-ins such as chopped nuts, chocolate chips, or dried fruit, until they are evenly distributed throughout the batter.

    Sourdough discard banana muffin batter in a bowl with a rubber spatula sticking out.

    Step 5: Fill muffin cups. Divide the batter evenly among the 12 muffin cups.

    Six paper lined muffin wells filled with sourdough banana muffin batter.

    Step 6: Bake muffins. Bake in the preheated oven for 14โ€“16 minutes, or until the muffin tops are golden brown and a toothpick inserted into the center comes out clean.

    Step 7: Cool and serve. Let the muffins cool in the tin for 5 minutes, then transfer them to a wire rack to cool completely. Serve warm for the best texture.

    Six baked sourdough banana muffins in a muffin tin.

    How to Store

    Store completely cooled sourdough discard banana muffins in an airtight container at room temperature for 3-4 days. For the best texture, reheat in the oven or microwave for 10-15 seconds before serving.

    For longer storage, freeze muffins in a freezer-safe container for up to 3 months. Thaw at room temperature and warm before serving.

    Several sourdough banana muffins stacked together. One of the muffins has been split in half to show the texture of the crumb.
    A cover of a recipe ebook with the title "Everyday Sourdough: 27 Sweet & Savory Sourdough Discard Recipes." There is an image of sourdough discard cinnamon rolls on the front. At the bottom, it reads "By Ashley Petrie of Everyday Homemade."
    Grab a copy today!

    Are you tired of watching your sourdough discard go to waste?

    Itโ€™s time to turn excess discard into something delicious with my new ebook - Everyday Sourdough!

    Inside, youโ€™ll find 27 tried-and-true sourdough discard recipes that will transform your leftover starter into mouthwatering creations your family and friends will love.

    No more guilt about wasting your discard - with Everyday Sourdough, you have endless options to quickly make something amazing anytime.

    Let's Connect!

    Be sure to leave a comment below if you have any questions. You can also connect with me on Instagram, Facebook, Pinterest, or via email at [email protected].

    More Sourdough Muffin Recipes

    • A sourdough blueberry muffin split in half on a muffin liner. There are several more whole muffins out of focus in the background.
      Sourdough Blueberry Muffins with Streusel Topping
    • A sourdough strawberry muffin split in half on a paper liner. There are more muffins out of focus in the background.
      Sourdough Strawberry Muffins
    • Several sourdough zucchini muffins with cinnamon streusel topping on a wooden counter.
      Sourdough Zucchini Muffins with Cinnamon Streusel Topping
    • Sourdough lemon poppyseed muffins on a piece of wrinkled parchment paper. One of the muffins is split in half, laying on the paper liner.
      Sourdough Lemon Poppyseed Muffins

    ๐Ÿ“– Recipe

    Five sourdough banana muffins on a piece of wrinkled parchment paper on top of a wooden cutting board.
    Print Pin SaveSaved!

    Sourdough Discard Banana Muffins

    These Sourdough Discard Banana Muffins are a quick and easy way to use up sourdough discard and overripe bananas. Ready in just 30 minutes, theyโ€™re moist, flavorful, and perfect for customizing with your favorite mix-ins.
    Course Breakfast, Snack
    Cuisine American
    Prep Time 15 minutes minutes
    Cook Time 15 minutes minutes
    Total Time 30 minutes minutes
    Servings 12 muffins
    Calories 228kcal
    Author Ashley Petrie, RDN, LDN

    Equipment

    • Standard 12-cup muffin tin
    • Mixing bowls
    • Whisk
    • Paper liners
    • Kitchen scale

    Ingredients

    • 1 ยฝ cups (180 grams) all-purpose flour
    • 1 teaspoon cinnamon
    • 1 teaspoon Diamond Crystal Kosher Salt
    • 1 teaspoon baking powder
    • ยฝ teaspoon baking soda
    • ยฝ cup (113 grams, 1 stick) unsalted butter melted
    • ยพ cup (150 grams) brown sugar packed
    • 2 large (100 grams) eggs room temperature
    • 4 small (400 grams) overripe bananas room temperature
    • ยฝ cup (100 grams) sourdough starter discard room temperature
    • 1 teaspoon vanilla extract
    • 1 cup mix-ins such as chopped nuts, chocolate chips, or dried fruit (optional)

    Instructions

    • Preheat your oven to 425ยฐF. Line a 12-cup muffin tin with paper liners, or lightly grease each cup with butter, oil, or cooking spray to prevent sticking.
    • In a medium bowl, whisk together the flour, cinnamon, salt, baking powder, and baking soda. Set aside.
      1 ยฝ cups (180 grams) all-purpose flour, 1 teaspoon cinnamon, 1 teaspoon Diamond Crystal Kosher Salt, 1 teaspoon baking powder, ยฝ teaspoon baking soda
    • In a large mixing bowl, whisk the melted butter and brown sugar until smooth and slightly lighter in color. Add the eggs one at a time, whisking well after each addition. Stir in the mashed bananas, sourdough discard, and vanilla extract, mixing until fully combined.
      ยฝ cup (113 grams, 1 stick) unsalted butter, ยพ cup (150 grams) brown sugar, 2 large (100 grams) eggs, 4 small (400 grams) overripe bananas, ยฝ cup (100 grams) sourdough starter discard, 1 teaspoon vanilla extract
    • Gently fold the dry ingredient mixture into the wet ingredients, being careful not to overmix to avoid dense muffins. If desired, fold in 1 cup of mix-ins such as chopped nuts, chocolate chips, or dried fruit, until they are evenly distributed throughout the batter.
      1 cup mix-ins
    • Divide the batter evenly among the 12 muffin cups.
    • Bake in the preheated oven for 14โ€“16 minutes, or until the muffin tops are golden brown and a toothpick inserted into the center comes out clean.
    • Let the muffins cool in the tin for 5 minutes, then transfer them to a wire rack to cool completely. Serve warm for the best texture.

    Notes

    • Quick Tip:ย Muffins made with all butter tend to firm up at room temperature since butter solidifies as it cools. A quick warm-up in the microwave for 10-15 seconds restores their soft texture.
    • Storage:ย Keep muffins in an airtight container at room temperature for 3-4 days or freeze them for up to 3 months.

    Nutrition

    Serving: 1muffin (without mix-ins) | Calories: 228kcal | Carbohydrates: 35g | Protein: 4g | Fat: 9g | Saturated Fat: 5g | Polyunsaturated Fat: 0.5g | Monounsaturated Fat: 2.5g | Trans Fat: 0.5g | Cholesterol: 53mg | Sodium: 202mg | Potassium: 155mg | Fiber: 1.5g | Sugar: 17.5g | Vitamin C: 4mg | Calcium: 44mg | Iron: 0.4mg
    Did you try this recipe?Let me know! Comment below, or take a picture and tag me on Instagram @everydayhomemadebyashley.

    Sourdough Corn Muffins

    February 4, 2025

    These Sourdough Corn Muffins are soft, buttery, and packed with cornmeal flavor. Theyโ€™re perfect as a quick breakfast, snack, or an easy side for soups, chili, and stews. Plus, theyโ€™re a great way to use up your sourdough discard!

    A sourdough corn muffin split in half on the wrapper with a piece of butter on each half.

    Since the start of the new year, Iโ€™ve been having fun reworking some of my old recipes into sourdough versions, starting with a variety of sourdough discard muffins.

    As I focus on making my blog more sourdough-centric this year, I decided to give an old cornbread recipe a makeover (since I already have a sourdough cornbread recipe on the blog) and turn it into these sourdough discard corn muffins.

    These muffins are soft, buttery, and full of corn flavor. Theyโ€™re easy to make and ready in under 30 minutes, making them a perfect way to use up any sourdough discard you have on hand.

    Theyโ€™re also incredibly versatile. Whether you enjoy one as a quick breakfast with butter or jam, as a satisfying snack, or paired with a hearty chili as the perfect side dish, these sourdough cornbread muffins are sure to be a hit.

    I hope you give them a try and enjoy them as much as I do!

    Disclaimer: Some links throughout this post are affiliate links. As an Amazon Associate, I earn from qualifying purchases. You can learn more by visiting my Affiliate Disclosure Page.

    Ingredients & Substitutions

    Here are some notes on key ingredients. For a full list of ingredients, check out the recipe card below.

    • Sourdough Discard- Adds moisture and a subtle tang. Use fresh discard for a mild flavor or older discard if you want a more noticeable sourdough flavor.
    • Cornmeal- For the best texture, choose medium or coarse-ground cornmeal. Fine cornmeal will make the muffins less hearty and more cake-like.
    • All-Purpose Flour- Provides structure to corn muffins. You can swap up to โ…“ of the flour with whole wheat flour for a nuttier flavor, but expect a slightly denser texture.
    • Granulated Sugar- Adds sweetness. If you prefer less sweet muffins, reduce the sugar to ยฝ cup.
    • Whole Milk- Contributes moisture and fat, which help create a tender crumb. You can use any milk or milk alternative, but the texture may vary slightly.
    • Butter- Adds rich flavor that complements to cornmeal. Butter firms up as it cools, so these corn muffins are best served warm. If you prefer, swap it for an equal amount of neutral-flavored oil like vegetable or canola.
    • Kosher Salt- I use Diamond Crystal Kosher Salt, about 2.8 grams per teaspoon. If using table salt or Mortonโ€™s, measure by weight or use half the amount.
    The ingredients to make sourdough corn muffins. Each ingredient is labeled with text. They include butter, granulated sugar, milk, egg, sourdough discard, cornmeal, all-purpose flour, salt, baking powder, and baking soda.

    Tips for Success

    • Measure ingredients accurately. For the best results, weigh your flour and cornmeal. If you donโ€™t have a scale, spoon into a measuring cup and level it off. Too much flour can lead to dry, dense muffins.
    • Use room temperature ingredients. Bring your eggs, sourdough discard, and milk to room temperature before mixing. This helps the batter combine evenly and ensures better rise.
    • Don't overmix. Gently fold the wet and dry ingredients together until just combined. Overmixing can make the muffins dense and tough.
    • Add mix-ins. For extra flavor, try adding minced jalapeรฑos, shredded cheddar cheese, diced bacon, whole corn kernels, or fresh herbs.
    • Serve warm. Butter-based muffins tend to firm up as they cool. Warm them for 10โ€“15 seconds in the microwave or a few minutes in the oven to restore their soft, tender texture.

    How to Make Sourdough Corn Muffins

    Here is how to make corn muffins with sourdough discard.

    Step 1: Prepare oven and muffin pan. Preheat oven to 400ยฐF. Line a 12-cup muffin tin with paper liners or grease the wells with butter, oil, or cooking spray.

    Step 2: Mix dry ingredients. In a medium bowl, whisk together the flour, cornmeal, baking powder, baking soda, and salt. Set aside.

    The dry ingredients mixed together in a glass bowl.

    Step 3: Whisk together wet ingredients. In a large bowl, whisk the melted butter and sugar until smooth and slightly lighter in color. Add the eggs one at a time, whisking well after each. Stir in the milk and sourdough discard until everything is combined.

    The wet ingredients whisked together in a glass bowl. There is a whisk sticking out of the bowl to the left.

    Step 4: Combine wet and dry ingredients. Add the dry ingredients to the wet mixture. Use a rubber spatula to gently fold the batter until just combined, being careful not to overmix. If youโ€™re using jalapeรฑos, fold them in now.

    Sourdough corn muffin batter in a glass mixing bowl with a rubber spatula sticking out of the bowl to the left.

    Step 5: Fill muffin tin. Divide the batter evenly among the 12 muffin cups.

    Six paper lined muffin tin wells filled with sourdough discard corn muffin batter.

    Step 6: Bake muffins. Bake for 14โ€“16 minutes, or until the tops are golden and a toothpick inserted into the center of a muffin comes out clean.

    Step 7: Cool and serve. Let the muffins cool in the pan for 5 minutes before transferring them to a wire rack to cool completely. Serve warm for the best texture.

    Six sourdough discard corn muffins on a wire cooling rack.

    Serving Suggestions

    These sourdough discard corn muffins are perfect for breakfast, a quick snack, or as a side dish. Enjoy them with strawberry, blueberry, or cranberry jam for breakfast. For dinner, pair them with beef and bean chili, pumpkin turkey chili, or BBQ pulled chicken.

    Need a quick snack? Warm one up and slather on some homemade butter - itโ€™s so good!

    How to Store

    Store fully cooled sourdough corn muffins in an airtight container at room temperature for 3-4 days. For the best texture, warm them in the oven or microwave for 10-15 seconds before serving.

    For longer storage, freeze the muffins in a freezer-safe container for up to 3 months. Thaw at room temperature and reheat before serving.

    Five sourdough discard corn muffins on a counter. One of the muffins is split in half with butter on each half.
    A cover of a recipe ebook with the title "Everyday Sourdough: 27 Sweet & Savory Sourdough Discard Recipes." There is an image of sourdough discard cinnamon rolls on the front. At the bottom, it reads "By Ashley Petrie of Everyday Homemade."
    Grab a copy today!

    Are you tired of watching your sourdough discard go to waste?

    Itโ€™s time to turn excess discard into something delicious with my new ebook - Everyday Sourdough!

    Inside, youโ€™ll find 27 tried-and-true sourdough discard recipes that will transform your leftover starter into mouthwatering creations your family and friends will love.

    No more guilt about wasting your discard - with Everyday Sourdough, you have endless options to quickly make something amazing anytime.

    Let's Connect!

    Be sure to leave a comment below if you have any questions. You can also connect with me on Instagram, Facebook, Pinterest, or via email at [email protected].

    More Sourdough Muffin Recipes

    • A sourdough cinnamon muffin on a wooden cutting board.
      Sourdough Cinnamon Muffins
    • Several sourdough zucchini muffins with cinnamon streusel topping on a wooden counter.
      Sourdough Zucchini Muffins with Cinnamon Streusel Topping
    • A raspberry white chocolate sourdough muffin split in half on a paper liner with several other muffins out of focus in the background.
      The Best Raspberry White Chocolate Sourdough Muffins
    • Sourdough morning glory muffins on a piece of parchment paper on a wooden cutting board.
      Sourdough Morning Glory Muffins (Healthy & Freezer-Friendly)

    ๐Ÿ“– Recipe

    A sourdough corn muffin split in half on the wrapper with a piece of butter on each half.
    Print Pin SaveSaved!
    5 from 2 votes

    Sourdough Corn Muffins

    These Sourdough Corn Muffins are soft, buttery, and packed with cornmeal flavor. Theyโ€™re perfect as a quick breakfast, snack, or an easy side for soups, chili, and stews. Plus, theyโ€™re a great way to use up your sourdough discard.
    Course Breakfast, Side Dish, Snack
    Cuisine American
    Prep Time 10 minutes minutes
    Cook Time 15 minutes minutes
    Total Time 25 minutes minutes
    Servings 12 muffins
    Calories 244kcal
    Author Ashley Petrie, RDN, LDN

    Equipment

    • Standard 12-cup muffin tin
    • Paper liners
    • Kitchen scale

    Ingredients

    • 1 ยฝ cups (180 grams) all-purpose flour
    • ยพ cup (120 grams) cornmeal
    • 2 teaspoons baking powder
    • ยฝ teaspoon baking soda
    • 1 teaspoon (3 grams) Diamond Crystal Kosher Salt
    • ยฝ cup (113 grams, 1 stick) unsalted butter melted
    • ยพ cup (150 grams) granulated sugar
    • 2 large (100 grams) eggs room temperature
    • ยพ cup (180 grams) whole milk room temperature
    • ยฝ cup (100 grams) sourdough starter discard room temperature
    • 1-2 fresh jalapeรฑos diced (optional)

    Instructions

    • Preheat oven to 400ยฐF. Line a 12-cup muffin tin with paper liners or grease the wells with butter, oil, or cooking spray.
    • In a medium bowl, whisk together the flour, cornmeal, baking powder, baking soda, and salt. Set aside.
      1 ยฝ cups (180 grams) all-purpose flour, ยพ cup (120 grams) cornmeal, 2 teaspoons baking powder, ยฝ teaspoon baking soda, 1 teaspoon (3 grams) Diamond Crystal Kosher Salt
    • In a large bowl, whisk the melted butter and sugar until smooth and slightly lighter in color. Add the eggs one at a time, whisking well after each. Stir in the milk and sourdough discard until everything is combined.
      ยฝ cup (113 grams, 1 stick) unsalted butter, ยพ cup (150 grams) granulated sugar, 2 large (100 grams) eggs, ยพ cup (180 grams) whole milk, ยฝ cup (100 grams) sourdough starter discard
    • Add the dry ingredients to the wet mixture. Use a rubber spatula to gently fold the batter until just combined, being careful not to overmix. If youโ€™re using jalapeรฑos, fold them in now.
      1-2 fresh jalapeรฑos
    • Divide the batter evenly among the 12 muffin cups.
    • Bake for 14โ€“16 minutes, or until the tops are golden and a toothpick inserted into the center of a muffin comes out clean.
    • Let the muffins cool in the pan for 5 minutes before transferring them to a wire rack to cool completely. Serve warm for the best texture.

    Notes

    • Quick Tip:ย Muffins made with all butter tend to firm up at room temperature since butter solidifies as it cools. A quick warm-up in the microwave for 10-15 seconds restores their soft texture.
    • Storage: Store muffins in an airtight container at room temperature for up to 4 days or freeze for up to 3 months. Warm in the oven or microwave before serving for the best texture.

    Nutrition

    Serving: 1muffin | Calories: 244kcal | Carbohydrates: 36g | Protein: 5g | Fat: 9.5g | Saturated Fat: 5.5g | Polyunsaturated Fat: 0.5g | Monounsaturated Fat: 3g | Trans Fat: 0.5g | Cholesterol: 55mg | Sodium: 249mg | Potassium: 77mg | Fiber: 1.5g | Sugar: 13.5g | Calcium: 70mg | Iron: 0.7mg
    Did you try this recipe?Let me know! Comment below, or take a picture and tag me on Instagram @everydayhomemadebyashley.

    Homemade Hummus

    February 3, 2025

    A quick and creamy homemade hummus made with just a few ingredients. Perfect for dipping sourdough pita, crackers, or even spreading on sandwiches.

    A bowl of hummus drizzled with olive oil and sprinkled with paprika surrounded by chunks of sourdough bread.

    Homemade hummus is one of those simple recipes thatโ€™s always worth making from scratch.

    This classic, creamy hummus comes together in just 10 minutes using a food processor or blender - no fancy techniques required! Itโ€™s perfect for dipping with sourdough crackers or pita bread, spreading on sandwiches, or serving alongside warm sourdough bread.

    My favorite way to enjoy it? As a sandwich spread on my multigrain sourdough, layered with roasted chicken breast, fresh spinach, and red onion. Itโ€™s the perfect balance of creamy, tangy, and savory.

    Plus, having a batch of hummus in the fridge makes for an easy, healthy snack anytime.

    Once you try this homemade version, youโ€™ll never go back to store-bought!

    Disclaimer: Some links throughout this post are affiliate links. As an Amazon Associate, I earn from qualifying purchases. You can learn more by visiting my Affiliate Disclosure Page.

    Ingredients & Substitutions

    Here are some notes on key ingredients. For a full list of ingredients, check out the recipe card below.

    • Chickpeas- I typically use canned chickpeas for convenience. But if you prefer, you can cook your own from dried chickpeas for a fresher flavor.
    • Tahini- Adds a rich, nutty flavor and creamy texture. If you don't have tahini, try using sunflower seed butter or almond butter, or skip it altogether and add extra olive oil.
    • Lemon Juice- Fresh lemon juice brightens the hummus and adds a bit of acidity. If you don't have fresh lemons, you can substitute with bottled lemon juice.
    • Water- Helps to smooth out the hummus and adjust the consistency. You can also use some of the liquid from the canned chickpeas (aquafaba) for a bit more flavor.
    • Olive Oil- Gives the hummus a smoother, more creamy consistency. You can substitute with another mild oil like avocado oil, or skip the oil for a lower-fat version - just add a little extra water to reach the desired consistency.
    • Garlic- Adds a savory pop of flavor. If youโ€™re not a fan of raw garlic, try roasted garlic for a milder taste, or use garlic powder for a subtler flavor.
    • Kosher Salt- Enhances the flavors of the hummus. If you're using table salt, start with half the amount as itโ€™s more concentrated.
    The ingredients to make hummus. Each ingredient is labeled with text. They include salt, tahini, water, olive oil, chickpeas, garlic, cumin, and lemon juice.

    Tips for Success

    • Blend well. Let the food processor run for at least 2โ€“3 minutes to get a super creamy texture.
    • Chill before serving. Hummus tastes even better after a few hours in the fridge, allowing the flavors to meld.
    • Adjust to taste. Start with the base recipe, then tweak it to your liking - add more lemon, garlic, or cumin for extra flavor.

    How to Make Hummus

    Here is how to make this easy homemade hummus recipe.

    Step 1: Combine ingredients. Combine all ingredients in the bowl of a food processor or blender.

    A food processor filled with all of the ingredients to make hummus.

    Step 2: Blend ingredients. Process on high for 2-3 minutes, scraping down the sides as needed, until the hummus is smooth and creamy.

    The finished hummus in a food processor.

    Step 3: Store and serve. Transfer hummus to an airtight container and store in the fridge for up to 1 week. Enjoy with your favorite sourdough bread, pita, or crackers for an easy snack!

    Hummus in a glass storage bowl.

    How to Store

    Store hummus in an airtight container in the refrigerator for up to one week.

    For longer storage, freeze hummus for up to 3 months. Note that freezing may change the consistency, so thawed hummus is best used as a sandwich spread or blended into a creamy pasta sauce.

    Serving Suggestions

    This creamy hummus is perfect for all things sourdough!

    Serve it as a dip in a sourdough bread bowl and scoop it up with sourdough olive bread, pita, whole wheat pita, naan, wheat crackers, cheese crackers, or soft pretzels. Spread it on sandwiches, make a hummus pizza, or turn it into a creamy sauce for pasta.

    A plate of sourdough bread chunks surrounding a small bowl of hummus.
    A cover of a recipe ebook with the title "Everyday Sourdough: 27 Sweet & Savory Sourdough Discard Recipes." There is an image of sourdough discard cinnamon rolls on the front. At the bottom, it reads "By Ashley Petrie of Everyday Homemade."
    Grab a copy today!

    Are you tired of watching your sourdough discard go to waste?

    Itโ€™s time to turn excess discard into something delicious with my new ebook - Everyday Sourdough!

    Inside, youโ€™ll find 27 tried-and-true sourdough discard recipes that will transform your leftover starter into mouthwatering creations your family and friends will love.

    No more guilt about wasting your discard - with Everyday Sourdough, you have endless options to quickly make something amazing anytime.

    Let's Connect!

    Be sure to leave a comment below if you have any questions. You can also connect with me on Instagram, Facebook, Pinterest, or via email at [email protected].

    More Dip Recipes

    • A bowl of black bean corn feta dip surrounded by pita chips. There is a pita chip sticking out of the dip.
      Black Bean Corn Feta Dip
    • A skillet filled with Greek yogurt buffalo chicken dip garnished with green onions and hot sauce.
      Greek Yogurt Buffalo Chicken Dip
    • A bowl of 4-ingredient guacamole garnished with cilantro.
      Easy 4-Ingredient Guacamole Recipe
    • A skillet of mayo-free spinach artichoke dip surrounded by tortilla chips.
      Baked Spinach Artichoke Dip (No Mayo)

    ๐Ÿ“– Recipe

    A bowl of hummus drizzled with olive oil and sprinkled with paprika surrounded by chunks of sourdough bread.
    Print Pin SaveSaved!
    5 from 1 vote

    Homemade Hummus

    A quick and creamy homemade hummus made with just a few ingredients. Perfect for dipping sourdough pita, crackers, or even spreading on sandwiches.
    Course Snack
    Cuisine Middle Eastern
    Prep Time 10 minutes minutes
    Cook Time 0 minutes minutes
    Total Time 10 minutes minutes
    Servings 28 tablespoons
    Calories 34kcal
    Author Ashley Petrie, RDN, LDN

    Equipment

    • Colander
    • Food processor or blender
    • Rubber spatula

    Ingredients

    • 1 (15.5 ounce) can low-sodium chickpeas drained and rinsed
    • ยผ cup tahini
    • ยผ cup fresh lemon juice (about 1 lemon)
    • ยผ cup water
    • 1 tablespoon extra virgin olive oil
    • 1 clove garlic minced
    • ยฝ teaspoon kosher salt
    • ยผ teaspoon cumin

    Instructions

    • Combine all ingredients in the bowl of a food processor or blender.
      1 (15.5 ounce) can low-sodium chickpeas, ยผ cup tahini, ยผ cup fresh lemon juice, ยผ cup water, 1 tablespoon extra virgin olive oil, 1 clove garlic, ยฝ teaspoon kosher salt, ยผ teaspoon cumin
    • Process on high for 2-3 minutes, scraping down the sides as needed, until the hummus is smooth and creamy.
    • Transfer hummus to an airtight container and store in the fridge for up to 1 week. Enjoy with your favorite sourdough bread, pita, or crackers for an easy snack!

    Notes

    • Yield: Recipe makes approximately 1 ยพ cups or about 28 tablespoons of hummus.
    • Storage: Store hummus in an airtight container in the refrigerator for up to one week. For longer storage, freeze hummus for up to 3 months. Note that freezing may change the consistency, so thawed hummus is best used as a sandwich spread or blended into a creamy pasta sauce.

    Nutrition

    Serving: 1tablespooon | Calories: 34kcal | Carbohydrates: 3g | Protein: 1g | Fat: 2g | Saturated Fat: 0.3g | Polyunsaturated Fat: 0.6g | Monounsaturated Fat: 0.8g | Sodium: 65mg | Potassium: 39mg | Fiber: 0.7g | Sugar: 0.5g | Calcium: 5.5mg | Iron: 0.3mg
    Did you try this recipe?Let me know! Comment below, or take a picture and tag me on Instagram @everydayhomemadebyashley.

    Chocolate Cherry Sourdough Bread

    February 3, 2025

    This Chocolate Cherry Sourdough Bread is a decadent dessert loaf made with cocoa powder, chocolate chips, and dried cherries - perfect for Valentineโ€™s Day or anytime you want to treat your favorite chocolate lover.

    A sliced loaf of chocolate cherry sourdough bread on a wooden cutting board.

    Valentine's Day has always been extra special in my house because it's also my fiancรฉ's birthday!

    This year, I wanted to create a sweet, indulgent sourdough bread recipe perfect for the occasion. Of course, I immediately thought of chocolate. Then, after browsing Pinterest for inspiration, I decided dried cherries would add the perfect burst of sweetness and color.

    When I was testing this recipe, I gave some to my mom and stepdad, and they ate three pieces in one night! They loved it with jam and gave it two big thumbs up. That made me even more excited to share this recipe with you all!

    This chocolate cherry sourdough bread is made with Dutch-processed cocoa powder, chocolate chips, and sweet dried cherries, creating a decadent dessert loaf thatโ€™s perfect for a special occasion (or anytime you want to spoil the chocolate lover in your life).

    I hope youโ€™ll give it a try and enjoy it as much as we do!

    Disclaimer: Some links throughout this post are affiliate links. As an Amazon Associate, I earn from qualifying purchases. You can learn more by visiting my Affiliate Disclosure Page.

    Ingredients & Substitutions

    Here are some notes on key ingredients. For a full list of ingredients, check out the recipe card below.

    • Active Sourdough Starter- Make sure your starter is bubbly and active for the best rise. If using discard, use one that's just a few days old. But keep in mind the dough might take longer to rise.
    • Dried Cherries- If your cherries are large, cut them into smaller pieces, about the same size as the chocolate chips. Canโ€™t find dried cherries? Dried cranberries make a good substitute!
    • Chocolate Chips- I love using semi-sweet chocolate chips because theyโ€™re the perfect balance of sweet and bitter, but you can use any type of chocolate you prefer.
    • Dutch-Processed Cocoa Powder- This type of cocoa is treated to balance out acidity, giving the bread a more balanced chocolate flavor. Itโ€™s my go-to for sourdough recipes.
    • Bread Flour- Gives the bread a nice, chewy texture and helps achieve a good rise. You can use all-purpose flour, or swap in some whole wheat flour - just add a little extra water.
    • Water- Cocoa powder absorbs a lot of liquid, so the dough might feel firmer than usual. Feel free to adjust the water for a wetter or firmer dough.
    • Granulated Sugar- Just a little sweetness to balance the chocolate, without making the bread overly sweet.
    • Kosher Salt- Enhances the flavor of the bread. I use Diamond Crystal Kosher Salt, which is about 8.4 grams per tablespoon. If you're using table salt or Morton's brand, be sure to measure by weight or use about half the amount.
    The ingredients to make chocolate cherry sourdough bread. Each ingredient is labeled with text. They include water, chocolate chips, dried cherries, bread flour, sourdough starter, salt, sugar, and Dutch-processed cocoa.

    Tips for Success

    • Use active starter. For the best rise, make sure your starter is bubbly and active. If you're using discard, stick to one that's just a few days old. Keep in mind the dough might take a bit longer to rise with older discard.
    • Opt for Dutch-Processed Cocoa. Dutch-processed cocoa gives the bread a more balanced chocolate flavor, which pairs well with the sourdoughโ€™s tang. Itโ€™s my go-to for recipes like this.
    • Find a warm spot to rise. Dough rises best in a warm spot. If your kitchen is cool, try placing the dough near a warm oven or on top of the fridge.
    • Use a straight-sided container. A straight-sided container makes it easy to track your doughโ€™s rise during bulk fermentation and see how much itโ€™s grown.
    • Build tension when shaping. When shaping, aim to create a tight surface without tearing. This helps the dough rise tall in the oven instead of spreading out.
    • Cool completely. Let the bread cool for at least two hours before slicing to avoid a gummy texture and get that perfect crumb!

    How to Make Chocolate Cherry Sourdough Bread

    Making sourdough chocolate cherry bread is so easy! Hereโ€™s my step-by-step process with pictures to help you along the way:

    1. Feed Sourdough Starter

    • Start by feeding your sourdough starter 6-12 hours before baking to ensure itโ€™s bubbly and active.
    • Depending on your kitchen temperature, it might take 6 hours in warmer kitchens (around 75โ„‰), or up to 12 hours in cooler kitchens (65-68โ„‰).
    An active sourdough starter in a glass mason jar.

    2. Mix the Dough

    • In a large mixing bowl, whisk together bread flour, cocoa powder, sugar, and salt.
    • Add warm water and the sourdough starter, mixing until fully incorporated with no dry flour remaining.
    • Cover and let rest for 20 minutes to allow the flour to fully hydrate and the gluten to relax.
    A chocolate sourdough dough ball mixed in a blue mixing bowl.

    3. Stretch and Fold

    • Lightly wet your hands to prevent the dough from sticking. Flatten the dough slightly and sprinkle ยผ of the chocolate chips and dried cherries in the center.
    • Perform a stretch-and-fold by grabbing one side of the dough, stretching it upwards, and folding it over.
    • Rotate the bowl 90ยฐ, add another ยผ of the chocolate chips and cherries, and repeat until all the chips and cherries are incorporated.
    • Gather the dough into a rough ball and place it seam-side down.
    • Cover and rest for 20 minutes.
    • Repeat the stretch-and-fold process 3 more times, allowing the dough to rest 20 minutes between each fold.
    Dried cherries and chocolate chips sprinkled on top of a chocolate sourdough dough ball.
    Dried cherries and chocolate chips being incorporated into a chocolate sourdough ball using the stretch and fold method.
    A kneaded chocolate cherry sourdough dough ball in a blue mixing bowl.

    4. Bulk Fermentation

    • Cover the dough and let it rise until it nearly doubles in size, with visible fermentation bubbles.
    • The rise time can vary anywhere from 4-12 hours (or longer) depending on your kitchen temperature and starter strength.

    ๐Ÿž Fermentation Tip: You can transfer the dough to a straight-sided container and mark the doughโ€™s starting level to better track its progress.

    Chocolate cherry sourdough bread dough in a straight-sided container before fermentation.
    Chocolate cherry sourdough bread dough in a straight-sided container after bulk fermentation.

    5. Pre-Shape

    • Gently turn the dough out onto a floured surface and stretch it into a rectangle.
    • Fold both long sides toward the center like you're folding a letter, then fold the short sides inward, and flip the dough seam-side down.
    • Use your hands or a bench scraper to gently shape it into a round ball.
    • Cover and let it rest for 15 minutes.

    6. Shape

    • Flip the dough seam-side up again and gently stretch it into a smaller rectangle.
    • If you're using a bowl or banneton, repeat the shaping process above.
    • For a batard, fold the shorter edges of the rectangle toward the center. Then, starting at one of the longer edges, roll the dough tightly into a log, pinching the seam and ends to seal.
    The fermented dough stretched into a rectangle on a lightly-floured countertop.
    The dough folded into thirds like a letter on a lightly-floured countertop.
    The shaped dough ball on a lightly-floured countertop.

    7. Cold Proof

    • Generously dust your proofing basket with rice flour, then transfer the dough seam-side up into the basket. If needed, pinch the seam to seal it.
    • Cover the dough and refrigerate overnight (12-16 hours) to cold proof.
    The shaped dough in a banneton basket before cold proofing overnight.

    8. Bake the Bread

    • Place a lidded Dutch oven inside your oven and preheat to 450โ„‰. Let the Dutch oven heat for an extra 30-60 minutes once the oven reaches temperature.
    • Turn the dough out onto a piece of parchment paper. Score the top as desired with a lame or sharp knife.
    • Carefully place 2 ice cubes in the Dutch oven for steam. Use the parchment paper to transfer the dough into the hot Dutch oven. Cover immediately with the lid to trap the steam inside.
    • Bake at 450โ„‰ for 45 minutes with the lid on. Then, remove the lid and bake for an additional 5 minutes, if needed, to achieve your desired crust color.
    • Allow the bread cool on a wire rack for at least 2-4 hours before slicing and serving.
    The proofed and scored dough on a sheet of parchment paper ready to bake.
    A baked loaf of chocolate cherry sourdough bread on a wire cooling rack.

    Baker's Timeline

    Hereโ€™s an example of a schedule you can follow to make this chocolate cherry sourdough bread:

    • 8:00 PM (Night Before): Feed your starter.
    • 8:00 AM: Mix the dough.
    • 8:20-9:30 AM: Stretch and fold, adding chocolate chips and dried cherries.
    • 9:30 AM-5:30 PM (Varies): Bulk fermentation.
    • 5:30-6:00 PM: Pre-shape and final shape.
    • 6:00 PM-8:00 AM (Next Day): Cold proof.
    • 8:00-8:45 AM: Bake.
    • 8:45 AM-12:45 PM: Cool.

    Note: Rise times will vary depending on the strength of your starter and the temperature of your kitchen and dough. It's best to rely on visual cues from your starter and dough rather than sticking strictly to the timeline.

    How to Store

    Store bread at room temperature in an airtight container or bread box for up to 4 days. For longer storage, slice the bread and freeze it in a freezer-safe bag for up to 3 months.

    When you're ready to enjoy it, simply thaw at room temperature or warm it up in a toaster or oven.

    Serving Suggestions

    This cherry chocolate sourdough bread is amazing with blueberry, strawberry, cranberry, or cherry jam. Itโ€™s also delicious with peanut butter (Teddie is my favorite), butter, or cream cheese.

    A slice of chocolate cherry sourdough bread slathered with butter and jam.
    A cover of a recipe ebook with the title "Everyday Sourdough: 27 Sweet & Savory Sourdough Discard Recipes." There is an image of sourdough discard cinnamon rolls on the front. At the bottom, it reads "By Ashley Petrie of Everyday Homemade."
    Grab a copy today!

    Are you tired of watching your sourdough discard go to waste?

    Itโ€™s time to turn excess discard into something delicious with my new ebook - Everyday Sourdough!

    Inside, youโ€™ll find 27 tried-and-true sourdough discard recipes that will transform your leftover starter into mouthwatering creations your family and friends will love.

    No more guilt about wasting your discard - with Everyday Sourdough, you have endless options to quickly make something amazing anytime.

    Let's Connect!

    Be sure to leave a comment below if you have any questions. You can also connect with me on Instagram, Facebook, Pinterest, or via email at [email protected].

    More Sourdough Bread Recipes

    • Three slices of double chocolate sourdough bread on a white linen napkin.
      Double Chocolate Sourdough Bread
    • Three slices of chocolate chip sourdough bread on a wooden cutting board.
      Chocolate Chip Sourdough Bread
    • Three slices of cranberry walnut sourdough bread.
      Cranberry Walnut Sourdough Bread
    • A loaf of apple cinnamon sourdough bread cut in half to show the apple-dotted crumb.
      Apple Cinnamon Sourdough Bread

    ๐Ÿ“– Recipe

    A sliced loaf of chocolate cherry sourdough bread on a wooden cutting board.
    Print Pin SaveSaved!
    5 from 1 vote

    Chocolate Cherry Sourdough Bread

    This Chocolate Cherry Sourdough Bread is a decadent dessert loaf made with cocoa powder, chocolate chips, and dried cherries - perfect for Valentineโ€™s Day or anytime you want to treat your favorite chocolate lover.
    Course Bread
    Cuisine American
    Prep Time 1 day day 12 hours hours
    Cook Time 45 minutes minutes
    Cool Time 2 hours hours
    Total Time 1 day day 14 hours hours 45 minutes minutes
    Servings 12 slices
    Calories 250kcal
    Author Ashley Petrie, RDN, LDN

    Equipment

    • Kitchen scale
    • Mixing bowls
    • Bowl scraper
    • Banneton or bowl lined with tea towel
    • Lame or sharp knife
    • 6-quart dutch oven
    • Parchment paper
    • Straight-sided container (optional)

    Ingredients

    • 4 cups (480 grams) bread flour
    • ยพ cup (60 grams) Dutch-processed cocoa powder
    • ยผ cup (50 grams) granulated sugar
    • 3 ยฝ teaspoons (10 grams) Diamond Crystal Kosher Salt
    • 1 ยพ cups (420 grams) warm water 80-90โ„‰
    • ยฝ cup (100 grams) active sourdough starter or "fresh" sourdough discard (i.e. less than one week old) - dough may take longer to rise
    • ยฝ cup (85 grams) semi-sweet chocolate chips
    • ยฝ cup (80 grams) dried cherries roughly chopped
    • Rice flour for dusting banneton basket
    • 2 ice cubes for steam

    Instructions

    • Start by feeding your sourdough starter 6-12 hours before baking to ensure itโ€™s bubbly and active. Depending on your kitchen temperature, it might take 6 hours in warmer kitchens (around 75โ„‰), or up to 12 hours in cooler kitchens (65-68โ„‰).
    • In a large mixing bowl, whisk together bread flour, cocoa powder, sugar, and salt. Add warm water and the sourdough starter, mixing until fully incorporated with no dry flour remaining. Cover and let rest for 20 minutes to allow the flour to fully hydrate and the gluten to relax.
      4 cups (480 grams) bread flour, ยพ cup (60 grams) Dutch-processed cocoa powder, ยผ cup (50 grams) granulated sugar, 3 ยฝ teaspoons (10 grams) Diamond Crystal Kosher Salt, 1 ยพ cups (420 grams) warm water, ยฝ cup (100 grams) active sourdough starter
    • Lightly wet your hands to prevent the dough from sticking. Flatten the dough slightly and sprinkle ยผ of the chocolate chips and dried cherries in the center. Perform a stretch-and-fold by grabbing one side of the dough, stretching it upwards, and folding it over. Rotate the bowl 90ยฐ, add another ยผ of the chocolate chips and cherries, and repeat until all the chips and cherries are incorporated. Gather the dough into a rough ball and place it seam-side down. Cover and rest for 20 minutes. Repeat the stretch-and-fold process 3 more times, allowing the dough to rest 20 minutes between each fold.
      ยฝ cup (85 grams) semi-sweet chocolate chips, ยฝ cup (80 grams) dried cherries
    • Cover the dough and let it rise until it nearly doubles in size, with visible fermentation bubbles. The rise time can vary anywhere from 4-12 hours (or longer) depending on your kitchen temperature and starter strength. (Tip:ย You can transfer the dough to a straight-sided container and mark the doughโ€™s starting level to track its progress.)
    • Gently turn the dough out onto a floured surface and stretch it into a rectangle. Fold both long sides toward the center like you're folding a letter, then fold the short sides inward, and flip the dough seam-side down. Use your hands or a bench scraper to gently shape it into a round ball. Cover and let it rest for 15 minutes.
    • Flip the dough seam-side up again and gently stretch it into a smaller rectangle. If you're using a bowl or banneton, repeat the shaping process above. For a batard, fold the shorter edges of the rectangle toward the center. Then, starting at one of the longer edges, roll the dough tightly into a log, pinching the seam and ends to seal.
    • Generously dust your proofing basket with rice flour, then transfer the dough seam-side up into the basket. If needed, pinch the seam to seal it. Cover the dough and refrigerate overnight (12-16 hours) to cold proof.
      Rice flour
    • Place a lidded Dutch oven inside your oven and preheat to 450โ„‰. Let the Dutch oven heat for an extra 30-60 minutes once the oven reaches temperature.
    • Turn the dough out onto a piece of parchment paper. Score the top as desired with a lame or sharp knife. Carefully place 2 ice cubes in the Dutch oven for steam. Use the parchment paper to transfer the dough into the hot Dutch oven. Cover immediately with the lid to trap the steam inside.
      2 ice cubes
    • Bake at 450โ„‰ for 45 minutes with the lid on. Then, remove the lid and bake for an additional 5 minutes, if needed, to achieve your desired crust color.
    • Allow the bread cool on a wire rack for at least 2-4 hours before slicing and serving.

    Notes

    • Storage:ย Store bread at room temperature in an airtight container or bread box for up to 4 days. For longer storage, slice and freeze in a freezer-safe container for up to 3 months.

    Nutrition

    Serving: 1slice | Calories: 250kcal | Carbohydrates: 48g | Protein: 7.5g | Fat: 3.5g | Saturated Fat: 2g | Polyunsaturated Fat: 0.5g | Sodium: 337mg | Potassium: 373mg | Fiber: 3.5g | Sugar: 13g | Calcium: 24mg | Iron: 4.7mg
    Did you try this recipe?Let me know! Comment below, or take a picture and tag me on Instagram @everydayhomemadebyashley.

    Double Chocolate Sourdough Bread

    February 3, 2025

    This Double Chocolate Sourdough Bread has everything you crave in a sweet loaf - rich, chocolatey, and a hint of sourdough tang. Loaded with melty chocolate chips and a soft, chewy texture, itโ€™s the perfect sourdough bread for breakfast or dessert.

    Three slices of double chocolate sourdough bread on a white linen napkin.

    If you're a chocolate lover, this double chocolate sourdough bread is a must-add to your sourdough recipe collection.

    Itโ€™s everything you want in a sourdough chocolate bread - soft, chewy texture and rich chocolate flavor with plenty of gooey chocolate chips, and just a hint of sourdough tang.

    As a fellow chocolate lover, Iโ€™ve always been curious about adding cocoa powder to sourdough. When I finally gave it a try, I realized it was easier than I expected!

    The key is adding a little extra water since cocoa powder tends to be so dry. I use Dutch-processed cocoa powder here for a smoother, more balanced chocolate flavor, and Iโ€™ve adjusted the dough hydration to ensure it comes out soft and chewy every time.

    One of my favorite ways to enjoy this bread is by toasting a slice until the chocolate chips are deliciously melty, then slathering it with natural peanut butter. Itโ€™s so good!

    Of course, itโ€™s also amazing with butter, jam, or cream cheese - there are so many ways to enjoy it. Whether you're after a sweet breakfast, an afternoon snack, or a decadent dessert, this bread hits the spot every time.

    I hope you give it a try and love it as much as I do!

    Disclaimer: Some links throughout this post are affiliate links. As an Amazon Associate, I earn from qualifying purchases. You can learn more by visiting my Affiliate Disclosure Page.

    Ingredients & Substitutions

    Here are some notes on key ingredients. For a full list of ingredients, check out the recipe card below.

    • Active Sourdough Starter- This recipe needs a bubbly, active starter to get the dough to rise properly. If youโ€™d rather use sourdough discard, just make sure itโ€™s only a few days old. Keep in mind, though, the dough might take a bit longer to rise.
    • Dutch-Processed Cocoa Powder- This cocoa powder has been treated with alkali to balance out some of the natural acidity you get with regular cocoa. I prefer using Dutch-processed cocoa in my sourdough recipes because it gives the chocolate flavor a nice balance, especially since sourdough already adds some acidity.
    • Chocolate Chips- I like using semi-sweet chocolate chips (or mini ones) because I find they're the perfect balance of sweet and bitter. But feel free to swap in any chocolate chips or chopped chocolate you like!
    • Bread Flour- Bread flour gives the bread that perfect chewy texture and helps it rise high. You can use all-purpose flour instead, or even try swapping in some whole wheat flour - just add a little extra water to adjust.
    • Water- Cocoa powder is pretty dry and absorbs a lot of liquid, so the dough might seem firmer than usual. The recipeโ€™s hydration level is about 88% (if youโ€™re just counting flour and water), but because of the cocoa powder, the dough will still feel easy to handle. If you like a wetter or firmer dough, feel free to adjust the water.
    • Granulated Sugar- Just a touch of sweetness to complement the chocolate - donโ€™t worry, it wonโ€™t make the bread overly sweet.
    • Kosher Salt- Enhances the flavor of the bread. I use Diamond Crystal Kosher Salt, which is about 8.4 grams per tablespoon. If you're using table salt or Morton's brand, be sure to measure by weight or use about half the amount.
    The ingredients to make double chocolate sourdough bread. Each ingredient is labeled with text. They include water, chocolate chips, salt, bread flour, sourdough starter, sugar, and Dutch-processed cocoa powder.

    Tips for Success

    • Use active starter. For the best rise, make sure your sourdough starter is bubbly and active. If youโ€™re using discard, try to use one that's only a few days old. Just remember, the dough might take a bit longer to rise when using older discard.
    • Opt for Dutch-Processed Cocoa. Dutch-processed cocoa gives your bread a more balanced chocolate flavor and works well with the sourdoughโ€™s natural acidity. Itโ€™s my go-to for recipes like this one!
    • Find a warm spot to rise. Dough rises best in a warm spot, especially when the weatherโ€™s cooler. If your kitchen is chilly, try placing the dough near a warm oven or on top of the fridge to speed up fermentation.
    • Use a straight-sided container. A straight-sided container is perfect for tracking your doughโ€™s rise during bulk fermentation. It helps you easily see how much the dough has expanded.
    • Build tension when shaping. When shaping the dough, aim to create a tight surface without tearing. This helps the dough hold its shape, ensuring a nice tall rise in the oven instead of spreading out.
    • Cool completely. Let your bread cool for at least two hours before slicing. Cutting too soon can result in a gummy texture, and after all of that work, we want that perfect crumb!

    How to Make Double Chocolate Sourdough Bread

    Making chocolate chocolate chip sourdough bread is super easy and so much fun! Hereโ€™s my step-by-step process with pictures to help you along the way.

    1. Feed Sourdough Starter

    • Start by feeding your sourdough starter 6-12 hours before baking to ensure itโ€™s bubbly and active.
    • Depending on your kitchen temperature, it might take 6 hours in warmer kitchens (around 75โ„‰), or up to 12 hours in cooler kitchens (65-68โ„‰).
    An active sourdough starter in a glass mason jar.

    2. Mix the Dough

    • In a large mixing bowl, whisk together bread flour, cocoa powder, sugar, and salt.
    • Add warm water and the sourdough starter, mixing until fully incorporated with no dry flour remaining.
    • Cover and let rest for 20 minutes to allow the flour to fully hydrate and the gluten to relax.
    A chocolate sourdough dough ball in a glass mixing bowl.

    3. Stretch and Fold

    • Lightly wet your hands to prevent the dough from sticking. Flatten the dough slightly and sprinkle ยผ of the chocolate chips in the center.
    • Perform a stretch-and-fold by grabbing one side of the dough, stretching it upwards, and folding it over.
    • Rotate the bowl 90ยฐ, add another ยผ of the chocolate chips, and repeat until all the chips are incorporated.
    • Gather the dough into a rough ball and place it seam-side down.
    • Cover and rest for 20 minutes.
    • Repeat the stretch-and-fold process 3 more times, allowing the dough to rest 20 minutes between each fold.
    Chocolate sourdough with mini chocolate chips on top of it in a glass mixing bowl.
    The double chocolate sourdough bread dough being stretched and folded to add the chocolate chips in a glass mixing bowl.
    A kneaded chocolate sourdough bread dough ball with mini chocolate chips in a glass mixing bowl.

    4. Bulk Fermentation

    • Cover the dough and let it rise until it nearly doubles in size, with visible fermentation bubbles.
    • The rise time can vary anywhere from 4-12 hours depending on your kitchen temperature and starter strength.

    ๐Ÿž Fermentation Tip: You can transfer the dough to a straight-sided container and mark the doughโ€™s starting level to better track its progress.

    The sourdough dough in a straight-sided container before fermenting.
    The sourdough dough in a straight-sided container after bulk fermenting, where it has doubled in size.

    5. Pre-Shape

    • Gently turn the dough out onto a floured surface and stretch it into a rectangle.
    • Fold both long sides toward the center like you're folding a letter, then fold the short sides inward, and flip the dough seam-side down.
    • Use your hands or a bench scraper to gently shape it into a round ball.
    • Cover and let it rest for 15 minutes.

    6. Shape

    • Flip the dough seam-side up again and gently stretch it into a smaller rectangle.
    • If you're using a bowl or banneton, repeat the shaping process above.
    • For a batard, fold the shorter edges of the rectangle toward the center. Then, starting at one of the longer edges, roll the dough tightly into a log, pinching the seam and ends to seal.
    A double chocolate sourdough dough stretched out into a rectangle on a wooden countertop.
    The dough, on a countertop, folded over itself into thirds like a letter.
    A shaped double chocolate sourdough dough ball on a wooden counter.

    7. Cold Proof

    • Generously dust your proofing basket with rice flour, then transfer the dough seam-side up into the basket. If needed, pinch the seam to seal it.
    • Cover the dough and refrigerate overnight (12-16 hours) to cold proof.
    The sourdough chocolate bread dough shaped in a batard proofing basket.

    8. Bake the Bread

    • Place a lidded Dutch oven inside your oven and preheat to 450โ„‰. Let the Dutch oven heat for an extra 30-60 minutes once the oven reaches temperature.
    • Turn the dough out onto a piece of parchment paper. Score the top as desired with a lame or sharp knife.
    • Carefully place 2 ice cubes in the Dutch oven for steam. Use the parchment paper to transfer the dough into the hot Dutch oven. Cover immediately with the lid to trap the steam inside.
    • Bake at 450โ„‰ for 45 minutes with the lid on. Then, remove the lid and bake for an additional 5 minutes, if needed, to achieve your desired crust color.
    • Allow the bread cool on a wire rack for at least 2-4 hours before slicing and serving.
    A scored double chocolate sourdough bread dough on a piece of parchment paper.
    A baked loaf of double chocolate sourdough bread in a Dutch oven.

    Baker's Timeline

    Hereโ€™s an example of a schedule you can follow to make this double chocolate chip sourdough bread:

    • 8:00 PM (Night Before): Feed your starter.
    • 8:00 AM: Mix the dough.
    • 8:20-9:30 AM: Stretch and fold, adding chocolate chips.
    • 9:30 AM-5:30 PM (Varies): Bulk fermentation.
    • 5:30-6:00 PM: Pre-shape and final shape.
    • 6:00 PM-8:00 AM (Next Day): Cold proof.
    • 8:00-8:45 AM: Bake.
    • 8:45 AM-12:45 PM: Cool.

    Note: Rise times will vary depending on the strength of your starter and the temperature of your kitchen and dough. It's best to rely on visual cues from your starter and dough rather than sticking strictly to the timeline.

    How to Store

    Store bread at room temperature in an airtight container or bread box for up to 4 days. For longer storage, slice the bread and freeze it in a freezer-safe bag for up to 3 months.

    When you're ready to enjoy it, simply thaw at room temperature or warm it up in a toaster or oven.

    Serving Suggestions

    This double chocolate sourdough bread is amazing with blueberry, strawberry, or cranberry jam. Itโ€™s also delicious with peanut butter (Teddie is my favorite), butter, or cream cheese.

    And if youโ€™re feeling nostalgic, make a chocolatey fluffernutter sandwich (shoutout to my fellow New Englanders!).

    A slice of double chocolate sourdough bread with peanut butter on a piece of wrinkled parchment paper.
    A cover of a recipe ebook with the title "Everyday Sourdough: 27 Sweet & Savory Sourdough Discard Recipes." There is an image of sourdough discard cinnamon rolls on the front. At the bottom, it reads "By Ashley Petrie of Everyday Homemade."
    Grab a copy today!

    Are you tired of watching your sourdough discard go to waste?

    Itโ€™s time to turn excess discard into something delicious with my new ebook - Everyday Sourdough!

    Inside, youโ€™ll find 27 tried-and-true sourdough discard recipes that will transform your leftover starter into mouthwatering creations your family and friends will love.

    No more guilt about wasting your discard - with Everyday Sourdough, you have endless options to quickly make something amazing anytime.

    Let's Connect!

    Be sure to leave a comment below if you have any questions. You can also connect with me on Instagram, Facebook, Pinterest, or via email at [email protected].

    More Sourdough Bread Recipes

    • Three slices of chocolate chip sourdough bread on a wooden cutting board.
      Chocolate Chip Sourdough Bread
    • A sliced loaf of chocolate cherry sourdough bread on a wooden cutting board.
      Chocolate Cherry Sourdough Bread
    • Slices of s'more sourdough bread on a piece of parchment paper.
      S'mores Sourdough Bread
    • A sliced loaf of chocolate peanut butter sourdough bread on a cutting board.
      Chocolate Peanut Butter Cup Sourdough Bread

    ๐Ÿ“– Recipe

    Three slices of double chocolate sourdough bread on a white linen napkin.
    Print Pin SaveSaved!
    5 from 1 vote

    Double Chocolate Sourdough Bread

    This Double Chocolate Sourdough Bread has everything you crave in a sweet loaf - rich, chocolatey, and a hint of sourdough tang. Loaded with melty chocolate chips and a soft, chewy texture, itโ€™s the perfect sourdough bread for breakfast or dessert.
    Course Bread
    Cuisine American
    Prep Time 1 day day 12 hours hours
    Cook Time 45 minutes minutes
    Cool Time 2 hours hours
    Total Time 1 day day 14 hours hours 45 minutes minutes
    Servings 12 slices
    Calories 263kcal
    Author Ashley Petrie, RDN, LDN

    Equipment

    • Kitchen scale
    • Mixing bowls
    • Bowl scraper
    • Banneton or bowl lined with tea towel
    • Lame or sharp knife
    • 6-quart dutch oven
    • Parchment paper
    • Straight-sided container (optional)

    Ingredients

    • 4 cups (480 grams) bread flour
    • ยพ cup (60 grams) Dutch-processed cocoa powder
    • ยผ cup (50 grams) granulated sugar
    • 3 ยฝ teaspoons (10 grams) Diamond Crystal Kosher Salt
    • 1 ยพ cups (420 grams) warm water 80-90โ„‰
    • ยฝ cup (100 grams) active sourdough starter or "fresh" sourdough discard (i.e. less than one week old) - dough may take longer to rise
    • 1 cup (170 grams) semi-sweet chocolate chips
    • Rice flour for dusting proofing basket
    • 2 ice cubes for steam

    Instructions

    • Start by feeding your sourdough starter 6-12 hours before baking to ensure itโ€™s bubbly and active. Depending on your kitchen temperature, it might take 6 hours in warmer kitchens (around 75โ„‰), or up to 12 hours in cooler kitchens (65-68โ„‰).
    • In a large mixing bowl, whisk together bread flour, cocoa powder, sugar, and salt. Add warm water and the sourdough starter, mixing until fully incorporated with no dry flour remaining. Cover and let rest for 20 minutes to allow the flour to fully hydrate and the gluten to relax.
      4 cups (480 grams) bread flour, ยพ cup (60 grams) Dutch-processed cocoa powder, ยผ cup (50 grams) granulated sugar, 3 ยฝ teaspoons (10 grams) Diamond Crystal Kosher Salt, 1 ยพ cups (420 grams) warm water, ยฝ cup (100 grams) active sourdough starter
    • Lightly wet your hands to prevent the dough from sticking. Flatten the dough slightly and sprinkle ยผ of the chocolate chips in the center. Perform a stretch-and-fold by grabbing one side of the dough, stretching it upwards, and folding it over. Rotate the bowl 90ยฐ, add another ยผ of the chocolate chips, and repeat until all the chips are incorporated. Gather the dough into a rough ball and place it seam-side down. Cover and rest for 20 minutes. Repeat the stretch-and-fold process 3 more times, allowing the dough to rest 20 minutes between each fold.
      1 cup (170 grams) semi-sweet chocolate chips
    • Cover the dough and let it rise until it nearly doubles in size, with visible fermentation bubbles. The rise time can vary anywhere from 4-12 hours depending on your kitchen temperature and starter strength. (Tip: You can transfer the dough to a straight-sided container and mark the doughโ€™s starting level to track its progress.)
    • Gently turn the dough out onto a floured surface and stretch it into a rectangle. Fold both long sides toward the center like you're folding a letter, then fold the short sides inward, and flip the dough seam-side down. Use your hands or a bench scraper to gently shape it into a round ball. Cover and let it rest for 15 minutes.
    • Flip the dough seam-side up again and gently stretch it into a smaller rectangle. If you're using a bowl or banneton, repeat the shaping process above. For a batard, fold the shorter edges of the rectangle toward the center. Then, starting at one of the longer edges, roll the dough tightly into a log, pinching the seam and ends to seal.
    • Generously dust your proofing basket with rice flour, then transfer the dough seam-side up into the basket. If needed, pinch the seam to seal it. Cover the dough and refrigerate overnight (12-16 hours) to cold proof.
      Rice flour
    • Place a lidded Dutch oven inside your oven and preheat to 450โ„‰. Let the Dutch oven heat for an extra 30-60 minutes once the oven reaches temperature.
    • Turn the dough out onto a piece of parchment paper. Score the top as desired with a lame or sharp knife. Carefully place 2 ice cubes in the Dutch oven for steam. Use the parchment paper to transfer the dough into the hot Dutch oven. Cover immediately with the lid to trap the steam inside.
      2 ice cubes
    • Bake at 450โ„‰ for 45 minutes with the lid on. Then, remove the lid and bake for an additional 5 minutes, if needed, to achieve your desired crust color.
    • Allow the bread cool on a wire rack for at least 2-4 hours before slicing and serving.

    Notes

    • Storage: Store bread at room temperature in an airtight container or bread box for up to 4 days. For longer storage, slice and freeze in a freezer-safe container for up to 3 months.

    Nutrition

    Serving: 1slice | Calories: 263kcal | Carbohydrates: 47g | Protein: 8g | Fat: 5.5g | Saturated Fat: 3g | Polyunsaturated Fat: 0.5g | Sodium: 336mg | Potassium: 361mg | Fiber: 3g | Sugar: 12g | Calcium: 19mg | Iron: 4.6mg
    Did you try this recipe?Let me know! Comment below, or take a picture and tag me on Instagram @everydayhomemadebyashley.

    Sourdough Zucchini Muffins with Cinnamon Streusel Topping

    February 3, 2025

    These Sourdough Zucchini Muffins are an easy sourdough discard recipe made with fresh zucchini, warm cinnamon, and a sweet streusel topping. They bake up soft and tender with a bakery-style texture, making them the perfect breakfast or snack.

    Several sourdough zucchini muffins with cinnamon streusel topping on a wooden counter.

    Gardening and sourdough baking are two of my favorite hobbies. So I love when I get to combine the two. Every summer, my garden gives me more zucchini than I know what to do with (not that Iโ€™m complaining!), and these sourdough zucchini muffins are one of my favorite ways to use it up.

    I recently gave this recipe a little update by adding a cinnamon streusel topping, increasing the baking powder for a better rise, and adjusting the baking method to create taller, bakery-style muffins. Now, they look just like something youโ€™d pick up from a bakery, but theyโ€™re actually so simple to make at home.

    With a buttery flavor, warm cinnamon spice, and a soft, tender crumb, these muffins are the perfect way to use up extra zucchini and sourdough discard. Enjoy them warm with a little butter, dolloped with jam, or just grab one straight from the container. You really can't go wrong!

    And if you have an abundance of zucchini this summer, be sure to check out my classic sourdough zucchini bread or chocolate zucchini bread too!

    Disclaimer: Some links throughout this post are affiliate links. As an Amazon Associate, I earn from qualifying purchases. You can learn more by visiting my Affiliate Disclosure Page.

    Ingredients & Substitutions

    Here are some notes on key ingredients. For a full list of ingredients, check out the recipe card below.

    • Sourdough Discard- Adds moisture, flavor, and is a great way to use up extra discard. Active sourdough starter works just as well.
    • Zucchini- Finely grate the zucchini using a box grater so it blends seamlessly into the batter. If your zucchini is especially watery, gently blot away excess moisture with paper towels, but don't squeeze it completely dry.
    • All-Purpose Flour- Provides structure and keeps the muffins light and tender. You can substitute up to โ…“ of the flour with whole wheat flour for a heartier muffin.
    • Brown & Granulated Sugar- Brown sugar adds moisture and a subtle caramel flavor, while granulated sugar helps create a lighter crumb. If needed, you can use all brown sugar or all granulated sugar, though the texture and flavor will vary slightly.
    • Unsweetened Applesauce- Keeps the muffins moist and tender. I recommend using one individual 3.9-ounce (111-gram) cup for easy measuring.
    • Butter- Adds rich flavor and tenderness. You can substitute an equal amount of a neutral-flavored oil, such as avocado or vegetable oil.
    • Streusel Topping- Cold butter is key to creating a crumbly topping. Keep the streusel chilled while you prepare the batter so it stays crisp during baking.
    • Kosher Salt- I use Diamond Crystal Kosher Salt (about 2.8 grams per teaspoon). If using Morton Kosher Salt or table salt, measure by weight or use half the amount.
    The ingredients to make sourdough zucchini muffins. Each ingredient is labeled with text. They include sourdough discard, butter, baking powder, baking soda, vanilla, sugar, cinnamon, eggs, brown sugar, salt, applesauce, all-purpose flour, and zucchini.

    Tips for Success

    • Measure your flour accurately. Weigh the flour with a kitchen scale for the most accurate results. If using measuring cups, spoon the flour into the cup and level it off. Too much flour can make the muffins dry and dense.
    • Use finely grated zucchini. Finely grate the zucchini with the small holes of a box grater so it melts into the batter. If your zucchini is especially watery, gently blot it with paper towels, but don't squeeze it completely dry.
    • Don't overmix the batter. Stir the dry ingredients into the wet ingredients just until no streaks of flour remain. Overmixing develops the gluten and can make the muffins dense instead of light and tender.
    • Keep the streusel cold. Refrigerate the streusel while you mix the batter so the butter stays cold. This helps create crisp, crumbly clusters on top of the muffins.
    • Customize with mix-ins. Fold in up to 1 cup of chocolate chips, chopped walnuts, pecans, or dried cranberries for an easy variation.

    How to Make Sourdough Zucchini Muffins

    These bakery-style sourdough zucchini muffins are simple to make in just a few easy steps. Scroll to the recipe card below for the full recipe and ingredient amounts.

    Step 1: Make cinnamon streusel. Stir together the flour, brown sugar, cinnamon, and salt. Cut in the cold butter until crumbly.

    Two hands pinching butter into flour, sugar, and cinnamon in a bowl.
    Cinnamon streusel topping in a bowl.

    Step 2: Combine dry ingredients. Whisk together the flour, cinnamon, baking powder, baking soda, and salt.

    The dry ingredients being whisked in a glass bowl.

    Step 3: Mix wet ingredients. In a separate bowl, whisk together the melted butter, brown sugar, granulated sugar, eggs, applesauce, sourdough discard, and vanilla until smooth.

    The wet ingredients, including sourdough discard, being whisked in a bowl.

    Step 4: Make the batter. Add the dry ingredients to the wet ingredients and stir just until combined. Fold in the grated zucchini.

    Sourdough discard muffin batter in a bowl.
    Sourdough zucchini muffin batter in a bowl.

    Step 5: Fill and top. Divide the batter evenly among the muffin cups. Sprinkle generously with the streusel.

    A standard 12-cup muffin pan with paper liners filled with sourdough discard zucchini muffin batter.
    Cinnamon streusel being pressed on top of the sourdough zucchini muffins before baking.

    Step 6: Bake and cool. Bake at 425ยฐF for 5 minutes, then, without opening the oven door, reduce the temperature to 375ยฐF and bake for 15โ€“18 minutes. Let the muffins cool in the pan for 5 minutes before transferring them to a wire rack to cool completely.

    Baked cinnamon streusel sourdough zucchini muffins in a muffin pan.

    How to Store

    Store completely cooled sourdough zucchini muffins in an airtight container at room temperature for 2-3 days.

    For longer storage, freeze muffins in a freezer-safe container for up to 3 months. Thaw at room temperature and warm before serving.

    Several sourdough zucchini muffins with cinnamon streusel topping on a wooden counter. One of the muffins is removed from the liner and split in half to show the crumb.
    A cover of a recipe ebook with the title "Everyday Sourdough: 27 Sweet & Savory Sourdough Discard Recipes." There is an image of sourdough discard cinnamon rolls on the front. At the bottom, it reads "By Ashley Petrie of Everyday Homemade."
    Grab a copy today!

    Are you tired of watching your sourdough discard go to waste?

    Itโ€™s time to turn excess discard into something delicious with my new ebook - Everyday Sourdough!

    Inside, youโ€™ll find 27 tried-and-true sourdough discard recipes that will transform your leftover starter into mouthwatering creations your family and friends will love.

    No more guilt about wasting your discard - with Everyday Sourdough, you have endless options to quickly make something amazing anytime.

    Let's Connect!

    Be sure to leave a comment below if you have any questions. You can also connect with me on Instagram, Facebook, Pinterest, or via email at [email protected].

    More Sourdough Muffin Recipes

    • A sourdough strawberry muffin split in half on a paper liner. There are more muffins out of focus in the background.
      Sourdough Strawberry Muffins
    • A sourdough blueberry muffin split in half on a muffin liner. There are several more whole muffins out of focus in the background.
      Sourdough Blueberry Muffins with Streusel Topping
    • A sourdough peach muffins split in half on a paper wrapper. There are more muffins and a whole peach out of focus in the background.
      Sourdough Peach Muffins with Streusel Topping
    • A raspberry white chocolate sourdough muffin split in half on a paper liner with several other muffins out of focus in the background.
      The Best Raspberry White Chocolate Sourdough Muffins

    ๐Ÿ“– Recipe

    Several sourdough zucchini muffins with cinnamon streusel topping on a wooden counter.
    Print Pin SaveSaved!

    Sourdough Zucchini Muffins with Cinnamon Streusel

    These Sourdough Zucchini Muffins are an easy sourdough discard recipe made with fresh zucchini, warm cinnamon, and a sweet streusel topping. They bake up soft and tender with a bakery-style texture, making them the perfect breakfast or snack.
    Course Breakfast, Snack
    Cuisine American
    Prep Time 30 minutes minutes
    Cook Time 20 minutes minutes
    Cool Time 10 minutes minutes
    Total Time 1 hour hour
    Servings 12 muffins
    Calories 300kcal
    Author Ashley Petrie, RDN, LDN

    Equipment

    • Standard 12-cup muffin tin
    • Paper liners
    • Box grater
    • Mixing bowls

    Ingredients

    Cinnamon Streusel

    • ยฝ cup (60 grams) all-purpose flour
    • ยผ cup (50 grams) brown sugar
    • 1 teaspoon cinnamon
    • ยผ teaspoon Diamond Crystal Kosher Salt use โ…› teaspoon if using Morton's brand or table salt
    • 3 tablespoons (42 grams) unsalted butter cold, cut into small cubes

    Sourdough Zucchini Muffins

    • 2 cups (240 grams) all-purpose flour
    • 2 teaspoons cinnamon
    • 1 ยฝ teaspoons baking powder
    • ยฝ teaspoon baking soda
    • 1 teaspoon Diamond Crystal Kosher Salt use ยฝ teaspoon if using Morton's brand or table salt
    • ยฝ cup (113 grams, 1 stick) unsalted butter melted
    • ยพ cup (150 grams) brown sugar packed
    • ยผ cup (50 grams) granulated sugar
    • 2 large (100 grams) eggs room temperature
    • 1 single-serve cup (111 grams, 3.9 ounces) unsweetened applesauce room temperature
    • ยฝ cup (100 grams) sourdough starter discard room temperature
    • 1 teaspoon vanilla extract
    • 1 ยผ cups (170 grams) grated zucchini

    Instructions

    • Preheat your oven to 425ยฐF. Line a 12-cup muffin tin with paper liners or lightly grease each cup with butter, oil, or cooking spray to prevent sticking.
    • Make the streusel topping. Combine flour, brown sugar, cinnamon, and salt in a small bowl. Cut in the cold butter with your fingers or a pastry cutter until the mixture forms coarse sand. Place in the refrigerator while preparing the muffin batter.
      ยฝ cup (60 grams) all-purpose flour, ยผ cup (50 grams) brown sugar, 1 teaspoon cinnamon, ยผ teaspoon Diamond Crystal Kosher Salt, 3 tablespoons (42 grams) unsalted butter
    • In a medium bowl, whisk together flour, cinnamon, baking powder, baking soda, and salt.
      2 cups (240 grams) all-purpose flour, 2 teaspoons cinnamon, 1 teaspoon Diamond Crystal Kosher Salt, 1 ยฝ teaspoons baking powder, ยฝ teaspoon baking soda
    • In a large bowl, whisk together melted butter, brown sugar, and granulated sugar until combined. Add eggs and whisk until smooth. Mix in applesauce, sourdough discard, and vanilla extract until fully combined.
      ยฝ cup (113 grams, 1 stick) unsalted butter, ยพ cup (150 grams) brown sugar, ยผ cup (50 grams) granulated sugar, 2 large (100 grams) eggs, 1 single-serve cup (111 grams, 3.9 ounces) unsweetened applesauce, ยฝ cup (100 grams) sourdough starter discard, 1 teaspoon vanilla extract
    • Add the dry ingredients to the wet ingredients and gently mix until just combined. Do not overmix. Fold in the grated zucchini until evenly distributed.
      1 ยผ cups (170 grams) grated zucchini
    • Divide the batter evenly between the prepared muffin cups. Sprinkle generously with cinnamon streusel.
    • Bake at 425ยฐF for 5 minutes, then reduce oven temperature to 375ยฐF and bake for another 15โ€“18 minutes, until a toothpick comes out clean.
    • Cool in the pan for 5 minutes before transferring to a wire rack to cool completely.

    Notes

    • Storage: Keep muffins in an airtight container at room temperature for 2-3 days or freeze them for up to 3 months.

    Nutrition

    Serving: 1muffin | Calories: 300kcal | Carbohydrates: 45g | Protein: 5.5g | Fat: 11.5g | Saturated Fat: 7g | Polyunsaturated Fat: 0.5g | Monounsaturated Fat: 3.5g | Trans Fat: 0.5g | Cholesterol: 61mg | Sodium: 250mg | Potassium: 125mg | Fiber: 1g | Sugar: 22g | Vitamin C: 2.7mg | Calcium: 68mg | Iron: 0.9mg
    Did you try this recipe?Let me know! Comment below, or take a picture and tag me on Instagram @everydayhomemadebyashley.

    Sourdough Cinnamon Muffins

    January 29, 2025

    These Sourdough Cinnamon Muffins are soft, buttery, and packed with warm cinnamon flavor - just like a churro. Topped with a crunchy cinnamon-sugar sprinkle, theyโ€™re a delicious and easy way to use up sourdough discard in just 30 minutes!

    A sourdough cinnamon muffin on a wooden cutting board.

    Iโ€™m on a mission this month to create as many sourdough muffin recipes as I can.

    So far, Iโ€™ve made everything from sourdough chocolate chip muffins and double chocolate sourdough muffins to sourdough oatmeal muffins and morning glory muffins. Itโ€™s been so fun swapping out my old non-sourdough quick bread recipes for these delicious sourdough versions.

    And these sourdough discard cinnamon muffins have quickly become a new favorite. My fiancรฉ devoured five of them in one day, so I can confidently say theyโ€™re a hit!

    They're soft, buttery, and packed with warm cinnamon flavor, almost like a churro in muffin form. Topped with a crunchy cinnamon-sugar sprinkle, they come together in just 30 minutes and are the perfect way to use up sourdough discard.

    Whether you want to enjoy them for breakfast, brunch, or a snack, they're easy to make ahead and can be customized with your favorite mix-ins.

    Iโ€™m so excited for you to try these cinnamon sourdough muffins, and I hope you love them as much as we do!

    Disclaimer: Some links throughout this post are affiliate links. As an Amazon Associate, I earn from qualifying purchases. You can learn more by visiting my Affiliate Disclosure Page.

    Ingredients & Substitutions

    Here are some notes on key ingredients. For a full list of ingredients, check out the recipe card below.

    • Sourdough Discard- Adds moisture and a slightly tangy taste. The older your discard is, the more noticeable the flavor will be.
    • Cinnamon- Cinnamon gives these muffins a warm, cozy flavor. You can mix in a little nutmeg or cardamom if you want to try something different.
    • All-Purpose Flour- Regular all-purpose flour works best here. You can swap up to โ…“ with whole wheat flour for a heartier muffin.
    • Granulated Sugar- Adds sweetness and helps with texture. You can also use brown sugar, coconut sugar, or reduce to ยพ cup (150 grams) for less sweetness.
    • Whole Milk- The fat in whole milk gives these muffins a tender texture, but any milk (dairy or non-dairy) works just fine.
    • Butter- Adds a rich, buttery flavor that pairs well with the cinnamon sugar. Since butter firms up at room temperature, these muffins are best served warm. You can use an equal amount of neutral-flavored oil if you prefer.
    • Kosher Salt- I use Diamond Crystal Kosher Salt, about 2.8 grams per teaspoon. If using table salt or Mortonโ€™s, measure by weight or use half the amount.
    The ingredients to make sourdough cinnamon muffins. Each ingredient is labeled with text. They include sourdough discard, egg, cinnamon, milk, salt, vanilla, all-purpose flour, baking powder, baking soda, butter, and granulated sugar.

    Tips for Success

    • Measure ingredients carefully. Weigh your flour or spoon it into the measuring cup and level it off to avoid using too much. Too much flour can make your muffins dense.
    • Use room temperature ingredients. For the best texture, make sure your eggs, sourdough discard, and milk are at room temperature before mixing.
    • Don't overmix. Stir the batter gently, just until everything is combined. Overmixing can result in dense, tough muffins.
    • Customize with mix-ins. Feel free to add your favorite mix-ins, like chocolate chips, nuts, or dried fruit, to make these muffins your own.
    • Serve warm. Muffins made with butter can firm up as they cool. A quick 10โ€“15 seconds in the microwave or a few minutes in the oven will soften them up perfectly.

    How to Make Sourdough Cinnamon Muffins

    Here is how to make cinnamon muffins with sourdough discard.

    Step 1: Prepare oven and muffin tin. Preheat your oven to 425ยฐF. Line a 12-cup muffin tin with paper liners or grease each well with butter, oil, or cooking spray.

    Step 2: Make cinnamon sugar mixture. In a small bowl, mix 1 tablespoon granulated sugar with 1 teaspoon cinnamon. Set aside.

    A mixture of cinnamon and sugar in a small glass bowl.

    Step 3: Whisk dry ingredients. In a medium bowl, whisk together the flour, cinnamon, salt, baking powder, and baking soda. Set aside.

    The dry ingredients mixed together in a glass bowl.

    Step 4: Mix wet ingredients. In a large mixing bowl, whisk the melted butter and sugar until smooth and slightly paler in color. Whisk in the eggs, one at a time, until fully incorporated. Stir in the milk, sourdough discard, and vanilla extract until well combined.

    The wet ingredients whisked together in a glass bowl.

    Step 5: Combine wet and dry ingredients. Gently fold the dry ingredients into the wet mixture, stirring just until no dry streaks remain. Be careful not to overmix to avoid dense muffins.

    Sourdough discard cinnamon muffin batter in a glass bowl with a rubber spatula sticking out to the left.

    Step 6: Fill muffin wells. Divide the batter evenly among the 12 muffin wells. Sprinkle a generous pinch of the cinnamon sugar topping over each muffin.

    Paper lined muffin wells filled with muffin batter that's been topped with cinnamon sugar.

    Step 7: Bake muffins. Place the muffins in the preheated oven and bake for 12โ€“15 minutes, or until the tops are golden brown and a toothpick inserted in the center comes out clean.

    Step 8: Cool and serve. Let the muffins cool in the pan for 5 minutes, then transfer them to a wire rack to cool completely. Serve warm for the best texture.

    Baked cinnamon sourdough muffins in a muffin tin.

    How to Store

    Store cooled sourdough cinnamon sugar muffins in an airtight container at room temperature for 3-4 days. For the best texture, warm in the oven or microwave for 10-15 seconds before serving.

    To store longer, freeze muffins in a freezer-safe container for up to 3 months. Thaw at room temperature and warm before serving.

    A sourdough cinnamon muffin split in half on the paper wrapper to show the crumb.
    A cover of a recipe ebook with the title "Everyday Sourdough: 27 Sweet & Savory Sourdough Discard Recipes." There is an image of sourdough discard cinnamon rolls on the front. At the bottom, it reads "By Ashley Petrie of Everyday Homemade."
    Grab a copy today!

    Are you tired of watching your sourdough discard go to waste?

    Itโ€™s time to turn excess discard into something delicious with my new ebook - Everyday Sourdough!

    Inside, youโ€™ll find 27 tried-and-true sourdough discard recipes that will transform your leftover starter into mouthwatering creations your family and friends will love.

    No more guilt about wasting your discard - with Everyday Sourdough, you have endless options to quickly make something amazing anytime.

    Let's Connect!

    Be sure to leave a comment below if you have any questions. You can also connect with me on Instagram, Facebook, Pinterest, or via email at [email protected].

    More Sourdough Muffin Recipes

    • A sourdough chocolate chip muffin split in half on the wrapper with a few more whole muffins out of focus in the background.
      Sourdough Chocolate Chip Muffins
    • A sourdough oatmeal muffin split in half still sitting in the muffin wrapper.
      Sourdough Oatmeal Muffins (Quick & Easy)
    • A sourdough blueberry muffin split in half on a muffin liner. There are several more whole muffins out of focus in the background.
      Sourdough Blueberry Muffins with Streusel Topping
    • Five sourdough banana muffins on a piece of wrinkled parchment paper on top of a wooden cutting board.
      Sourdough Discard Banana Muffins (30 Minutes!)

    ๐Ÿ“– Recipe

    A sourdough cinnamon muffin on a wooden cutting board.
    Print Pin SaveSaved!

    Sourdough Cinnamon Muffins

    These Sourdough Cinnamon Muffins are soft, buttery, and packed with warm cinnamon flavor - just like a churro. Topped with a crunchy cinnamon-sugar sprinkle, theyโ€™re a delicious and easy way to use up sourdough discard in just 30 minutes!
    Course Breakfast, Snack
    Cuisine American
    Prep Time 15 minutes minutes
    Cook Time 15 minutes minutes
    Total Time 30 minutes minutes
    Servings 12 muffins
    Calories 248kcal
    Author Ashley Petrie, RDN, LDN

    Equipment

    • Standard 12-cup muffin tin
    • Paper liners
    • Kitchen scale
    • Mixing bowls
    • Whisk

    Ingredients

    Cinnamon Sugar Topping

    • 1 tablespoon granulated sugar
    • 1 teaspoon ground cinnamon

    Sourdough Muffins

    • 2 cups (240 grams) all-purpose flour
    • 1 teaspoon ground cinnamon
    • 1 teaspoon Diamond Crystal Kosher Salt if using table salt or Morton's, reduce the amount by about half
    • 1 teaspoon baking powder
    • ยฝ teaspoon baking soda
    • ยฝ cup (113 grams, 1 stick) unsalted butter melted
    • 1 cup (200 grams) granulated sugar
    • 2 large (100 grams) eggs room temperature
    • ยพ cup (180 grams) whole milk room temperature
    • ยฝ cup (100 grams) sourdough starter discard room temperature
    • 1 teaspoon vanilla extract

    Instructions

    • Preheat your oven to 425ยฐF. Line a 12-cup muffin tin with paper liners or grease each well with butter, oil, or cooking spray.
    • In a small bowl, mix 1 tablespoon granulated sugar with 1 teaspoon cinnamon. Set aside.
      1 tablespoon granulated sugar, 1 teaspoon ground cinnamon
    • In a medium bowl, whisk together the flour, cinnamon, salt, baking powder, and baking soda. Set aside.
      2 cups (240 grams) all-purpose flour, 1 teaspoon ground cinnamon, 1 teaspoon Diamond Crystal Kosher Salt, 1 teaspoon baking powder, ยฝ teaspoon baking soda
    • In a large mixing bowl, whisk the melted butter and sugar until smooth and slightly paler in color. Whisk in the eggs, one at a time, until fully incorporated. Stir in the milk, sourdough discard, and vanilla extract until well combined.
      ยฝ cup (113 grams, 1 stick) unsalted butter, 1 cup (200 grams) granulated sugar, 2 large (100 grams) eggs, ยพ cup (180 grams) whole milk, ยฝ cup (100 grams) sourdough starter discard, 1 teaspoon vanilla extract
    • Gently fold the dry ingredients into the wet mixture, stirring just until no dry streaks remain. Be careful not to overmix to avoid dense muffins.
    • Divide the batter evenly among the 12 muffin wells. Sprinkle a generous pinch of the cinnamon sugar topping over each muffin.
    • Place the muffins in the preheated oven and bake for 12โ€“15 minutes, or until the tops are golden brown and a toothpick inserted in the center comes out clean.
    • Let the muffins cool in the pan for 5 minutes, then transfer them to a wire rack to cool completely. Serve warm for the best texture.

    Notes

    • Quick Tip:ย Muffins made with all butter tend to firm up at room temperature since butter solidifies as it cools. A quick warm-up in the microwave for 10-15 seconds restores their soft texture.
    • Storage:ย Keep muffins in an airtight container at room temperature for 3-4 days or freeze them for up to 3 months.

    Nutrition

    Serving: 1muffin | Calories: 248kcal | Carbohydrates: 37g | Protein: 5g | Fat: 9g | Saturated Fat: 5g | Polyunsaturated Fat: 0.5g | Monounsaturated Fat: 2.5g | Trans Fat: 0.5g | Cholesterol: 55mg | Sodium: 205mg | Potassium: 51mg | Fiber: 1g | Sugar: 18.5g | Calcium: 51mg | Iron: 0.4mg
    Did you try this recipe?Let me know! Comment below, or take a picture and tag me on Instagram @everydayhomemadebyashley.

    Can You Freeze Sourdough Pizza Dough? How to Do it Right

    January 28, 2025

    Sourdough pizza is loved for its flavor and texture, but making it from scratch every time can be a hassle. The good news? You can freeze sourdough pizza dough for a quick and easy pizza night anytime!

    Four images of sourdough pizza dough balls with the text "Can You Freeze Sourdough Pizza Dough" in a textbox in the middle.

    Every Friday, my fiancรฉ and I look forward to homemade pizza night. But after a busy week, I don't always feel like making the dough from scratch.

    Thatโ€™s when I wondered, can you freeze sourdough pizza dough? The answer is yes! And itโ€™s so simple - just freeze the dough balls on a parchment-lined baking sheet, then store them in a freezer-safe bag.

    Now, whenever I make my sourdough discard pizza dough, I always make a double batch - one for the oven and one for the freezer. No matter how busy we are, we always have dough on hand for pizza, flatbreads, calzones, or even garlic knots.

    Freezing dough has been a game changer for me. It saves me time and reduces sourdough discard waste.

    So, if you want to make pizza night easier, keep reading to learn how to freeze sourdough pizza dough for your next homemade pizza!

    Disclaimer: Some links throughout this post are affiliate links. As an Amazon Associate, I earn from qualifying purchases. You can learn more by visiting my Affiliate Disclosure Page.

    Why Freeze Sourdough Pizza Dough?

    Freezing sourdough pizza dough can make your life easier. Here are a few great reasons to do it:

    • Convenience- Having dough in the freezer means an easy weeknight dinner is always just a thaw away.
    • Save Time- Prep a big batch and freeze portions for future pizza nights.
    • Keeps Flavor & Texture- Freezing doesnโ€™t change the doughโ€™s taste or texture if done right.

    Tips for Success

    • Start with the right recipe. Use a reliable dough recipe, like my sourdough discard pizza dough or whole wheat sourdough pizza dough, for the best results after freezing.
    • Avoid over-proofing. Leave a little room for fermentation as the dough thaws. Over-proofing before freezing can affect the rise when you're ready to bake.
    • Use a parchment-lined baking sheet. Freezing dough balls on parchment keeps them from sticking. Once frozen, theyโ€™re easy to transfer to bags or containers.
    • Label your dough. Always mark the date on your dough so you know how long itโ€™s been in the freezer. For best quality, use it within 3 months.
    • Allow enough thawing time. While room temperature thawing works, letting the dough thaw slowly in the fridge overnight gives the best texture and flavor.

    How to Freeze Sourdough Pizza Dough

    Freezing sourdough pizza dough is a great way to have homemade dough ready whenever pizza cravings strike.

    Hereโ€™s how to freeze sourdough pizza dough the right way:

    1. Shape the Dough. After letting your dough rise, divide it into individual portions or balls, depending on how large you want your pizzas to be.
    2. Freeze on a Baking Sheet. Place the dough balls on a baking sheet lined with parchment paper. Make sure theyโ€™re spaced apart so they donโ€™t stick together. Freeze them until theyโ€™re solid, which usually takes about 2-3 hours.
    3. Transfer to a Freezer Bag. Once the dough is frozen, transfer it to a resealable freezer bag or an airtight container. Be sure to label it with the date, so you know when it was frozen. Dough can be stored for up to 3 months without losing quality.

    Thawing Your Frozen Sourdough Pizza Dough

    Thawing frozen sourdough pizza dough is simple. Hereโ€™s how:

    • Best Results (Overnight in the Fridge)- Thawing the dough in the fridge overnight helps it maintain its structure a little better, making it easier to work with.
    • Quick Thaw (Room Temperature)- In a hurry? Let the dough sit on the counter at room temperature for 2-4 hours.

    Once thawed, you can shape and bake as usual!

    Two balls of sourdough discard pizza dough on a lightly floured wooden pizza peel.

    Frequently Asked Questions

    Can I freeze sourdough discard pizza dough?

    Absolutely! Sourdough discard pizza dough freezes just as well as dough made with an active starter. The flavor and texture will still be great once thawed.

    Does freezing affect the flavor of the dough?

    No! Freezing sourdough pizza dough preserves its flavor and texture for up to 3 months, as long as you follow the right steps.

    Can I freeze sourdough pizza dough with toppings?

    It's best to freeze just the dough. Adding toppings before freezing can affect the texture and make it soggy when baked.

    Can you par-bake and freeze sourdough pizza dough?

    While I havenโ€™t tried this myself, you can par-bake pizza dough before freezing. Simply bake the dough without toppings at 450ยฐF for about 5 minutes, until itโ€™s set and looks pale and dry on top. Let it cool completely before freezing. When you're ready to use it, just add your toppings and bake as usual.

    Two images of sourdough discard pizza dough. The top image is of the dough stretched out. The bottom images is of a sourdough pizza dough ball. Text overlaid on the image reads "Sourdough Pizza Dough Make Ahead. How to Freeze for Easy Meal Prep!"

    Let's Connect!

    Be sure to leave a comment below if you have any questions. You can also connect with me on Instagram, Facebook, Pinterest, or via email at [email protected].

    A cover of a recipe ebook with the title "Everyday Sourdough: 27 Sweet & Savory Sourdough Discard Recipes." There is an image of sourdough discard cinnamon rolls on the front. At the bottom, it reads "By Ashley Petrie of Everyday Homemade."
    Grab a copy today!

    Are you tired of watching your sourdough discard go to waste?

    Itโ€™s time to turn excess discard into something delicious with my new ebook - Everyday Sourdough!

    Inside, youโ€™ll find 27 tried-and-true sourdough discard recipes that will transform your leftover starter into mouthwatering creations your family and friends will love.

    No more guilt about wasting your discard - with Everyday Sourdough, you have endless options to quickly make something amazing anytime.

    More Sourdough

    • Slices of sourdough bread on a cutting board. Text on top of the image reads "Can you freeze sourdough bread? A complete guide to freezing homemade sourdough bread."
      Can You Freeze Sourdough Bread? A Complete Guide
    • Sourdough discard pizza dough stretched out on a pizza peel.
      Sourdough Discard Pizza Dough (No Yeast)
    • Four pieces of sourdough focaccia pizza on a piece of parchment paper.
      Sourdough Focaccia Pizza
    • Sliced sourdough pepperoni pizza bread on a wooden cutting board.
      Pepperoni Pizza Sourdough Bread with Mozzarella & Parmesan

    Sourdough Chocolate Chip Muffins

    January 27, 2025

    These Sourdough Chocolate Chip Muffins are quick and easy to make with sourdough discard. Enjoy them fresh out of the oven or make them ahead for a sweet breakfast or snack anytime.

    A sourdough chocolate chip muffin split in half on the wrapper with a few more whole muffins out of focus in the background.

    These might just be my favorite sourdough muffins Iโ€™ve ever made. And trust me, Iโ€™ve made a lot of sourdough muffins.

    As a chocolate lover, I tend to lean toward chocolatey baked goods (my chocolate sourdough bread, double chocolate sourdough muffins, and chocolate sourdough zucchini bread are a few of my top picks).

    But, these chocolate chip sourdough muffins? They might just be the winner.

    The buttery muffin base is loaded with chocolate chips and topped with coarse sugar, making them taste like they came straight from your favorite bakery. Plus, theyโ€™re quick and easy to make with any excess sourdough discard you have hiding in the back of your fridge.

    The best part? You can have these homemade muffins ready the same day or freeze them for later for a delicious breakfast or snack anytime.

    Iโ€™m so excited for you to try these sourdough chocolate chip muffins, and I hope you love them as much as I do!

    Disclaimer: Some links throughout this post are affiliate links. As an Amazon Associate, I earn from qualifying purchases. You can learn more by visiting my Affiliate Disclosure Page.

    Ingredients & Substitutions

    Here are some notes on key ingredients. For a full list of ingredients, check out the recipe card below.

    • Sourdough Discard- Adds moisture and a slightly tangy taste. The older your discard is, the more noticeable the flavor will be, so adjust to your liking.
    • Chocolate Chips- Semi-sweet chips are the classic choice, offering a balanced sweetness and rich chocolate flavor. However, feel free to swap with milk or dark chocolate chips, or even chopped chocolate if you prefer.
    • All-Purpose Flour- Gives structure to the muffins. You can swap up to โ…“ for whole wheat flour, though it may make them a bit denser.
    • Granulated Sugar- Adds sweetness and helps with texture. You can also use brown sugar, coconut sugar, or reduce to ยฝ cup (100 grams) for less sweetness.
    • Whole Milk- Adds moisture and richness. Feel free to swap with any milk you prefer, including non-dairy options.
    • Butter- Adds a rich, buttery flavor that pairs well with the chocolate chips. Since butter firms up at room temperature, these muffins are best served warm. You can use an equal amount of neutral-flavored oil if you prefer.
    • Kosher Salt- I use Diamond Crystal Kosher Salt, about 2.8 grams per teaspoon. If using table salt or Mortonโ€™s, measure by weight or use half the amount.
    The ingredients to make sourdough chocolate chip muffins. Each ingredient is labeled with text. They include vanilla, butter, baking powder, baking soda, sugar, milk, sourdough discard, salt, eggs, chocolate chips, and all-purpose flour.

    Tips for Success

    • Measure ingredients accurately. Be sure to weight the flour or spoon it into the measuring cup and level it off to avoid using too much. Too much flour can lead to dense muffins.
    • Use room temperature ingredients. For a better texture, ensure your eggs, sourdough discard, and milk are at room temperature before mixing the batter.
    • Don't overmix. Stir the batter just until combined to avoid dense or tough muffins.
    • Add a touch of coarse sugar. For a bakery-like finish, sprinkle some coarse sugar on top of the muffins before baking.
    • Serve warm. Muffins made with butter firm up a bit as they cool. A quick 10โ€“15 seconds in the microwave or a few minutes in the oven will soften them right up.

    How to Make Sourdough Chocolate Chip Muffins

    Here is how to make chocolate chip muffins with sourdough discard.

    Step 1: Prepare oven and muffin tin. Preheat your oven to 425ยฐF. Line a 12-cup muffin tin with paper liners or grease each cup with butter, oil, or cooking spray to prevent sticking.

    Step 2: Mix dry ingredients. In a medium bowl, combine the flour, baking powder, baking soda, and salt. Set aside.

    The dry ingredients mixed together in a bowl.

    Step 3: Prepare wet ingredients. In a large mixing bowl, whisk the melted butter and sugar until the mixture looks smooth and slightly lighter in color. Add the eggs, one at a time, whisking well after each addition. Pour in the milk, sourdough discard, and vanilla extract, and whisk again until everything is fully combined.

    The wet ingredients mixed together in a bowl.

    Step 4: Combine wet and dry ingredients. Gently fold the dry ingredients into the wet mixture, being careful not to overmix. Once combined, gently fold in the chocolate chips until evenly distributed.

    Chocolate chip sourdough muffin batter in a mixing bowl with a rubber spatula sticking out to the left.

    Step 5: Fill muffin tin. Evenly divide the batter between the 12 muffin cups. If desired, sprinkle a little coarse sugar on top of each muffin before baking.

    Six paper lined muffin wells filled with sourdough chocolate chip muffin batter.

    Step 6: Bake muffins. Bake in the preheated oven for 14-16 minutes or until a toothpick inserted into the center comes out clean.

    Step 7: Cool and serve. Allow the muffins to cool in the tin for 5 minutes before transferring to a wire rack to cool completely. Serve warm for the best texture.

    Six baked sourdough chocolate chip muffins in a muffin tin.

    How to Store

    Store cooled sourdough chocolate chip muffins in an airtight container at room temperature for 3-4 days. For the best texture, warm in the oven or microwave for 10-15 seconds before serving.

    To store longer, freeze muffins in a freezer-safe container for up to 3 months. Thaw at room temperature and warm before serving.

    Three sourdough chocolate chip muffins on a wooden cutting board. Two of the muffins are stacked on top of each other while the other muffin is laying next to them with the top visible.
    A cover of a recipe ebook with the title "Everyday Sourdough: 27 Sweet & Savory Sourdough Discard Recipes." There is an image of sourdough discard cinnamon rolls on the front. At the bottom, it reads "By Ashley Petrie of Everyday Homemade."
    Grab a copy today!

    Are you tired of watching your sourdough discard go to waste?

    Itโ€™s time to turn excess discard into something delicious with my new ebook - Everyday Sourdough!

    Inside, youโ€™ll find 27 tried-and-true sourdough discard recipes that will transform your leftover starter into mouthwatering creations your family and friends will love.

    No more guilt about wasting your discard - with Everyday Sourdough, you have endless options to quickly make something amazing anytime.

    Let's Connect!

    Be sure to leave a comment below if you have any questions. You can also connect with me on Instagram, Facebook, Pinterest, or via email at [email protected].

    More Sourdough Muffin Recipes

    • Five sourdough chocolate muffins on a wooden cutting board.
      Double Chocolate Sourdough Discard Muffins
    • A raspberry white chocolate sourdough muffin split in half on a paper liner with several other muffins out of focus in the background.
      The Best Raspberry White Chocolate Sourdough Muffins
    • A sourdough blueberry muffin split in half on a muffin liner. There are several more whole muffins out of focus in the background.
      Sourdough Blueberry Muffins with Streusel Topping
    • A mini muffin tin filled with sourdough discard mini muffins.
      Sourdough Discard Mini Muffins (Choose Your Own Mix-Ins!)

    ๐Ÿ“– Recipe

    A sourdough chocolate chip muffin split in half on the wrapper with a few more whole muffins out of focus in the background.
    Print Pin SaveSaved!

    Sourdough Chocolate Chip Muffins

    These Sourdough Chocolate Chip Muffins are quick and easy to make with sourdough discard. Enjoy them fresh out of the oven or make them ahead for a sweet breakfast or snack anytime.
    Course Breakfast, Snack
    Cuisine American
    Prep Time 15 minutes minutes
    Cook Time 15 minutes minutes
    Total Time 30 minutes minutes
    Servings 12 muffins
    Calories 335kcal
    Author Ashley Petrie, RDN, LDN

    Equipment

    • Standard 12-cup muffin tin
    • Mixing bowls
    • Whisk
    • Paper liners

    Ingredients

    • 2 cups (240 grams) all-purpose flour
    • 1 teaspoon baking powder
    • ยฝ teaspoon baking soda
    • 1 teaspoon Diamond Crystal Kosher Salt use half the amount of table salt or Morton's brand
    • ยฝ cup (113 grams, 1 stick) unsalted butter melted
    • ยพ cup (150 grams) granulated sugar
    • 2 large (100 grams) eggs room temperature
    • ยพ cup (180 grams) whole milk room temperature
    • ยฝ cup (100 grams) sourdough starter discard room temperature
    • 1 teaspoon vanilla extract
    • 1 ยฝ cups (250 grams) semi-sweet chocolate chips
    • Coarse sugar for sprinkling on top (optional)

    Instructions

    • Preheat your oven to 425ยฐF. Line a 12-cup muffin tin with paper liners or grease each cup with butter, oil, or cooking spray to prevent sticking.
    • In a medium bowl, combine the flour, baking powder, baking soda, and salt. Set aside.
      2 cups (240 grams) all-purpose flour, 1 teaspoon baking powder, ยฝ teaspoon baking soda, 1 teaspoon Diamond Crystal Kosher Salt
    • In a large mixing bowl, whisk the melted butter and sugar until the mixture looks smooth and slightly lighter in color. Add the eggs, one at a time, whisking well after each addition. Pour in the milk, sourdough discard, and vanilla extract, and whisk again until everything is fully combined.
      ยฝ cup (113 grams, 1 stick) unsalted butter, ยพ cup (150 grams) granulated sugar, 2 large (100 grams) eggs, ยพ cup (180 grams) whole milk, ยฝ cup (100 grams) sourdough starter discard, 1 teaspoon vanilla extract
    • Gently fold the dry ingredients into the wet mixture, being careful not to overmix. Once combined, gently fold in the chocolate chips until evenly distributed.
      1 ยฝ cups (250 grams) semi-sweet chocolate chips
    • Evenly divide the batter between the 12 muffin cups. If desired, sprinkle a little coarse sugar on top of each muffin before baking.
      Coarse sugar
    • Bake in the preheated oven for 14-16 minutes or until a toothpick inserted into the center comes out clean.
    • Allow the muffins to cool in the tin for 5 minutes before transferring to a wire rack to cool completely. Serve warm for the best texture.

    Notes

    • Quick Tip:ย Muffins made with all butter tend to firm up at room temperature since butter solidifies as it cools. A quick warm-up in the microwave for 10-15 seconds restores their soft texture.
    • Storage:ย Keep muffins in an airtight container at room temperature for 3-4 days or freeze them for up to 3 months.

    Nutrition

    Serving: 1muffin | Calories: 335kcal | Carbohydrates: 46g | Protein: 5.5g | Fat: 15g | Saturated Fat: 9g | Polyunsaturated Fat: 0.5g | Monounsaturated Fat: 2.5g | Trans Fat: 0.5g | Cholesterol: 54.5mg | Sodium: 205mg | Potassium: 138mg | Fiber: 1.5g | Sugar: 26g | Calcium: 47mg | Iron: 0.6mg
    Did you try this recipe?Let me know! Comment below, or take a picture and tag me on Instagram @everydayhomemadebyashley.

    Double Chocolate Sourdough Zucchini Bread (Extra Moist)

    January 21, 2025

    This Sourdough Chocolate Zucchini Bread is moist, fudgy, and packed with chocolate flavor. Made with sourdough discard and fresh zucchini, itโ€™s the perfect way to sneak extra veggies into breakfast or snack time.

    Sourdough chocolate zucchini bread cut into slices on a counter.

    If youโ€™ve read my blog for a while, you know Iโ€™m a big fan of chocolate. And when it comes to chocolate, double chocolate will always win. (My double chocolate sourdough loaf, muffins, and cookies are proof!)

    So when I decided to revisit an old recipe from my pre-sourdough days, it only made sense to turn it into a double chocolate zucchini bread made with sourdough discard.

    While testing this recipe, I shared slices with friends after dinner. And they all agreed it was one of the best quick breads theyโ€™d ever had. Itโ€™s incredibly moist, rich, and chocolatey with a taste and texture thatโ€™s almost like a brownie.

    But the best part? Itโ€™s super quick and easy to make. Mix the batter in minutes, bake it up, and youโ€™ll have the perfect sweet breakfast, afternoon snack, or decadent dessert in no time.

    This sourdough chocolate zucchini bread is an easy way to use up both extra discard and zucchini. And it's sure to become a new favorite. I hope you enjoy it as much as we did!

    Disclaimer: Some links throughout this post are affiliate links. As an Amazon Associate, I earn from qualifying purchases. You can learn more by visiting my Affiliate Disclosure Page.

    Ingredients & Substitutions

    Here are some notes on key ingredients. For a full list of ingredients, check out the recipe card below.

    • Sourdough Discard- Adds moisture while putting extra discard to good use.
    • Zucchini- Use freshly grated zucchini. No need to squeeze out the moisture, it helps keep the bread soft and tender.
    • Cocoa Powder- I've tested this recipe with both natural and Dutch-processed cocoa powder. While I prefer Dutch-processed for its richer flavor, either works well.
    • Chocolate Chips- Add pockets of rich, melty chocolate throughout the loaf. Feel free to use semisweet, dark, milk, or white chocolate chips.
    • All-Purpose Flour- Provides structure while keeping the crumb soft and tender.
    • Brown & Granulated Sugar- Brown sugar adds moisture and a deeper caramel-like flavor, while granulated sugar balances the sweetness.
    • Applesauce- Helps keep the bread moist and tender without adding extra fat.
    • Butter- Adds rich, buttery flavor. You can substitute melted coconut oil or another neutral baking oil if preferred.
    • Kosher Salt- I use Diamond Crystal Kosher Salt (2.8 grams per teaspoon). If using table salt or Mortonโ€™s, reduce to ยฝ teaspoon.
    The ingredients to make sourdough chocolate zucchini bread. Each ingredient is labeled with text. They include cocoa powder, eggs, chocolate chips, butter, zucchini, all-purpose flour, baking powder, baking soda, vanilla, applesauce, brown sugar, granulated sugar, sourdough discard, and salt.

    Tips for Success

    • Measure your flour correctly. Too much flour is the easiest way to end up with dry zucchini bread. Use a kitchen scale or the spoon-and-level method for the most accurate results.
    • Use freshly grated zucchini. Freshly grated zucchini adds the most moisture and the best texture. Avoid pre-shredded zucchini, which tends to be dry.
    • Use room temperature ingredients. Room temperature eggs, sourdough discard, and applesauce help keep the melted butter from solidifying, resulting in a better-textured loaf.
    • Don't overmix. Stir the batter just until the ingredients are combined. Overmixing can make the bread dense instead of tender.
    • Cool completely before slicing. This gives the crumb time to set, making it easier to slice without becoming gummy.

    How to Make Sourdough Chocolate Zucchini Bread

    Follow along with the step-by-step photos below to make this rich and moist sourdough chocolate zucchini bread. The full recipe is in the recipe card below.

    Step 1: Mix dry ingredients. Whisk together the flour, cocoa powder, baking powder, baking soda, and salt.

    The dry ingredients whisked together in a bowl.

    Step 2: Whisk wet ingredients. Whisk the melted butter with both sugars. Add the eggs, then mix in the sourdough discard, applesauce, and vanilla.

    Sourdough discard and other wet ingredients whisked together in a bowl.

    Step 3: Make batter. Gently fold the dry ingredients into the wet until just combined. Fold in the zucchini and chocolate chips.

    The wet and dry ingredients mixed together in a bowl.
    Sourdough chocolate zucchini bread batter whisked together in a bowl.

    Step 4: Bake. Pour the batter into the pan and smooth the top. Bake 60โ€“70 minutes at 350ยฐF. Cool completely before slicing.

    The chocolate sourdough zucchini bread being spread into a parchment-lined loaf pan.
    A baked loaf of sourdough chocolate zucchini bread in a loaf pan.

    How to Store

    Store sourdough chocolate zucchini bread in an airtight container at room temperature for 3 to 4 days.

    For longer storage, freeze in a freezer-safe container for up to 3 months. Thaw at room temperature.

    A slice of sourdough discard chocolate zucchini bread on a wooden cutting board.
    A cover of a recipe ebook with the title "Everyday Sourdough: 27 Sweet & Savory Sourdough Discard Recipes." There is an image of sourdough discard cinnamon rolls on the front. At the bottom, it reads "By Ashley Petrie of Everyday Homemade."
    Grab a copy today!

    Are you tired of watching your sourdough discard go to waste?

    Itโ€™s time to turn excess discard into something delicious with my new ebook - Everyday Sourdough!

    Inside, youโ€™ll find 27 tried-and-true sourdough discard recipes that will transform your leftover starter into mouthwatering creations your family and friends will love.

    No more guilt about wasting your discard - with Everyday Sourdough, you have endless options to quickly make something amazing anytime.

    Let's Connect!

    Be sure to leave a comment below if you have any questions. You can also connect with me on Instagram, Facebook, Pinterest, or via email at [email protected].

    More Sourdough Quick Bread Recipes

    • Slices of sourdough discard zucchini bread stacked on a small white plate.
      Sourdough Discard Zucchini Bread
    • Sliced sourdough banana bread on a linen napkin.
      Simple Sourdough Discard Banana Bread (Made with Butter)
    • A few slices of sourdough blueberry bread set on a piece of parchment paper. The other half of the loaf and a small bowl of blueberries are out of focus in the background.
      Sourdough Blueberry Bread
    • Slices of sourdough discard pumpkin bread on a wooden cutting board with white and orange cloth napkins in the background.
      Sourdough Discard Pumpkin Quick Bread

    ๐Ÿ“– Recipe

    Sourdough chocolate zucchini bread cut into slices on a counter.
    Print Pin SaveSaved!
    5 from 3 votes

    Sourdough Discard Chocolate Zucchini Bread

    This Sourdough Chocolate Zucchini Bread is moist, fudgy, and packed with chocolate flavor. Made with sourdough discard and fresh zucchini, itโ€™s the perfect way to sneak extra veggies into breakfast or snack time.
    Course Breakfast, Snack
    Cuisine American
    Prep Time 20 minutes minutes
    Cook Time 1 hour hour
    Cool Time 1 hour hour
    Total Time 2 hours hours 20 minutes minutes
    Servings 12 slices
    Calories 305kcal
    Author Ashley Petrie, RDN, LDN

    Equipment

    • Standard 9"x5" aluminum loaf pan
    • Box grater
    • Mixing bowls
    • Parchment paper

    Ingredients

    • 1 ยฝ cups (180 grams) all-purpose flour
    • ยฝ cup (60 grams) cocoa powder natural or Dutch-processed
    • 1 ยฝ teaspoons baking powder
    • ยฝ teaspoon baking soda
    • 1 teaspoon Diamond Crystal Kosher Salt reduce to ยฝ teaspoon if using Morton's brand or table salt
    • ยฝ cup (113 grams, 1 stick) unsalted butter melted
    • ยพ cup (150 grams) brown sugar packed
    • ยผ cup (50 grams) granulated sugar
    • 2 large eggs room temperature
    • ยฝ cup (100 grams) sourdough starter discard room temperature
    • 1 single-serve cup (111 grams, 3.9 ounces) unsweetened applesauce room temperature
    • 1 teaspoon vanilla extract
    • 1 ยผ cups (170 grams) grated zucchini
    • 1 cup (170 grams) semi-sweet chocolate chips

    Instructions

    • Preheat the oven to 350ยฐF. Grease a 9x5-inch loaf pan and line it with parchment paper, leaving some overhang on the short sides for easy removal.
    • In a medium bowl, whisk together the flour, cocoa powder, baking powder, baking soda, and salt. Set aside.
      1 ยฝ cups (180 grams) all-purpose flour, ยฝ cup (60 grams) cocoa powder, 1 ยฝ teaspoons baking powder, ยฝ teaspoon baking soda, 1 teaspoon Diamond Crystal Kosher Salt
    • In a large mixing bowl, whisk together the melted butter and sugars until smooth. Add the eggs one at a time, mixing well after each addition. Stir in the sourdough discard, applesauce, and vanilla extract until combined.
      ยฝ cup (113 grams, 1 stick) unsalted butter, ยพ cup (150 grams) brown sugar, ยผ cup (50 grams) granulated sugar, 2 large eggs, ยฝ cup (100 grams) sourdough starter discard, 1 single-serve cup (111 grams, 3.9 ounces) unsweetened applesauce, 1 teaspoon vanilla extract
    • Add the dry ingredients to the wet ingredients and gently fold until just combined. Fold in the grated zucchini and chocolate chips, being careful not to overmix.
      1 cup (170 grams) semi-sweet chocolate chips, 1 ยผ cups (170 grams) grated zucchini
    • Pour the batter into the prepared loaf pan and spread it evenly. Bake for 60โ€“70 minutes, or until a toothpick inserted into the center comes out clean.
    • Let the bread cool in the pan for 10 minutes, then use the parchment paper overhang to lift it onto a wire rack. Cool completely before slicing and serving.

    Notes

    • Storage: Store the bread in an airtight container at room temperature for 3-4 days or freeze for up to 3 months.

    Nutrition

    Serving: 1slice | Calories: 305kcal | Carbohydrates: 43.5g | Protein: 5.5g | Fat: 13.5g | Saturated Fat: 8g | Polyunsaturated Fat: 0.5g | Monounsaturated Fat: 2.5g | Trans Fat: 0.5g | Cholesterol: 53mg | Sodium: 203mg | Potassium: 374mg | Fiber: 3g | Sugar: 26g | Vitamin C: 2.6mg | Calcium: 64mg | Iron: 2.7mg
    Did you try this recipe?Let me know! Comment below, or take a picture and tag me on Instagram @everydayhomemadebyashley.

    Double Chocolate Sourdough Discard Muffins

    January 20, 2025

    These Sourdough Chocolate Muffins are moist, decadent, and packed with chocolate chips. Ready in just 30 minutes, theyโ€™re an easy, delicious way to use up sourdough discard.

    Five sourdough chocolate muffins on a wooden cutting board.

    Iโ€™ll admit, Iโ€™m a huge chocolate lover. I have a piece or two every night after dinner, so it should come as no surprise that chocolate baked goods are some of my favorites (sourdough brownies, anyone?).

    And these sourdough chocolate muffins are at the top of that list. Made with cocoa powder and chocolate chips, theyโ€™re a chocolate loverโ€™s dream.

    I like to add a touch of coffee to the batter to boost the chocolate flavor (totally optional, but worth it). I also usually use Dutch-processed cocoa for a smoother, less acidic taste.

    But my absolute favorite thing about these muffins?

    They come together in just 30 minutes and are perfect for breakfast or a grab-and-go snack. Make them ahead, freeze, and enjoy anytime, all while using up extra sourdough discard.

    Ready to dig in? I know youโ€™re going to love them as much as I do!

    Disclaimer: Some links throughout this post are affiliate links. As an Amazon Associate, I earn from qualifying purchases. You can learn more by visiting my Affiliate Disclosure Page.

    Ingredients & Substitutions

    Here are some notes on key ingredients. For a full list of ingredients, check out the recipe card below.

    • Sourdough Discard- Adds moisture and is an easy way to use up discard. You can always use active starter if that's all you have on hand.
    • Dutch-Processed Cocoa Powder- Less acidic than natural cocoa, giving the muffins a smoother chocolate flavor. Natural cocoa works too, but the muffins may taste slightly more acidic.
    • Chocolate Chips- Semi-sweet chocolate chips are perfect for a balanced sweetness, but feel free to swap in milk or dark chocolate chips, or chop up a chocolate bar.
    • Coffee- Optional, but recommended! Coffee enhances the chocolate flavor without making the muffins taste like coffee.
    • All-Purpose Flour- Provides structure for the muffins. You can replace up to โ…“ with whole wheat flour, but it may make them a bit denser.
    • Granulated Sugar- Adds sweetness and helps with texture. You can swap with brown sugar or coconut sugar or reduce to ยฝ cup (100 grams) if you want less sweetness.
    • Whole Milk- Adds moisture and richness. You can replace the whole milk with any milk you like, including non-dairy options.
    • Butter- Adds flavor. Since it firms at room temperature, serve warm for the softest texture. Can swap with coconut or other liquid oils.
    • Kosher Salt- I use Diamond Crystal Kosher Salt (2.8 grams per teaspoon). If using table salt or Mortonโ€™s, measure by weight or use half the amount.
    The ingredients to make sourdough chocolate muffins. Each ingredient is labeled with text. They include salt, vanilla, butter, sugar, baking powder, baking soda, coffee, sourdough discard, milk, eggs, cocoa powder, chocolate chips, and all-purpose flour.

    Mix-In Ideas

    Feel free to get creative with your mix-ins! Here are some ideas:

    • Nuts & seeds- walnuts, pecans, almonds, pumpkin, or chia seeds
    • Chocolate- dark, milk, or white chips
    • Fruit- fresh or frozen berries, banana, or dried cherries
    • Others- coconut flakes, orange zest, or a pinch of cinnamon

    Tips for Success

    • Use Dutch-processed cocoa powder. Itโ€™s less acidic than natural cocoa, giving these muffins a richer, smoother chocolate flavor.
    • Bring ingredients to room temperature. Using eggs, milk, and sourdough discard at room temp help create a smoother batter and more tender, even crumb.
    • Don't overmix. Stir the batter just until combined to avoid dense, tough muffins.
    • Serve warm. Muffins made with butter firm up as they cool, so a quick 10โ€“15 seconds in the microwave or a short warm-up in the oven keeps them soft and tender.

    How to Make Double Chocolate Sourdough Muffins

    Step-by-step instructions (with photos!) to turn your sourdough discard into rich, chocolatey muffins everyone will love.

    Step 1: Mix dry ingredients. Preheat oven to 425ยฐF. Line a 12-cup muffin tin with paper liners or grease well. In a bowl, whisk together flour, cocoa powder, baking powder, baking soda, and salt.

    The dry ingredients whisked together in a bowl.

    Step 2: Whisk wet ingredients. In a large bowl, whisk melted butter and sugar until smooth. Add eggs, milk, sourdough discard, coffee (optional), and vanilla. Mix until combined.

    The wet ingredients blended together in a mixing bowl.

    Step 3: Mix batter. Gently fold the dry ingredients into the wet, then fold in chocolate chips.

    Sourdough double chocolate muffin batter in a mixing bowl.

    Step 4: Bake and cool. Divide batter evenly into muffin cups. Bake 14โ€“16 minutes, or until a toothpick comes out clean. Cool slightly before serving.

    Sourdough chocolate muffin batter in paper-lined muffin tin.
    Baked sourdough chocolate muffins in a muffin tin.

    How to Store

    Once completely cooled, store muffins in an airtight container at room temperature for 3โ€“4 days. Warm briefly in the oven or microwave for the best texture.

    For longer storage, freeze in a freezer-safe container for up to 3 months. Thaw at room temperature and rewarm before serving.

    A sourdough double chocolate muffins split in half in a paper wrapper surrounded by more muffins.
    A cover of a recipe ebook with the title "Everyday Sourdough: 27 Sweet & Savory Sourdough Discard Recipes." There is an image of sourdough discard cinnamon rolls on the front. At the bottom, it reads "By Ashley Petrie of Everyday Homemade."
    Grab a copy today!

    Are you tired of watching your sourdough discard go to waste?

    Itโ€™s time to turn excess discard into something delicious with my new ebook - Everyday Sourdough!

    Inside, youโ€™ll find 27 tried-and-true sourdough discard recipes that will transform your leftover starter into mouthwatering creations your family and friends will love.

    No more guilt about wasting your discard - with Everyday Sourdough, you have endless options to quickly make something amazing anytime.

    Let's Connect!

    Be sure to leave a comment below if you have any questions. You can also connect with me on Instagram, Facebook, Pinterest, or via email at [email protected].

    More Sourdough Muffin Recipes

    • A sourdough chocolate chip muffin split in half on the wrapper with a few more whole muffins out of focus in the background.
      Sourdough Chocolate Chip Muffins
    • A sourdough blueberry muffin split in half on a muffin liner. There are several more whole muffins out of focus in the background.
      Sourdough Blueberry Muffins with Streusel Topping
    • Sourdough morning glory muffins on a piece of parchment paper on a wooden cutting board.
      Sourdough Morning Glory Muffins (Healthy & Freezer-Friendly)
    • A sourdough oatmeal muffin split in half still sitting in the muffin wrapper.
      Sourdough Oatmeal Muffins (Quick & Easy)

    ๐Ÿ“– Recipe

    Five sourdough chocolate muffins on a wooden cutting board.
    Print Pin SaveSaved!
    5 from 4 votes

    Sourdough Chocolate Muffins

    These Sourdough Chocolate Muffins are moist, decadent, and packed with chocolate chips. Ready in just 30 minutes, theyโ€™re an easy, delicious way to use up sourdough discard.
    Course Breakfast, Snack
    Cuisine American
    Prep Time 15 minutes minutes
    Cook Time 15 minutes minutes
    Total Time 30 minutes minutes
    Servings 12 muffins
    Calories 325kcal
    Author Ashley Petrie, RDN, LDN

    Equipment

    • Standard 12-cup muffin tin
    • Mixing bowls
    • Whisk
    • Paper liners

    Ingredients

    • 1 ยฝ cups (180 grams) all-purpose flour
    • ยฝ cup (60 grams) Dutch-processed cocoa
    • 1 teaspoon baking powder
    • ยฝ teaspoon baking soda
    • ยฝ teaspoon Diamond Crystal Kosher Salt
    • ยฝ cup (113 grams, 1 stick) unsalted butter melted
    • ยพ cup (150 grams) granulated sugar
    • 2 large (100 grams) eggs room temperature
    • ยพ cup (180 grams) whole milk room temperature
    • ยฝ cup (100 grams) sourdough starter discard room temperature
    • 2 tablespoons brewed coffee optional
    • 1 teaspoon vanilla extract
    • 1 ยฝ cups (250 grams) semi-sweet chocolate chips

    Instructions

    • Preheat your oven to 425ยฐF. Line a 12-cup muffin tin with paper liners or grease each cup with butter, oil, or cooking spray to prevent sticking.
    • In a medium bowl, combine the flour, cocoa powder, baking powder, baking soda, and salt. Set aside.
      1 ยฝ cups (180 grams) all-purpose flour, ยฝ cup (60 grams) Dutch-processed cocoa, 1 teaspoon baking powder, ยฝ teaspoon baking soda, ยฝ teaspoon Diamond Crystal Kosher Salt
    • In a large mixing bowl, whisk the melted butter and sugar until the mixture looks smooth and slightly lighter in color. Add the eggs, one at a time, whisking well after each addition. Pour in the milk, sourdough discard, coffee (if using) and vanilla extract, and whisk again until everything is fully combined.
      ยฝ cup (113 grams, 1 stick) unsalted butter, ยพ cup (150 grams) granulated sugar, 2 large (100 grams) eggs, ยพ cup (180 grams) whole milk, ยฝ cup (100 grams) sourdough starter discard, 2 tablespoons brewed coffee, 1 teaspoon vanilla extract
    • Gently fold the dry ingredients into the wet mixture, being careful not to overmix. Once combined, gently fold in the chocolate chips until evenly distributed.
      1 ยฝ cups (250 grams) semi-sweet chocolate chips
    • Evenly divide the batter between the 12 muffin cups.
    • Bake in the preheated oven for 14-16 minutes or until a toothpick inserted into the center comes out clean.
    • Allow the muffins to cool in the tin for 5 minutes before transferring to a wire rack to cool completely. Serve warm for the best texture.

    Notes

    • Quick Tip:ย Muffins made with all butter tend to firm up at room temperature since butter solidifies as it cools. A quick warm-up in the microwave for 10-15 seconds restores their soft texture.
    • Storage:ย Keep muffins in an airtight container at room temperature for 3-4 days or freeze them for up to 3 months.

    Nutrition

    Serving: 1muffin | Calories: 325kcal | Carbohydrates: 43g | Protein: 6g | Fat: 16g | Saturated Fat: 9.5g | Polyunsaturated Fat: 0.5g | Monounsaturated Fat: 2.5g | Trans Fat: 0.5g | Cholesterol: 54.5mg | Sodium: 158mg | Potassium: 372mg | Fiber: 3g | Sugar: 25g | Calcium: 55mg | Iron: 2.6mg
    Did you try this recipe?Let me know! Comment below, or take a picture and tag me on Instagram @everydayhomemadebyashley.

    Sourdough Morning Glory Muffins (Healthy & Freezer-Friendly)

    January 20, 2025

    These Sourdough Morning Glory Muffins turn extra sourdough discard into wholesome, from-scratch muffins your family will love for breakfast or snacks. Theyโ€™re make-ahead friendly, freeze beautifully, and are super easy to grab on busy mornings.

    Sourdough morning glory muffins on a piece of parchment paper on a wooden cutting board.

    As a dietitian and sourdough baker, I love when a recipe is both healthy and helps use up extra sourdough discard.

    So, when I started testing a variety of sourdough muffin recipes for the blog, I knew sourdough morning glory muffins had to be one of them.

    These muffins are made from scratch with ingredients you can feel good about, like whole wheat flour, flaxseed, carrots, nuts, and of course, sourdough discard.

    Plus, theyโ€™re packed with fiber, easy to prepare, and make-ahead friendly so you can stock your fridge or freezer for grab-and-go breakfasts on busy mornings.

    Iโ€™m so excited for you to try these muffins. I hope they become a new breakfast staple in your house!

    Disclaimer: Some links throughout this post are affiliate links. As an Amazon Associate, I earn from qualifying purchases. You can learn more by visiting my Affiliate Disclosure Page.

    Ingredients & Substitutions

    Here are some notes on key ingredients. For a full list of ingredients, check out the recipe card below.

    • Sourdough Discard- Adds moisture and helps use up discard.
    • Whole Wheat Flour- Gives a nutty, hearty flavor. Swap with all-purpose for lighter muffins.
    • Carrots- Finely grate for best texture. Can swap with grated zucchini or apple for a different flavor.
    • Shredded Coconut- Use sweetened or unsweetened coconut depending on your preference. If you're not a fan, feel free to leave it out.
    • Pecans or Walnuts- Adds crunch. Can swap with other nuts or omit for nut-free.
    • Flaxseed- Ground flaxseed adds fiber and healthy fats, and helps bind the ingredients. Chia seeds are a good alternative.
    • Orange Juice + Zest- Adds moisture and a vibrant orange flavor to the muffins. Swap with milk or water if preferred.
    • Butter- Gives the muffins a richer flavor. Since it firms up at room temperature, these muffins are best served warm. You can swap it for coconut oil or a liquid oil if preferred.
    • Brown Sugar- Adds a warm sweetness that pairs perfectly with the spices. Granulated sugar can be used as a substitute.
    • Applesauce- Keeps the muffins moist and adds subtle sweetness. You can replace it with mashed banana or yogurt, but the texture may vary.
    • Warm Spices- A blend of cinnamon, nutmeg, and ginger.
    • Kosher Salt- I use Diamond Crystal Kosher Salt, about 2.8 grams per teaspoon. If using table salt or Mortonโ€™s, measure by weight or use half the amount.
    The ingredients to make sourdough morning glory muffins. Each ingredient is labeled with text. They include brown sugar, applesauce, spices, salt, vanilla, flaxseed, butter, leavening agents, orange, sourdough discard, pecans, wheat flour, eggs, carrot, all-purpose flour, raisins, and coconut.

    Tips for Success

    • Grate the carrots finely. Finely grate fresh carrots using a box grater for the best texture. This helps them blend into the batter and ensures they bake evenly throughout the muffins.
    • Use room temperature ingredients. For a smoother batter and better texture, make sure your eggs, sourdough discard, and milk are at room temperature before adding them to the wet ingredients.
    • Don't overmix. Overmixing can make morning glory muffins dense and tough, so stir the batter only until is just combined.
    • Serve warm. Muffins made with all butter can firm up as they cool since butter solidifies at room temperature. A quick 10-15 seconds in the microwave or a brief warm-up in the oven will restore their soft texture.

    How to Make Sourdough Morning Glory Muffins

    Follow these step-by-step instructions (with pictures) to make your own morning glory muffins with sourdough discard.

    Step 1: Mix dry ingredients. Preheat oven to 425ยฐF and prepare muffin pan. In a medium bowl, whisk together whole wheat flour, all-purpose flour, coconut, flaxseed, baking powder, baking soda, salt, cinnamon, ginger, and nutmeg.

    The dry ingredients mixed together in a bowl.

    Step 2: Whisk wet ingredients. In a large bowl, whisk melted butter and brown sugar. Add eggs one at a time, then stir in carrots, applesauce, sourdough discard, orange juice, zest, and vanilla.

    The wet ingredients mixed together in a bowl.

    Step 3: Fold batter together. Gently fold dry ingredients into wet, then fold in nuts and raisins. Donโ€™t overmix.

    Sourdough morning glory muffin batter in a mixing bowl.

    Step 4: Fill muffin cups. Divide batter evenly into muffin cups about ยพ full. You'll have enough batter for about 16 muffins total.

    Paper-lined muffin tin wells filled with sourdough morning glory muffin batter.

    Step 6: Bake and cool. Bake 12โ€“15 minutes until golden and a toothpick comes out clean. Cool 5 minutes in the tin, then transfer to a wire rack. Serve warm.

    Baked sourdough morning glory muffins in a muffin tin.

    How to Store

    Store cooled muffins in an airtight container at room temperature for 3-4 days. For the best texture, reheat in the oven or microwave for 10-15 seconds before serving.

    For longer storage, freeze muffins in a freezer-safe container for up to 3 months. Thaw at room temperature and warm before serving.

    Three sourdough morning glory muffins stacked on top of each other with a few other muffins scattered around.
    A cover of a recipe ebook with the title "Everyday Sourdough: 27 Sweet & Savory Sourdough Discard Recipes." There is an image of sourdough discard cinnamon rolls on the front. At the bottom, it reads "By Ashley Petrie of Everyday Homemade."
    Grab a copy today!

    Are you tired of watching your sourdough discard go to waste?

    Itโ€™s time to turn excess discard into something delicious with my new ebook - Everyday Sourdough!

    Inside, youโ€™ll find 27 tried-and-true sourdough discard recipes that will transform your leftover starter into mouthwatering creations your family and friends will love.

    No more guilt about wasting your discard - with Everyday Sourdough, you have endless options to quickly make something amazing anytime.

    Let's Connect!

    Be sure to leave a comment below if you have any questions. You can also connect with me on Instagram, Facebook, Pinterest, or via email at [email protected].

    More Sourdough Muffin Recipes

    • A sourdough blueberry muffin split in half on a muffin liner. There are several more whole muffins out of focus in the background.
      Sourdough Blueberry Muffins with Streusel Topping
    • A sourdough oatmeal muffin split in half still sitting in the muffin wrapper.
      Sourdough Oatmeal Muffins (Quick & Easy)
    • Sourdough apple muffins with cinnamon streusel topping on a wooden cutting board with one green apple amongst them.
      Sourdough Discard Apple Muffins with Cinnamon Streusel
    • A stack of three sourdough carrot muffins with three other muffins in the background.
      Sourdough Carrot Muffins (Sourdough Carrot Cake Muffins)

    ๐Ÿ“– Recipe

    Sourdough morning glory muffins on a piece of parchment paper on a wooden cutting board.
    Print Pin SaveSaved!
    5 from 2 votes

    Sourdough Morning Glory Muffins

    These Sourdough Morning Glory Muffins turn extra sourdough discard into wholesome, from-scratch muffins your family will love for breakfast or snacks. Theyโ€™re make-ahead friendly, freeze beautifully, and are super easy to grab on busy mornings.
    Course Breakfast, Snack
    Cuisine American
    Prep Time 20 minutes minutes
    Cook Time 15 minutes minutes
    Total Time 35 minutes minutes
    Servings 16
    Calories 247kcal
    Author Ashley Petrie, RDN, LDN

    Equipment

    • Standard 12-cup muffin tin
    • Box grater
    • Microplane
    • Mixing bowls
    • Whisk
    • Paper liners

    Ingredients

    • 1 cup (120 grams) whole wheat flour
    • 1 cup (120 grams) all-purpose flour
    • ยฝ cup (60 grams) shredded coconut
    • 2 tablespoons (13 grams) ground flaxseed
    • 2 teaspoons baking powder
    • ยฝ teaspoon baking soda
    • 1 teaspoon Diamond Crystal Kosher Salt
    • 2 teaspoons cinnamon
    • ยผ teaspoon ginger
    • ยผ teaspoon nutmeg
    • ยฝ cup (113 grams, 1 stick) unsalted butter melted
    • ยพ cup (150 grams) brown sugar packed
    • 3 large (150 grams) eggs room temperature
    • 2 cups (170 grams) freshly grated carrots
    • ยพ cups (200 grams) unsweetened applesauce
    • ยฝ cup (100 grams) sourdough starter discard room temperature
    • ยผ cup orange juice
    • 1 tablespoon orange zest
    • 1 teaspoon vanilla extract
    • ยฝ cup chopped pecans or walnuts
    • ยฝ cup raisins

    Instructions

    • Preheat your oven to 425ยฐF. Line a 12-cup muffin tin with paper liners or grease each well with butter, oil, or cooking spray.
    • In a medium bowl, whisk together the whole wheat flour, all-purpose flour, shredded coconut, ground flaxseed, baking powder, baking soda, salt, cinnamon, ginger, and nutmeg. Set aside.
      1 cup (120 grams) whole wheat flour, 1 cup (120 grams) all-purpose flour, ยฝ cup (60 grams) shredded coconut, 2 tablespoons (13 grams) ground flaxseed, 2 teaspoons baking powder, ยฝ teaspoon baking soda, 1 teaspoon Diamond Crystal Kosher Salt, 2 teaspoons cinnamon, ยผ teaspoon ginger, ยผ teaspoon nutmeg
    • In a large mixing bowl, whisk the melted butter and brown sugar until smooth and slightly lighter in color. Add the eggs, one at a time, whisking well after each addition. Stir in the shredded carrots, applesauce, sourdough discard, orange juice, orange zest, and vanilla extract until fully combined.
      ยฝ cup (113 grams, 1 stick) unsalted butter, ยพ cup (150 grams) brown sugar, 3 large (150 grams) eggs, 2 cups (170 grams) freshly grated carrots, ยพ cups (200 grams) unsweetened applesauce, ยฝ cup (100 grams) sourdough starter discard, ยผ cup orange juice, 1 tablespoon orange zest, 1 teaspoon vanilla extract
    • Gently fold the dry ingredients into the wet mixture, being careful not to overmix. Once combined, gently fold in the chopped pecans (or walnuts) and raisins.
      ยฝ cup chopped pecans or walnuts, ยฝ cup raisins
    • Evenly divide the batter between the 12 muffin cups (youโ€™ll have enough batter for about 4 additional muffins). The cups should be about ยพ full.
    • Bake in the preheated oven for 12-15 minutes or until the tops are golden brown and a toothpick inserted into the center comes out clean.
    • Allow the muffins to cool in the tin for 5 minutes before transferring to a wire rack to cool completely. For the best texture, serve warm with butter, jam, or enjoy as is.

    Notes

    • Quick Tip:ย Muffins made with all butter tend to firm up at room temperature since butter solidifies as it cools. A quick warm-up in the microwave for 10-15 seconds restores their soft texture.
    • Storage:ย Keep muffins in an airtight container at room temperature for 3-4 days or freeze them for up to 3 months.

    Nutrition

    Serving: 1muffin | Calories: 247kcal | Carbohydrates: 32g | Protein: 5g | Fat: 12.5g | Saturated Fat: 6.5g | Polyunsaturated Fat: 1.5g | Monounsaturated Fat: 3.5g | Cholesterol: 52mg | Sodium: 196mg | Potassium: 197mg | Fiber: 3.5g | Sugar: 14.5g | Vitamin C: 3mg | Calcium: 75mg | Iron: 1.1mg
    Did you try this recipe?Let me know! Comment below, or take a picture and tag me on Instagram @everydayhomemadebyashley.

    Sourdough Oatmeal Muffins (Quick & Easy)

    January 20, 2025

    These Sourdough Oatmeal Muffins are made with rolled oats and all butter for a hearty, make-ahead breakfast or snack. With just a bowl and whisk, this easy sourdough discard recipe is ready the same day and sure to become a new favorite.

    A sourdough oatmeal muffin split in half still sitting in the muffin wrapper.

    At the start of each year, I take a look back at all the recipes Iโ€™ve shared on the blog to see what you (my awesome readers!) are most interested in. This year, it was clear - you all love sourdough discard recipes.

    Iโ€™m totally on board with this because I love sharing sourdough discard recipes, especially muffins! So, I decided to take some of my older muffin recipes and give them a sourdough discard twist.

    Thatโ€™s how these sourdough discard oatmeal muffins came to be.

    These muffins are packed with rolled oats, making them hearty enough for breakfast or a quick snack. They're also the perfect blank canvas - add your favorite mix-ins like fresh, frozen, or dried fruit, nuts, or chocolate chips to truly make them your own.

    And the best part? This recipe uses all butter (no oil), giving these oatmeal sourdough muffins a rich, buttery flavor that's amazing when served warm with butter or jam.

    Iโ€™m so excited for you to try these, and I hope you enjoy them as much as I do!

    Can't get enough oats? Check out my sourdough oatmeal cookies or oatmeal sourdough pancakes!

    Disclaimer: Some links throughout this post are affiliate links. As an Amazon Associate, I earn from qualifying purchases. You can learn more by visiting my Affiliate Disclosure Page.

    Ingredients & Substitutions

    Here are some notes on key ingredients. For a full list of ingredients, check out the recipe card below.

    • Sourdough Discard- This sourdough oat muffin recipe uses sourdough discard for moisture and a tangy flavor. Keep in mind that the older your discard is, the stronger the sourdough flavor will be.
    • Rolled Oats- Rolled oats give the muffins a hearty texture. Be sure to let the batter rest for a few minutes before baking to give the oats time to soften. If you prefer a softer, more tender muffin, you can swap rolled oats for an equal amount of quick oats.
    • All-Purpose Flour- All-purpose flour provides the structure for these muffins. If youโ€™d like, you can replace part of it with whole wheat flour, but note that it may result in a denser texture.
    • Butter- I love using butter in my muffin recipes because it gives them a rich, buttery flavor. Since butter is solid at room temperature, these muffins are best served warm for the softest texture. If you'd rather, you can swap the butter for a neutral oil like vegetable or canola oil.
    • Whole Milk- Whole milk adds moisture and richness to the muffins. Feel free to substitute with another milk variety or juice if you prefer.
    • Brown Sugar- The warm, caramelized flavor of brown sugar complements the cinnamon and oats beautifully.
    • Kosher Salt- I used Diamond Crystal Kosher Salt, which is about 2.8 grams per teaspoon. If youโ€™re using table salt or Mortonโ€™s brand, be sure to measure by weight or use about half the amount.
    The ingredients to make sourdough oatmeal muffins. Each ingredient is labeled with text. They include brown sugar, salt, cinnamon, vanilla, butter, baking powder, baking soda, milk, sourdough discard, oats, eggs, and all-purpose flour.

    Tips for Success

    • Use room temperature ingredients. For a smoother batter and better finished muffin texture, make sure your eggs, sourdough discard, and milk are at room temperature before mixing them in.
    • Don't overmix. Overmixing can make muffins dense and tough, so be sure to mix the batter until it's just combined.
    • Let the batter rest. Giving the batter a few minutes to sit before baking allows the rolled oats to absorb some liquid and soften, resulting in more tender muffins.
    • Mix it up. These sourdough oat muffins are the perfect blank canvas for your favorite flavors. Try adding chocolate chips, raisins, blueberries, orange zest, or anything else you love.
    • Serve warm. Muffins made with all butter tend to firm up at room temperature since butter solidifies as it cools. A quick 10โ€“15 seconds in the microwave or a short warm-up in the oven will bring back their soft texture.

    How to Make Sourdough Oatmeal Muffins

    Here is how to make oatmeal muffins with sourdough discard.

    Step 1: Prepare oven and muffin tin. Preheat your oven to 425ยฐF. Line a 12-cup muffin tin with paper liners or grease each cup with butter, oil, or cooking spray to prevent sticking.

    Step 2: Mix dry ingredients. In a medium bowl, combine the flour, rolled oats, baking powder, baking soda, salt, and cinnamon. Whisk everything together until evenly mixed, and set aside.

    The dry ingredients in a small mixing bowl.

    Step 3: Whisk together wet ingredients. In a large mixing bowl, whisk the melted butter and brown sugar until the mixture looks smooth and slightly lighter in color. Add the eggs, one at a time, whisking well after each addition. Pour in the milk, sourdough discard, and vanilla extract, and whisk again until everything is fully combined.

    The wet ingredients blended together in a mixing bowl.

    Step 4: Combine wet and dry ingredients. Add the dry ingredients to the wet mixture. Use a rubber spatula or wooden spoon to fold the ingredients together gently. Mix just until you no longer see streaks of flour - avoid overmixing to keep the muffins light and tender. If youโ€™re using mix-ins like chocolate chips or raisins, fold them into the batter now, distributing them evenly without overworking the batter.

    Sourdough discard oatmeal muffin batter in a mixing bowl.

    Step 5: Fill muffin tin. Divide the batter evenly between the 12 muffin cups. Let the batter sit for 10 minutes before baking to allow the oats to absorb some moisture and soften.

    Six paper-lined muffin wells filled with sourdough oat muffin batter.

    Step 6: Bake muffins. Place the muffin tin in the preheated oven and bake for 12โ€“15 minutes. The muffins are ready when the tops are golden brown and a toothpick inserted into the center comes out clean.

    Step 7: Cool and serve. Let the muffins cool in the pan for 5 minutes before transferring them to a wire rack to cool completely. Serve your muffins warm with butter, jam, or enjoy them as is.

    Six sourdough oatmeal muffins baked in a muffin tin.

    How to Store

    Store cooled muffins in an airtight container at room temperature for 3โ€“4 days. For the best texture, warm them in the oven or microwave for 10โ€“15 seconds before serving.

    To store longer, freeze muffins in a freezer-safe container for up to 3 months. Simply thaw at room temperature and warm before serving.

    Five sourdough oatmeal muffins on a piece of wrinkled parchment paper on a countertop.
    A cover of a recipe ebook with the title "Everyday Sourdough: 27 Sweet & Savory Sourdough Discard Recipes." There is an image of sourdough discard cinnamon rolls on the front. At the bottom, it reads "By Ashley Petrie of Everyday Homemade."
    Grab a copy today!

    Are you tired of watching your sourdough discard go to waste?

    Itโ€™s time to turn excess discard into something delicious with my new ebook - Everyday Sourdough!

    Inside, youโ€™ll find 27 tried-and-true sourdough discard recipes that will transform your leftover starter into mouthwatering creations your family and friends will love.

    No more guilt about wasting your discard - with Everyday Sourdough, you have endless options to quickly make something amazing anytime.

    Let's Connect!

    Be sure to leave a comment below if you have any questions. You can also connect with me on Instagram, Facebook, Pinterest, or via email at [email protected].

    More Sourdough Muffin Recipes

    • A sourdough blueberry muffin split in half on a muffin liner. There are several more whole muffins out of focus in the background.
      Sourdough Blueberry Muffins with Streusel Topping
    • A sourdough chocolate chip muffin split in half on the wrapper with a few more whole muffins out of focus in the background.
      Sourdough Chocolate Chip Muffins
    • Sourdough apple muffins with cinnamon streusel topping on a wooden cutting board with one green apple amongst them.
      Sourdough Discard Apple Muffins with Cinnamon Streusel
    • A stack of three sourdough carrot muffins with three other muffins in the background.
      Sourdough Carrot Muffins (Sourdough Carrot Cake Muffins)

    ๐Ÿ“– Recipe

    A sourdough oatmeal muffin split in half still sitting in the muffin wrapper.
    Print Pin SaveSaved!
    5 from 2 votes

    Sourdough Oatmeal Muffins

    These Sourdough Oatmeal Muffins are made with rolled oats and all butter for a hearty, make-ahead breakfast or snack. With just a bowl and whisk, this easy sourdough discard recipe is ready the same day and sure to become a new favorite.
    Course Breakfast, Snack
    Cuisine American
    Prep Time 20 minutes minutes
    Cook Time 15 minutes minutes
    Total Time 35 minutes minutes
    Servings 12 muffins
    Calories 244kcal
    Author Ashley Petrie, RDN, LDN

    Equipment

    • Standard 12-cup muffin tin
    • Mixing bowls
    • Whisk
    • Paper liners

    Ingredients

    • 1 ยฝ cups (180 grams) all-purpose flour
    • 1 ยผ cups (100 grams) rolled oats
    • 2 teaspoons baking powder
    • ยฝ teaspoon baking soda
    • 1 teaspoon Diamond Crystal Kosher Salt
    • 2 teaspoons cinnamon
    • ยฝ cup (113 grams, 1 stick) unsalted butter melted
    • ยพ cup (150 grams) brown sugar packed
    • 3 large (150 grams) eggs room temperature
    • ยฝ cup (120 grams) whole milk room temperature
    • ยฝ cup (100 grams) sourdough starter discard room temperature
    • 1 teaspoon vanilla extract
    • 1-1 ยฝ cups mix-ins (such as chocolate chips, raisins, dried cranberries, etc.) optional

    Instructions

    • Preheat your oven to 425ยฐF. Line a 12-cup muffin tin with paper liners or grease each cup with butter, oil, or cooking spray to prevent sticking.
    • In a medium bowl, combine the flour, rolled oats, baking powder, baking soda, salt, and cinnamon. Whisk everything together until evenly mixed, and set aside.
      1 ยฝ cups (180 grams) all-purpose flour, 1 ยผ cups (100 grams) rolled oats, 2 teaspoons baking powder, ยฝ teaspoon baking soda, 1 teaspoon Diamond Crystal Kosher Salt, 2 teaspoons cinnamon
    • In a large mixing bowl, whisk the melted butter and brown sugar until the mixture looks smooth and slightly lighter in color. Add the eggs, one at a time, whisking well after each addition. Pour in the milk, sourdough discard, and vanilla extract, and whisk again until everything is fully combined.
      ยฝ cup (113 grams, 1 stick) unsalted butter, ยพ cup (150 grams) brown sugar, 3 large (150 grams) eggs, ยฝ cup (120 grams) whole milk, ยฝ cup (100 grams) sourdough starter discard, 1 teaspoon vanilla extract
    • Add the dry ingredients to the wet mixture. Use a rubber spatula or wooden spoon to fold the ingredients together gently. Mix just until you no longer see streaks of flour - avoid overmixing to keep the muffins light and tender. If youโ€™re using mix-ins like chocolate chips or raisins, fold them into the batter now, distributing them evenly without overworking the batter.
      1-1 ยฝ cups mix-ins (such as chocolate chips, raisins, dried cranberries, etc.)
    • Divide the batter evenly between the 12 muffin cups. Let the batter sit for 10 minutes before baking to allow the oats to absorb some moisture and soften.
    • Place the muffin tin in the preheated oven and bake for 12โ€“15 minutes. The muffins are ready when the tops are golden brown and a toothpick inserted into the center comes out clean.
    • Let the muffins cool in the pan for 5 minutes before transferring them to a wire rack to cool completely. Serve your muffins warm with butter, jam, or enjoy them as is.

    Notes

    • Quick Tip: Muffins made with all butter tend to firm up at room temperature since butter solidifies as it cools. A quick warm-up in the microwave for 10-15 seconds restores their soft texture.
    • Storage: Keep muffins in an airtight container at room temperature for 3-4 days or freeze them for up to 3 months.

    Nutrition

    Serving: 1muffin (without mix-ins) | Calories: 244kcal | Carbohydrates: 33.5g | Protein: 5.5g | Fat: 10g | Saturated Fat: 5.5g | Polyunsaturated Fat: 1g | Monounsaturated Fat: 3g | Trans Fat: 0.5g | Cholesterol: 70mg | Sodium: 252mg | Potassium: 96mg | Fiber: 1.5g | Sugar: 13g | Calcium: 85mg | Iron: 0.9mg
    Did you try this recipe?Let me know! Comment below, or take a picture and tag me on Instagram @everydayhomemadebyashley.

    Pepperoni Pizza Sourdough Bread with Mozzarella & Parmesan

    January 20, 2025

    This Pepperoni Pizza Sourdough Bread is loaded with slices of pepperoni, mozzarella, parmesan, and pizza seasoning for a savory loaf packed with pizza flavor. Enjoy it as an appetizer with marinara or turn it into delicious sandwiches.

    Sliced sourdough pizza bread on a wooden cutting board.

    I think the only thing I might love more than sourdough bread is pizza (can I say that?!).

    I already have a few pizza-inspired recipes on the blog, including sourdough focaccia pizza, grilled sourdough pizza, sourdough whole wheat pizza dough, and my popular sourdough discard pizza dough. So when I was brainstorming new sourdough bread recipes to share this year, I was surprised I hadnโ€™t created a pizza-flavored loaf yet!

    Of course, I had to fix that.

    During testing, I experimented with both sliced pepperoni and pepperoni from a log. I found that thin slices cut into smaller pieces worked best because they distributed more evenly throughout the dough and released less excess grease.

    I also tested adding the pepperoni and cheese during shaping versus incorporating them during the stretch-and-fold phase. Adding them during the stretch and folds was the clear winner because it helped evenly distribute the mix-ins and made it easier to separate any pepperoni pieces before the dough went into its final cold proof.

    The result is a soft, chewy sourdough loaf packed with savory pizza flavor. Itโ€™s perfect for sandwiches, dipping into marinara sauce, or simply enjoying warm and fresh on its own.

    I hope you give this pepperoni pizza sourdough bread a try and love it as much as I do!

    Disclaimer: Some links throughout this post are affiliate links. As an Amazon Associate, I earn from qualifying purchases. You can learn more by visiting my Affiliate Disclosure Page.

    Ingredients & Substitutions

    Here are some notes on key ingredients. For a full list of ingredients, check out the recipe card below.

    • Active Sourdough Starter- Use a bubbly, active starter for the best rise. You can use 1-2 day old sourdough discard, but expect a longer rise time.
    • Pepperoni- Cut into smaller pieces and separate as you add it to the dough to help distribute it evenly.
    • Mozzarella Cheese- Use low-moisture mozzarella to prevent excess moisture in the dough.
    • Parmesan- Freshly grated parmesan provides the best flavor and melts smoothly into the dough.
    • Pizza Seasoning- Use a salt-free blend to avoid adding too much salt. You can also substitute with 2 teaspoons dried oregano and 1 teaspoon garlic powder.
    • Bread Flour- Bread flour helps create a chewy loaf with good structure. All-purpose flour can be used, but the loaf may be slightly less chewy.
    • Water- This recipe makes a 77% hydration dough, which creates an airy crumb while still being manageable to work with. Adjust slightly if you prefer a wetter or firmer dough.
    • Kosher Salt- enhances flavor and strengthens the dough. I use Diamond Crystal Kosher Salt (about 2.8 grams per teaspoon). If using Morton's salt or table salt, reduce the amount or measure by weight.
    The ingredients to make pizza sourdough bread. Each ingredient is labeled with text. They include water, sourdough starter, bread flour, pizza seasoning, pepperoni, mozzarella cheese, parmesan cheese, and kosher salt.

    Tips for Success

    • Use freshly shredded cheese. It melts better and avoids the anti-caking agents found in pre-shredded cheese.
    • Cut the pepperoni into smaller pieces. Smaller pieces distribute more evenly and prevent heavy pockets in the dough.
    • Separate the pepperoni as you work. This helps prevent clumps and ensures even distribution throughout the loaf.
    • Watch the dough, not the clock. Bulk fermentation can vary based on your starter and kitchen temperature. Look for a puffy dough with bubbles throughout that has nearly doubled in size.
    • Expect slightly less oven spring. The added weight and fat from the pepperoni and cheese can limit how much the loaf rises compared to a plain sourdough.

    How to Make Sourdough Pizza Bread

    This pepperoni pizza sourdough bread is packed with your favorite pizza flavors. Follow along with my step-by-step photos to see how it comes together! Full instructions are in the recipe card below.

    Step 1: Feed sourdough starter. Feed your sourdough starter 6-12 hours before starting to ensure itโ€™s bubbly and active.

    An active sourdough starter in a glass mason jar.

    Step 2: Mix the dough. In a large mixing bowl, whisk together warm water, sourdough starter, and pizza seasoning. Add bread flour and mix until fully combined with no dry flour left. Cover and let rest for 20 minutes.

    Sourdough starter, water, and pizza seasoning whisked together in a bowl.
    Sourdough pizza bread dough mixed in a bowl.

    Step 3: Stretch and fold. Complete four sets of stretch and folds, resting 15 minutes between each set. During the first set, gradually fold in the pepperoni and cheeses.

    Pepperoni, mozzarella, and parmesan cheese being stretched and folded into the dough.
    Pepperoni, mozzarella, and parmesan cheese being folded into the dough.
    Pepperoni pizza sourdough bread dough in a mixing bowl.

    Step 4: Bulk fermentation. Cover and let the dough rise at room temperature until doubled, bubbly, and slightly jiggly. This usually takes 4โ€“12 hours depending on your kitchen temperature.

    Pepperoni pizza sourdough bread dough in a straight-sided container before bulk fermentation.
    Pepperoni pizza sourdough bread dough in a straight-sided container after bulk fermentation.

    Step 5: Shape. Gently shape the dough into a round by folding the edges toward the center, flipping it seam-side down, and using your hands to round it on the counter.

    Sourdough pizza bread dough being shaped on a floured counter.
    Sourdough pizza bread dough being shaped on a floured counter.
    Pepperoni pizza sourdough bread being shaped into a round dough ball.

    Step 6: Cold proof. Place the dough seam-side up in a well-floured proofing basket. Cover and refrigerate overnight for 12โ€“16 hours.

    Pepperoni pizza sourdough bread in an oval proofing basket before cold proofing overnight.
    Pepperoni pizza sourdough bread in an oval proofing basket after cold proofing overnight.

    Step 7: Bake. Bake in a preheated Dutch oven at 450ยฐF for 40 minutes, then uncover and bake 5-10 more minutes. Let the bread cool completely before slicing.

    Sourdough pizza bread being scored with a lame on a piece of parchment paper.
    A baked loaf of pepperoni pizza sourdough bread on a wire cooling rack.

    Baker's Timeline

    Here is an example of a schedule you can use to make this sourdough pepperoni pizza bread.

    • 8:00 PM (Night Before): Feed your starter.
    • 8:00 AM: Mix the dough.
    • 8:30-9:30 AM: Stretch and fold, add pepperoni.
    • 9:30 AM-3:30 PM: Bulk fermentation.
    • 3:30-4:00 PM: Shape.
    • 4:00 PM-8:00 AM (Next Day): Cold proof.
    • 8:00-8:45 AM: Bake.
    • 8:45 AM-12:45 PM: Cool.

    Note: Rise times will vary depending on the strength of your starter and the temperature of your kitchen and dough. It's best to use visual cues from your starter and dough rather than sticking to a strict timeline.

    How to Store

    Store pepperoni pizza sourdough bread in an airtight container at room temperature for 1-2 days.

    For longer storage, freeze in a freezer-safe bag for up to 3 months. When ready to enjoy, thaw at room temperature or warm it up in a toaster or oven.

    Serving Suggestions

    Try this pepperoni pizza sourdough bread dipped in marinara or pesto, slathered with cream cheese or butter, or turned into a mouthwatering grilled cheese sandwich!

    A whole boule of sourdough pepperoni bread on a wooden cutting board.
    A cover of a recipe ebook with the title "Everyday Sourdough: 27 Sweet & Savory Sourdough Discard Recipes." There is an image of sourdough discard cinnamon rolls on the front. At the bottom, it reads "By Ashley Petrie of Everyday Homemade."
    Grab a copy today!

    Are you tired of watching your sourdough discard go to waste?

    Itโ€™s time to turn excess discard into something delicious with my new ebook - Everyday Sourdough!

    Inside, youโ€™ll find 27 tried-and-true sourdough discard recipes that will transform your leftover starter into mouthwatering creations your family and friends will love.

    No more guilt about wasting your discard - with Everyday Sourdough, you have endless options to quickly make something amazing anytime.

    Let's Connect!

    Be sure to leave a comment below if you have any questions. You can also connect with me on Instagram, Facebook, Pinterest, or via email at [email protected].

    More Sourdough Bread Recipes

    • A slice of smoky brown sugar bacon sourdough bread on a cutting board.
      Chipotle Brown Sugar Bacon Sourdough Bread
    • A whole loaf of loaded baked potato sourdough bread.
      Loaded Baked Potato Sourdough Bread with Bacon, Cheddar & Chives
    • Slices of sun-dried tomato sourdough bread on a cutting board.
      Sun-Dried Tomato Sourdough Bread (with Roasted Garlic & Parmesan)
    • A slice of buffalo chicken sourdough bread on a wooden cutting board.
      Buffalo Chicken Dip Sourdough Bread (No Chicken Required!)

    ๐Ÿ“– Recipe

    Sliced sourdough pepperoni pizza bread on a wooden cutting board.
    Print Pin SaveSaved!

    Pepperoni Pizza Sourdough Bread

    This Pepperoni Pizza Sourdough Bread is loaded with slices of pepperoni, mozzarella, parmesan, and pizza seasoning for a savory loaf packed with pizza flavor. Enjoy it as an appetizer with marinara or turn it into delicious sandwiches.
    Course Bread
    Cuisine American, Italian
    Prep Time 1 day day 12 hours hours
    Cook Time 45 minutes minutes
    Cool Time 2 hours hours
    Total Time 1 day day 14 hours hours 45 minutes minutes
    Servings 12 slices
    Calories 250kcal
    Author Ashley Petrie, RDN, LDN

    Equipment

    • Kitchen scale
    • Box grater
    • Bowl scraper
    • Straight-sided container (optional)
    • Proofing basket or bowl lined with tea towel
    • Bread sling or parchment paper
    • Lame or sharp knife
    • 6-quart dutch oven

    Ingredients

    • 1 ยฝ cups (360 grams) water
    • ยฝ cup (100 grams) active sourdough starter
    • 1 tablespoon pizza seasoning (salt-free; or use 2 teaspoons dried oregano + 1 teaspoon garlic powder)
    • 4 cups (480 grams) bread flour
    • 3 ยฝ teaspoons (10 grams) Diamond Crystal Kosher Salt reduce to 1 ยพ teaspoons if using Morton's brand or table salt
    • ยพ cup (100 grams) pepperoni slices cut into thin strips
    • 1 cup (100 grams) low-moisture mozzarella cheese shredded
    • ยฝ cup (50 grams) parmesan cheese grated
    • Rice flour for proofing basket
    • 2 ice cubes for steam

    Instructions

    • Feed your sourdough starter 6โ€“12 hours before you plan to mix your dough. It should be active, bubbly, and roughly doubled in size before you begin.
    • In a large bowl, whisk together the water, active sourdough starter, and pizza seasoning until combined. Add the bread flour and salt, then mix until no dry flour remains and a sticky, cohesive dough forms. Cover the bowl and let the dough rest for 20 minutes.
      1 ยฝ cups (360 grams) water, ยฝ cup (100 grams) active sourdough starter, 3 ยฝ teaspoons (10 grams) Diamond Crystal Kosher Salt, 1 tablespoon pizza seasoning, 4 cups (480 grams) bread flour
    • Lightly wet your hands to prevent sticking. Gently flatten the dough and add about ยผ of the pepperoni, mozzarella, and parmesan to the center. Perform a stretch-and-fold by grabbing one side of the dough, stretching it upward, and folding it over the top. Rotate the bowl 90 degrees, add another ยผ of the mix-ins, and repeat. Continue until all of the pepperoni and cheese have been incorporated and the dough has been folded 4 times. Gather the dough into a rough ball, cover, and let it rest for 20 minutes. Repeat the stretch-and-fold process 3 more times, allowing the dough to rest for about 15 minutes between each set.
      ยพ cup (100 grams) pepperoni slices, 1 cup (100 grams) low-moisture mozzarella cheese, ยฝ cup (50 grams) parmesan cheese
    • Make sure the pepperoni pieces are separated before adding them to the dough. If they are stuck together in clumps, gently pull them apart so they distribute evenly throughout the loaf.
    • Cover the dough and let it rise at room temperature until it has nearly doubled in size, looks puffy, and has visible bubbles throughout. This can take anywhere from 4โ€“12+ hours depending on the temperature of your kitchen.
    • A straight-sided container can make it easier to monitor how much the dough has risen during bulk fermentation.
    • Turn the dough out onto a lightly floured surface. Gently stretch it into a rough rectangle. Fold the dough by stretching one short side slightly and folding it toward the center. Repeat with the opposite short side. Then fold each long side toward the center. Flip the dough over so the seam side is facing down. Using your hands or a bench scraper, gently shape the dough into a round by tucking the edges underneath and rotating the dough to build surface tension.
    • Generously dust a proofing basket with rice flour. Transfer the dough into the basket with the seam side facing up, pinching the seam closed if needed. Cover and refrigerate for 12โ€“16 hours.
      Rice flour
    • Place a lidded Dutch oven in the oven and preheat to 450ยฐF. Once the oven reaches temperature, allow the Dutch oven to continue heating for an additional 30 minutes.
    • Turn the chilled dough out onto a bread sling or sheet of parchment paper. Score the top of the dough as desired. Carefully place 2 ice cubes into the hot Dutch oven to create steam, then transfer the dough inside and immediately cover with the lid. Bake at 450ยฐF for 40 minutes with the lid on. Remove the lid and continue baking for an additional 5โ€“10 minutes, or until the crust reaches your desired level of browning.
      2 ice cubes
    • Transfer the bread to a wire rack and let cool for at least 2โ€“4 hours before slicing.

    Notes

    • Expect slightly less oven spring. The added weight and fat from the pepperoni and cheese can limit how much the loaf rises compared to a plain sourdough.
    • Storage: Store bread in an airtight container at room temperature for 1-2 days or freeze for up to 3 months.ย 

    Nutrition

    Serving: 1slice | Calories: 250kcal | Carbohydrates: 33.5g | Protein: 11g | Fat: 7.5g | Saturated Fat: 3g | Polyunsaturated Fat: 1g | Monounsaturated Fat: 2.5g | Cholesterol: 17mg | Sodium: 625mg | Potassium: 106mg | Fiber: 1g | Calcium: 106mg | Iron: 2.7mg
    Did you try this recipe?Let me know! Comment below, or take a picture and tag me on Instagram @everydayhomemadebyashley.

    Homemade Pizza Seasoning

    January 13, 2025

    This Homemade Pizza Seasoning adds the perfect blend of herbs and spices to your pizza dough, garlic bread, pasta dishes, and more.

    Homemade pizza seasoning in a glass mason jar.

    What is pizza seasoning?

    Pizza seasoning is a flavorful mix of herbs, spices, and salt that gives bold flavor to everything from pizza to pasta and tomato sauce. It usually has oregano, basil, garlic, red pepper flakes, and a few other seasonings - perfect for adding a little extra kick to your favorite dishes.

    I first tried this seasoning when testing my sourdough pizza bread recipe. And it was so good that I started mixing it into my sourdough discard pizza dough and sourdough whole wheat pizza dough, too!

    Itโ€™s also great for seasoning roasted veggies, stirring into pasta sauce, or even sprinkling on popcorn. And the best part? It takes just 5 minutes to make with basic pantry staples. So quick and easy!

    Trust me, once you have a jar of this on hand, you'll be finding new ways to use it all the time. I hope you give it a try and enjoy it as much as I do!

    Disclaimer: Some links throughout this post are affiliate links. As an Amazon Associate, I earn from qualifying purchases. You can learn more by visiting my Affiliate Disclosure Page.

    Ingredients & Substitutions

    Here are some notes on key ingredients. For a full list of ingredients, check out the recipe card below.

    • Oregano- A must-have for pizza seasoning, dried oregano adds a bold, earthy flavor.
    • Basil- With its peppery kick, dried basil is a classic in pizza seasoning. If youโ€™re out of dried basil, dried parsley works as a substitute.
    • Garlic Powder- Adds a strong, garlicky flavor that pairs perfectly with the other herbs.
    • Onion Powder- A little onion powder brings a touch of sweetness that balances the bold, savory flavors. You can swap it with onion flakes if preferred.
    • Rosemary- A pinch of dried rosemary adds a piney flavor that complements the other herbs. If you donโ€™t have it, dried thyme makes a great substitute.
    • Crushed Red Pepper Flakes- Adds a bit of heat to the seasoning. If you prefer a milder version, you can reduce the amount or omit it altogether.
    • Kosher Salt- I use Diamond Crystal Kosher Salt, which measures about 2.8 grams per teaspoon. If you're using table salt or Morton's brand, be sure to measure by weight or use about half the amount. You can also omit the salt for a salt-free pizza seasoning.
    The ingredients to make homemade pizza seasoning. Each ingredient is labeled with text. They include oregano, basil, onion powder, garlic powder, rosemary, red pepper flakes, and kosher salt.

    How to Make Pizza Seasoning

    Making homemade pizza seasoning is quick and easy! Just follow these simple steps:

    1. In a small glass jar, add the dried oregano, dried basil, garlic powder, onion powder, kosher salt, dried rosemary, and crushed red pepper flakes.
    2. Seal the jar tightly and shake until all the ingredients are evenly combined.
    Homemade pizza seasoning mixed together in a glass jar.

    How to Use Homemade Pizza Seasoning

    Here are a few ideas for how to use this versatile seasoning blend:

    • Pizza- Sprinkle it on top of homemade pizza. Try pairing it with my sourdough discard pizza dough, whole wheat pizza dough, grilled pizza, pan pizza, focaccia pizza, or sourdough pizza bread.
    • Tomato Sauce- Stir it into your favorite marinara sauce to serve with sourdough pasta.
    • Roasted Vegetables- Toss veggies like zucchini, bell peppers, mushrooms, or potatoes with olive oil and a sprinkle of pizza seasoning before roasting.
    • Popcorn- Shake some on freshly popped popcorn.
    • Salad Dressing- Mix it with olive oil and vinegar for a quick, herby vinaigrette.
    • Breadsticks or Garlic Bread- Sprinkle it over sourdough breadsticks or garlic bread before baking.

    How to Store

    Store homemade pizza seasoning in an airtight container in a cool, dry place, away from sunlight for up to 6 months.

    Homemade pizza seasoning poured out onto a piece of parchment paper.

    Let's Connect!

    Be sure to leave a comment below if you have any questions. You can also connect with me on Instagram, Facebook, Pinterest, or via email at [email protected].

    More Seasoning Recipes

    • A spoonful of homemade chili seasoning being held above a jar of chili seasoning and a bowl of chili.
      Homemade Chili Seasoning
    • A small jar of pumpkin pie spice with a spoon sticking out of it. The jar is next to a pumpkin cheesecake dessert.
      Homemade Pumpkin Pie Spice (5 Ingredients!)

    ๐Ÿ“– Recipe

    Homemade pizza seasoning in a glass mason jar.
    Print Pin SaveSaved!

    Pizza Seasoning

    This Homemade Pizza Seasoning adds the perfect blend of herbs and spices to your pizza dough, garlic bread, pasta dishes, and more.
    Course Seasonings
    Cuisine American, Italian
    Prep Time 5 minutes minutes
    Cook Time 0 minutes minutes
    Total Time 5 minutes minutes
    Servings 20 teaspoons
    Calories 4kcal
    Author Ashley Petrie, RDN, LDN

    Equipment

    • Small glass jar

    Ingredients

    • 3 tablespoons dried oregano
    • 1 tablespoon dried basil or parsley
    • 1 tablespoon garlic powder
    • 2 teaspoons onion powder
    • 2 teaspoons Diamond Crystal Kosher Salt or to taste; use half the amount of table salt or Morton's brand
    • ยฝ teaspoon dried rosemary or thyme
    • ยผ teaspoon crushed red pepper flakes or to taste

    Instructions

    • In a small glass jar, add the dried oregano, dried basil, garlic powder, onion powder, kosher salt, dried rosemary, and crushed red pepper flakes.
      3 tablespoons dried oregano, 1 tablespoon dried basil, 1 tablespoon garlic powder, 2 teaspoons onion powder, 2 teaspoons Diamond Crystal Kosher Salt, ยฝ teaspoon dried rosemary, ยผ teaspoon crushed red pepper flakes
    • Seal the jar tightly and shake until all the ingredients are evenly combined.
    • Sprinkle the seasoning onto pizza dough, garlic bread, pasta dishes, roasted vegetables, popcorn, and more!

    Notes

    • Storage: Store in a cool, dry place, away from sunlight for up to 6 months.

    Nutrition

    Serving: 1teaspoon | Calories: 4kcal | Carbohydrates: 1g | Sodium: 113mg | Potassium: 17mg | Calcium: 11mg | Iron: 0.3mg
    Did you try this recipe?Let me know! Comment below, or take a picture and tag me on Instagram @everydayhomemadebyashley.

    Lemon Blueberry Sourdough Bread (Fresh or Frozen Berries)

    January 6, 2025

    This Sourdough Blueberry Bread is studded with juicy blueberries and bright lemon zest for a naturally sweet, tangy loaf. Soft, flavorful, and beginner-friendly, itโ€™s perfect toasted with butter, cream cheese, or lemon curd.

    Slices of lemon blueberry sourdough bread on a wooden cutting board.

    I first shared this blueberry sourdough bread last January. Back then I only tested it with fresh blueberries. I'll admit, I was a little intimidated by using frozen berries in the dough.

    But after a reel about it took off on Instagram, I knew I wanted to revisit it and do some more testing.

    So, a few weeks ago, I finally gave frozen blueberries a try. I thawed them in the microwave, strained the liquid, and folded them in during the first stretch-and-fold. And it worked beautifully!

    Honestly, I think it even bakes up better than fresh, since most of the berry liquid is released before it hits the oven.

    I also bumped up the lemon zest for extra brightness and cut back on the juice, so the acidity doesnโ€™t slow the fermentation. It keeps this inclusion loaf beginner-friendly while still bursting with flavor.

    I skipped adding sugar so the blueberries can really shine. Toast a slice with butter and a sprinkle of brown sugar, or spread on some cream cheese or lemon curd.

    I canโ€™t wait for you to try it. I think youโ€™re going to love it as much as I do!

    ๐Ÿซ Can't get enough blueberries? Give my blueberry cream cheese sourdough bread, focaccia, quick bread, or muffins a try!

    Disclaimer: Some links throughout this post are affiliate links. As an Amazon Associate, I earn from qualifying purchases. You can learn more by visiting my Affiliate Disclosure Page.

    Ingredients & Substitutions

    Here are some notes on key ingredients. For a full list of ingredients, check out the recipe card below.

    • Active Sourdough Starter- Use a bubbly, active starter for the best rise. You can use sourdough discard thatโ€™s 1โ€“2 days old, but the dough may take longer to rise.
    • Blueberries- Use fresh or fully thawed frozen blueberries, drained well.
    • Lemon Juice + Zest- Zest 1โ€“2 lemons and use juice from ยฝ a lemon. Too much juice can interfere with fermentation. Swap in orange or lime if desired.
    • Bread Flour- Gives the loaf structure, chew, and a taller rise. All-purpose flour works, though the bread may be slightly softer. You can also swap in some whole wheat, but you may need to add a little extra water.
    • Water- Total hydration is about 69% (water + lemon juice), giving an airy yet easy-to-handle dough. Adjust slightly if you prefer a wetter or drier dough.
    • Kosher Salt- Enhances the flavor of the bread. I use Diamond Crystal Kosher Salt, which is about 2.8 grams per teaspoon. If you're using table salt or Morton's brand, be sure to measure by weight or use about half the amount.
    The ingredients to make lemon blueberry sourdough bread. Each ingredient is labeled with text. They include blueberries, sourdough starter, water, lemon juice, lemon zest, kosher salt, and bread flour.

    Tips for Success

    • Use active starter. For the best rise, use an active sourdough starter. Discard works if itโ€™s only 1โ€“2 days old, but expect a slightly longer rise time.
    • Strain frozen blueberries. Thaw and drain them well before adding to the dough to prevent extra liquid from making it too wet.
    • Find a warm spot. Dough rises best in a warm (not hot) spot, especially in cooler weather.
    • Keep an eye on fermentation. Lemon juice can speed things up, so check often to avoid overproofing.
    • Use a straight-sided container. Mark the starting level to easily see when the dough has doubled.
    • Build tension when shaping. A tight surface helps the loaf hold its shape and rise tall.
    • Cool completely. Wait at least two hours before slicing to avoid a gummy texture.

    How to Make Blueberry Sourdough Bread

    Follow these step-by-step instructions with photos to make lemon blueberry sourdough bread.

    Step 1: Feed starter. Feed your sourdough starter 6โ€“12 hours before mixing, until bubbly, active, and doubled in size.

    An active sourdough starter in a glass mason jar.

    Step 2: Mix the dough. Whisk water, starter, lemon zest, and juice. Add flour and salt, mix into a shaggy dough. Rest 20 minutes.

    Sourdough starter, water, lemon juice, and lemon zest whisked together in a mixing bowl.
    Sourdough bread dough mixed in a stainless steel mixing bowl.

    Step 3: Add blueberries with stretch and folds. With wet hands, fold in blueberries during the first set of stretch-and-folds. Repeat 3 more times, resting 15 minutes between each set.

    Two hands stretching, folding, and mixing blueberries into sourdough bread dough.
    Two hands stretching, folding, and mixing blueberries into sourdough bread dough.
    Sourdough bread dough with blueberries added in a stainless steel mixing bowl.

    Step 4: Bulk fermentation. Cover and let dough rise until puffy and doubled, 4โ€“12 hours depending on room temp.

    Lemon blueberry sourdough bread dough in a straight-sided container before bulk fermentation.
    Lemon blueberry sourdough bread dough in a straight-sided container after bulk fermentation.

    Step 5: Shape the dough. Turn dough out onto a floured surface. Stretch into a rectangle, fold edges to center, flip seam-side down, and shape into a round.

    Fermented blueberry sourdough bread dough stretched into a rectangle on a floured counter.
    Two hands shaping blueberry sourdough bread dough on a counter.
    Blueberry sourdough bread dough shaped into a boule on a counter.

    Step 6: Cold proof. Place in a well-floured proofing basket. Cover and refrigerate overnight (12โ€“16 hours).

    Blueberry sourdough bread dough in a banneton proofing basket before cold proofing overnight.
    Blueberry sourdough bread dough in a banneton proofing basket after cold proofing overnight.

    Step 7: Bake the bread. Preheat a Dutch oven to 450ยฐF. Turn the dough onto parchment, score the top, and add 2 ice cubes for steam. Cover and bake 40 minutes, then uncover and bake 5โ€“10 minutes more until golden. Cool on a wire rack 2โ€“4 hours before slicing.

    Blueberry lemon sourdough bread dough being scored with a lame on a piece of parchment paper.
    A baked loaf of lemon blueberry sourdough bread in a Dutch oven.

    Baker's Timeline

    Here is an example of a schedule you can use to make this lemon blueberry sourdough bread.

    • 8:00 PM (Night Before): Feed your starter.
    • 8:00 AM: Mix the dough.
    • 8:30-9:30 AM: Stretch and fold, add blueberries.
    • 9:30 AM-3:30 PM (varies): Bulk fermentation.
    • 3:30-4:00 PM: Shape.
    • 4:00 PM-8:00 AM (Next Day): Cold proof.
    • 8:00-8:45 AM: Bake.
    • 8:45-10:45 AM: Cool.

    Note: Rise times will vary depending on the strength of your starter and the temperature of your kitchen and dough. It's best to use visual cues from your starter and dough rather than sticking to a strict timeline.

    How to Store

    Store blueberry sourdough bread in an airtight container at room temperature for up to 2 days.

    For longer storage, slice and freeze in a freezer-safe container for up to 3 months. Thaw at room temperature or toast slices straight from the freezer.

    A sliced loaf of blueberry sourdough bread on a wooden cutting board.
    A cover of a recipe ebook with the title "Everyday Sourdough: 27 Sweet & Savory Sourdough Discard Recipes." There is an image of sourdough discard cinnamon rolls on the front. At the bottom, it reads "By Ashley Petrie of Everyday Homemade."
    Grab a copy today!

    Are you tired of watching your sourdough discard go to waste?

    Itโ€™s time to turn excess discard into something delicious with my new ebook - Everyday Sourdough!

    Inside, youโ€™ll find 27 tried-and-true sourdough discard recipes that will transform your leftover starter into mouthwatering creations your family and friends will love.

    No more guilt about wasting your discard - with Everyday Sourdough, you have endless options to quickly make something amazing anytime.

    Let's Connect!

    Be sure to leave a comment below if you have any questions. You can also connect with me on Instagram, Facebook, Pinterest, or via email at [email protected].

    More Sourdough Bread Recipes

    • Three slices of strawberry sourdough bread on a wooden cutting board.
      Freeze-Dried Strawberry Swirl Sourdough Bread
    • A slice of red, white, and blue sourdough bread on a wooden cutting board.
      Red, White, and Blue Sourdough Bread (Naturally Colored!)
    • A loaf of apple cinnamon sourdough bread cut in half to show the apple-dotted crumb.
      Apple Cinnamon Sourdough Bread
    • A sliced loaf of chocolate cherry sourdough bread on a wooden cutting board.
      Chocolate Cherry Sourdough Bread

    ๐Ÿ“– Recipe

    Slices of lemon blueberry sourdough bread on a wooden cutting board.
    Print Pin SaveSaved!

    Lemon Blueberry Sourdough Bread

    This Sourdough Blueberry Bread is studded with juicy blueberries and bright lemon zest for a naturally sweet, tangy loaf. Soft, flavorful, and beginner-friendly, itโ€™s perfect toasted with butter, cream cheese, or lemon curd.
    Course Bread
    Cuisine American
    Prep Time 1 day day 12 hours hours
    Cook Time 45 minutes minutes
    Cool Time 2 hours hours
    Total Time 1 day day 14 hours hours 45 minutes minutes
    Servings 12 slices
    Calories 172kcal
    Author Ashley Petrie, RDN, LDN

    Equipment

    • Kitchen scale
    • Microplane
    • Bowl scraper
    • Straight-sided container (optional)
    • Proofing basket or bowl lined with tea towel
    • Bread sling or parchment paper
    • Lame or sharp knife
    • 6-quart dutch oven

    Ingredients

    • 1 ยผ cups (300 grams) warm water 80-90โ„‰
    • ยฝ cup (100 grams) active sourdough starter
    • Zest of 1-2 lemons
    • 2 tablespoons (30 grams or about ยฝ lemon) lemon juice
    • 4 cups (480 grams) bread flour
    • 3 ยฝ teaspoons (10 grams) Diamond Crystal Kosher Salt
    • 1 cup (140 grams) blueberries fresh or frozen (if frozen, thaw completely and drain well before adding to dough)
    • Rice flour for dusting proofing basket
    • 2 ice cubes for steam

    Instructions

    • Feed your sourdough starter 6โ€“12 hours before mixing the dough, until itโ€™s bubbly and active. In cooler kitchens (65โ€“68ยฐF), this may take closer to 10โ€“12 hours; in warmer kitchens (around 75ยฐF), about 6 hours.
    • In a large bowl, whisk together the warm water, active sourdough starter, lemon zest, and lemon juice. Add the bread flour and salt, mixing until a rough, sticky dough forms and no dry flour remains. Cover and let rest for 20 minutes.
      Zest of 1-2 lemons, 2 tablespoons (30 grams or about ยฝ lemon) lemon juice, 1 ยผ cups (300 grams) warm water, ยฝ cup (100 grams) active sourdough starter, 4 cups (480 grams) bread flour, 3 ยฝ teaspoons (10 grams) Diamond Crystal Kosher Salt
    • Lightly wet your hands to prevent sticking. Gently flatten the dough and sprinkle ยผ of the blueberries over the center. Perform a stretch-and-fold by lifting one side of the dough, stretching it upward, and folding it over itself. Rotate the bowl 90ยฐ, add another ยผ of the blueberries, and repeat. Continue until all four sides are folded and all blueberries are incorporated. Gather the dough into a loose ball, seam side down. Cover and rest for 15 minutes. Repeat this stretch-and-fold process 3 more times, resting 15 minutes between each round (4 total sets).
      1 cup (140 grams) blueberries
    • Cover the dough and let it rise until doubled in size with visible bubbles, about 4โ€“12 hours depending on room temperature and starter strength. Tip: A straight-sided container makes it easier to track the rise.
    • Turn the dough out onto a lightly floured surface and gently stretch it into a rectangle. Fold one short side toward the center, then the other, like folding a letter. Next, fold the long sides in, flip the dough seam-side down, and gently shape into a round.
    • Generously dust a proofing basket with rice flour. Transfer the dough to the basket seam-side up, pinching the seam closed if needed. Cover and refrigerate overnight for 12โ€“16 hours.
      Rice flour
    • Place a lidded Dutch oven in your oven and preheat to 450ยฐF. Once the oven reaches temperature, allow the Dutch oven to heat for an additional 30โ€“60 minutes.
    • Turn the dough out onto a bread sling or parchment paper. Score the top as desired. Carefully place 2 ice cubes into the hot Dutch oven for steam, then transfer the dough inside. Cover immediately.
      2 ice cubes
    • Bake at 450ยฐF for 40 minutes with the lid on. Remove the lid and bake for an additional 5โ€“10 minutes, until the crust reaches your desired color.
    • Transfer the bread to a wire rack and let cool for at least 2โ€“4 hours before slicing.

    Notes

    • Storage: Store in an airtight container at room temperature for up to 2 days or freeze for up to 3 months.

    Nutrition

    Serving: 1slice | Calories: 172kcal | Carbohydrates: 34g | Protein: 6.5g | Fat: 1g | Polyunsaturated Fat: 0.5g | Sodium: 336mg | Potassium: 70mg | Fiber: 1.5g | Sugar: 1.5g | Vitamin C: 2.6mg | Calcium: 11.5mg | Iron: 2.5mg
    Did you try this recipe?Let me know! Comment below, or take a picture and tag me on Instagram @everydayhomemadebyashley.

    Sourdough Bread Bowls (for Soups, Salads & Dips!)

    December 30, 2024

    These Sourdough Bread Bowls are so fun and easy to make at home! Crusty on the outside, chewy on the inside, and sturdy enough to hold your favorite soups, dips, and more.

    A sourdough bread bowl filled with tomato soup on a small plate with chunks of sourdough bread on the plate to the right. The soup is garnished with fresh basil.

    Who doesn't love anything served inside an edible bowl made of bread? A good bread bowl is hard to resist, but one made at home with your own sourdough starter? Even better.

    These sourdough bread bowls are such a fun way to serve up your favorite cozy meals and appetizers. Fill them with soup, dips, salads, mac and cheese, baked brie... Iโ€™m convinced just about anything tastes better when itโ€™s served in a bread bowl.

    I originally shared this recipe back in December 2024. But since Iโ€™m always learning and growing as a sourdough baker (and blogger!), I knew it was time to revisit this one. This is such a great staple recipe to have in your sourdough rotation, and I wanted to make a few small updates to make these bread bowls even better.

    So if youโ€™re looking for a fun sourdough project or want to make your next cozy meal a little more special, give these sourdough bread bowls a try.

    I hope you enjoy making (and eating!) them as much as I do!

    Disclaimer: Some links throughout this post are affiliate links. As an Amazon Associate, I earn from qualifying purchases. You can learn more by visiting my Affiliate Disclosure Page.

    Ingredients & Substitutions

    Here are some notes on key ingredients. For a full list of ingredients, check out the recipe card below.

    • Active Sourdough Starter- Use a strong, active starter for the best rise and texture. If you prefer to use discard, choose some thatโ€™s only a few days old. Just keep in mind that the dough may take longer to rise since discard is typically less active.
    • Bread Flour- Bread flour gives the bowls a chewy texture and helps them rise higher. You can swap with all-purpose flour if preferred.
    • Water- This recipe uses about 71% hydration, creating a dough thatโ€™s easy to work with while still producing a light, open crumb. You can slightly adjust the water amount if needed depending on your flour and desired dough consistency.
    • Kosher Salt- Enhances flavor. I use Diamond Crystal Kosher Salt (2.8 grams per teaspoon). If using table salt or Morton's, measure by weight or use roughly half the amount by volume.
    The ingredients to make sourdough bread bowls. Each ingredient is labeled with text. They include water, active sourdough starter, bread flour, and salt.

    Tips for Success

    • Measure ingredients by weight. Use a kitchen scale for the most accurate measurements and to ensure your dough has the correct hydration.
    • Build tension when shaping. Create surface tension as you shape each dough ball, but be careful not to tear the dough. This helps the bread bowls hold their shape and rise upward instead of spreading in the oven.
    • Score a square on top. Scoring a square makes it easier to remove the top of the bread bowl when youโ€™re ready to fill it.
    • Bake in batches if needed. If your Dutch oven isnโ€™t large enough to fit both bread bowls, bake them one at a time. Keep the unbaked dough refrigerated until youโ€™re ready to bake.
    • Let them cool completely. Wait at least one hour before cutting into your bread bowls. Cutting too soon can lead to a dense, gummy crumb.

    How to Make Sourdough Bread Bowls

    Follow these step-by-step photos to turn your starter into homemade sourdough bread bowls. See the recipe card below for detailed instructions.

    Step 1: Feed sourdough starter. Feed your starter 6-12 hours before mixing dough.

    An active sourdough starter in a glass mason jar.

    Step 2: Mix the dough. Whisk together the water and active sourdough starter, then mix in the bread flour and salt until dough forms. Let rest for 20 minutes.

    Water and sourdough starter whisked together in a bowl.
    Sourdough bread dough mixed together in a bowl.

    Step 3: Stretch and fold. Complete 4 rounds of stretch and folds, resting 15 minutes between each round.

    Sourdough bread dough being stretched and folded in a bowl.
    Sourdough bread dough being stretched and folded in a bowl.
    Sourdough bread dough in a bowl after stretching and folding.

    Step 4: Bulk fermentation. Cover the dough and let it rise at room temperature until itโ€™s nearly doubled, puffy, and full of bubbles.

    Sourdough bread dough in a straight-sided container before bulk fermentation.
    Sourdough bread dough in a straight-sided container after bulk fermentation.

    Step 5: Divide and shape. Turn the dough out onto a lightly floured surface and divide it into two equal pieces. Shape each piece into a tight ball, then place them seam-side up in floured proofing baskets.

    Sourdough bread dough being divided into two pieces on a floured counter.
    Sourdough bread dough being shaped on a floured counter.
    Sourdough bread dough being shaped into balls on a floured counter.

    Step 6: Cold proof. Cover the dough and refrigerate overnight, or for 12โ€“16 hours.

    Two sourdough bread bowl doughs in cloth lined bowls before cold proofing overnight.

    Step 7: Bake and cool. Bake each bread bowl in a preheated Dutch oven with steam from ice cubes until deeply golden brown. Let cool completely before slicing and filling with your favorite soup, dip, or baked brie.

    Two sourdough bread bowls being scored with a square on the top.
    Two baked sourdough bread bowls on a wire cooling rack.
    One sourdough bread bowl hollowed out on a small plate with the bread chunks sitting on the plate to the right.

    Baker's Timeline

    Here is an example of a schedule you can use to make these sourdough bread bowls.

    • 8:00 PM (Night Before): Feed your starter.
    • 8:00 AM: Mix the dough.
    • 8:30-9:30 AM: Stretch and fold.
    • 9:30 AM-3:30 PM: Bulk fermentation.
    • 3:30-4:00 PM: Shape.
    • 4:00 PM-8:00 AM (Next Day): Cold proof.
    • 8:00-8:45 AM: Bake.
    • 8:45-10:00 AM: Cool.

    Note: Rise times will vary depending on the strength of your starter and the temperature of your kitchen and dough. It's best to use visual cues from your starter and dough rather than sticking to a strict timeline.

    How to Store

    Store leftover sourdough bread bowls in an airtight container at room temperature for up to 3 days.

    For longer storage, freeze the bread bowls in a freezer-safe container or bag for up to 3 months. When ready to use, thaw at room temperature, then lightly spritz the outside with water. Warm in a 350ยฐF oven for 10โ€“15 minutes to help restore the crisp crust.

    Serving Suggestions

    These sourdough bread bowls are perfect for cozy soups, stews, chowders, and chilis. They also make a fun edible serving dish for appetizers like buffalo chicken dip, spinach dip, salads, or baked brie.

    Two sourdough bread bowls stacked on top of one another.
    A cover of a recipe ebook with the title "Everyday Sourdough: 27 Sweet & Savory Sourdough Discard Recipes." There is an image of sourdough discard cinnamon rolls on the front. At the bottom, it reads "By Ashley Petrie of Everyday Homemade."
    Grab a copy today!

    Are you tired of watching your sourdough discard go to waste?

    Itโ€™s time to turn excess discard into something delicious with my new ebook - Everyday Sourdough!

    Inside, youโ€™ll find 27 tried-and-true sourdough discard recipes that will transform your leftover starter into mouthwatering creations your family and friends will love.

    No more guilt about wasting your discard - with Everyday Sourdough, you have endless options to quickly make something amazing anytime.

    Let's Connect!

    Be sure to leave a comment below if you have any questions. You can also connect with me on Instagram, Facebook, Pinterest, or via email at [email protected].

    More Sourdough Bread Recipes

    • A round loaf of Dutch oven sourdough bread.
      Beginner-Friendly Sourdough Bread Recipe (Dutch Oven Method)
    • Three slices of sourdough sandwich bread on a cutting board.
      Sourdough Sandwich Bread
    • Two pieces of 100% whole wheat sourdough bread on a piece of parchment paper.
      100% Whole Wheat Sourdough Bread
    • Three slicing of multigrain sourdough bread on a cutting board next to half of a loaf.
      Multigrain Sourdough Bread

    ๐Ÿ“– Recipe

    A sourdough bread bowl filled with tomato soup on a small plate with chunks of sourdough bread on the plate to the right. The soup is garnished with fresh basil.
    Print Pin SaveSaved!
    5 from 1 vote

    Sourdough Bread Bowls

    These Sourdough Bread Bowls are so fun and easy to make at home! Crusty on the outside, chewy on the inside, and sturdy enough to hold your favorite soups, dips, and more.
    Course Bread
    Cuisine American
    Prep Time 1 day day 12 hours hours
    Cook Time 40 minutes minutes
    Cool Time 1 hour hour
    Total Time 1 day day 13 hours hours 40 minutes minutes
    Servings 2 bowls
    Calories 985kcal
    Author Ashley Petrie, RDN, LDN

    Equipment

    • Kitchen scale
    • Bowl scraper
    • Mixing bowl
    • Straight-sided container (optional)
    • Mini banneton or bowl lined with tea towel
    • Bread sling or parchment paper
    • Lame or sharp knife
    • 6-quart dutch oven

    Ingredients

    • 1 ยผ cups + 2 tablespoons (330 grams) water
    • ยฝ cup (100 grams) active sourdough starter
    • 4 cups (480 grams) bread flour
    • 3 ยฝ teaspoons (10 grams) Diamond Crystal Kosher Salt reduce to 1 ยพ teaspoons if using Morton's brand or table salt
    • Rice flour for proofing baskets
    • 2-4 ice cubes for steam

    Instructions

    • Feed your sourdough starter 6โ€“12 hours before you plan to start the dough. It should be bubbly, active, and have doubled in size before mixing. In cooler kitchens (around 65โ€“68ยฐF), this may take closer to 10โ€“12 hours, while warmer kitchens (around 75ยฐF) may only take about 6 hours.
    • In a large bowl, whisk together the water and active sourdough starter until the starter is mostly dissolved. Add the bread flour and salt, then mix until no dry flour remains and a shaggy, cohesive dough forms. Cover and let the dough rest for 20 minutes.
      4 cups (480 grams) bread flour, 1 ยผ cups + 2 tablespoons (330 grams) water, ยฝ cup (100 grams) active sourdough starter, 3 ยฝ teaspoons (10 grams) Diamond Crystal Kosher Salt
    • Lightly wet your hands to prevent sticking. Grab one side of the dough, gently stretch it upward, and fold it over the center. Rotate the bowl a quarter turn and repeat until youโ€™ve completed 4 folds around the dough. Gather the dough into a loose ball, place it seam-side down, cover, and rest for 15 minutes. Repeat this stretch-and-fold process 3 more times (for a total of 4 rounds), resting 15 minutes between each round.
    • Cover the dough and let it rise at room temperature until it has nearly doubled in size, looks puffy, and has bubbles throughout. This can take anywhere from 4โ€“12+ hours depending on your kitchen temperature and starter strength.
    • A straight-sided container makes it easy to monitor how much the dough has risen.
    • Turn the dough onto a lightly floured surface and gently stretch it into a rectangle. Use a bench scraper or sharp knife to divide the dough into two equal pieces. Working with one piece of dough at a time, fold one short side toward the center, then fold the opposite short side over the top, like folding a letter. Fold the two long sides toward the center in the same way, then flip the dough over so the seam side is underneath. Using your hands or a bench scraper, gently pull the dough toward yourself across the work surface to create tension and shape it into a smooth, tight ball. Repeat with the second piece of dough.
    • Lightly dust two mini proofing baskets (or bowls lined with clean tea towels) with rice flour. Place each dough ball seam-side up into a basket. Pinch the seam closed if needed. Cover and refrigerate overnight, or for 12โ€“16 hours.
      Rice flour
    • Place a lidded Dutch oven in the oven and preheat to 450ยฐF. Once the oven reaches temperature, allow the Dutch oven to continue heating for 30 minutes.
    • Because most Dutch ovens can only fit one bread bowl at a time, bake them separately unless you have two Dutch ovens or a large enough Dutch oven to fit both.
    • Remove one dough bowl from the refrigerator and turn it out onto parchment paper or a bread sling. Score a square shape on the top of the dough using a lame or sharp knife. Carefully remove the hot Dutch oven from the oven. Add 2 ice cubes to the bottom of the pot to create steam, then carefully lower the dough inside. Cover with the lid and bake for 35 minutes. Remove the lid and continue baking for 5โ€“10 minutes, or until the crust is deeply golden brown. Repeat the baking process with the second bread bowl.
      2-4 ice cubes
    • Transfer the bread bowls to a wire rack and let them cool for at least 1 hour before slicing and filling.

    Notes

    • Storage: Store in airtight container at room temperature for 2-3 days or freeze for up to 3 months.

    Nutrition

    Serving: 1bowl | Calories: 985kcal | Carbohydrates: 193g | Protein: 38g | Fat: 4.5g | Saturated Fat: 0.5g | Polyunsaturated Fat: 2g | Monounsaturated Fat: 0.5g | Sodium: 2008mg | Potassium: 336mg | Fiber: 6.5g | Sugar: 0.5g | Calcium: 50mg | Iron: 14.7mg
    Did you try this recipe?Let me know! Comment below, or take a picture and tag me on Instagram @everydayhomemadebyashley.

    Multigrain Sourdough Bread

    December 23, 2024

    This Multigrain Sourdough Bread is made with whole wheat flour, along with a blend of whole grains and seeds, for a healthy, hearty loaf thatโ€™s perfect for sandwiches or toast.

    Three slicing of multigrain sourdough bread on a cutting board next to half of a loaf.

    If I could only keep one type of bread in my freezer, it would definitely be this multigrain sourdough bread.

    As a dietitian, I tend to gravitate toward high-fiber, whole grain bread. And I find this one has the perfect mix of great flavor, a hearty texture, and wonderful health benefits.

    I first started making this recipe after visiting the King Arthur Baking popup in Boston, where I picked up a big bag of their Harvest Grain Blend. This blend is packed with oats, rye flakes, flaxseed, sunflower seeds, and more.

    As soon as I got home, I couldnโ€™t wait to start experimenting by adding it to different doughs.

    The combination of half whole wheat flour, half bread flour, and the grain blend worked so well that I knew I had to share it on the blog. I love it so much, Iโ€™m already on my fourth or fifth loaf in just over a month.

    Iโ€™ve been enjoying it toasted with avocado nearly every day. Itโ€™s also fantastic for sandwiches, charcuterie boards, and dipping.

    Iโ€™m so excited to share my recipe for multigrain sourdough bread with you today. I hope you give it a try and enjoy it as much as I do!

    Disclaimer: Some links throughout this post are affiliate links. As an Amazon Associate, I earn from qualifying purchases. You can learn more by visiting my Affiliate Disclosure Page.

    Ingredients & Substitutions

    Here are some notes on key ingredients. For a full list of ingredients, check out the recipe card below.

    • Active Sourdough Starter- This multigrain sourdough loaf relies on a strong, bubbly, and active starter for a good rise. If you prefer to use discard, opt for some thatโ€™s only a few days old - just be aware that the dough may take longer to rise.
    • Bread Flour- Using about half bread flour balances the hearty, denser whole wheat flour, resulting in a taller, more airy loaf.
    • Whole Wheat Flour- Whole wheat flour gives this seeded sourdough bread a nutty flavor and hearty texture. Don't be afraid to play around with the ratio of bread flour to whole wheat flour to suit your tastes.
    • Grain Blend- Feel free to use up to ยฝ cup of your favorite grain or seed blend in this recipe. I used King Arthur Baking's Harvest Grains Blend, which includes oats, millet, rye, wheat, flax, poppy, sesame, and sunflower seeds.
    • Water- This recipe uses about 75% hydration, but the dough is still easy to handle because whole wheat flour absorbs more water. Feel free to adjust the hydration level to what works best for you.
    • Kosher Salt- Enhances the flavor of the bread. I use Diamond Crystal Kosher Salt, which is about 8.4 grams per tablespoon. If you're using table salt or Morton's brand, be sure to measure by weight or use about half the amount.
    The ingredients to make multigrain sourdough bread. Each ingredient is labeled with text. They include bread flour, whole wheat flour, multigrain blend, active sourdough starter, water, and kosher salt.

    Tips for Success

    • Use active sourdough starter. For the best results, use an active sourdough starter. If you want to use discard, opt for some that is only a few days old and keep in mind that it may take longer for your dough to rise.
    • Try higher hydration. Whole grains absorb more water, so aim for a hydration level of at least 70โ€“75% to promote better gluten development.
    • Don't skip autolyse. Be sure to mix the flour and water and let it sit for about one hour before adding the starter and salt. This hydrates the grains, softens the dough, and improves gluten development.
    • Find a warm spot to rise. Let the dough rise in a warm (not hot) place, especially in cooler weather, to speed up fermentation.
    • Watch the fermentation time. Whole wheat doughs may ferment more quickly due to their higher nutrient content. Monitor closely to avoid overproofing, which can result in a denser loaf.
    • Build tension when shaping. When shaping, create surface tension on the dough without tearing it. This helps the loaf rise up rather than spread out in the oven.
    • Cool completely. Wait at least two hours before slicing to avoid a gummy texture.

    How to Make Multigrain Sourdough Bread

    Here is how to make sourdough multigrain bread.

    1. Feed Sourdough Starter

    • Feed your sourdough starter 6-12 hours before starting to ensure itโ€™s bubbly and active.
    • Timing will depend on your kitchen temperature.
    • In cooler kitchens (around 65-68โ„‰), it might take 10-12 hours. In warmer kitchens (75โ„‰), it might take just 6 hours.
    An active sourdough starter in a glass mason jar.

    2. Autolyse

    • About one hour before your starter is ready, combine bread flour, whole wheat flour, grain blend, and water in a large mixing bowl.
    • Mix until no dry flour remains.
    • Cover the bowl and let it rest for 1 hour. This helps hydrate the grains and kickstart gluten development.
    Bread flour, whole wheat flour, multigrain blend, and water mixed together in a bowl for the autolyse step of making seeded sourdough bread.

    3. Mix the Dough

    • Add your active sourdough starter and kosher salt to the bowl.
    • Use your hands to mix for about 5 minutes until everything is fully combined.
    • Cover the bowl and let the dough rest for 20 minutes.
    Active sourdough starter and kosher salt added to the mixing bowl with the flour and water.
    The mixed multigrain sourdough dough in a bowl.

    4. Stretch and Fold

    • Lightly wet your hands to prevent sticking.
    • Perform a โ€œstretch and foldโ€: Grab one edge of the dough, stretch it upwards without tearing it, and fold it over the top. Rotate the bowl 90ยฐ and repeat on all four sides.
    • Gather the dough into a ball and flip it seam-side down in the bowl.
    • Cover and let it rest for 20 minutes.
    • Repeat this stretch-and-fold process a total of 4 times, with 20-minute rests between each round.
    The dough being stretched and folded in a mixing bowl.

    5. Bulk Fermentation

    • Cover the dough and let it rise until it doubles in size and develops visible fermentation bubbles on the surface.
    • The rise time can vary widely, taking anywhere from 4 to 8 hours or more, depending on the temperature of your kitchen and the strength of your starter.
    • For an easy way to track its progress, use a straight-sided container and mark the starting level of the dough.
    The multigrain sourdough dough in a mixing bowl before bulk fermentation.
    The fully fermented dough in a mixing bowl.

    6. Pre-Shape

    • Turn the fermented dough out onto a lightly floured surface.
    • Gently pull it into a large rectangle.
    • Fold one long edge toward the center, then the other, like folding a letter. Then, fold each short end towards the center in the same manner.
    • Flip the dough seam-side down, gently shaping it into a ball.
    • Cover and let it rest for 15 minutes.
    The dough stretched out into a rectangle on a floured surface.
    The dough folded over itself into thirds on a floured counter.
    The dough shaped into a boule on a countertop.

    7. Shape

    • Flip the dough seam-side up again and gently stretch it into a smaller rectangle.
    • If you're using a bowl or banneton, repeat the shaping process above.
    • For a batard, fold the shorter edges of the rectangle toward the center. Then, starting at one of the longer edges, roll the dough tightly into a log, pinching the seam and ends to seal.

    8. Cold Proof

    • Dust your proofing basket generously with rice flour to prevent sticking.
    • Transfer the shaped dough into the basket, seam side up. Pinch the seam to seal if necessary.
    • Cover and cold proof the dough overnight in the refrigerator (about 12-16 hours).
    The shaped dough in a banneton bread basket.

    9. Bake the Bread

    • Place a lidded Dutch oven inside your oven and preheat to 450โ„‰. Let the Dutch oven heat for an extra 30-60 minutes once the oven reaches temperature.
    • Turn the dough out onto a bread sling or parchment paper. Score the top as desired with a lame or sharp knife.
    • Carefully place 2 ice cubes in the Dutch oven for steam.
    • Use the parchment or sling to transfer the dough into the hot Dutch oven. Cover immediately with the lid to trap the steam inside.
    • Bake at 450โ„‰ for 40 minutes with the lid on. Then, remove the lid and bake for an additional 5-10 minutes or until your desired crust color is achieved.
    • Allow the bread cool on a wire rack for at least 2-4 hours before slicing and serving.
    The scored dough on a bread sling ready to be baked.
    A baked loaf of multigrain sourdough bread on a wire cooling rack.

    Baker's Timeline

    Here is an example of a schedule you can use to make this seeded sourdough bread.

    • 8:00 PM (Night Before): Feed your starter.
    • 7:00-8:00 AM: Autolyse.
    • 8:00 AM: Mix the dough.
    • 8:30-9:30 AM: Stretch and fold.
    • 9:30 AM-3:30 PM: Bulk fermentation.
    • 3:30-4:00 PM: Shape.
    • 4:00 PM-8:00 AM (Next Day): Cold proof.
    • 8:00-8:45 AM: Bake.
    • 8:45 AM-12:45 PM: Cool.

    Note: Rise times will vary depending on the strength of your starter and the temperature of your kitchen and dough. It's best to use visual cues from your starter and dough rather than sticking to a strict timeline.

    How to Store

    • Uncut Loaf- Keep the unsliced multigrain sourdough bread at room temperature in a bread box or on the counter for up to 3 days.
    • Sliced Bread- Store slices in an airtight container at room temperature for up to 2 days.
    • Freeze- For longer storage, freeze the sliced bread in a freezer-safe container for up to 3 months. When ready to enjoy, thaw at room temperature or warm briefly in the microwave.
    A loaf of multigrain sourdough bread cut into five slices on a cutting board.
    A cover of a recipe ebook with the title "Everyday Sourdough: 27 Sweet & Savory Sourdough Discard Recipes." There is an image of sourdough discard cinnamon rolls on the front. At the bottom, it reads "By Ashley Petrie of Everyday Homemade."
    Grab a copy today!

    Are you tired of watching your sourdough discard go to waste?

    Itโ€™s time to turn excess discard into something delicious with my new ebook - Everyday Sourdough!

    Inside, youโ€™ll find 27 tried-and-true sourdough discard recipes that will transform your leftover starter into mouthwatering creations your family and friends will love.

    No more guilt about wasting your discard - with Everyday Sourdough, you have endless options to quickly make something amazing anytime.

    Let's Connect!

    Be sure to leave a comment below if you have any questions. You can also connect with me on Instagram, Facebook, Pinterest, or via email at [email protected].

    More Sourdough Bread Recipes

    • Two pieces of 100% whole wheat sourdough bread on a piece of parchment paper.
      100% Whole Wheat Sourdough Bread
    • A round loaf of Dutch oven sourdough bread.
      Beginner-Friendly Sourdough Bread Recipe (Dutch Oven Method)
    • A loaf of sourdough rye bread cut into slices on a wooden cutting board.
      Sourdough Rye Bread (Easy, Beginner-Friendly Recipe)
    • Three slices of maple oat sourdough bread on a cutting board. On the cutting board next to the bread is a white cloth napkin and a ceramic cup that says "but first, maple syrup."
      Maple Oat Sourdough Bread

    ๐Ÿ“– Recipe

    Three slicing of multigrain sourdough bread on a cutting board next to half of a loaf.
    Print Pin SaveSaved!
    5 from 1 vote

    Multigrain Sourdough Bread

    This Multigrain Sourdough Bread is made with whole wheat flour, along with a blend of whole grains and seeds, for a healthy, hearty loaf thatโ€™s perfect for sandwiches or toast.
    Course Bread
    Cuisine American
    Prep Time 1 day day 12 hours hours
    Cook Time 50 minutes minutes
    Cool Time 2 hours hours
    Total Time 1 day day 14 hours hours 50 minutes minutes
    Servings 12 slices
    Calories 200kcal
    Author Ashley Petrie, RDN, LDN

    Equipment

    • Kitchen scale
    • Bowl scraper
    • Mixing bowl
    • Proofing basket banneton or batard
    • Lame or sharp knife
    • Bread sling or parchment paper
    • 6-quart dutch oven

    Ingredients

    • 2 ยผ cups (270 grams) bread flour
    • 2 cups (240 grams) whole wheat flour
    • ยฝ cup (80 grams) grain blend choose your favorite mix; King Arthur Baking's Harvest Grains Blend is a great option
    • 1 ยฝ cups + 2 tablespoons (390 grams) water
    • ยฝ cup (100 grams) active sourdough starter
    • 4 teaspoons (11 grams) Diamond Crystal Kosher Salt use about half the volume if substituting with Morton's kosher salt or table salt
    • Rice flour for dusting proofing basket
    • 2 ice cubes for steam

    Instructions

    • Feed your sourdough starter 6-12 hours before starting to ensure itโ€™s bubbly and active. Timing will depend on your kitchen temperature. In cooler kitchens (around 65-68โ„‰), it might take 10-12 hours. In warmer kitchens (75โ„‰), it might take just 6 hours.
    • About one hour before your starter is ready, combine bread flour, whole wheat flour, grain blend, and water in a large mixing bowl. Mix until no dry flour remains. Cover the bowl and let it rest for 1 hour. This helps hydrate the grains and kickstart gluten development.
      2 ยผ cups (270 grams) bread flour, 2 cups (240 grams) whole wheat flour, ยฝ cup (80 grams) grain blend, 1 ยฝ cups + 2 tablespoons (390 grams) water
    • Add your active sourdough starter and kosher salt to the bowl. Use your hands to mix for about 5 minutes until everything is fully combined. Cover the bowl and let the dough rest for 20 minutes.
      ยฝ cup (100 grams) active sourdough starter, 4 teaspoons (11 grams) Diamond Crystal Kosher Salt
    • Lightly wet your hands to prevent sticking. Perform a โ€œstretch and foldโ€: grab one edge of the dough, stretch it upwards without tearing it, and fold it over the top. Rotate the bowl 90ยฐ and repeat on all four sides. Gather the dough into a ball and flip it seam-side down in the bowl. Cover and let it rest for 20 minutes. Repeat this stretch-and-fold process a total of 4 times, with 20-minute rests between each round.
    • Cover the dough and let it rise until it doubles in size and develops visible fermentation bubbles on the surface. The rise time can vary widely, taking anywhere from 4 to 8 hours or more, depending on the temperature of your kitchen and the strength of your starter. For an easy way to track its progress, use a straight-sided container and mark the starting level of the dough.
    • Turn the fermented dough out onto a lightly floured surface. Gently pull it into a large rectangle. Fold one long edge toward the center, then the other, like folding a letter. Then, fold each short end towards the center in the same manner. Flip the dough seam-side down, gently shaping it into a ball. Cover and let it rest for 15 minutes.
    • Flip the dough seam-side up and gently stretch it into a smaller rectangle. If you're using a bowl or banneton, repeat the shaping process above. For a batard, fold the shorter edges of the rectangle toward the center. Then, starting at one of the longer edges, roll the dough tightly into a log, pinching the seam and ends to seal.
    • Dust your proofing basket generously with rice flour to prevent sticking. Transfer the shaped dough into the basket, seam side up. Pinch the seam to seal if necessary. Cover and cold proof the dough overnight in the refrigerator (about 12-16 hours).
      Rice flour
    • Place a lidded Dutch oven inside your oven and preheat to 450โ„‰. Let the Dutch oven heat for an extra 30-60 minutes once the oven reaches temperature.
    • Turn the dough out onto a bread sling or parchment paper. Score the top as desired with a lame or sharp knife. Carefully place 2 ice cubes in the Dutch oven for steam. Use the parchment or sling to transfer the dough into the hot Dutch oven. Cover immediately with the lid to trap the steam inside.
      2 ice cubes
    • Bake at 450โ„‰ for 40 minutes with the lid on. Then, remove the lid and bake for an additional 5-10 minutes or until your desired crust color is achieved.
    • Allow the bread cool on a wire rack for at least 2-4 hours before slicing and serving.

    Notes

    • For the best results, use a kitchen scale to measure your ingredients.
    • Storage: Store the uncut loaf at room temperature for up to 3 days, or freeze it for up to 3 months. Sliced sourdough can be kept in an airtight container at room temperature for up to 2 days, or frozen for up to 3 months. Avoid refrigerating sourdough bread, as it can dry out the loaf.

    Nutrition

    Serving: 1slice | Calories: 200kcal | Carbohydrates: 38.5g | Protein: 7.5g | Fat: 2g | Saturated Fat: 0.2g | Polyunsaturated Fat: 0.3g | Monounsaturated Fat: 0.1g | Sodium: 370mg | Potassium: 122mg | Fiber: 3.5g | Calcium: 18mg | Iron: 1.2mg
    Did you try this recipe?Let me know! Comment below, or take a picture and tag me on Instagram @everydayhomemadebyashley.

    How to Make Sourdough Breadcrumbs

    December 16, 2024

    Sourdough Breadcrumbs are a quick and easy way to use up leftover sourdough bread. Whether fresh or dried, theyโ€™re simple to make and so much better than store-bought.

    Sourdough breadcrumbs on a baking sheet with a metal spoon scooping some up.

    I donโ€™t often have leftover sourdough bread. But when I do, itโ€™s almost always the heel pieces that get skipped for a fresh loaf. I used to give this stale sourdough to my chickens before I realized how perfect it is for making breadcrumbs.

    Sourdough breadcrumbs are so handy to have around. I use them all the time in homemade meatballs or sprinkled on top of mac and cheese. They're not only easy to make, but they also taste so much better than store-bought.

    Plus, they keep well and are freezer-friendly, so you can always have some on hand.

    Use them fresh right after blending, or dry them in the oven for a crispy coating on meat, seafood, or veggies. You can even season them with dried herbs, garlic, or chili flakes to make them your own.

    Trust me - once you make these sourdough breadcrumbs, youโ€™ll never want to go back. I hope you give it a try and enjoy having this homemade pantry staple in your kitchen as much as I do!

    Disclaimer: Some links throughout this post are affiliate links. As an Amazon Associate, I earn from qualifying purchases. You can learn more by visiting my Affiliate Disclosure Page.

    Ingredient & Equipment Notes

    Here are some notes on key ingredients. For a full list of ingredients, check out the recipe card below.

    • Sourdough Bread- Use any leftover sourdough bread you like - classic, sandwich, multigrain, or whole wheat all work well. Around 200 grams of bread makes about 3 cups of fresh breadcrumbs or 2 โ…“ cups of dried breadcrumbs.
    • Seasonings (Optional)- Adding fresh or dried herbs and spices is a great way to flavor your homemade sourdough breadcrumbs.
    • Equipment- You'll need a food processor or blender, a baking sheet (if drying), and an airtight container for storage.
    Four slices of sourdough sandwich bread on a white plate with the text "sourdough bread" above it.

    Tips for Success

    • Use stale bread. Stale sourdough works best for breadcrumbs - it blends easier and gives a crunchier texture.
    • Don't over-blend. Pulse the bread in the food processor instead of blending continuously to avoid ending up with breadcrumbs with too fine a texture.
    • Stir occasionally. If drying breadcrumbs in the oven, stir them occasionally for even crisping.
    • Cool completely before storing. Let dried breadcrumbs cool completely before storing them to avoid condensation and keep them fresh longer.

    How to Make Sourdough Breadcrumbs

    Here is how to make homemade breadcrumbs with sourdough bread.

    Step 1: Prep the bread. Cut fresh or stale sourdough bread into small cubes or tear into chunks.

    Two slices of sourdough bread and sourdough bread cubes on a bamboo cutting board.

    Step 2: Blend the bread. Place the bread chunks into a food processor or blender. Add any desired seasonings, then pulse until the breadcrumbs reach your preferred texture. If using fresh breadcrumbs, incorporate them immediately into your recipe or store them in an airtight container for up to 3 days.

    Fresh sourdough breadcrumbs in the bowl of a food processor.

    Step 3: Dry the breadcrumbs (optional). If drying, spread breadcrumbs evenly on a rimmed baking sheet. Bake at 250ยฐF for 20-30 minutes, stirring every 10 minutes, until fully dried. Allow the dried breadcrumbs to cool completely before storing.

    Fresh sourdough breadcrumbs spread out on a baking sheet before being dried.
    Dried sourdough breadcrumbs on a baking sheet with a metal spoon scooping some up.

    How to Store

    Store fresh breadcrumbs in an airtight container at room temperature for up to 3 days or in the refrigerator for up to 1 week. For longer storage, freeze for up to 3 months.

    Dried breadcrumbs can be kept at room temperature for up to 2 weeks or frozen for up to 3 months.

    What to Do with Sourdough Breadcrumbs

    Homemade sourdough breadcrumbs are a kitchen staple with endless uses. Here are a few ideas to get you started:

    • Use in meatballs, burger patties, or meatloaf as a binder.
    • Top casseroles, mac and cheese, or pasta dishes.
    • Coat chicken, pork, fish, shrimp, or sliced vegetables.
    • Use as a filling in stuffed mushrooms or peppers.
    • Toast and sprinkle over roasted veggies, soups, or salads for added texture.
    A white bowl filled with spaghetti and Dutch oven meatballs in tomato sauce.
    A cover of a recipe ebook with the title "Everyday Sourdough: 27 Sweet & Savory Sourdough Discard Recipes." There is an image of sourdough discard cinnamon rolls on the front. At the bottom, it reads "By Ashley Petrie of Everyday Homemade."
    Grab a copy today!

    Are you tired of watching your sourdough discard go to waste?

    Itโ€™s time to turn excess discard into something delicious with my new ebook - Everyday Sourdough!

    Inside, youโ€™ll find 27 tried-and-true sourdough discard recipes that will transform your leftover starter into mouthwatering creations your family and friends will love.

    No more guilt about wasting your discard - with Everyday Sourdough, you have endless options to quickly make something amazing anytime.

    Let's Connect!

    Be sure to leave a comment below if you have any questions. You can also connect with me on Instagram, Facebook, Pinterest, or via email at [email protected].

    More Leftover Sourdough Recipes

    • Sourdough croutons on an aluminum baking sheet.
      Easy Seasoned Sourdough Bread Croutons (Made with Stale Bread)
    • A white bowl filled with sourdough stuffing. The stuffing is garnished with two leaves of fresh sage.
      Sourdough Bread Stuffing
    • A sourdough grilled cheese sandwich cut in half diagonally on a small white plate.
      Sourdough Grilled Cheese Sandwich
    • Two pieces of sourdough French toast covered in butter, maple syrup, and powdered sugar. The ends of both pieces are cut off.
      Sourdough French Toast

    ๐Ÿ“– Recipe

    Sourdough breadcrumbs on a baking sheet with a metal spoon scooping some up.
    Print Pin SaveSaved!

    Sourdough Breadcrumbs

    Sourdough Breadcrumbs are a quick and easy way to use up leftover sourdough bread. Whether fresh or dried, theyโ€™re simple to make and so much better than store-bought.
    Course Bread, Ingredient
    Cuisine American
    Prep Time 10 minutes minutes
    Cook Time 30 minutes minutes
    Total Time 40 minutes minutes
    Servings 3 cups (fresh)
    Calories 142kcal
    Author Ashley Petrie, RDN, LDN

    Equipment

    • Food processor or blender
    • Rimmed baking sheet

    Ingredients

    • 4 slices (200 grams) sourdough bread
    • ยฝ-1 teaspoon herbs and spices optional for seasoning

    Instructions

    • Cut fresh or stale sourdough bread into small cubes or tear into chunks.
    • Place the bread chunks into a food processor or blender. Add any desired seasonings, then pulse until the breadcrumbs reach your preferred texture. If using fresh breadcrumbs, incorporate them immediately into your recipe or store them in an airtight container for up to 3 days.
      4 slices (200 grams) sourdough bread, ยฝ-1 teaspoon herbs and spices
    • If drying, spread breadcrumbs evenly on a rimmed baking sheet. Bake at 250ยฐF for 20-30 minutes, stirring every 10 minutes, until fully dried. Allow the dried breadcrumbs to cool completely before storing.

    Notes

    • Yield: 4 slices (200 grams) of sourdough bread yield approximately 3 cups of fresh breadcrumbs or 2 โ…“ cups of dried breadcrumbs.
    • Storage: Store fresh breadcrumbs in an airtight container at room temperature for up to 3 days, in the refrigerator for up to 1 week, or freeze for up to 3 months. Dried breadcrumbs can be kept at room temperature for up to 2 weeks or frozen for up to 3 months.

    Nutrition

    Serving: 1cup | Calories: 142kcal | Carbohydrates: 28.5g | Protein: 4.5g | Fat: 0.5g | Polyunsaturated Fat: 0.5g | Sodium: 287mg | Potassium: 39mg | Fiber: 1g | Calcium: 7mg | Iron: 1.7mg
    Did you try this recipe?Let me know! Comment below, or take a picture and tag me on Instagram @everydayhomemadebyashley.
    • « Go to Previous Page
    • Page 1
    • Page 2
    • Page 3
    • Page 4
    • Page 5
    • Interim pages omitted …
    • Page 8
    • Go to Next Page »

    Primary Sidebar

    Ashley wearing a colorful jacket and jeans standing in a boat harbor smiling at the camera.

    Hi, I'm Ashley!

    Welcome to Everyday Homemade, where I share fun and easy sourdough recipes, creative ways to use discard, and homemade meals that pair perfectly with fresh-baked sourdough bread.

    More about me

    Subscribe for new sourdough recipes every Saturday!

    Trending Recipes

    • Sourdough discard pizza dough stretched out on a pizza peel.
      Sourdough Discard Pizza Dough (No Yeast)
    • Sourdough discard brownies in an aluminum baking pan.
      Sourdough Discard Brownies
    • A stack of five sourdough granola bars with more bars out of focus in the background.
      Sourdough Granola Bars (Peanut Butter Chocolate Chip)
    • A plate of sourdough soft pretzels with honey mustard dipping sauce.
      Sourdough Soft Pretzels (or Pretzel Bites)

    Sourdough Recipes

    • Several sourdough chocolate chip cookies on a piece of wrinkled parchment paper on a wooden cutting board.
      Sourdough Chocolate Chip Cookies (No Chill)
    • A bowl of sourdough cheese crackers.
      5-Ingredient Sourdough Discard Cheese Crackers (Quick & Easy!)
    • Three nests of homemade sourdough pasta noodles on a flour-dusted baking sheet.
      How to Make Sourdough Pasta
    • A pile of sourdough discard tortillas on a white cloth.
      Sourdough Discard Tortillas (5 Ingredients!)
    ALL RECIPES

    Footer

    โ†‘ back to top

    Legal

    • Privacy Policy
    • Terms & Conditions
    • Affiliate Disclosure

    Newsletter

    • Sign Up! for emails and updates

    About

    • About
    • Contact
    • Work With Me

    As an Amazon Associate I earn from qualifying purchases.

    Copyright ยฉ 2025 Everyday Homemade