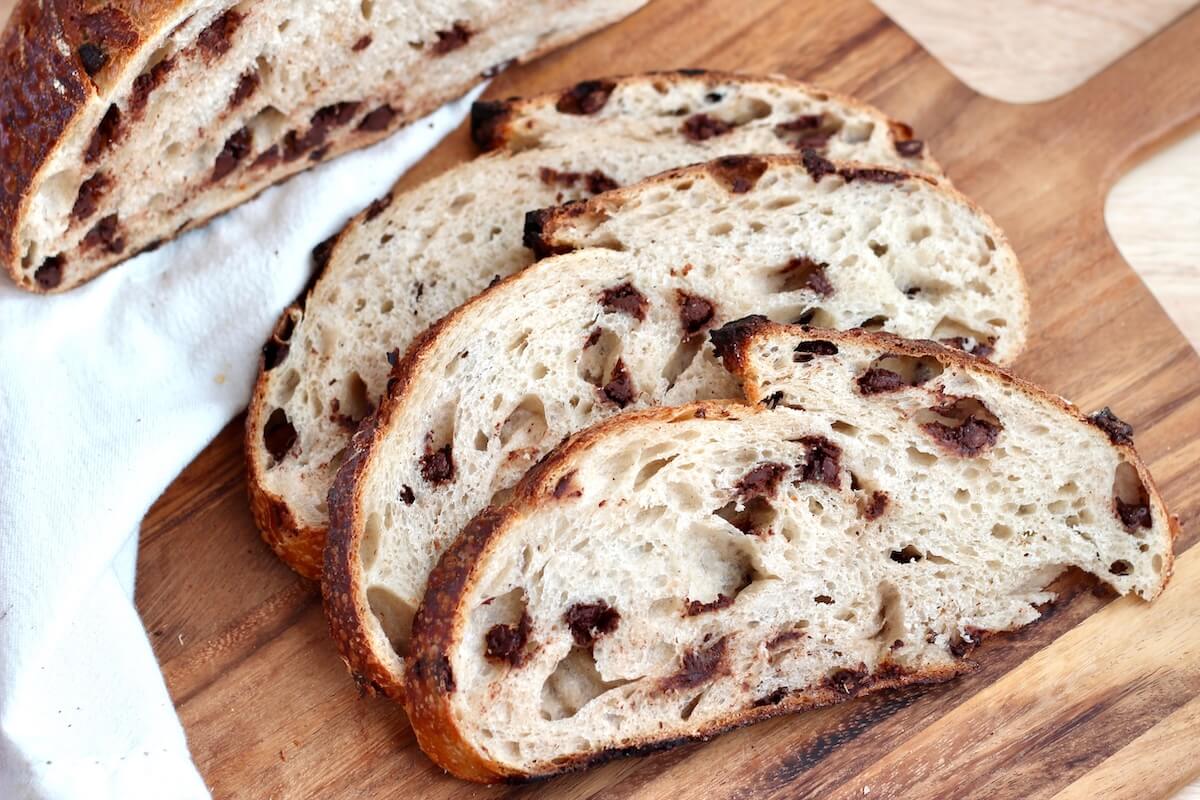
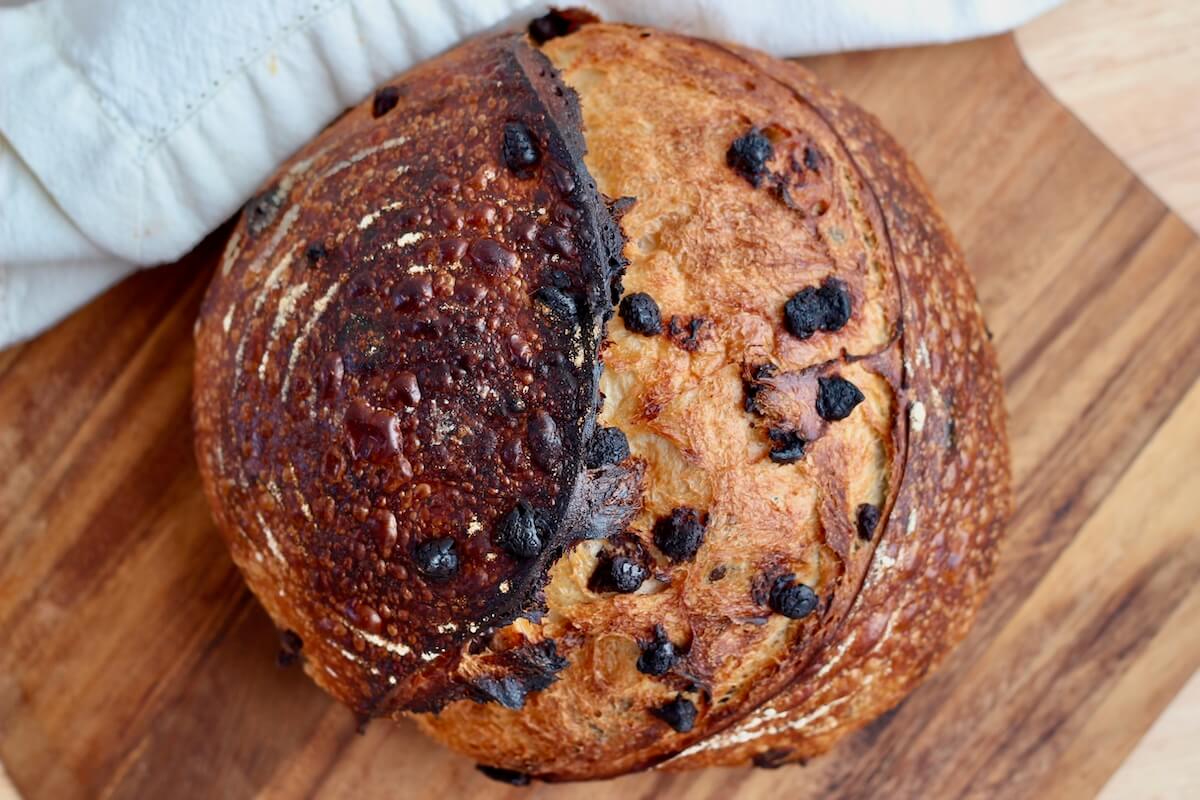
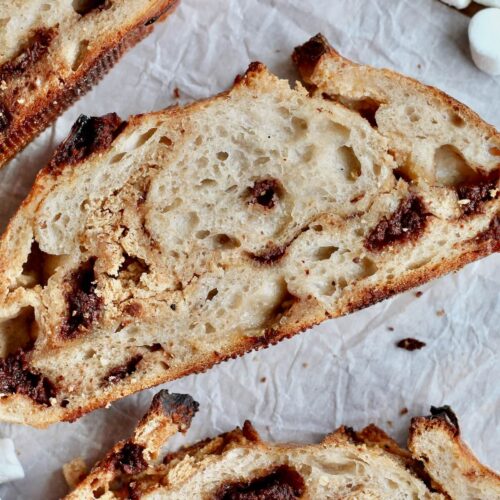
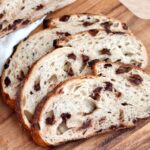
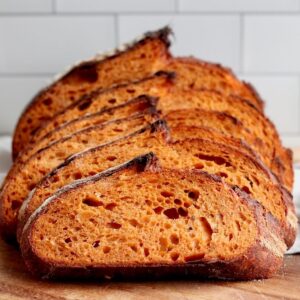
This Chocolate Chip Sourdough Bread is crusty on the outside, soft and tangy on the inside, with just a hint of decadent sweetness from the chocolate chips. It’s an easy, beginner-friendly sourdough bread recipe that’s sure to become a favorite.
When it comes to sourdough inclusions, I usually lean toward savory combos - like pepperoni and mozzarella or jalapeño and cheddar - because they feel so versatile.
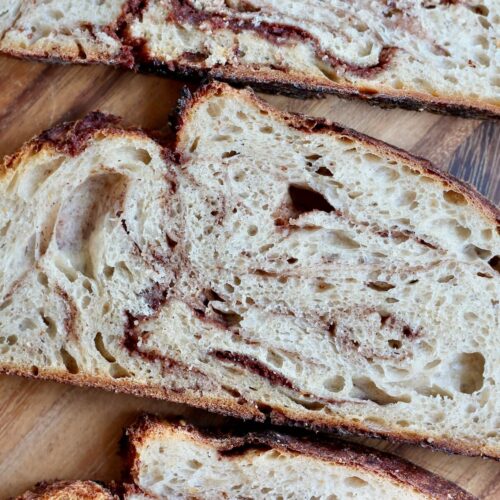
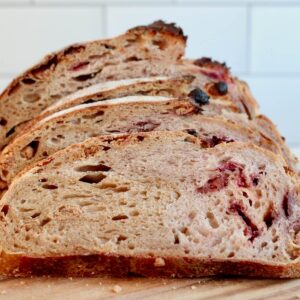
But lately, my sweet tooth has taken over, and I’ve been experimenting with sweet sourdough breads like the double chocolate and chocolate cherry sourdough recipes I posted a few weeks ago.
Naturally, I had to add a simple chocolate chip sourdough bread to the mix, too!
This recipe is perfect for beginners, thanks to its lower hydration dough that’s easy to handle. I added a little sugar to complement the sweetness of the chocolate chips, but otherwise, it’s a classic sourdough loaf with a decadent twist.
Just fold in the chocolate chips, let it ferment overnight, and bake it in the morning for a soft, sweet loaf that’s perfect for breakfast, dessert, or a snack.
I hope you give it a try and love it as much as I do!
Disclaimer: Some links throughout this post are affiliate links. As an Amazon Associate, I earn from qualifying purchases. You can learn more by visiting my Affiliate Disclosure Page.
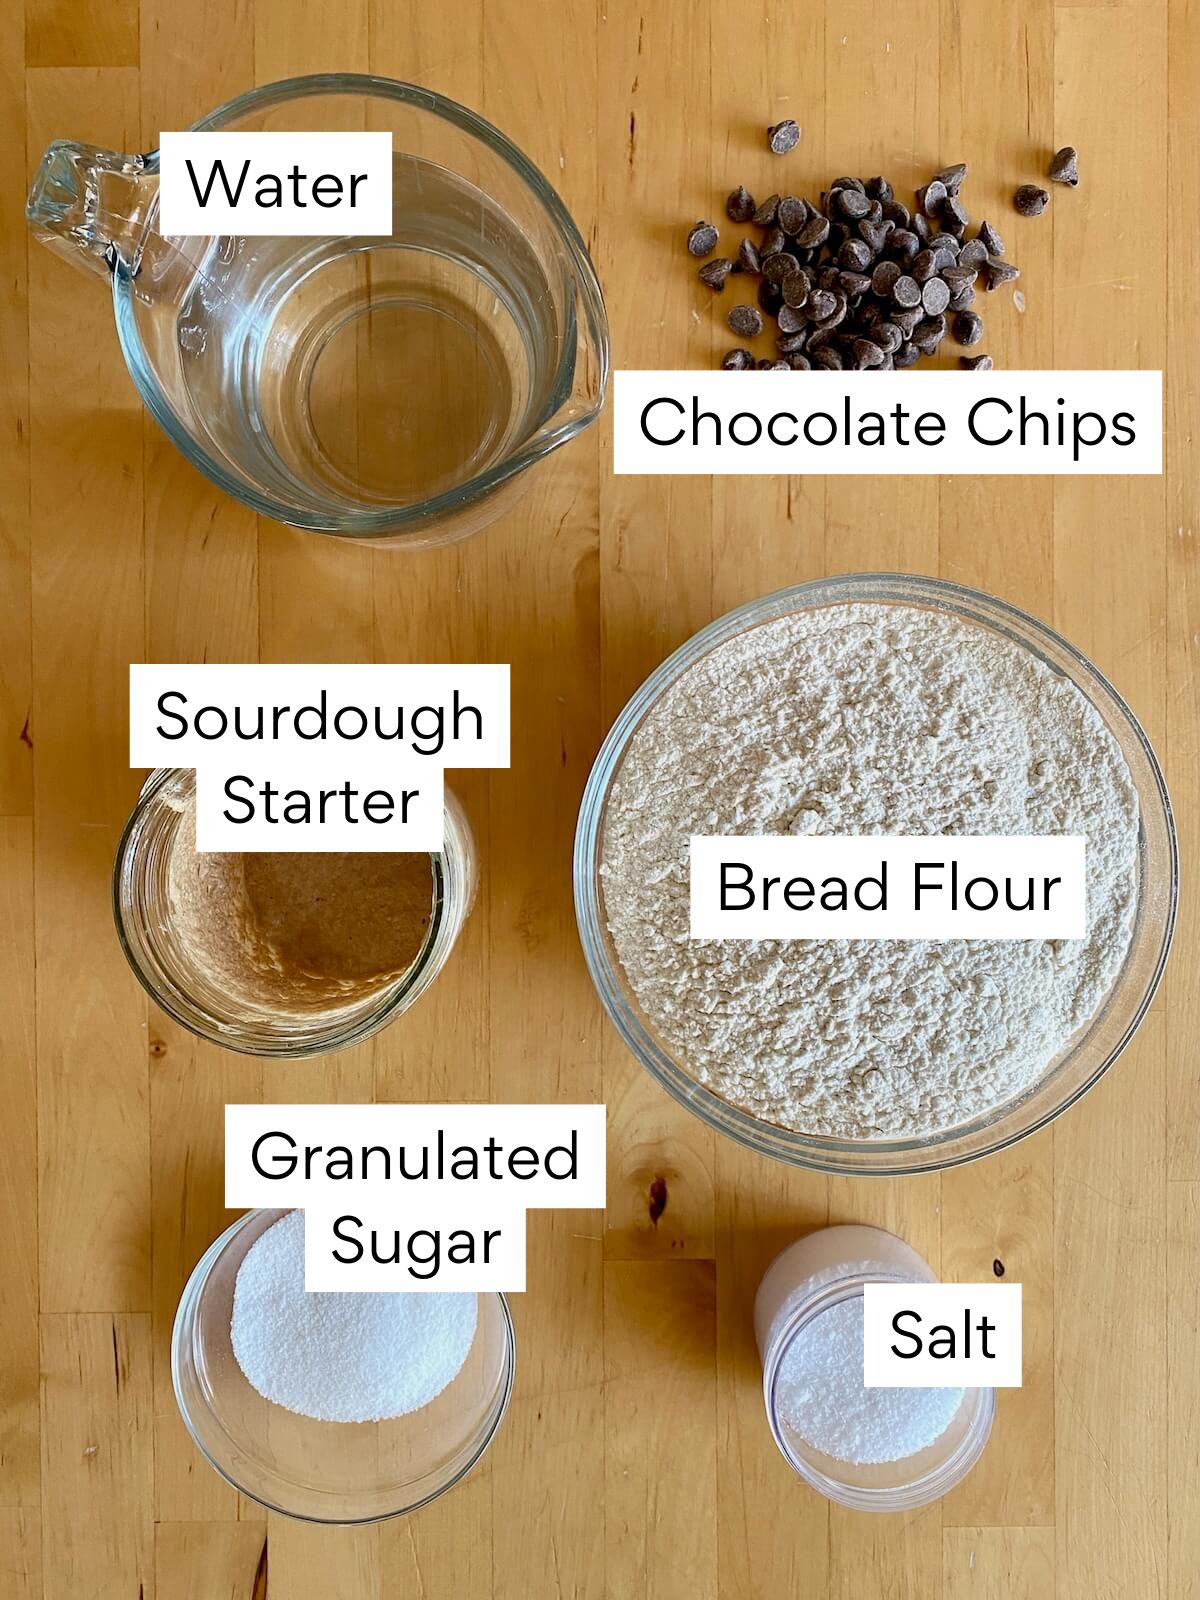
Ingredients & Substitutions
Here are some notes on key ingredients. For a full list of ingredients, check out the recipe card below.
- Active Sourdough Starter- Make sure your starter is bubbly and active. If you’re using discard, go with fresh discard that’s less than a week old for better flavor, texture, and rise.
- Semi-Sweet Chocolate Chips- I love semi-sweet chips for their perfect balance of sweet and bitter. Use whatever chocolate you like - milk, dark, or even chopped chocolate bars work great.
- Bread Flour- Gives the bread its chewy texture and helps with the rise. You can swap it for all-purpose flour or whole wheat. If you go with whole wheat, you might need to add a little extra water to keep the dough soft and workable.
- Water- This dough is about 65% hydration, which makes it easier to handle - perfect for beginners. You can adjust the hydration higher if you prefer a softer or more open crumb.
- Granulated Sugar- Adds a subtle touch of sweetness without overpowering the tangy sourdough flavor. You can swap it for brown sugar or leave it out if you prefer a less sweet bread.
- Kosher Salt- Enhances the flavor of the bread. I use Diamond Crystal Kosher Salt, (about 2.8 grams per teaspoon). If you’re using table salt or Morton’s kosher salt, measure by weight or use about half as much.
Tips for Success
- Use active starter. Make sure your starter is bubbly and active for the best rise. If you’re using discard, stick with fresh discard that’s only a few days old - older discard can slow down fermentation.
- Weigh ingredients. A kitchen scale is your best friend when it comes to sourdough baking. Measuring by weight gives you consistent results every time.
- Fold in chocolate chips evenly. When adding the chocolate chips, some might fall out - don’t sweat it! Just press them back in and try to distribute them as evenly as possible for chocolate in every bite.
- Find a warm spot to rise. If your kitchen is cool, try placing the dough near a warm oven, on top of the fridge, or inside a turned-off oven with the light on.
- Use a straight-sided container. It’s easier to track how much your dough has risen with a straight-sided container - just mark the starting level and watch it grow.
- Build tension when shaping. Create a tight surface when shaping the dough without tearing it so that the loaf rises tall in the oven instead of spreading out.
- Cool completely. As tempting as it is to dig in immediately, let the bread cool for at least two hours. This keeps the crumb from turning gummy and gives you a better texture.
How to Make Chocolate Chip Sourdough Bread
Making sourdough bread with chocolate chips is easy! Here’s my step-by-step process with pictures to help you along the way:
1. Feed Sourdough Starter
- Start by feeding your sourdough starter 6-12 hours before baking to ensure it’s bubbly and active.
- Depending on your kitchen temperature, it might take 6 hours in warmer kitchens (around 75℉), or up to 12 hours in cooler kitchens (65-68℉).

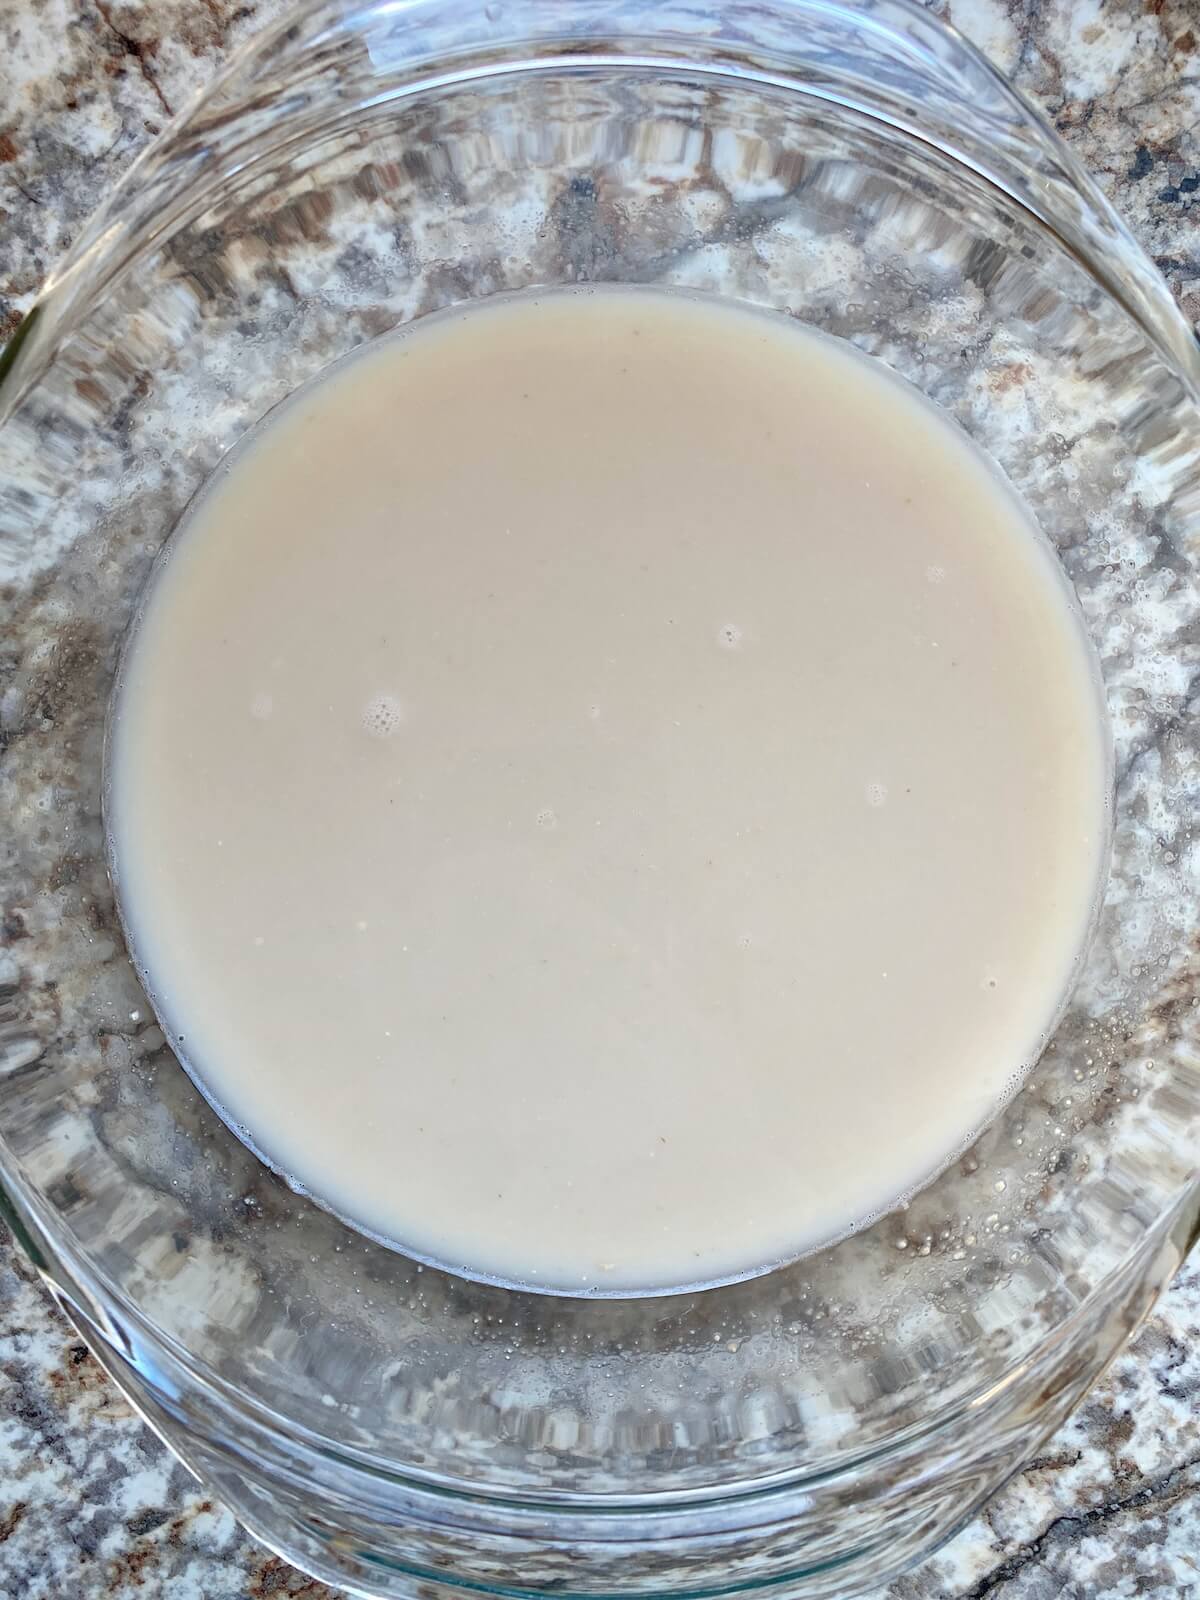
2. Mix Dough
- In a large mixing bowl, whisk together the warm water and the sourdough starter until dissolved.
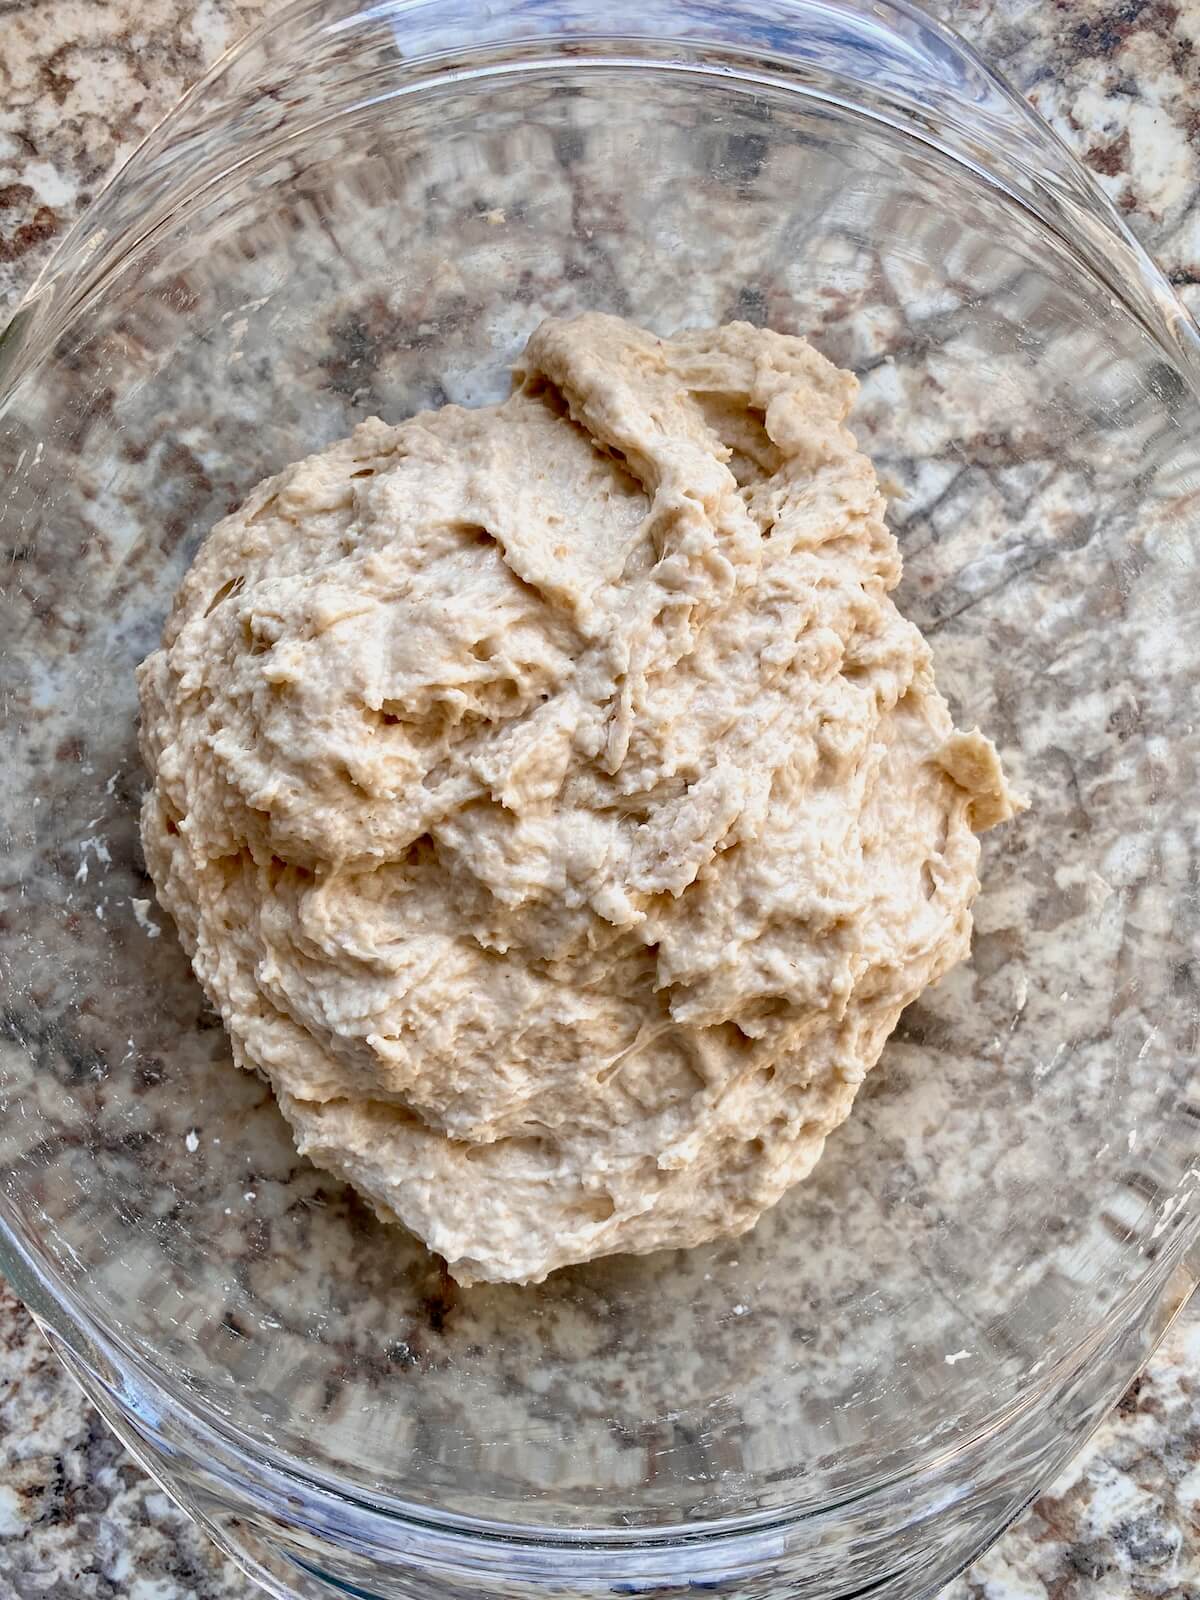
- Add the flour, sugar, and salt, mixing until fully incorporated with no dry flour remaining.
- Cover and let rest for 20 minutes to allow the flour to fully hydrate and the gluten to relax.
3. Stretch and Fold
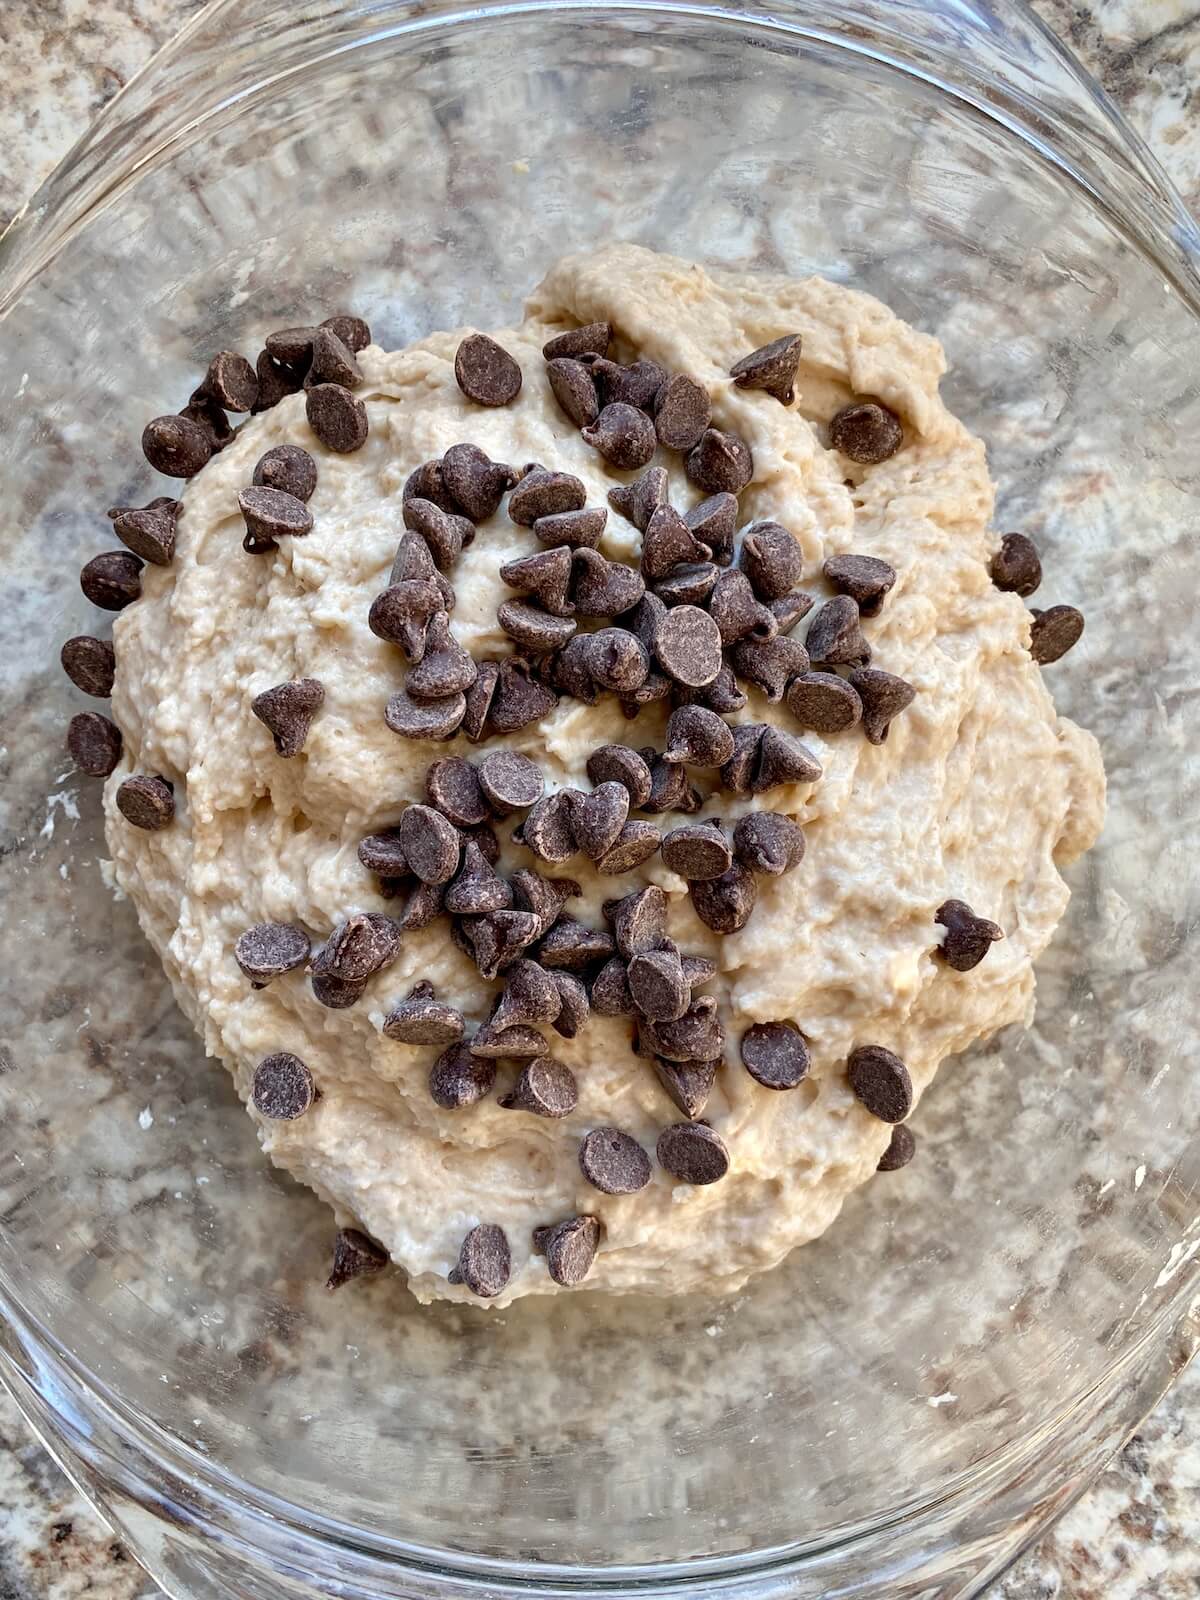
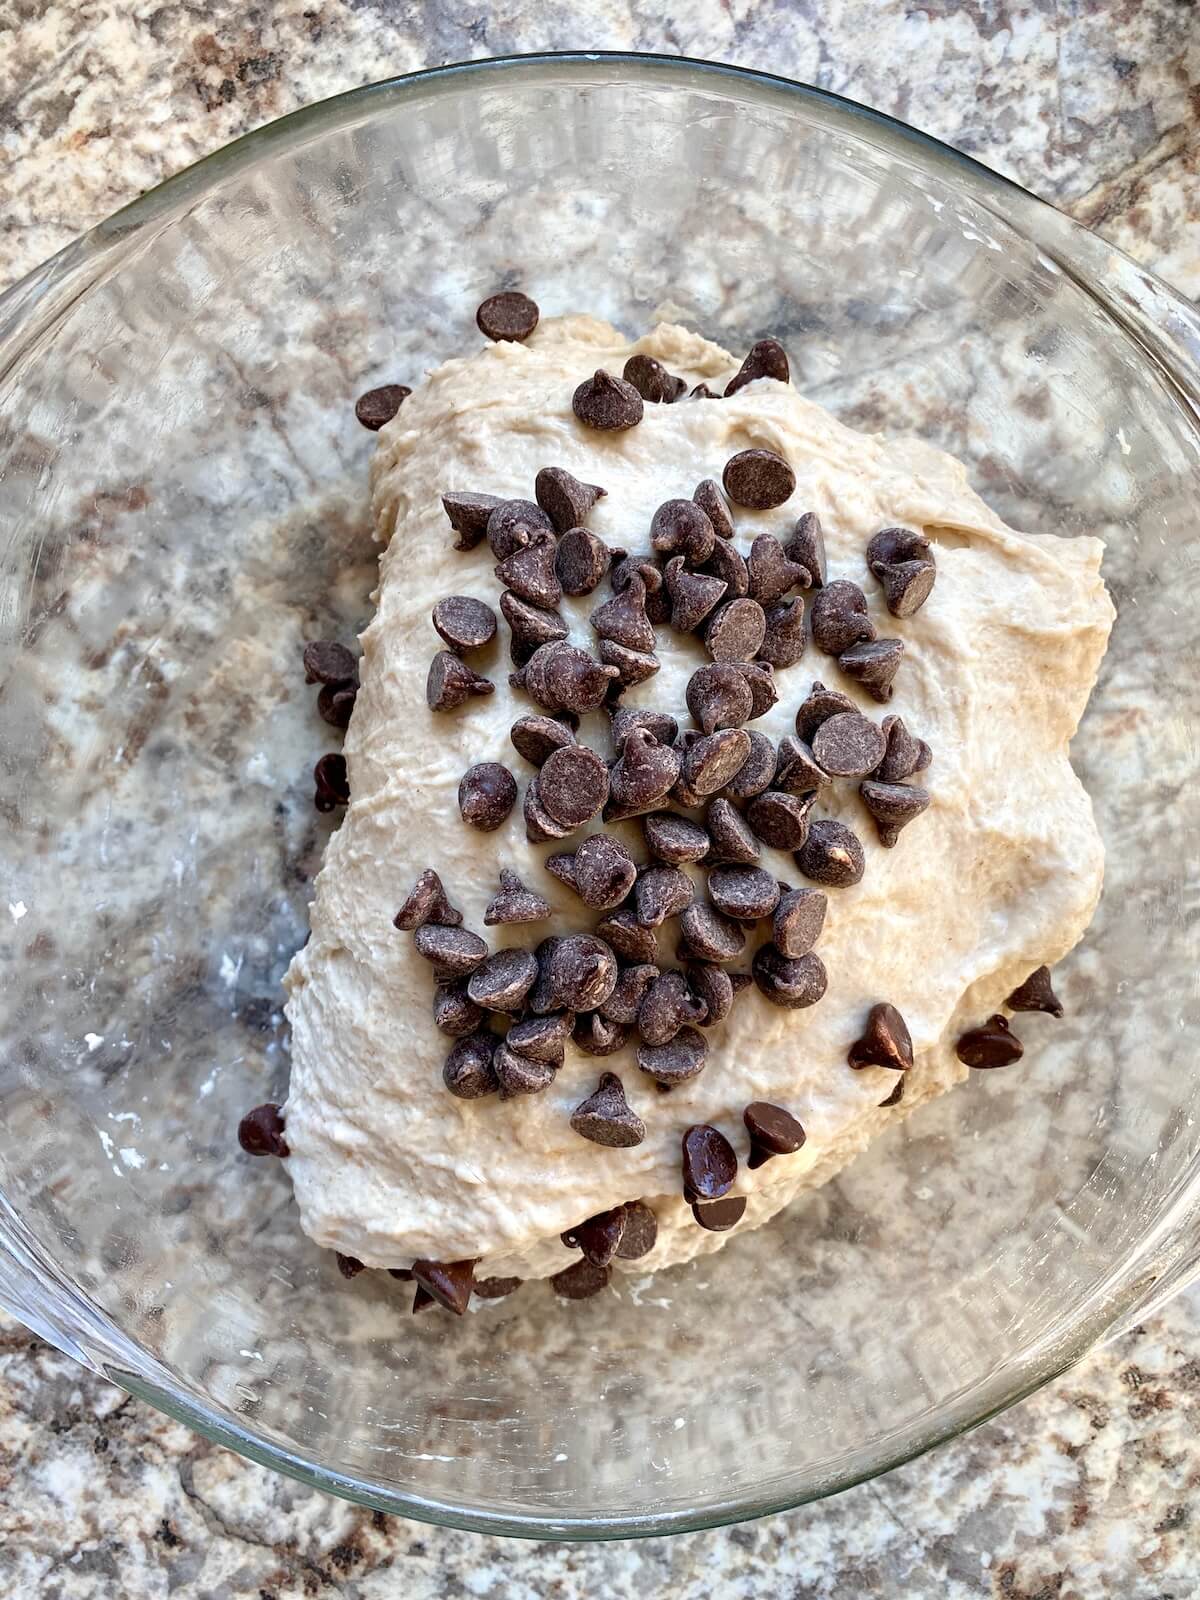
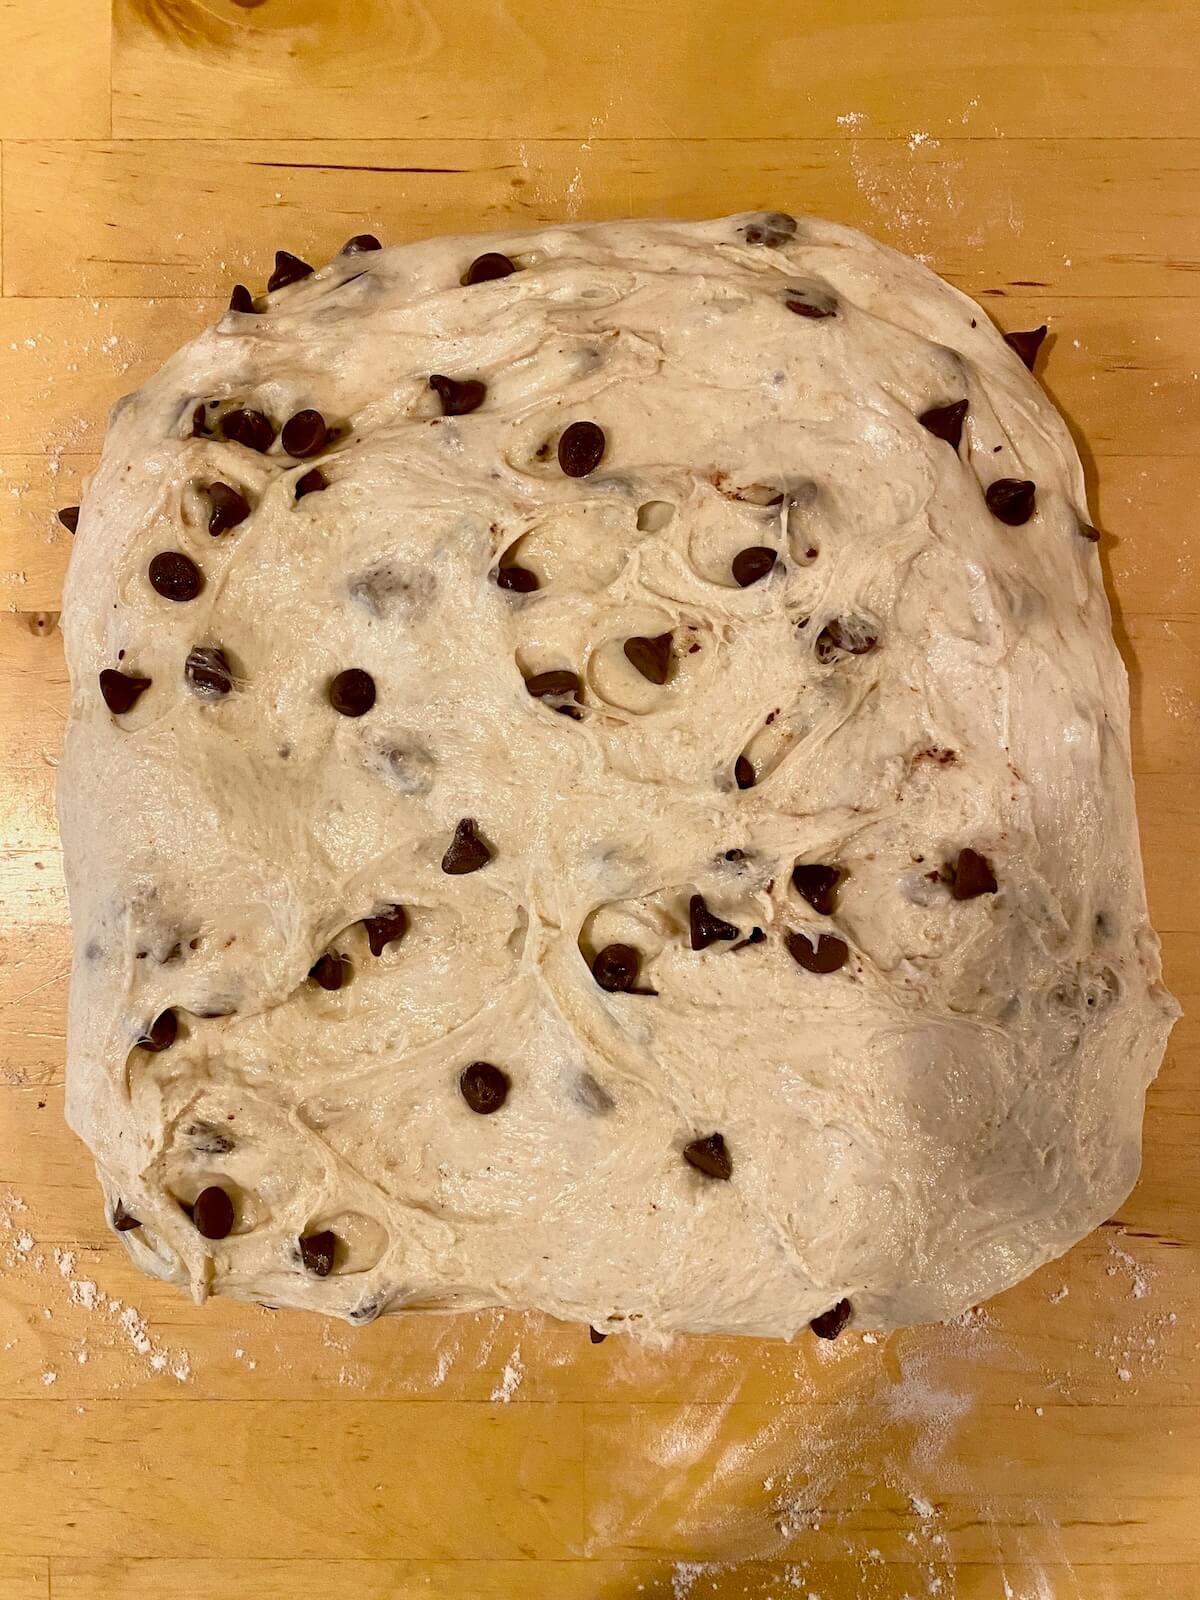
- Lightly wet your hands to prevent the dough from sticking. Flatten the dough slightly and sprinkle ¼ of the chocolate chips in the center.
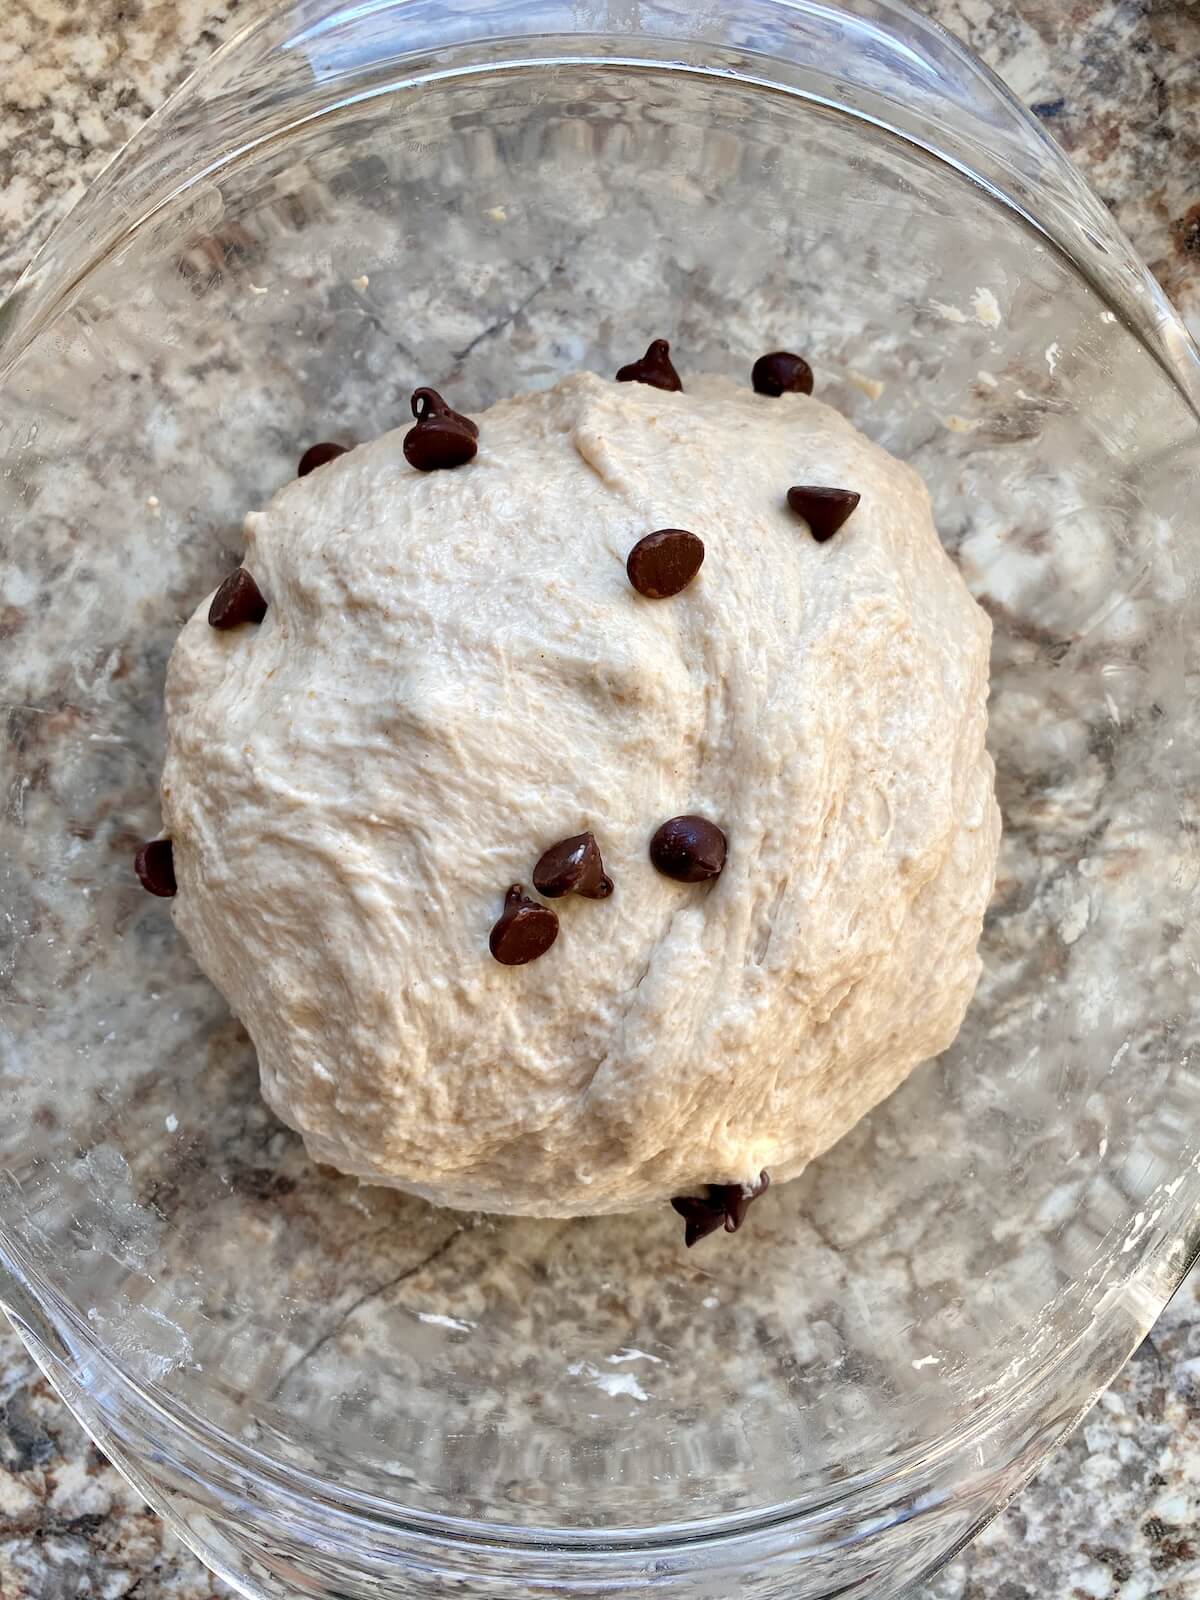
- Perform a stretch-and-fold by grabbing one side of the dough, stretching it upwards, and folding it over. Rotate the bowl 90°, add another ¼ of the chocolate chips, and repeat until all the chips are incorporated. Gather the dough into a rough ball and place it seam-side down.
- Cover and rest for 20 minutes. Repeat the stretch-and-fold process 3 more times, allowing the dough to rest 20 minutes between each fold.
4. Bulk Fermentation
- Cover the dough and let it rise until it nearly doubles in size, with visible fermentation bubbles.
- The rise time can vary anywhere from 4-12 hours depending on your kitchen temperature and starter strength.
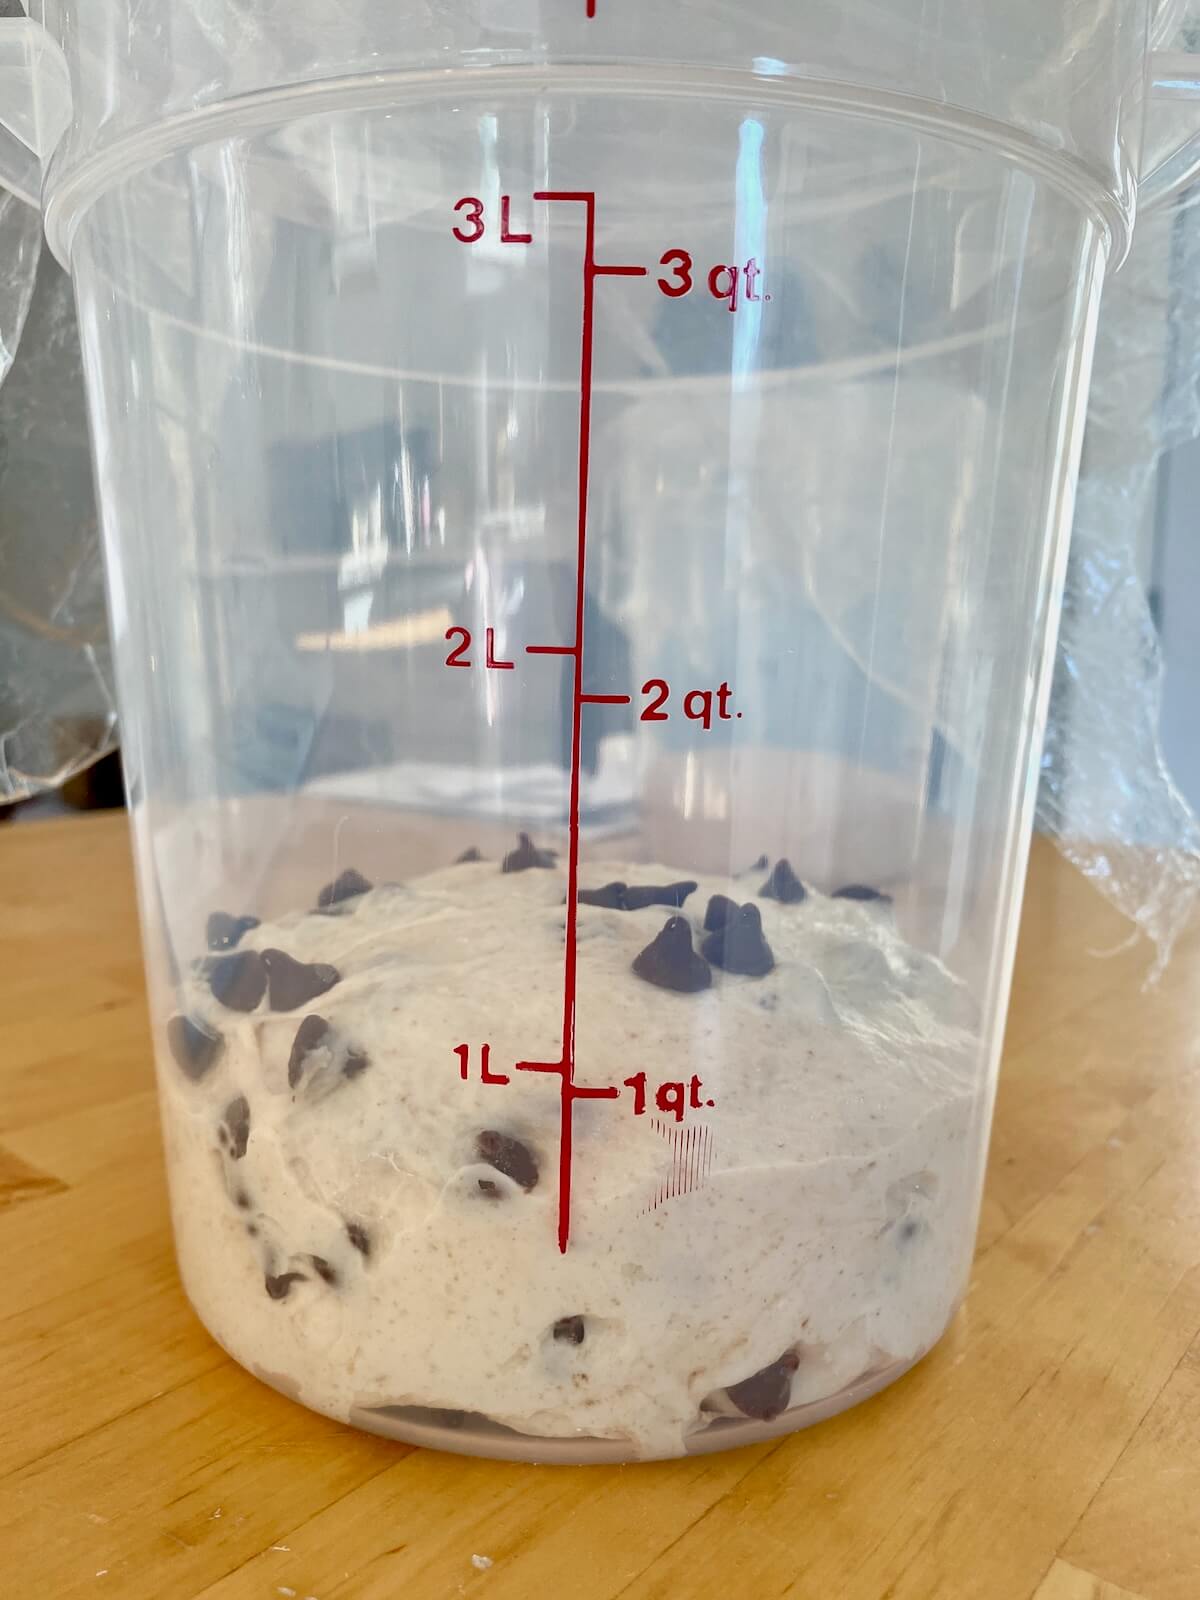
🍞 Fermentation Tip: You can transfer the dough to a straight-sided container and mark the dough’s starting level to track its progress.
5. Pre-Shape
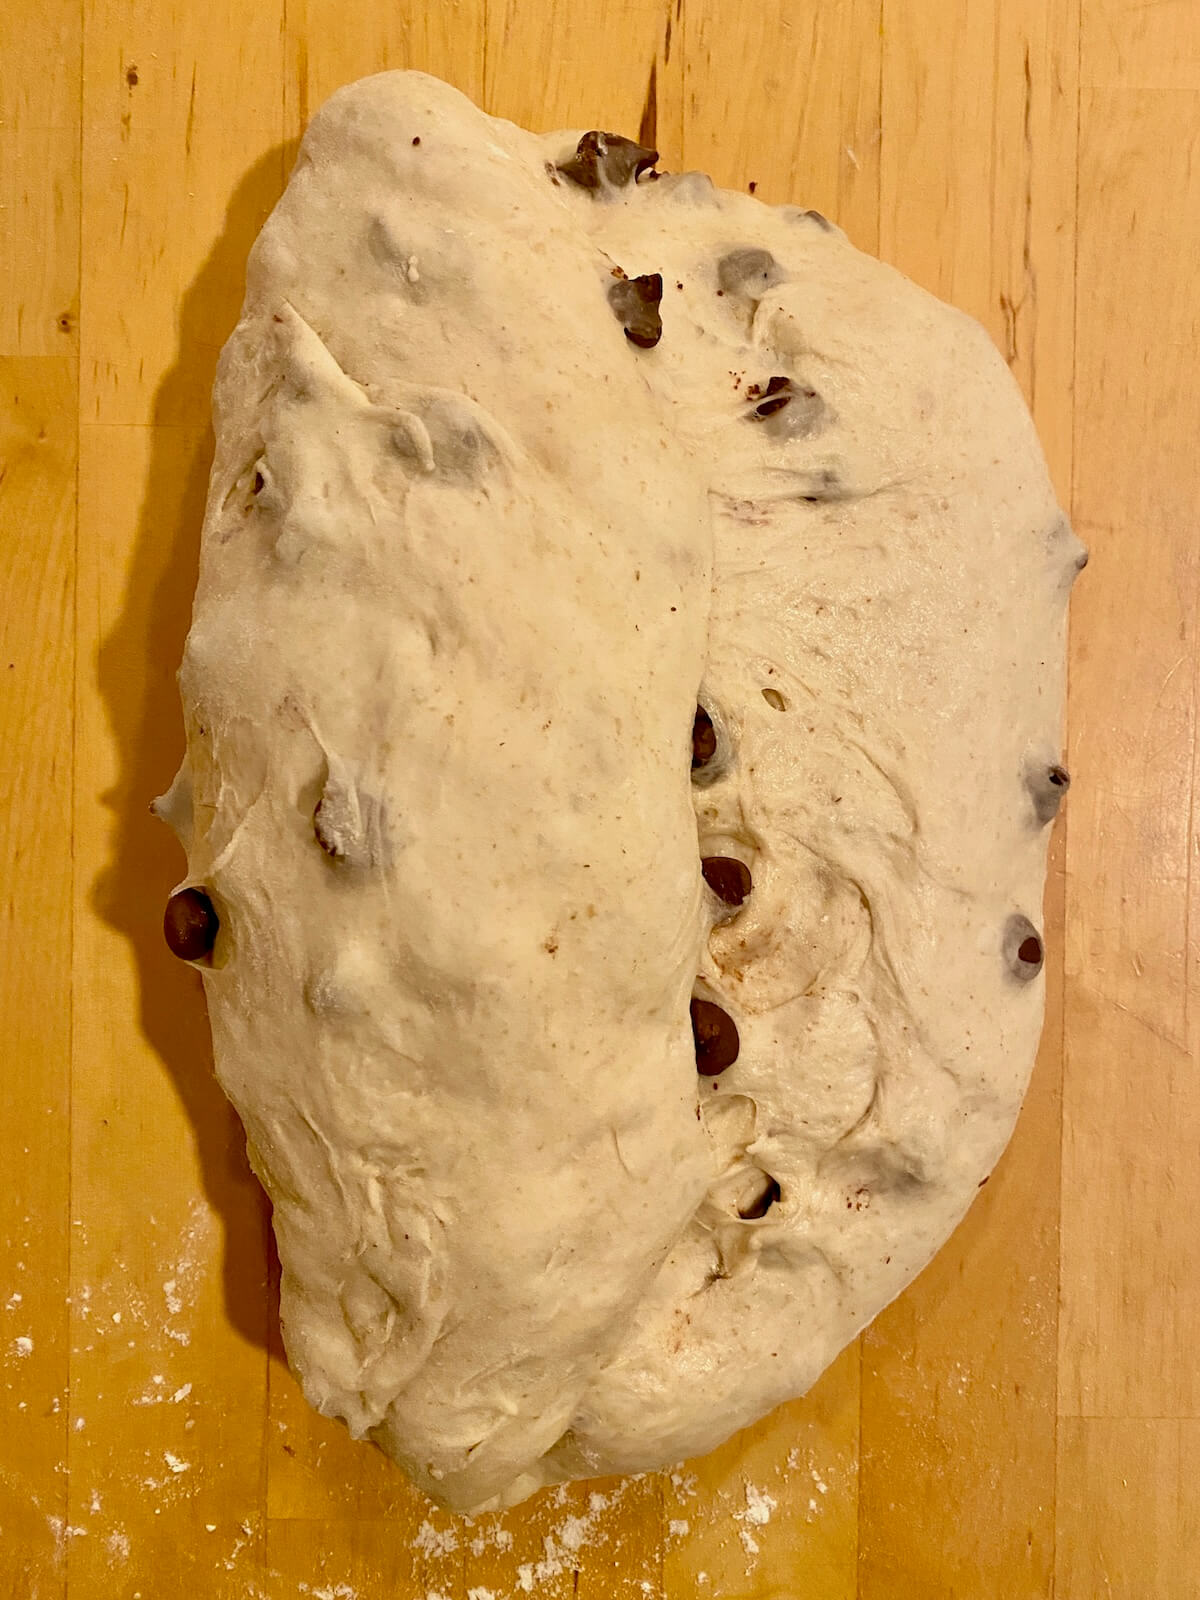
- Gently turn the dough out onto a floured surface and stretch it into a rectangle.
- Fold both long sides toward the center like you're folding a letter, then fold the short sides inward, and flip the dough seam-side down.
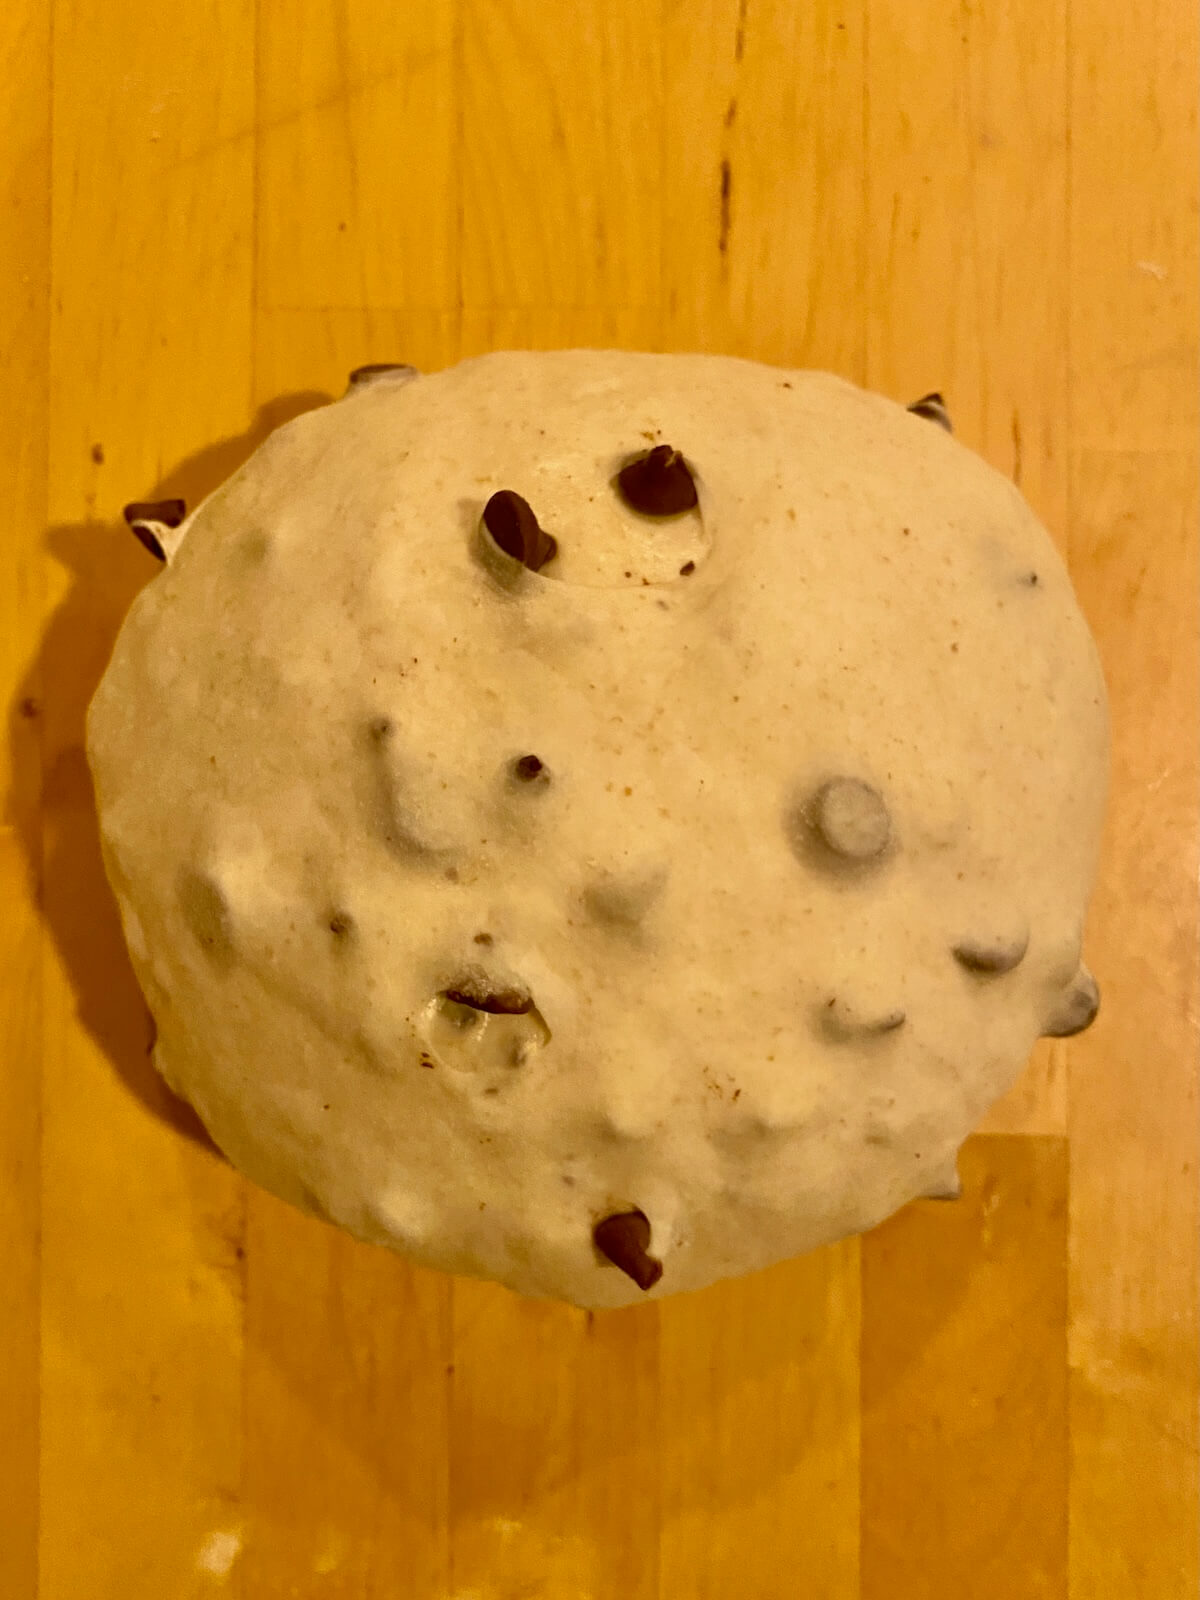
- Use your hands or a bench scraper to gently shape it into a round ball.
- Cover and let it rest for 15 minutes.
6. Final Shaping
- Flip the dough seam-side up again and gently stretch it into a smaller rectangle.
- If you're using a bowl or banneton, repeat the shaping process above.
- For a batard, fold the shorter edges of the rectangle toward the center. Then, starting at one of the longer edges, roll the dough tightly into a log, pinching the seam and ends to seal.
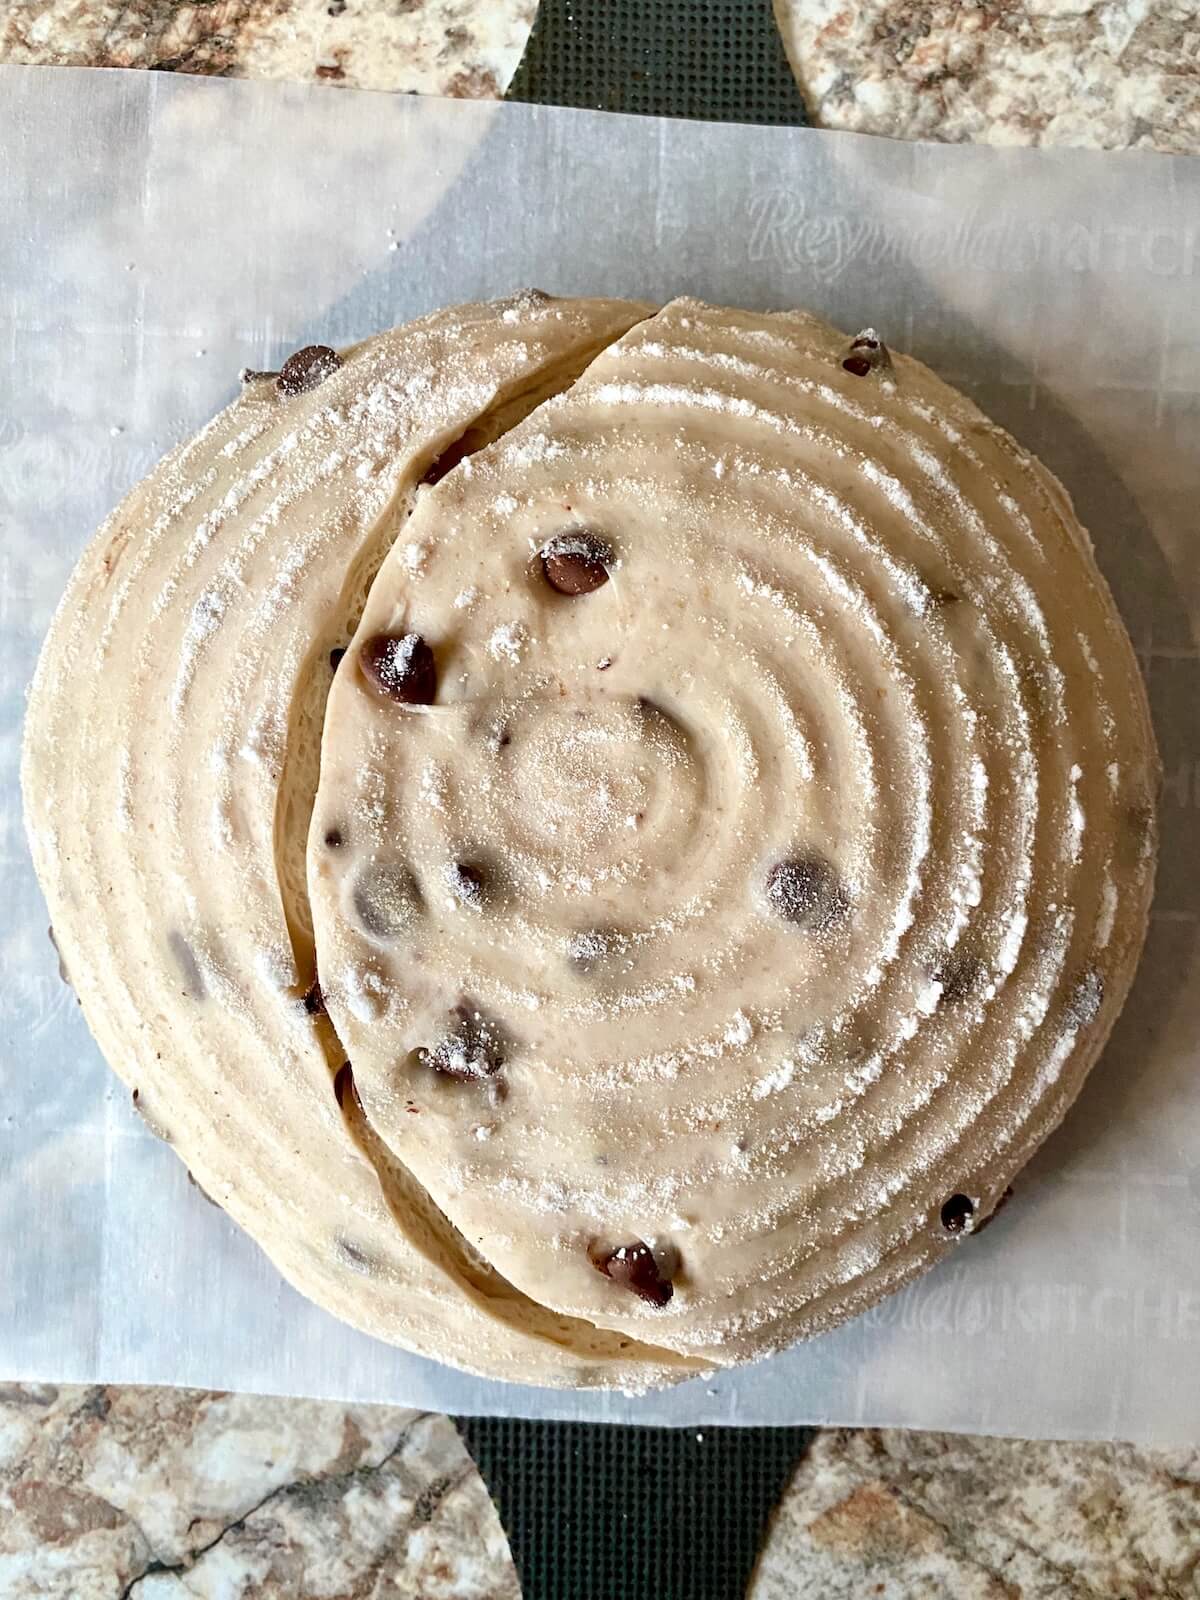
7. Cold Proof
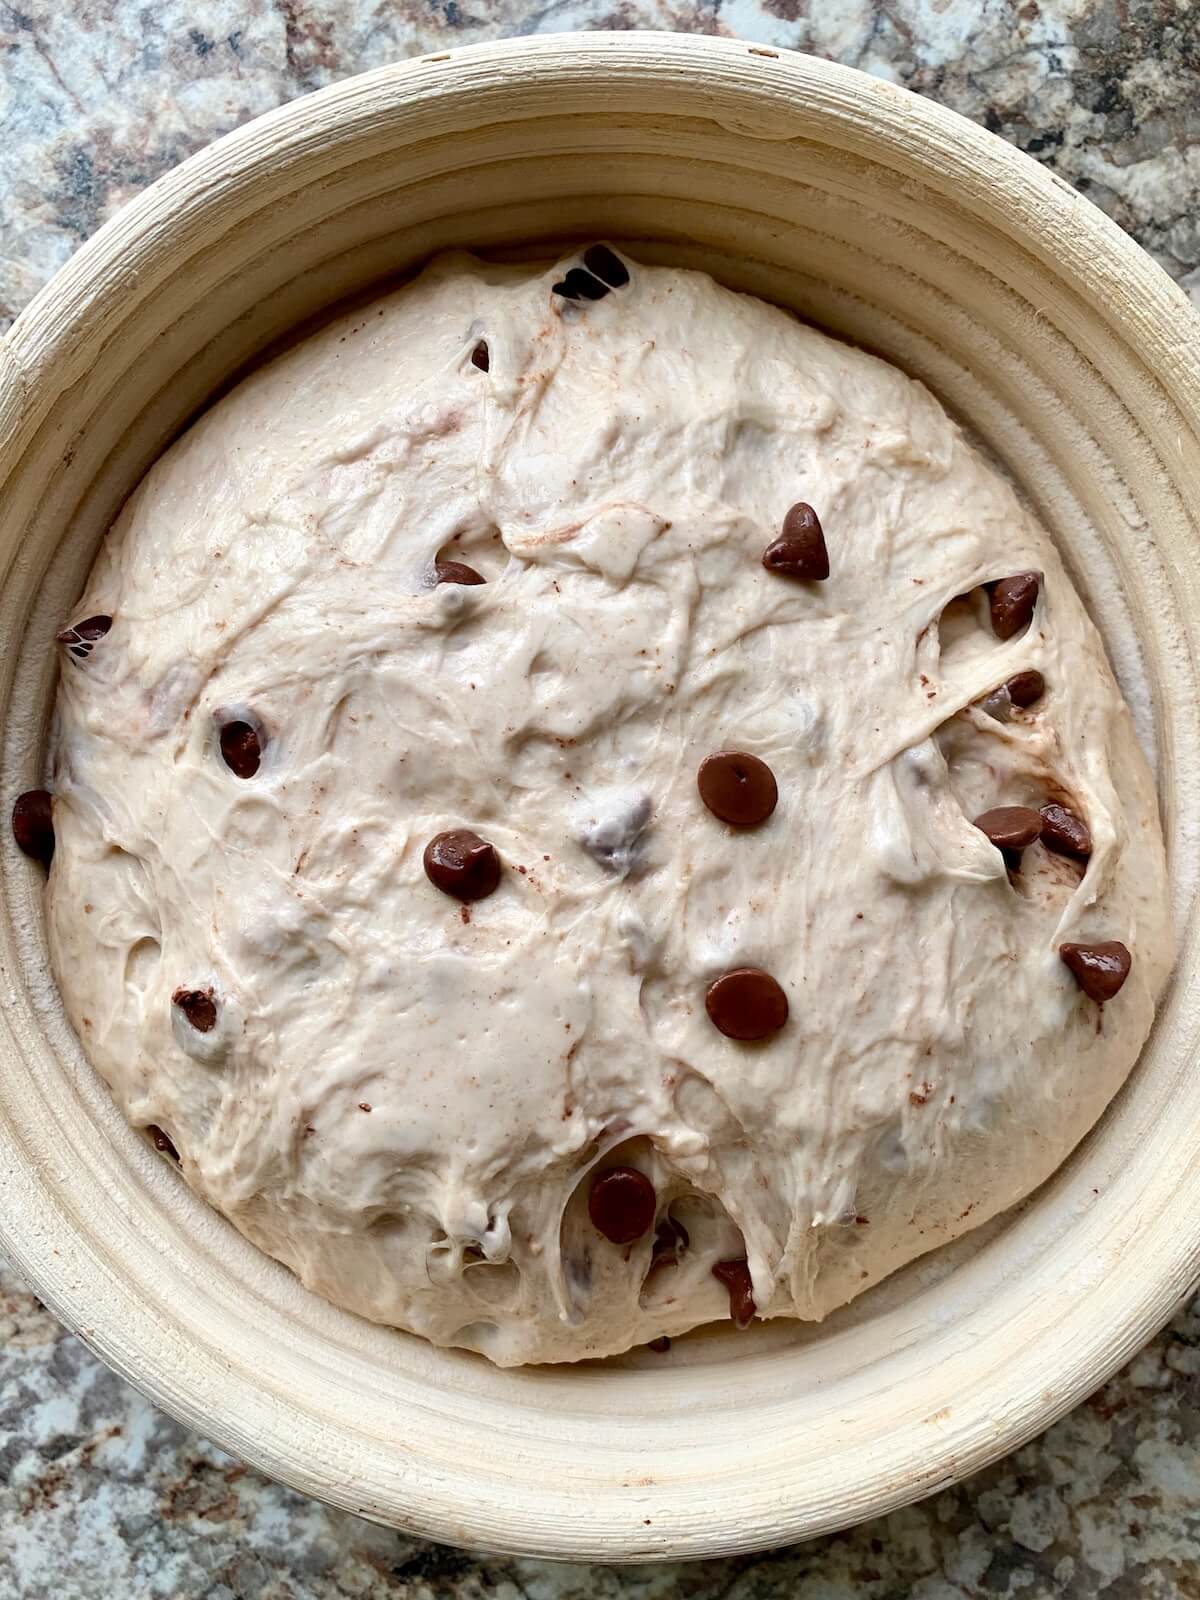
- Generously dust your proofing basket with rice flour, then transfer the dough seam-side up into the basket.
- If needed, pinch the seam to seal it.
- Cover the dough and refrigerate overnight (12-16 hours) to cold proof.

8. Bake the Bread
- Preheat a lidded Dutch oven to 450°F for 30-60 minutes.
- Turn the dough onto bread sling or parchment and score as desired.
- Add 2 ice cubes to the hot Dutch oven.
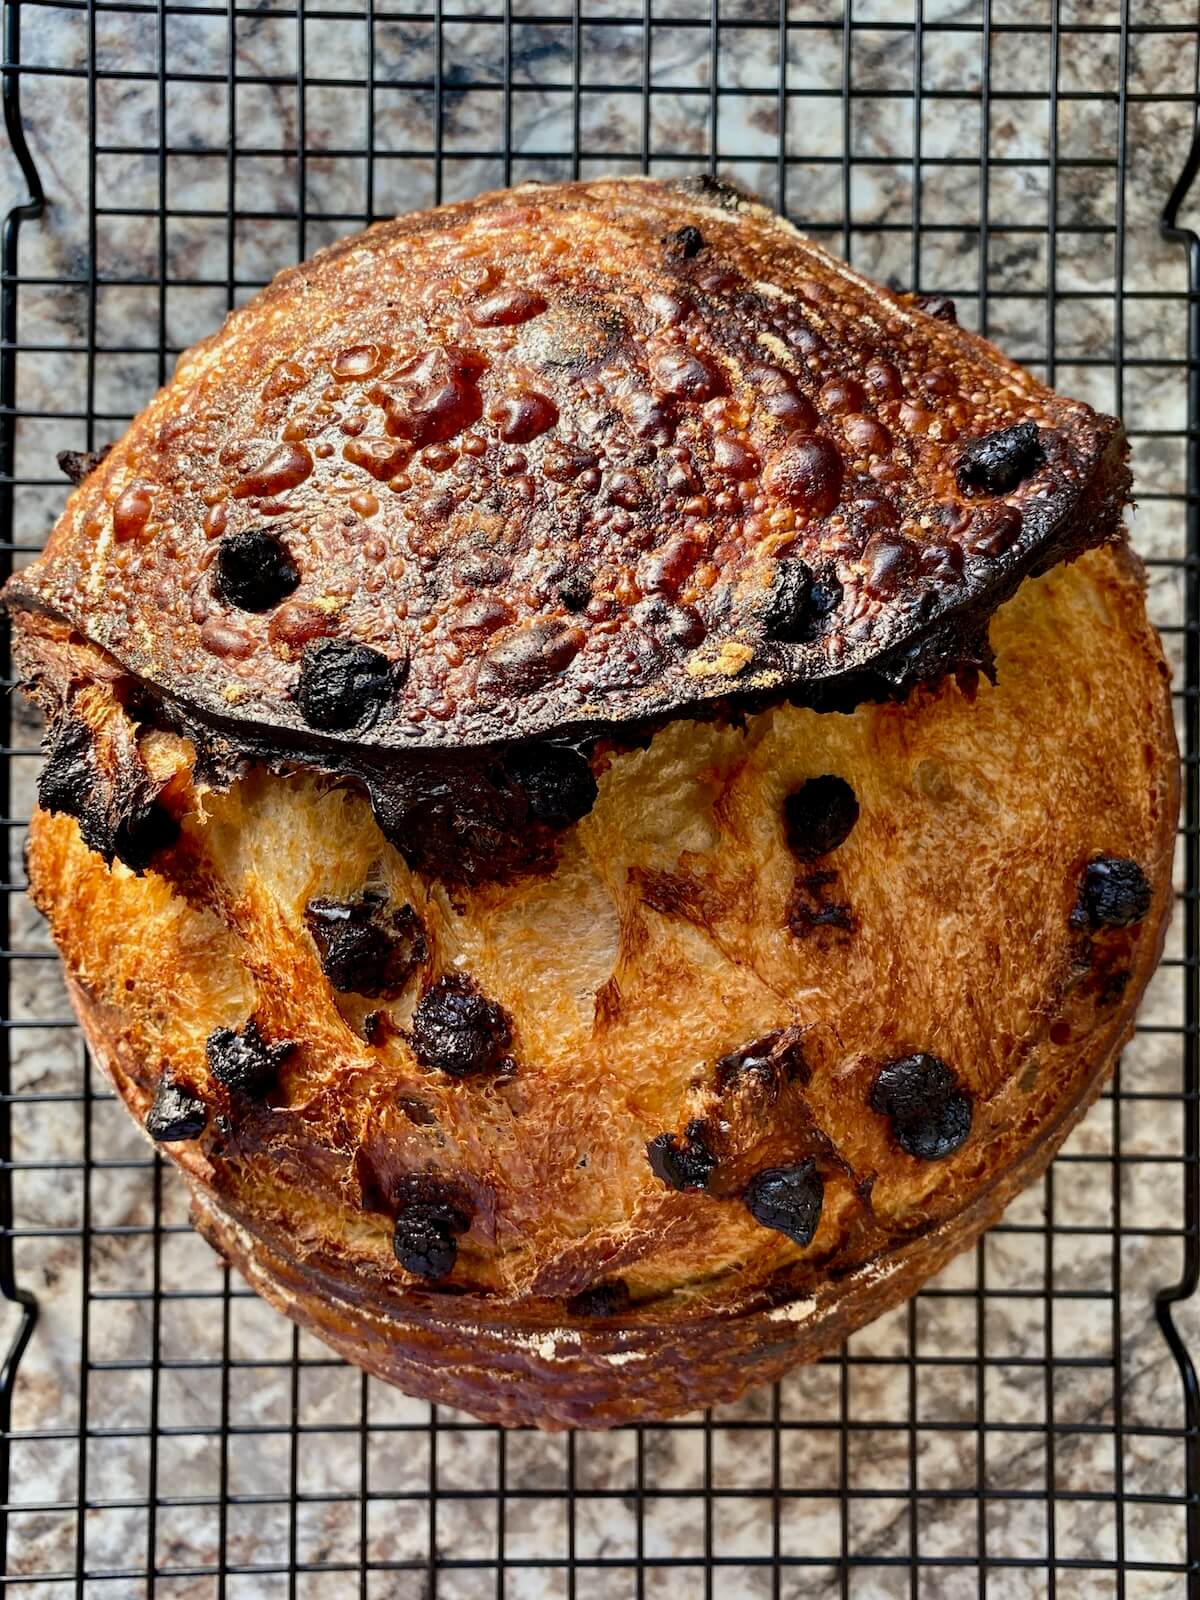
- Transfer the dough, cover, and bake for 45 minutes. Remove the lid and bake for 5 more minutes for a golden crust.
- Cool on a wire rack for 2-4 hours before slicing.
Baker's Timeline
Here’s an example of a schedule you can follow to make this chocolate chip sourdough bread:
- 8:00 PM (Night Before): Feed your starter.
- 8:00 AM: Mix the dough.
- 8:30-9:30 AM: Stretch and fold, add chocolate chips.
- 9:30 AM-3:30 PM (Varies): Bulk fermentation.
- 3:30-4:00 PM: Pre-shape and final shape.
- 4:00 PM-8:00 AM (Next Day): Cold proof.
- 8:00-8:45 AM: Bake.
- 8:45 AM-12:45 PM: Cool.
Note: Rise times will vary depending on the strength of your starter and the temperature of your kitchen and dough. It's best to rely on visual cues from your starter and dough rather than sticking strictly to the timeline.
How to Store
Store bread at room temperature in an airtight container or bread box for up to 4 days.
For longer storage, slice and freeze in a freezer-safe bag for up to 3 months. When you're ready to enjoy, just thaw at room temperature or warm it in the toaster or oven.
Serving Suggestions
This chocolate chip sourdough bread is delicious served warm with a slather of homemade butter or your favorite spread - peanut butter, hazelnut spread, and strawberry apple jam are some of my favorites.
Or turn it into sourdough French toast for a sweet, chocolatey breakfast that’s perfect for Sunday morning.

Are you tired of watching your sourdough discard go to waste?
It’s time to turn excess discard into something delicious with my new ebook - Everyday Sourdough!
Inside, you’ll find 27 tried-and-true sourdough discard recipes that will transform your leftover starter into mouthwatering creations your family and friends will love.
No more guilt about wasting your discard - with Everyday Sourdough, you have endless options to quickly make something amazing anytime.
Let's Connect!
Be sure to leave a comment below if you have any questions. You can also connect with me on Instagram, Facebook, Pinterest, or via email at [email protected].

📖 Recipe
Chocolate Chip Sourdough Bread
Equipment
- Straight-sided container (optional, for bulk fermenation)
- Banneton or bowl lined with tea towel
- Lame or sharp knife
Ingredients
- 1 ¼ cups + 2 tablespoons (330 grams) warm water 80-90℉
- ½ cup (100 grams) active sourdough starter
- 4 ¼ cups (510 grams) bread flour
- ¼ cup (50 grams) granulated sugar
- 3 ½ teaspoons (10 grams) Diamond Crystal Kosher Salt measure by weight or reduce volume by about half if using table salt or Morton's brand
- 1 cup (170 grams) semi-sweet chocolate chips
- Rice flour for dusting banneton
- 2 ice cubes for steam
Instructions
- Start by feeding your sourdough starter 6-12 hours before baking to ensure it’s bubbly and active. Depending on your kitchen temperature, it might take 6 hours in warmer kitchens (around 75℉), or up to 12 hours in cooler kitchens (65-68℉).
- In a large mixing bowl, whisk together the warm water and the sourdough starter until dissolved. Add the flour, sugar, and salt, mixing until fully incorporated with no dry flour remaining. Cover and let rest for 20 minutes to allow the flour to fully hydrate and the gluten to relax.1 ¼ cups + 2 tablespoons (330 grams) warm water, ½ cup (100 grams) active sourdough starter, 4 ¼ cups (510 grams) bread flour, ¼ cup (50 grams) granulated sugar, 3 ½ teaspoons (10 grams) Diamond Crystal Kosher Salt
- Lightly wet your hands to prevent the dough from sticking. Flatten the dough slightly and sprinkle ¼ of the chocolate chips in the center. Perform a stretch-and-fold by grabbing one side of the dough, stretching it upwards, and folding it over. Rotate the bowl 90°, add another ¼ of the chocolate chips, and repeat until all the chips are incorporated. Gather the dough into a rough ball and place it seam-side down. Cover and rest for 20 minutes. Repeat the stretch-and-fold process 3 more times, allowing the dough to rest 20 minutes between each fold.1 cup (170 grams) semi-sweet chocolate chips
- Cover the dough and let it rise until it nearly doubles in size, with visible fermentation bubbles. The rise time can vary anywhere from 4-12 hours depending on your kitchen temperature and starter strength. (Tip: You can transfer the dough to a straight-sided container and mark the dough’s starting level to track its progress.)
- Gently turn the dough out onto a floured surface and stretch it into a rectangle. Fold both long sides toward the center like you're folding a letter, then fold the short sides inward, and flip the dough seam-side down. Use your hands or a bench scraper to gently shape it into a round ball. Cover and let it rest for 15 minutes.
- Flip the dough seam-side up again and gently stretch it into a smaller rectangle. If you're using a bowl or banneton, repeat the shaping process above. For a batard, fold the shorter edges of the rectangle toward the center. Then, starting at one of the longer edges, roll the dough tightly into a log, pinching the seam and ends to seal.
- Generously dust your proofing basket with rice flour, then transfer the dough seam-side up into the basket. If needed, pinch the seam to seal it. Cover the dough and refrigerate overnight (12-16 hours) to cold proof.Rice flour
- Place a lidded Dutch oven inside your oven and preheat to 450℉. Let the Dutch oven heat for an extra 30-60 minutes once the oven reaches temperature.
- Turn the dough out onto a piece of parchment paper. Score the top as desired with a lame or sharp knife. Carefully place 2 ice cubes in the Dutch oven for steam. Use the parchment paper to transfer the dough into the hot Dutch oven. Cover immediately with the lid to trap the steam inside.2 ice cubes
- Bake at 450℉ for 45 minutes with the lid on. Then, remove the lid and bake for an additional 5 minutes, if needed, to achieve your desired crust color.
- Allow the bread cool on a wire rack for at least 2-4 hours before slicing and serving.
Notes
- Quick Tip: Use a kitchen scale to weigh ingredients in grams for best results.
- Storage: Store bread at room temperature in an airtight container or bread box for up to 4 days. For longer storage, slice and freeze in a freezer-safe container for up to 3 months.


Comments
No Comments